REVIT_Usage of Collabrate tool_Week 6
1) Open an architectural template. Using the Manage tab set project base point and project shared coordinates for the project.
Aim: to set the base point of the project using manage tab and project shared coordinates for the project.
Tools used:
Architectural
grids
Manage
Specify coordinate
Collaborate
Procedure:
- open the file and select the architectural tab from that select the grid property.
- Draw thegrids one in vertical and the other in horizontal.
- now rename the grids
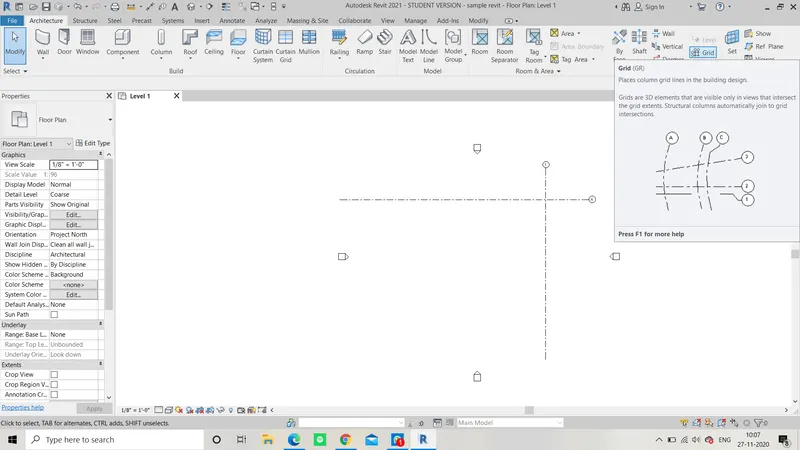
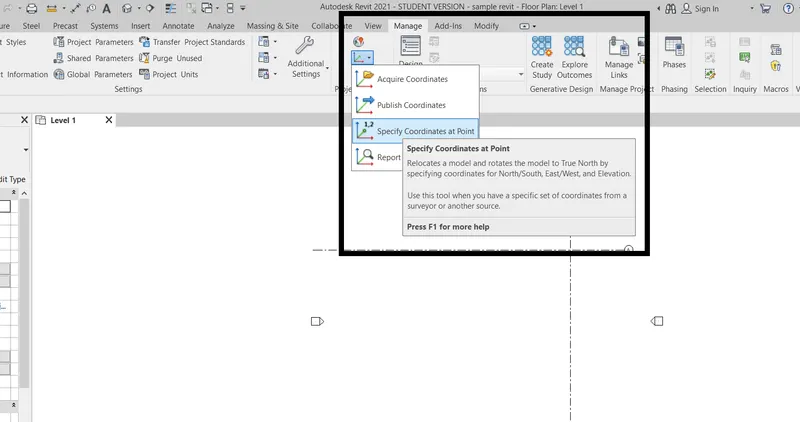
- from the manage tab select the specify coordinate at a point property .
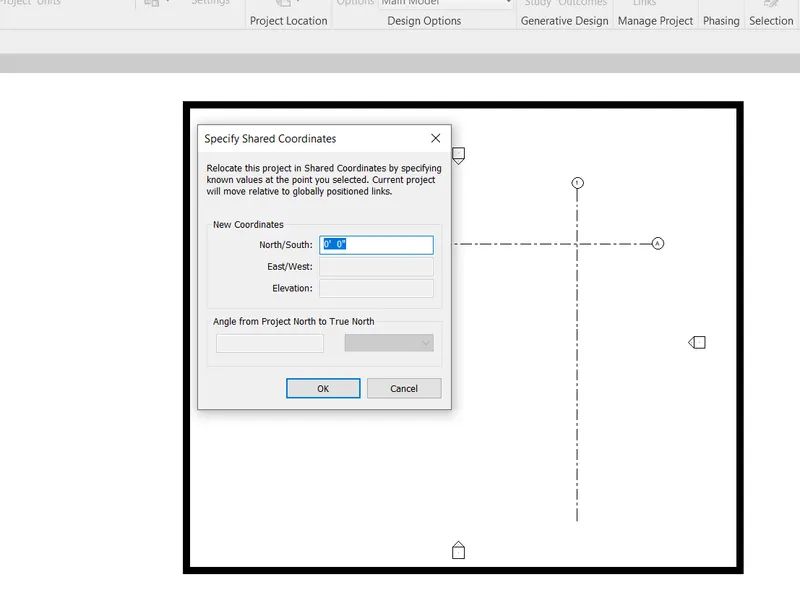
- now select one of the grids and specify the coordinate as 0’0”.
- Now select the other grid line and do the same.
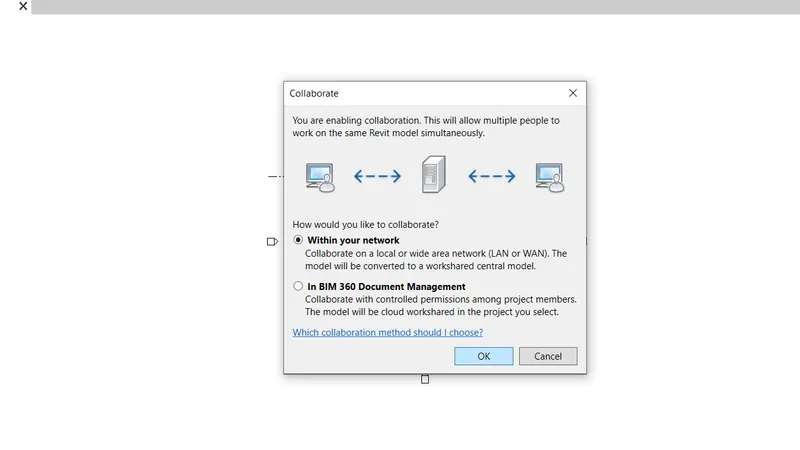
- Andnow select collaborate tab and collaborate the drawing.
- Save the drawing.
Result: the required based point for the project is set using manage tab and project shared coordinates for the project.
2)Open another new file but with a structural template. Using manage tab set project parameters the same as the architectural model. Copy the parameters from the architectural model to the structural template or enter the parameters manually into the structural model.
Aim: to create a structural template and set the parameters as same as architectural template.
Tools used:
New
structural template
Grid
Manage
specify coordinate at a point
Procedure:
- Open the file from structural template.
- 2.select structural menu and choose grid property from that.
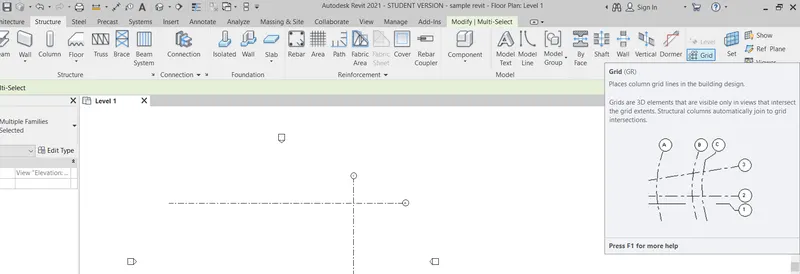
- Draw the grids similar to the architectural template.
- rename the grids.
- specify the grid coordinate points as 0'0" for both the grids.
- from the collaborate tab collaborate the drawing.
- save the drawing file.
Result: the para meters same as architectural template is set using the structural menu in the structural template.
3) Re-open the architectural model. Using the tools under the Collaborate tab make the architectural model a central model ( enabling simultaneous working on the model )
Aim: to collaborate the drawing
tools used:
File
Collaborate
Procedure:
- 1.open theRevit file
- Save the file
- on the quick access toolbar select the collaborate tab
- After that some options will pop outabout how to collaborate the file
- select within your network and click on OK.
Result: the file is collaberated successfully and is feasible to work on model simultaneously.
4) Create the Grids Longitudinal and Transverse pattern for the project similar to the task done in Week 2
Aim: to create a grid pattern similar to the previous task from week 2.
tools used:
File
Open
architectural tab
Grid
Rename
Procedure:
- open the Revit file.
- click on the architectural tab.
- select the grid property.
- Draw the grids vertically and horizontally with a specified distance.
- Assumethe specified distance as 20’.
- rename the grids accordingly.
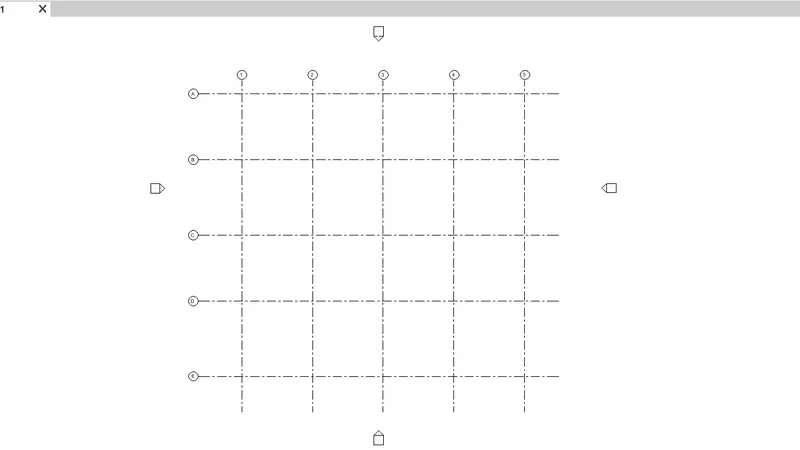
- save the file.
Result: the grid pattern similar to that of week two has been drawn successfully.
5) Synchronize the changes from the local copy to the central file of the architectural model.
Aim: to synchronize the changes from the local copy to the central file of architectural model.
Tools used:
File
Open
Collaborate
synchronize tab
synchronize with central
Procedure:
- open the Revit file.
- Go to the collaborate tab and select the collaborate property
- Now for the accessibility of the synchronize tab we should save the file as central file.
- For that click the save button or for easy accessibility clickctrl+s.
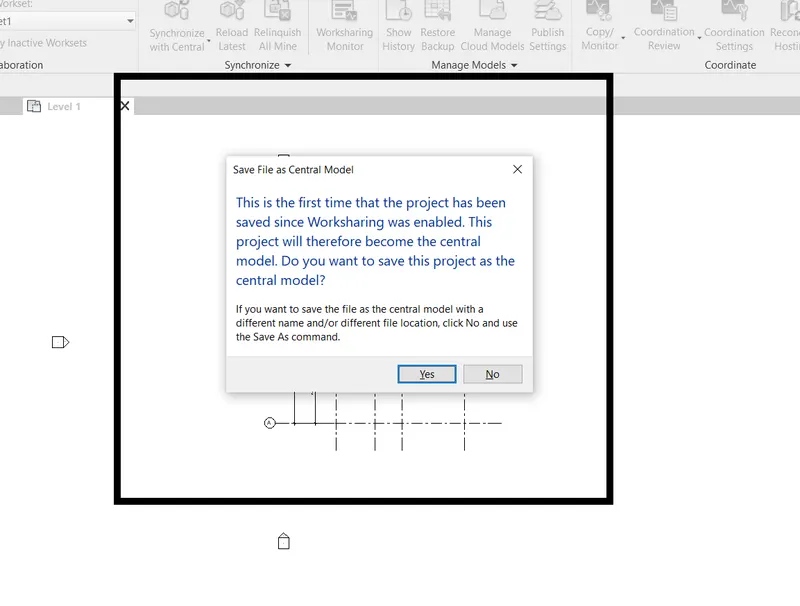
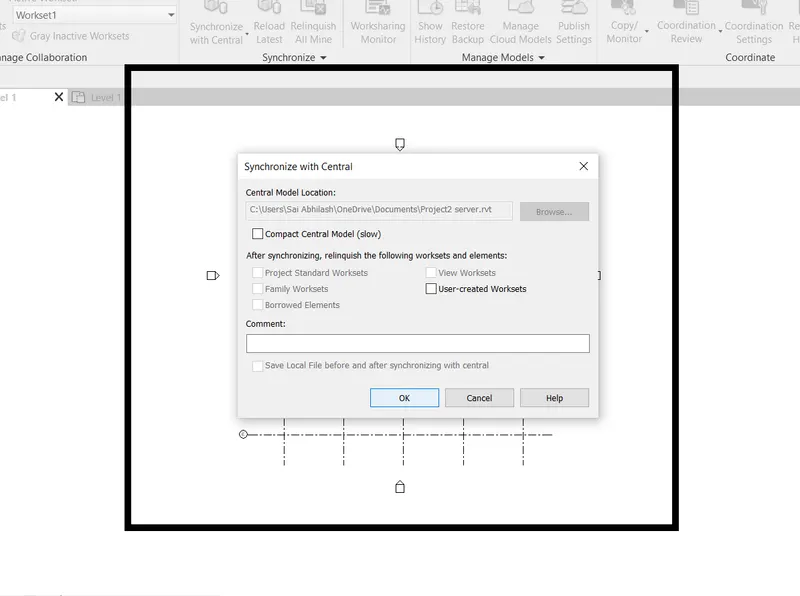
- Then a window will pop out asking the file to be changed to central file then click on OK.
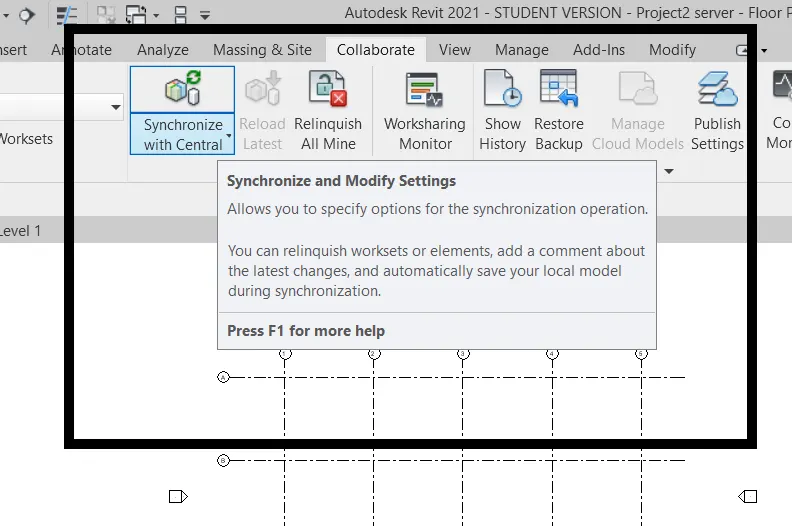
- After that, from the synchronize tab select the synchronize with central property and then click on OK.
Result: the file is successfully change it to central file and also synchronized with the central file.
6)Open the structural model and using the collaborate tools to save the model as a central file.
tools used:
File
Open
Collaborate
Save.
central file
procedure:
- open the structural template
- from the quick access toolbar select the collaborate tab
- click on collaborate property.
- A window showing the types of collaboration will be shown , select on the within your network box and confirm by clicking OK.
- then save the file or for easy accessibility enter crtl+s.
- then a window will pop out asking to change the file to the central file.
- click on Yes to change structural model to central file.
Result: Therefore, the required structural model has been changed to the central file successfully.
7) Under the Collaborate tab, select the grids and levels from the architectural model, and using Copy Monitor try to copy the grids to the structural model. See what happens when the copy monitored grid is moved around in the structural model.
Aim: to select the grids and levels from the architectural model and copy them in structural model using copy monitor from collaborate tab.
Tools used:
File
collaborate
Manage
Grids
copy monitor
Procedure:
- Open the architectural model file
- Then select the collaborate tab
- Collaborate the file and make it as the central model.
- Now do the same with the structural model
- Now to include the structural model file to the architectural model central file we need to insert the file using insert tab
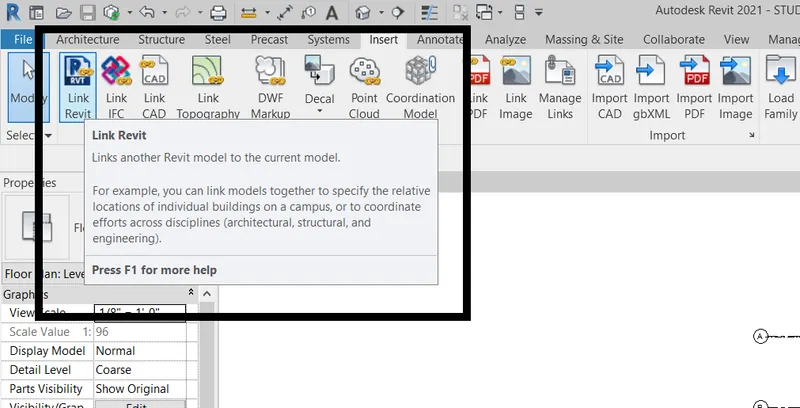
- From the insert tab select the link rivet property and include the structural model file into the central file.
- Now again open the architectural model file.
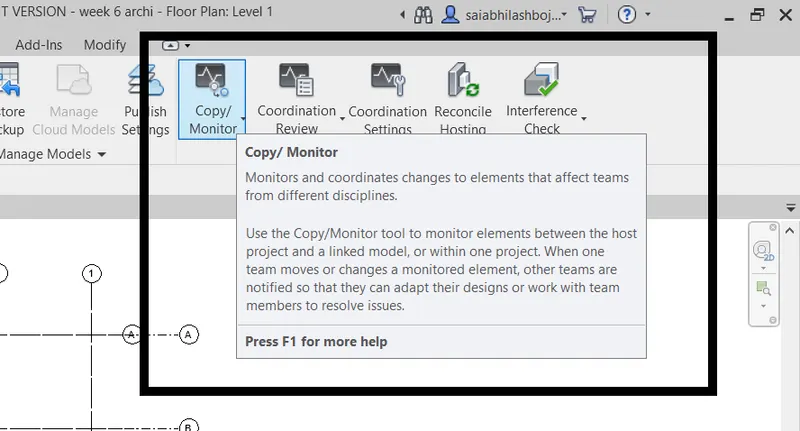
- From the same collaborate tab select the copy monitor property.
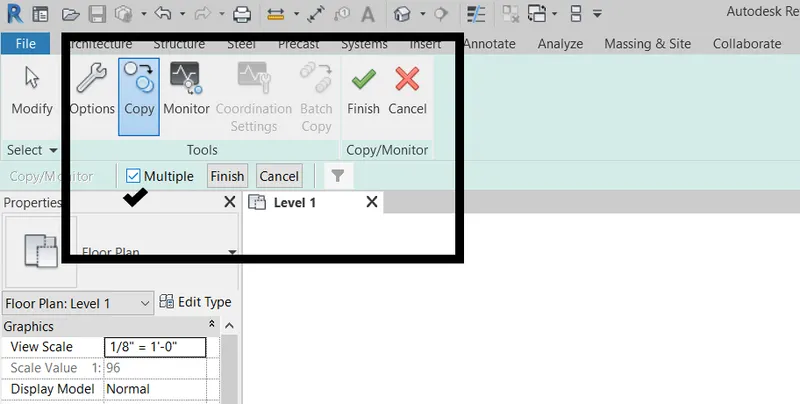
- then select multiple and choose all the grids levels and click on finish
- Now open the structural template and now you can find the grids and the columns in the structural template
Results: the grids in the architectural model are successfully copied to the structural model and all the grids and levels are even visible in the structural model
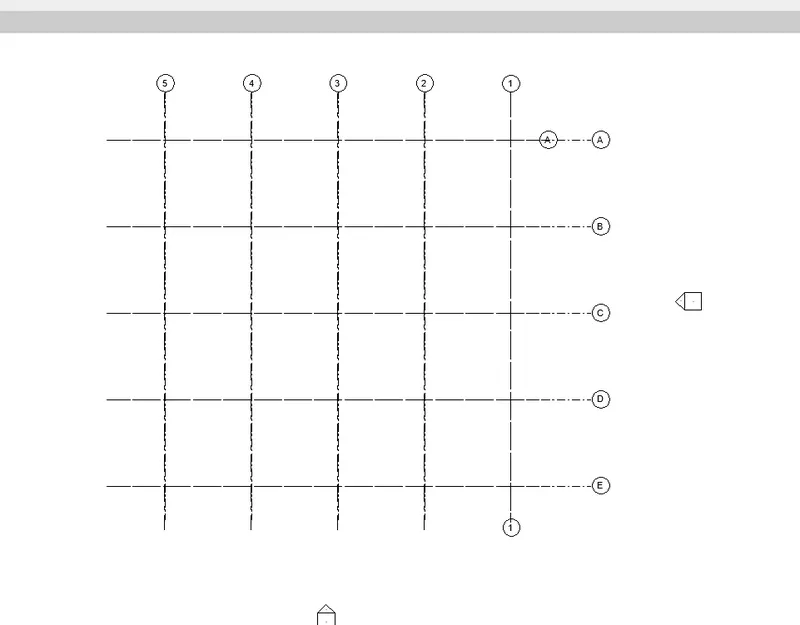
8) Create another new file with a construction template. Save the new file as a central model. This file will include both architectural and structural model. Under the manage tab, Click manage links to link both architectural and structural files. Save the file and close all the files.
Aim: To create a new construction template and make it as a central file,using manage tabs and with manage links should include both the architectural and structural model and save the file.
Tools used:
new
construction template
manage tab
manage links
add
select
ok
save
Procedure:
- Open a new revit file with construction template.
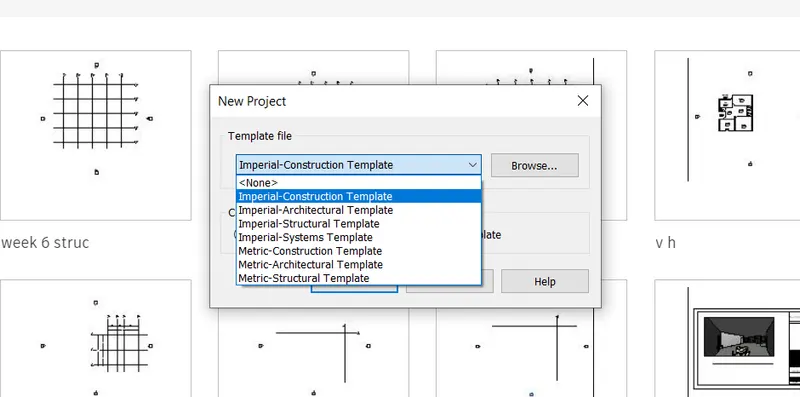
- now using the collaborate tab make te file as a central file as we did in previous types,.
- after making it a central file select the manage tab.
- from that select manage links property.
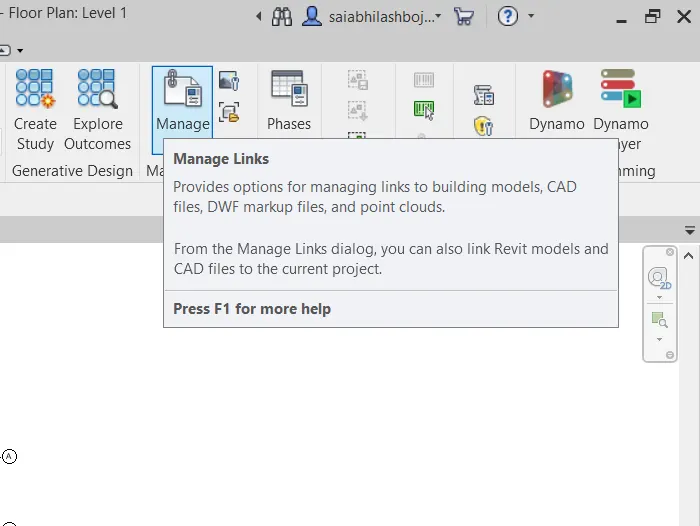
- if any file is already inserted through 'link revit' it will be displayed.
- incase to add a new file select the add icon.
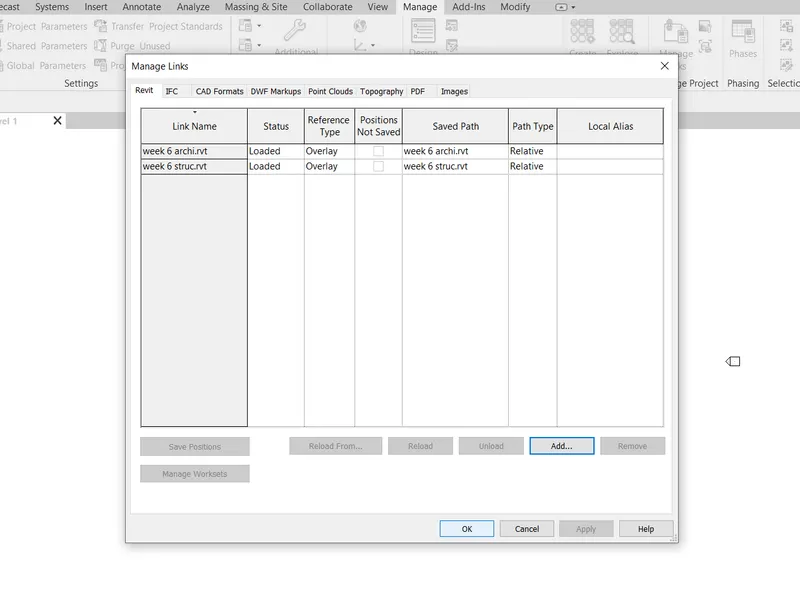
- now select both the architectural and structural model files and clivk on add.
- press 'ok'
- now save the file wiith appropriate name .
Result: The construction template has been created successfully and both the tabs are inserted using the manage links property and the file is saved with appropriate name.
9) Are the grids from structural and architectural model matching in the construction template created? If yes the model is set up for project 2. If not work on the shared parameters and linking options under Manage links
( Hint: origin to origin, by shared coordinates or by project base point to base point ) to link the models in an appropriate manner
Aim: To check whether the grids of both the structural and architectural model are coinciding perfectly in the construction template created.
Tools used:
manage
manage links
acquire position
relocate positions.
Procedure:
- In my construction file i have attached/ inserted both the architectural and structural model files and made the construction file as the central file.
- the grids from both the models are perfectly coinciding in my drawing file.
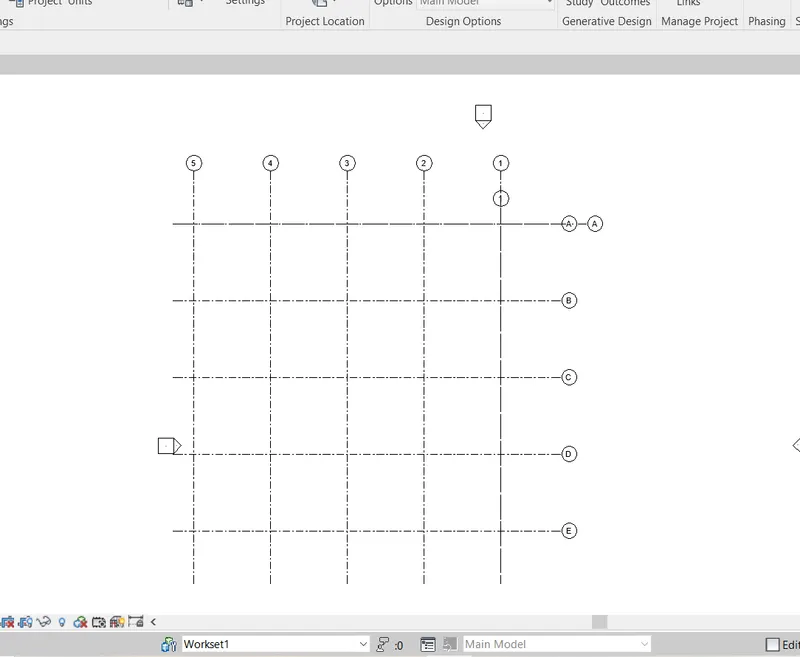
- In case if they are not matching we should select the archi grids which are not actually coinciding with the structural grids.
- and select acquire coordinate property .
- choose the position icon and select the relocate property and to exactly coincide with the grids of structural model select the intersection point.
- grids will be positioned properly.
Result: In my drawing file the grids coincided perfectly and i have saved the file for project 2.
10) List a flow chart of a project tree set up in terms of Construction model, Architecture & Structure model, in this exercise and understand how many people can work on the same project using Revit simultaneously
ANS: i have created a flow chart analyzing the stages of work for the project and represented in apicture below:
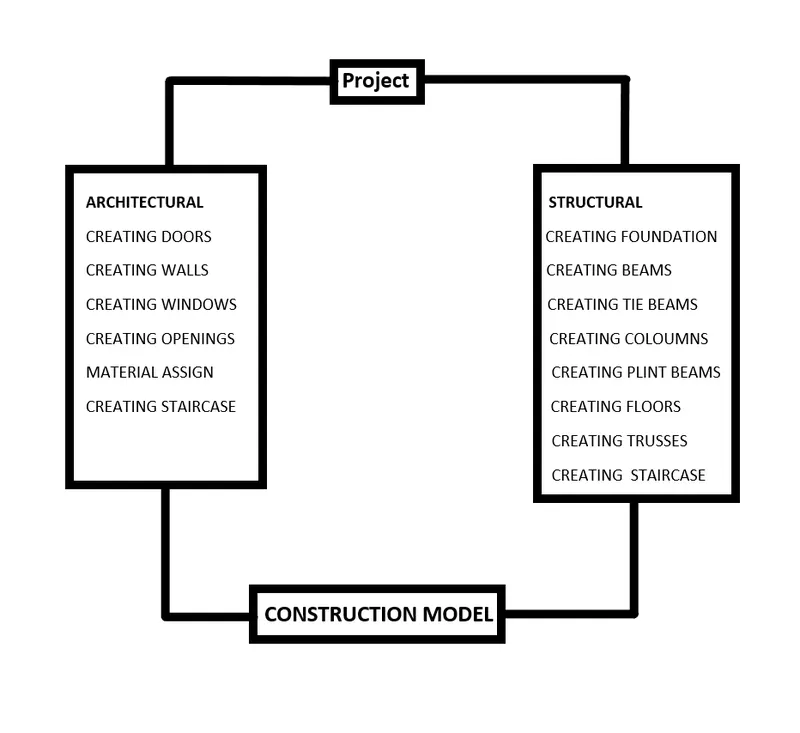
from the cloud modelling in revit we know that different people could work on the same model .
so as of considering a project management team could go through the structural and location properties of the model
and design team could take care of the remaining design.