Week 12:Project 2-Meshing of Rear Wheel Holder challenge
Aim: To build a 2D mesh for the floor panel of the car with the given quality criteria and after meshing assign the thickness to the mesh as mentioned.
Solution:
The given component is a rear wheel holder of the car. First import the (.hm) file of the wheel holder of the car. Then we take the mid surface of the model and mesh it in 2D. We can add thickness to the mesh which is the same as the model.
For manual midsurfacing we first check the thickness of the components. The distance can be found using the distance option by pressing F4 and then placing the radio button at two points. Then selecting the two points at the extremums will give us the thickness of the model.
We can use the OFFSET option in SURFACES EDIT by pressing SHIFT+F9. The radio button needs to be placed in OFFSET and select the outer surfaces of the component and duplicate it to the current component. Type the distance as half of the thickness and check the normal using the vector normal option.
If the vector is not in the required direction then we reverse it by using the reverse normal option and hitting OFFSET. This will give us the required midsurface.
Fig 1 checking midsurface of the floor panel
We do a topology clean-up and then we start meshing the midsurface. Here we can use the automesh option in the 2D panel to mesh the surface. Navigate to 2D PANEL>AUTOMESH>Select the surfaces needed to mesh>give the element size AS 5 MM >HIT MESH. After meshing some of the elements violate the quality criteria. This can be checked by Press F10 which is the check element tab. This can also be checked by Tool>check elements>type the quality in relevant boxes. Then click on the respective options to check whether tab elements fail or not. So we can make them follow the quality criteria by relevant tools.
Fig 2 Checking topology error in topo mode
Fig 3 after clearing topology error
Fig 4 Checking Topology cleaned in wireframe mode
After assigning the thickness to the mesh we need to create the property and apply the thickness to it as the real component thickness. Then we assign those properties to the respective component.
Result:
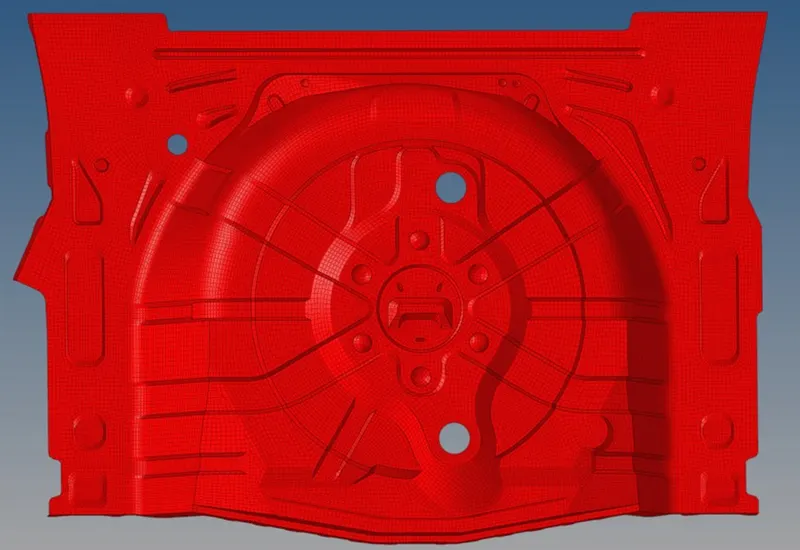
Screensnip after thickness is assigned.
CONCLUSION: The challenge was successfully completed as per the given requirement.