Week 12:Project-1-Meshing of Door Inner Panel Challenge
AIM: To extract the mid surface and mesh the given model
PROCEDURE:
Step 1:-
- Import the given model into the software
- Below image shows the initial CAD model
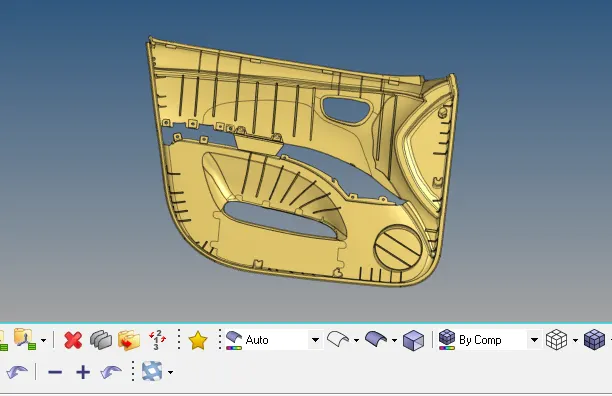
- Look for any damaged surface and unstiched edges and correct the same by filling the surface or toggle edges
- Measure the thickness of the model
- Since it is a plastic model whole component might not have uniform thickness
- Take mid surface of different thickness in different collectors
Step2:-
- Take mid surface of each portions of having same thickness
- Assign the quality criteria which is mentioned above before starting the mesh
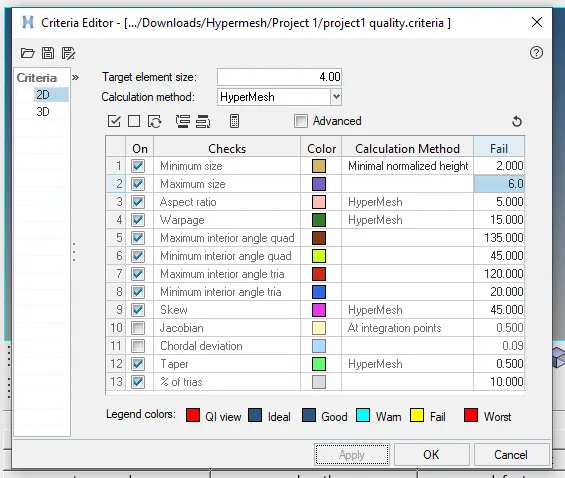
Step 3:-
- Once we start meshing , mesh the component portion by portion , so that mesh flow will be proper
- Go to options keep the mesh and split the surface as required
- kee[ the option as advanced remesh when meshing is done
- Taking mid surface for ribs is diffrent from other parts
- Firstly defeature the small fillets arround ribs
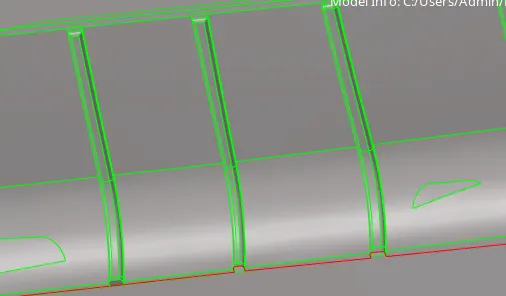
- After defeaturing the fillet, take midlle line of the ribs by lines option
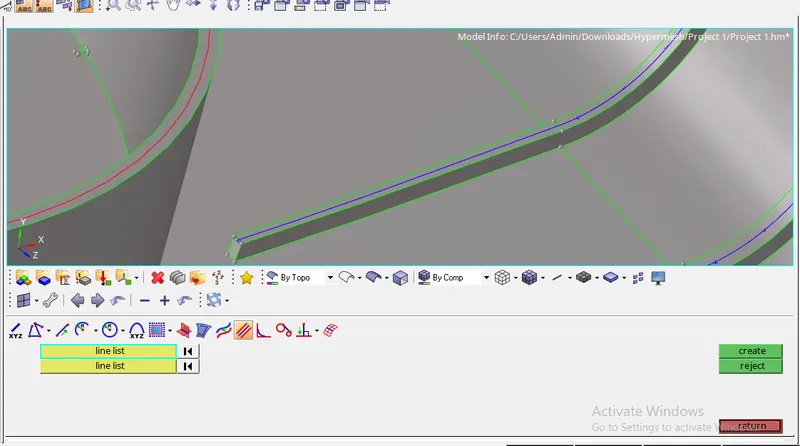
- Now the mid line will be projected on the adjacent mid surface where it has to be connected
Step 4:-
- Project the line on the mid surface and split the surface using the projected line as shown below
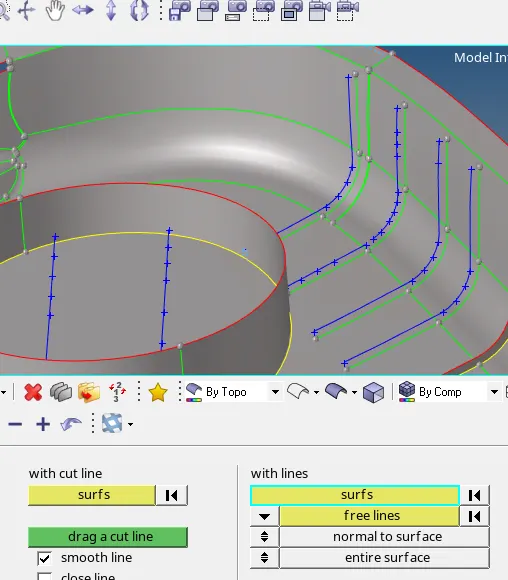
- Now connect the both lines using surface ruled option
- Extraction of rib mid surface is done
Step 5:-
- Now to create mid surface for doghouse
- since the thickness of mid surface is more than 6mm, mid surface will be taken like shown above
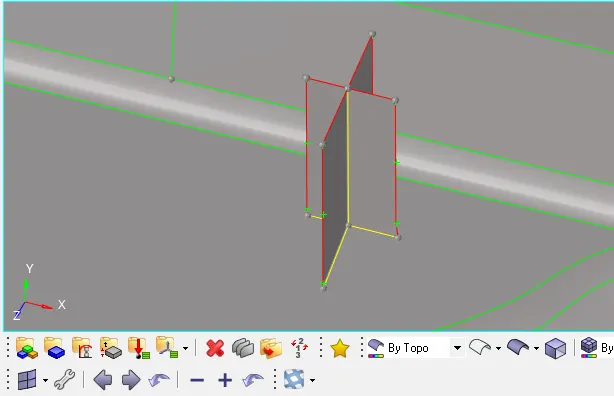
- Firstly create mid line fromeach faces of the feature, as shown in below image
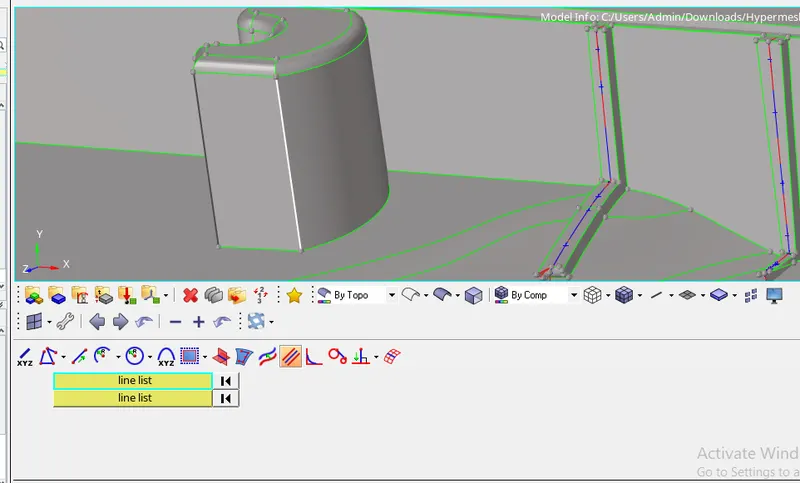
- Do it on all the sides, so that four lines will be creared as shown below
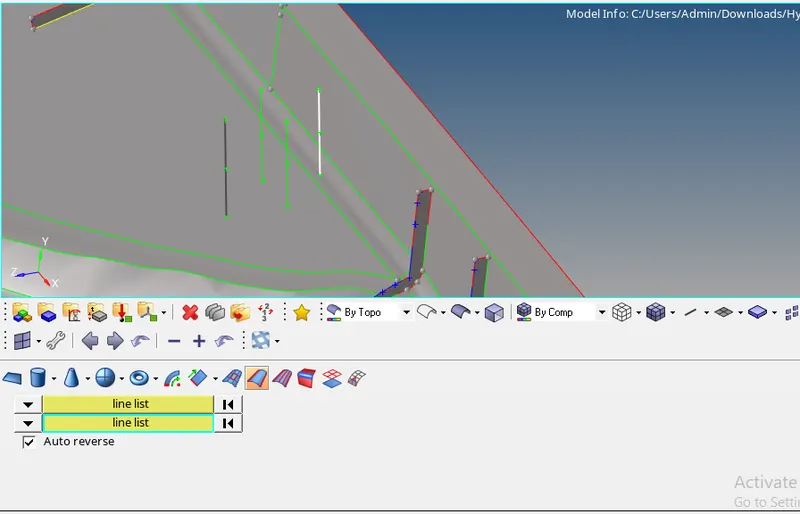
- Using the above lines create surface by surface ruled option
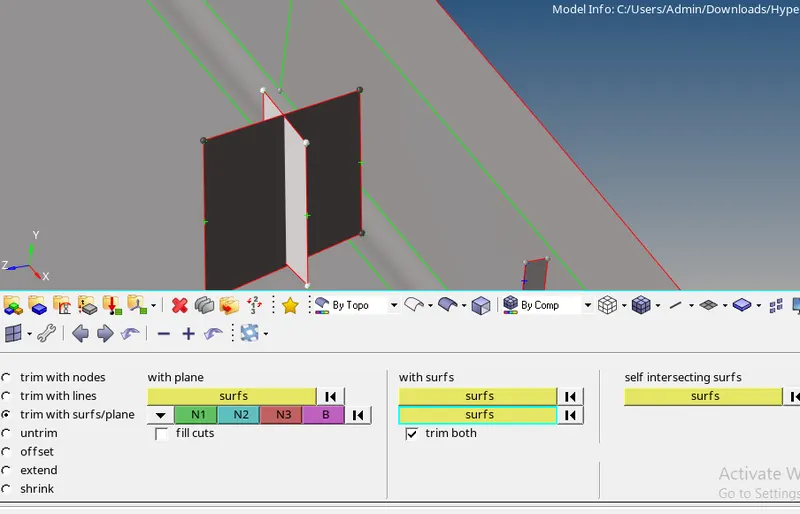
- In the above image , we can see there is no conection between surfaces
- So go to surface edit>trim with surfs/plane select both surface , enable trim both option
- Both the surface will be now joined together, extend the bottom edge to mid surface below
Step 6:-
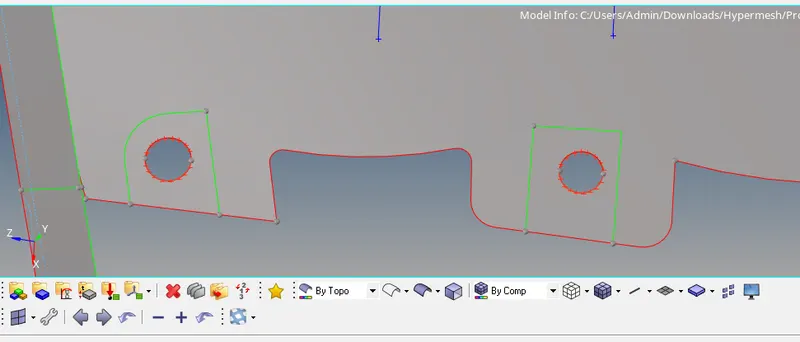
- The feature shown in below image, it is not needed to capture the edge of feature, it is important to capture the hole( as mentioned in question)
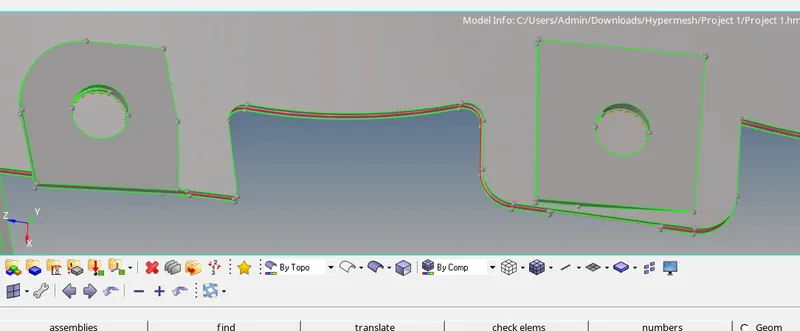
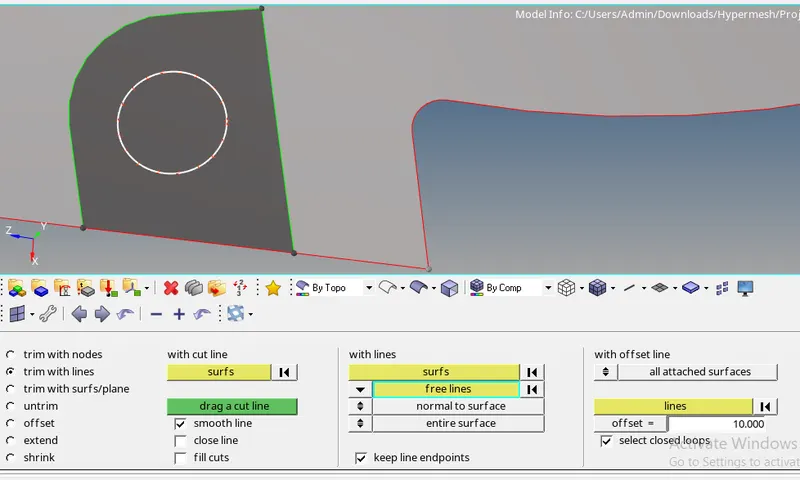
- Inorder to capture the hole , project the hole on the mid surface , so that outline of the hole will be there on mid surface
- Now using the line, go to surface edit>trim with lines option split the surface as shwon below
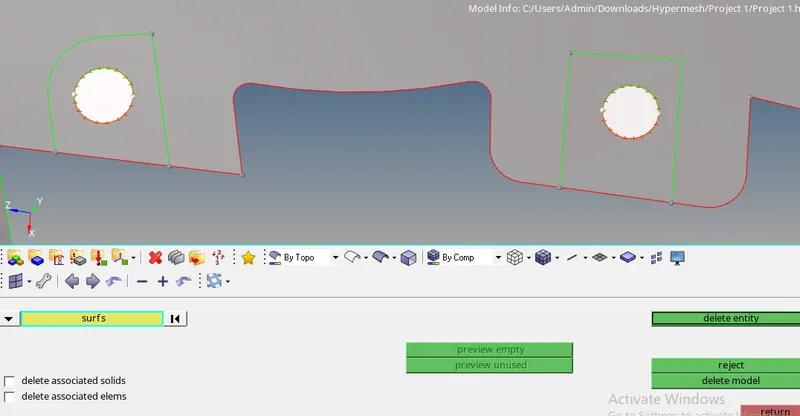
- Delete the inside surface and now the hole feature will be captured
Step 7:-
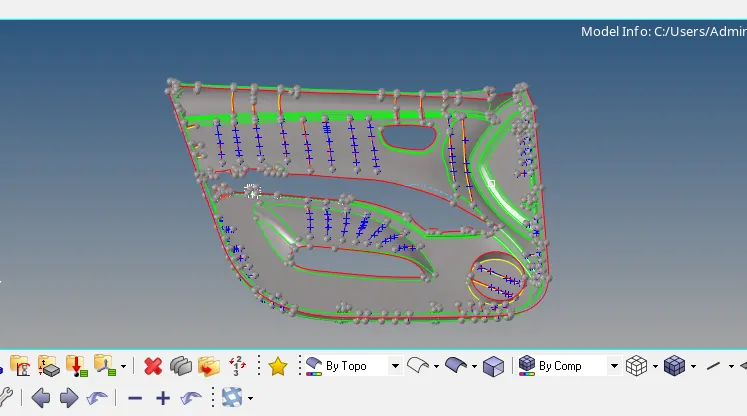
- In same the mid surface will be taken to all parts of different thickness
- Final mid surface is shown in below image
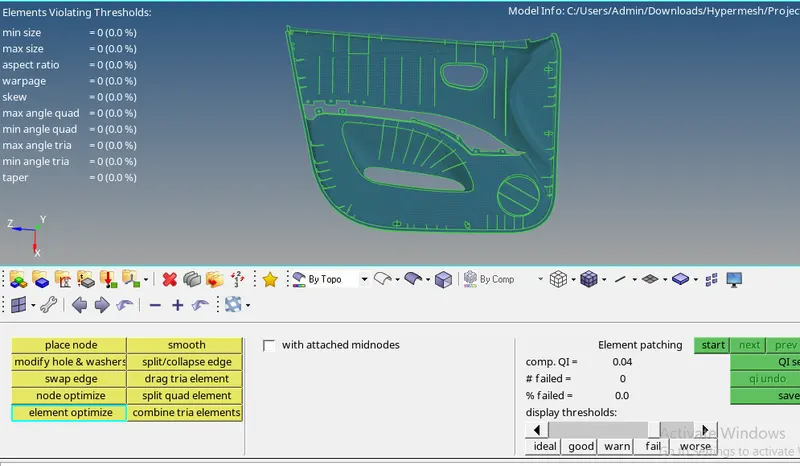
- Next is to mesh the surface portion by portion
- Fix the quality issues immediately, using cleanup tools
- The below image shows there is no quality issues in the generated mesh
Step 8:-
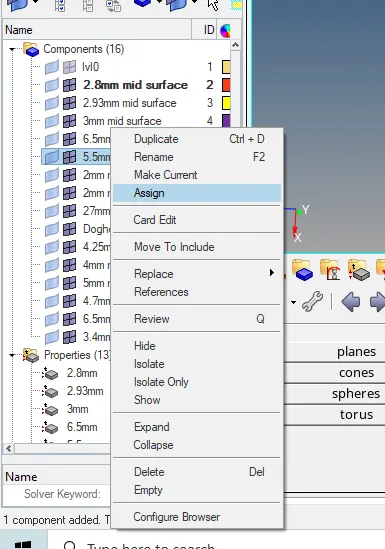
- Now we have to create property card, right click>create>property
- Create property card for each thickness
- Assign the respective property card to the component, as shown in below image
- Final result is shown below
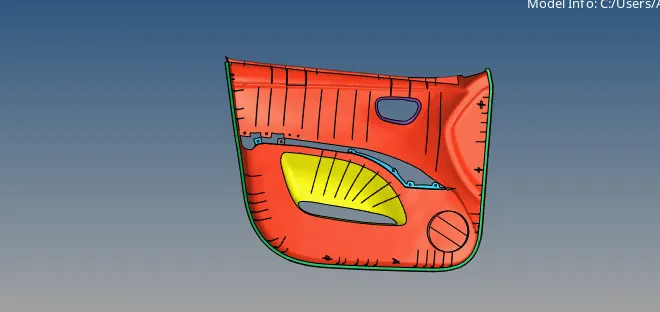
Final result with thickness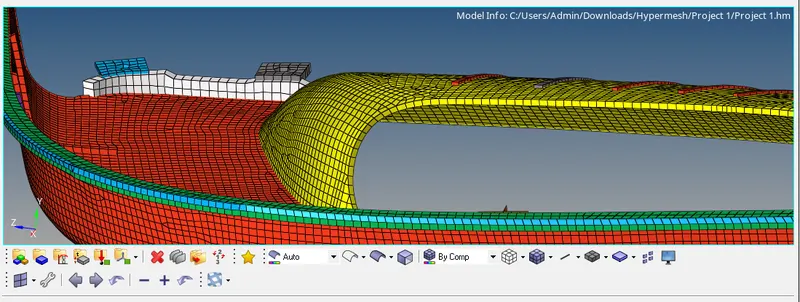
CONCLUSION:
- Understood how to create mid surface for varrying thickness model
- Understood how to create mid surface for features like Rib
- Understood how to join the different surfaces