Week 11 - Final project
OBJECTIVE:
Creation of CAD model for the door panel complete work, create Push pin with Dog house for Lower substrate – Door panel attachment, create heat stakes for part to part attachment. Creation of CAD model considering following inputs as like in OEM and tier1 companies.
Key Terms:
TOOLING AXIS:
- It is the direction of Mold's Core & Cavity moves.
- The Tooling Direction is basically the direction that the mold pulls apart.
- The mold is built in two separate pieces, Cavity side & Core side.
- The Core pulls apart from the Cavity and that's the Tooling Direction.
- The Line of Direction or Axis followed is Tooling Axis.
CLASS A SURFACE:
- Class A surface means Visible surface of the Component or part.
- It is the base reference to the creation of B & C surfaces that forms the Component.
- It provides the Aesthetic Appreance to the component.
CLASS B SURFACE:
- It is the mostly the Non-Visible Surface area
- It is the behind the Class A surface .
- It helps in the Parting surface creation.
- Flashes and Missmatches are done in the Class B surface , that will not distrub the Class A surface.
CLASS C SURFACE:
- It connetcs the Class A surface and Class B surface of the component.
- It also describes the Thickness of the Component.
DRAFT ANALYSIS:
- The Draft Analysis technique is used to analyze whether our Part model created is Manufacturable or not.
- Based on the Draft condition and Tooling Axis applied, Here the part should get easily removed from the Mold (Core & Cavity).
DOG HOUSE:
- It Avoid Sink Marks on Class A surface.
- It also arrests the Degress of fredom of component.
- Engineering features like snaps, locators , Screw Bosses etc. are mounded on them to increase their strength.
LOCATORS:
- These aremainly used to Arrest the Degrees of Freedom of the Plastic Component.
- Usually There are 2 way and 4 way Locators.
- Same rules as the Ribs are Followed.
- It also supports the Position of Plastic Component While Assembly or Joining of Components.
HEAT STAKES:
- Heat staking also known as Thermoplastic staking is the process of joining two Plastic Components together.
- Heat Staking is a pulsed-heat process to join two or more parts out of which one at least is made of plastic.
- The bond is made by partially de-forming the plastic part in order to fix the other.
- These Helps in Not forming the Heat Sinks , and B side deffetcts of Platic Components.
- These helps mostly in Locating and Used for Fastners Supports.
PROCEURE:
- Open the Step file in the Catia
- Copy the file details to the new product file
- Place the individual surfaces in the separate part files in the product file.
- Create the Tooling axis and perform the Draft Analysis.
- Create Class B and Class C surface.
Given Input
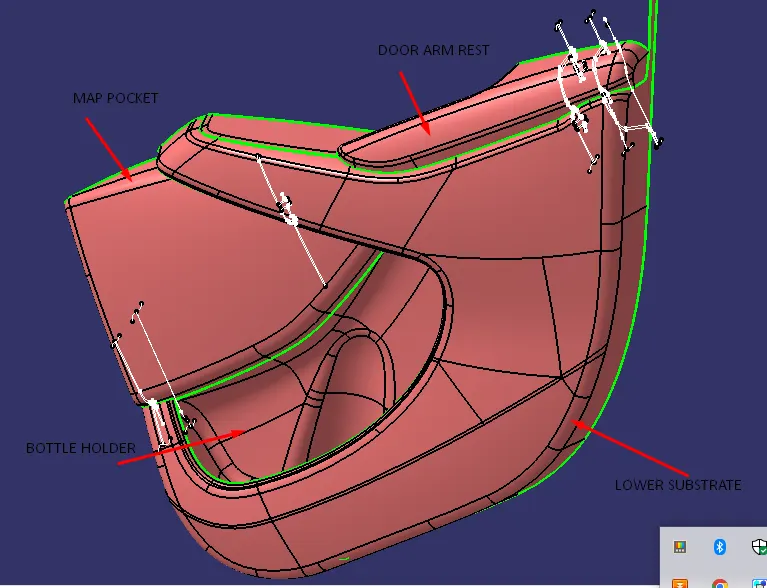
DOOR ARM REST:
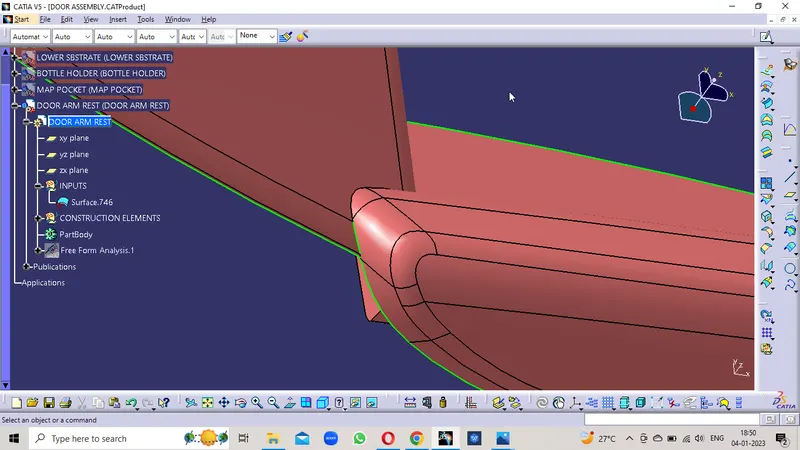
CLASS A SURFACE:
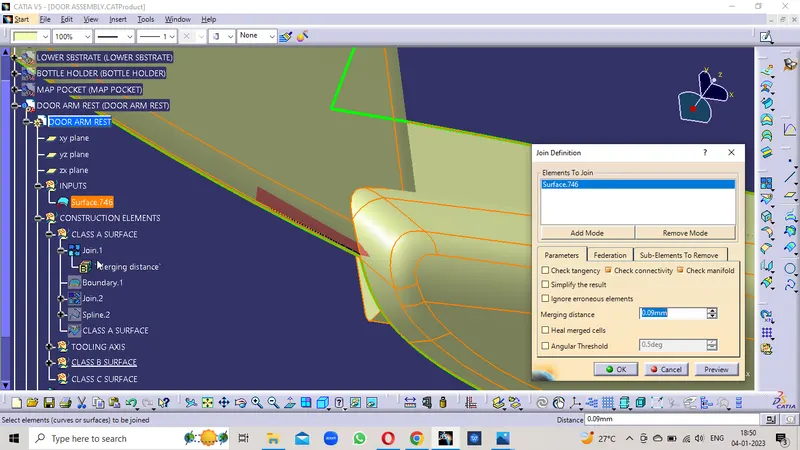
- Check the Class A surface for the patch works and join the surface by the value 0.09mm as the merging distance.
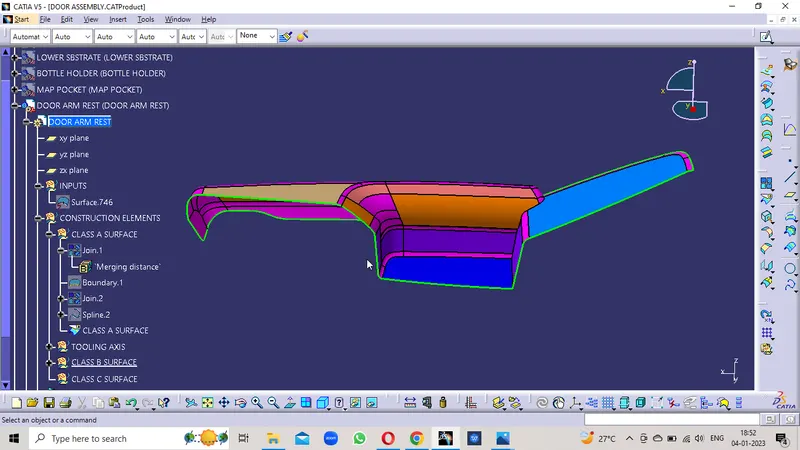
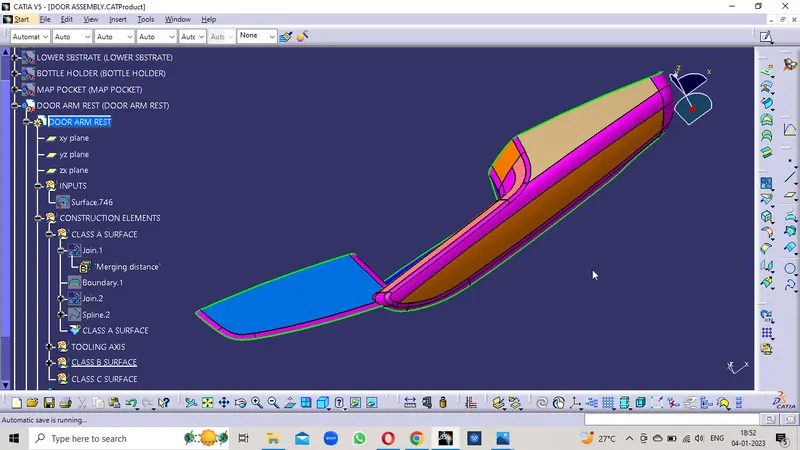
- Devolop the Class A surface and remove the excessive elemets.
- Publish the Modified Class A surface
Class A Surface Inputs
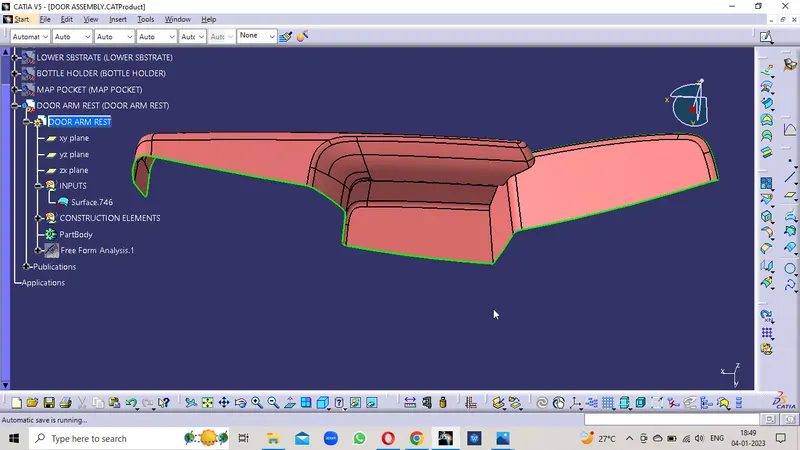
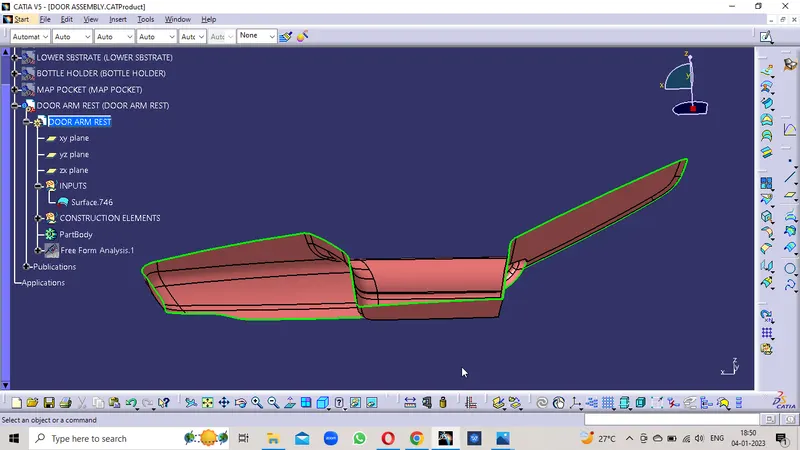
Patched Class A surface
Join the surface by the merging distance of the 0.09mm
Improved the Class A surface
TOOLING AXIS:
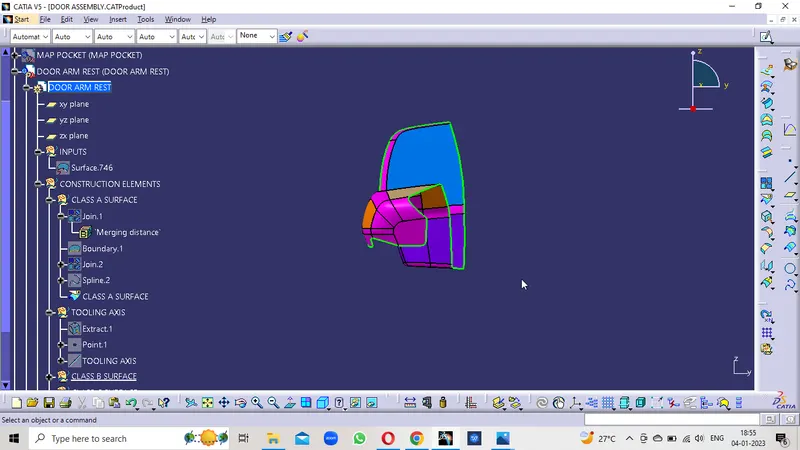
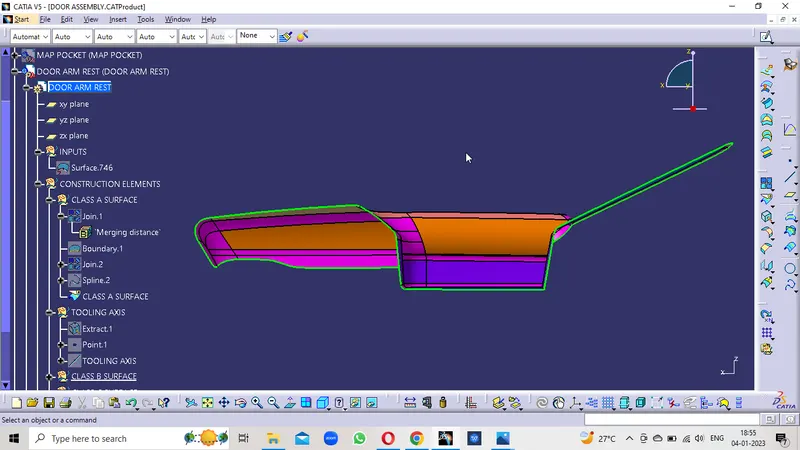
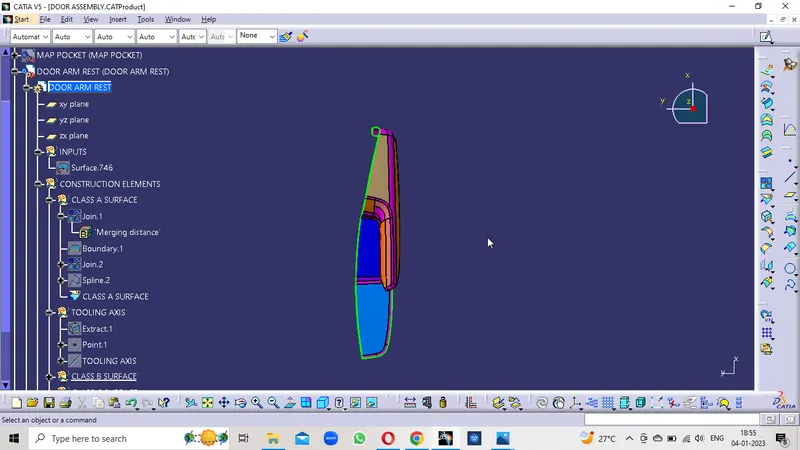
- Check the all the possibile directions for the tooling axis and draft directions and confirms the Y direction as the suitable one.
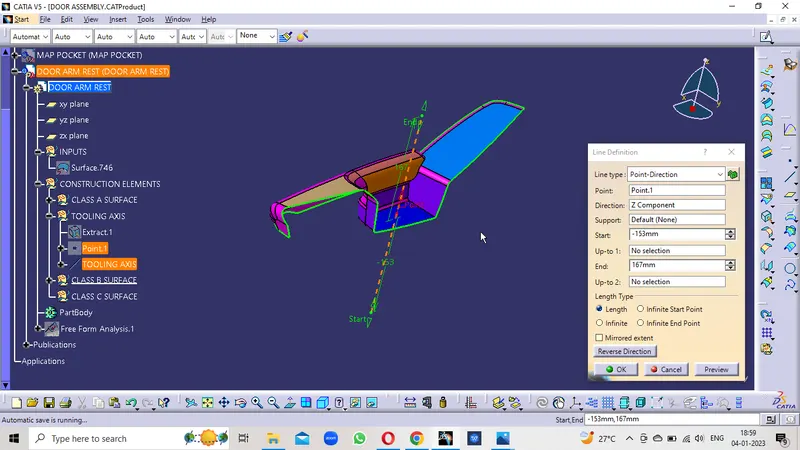
- Extract the base surface and create a point on it.
- Create a line in the Z-Direction .
- Select the View mode in the material mode and perform the draft analysis
- The Surface cleares the draft angle of 3Deg and publish the Line as the Tooling axis.
X-Direction
Y-Direction as the Side Core Tooling Axis
Z-Direction as possible direction.
Tooling Axis in the Z-Direction.
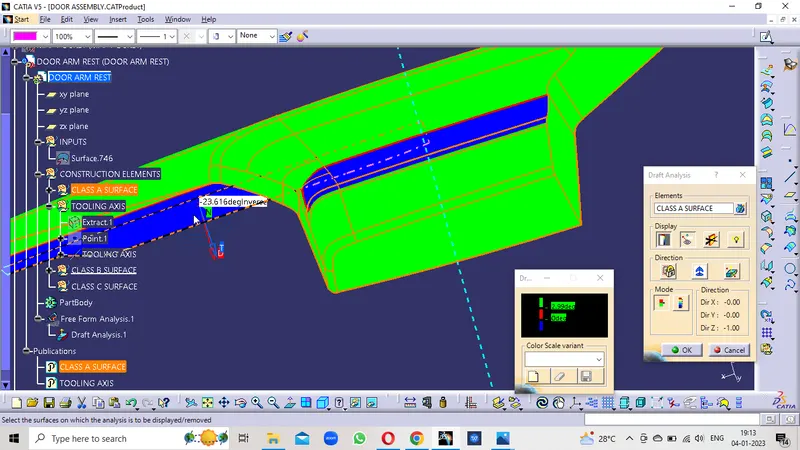
Draft Analysis of Class A surface
- Select into the Material Mode and Insert the Feature Draft Analysis.
- Select the Compass place in the Tooling Axis Direction and Activate the Compass , adjust the compass to the Tooling Axis Direction.
- Provide the Minimum Draft angle is 3Deg. If some patches are Created them provide draft angle as 2.9 or 2.95Deg.
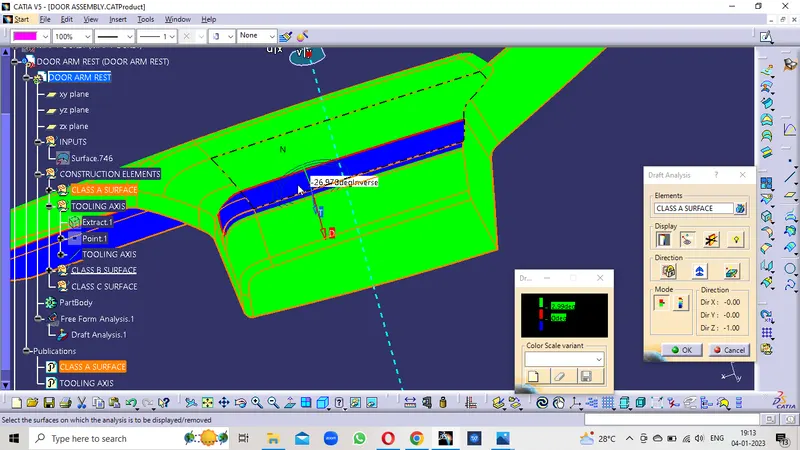
- Select the surface So that the Green Area that is Draft angle is more than 3Deg angle and it is Manufacturable.
- In the surface area the places are getting the negative Draft angle due to its curve section and side profile on it.
- It is clreared by the side core profiles. so the draft analysis is done.
Draft Analysis of Class A Surface
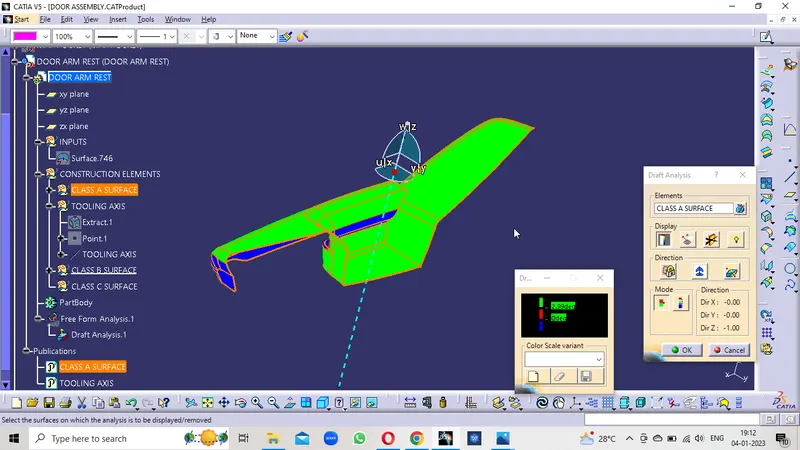
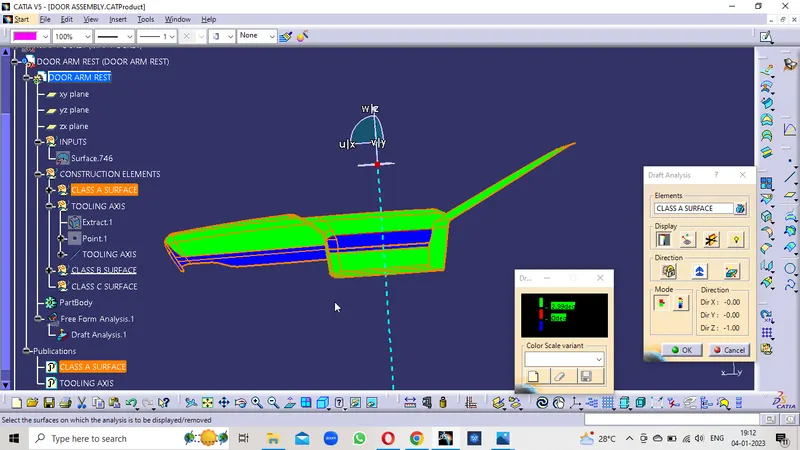
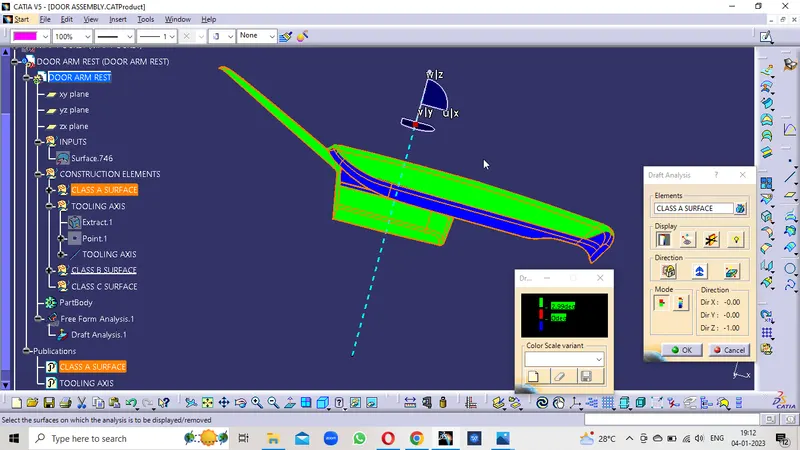
Negative draft angle
clears by the side core block
CLASS B SURFACE:
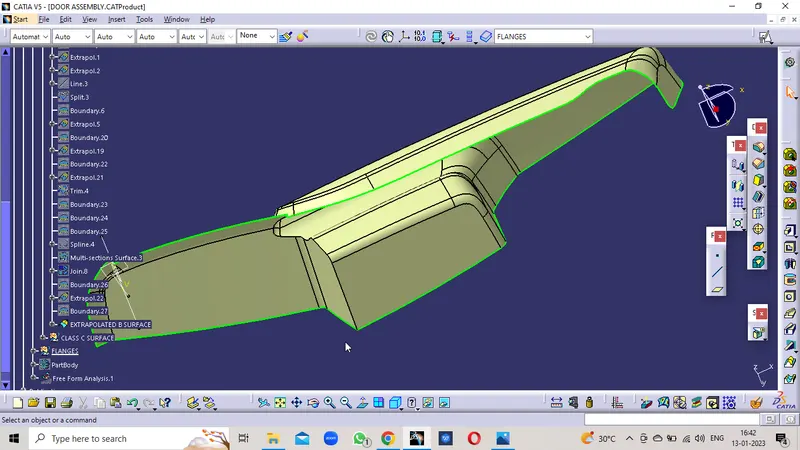
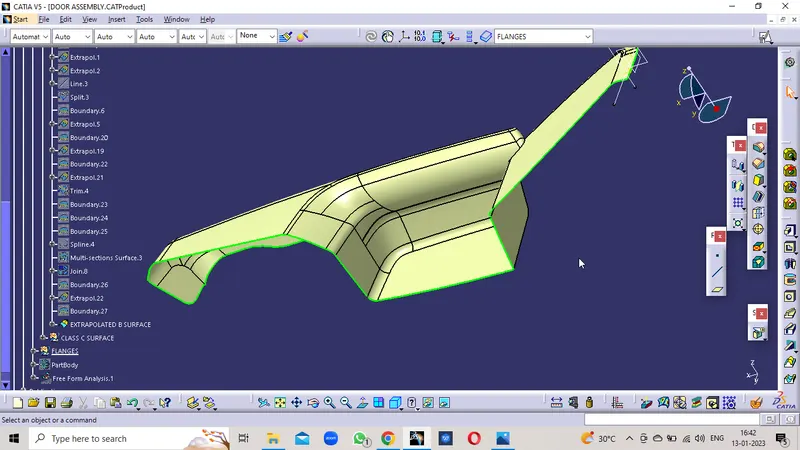
Class B surface is mostly the not visible surface and it is the back of the Class A surface.
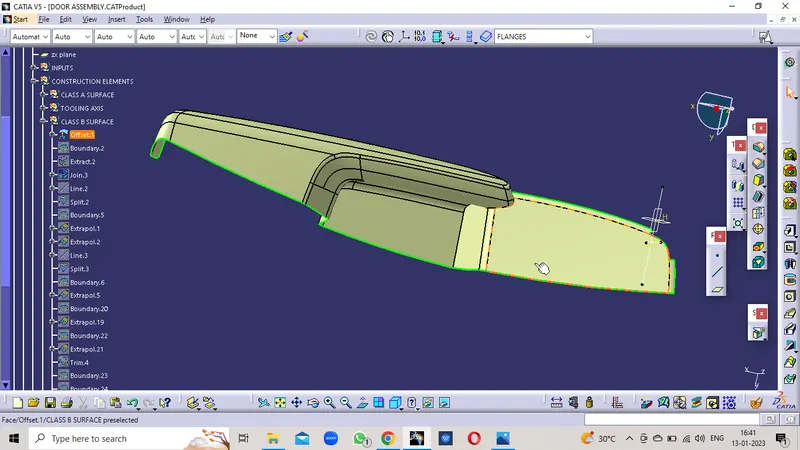
- Offset the Class A surface for 2.5mm (Thickness of Component is 2.5mm).
- The offset surface has the Patches that the minimum fillet value placess cant be offset.
- All The Patched surfaces are Extarcted by using the Extract & Multi Extract Commands.
- Then the Surfaces are Extrapolated untill the Intersection done.
- Then the both Intersection Surfaces are Trimed by using Trim command.
- All the surfaces are Checked for the patches.
- Cross checked gap between the two surfaces Class A and Class B surfaces found that to be 2.5 mm.
- Edges on the Class B surface are Extrapolated to get an intersection with Class C Surface.
Offset Surface
PATCHED SURFACE
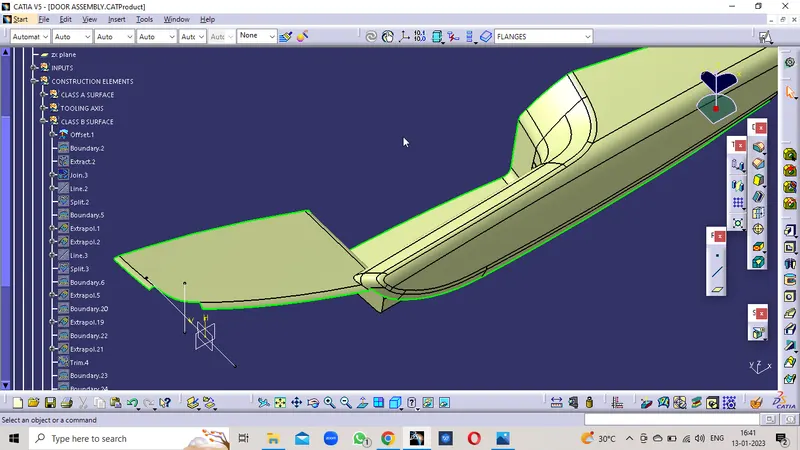
CLASS B SURFACE
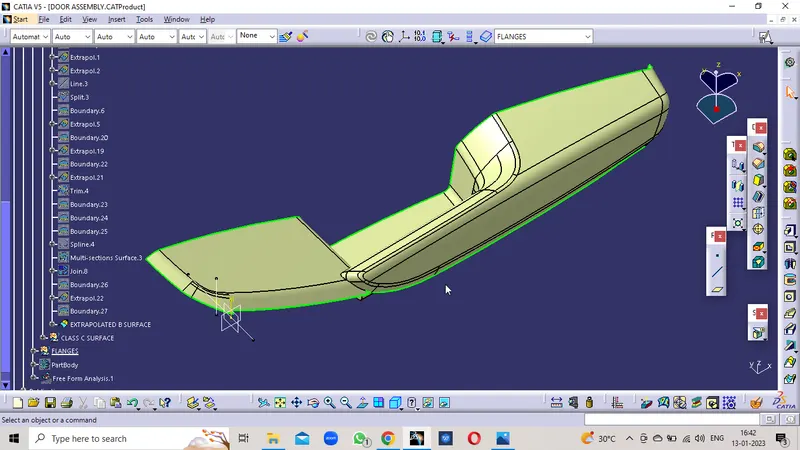
EXTRAPOLATED B SURFACE
CLASS C SURFACE:
Class C Surface is that connect the Class A Surface and Class B Surface.
- Create a boundary on the Class A surface at the individual corner and then Sweep it individually to avoid the patches.
- By using the Sweep Command with the reference of Class A surface and angle of 90Deg to it. It is done only when the surface is perpendicular to Tooling Axis.
- The Class C surface that is parllel to the Tooling Axis is done by the Draft Direction with the 3Deg Draft Angle.
- Create a Joining surface between the Sweeped Surfaces by using the Multisection Surface and Fill commands.
- The thickness or length of the Class C Surface is 4mm minimum, so that it will be trimed easily with Class B Surface.
- Join the Class C surfaces and trim them to form it.
- Join the Class C surface with the Class A surface by the Merging distance as 0.003mm.
Class C surface
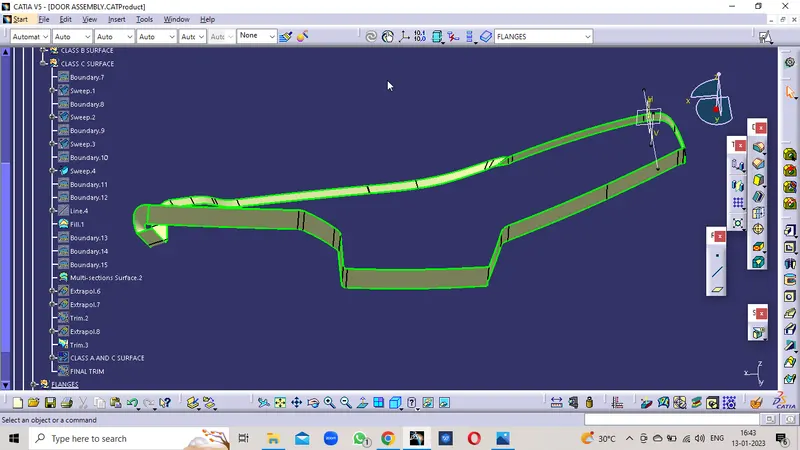
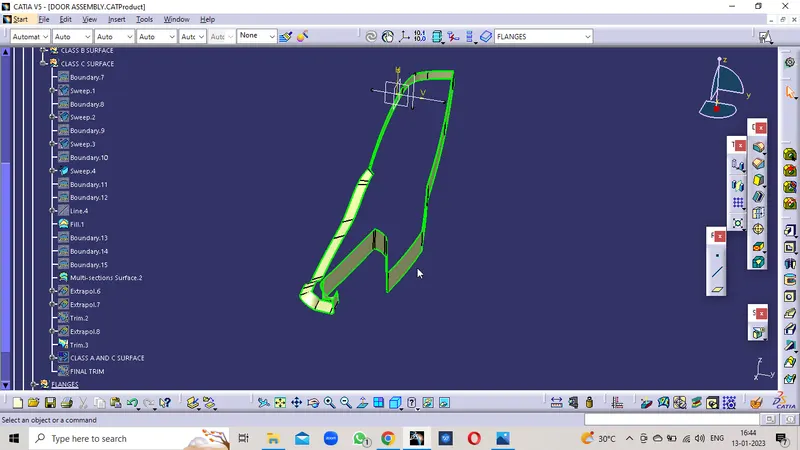
Class A and C surface
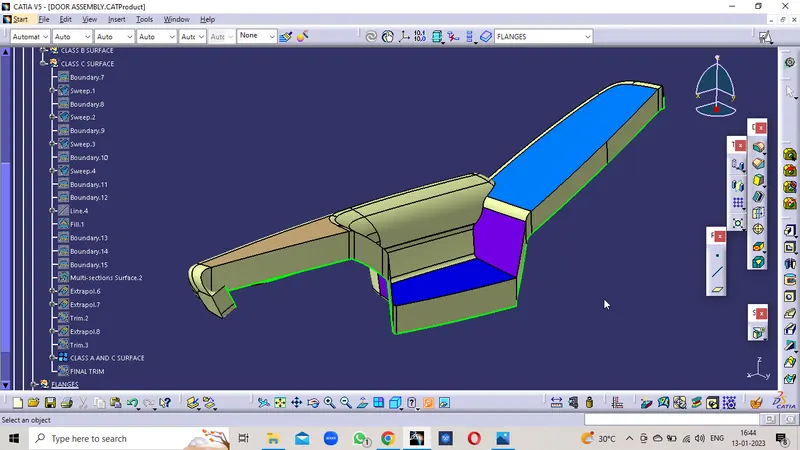
Closed Surface:
- Now trim the Class A&C surface with the Class B surface.
- The Trimed surface is formed.
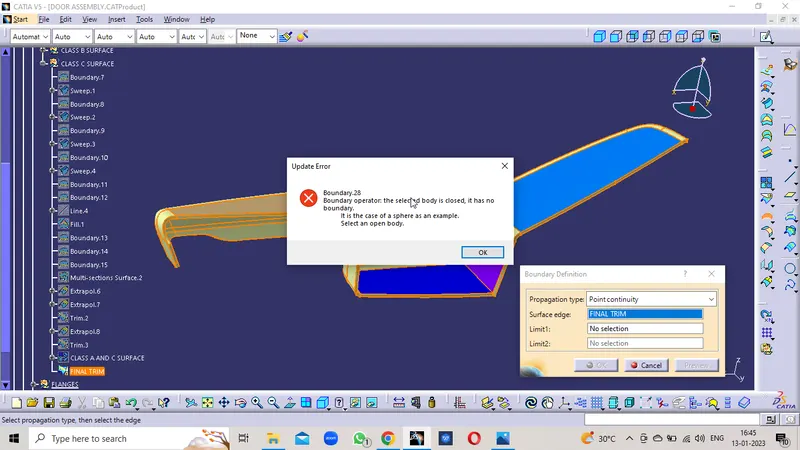
- Created a Boundary on the Trimed Surface so that it enssures that no boundary formed. Confirms that it is completely closed.
- By using the Closed surface Command in the Part Body Design to the surface body.
- Now the Solid Body is formed.
Closed Surface
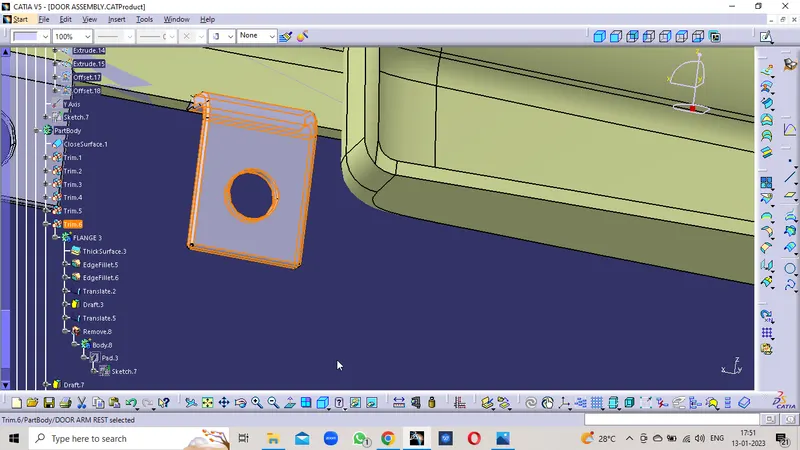
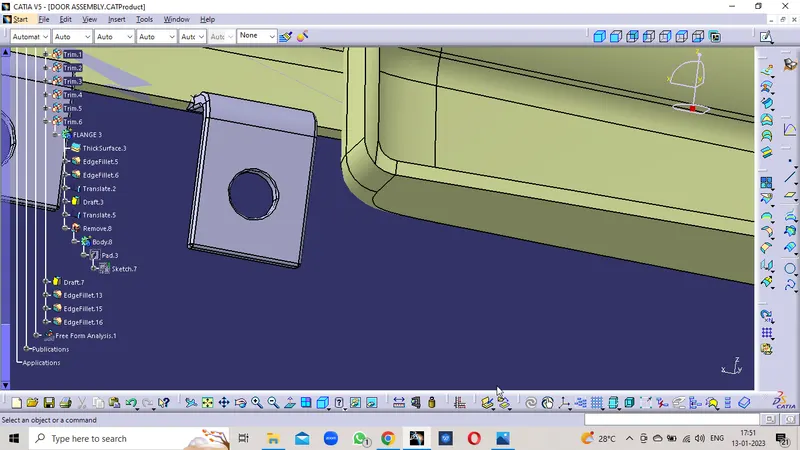
Flanges:
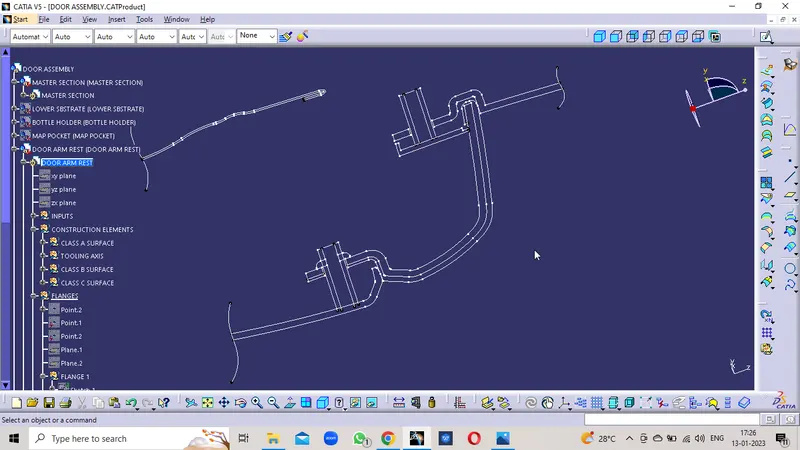
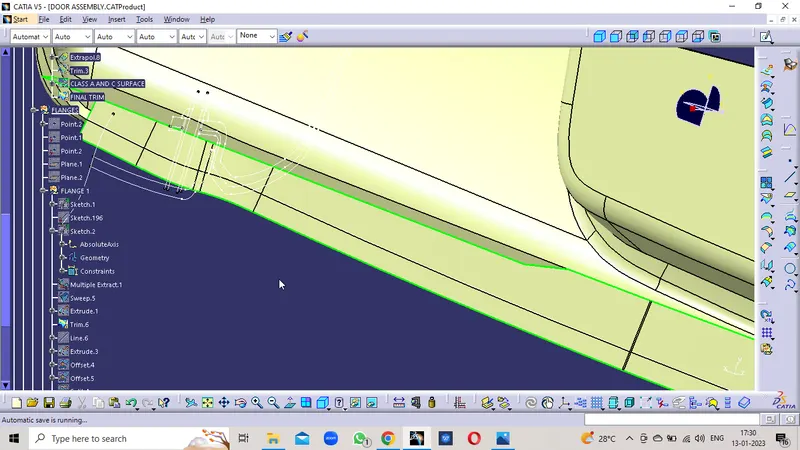
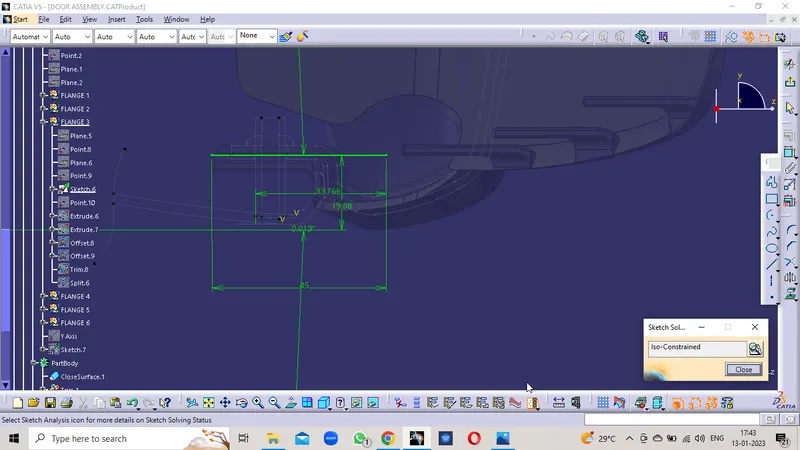
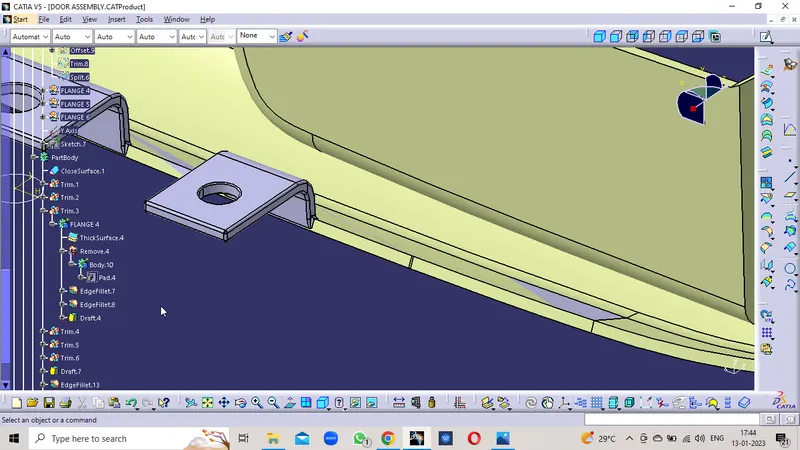
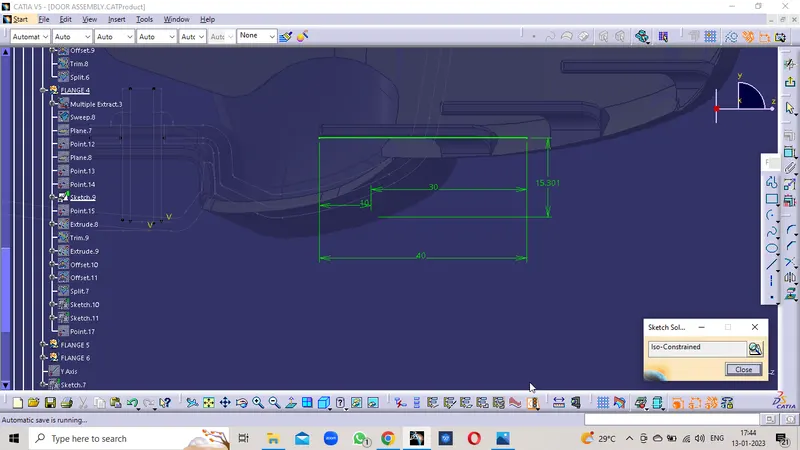
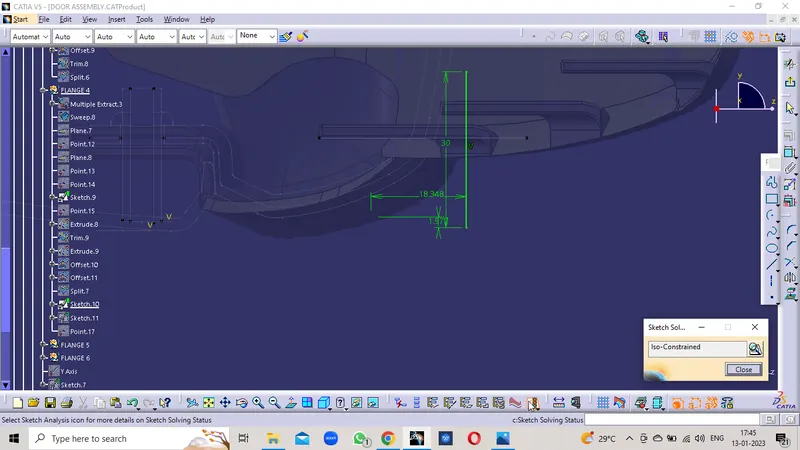
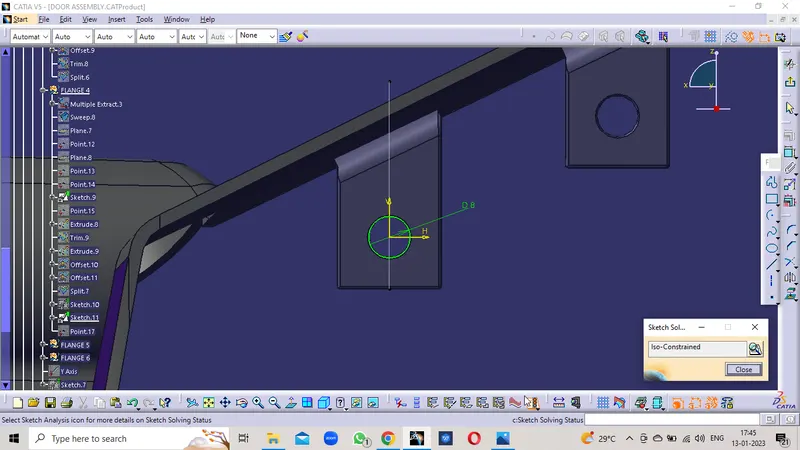
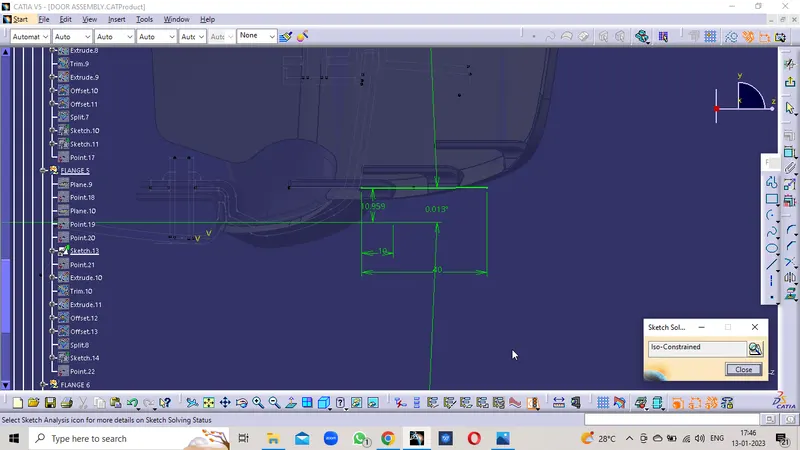
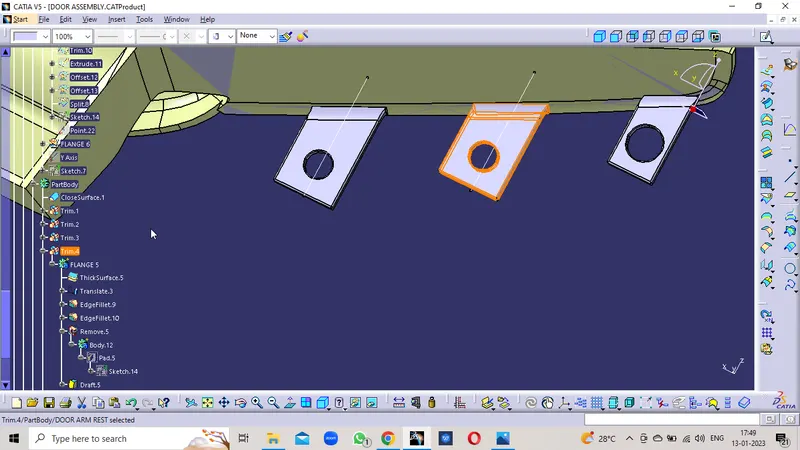
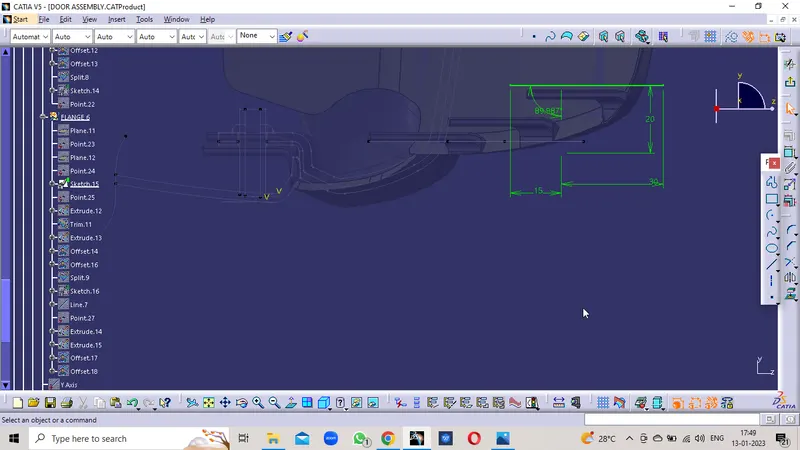
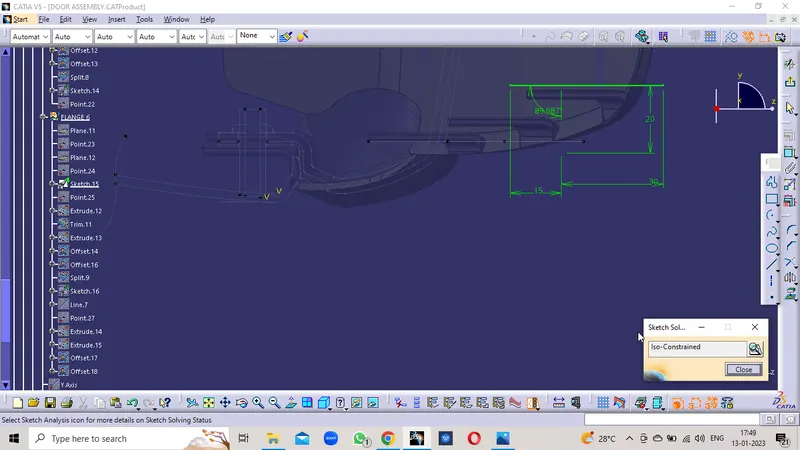
Flanges are the Connecting of the two Parts or Two Components. These were connected by Heat Stakes and Locators with help of Flanges.
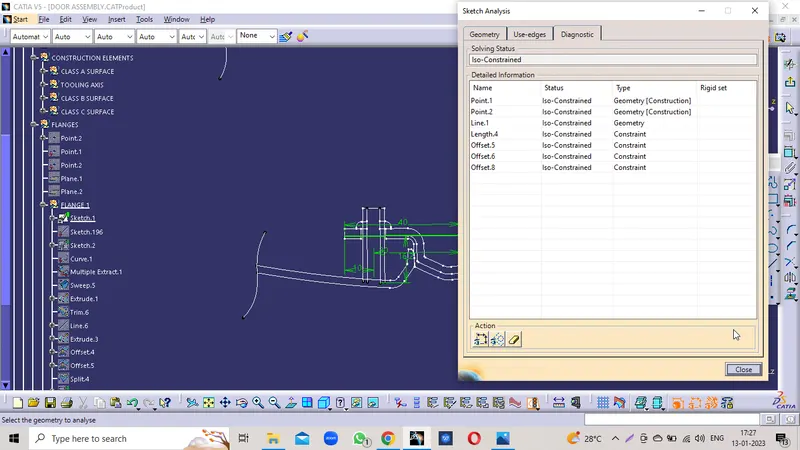
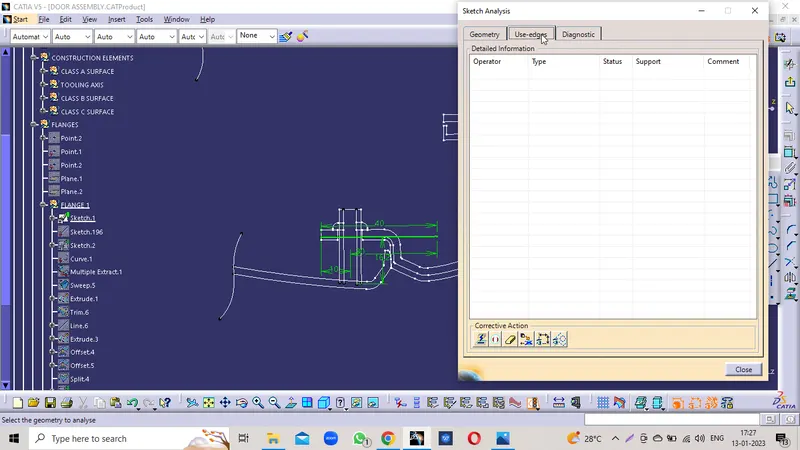
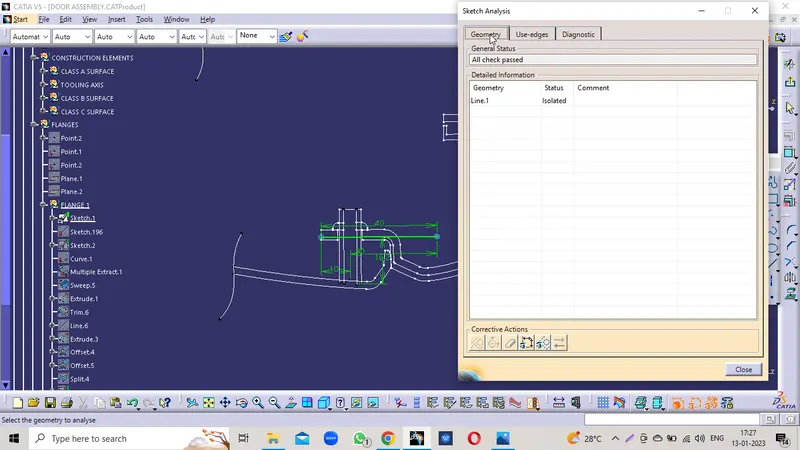
- Extract the lines from the Master section of the flange and Isolate them.
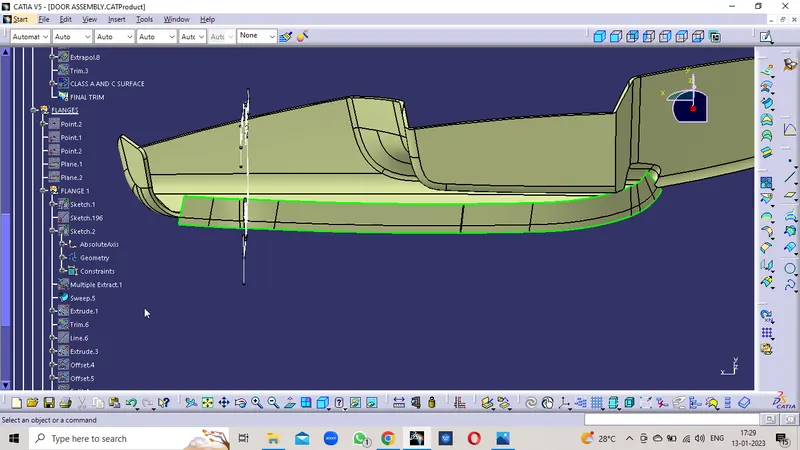
- Extrudue it and sweep the surface on the class C surface .
- Trim the Both surfaces and form the closed one
- Now thicken the Surface with 2.5mm in the part body
- Give the fillets and split the flange with approx value
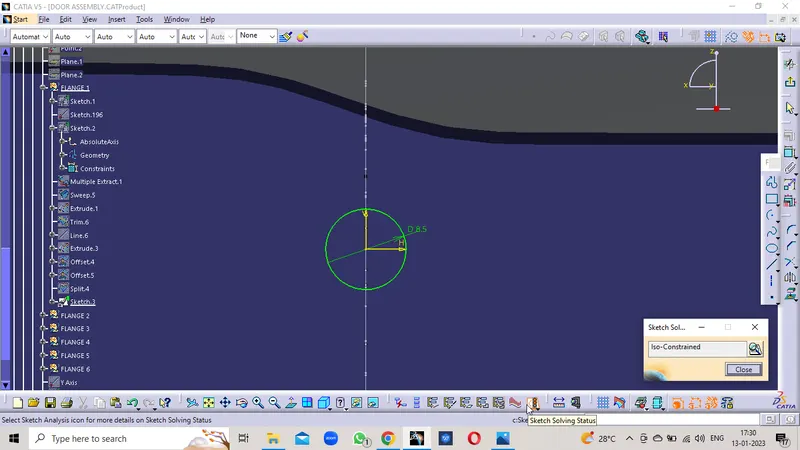
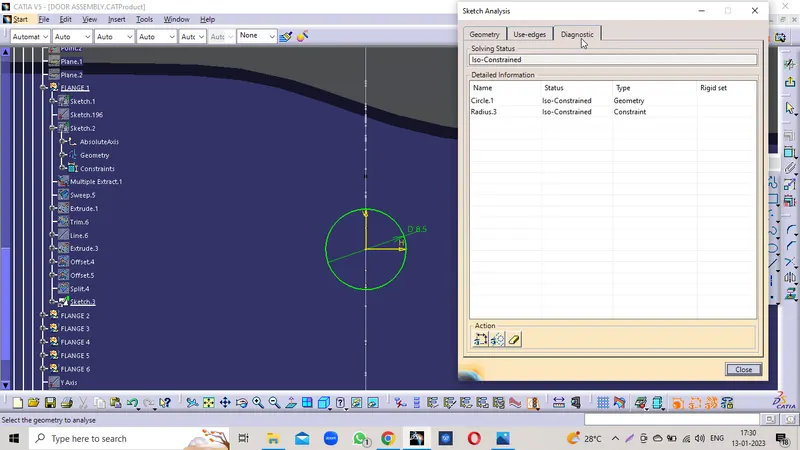
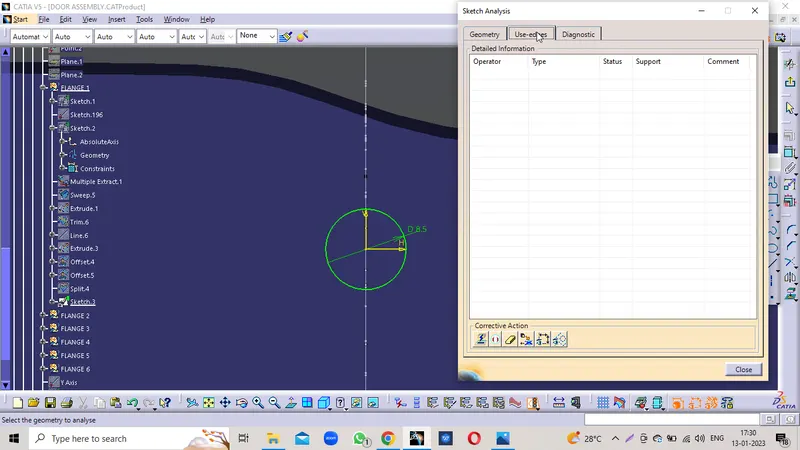
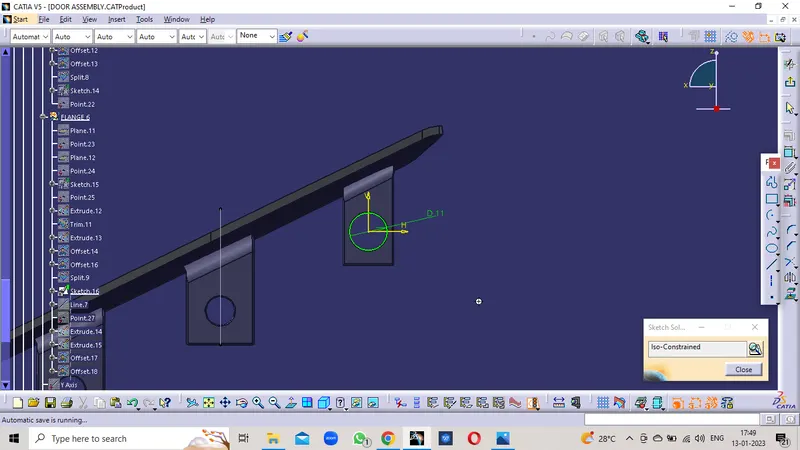
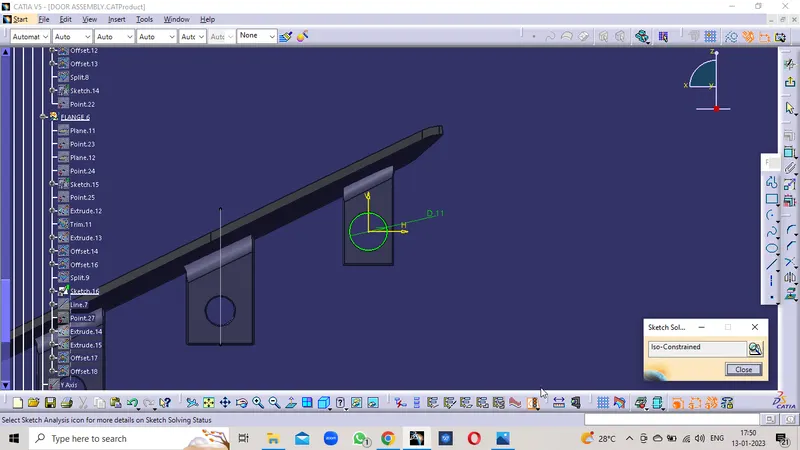
- Provide the Hole according the Heat Stake and Locator size with 1mm clearence to it.
- Draft it with the 0.5Deg on possible directions.
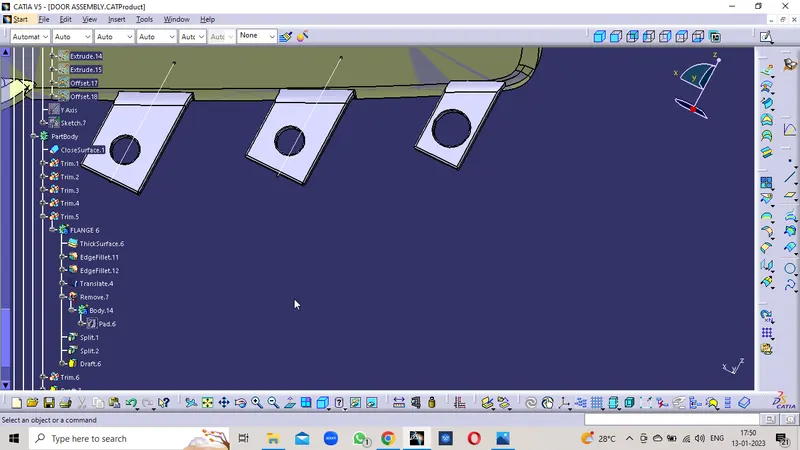
- Create the Flanges according to the Heat Stakes and Locators for the assembly
- Provide the Minimum Fillet radius of 0.5mm on all surfaces and 0.25mm on the inner circle bore for heat stakes and locators.
Master Section Profile
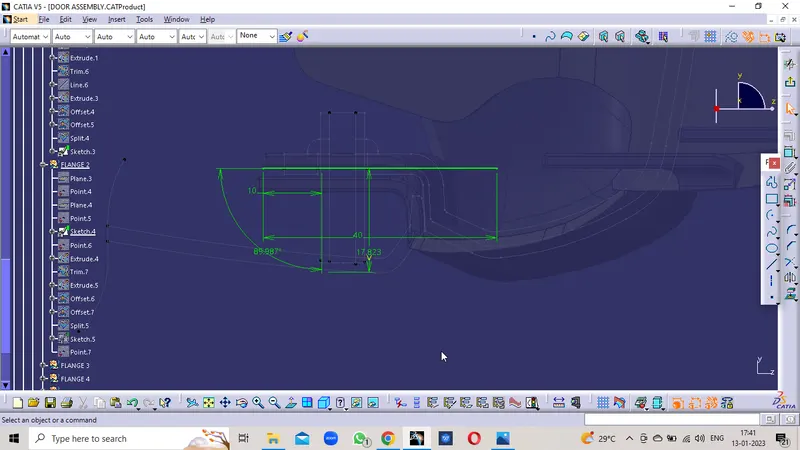
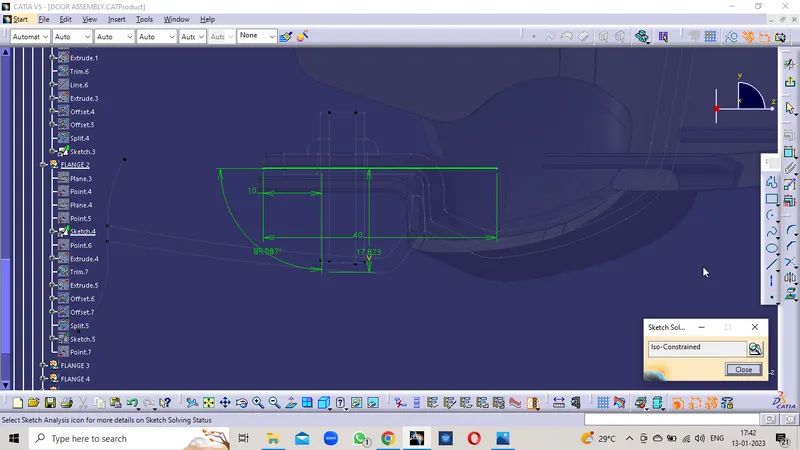
Flange Profile Sketch
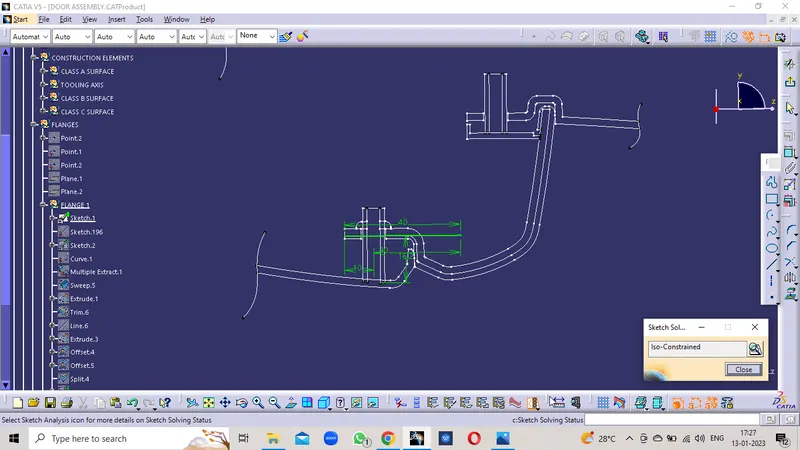
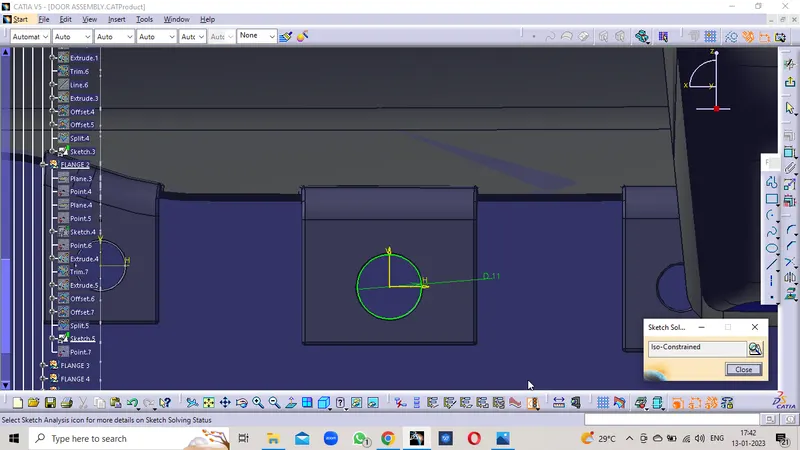
Heat Stake Hole Profile
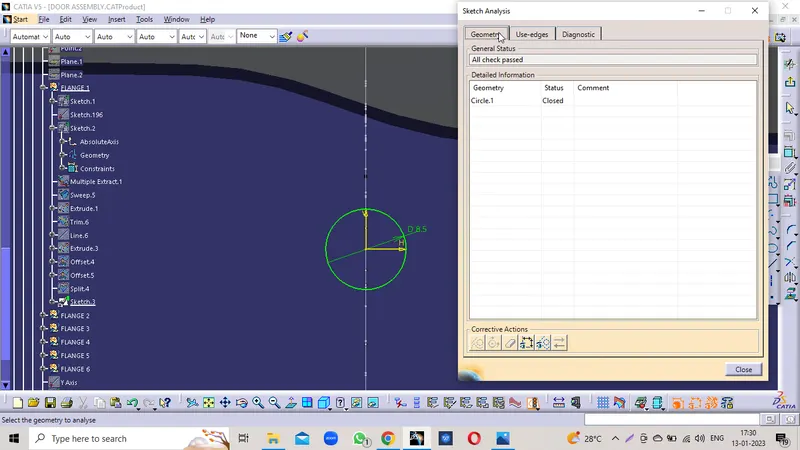
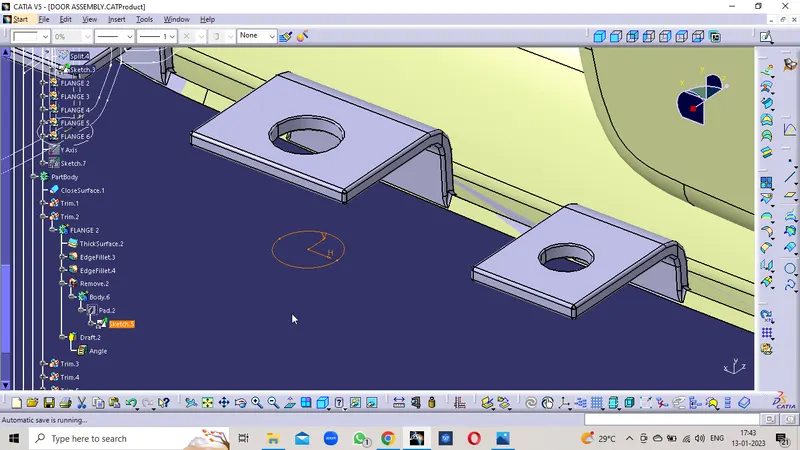
Flange Base
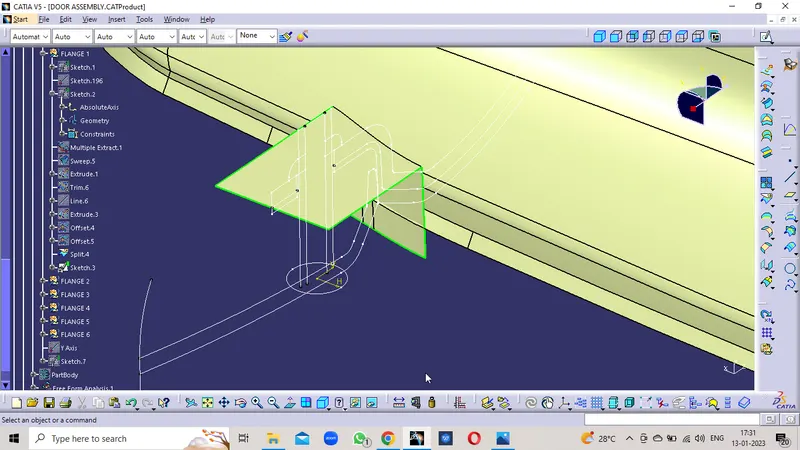
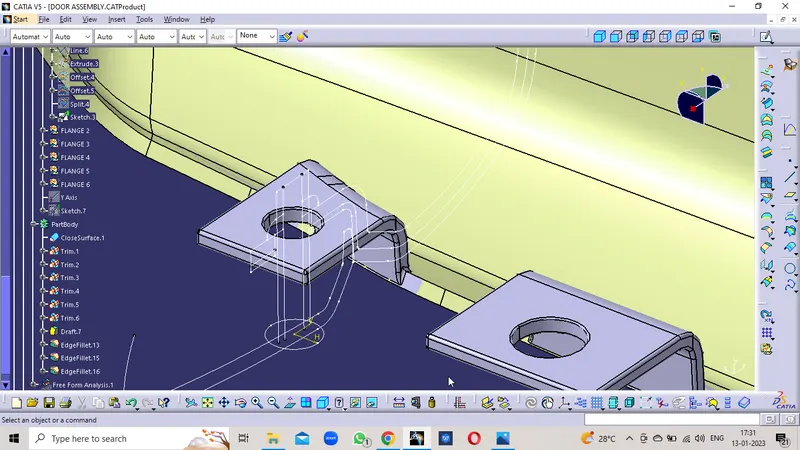
Flange According to the Master Section
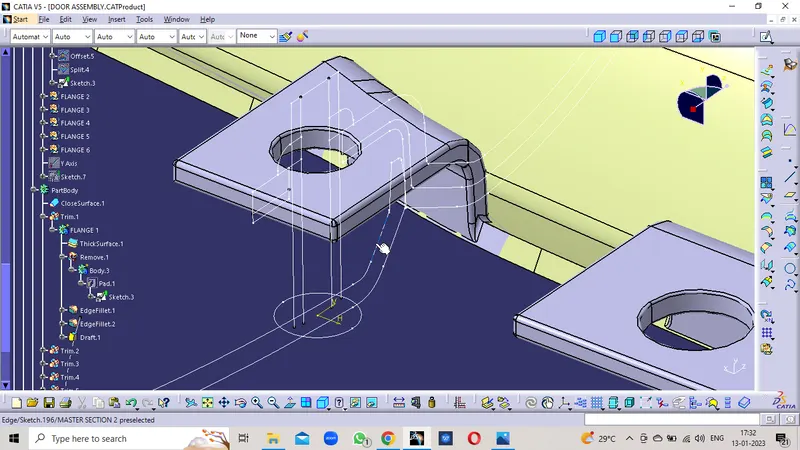
Other Flanges
Draft Analysis:
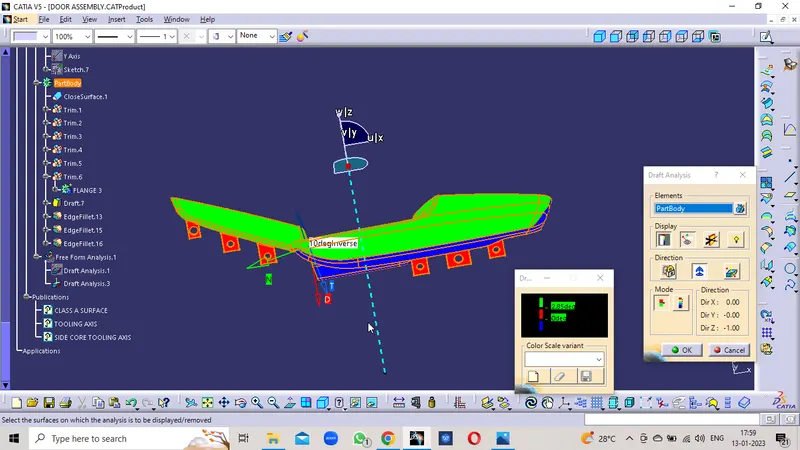
- Select the Draft Analysis to the ClOSED SURFACE.
- Select the Axis and place the Axis line along the Tooling Axis direction, and activate the compass.
- Select the Draft angle degree as 3Deg or 2.9Deg minimum.
- Selected the Surface and found in Green Colour in all the surface area in the Draft Direction.
- Checked the inversion of Drafting to the Core side and Cavity side.
- Cross checked the angle of draft at all surfaces and found that is more than 3 deg.
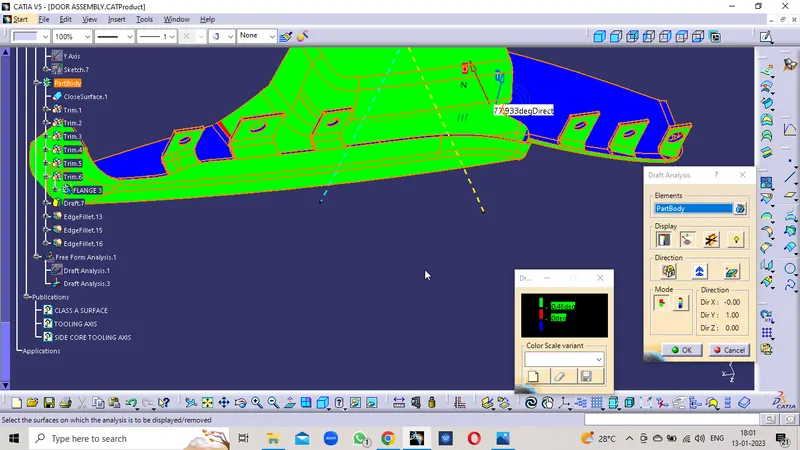
- Checked the Draft angle as 0.48Deg that is approx to 0.5Deg for the Heat Stakes and Locators are clearing the Draft Analysis in the same Tooling Axis Direction.
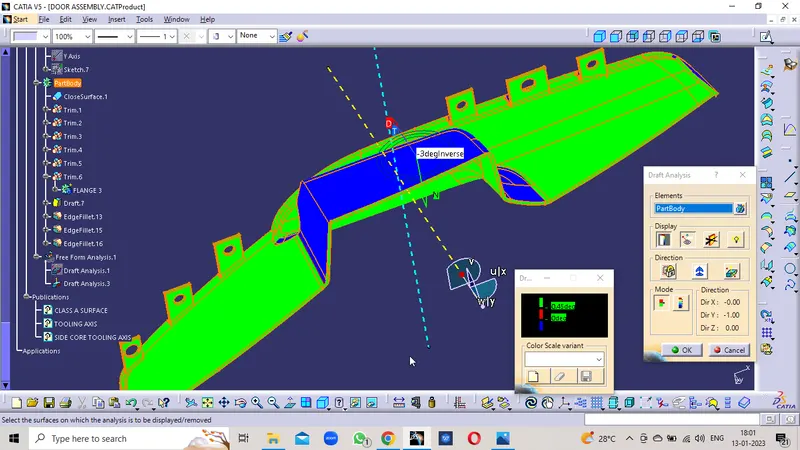
- Here the Some portions of the Closed part body is not clearing the Draft analysis, These are not clearing in the Class A surface.
- It is cleared with the Help of Side Core Tooling Axis.
- The Flanges are also cleared the Along the Side core tooling axis.
Part Body Draft Analysis with the Tooling Axis 3Deg or 2.85Deg
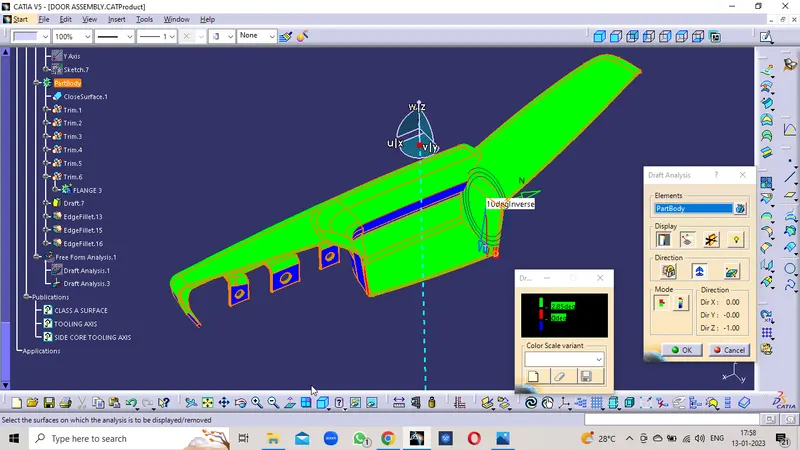
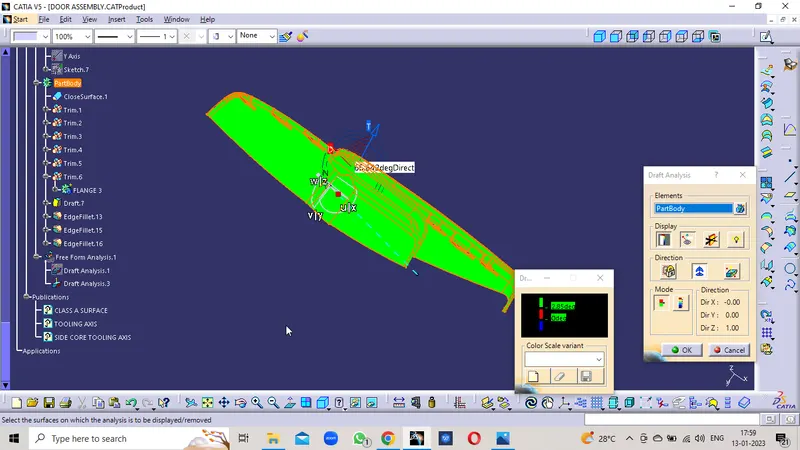
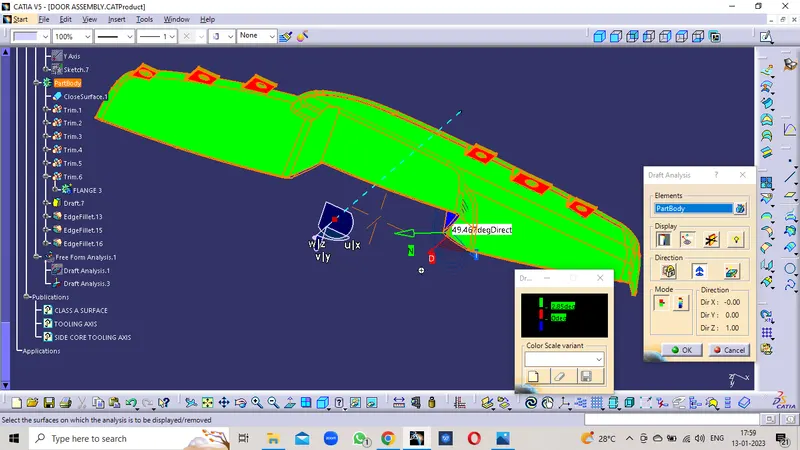
Draft Analysis with Side Core Tooling axis as 2.85Deg
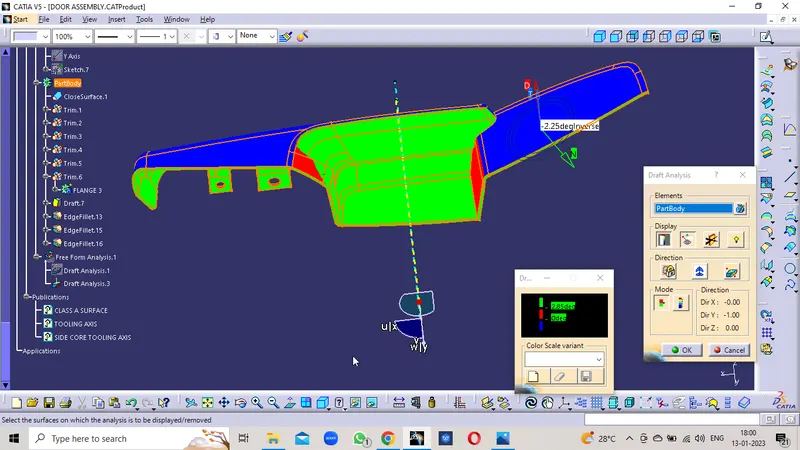
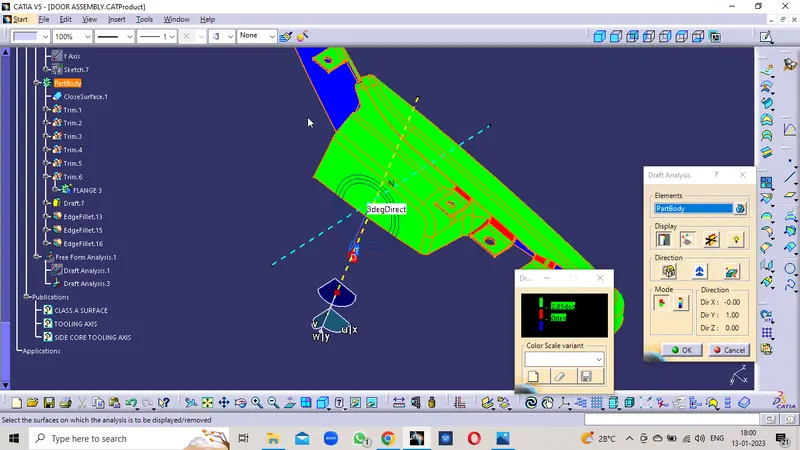
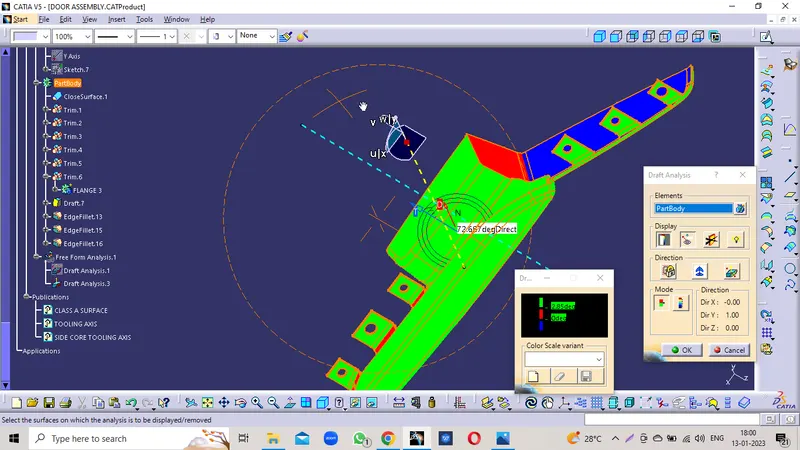
Flange draft Clearence of 0.45Deg (0.5Deg)
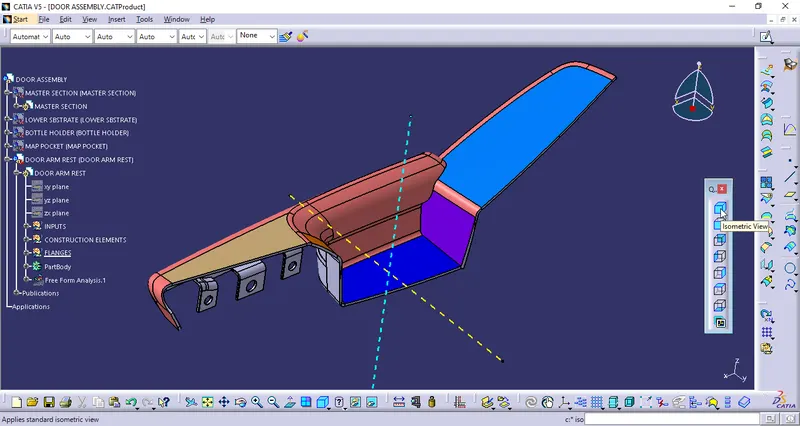
ISOMETRIC VIEW
FRONT VIEW
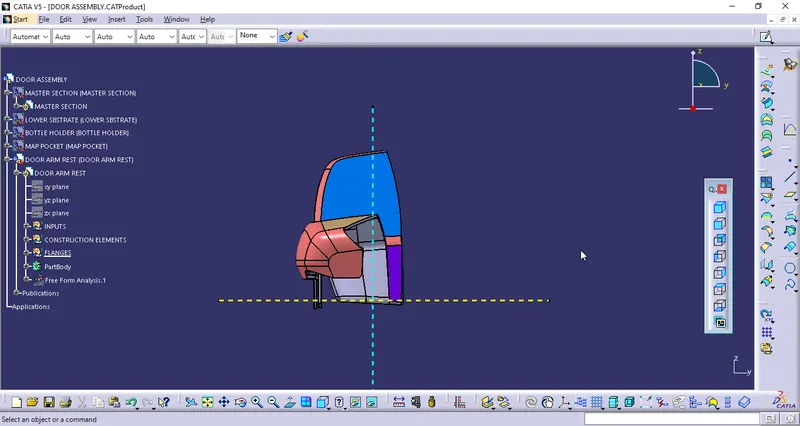
BACK VIEW
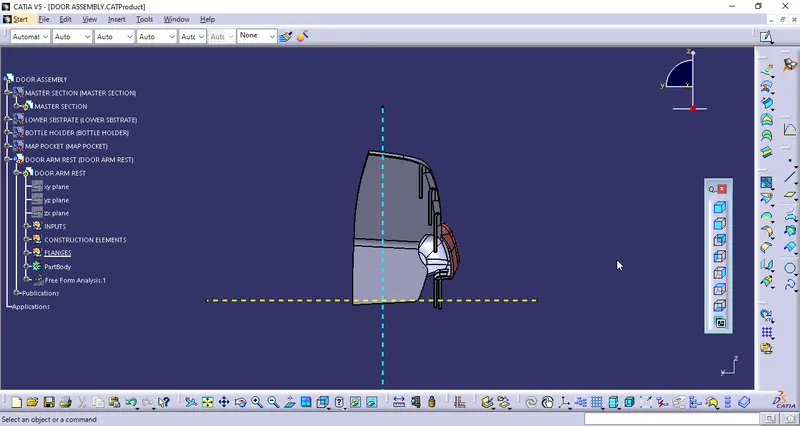
LEFT VIEW
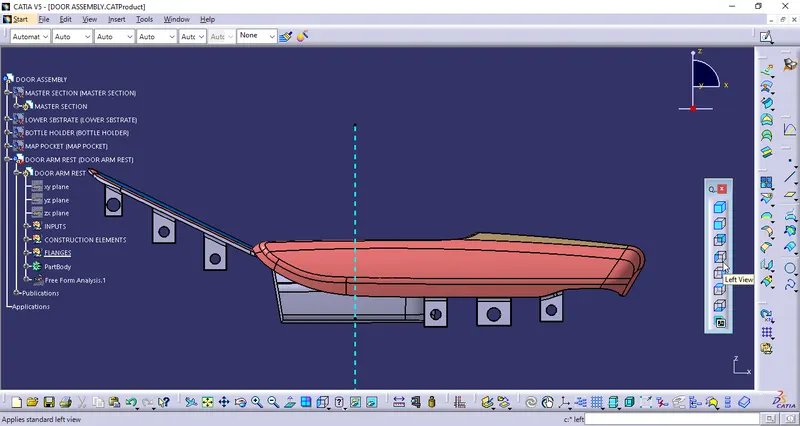
RIGHT VIEW
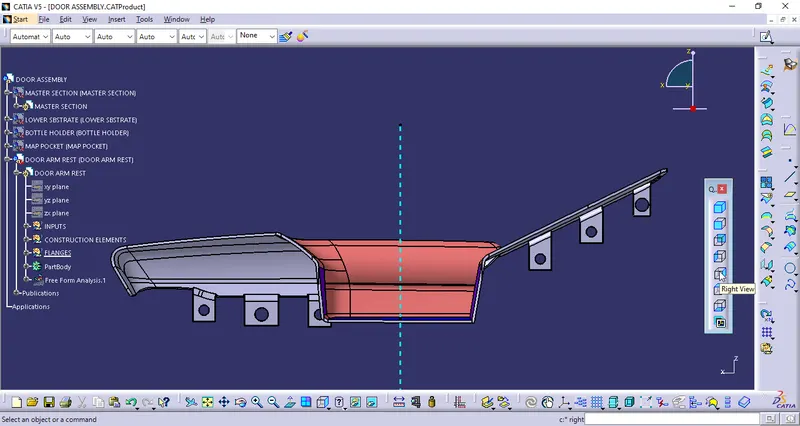
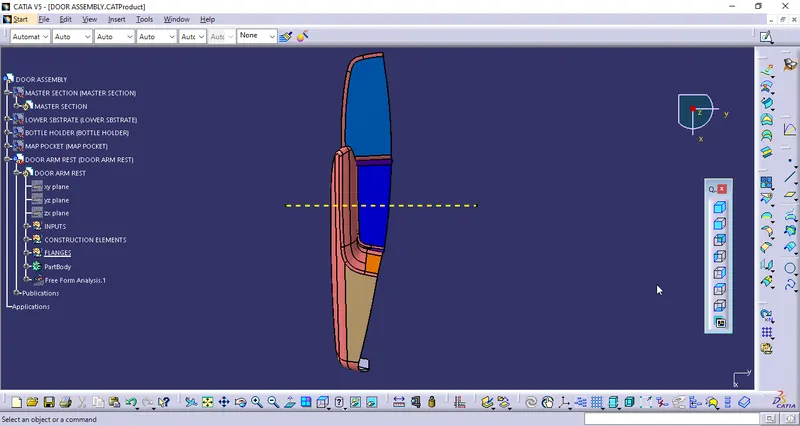
TOP VIEW
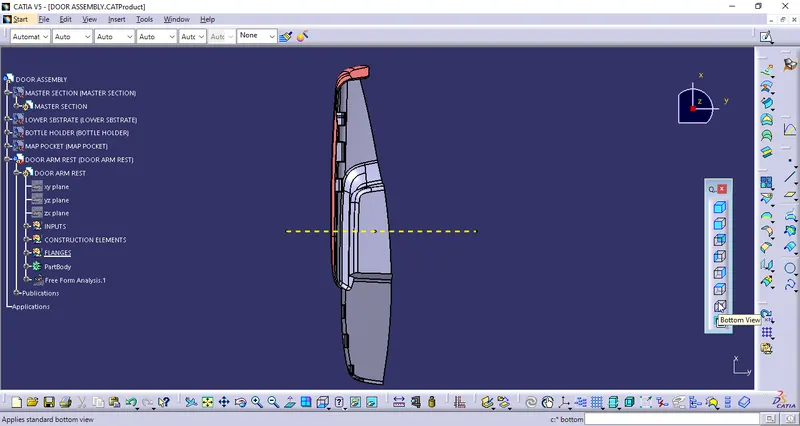
BOTTOM VIEW
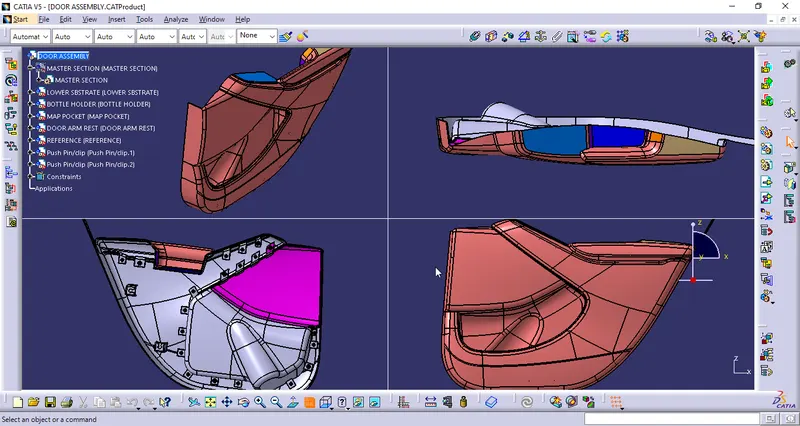
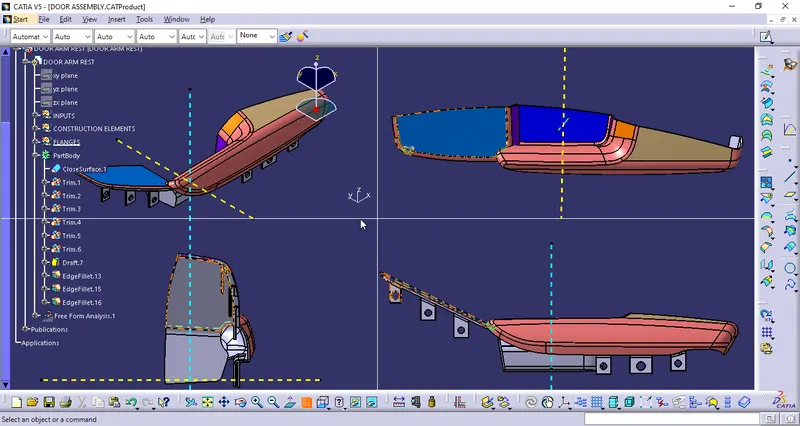
MULTI VIEW
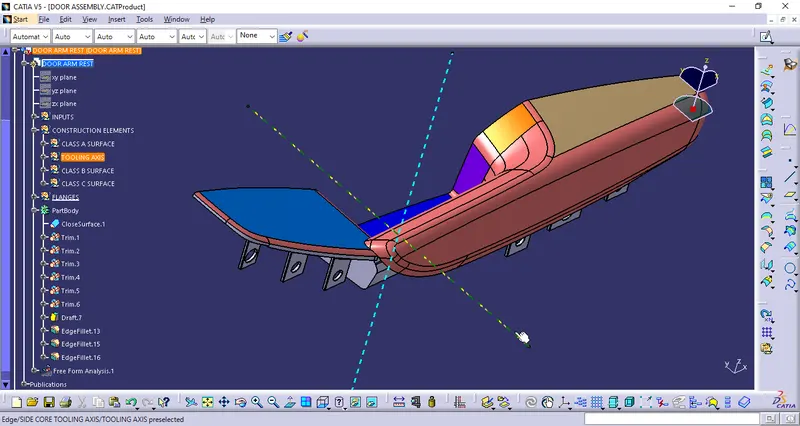
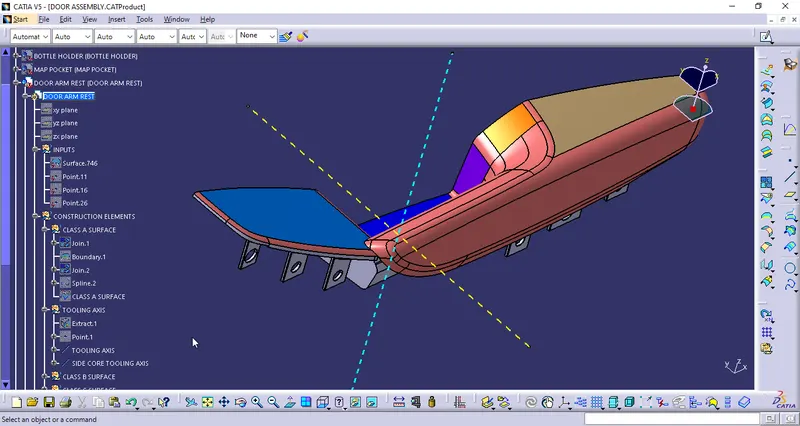
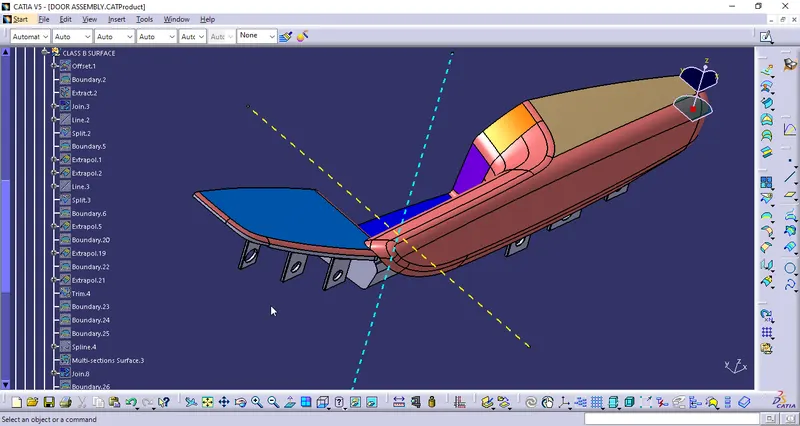
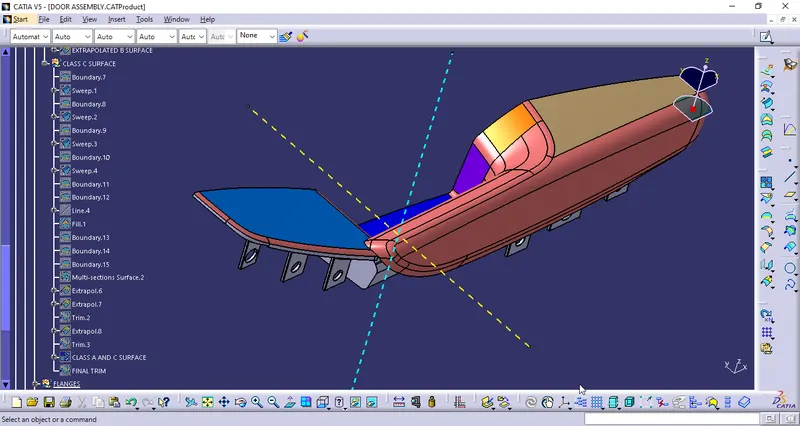
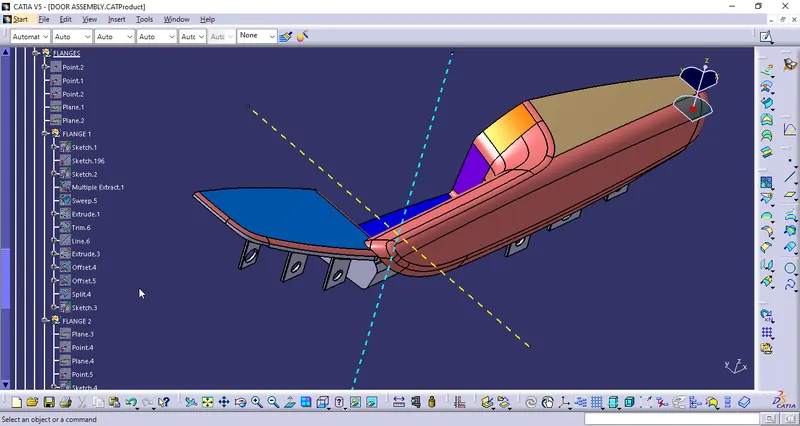
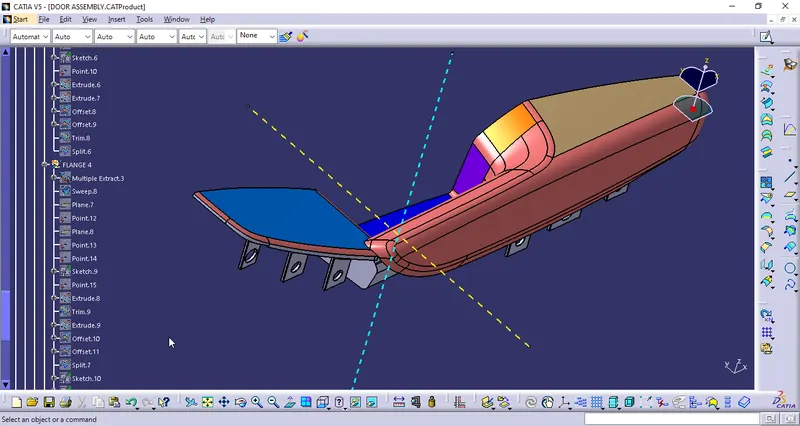
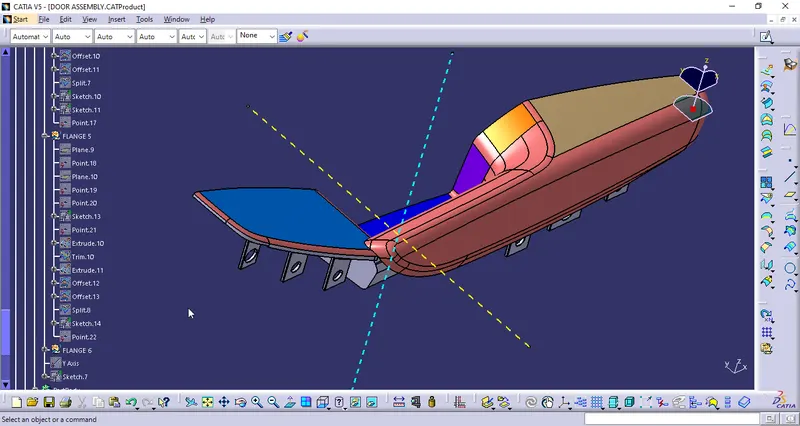
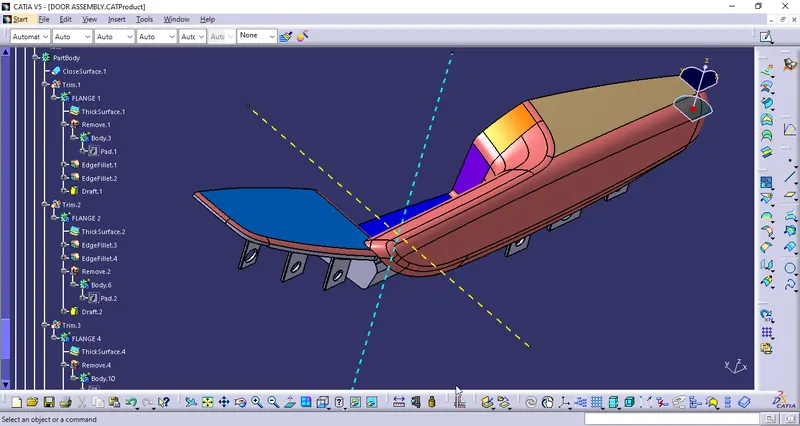
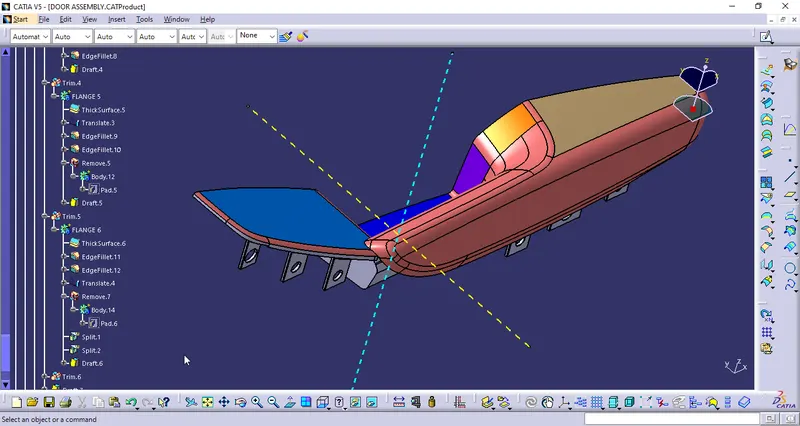
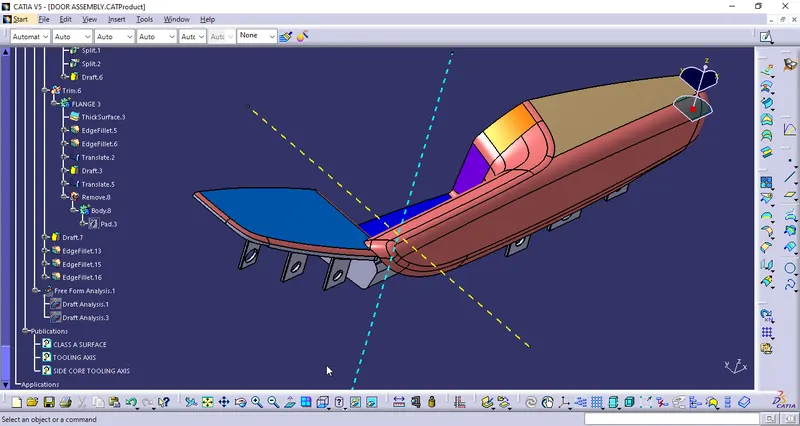
TREE STRUCTURE OF DOOR ARM REST
MAP POCKET:
CLASS A SURFACE:
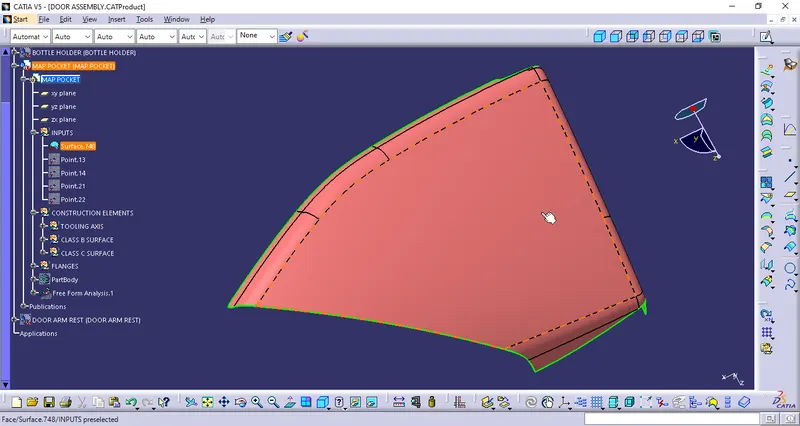
- Check the Class A surface for the patch works or any Boundary in the Class A surface.
- Confirms that there is no other boundary and patches on it.
- Publish the Modified Class A surface and proceed for part body creation.
Class A Surface Inputs
TOOLING AXIS
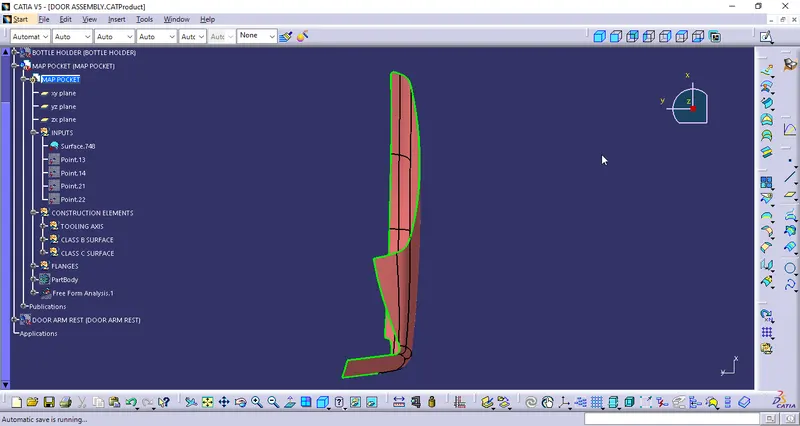
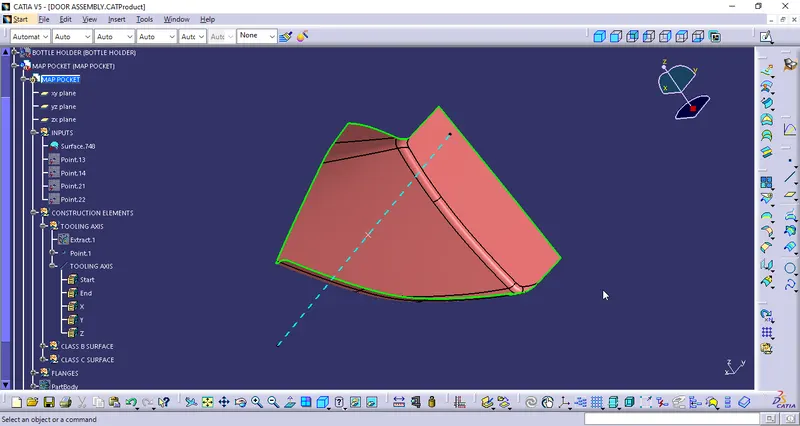
- Check the all the possibile directions for the tooling axis and draft directions and confirms the Y direction as the suitable one.
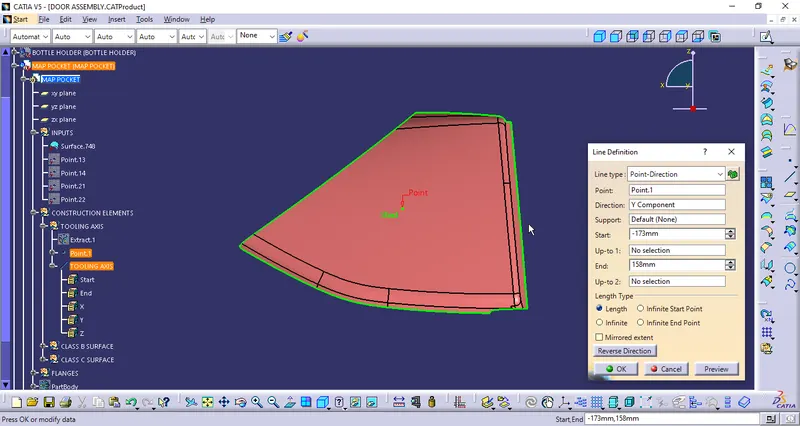
- Extract the base surface and create a point on it.
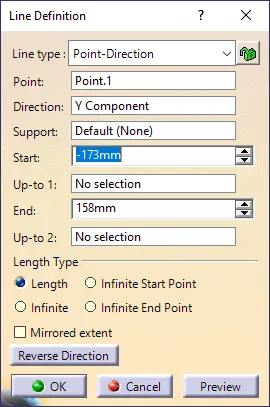
- Create a line in the Y-Direction .
X-Direction
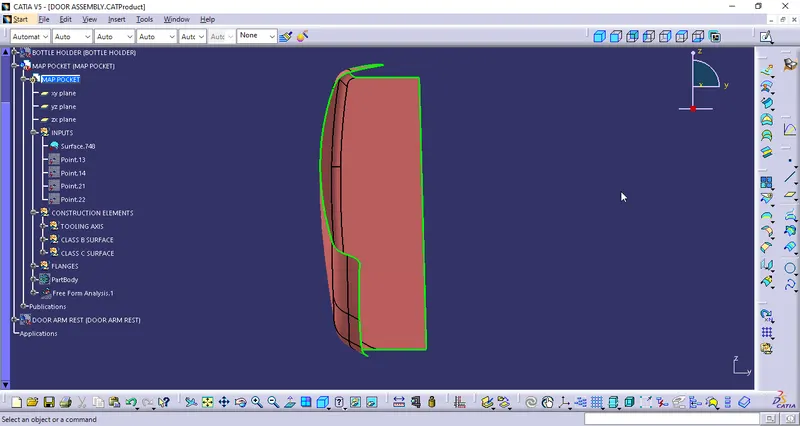
Y-Direction clears more area
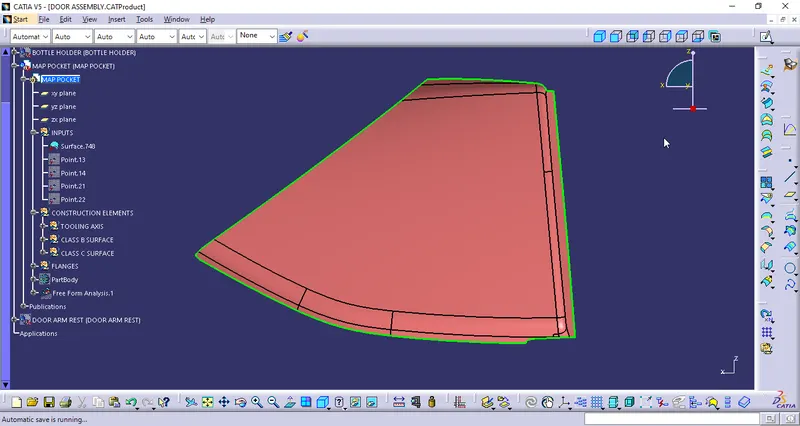
Z-Direction
Line in Y-Direction
DRAFT ANALYSIS of Class A surface:
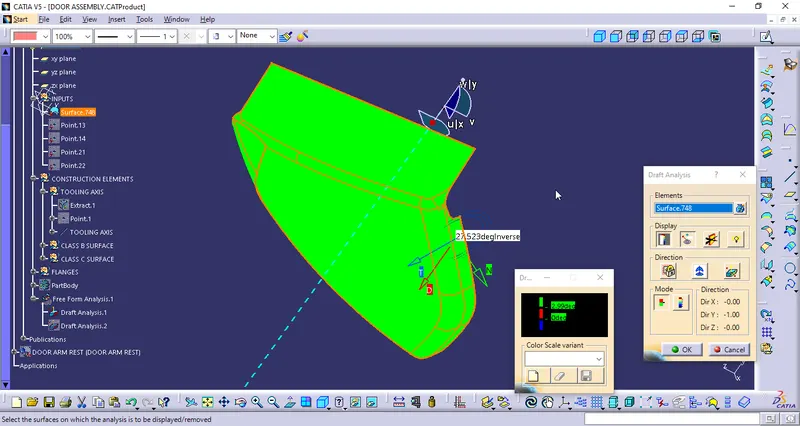
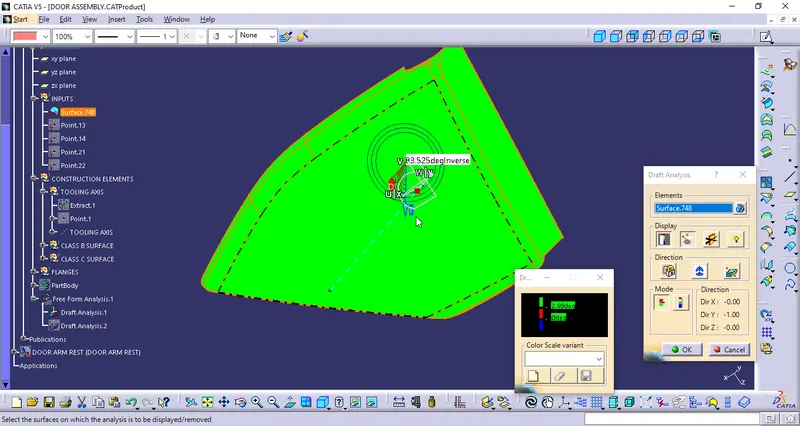
- Select into the Material Mode and Insert the Feature Draft Analysis.
- Select the Compass place in the Tooling Axis Direction and Activate the Compass , adjust the compass to the Tooling Axis Direction.
- Provide the Minimum Draft angle is 3Deg. If some patches are Created them provide draft angle as 2.9 or 2.95Deg.
- Select the surface So that the Green Area that is Draft angle is more than 3Deg angle and it is Manufacturable.
Draft Analysis on Tooling Axis
CLASS B SURFACE:
Class B surface is mostly the not visible surface and it is the back of the Class A surface.
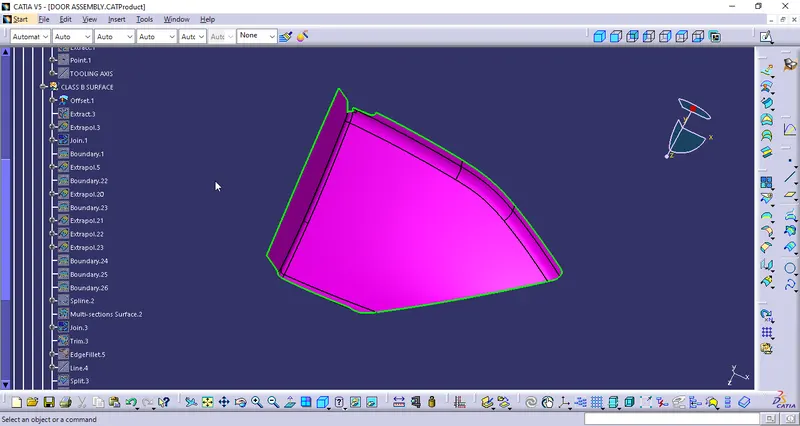
- Offset the Class A surface for 2.5mm (Thickness of Component is 2.5mm).
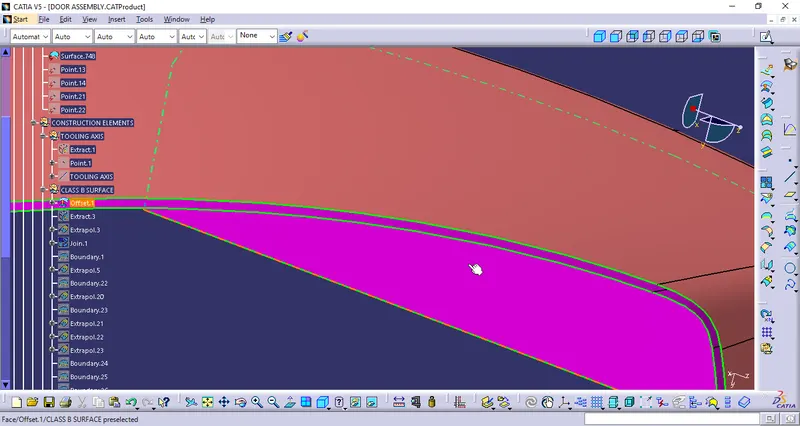
- The offset surface has the Patches that the minimum fillet value placess cant be offset.
- All The Patched surfaces are Extarcted by using the Extract & Multi Extract Commands.
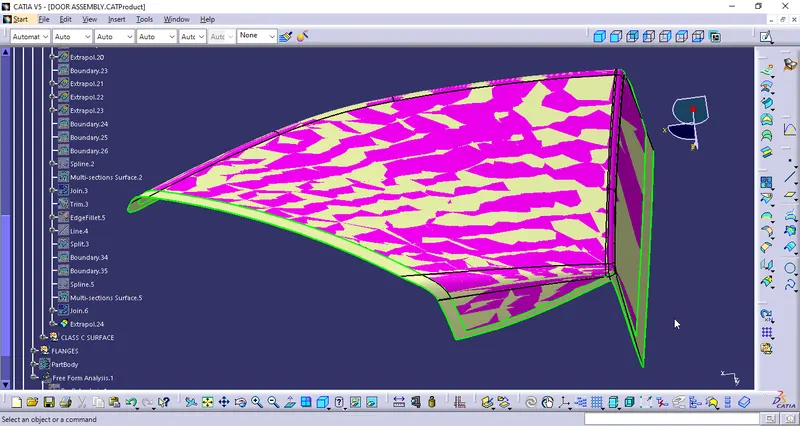
- Then the Surfaces are Extrapolated untill the Intersection done.
- Then the both Intersection Surfaces are Trimed by using Trim command.
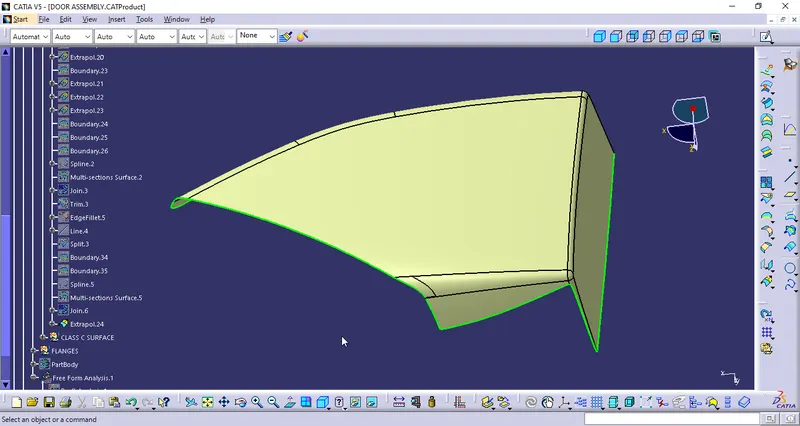
- All the surfaces are Checked for the patches.
- Cross checked gap between the two surfaces Class A and Class B surfaces found that to be 2.5 mm.
- Edges on the Class B surface are Extrapolated to get an intersection with Class C Surface.
Offset Surface
Extrapoled B Surface
Final B Surface
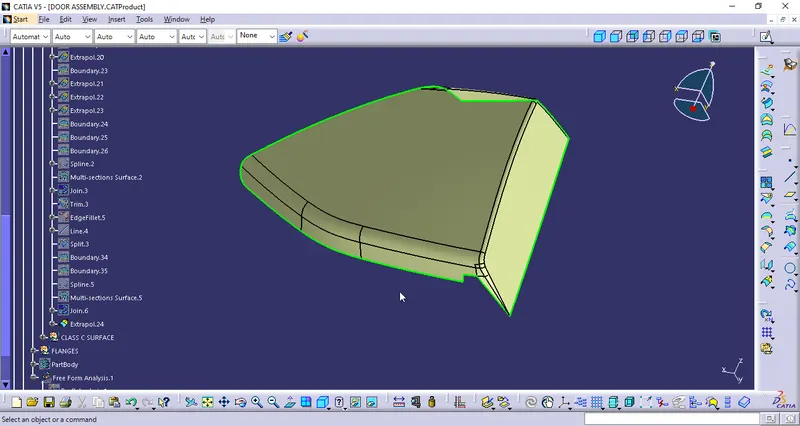
CLASS C SURFACE:
Class C Surface is that connect the Class A Surface and Class B Surface.
- Create a boundary on the Class A surface at the individual corner and then Sweep it individually to avoid the patches.
- By using the Sweep Command with the reference of Class A surface and angle of 90Deg to it. It is done only when the surface is perpendicular to Tooling Axis.
- The Class C surface that is parllel to the Tooling Axis is done by the Draft Direction with the 3Deg Draft Angle.
- Create a Joining surface between the Sweeped Surfaces by using the Multisection Surface and Fill commands.
- The thickness or length of the Class C Surface is 4mm minimum, so that it will be trimed easily with Class B Surface.
- Join the Class C surfaces and trim them to form it.
- Join the Class C surface with the Class A surface by the Merging distance as 0.003mm.
Class C surface
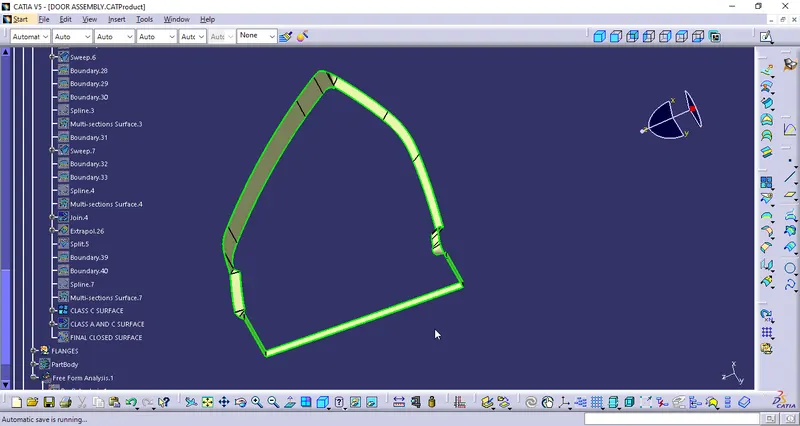
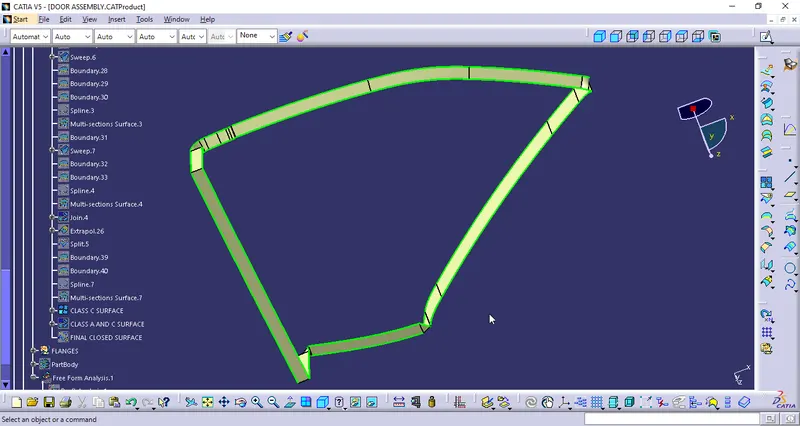
Class A and C surface
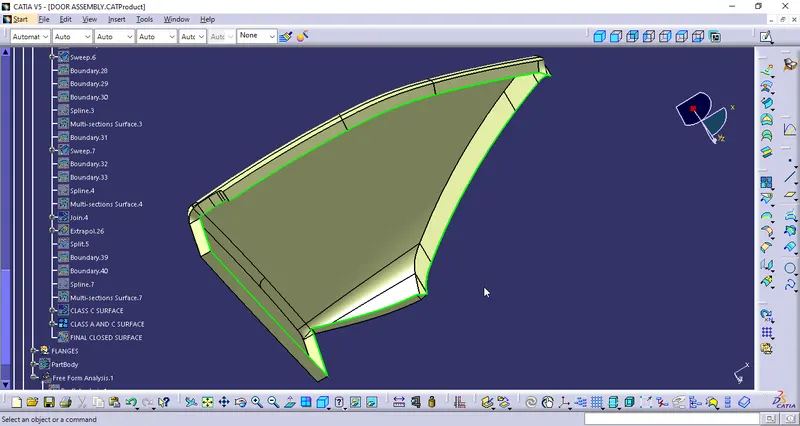
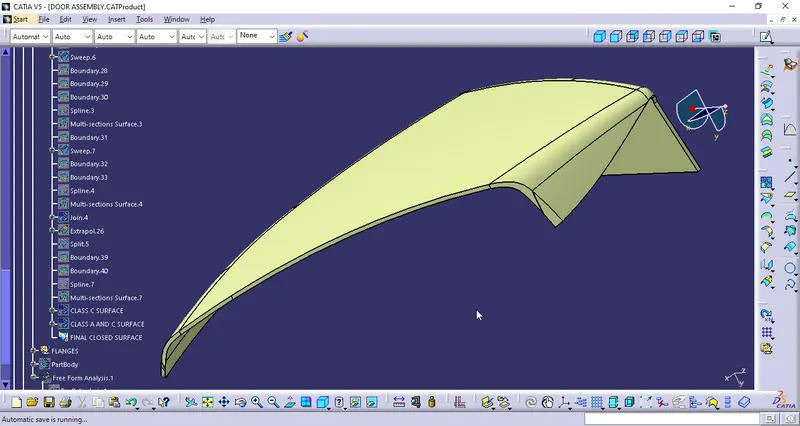
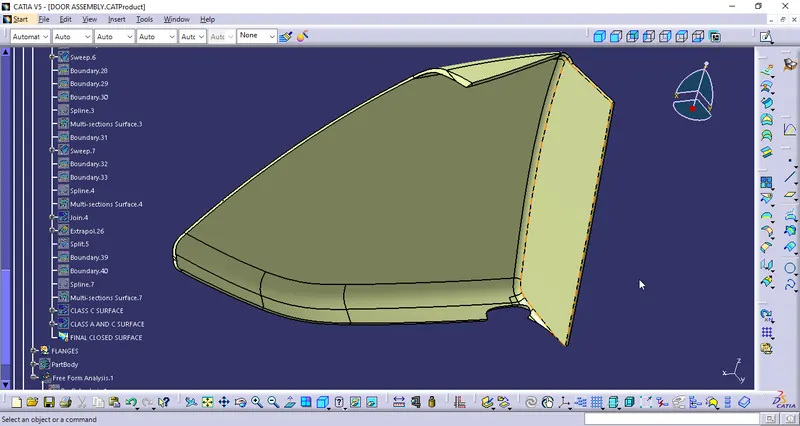
CLOSED SURFACE BODY:
- Now trim the Class A&C surface with the Class B surface.
- The Trimed surface is formed.
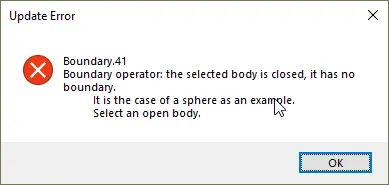
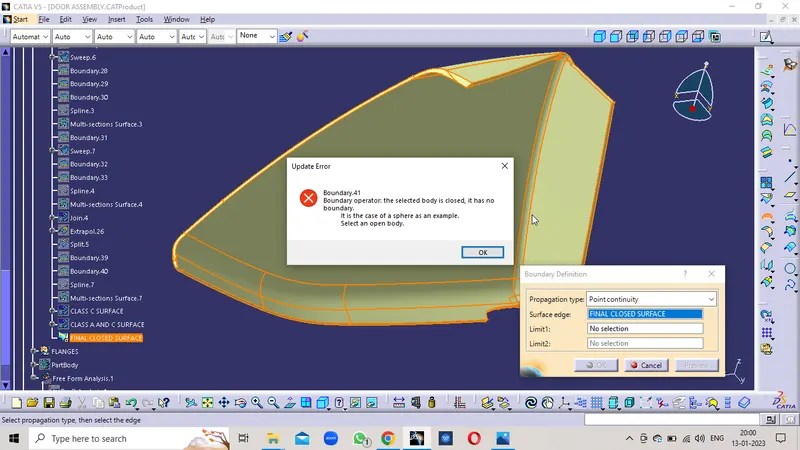
- Created a Boundary on the Trimed Surface so that it enssures that no boundary formed. Confirms that it is completely closed.
- By using the Closed surface Command in the Part Body Design to the surface body.
- Now the Solid Body is formed.
CLOSED SURFACE
Flanges:
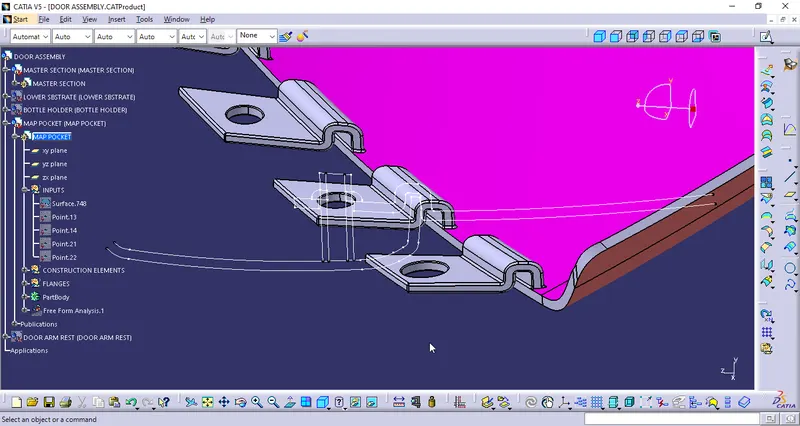
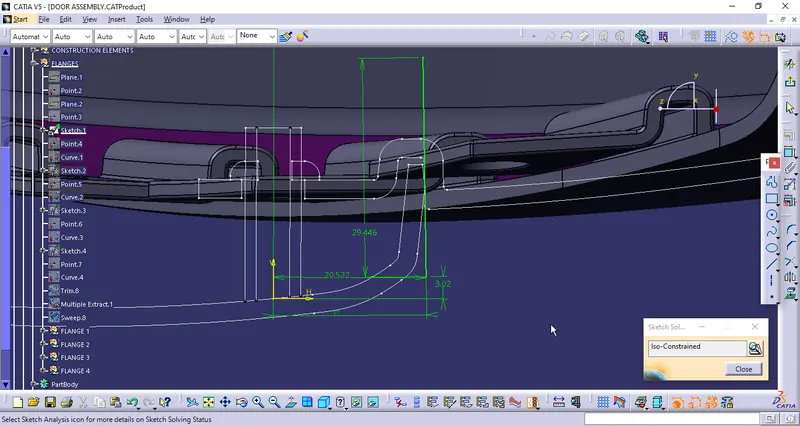
Flanges are the Connecting of the two Parts or Two Components. These were connected by Heat Stakes and Locators with help of Flanges.
- Extract the lines from the Master section of the flange and Isolate them.
- Extrudue it and sweep the surface on the class C surface .
- Trim the Both surfaces and form the closed one
- Now thicken the Surface with 2.5mm in the part body
- Give the fillets and split the flange with approx value as per the given master section
- Provide the Hole according the Heat Stake and Locator size with 1mm clearence to it.
- Draft it with the 0.5Deg on possible directions.
- Create the Flanges according to the Heat Stakes and Locators for the assembly
- Provide the Minimum Fillet radius of 0.5mm on all surfaces and 0.25mm on the inner circle bore for heat stakes and locators.
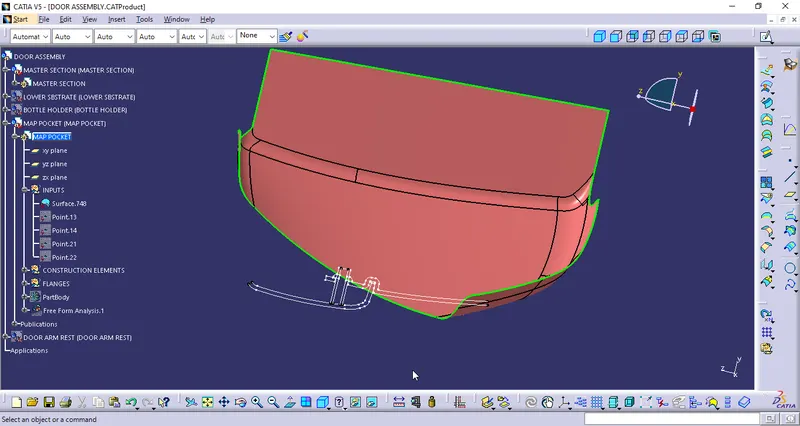
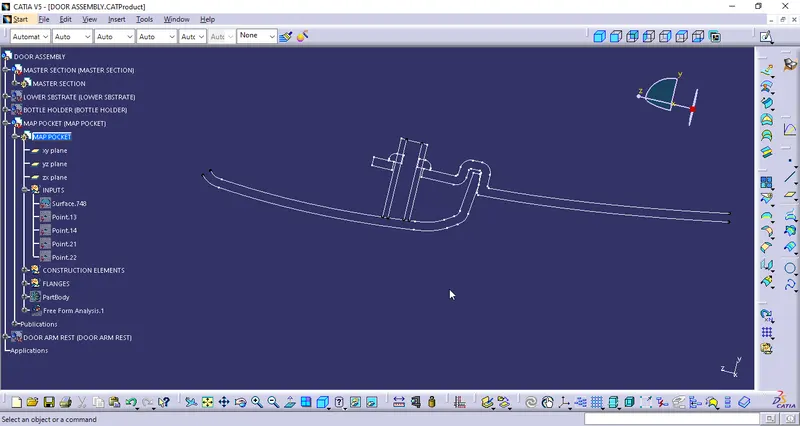
MASTER SECTION PROFILE ON MAP POCKET
FLANGE CREATION SKETCHES
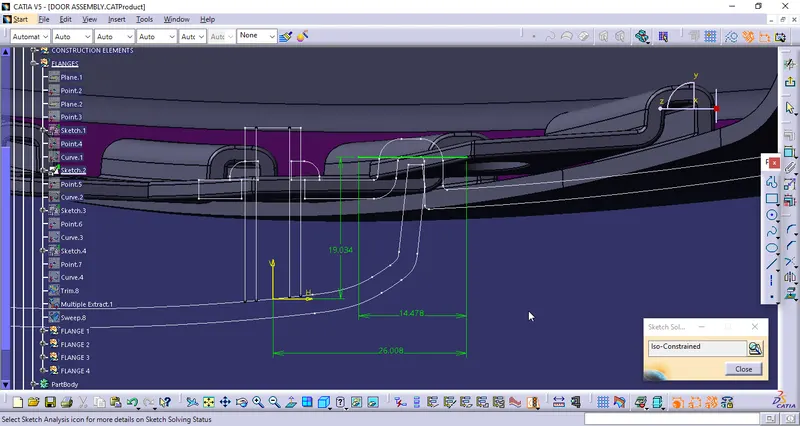
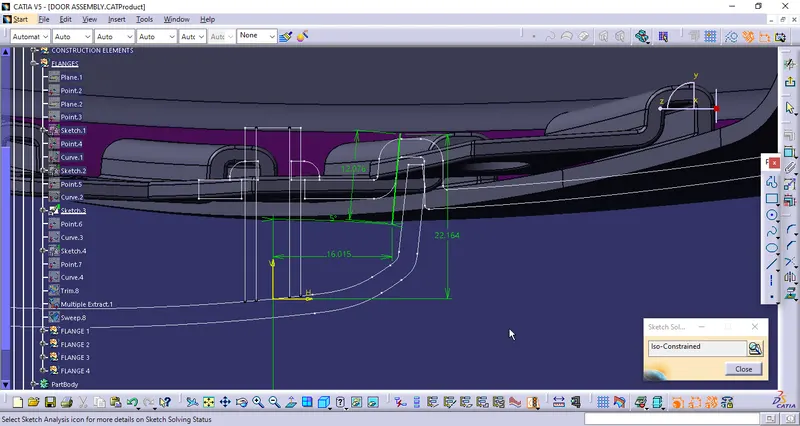
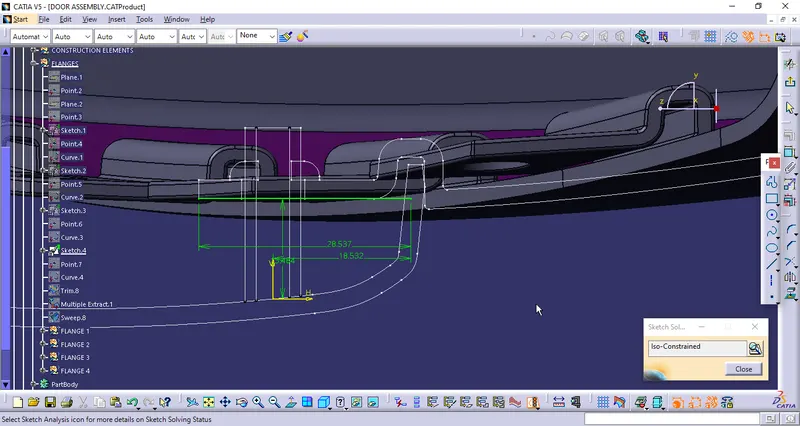
HEAT STAKES HOLE
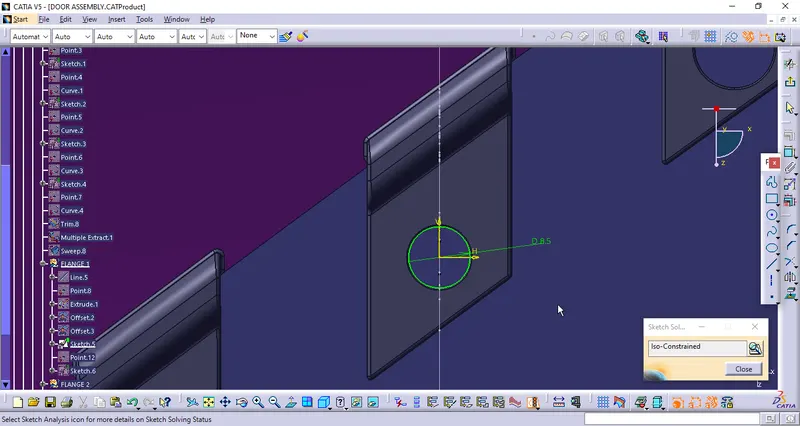
LOCATOR HOLE
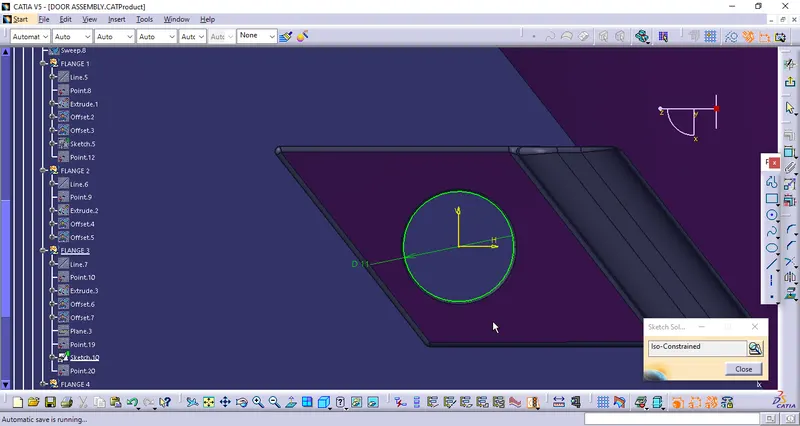
SWEEP SURFACE
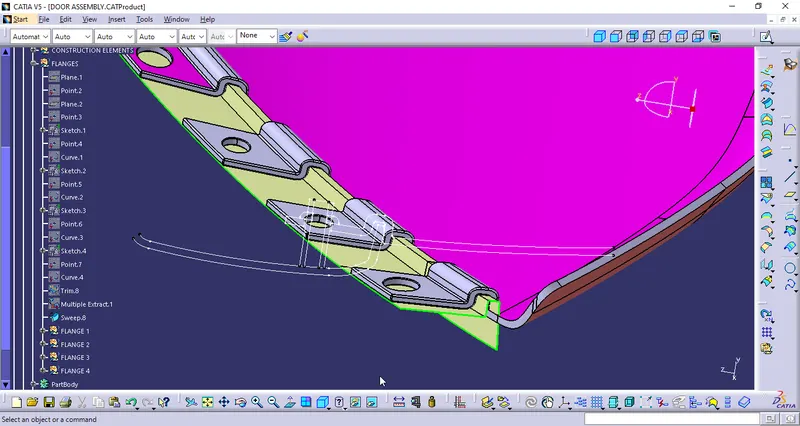
FLANGE 1
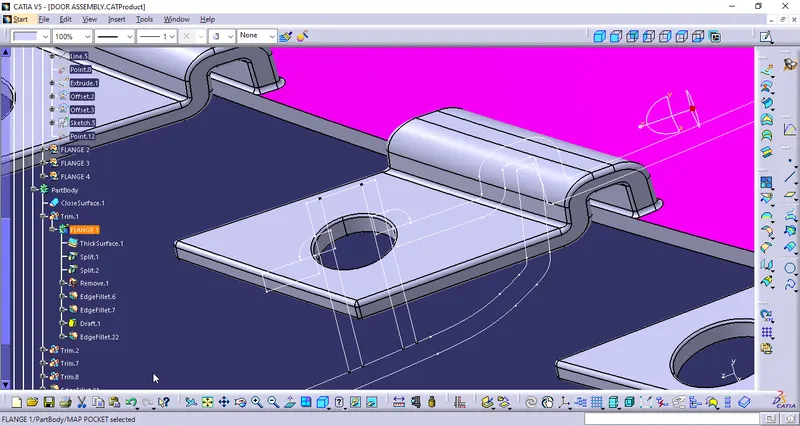
FLANGE 2
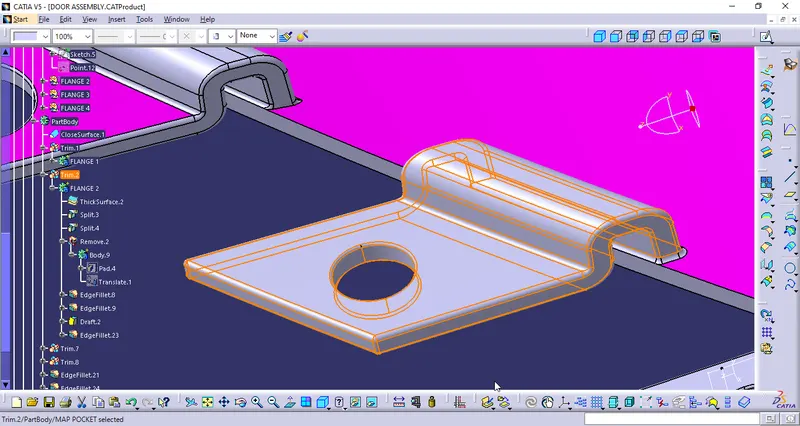
FLANGE 3
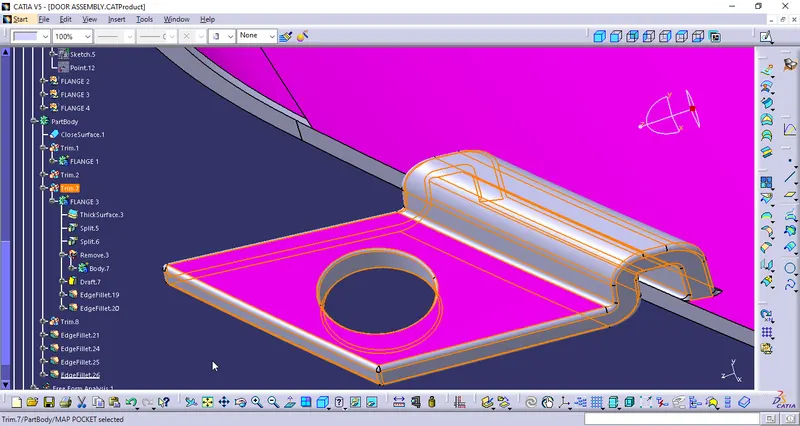
FLANGE 4
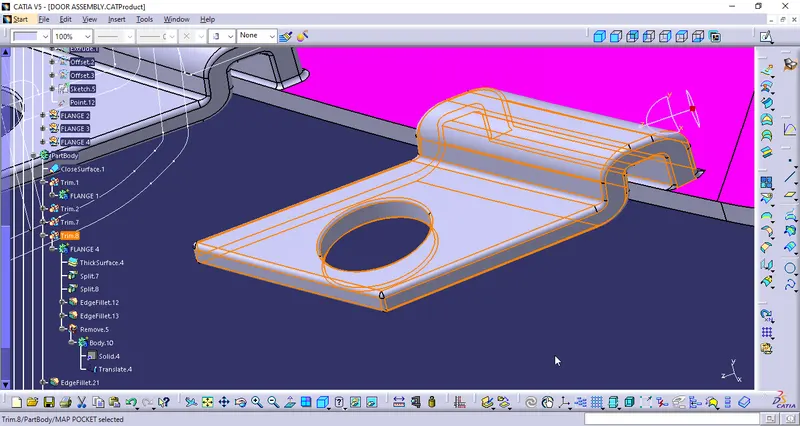
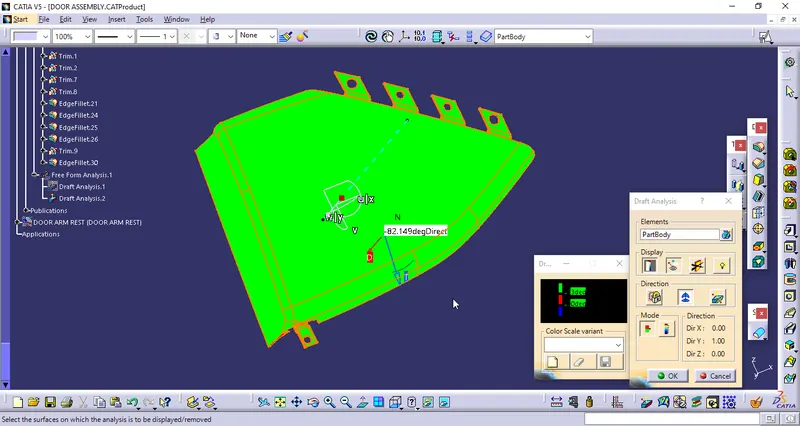
DRAFT ANALYSIS OF MAP POCKET
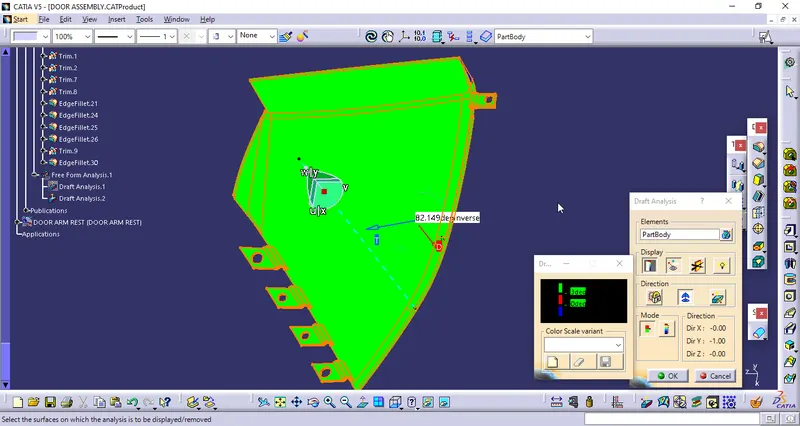
- Select the Draft Analysis to the ClOSED SURFACE.
- Select the Axis and place the Axis line along the Tooling Axis direction, and activate the compass.
- Select the Draft angle degree as 3Deg or 2.9Deg minimum.
- Selected the Surface and found in Green Colour in all the surface area in the Draft Direction.
- Checked the inversion of Drafting to the Core side and Cavity side.
- Cross checked the angle of draft at all surfaces and found that is more than 3 deg.
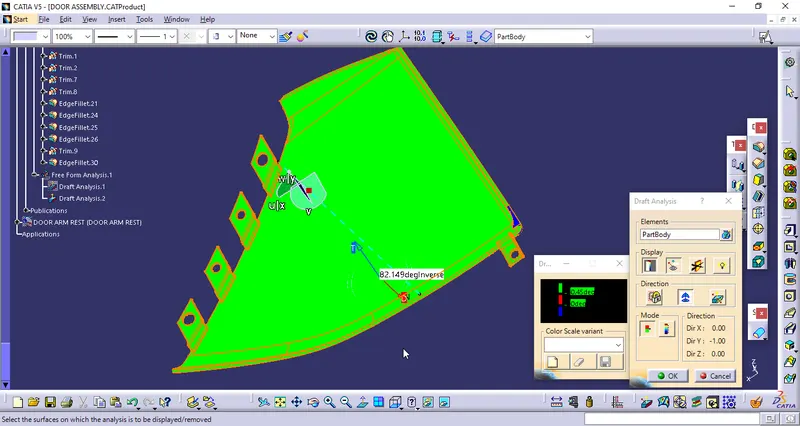
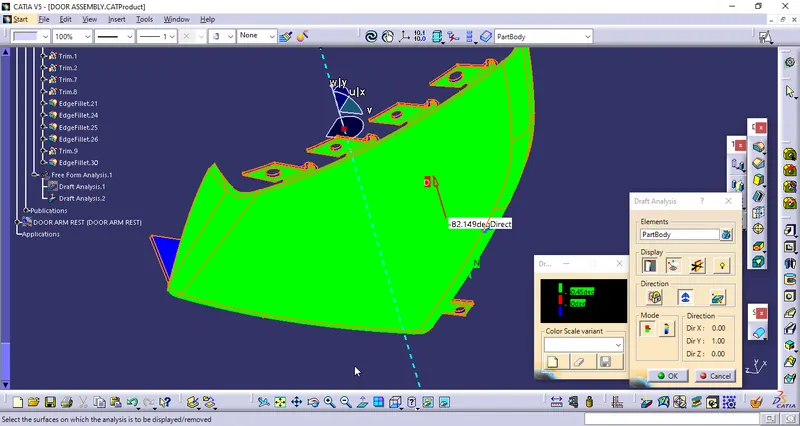
- Checked the Draft angle as 0.48Deg that is approx to 0.5Deg for the Heat Stakes, Locators and Flanges are clearing the Draft Analysis in the same Tooling Axis Direction with Draft angle of 0.5Deg.
- The Flanges are also cleared the Along the Side core tooling axis.
Draft Analysis of Map Pocket with 3Deg Draft Angle
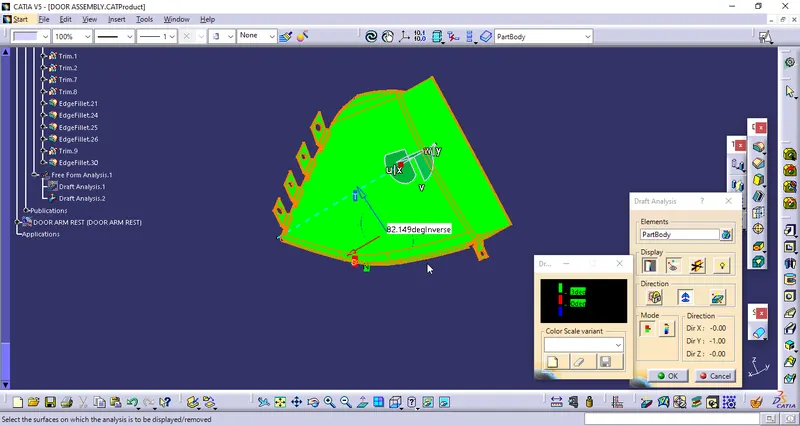
Flanges Draft Clearence of 0.45Deg
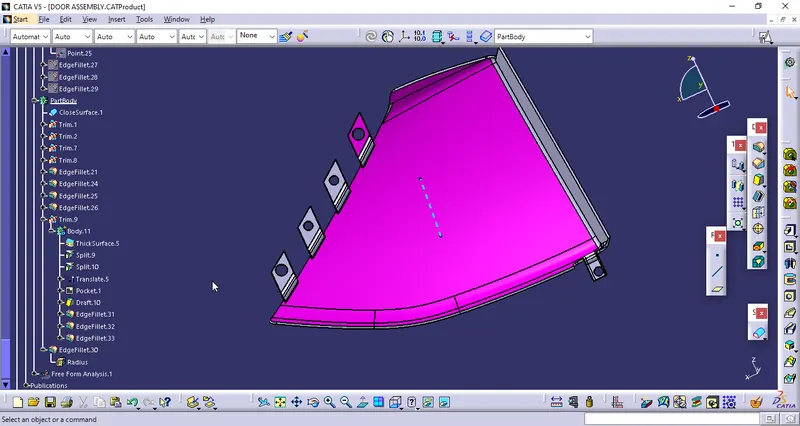
ISOMETRIC VIEW
FRONT VIEW
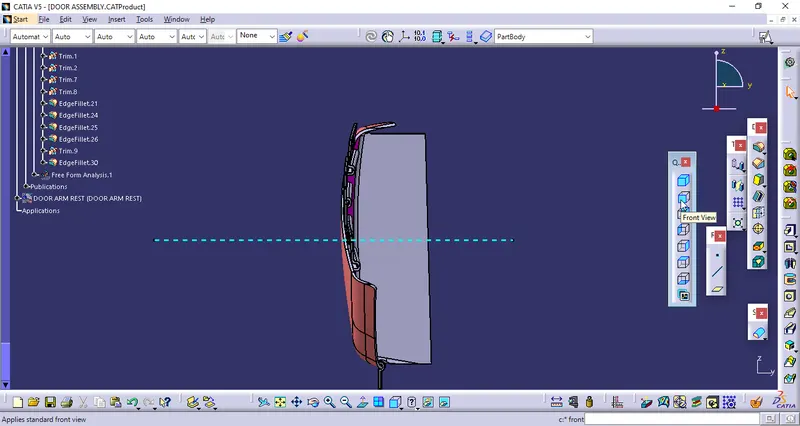
BACK VIEW
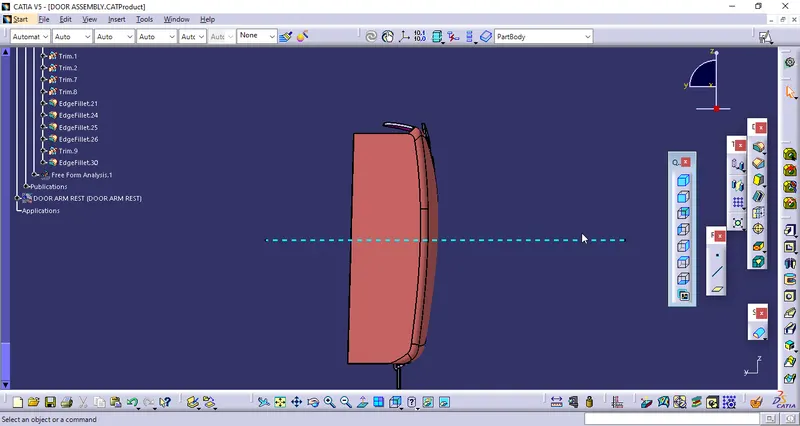
LEFT VIEW
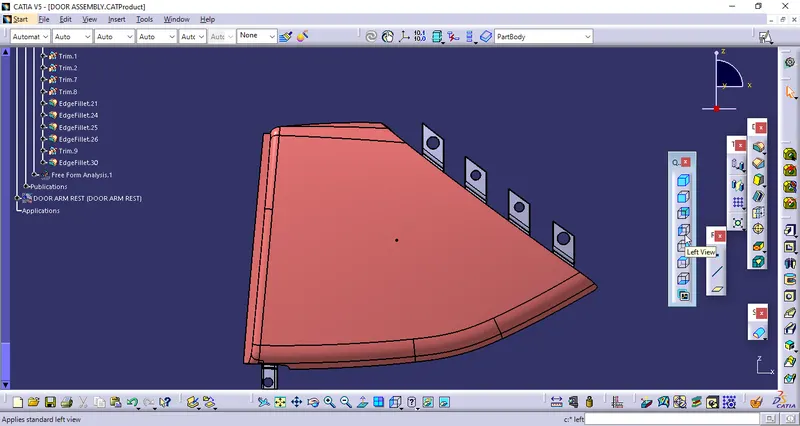
RIGHT VIEW
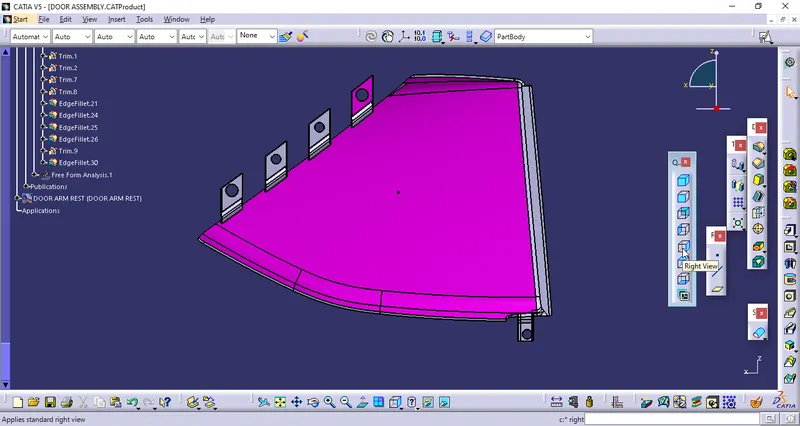
TOP VIEW
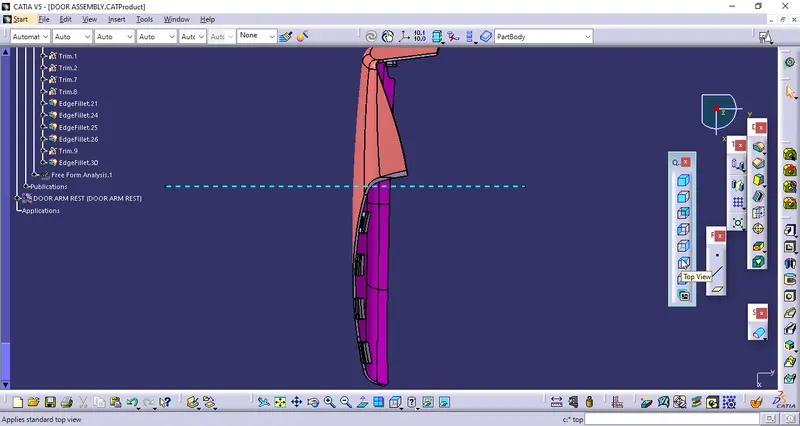
BOTTOM VIEW
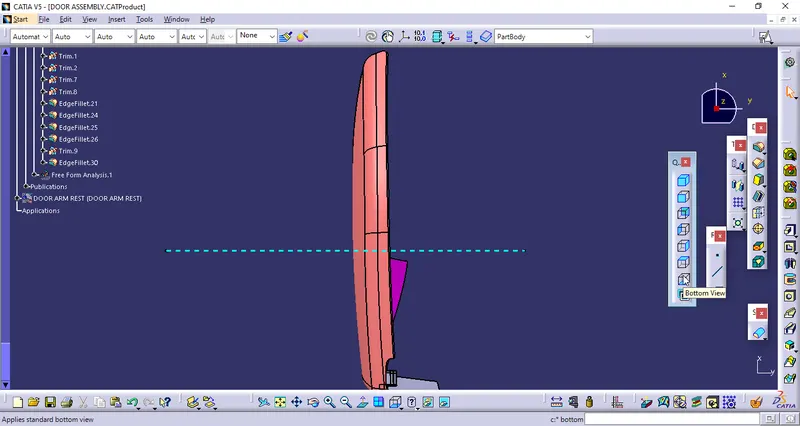
MULTI SECTION VIEW
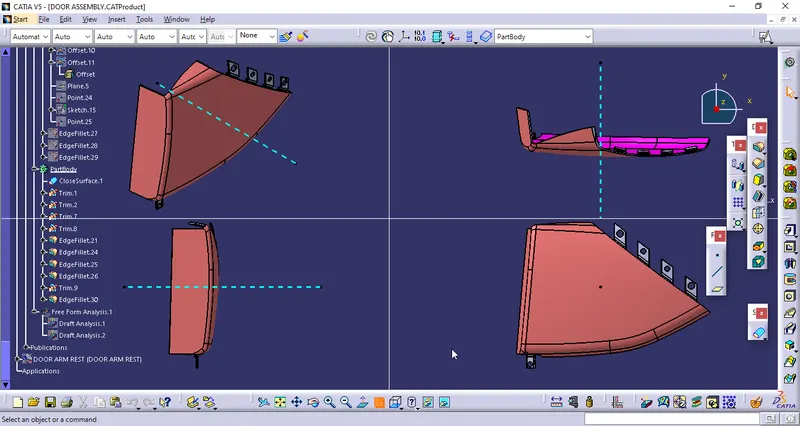
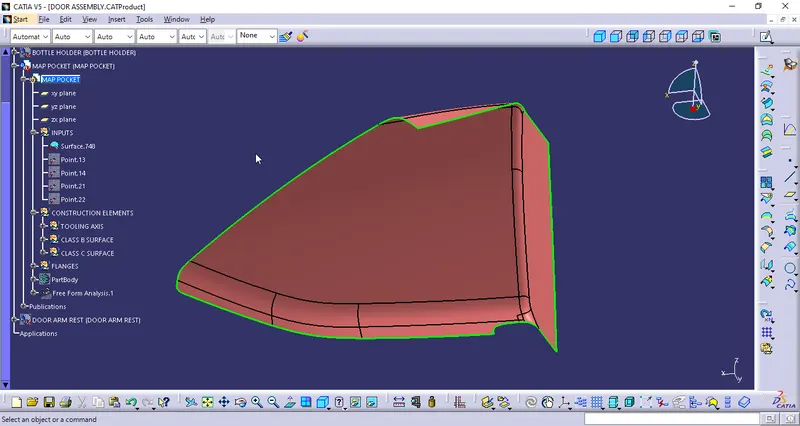
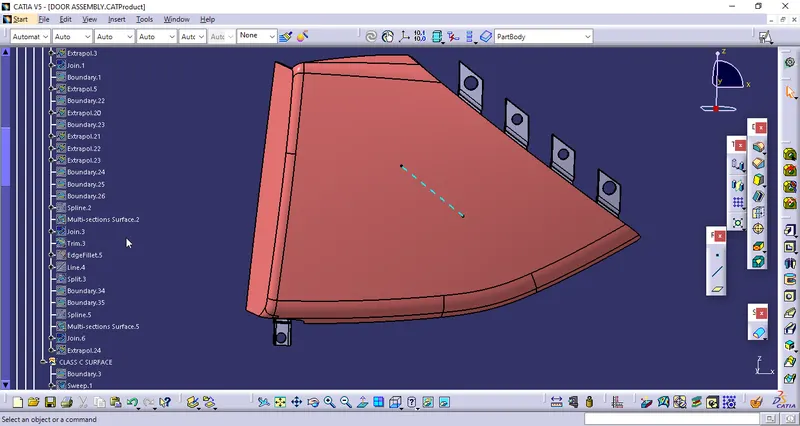
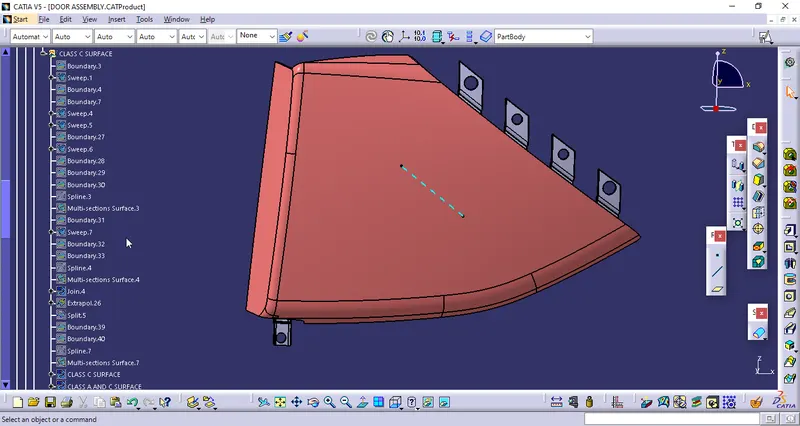
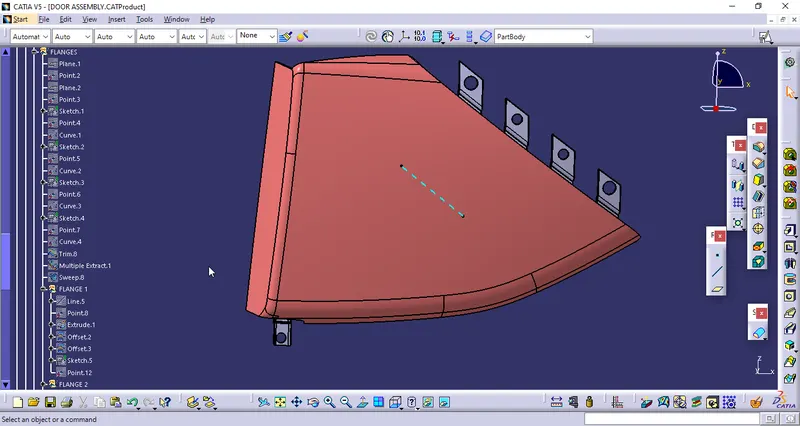
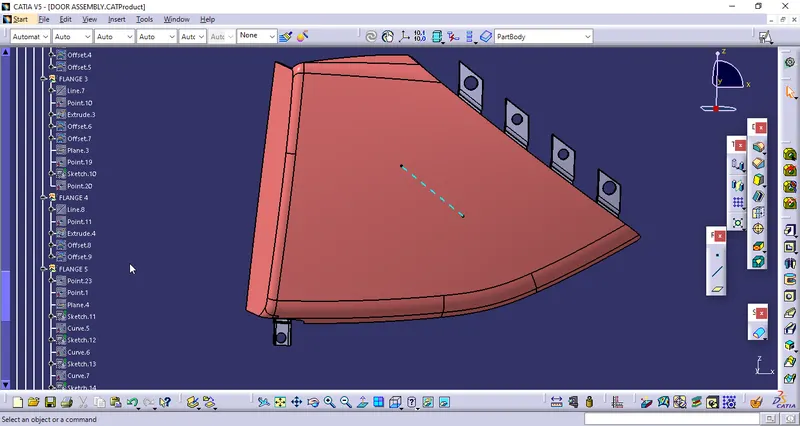
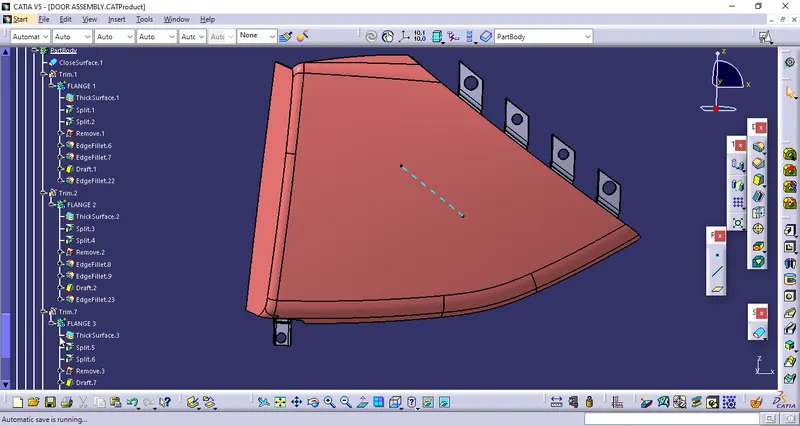
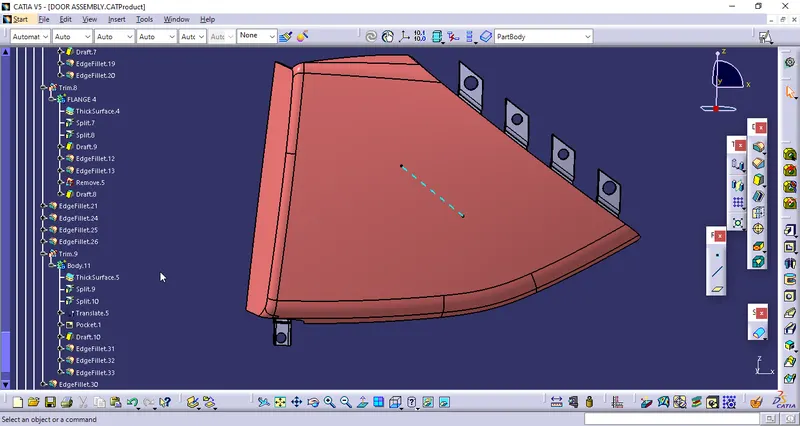
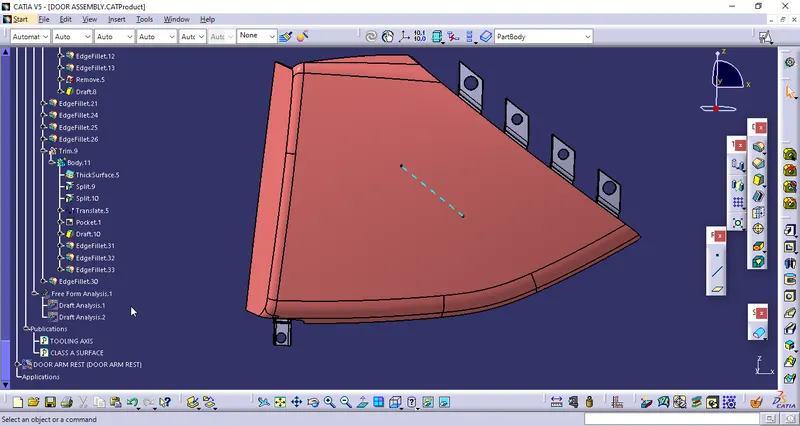
TREE STRUCTURE OF MAP POCKET
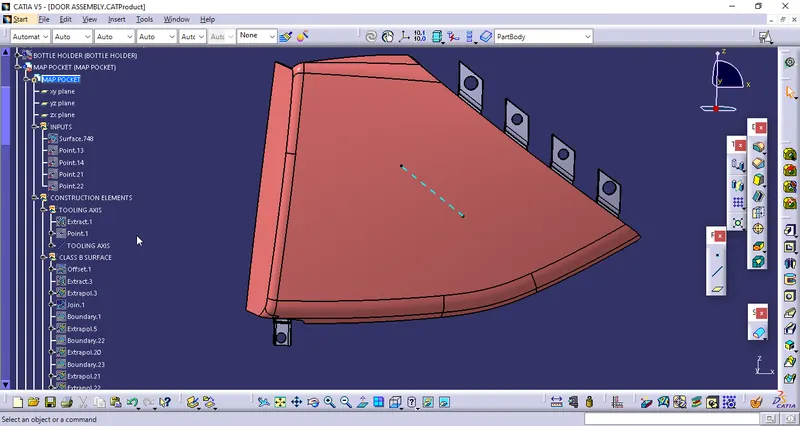
BOTTLE HOLDER:
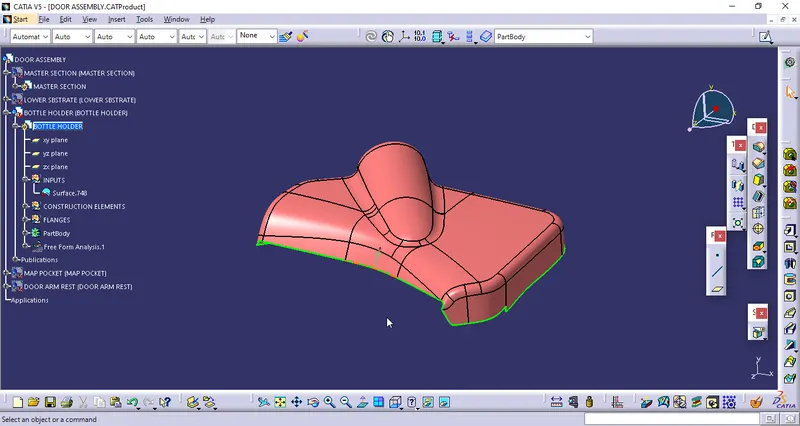
CLASS A SURFACE:
- Check the Class A surface for the patch works or any Boundary in the Class A surface.
- Confirms that there is no other boundary and patches on it.
- Publish the Modified Class A surface and proceed for part body creation.
Class A Surface Inputs
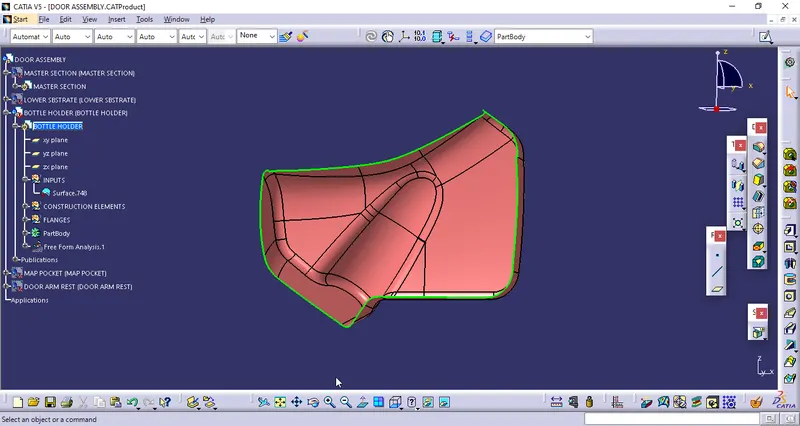
TOOLING AXIS
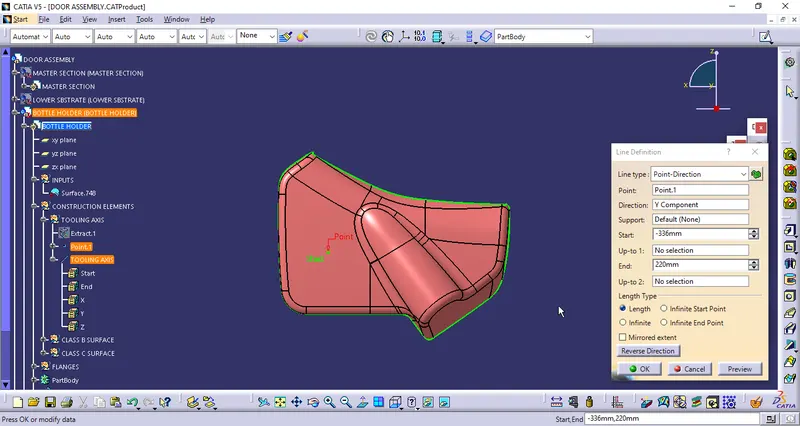
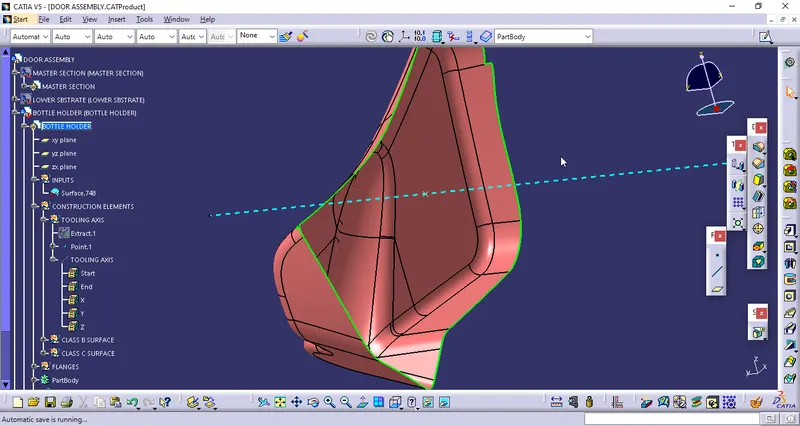
- Check the all the possibile directions for the tooling axis and draft directions and confirms the Y direction as the suitable one.
- Extract the base surface and create a point on it.
- Create a line in the Y-Direction .
X-Direction
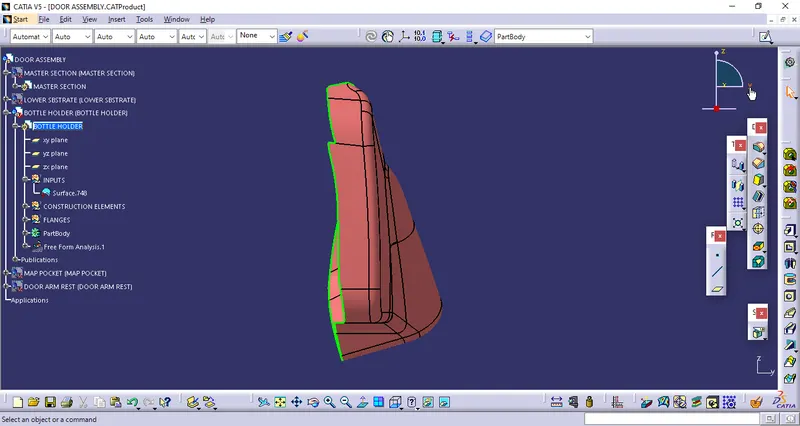
Y-Direction Maximum Area is clearing
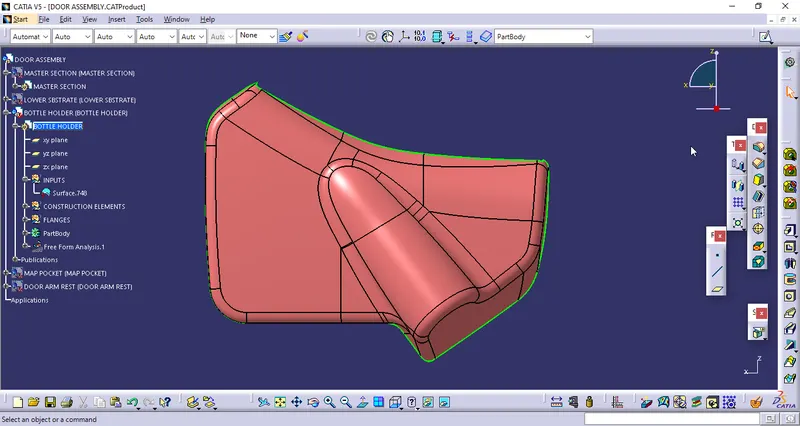
Z-Direction
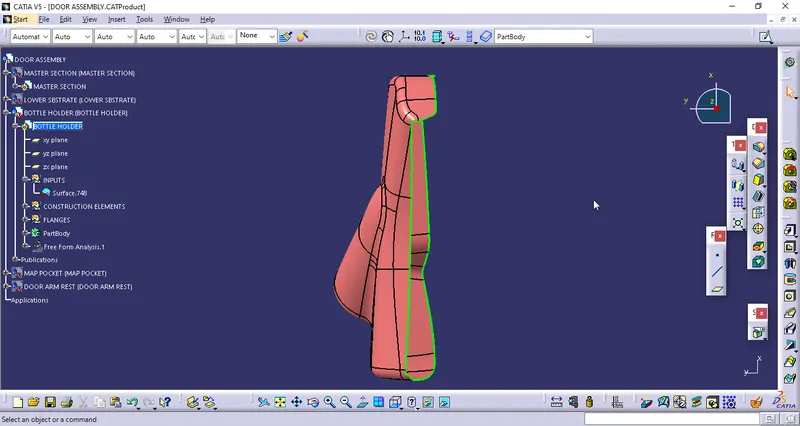
Tooling Axis in Y-Direction
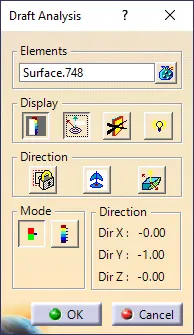
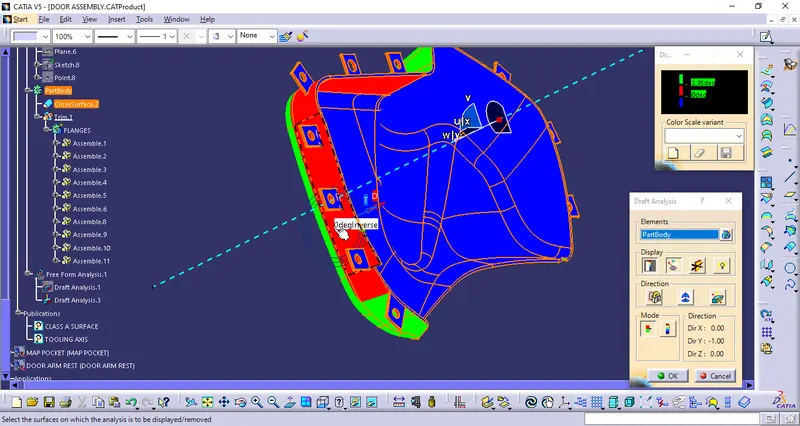
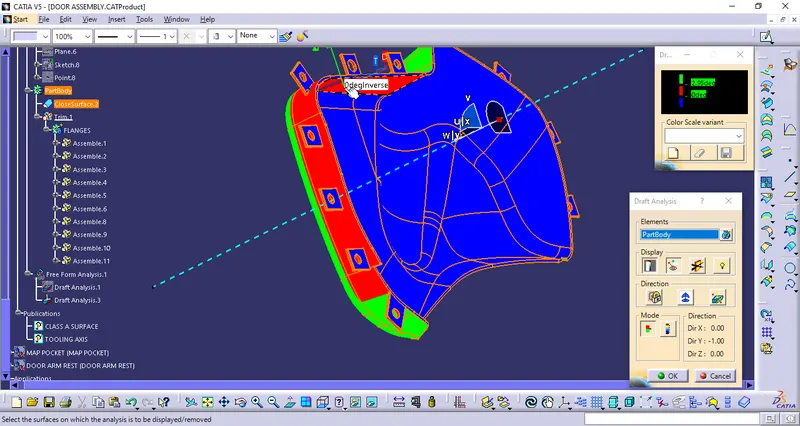
DRAFT ANALYSIS of Class A surface:
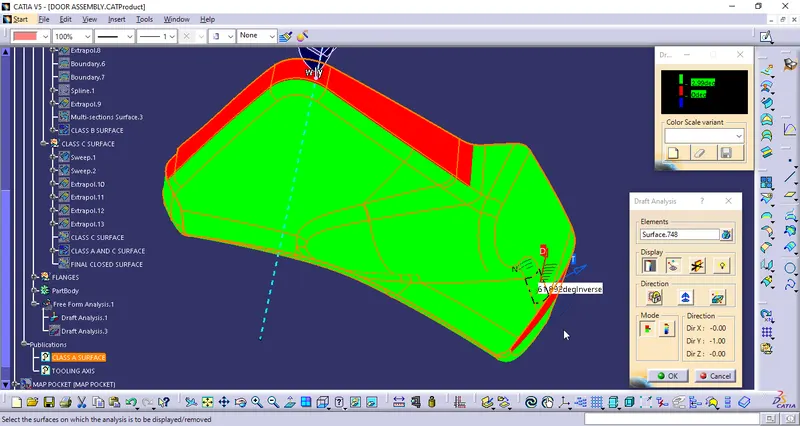
- Select into the Material Mode and Insert the Feature Draft Analysis.
- Select the Compass place in the Tooling Axis Direction and Activate the Compass , adjust the compass to the Tooling Axis Direction.
- Provide the Minimum Draft angle is 3Deg. If some patches are Created them provide draft angle as 2.9 or 2.95Deg.
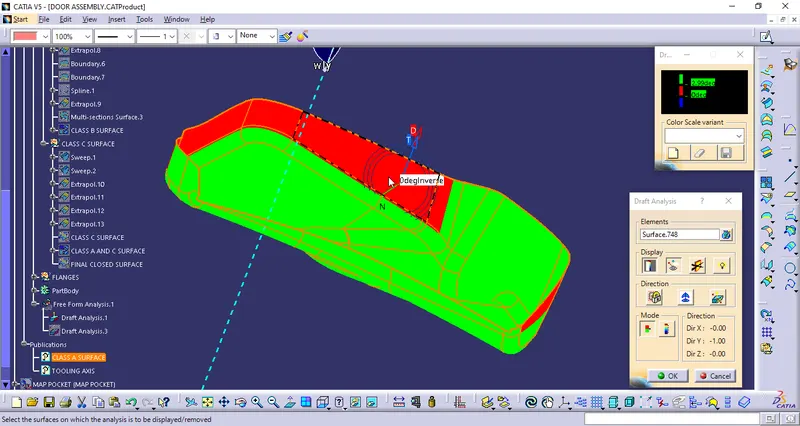
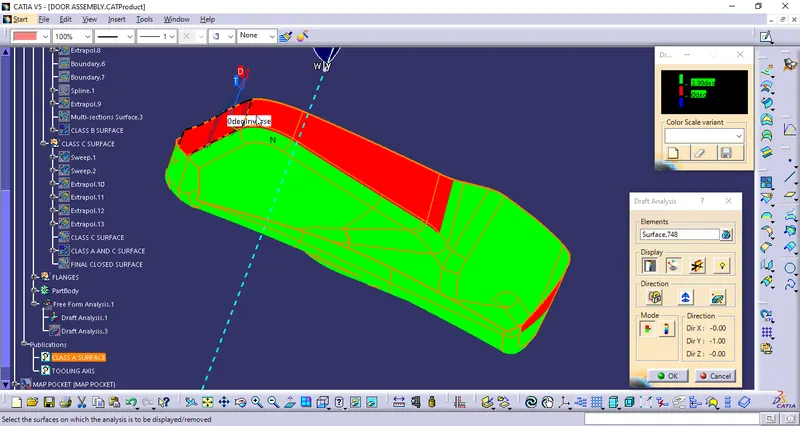
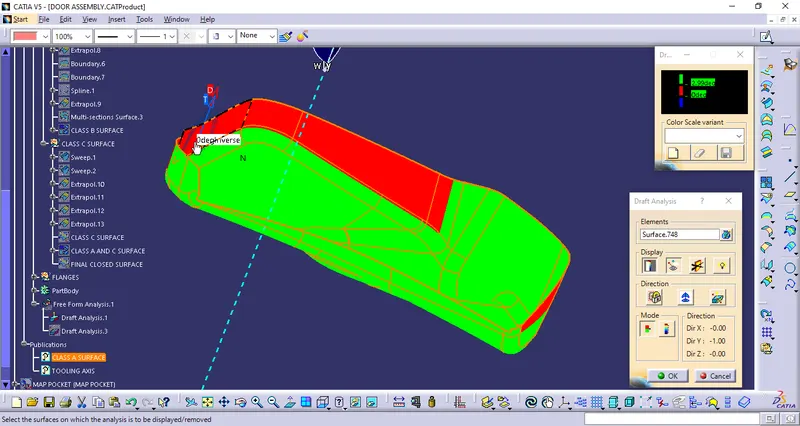
- Select the surface So that the Green Area that is Draft angle is more than 3Deg angle and it is Manufacturable.
- Some portions are getting not cleared due the surfaces are the parllel to the Tooling axis so the Draft angle at that area is 0Deg.
Draft Analysis on Tooling Axis 3deg
Maximum of area is clearing
0 Deg draft at the side walls
CLASS B SURFACE:
Class B surface is mostly the not visible surface and it is the back of the Class A surface.
- Offset the Class A surface for 2.5mm (Thickness of Component is 2.5mm).
- The offset surface has the Patches that the minimum fillet value placess cant be offset.
- All The Patched surfaces are Extarcted by using the Extract & Multi Extract Commands.
- Then the Surfaces are Extrapolated untill the Intersection done.
- Then the both Intersection Surfaces are Trimed by using Trim command.
- All the surfaces are Checked for the patches.
- Cross checked gap between the two surfaces Class A and Class B surfaces found that to be 2.5 mm.
- Edges on the Class B surface are Extrapolated to get an intersection with Class C Surface.
Offset Surface
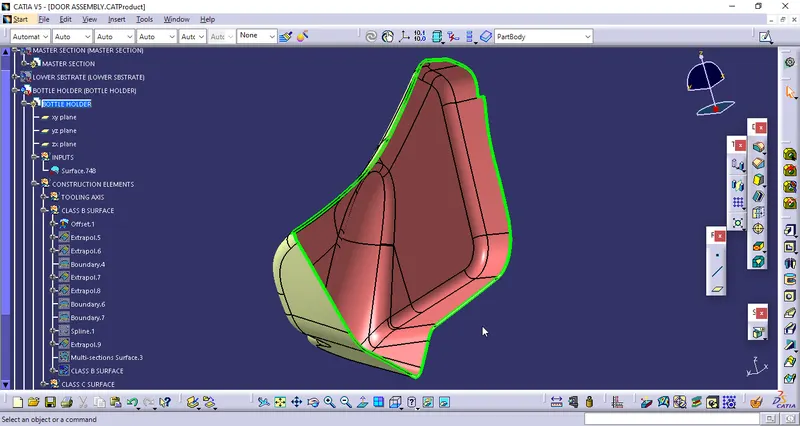
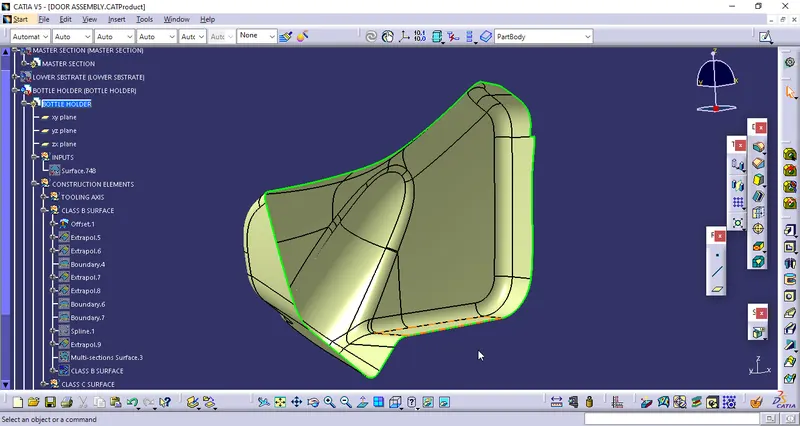
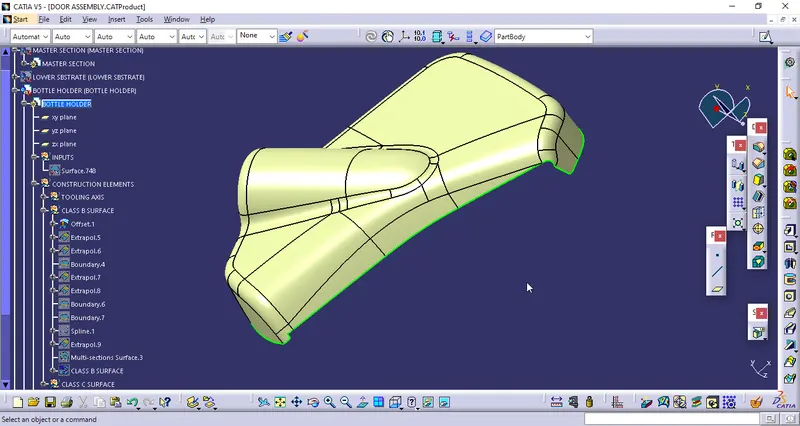
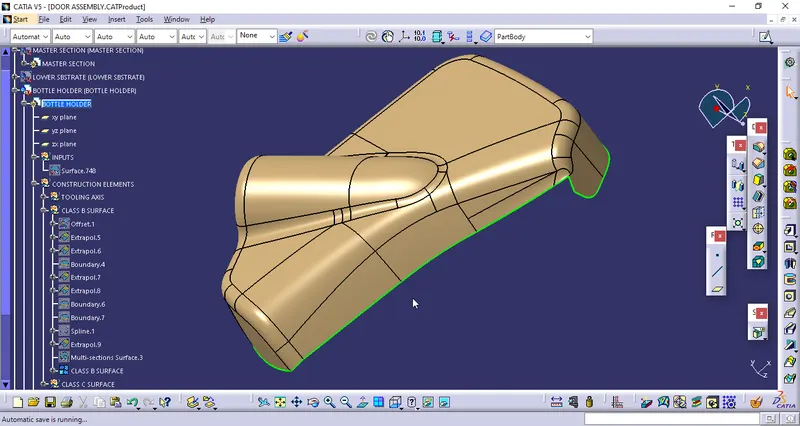
Extrapolated Class B Surface
CLASS C SURFACE:
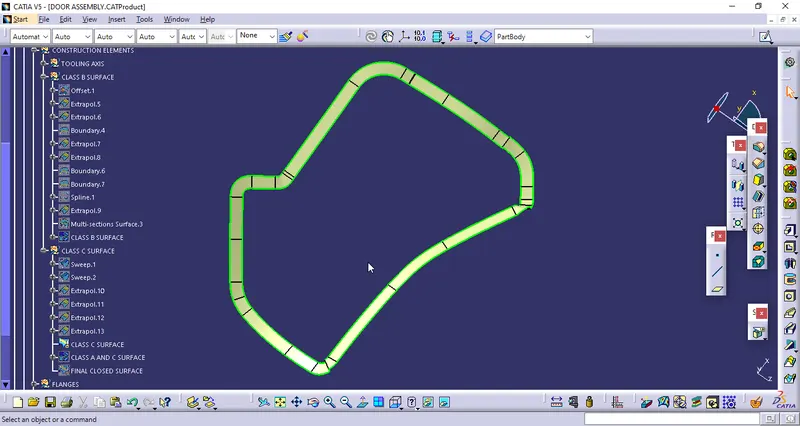
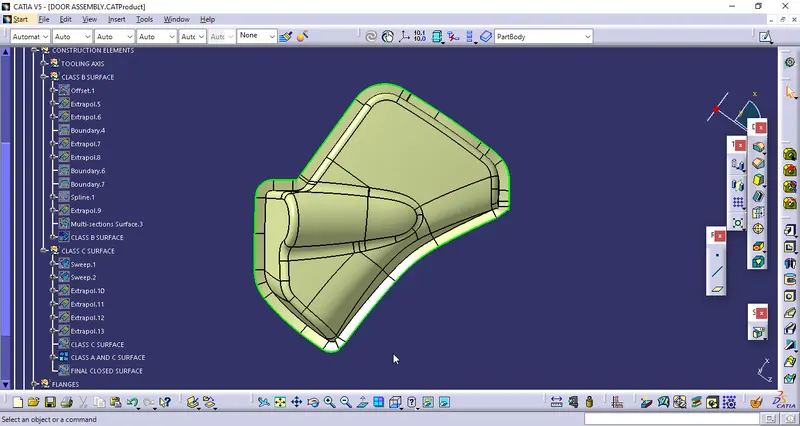
Class C Surface is that connect the Class A Surface and Class B Surface.
- Create a boundary on the Class A surface at the individual corner and then Sweep it individually to avoid the patches.
- By using the Sweep Command with the reference of Class A surface and angle of 90Deg to it. It is done only when the surface is perpendicular to Tooling Axis.
- The Class C surface that is parllel to the Tooling Axis is done by the Draft Direction with the 3Deg Draft Angle.
- Create a Joining surface between the Sweeped Surfaces by using the Multisection Surface and Fill commands.
- The thickness or length of the Class C Surface is 4mm minimum, so that it will be trimed easily with Class B Surface.
- Join the Class C surfaces and trim them to form it.
- Join the Class C surface with the Class A surface by the Merging distance as 0.003mm.
Class C surface
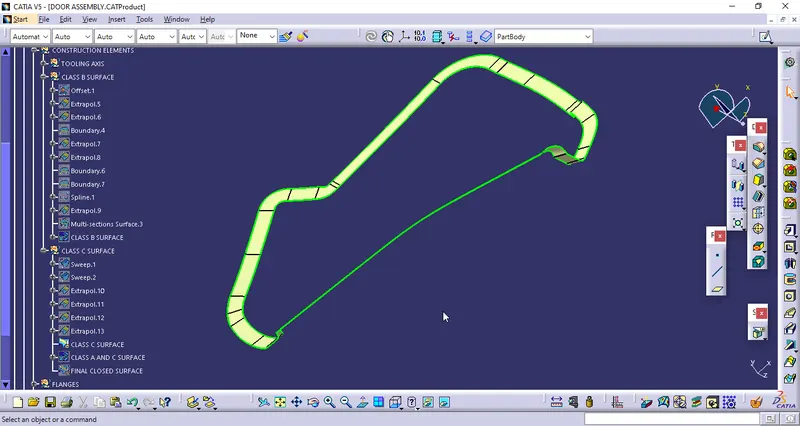
Class A & C Surface
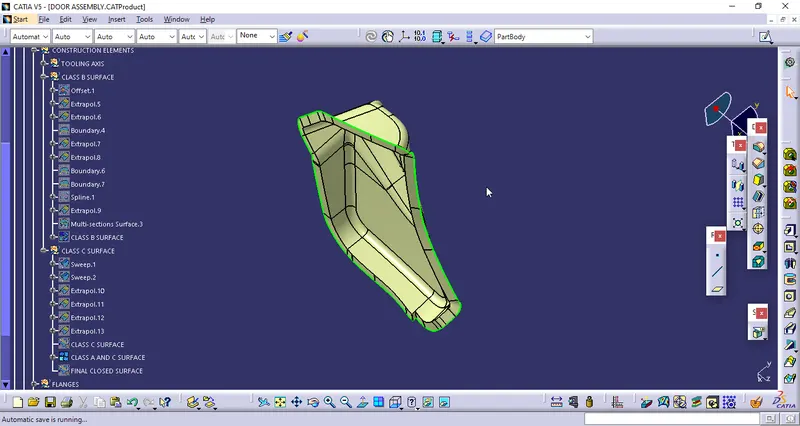
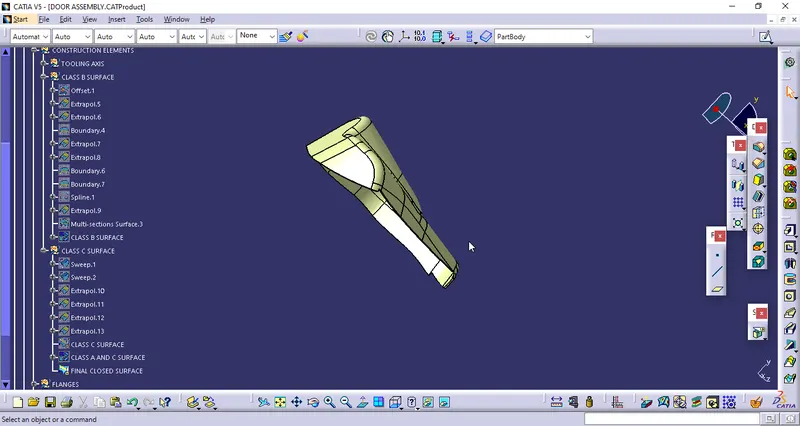
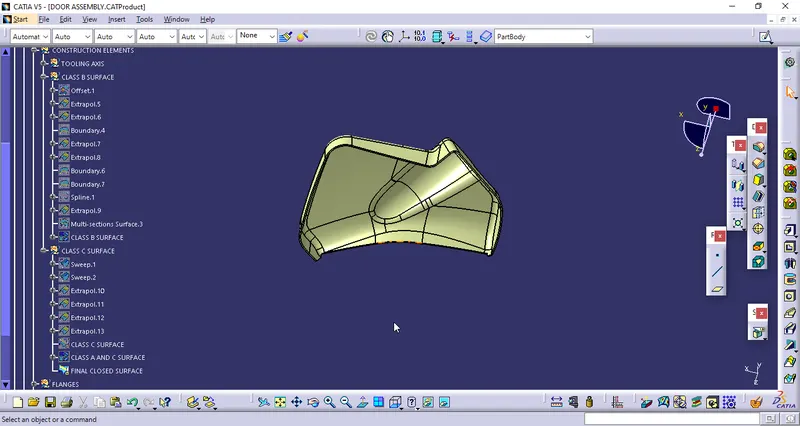
CLOSED SURFACE BODY:
- Now trim the Class A&C surface with the Class B surface.
- The Trimed surface is formed.
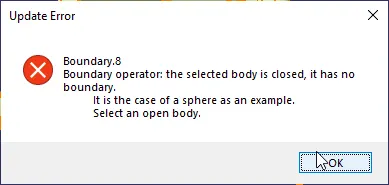
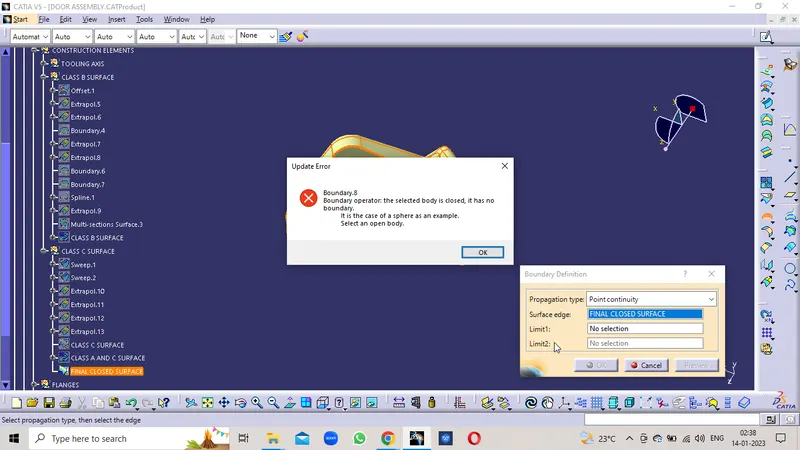
- Created a Boundary on the Trimed Surface so that it enssures that no boundary formed. Confirms that it is completely closed.
- By using the Closed surface Command in the Part Body Design to the surface body.
- Now the Solid Body is formed.
Flanges:
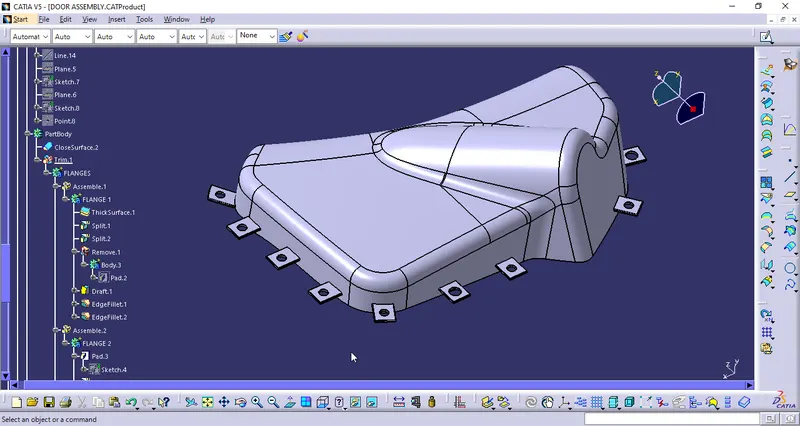
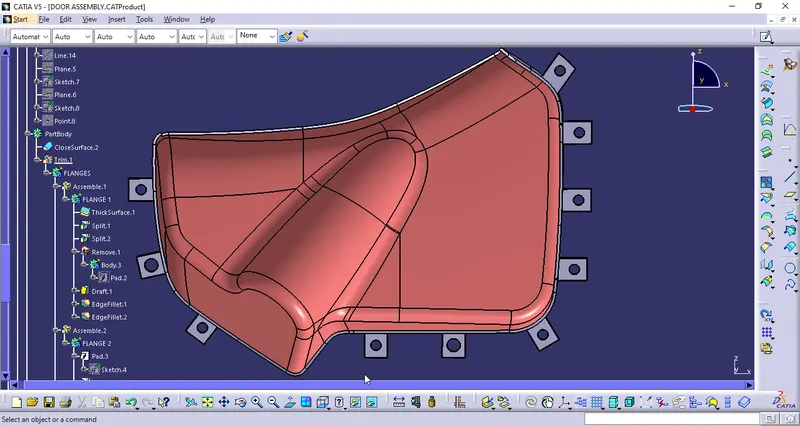
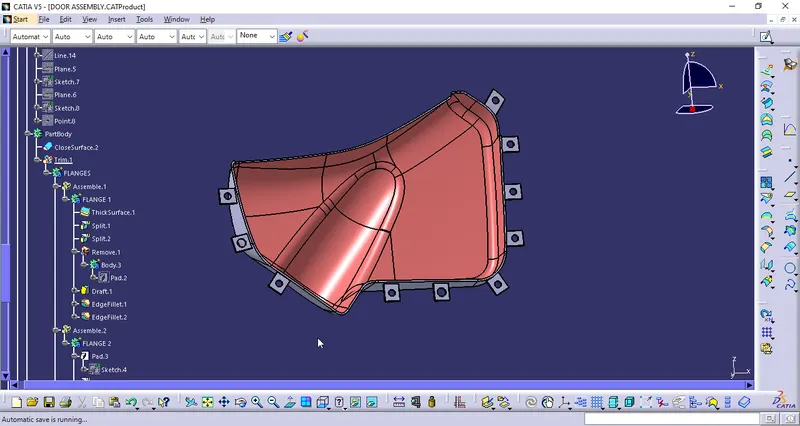
Flanges are the Connecting of the two Parts or Two Components. These were connected by Heat Stakes and Locators with help of Flanges.
- There were no master section provided.
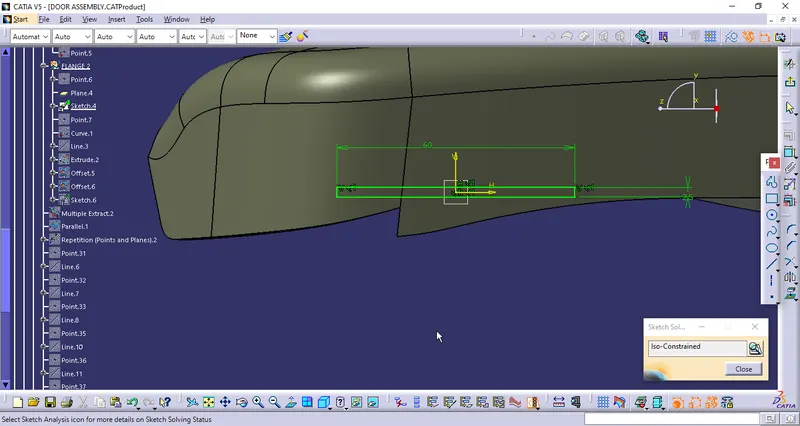
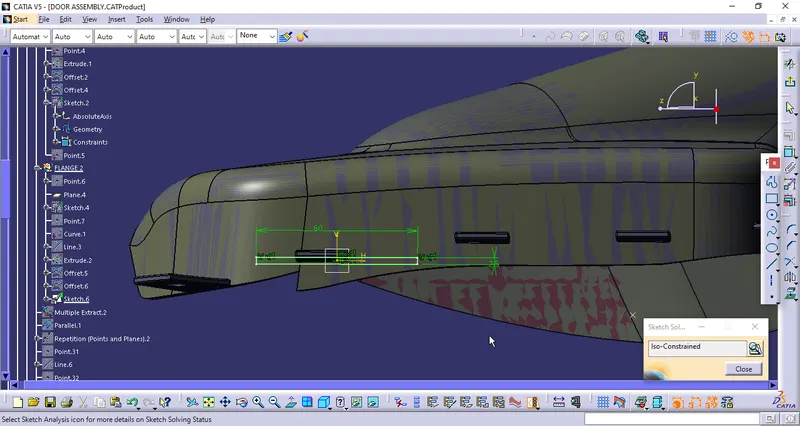
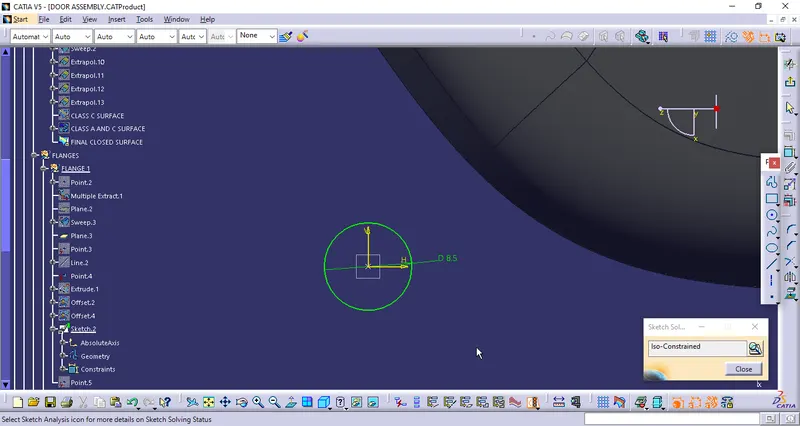
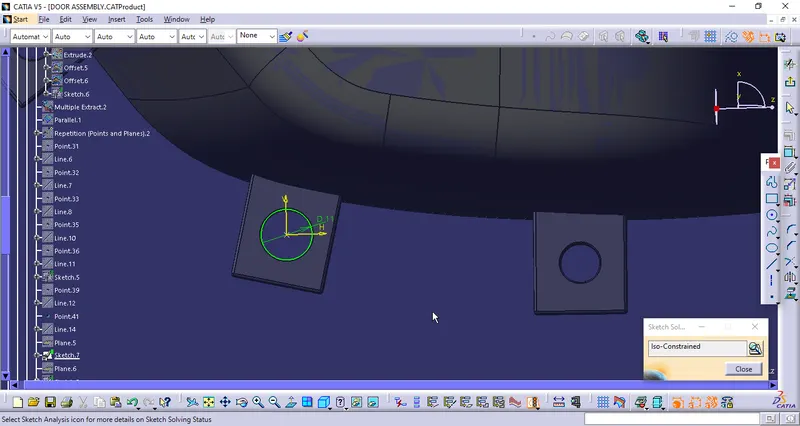
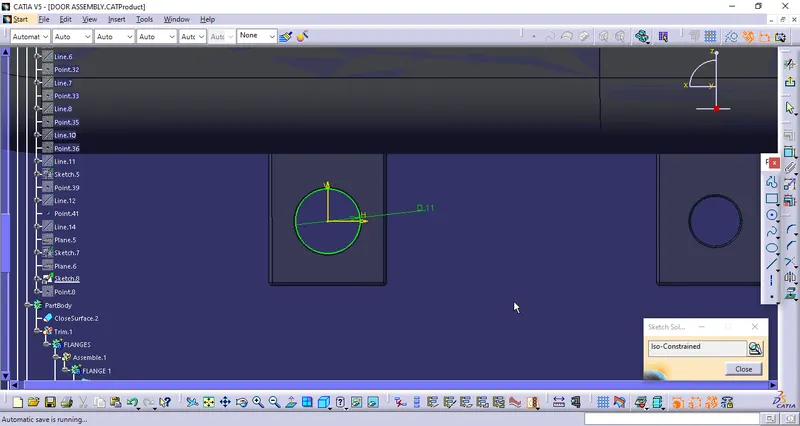
- Create a point on the surface and create a plane on it.
- Create a Position Sketch of Flange with help of Plane and Point and isolate the sketch of it .
- Extrudue it and sweep the surface.
- Trim the Both surfaces and form the closed one
- Now thicken the Surface with 2.5mm in the part body
- Give the fillets and split the flange with approx value
- Provide the Hole according the Heat Stake and Locator size with 1mm clearence to it.
- Draft it with the 0.5Deg on possible directions.
- Create the Flanges according to the Heat Stakes and Locators for the assembly
- Provide the Minimum Fillet radius of 0.5mm on all surfaces and 0.25mm on the inner circle bore for heat stakes and locators.
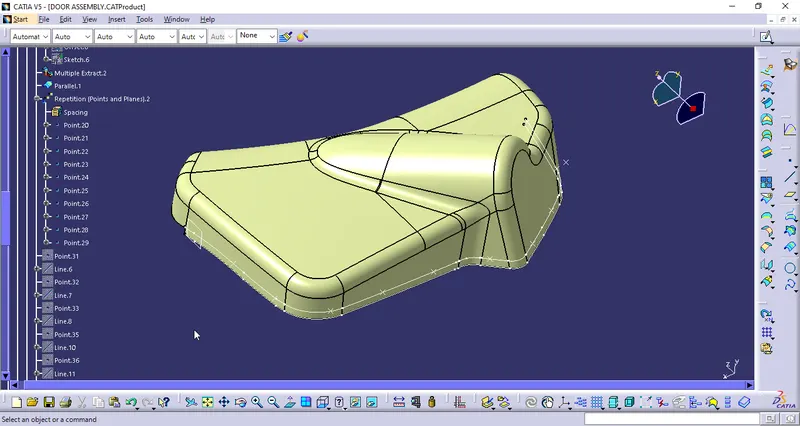
- Create a MultiExtract of Edge of Class C surface and Parllel Curve it to the height of Flange
- Replicate the points on the Parllel Curve with the Spacing of 60mm instances of it.
- Translate the Flanges from the point to the point and Translate individually them as a Flange Poisition of the First one or Base one.
Parllel Curve and Replication Points
Draft Analysis:
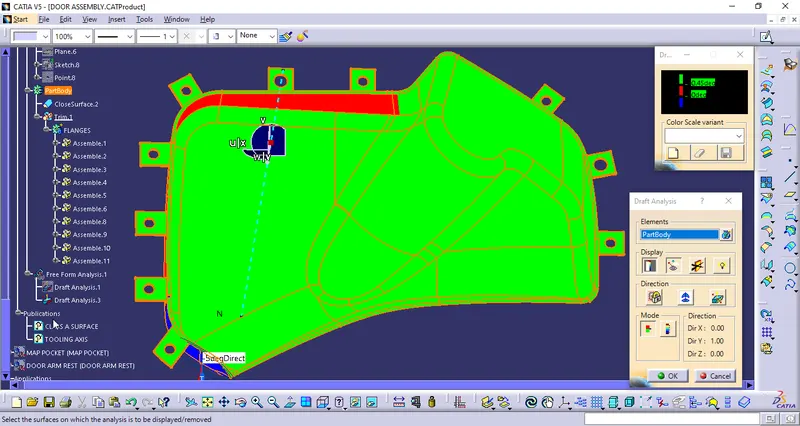
- Select the Draft Analysis to the ClOSED SURFACE.
- Select the Axis and place the Axis line along the Tooling Axis direction, and activate the compass.
- Select the Draft angle degree as 3Deg or 2.9Deg minimum.
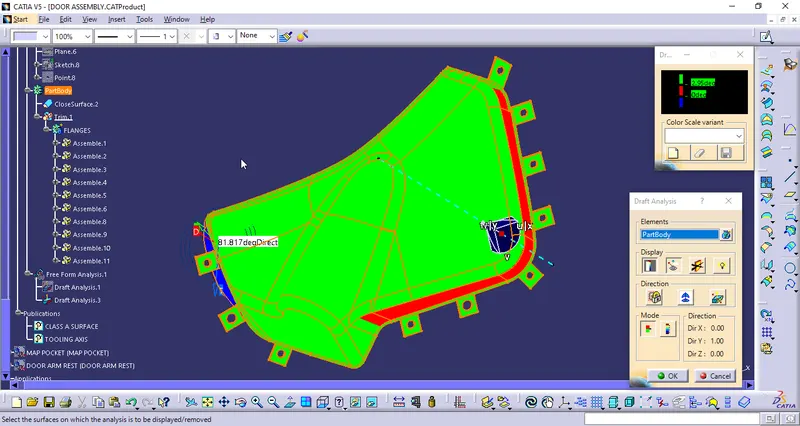
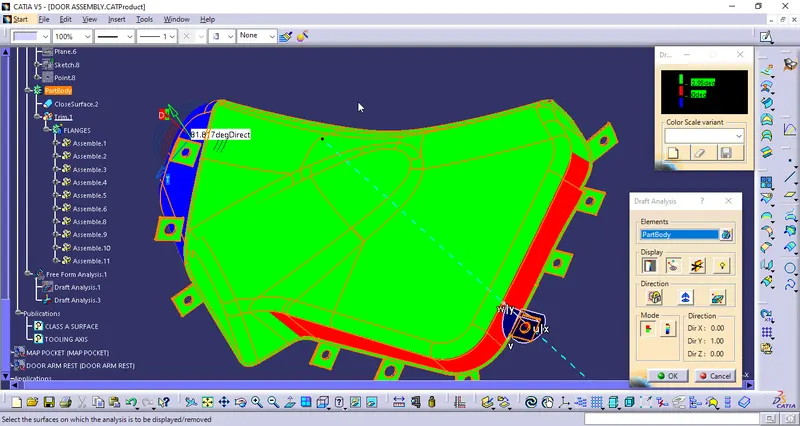
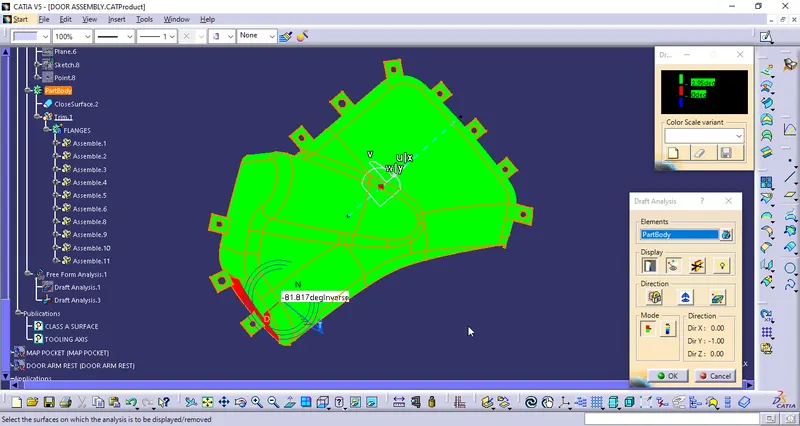
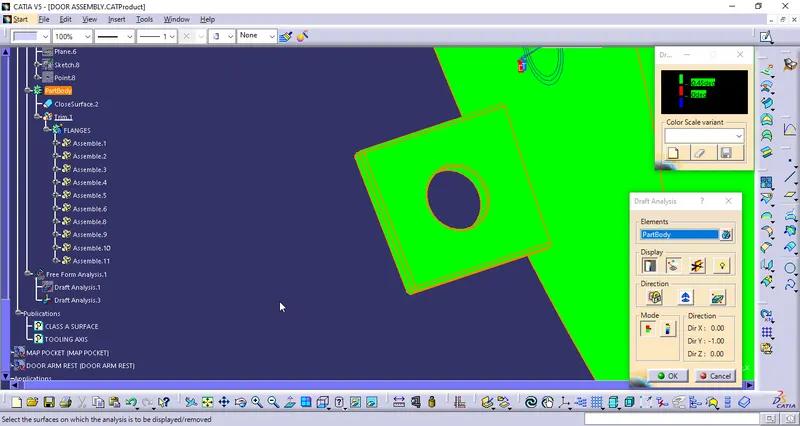
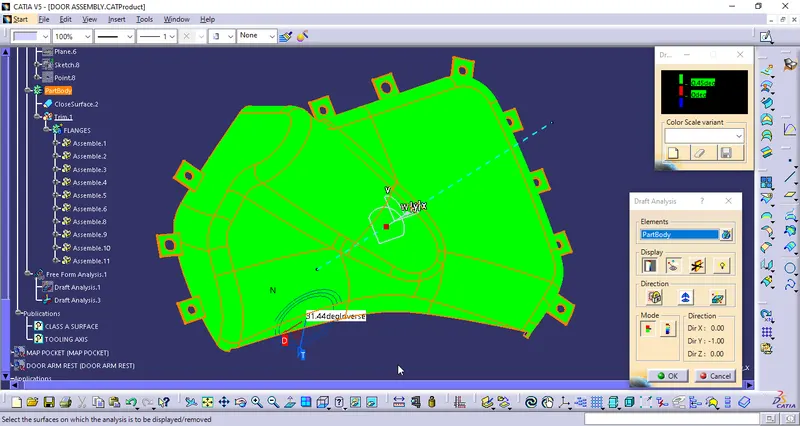
- Selected the Surface and found in Green Colour in all the surface area in the Draft Direction.
- Checked the inversion of Drafting to the Core side and Cavity side.
- Cross checked the angle of draft at all surfaces and found that is more than 3 deg.
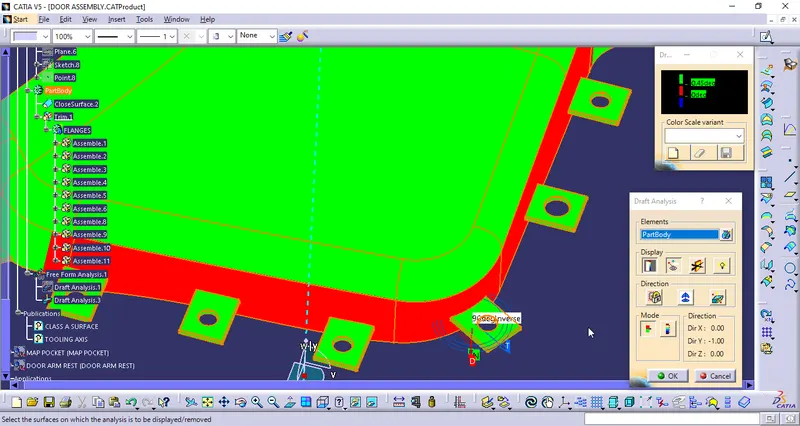
- Checked the Draft angle as 0.48Deg that is approx to 0.5Deg for the Heat Stakes and Locators are clearing the Draft Analysis in the same Tooling Axis Direction.
- Here the Some portions of the Closed part body is not clearing the Draft analysis, These are not clearing in the Class A surface.
- The Flanges are also cleared the Along the Side core tooling axis.
Part Body Draft Analysis with the Tooling Axis 3Deg or 2.85Deg
Faces parllel to the Tooling Axis 0Deg Draft
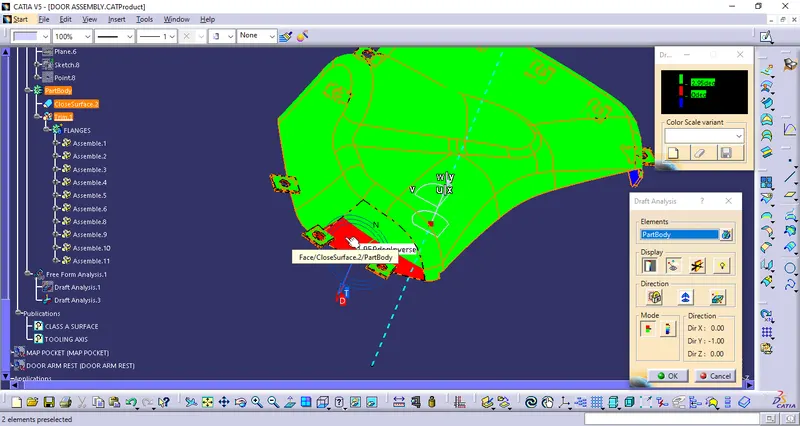
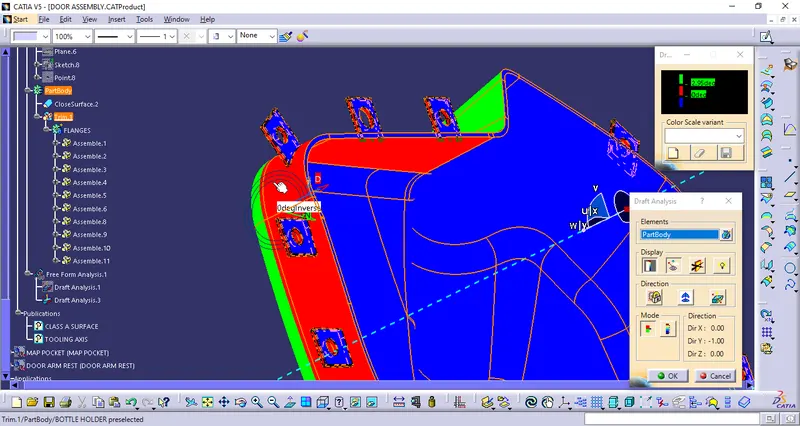
Flanges Draft Angle of 0.45Deg
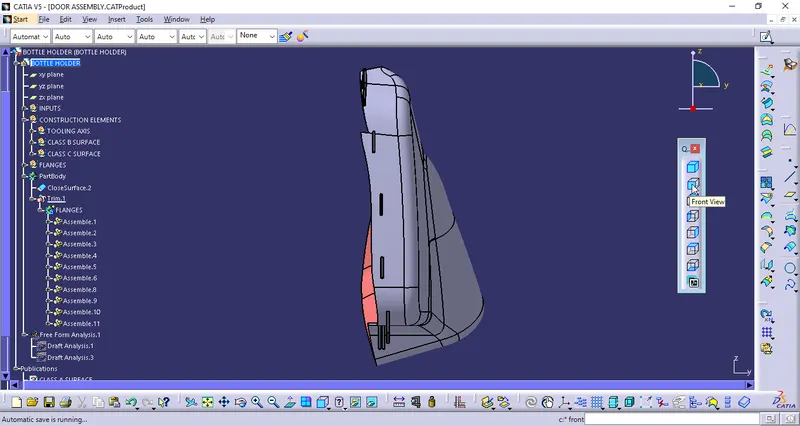
Isometric view
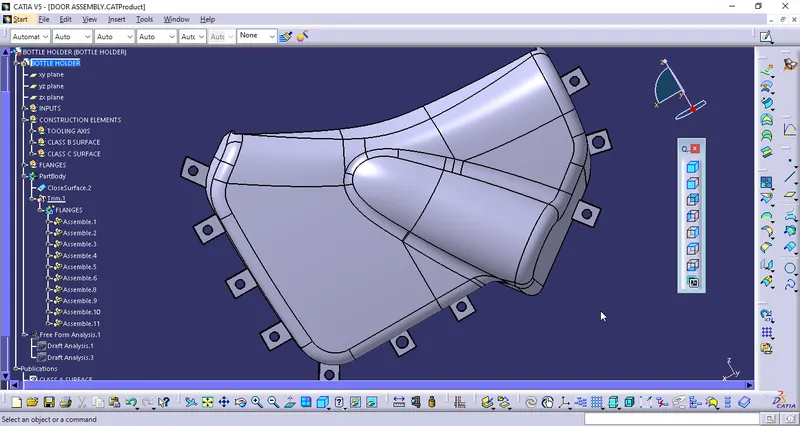
Top View
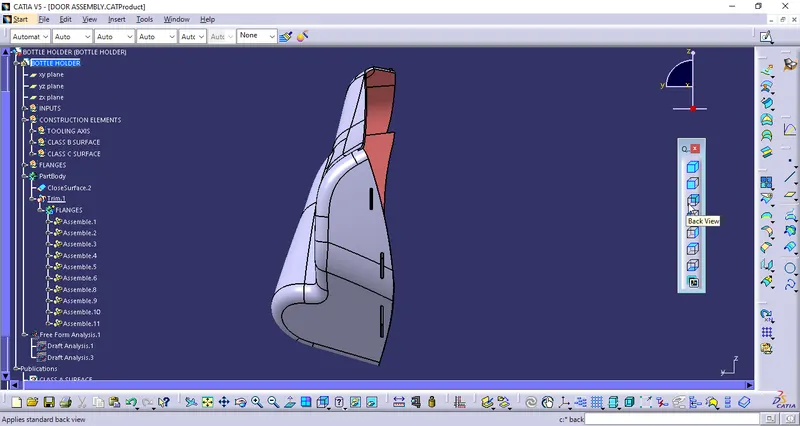
Bottom View
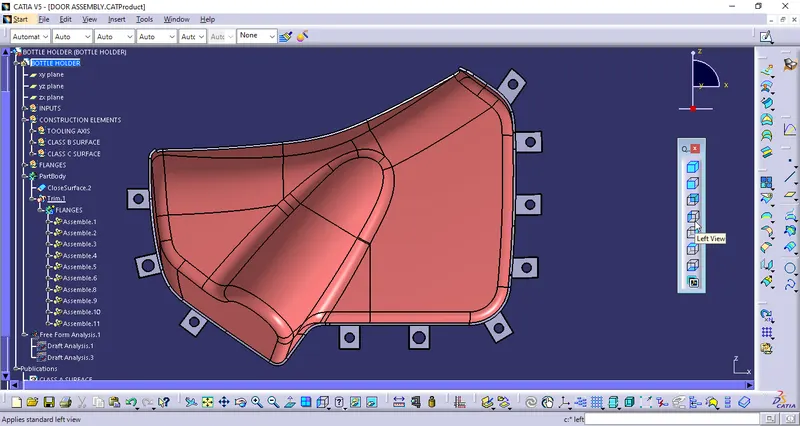
Left View
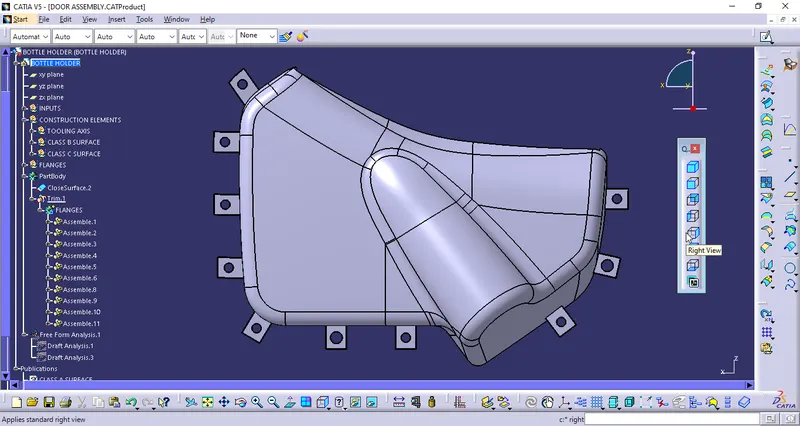
Right View
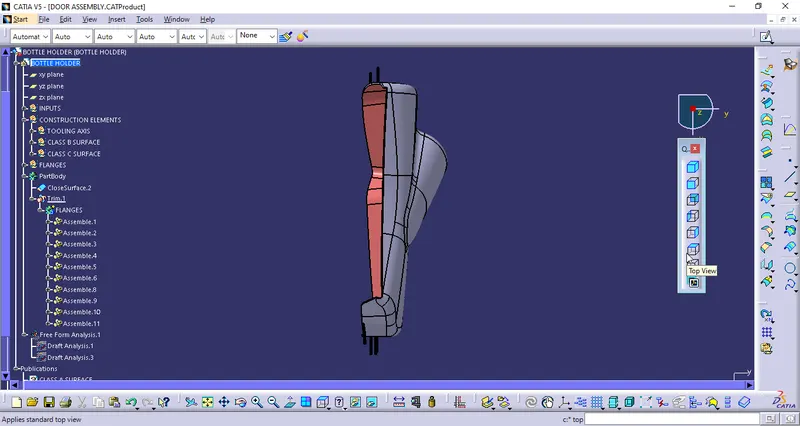
Top View
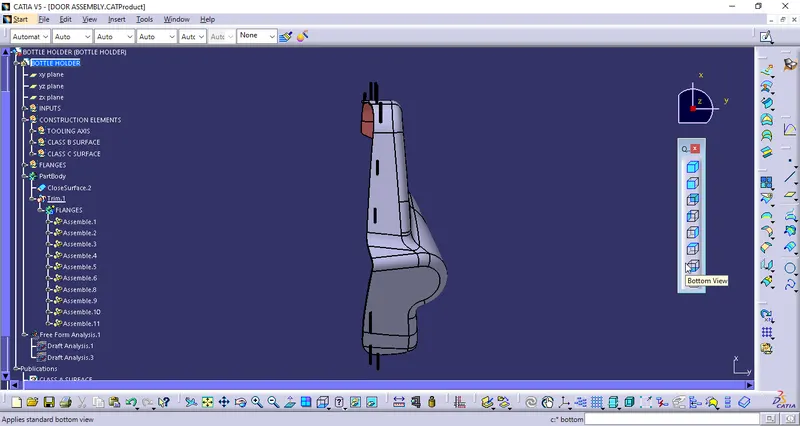
Bottom View
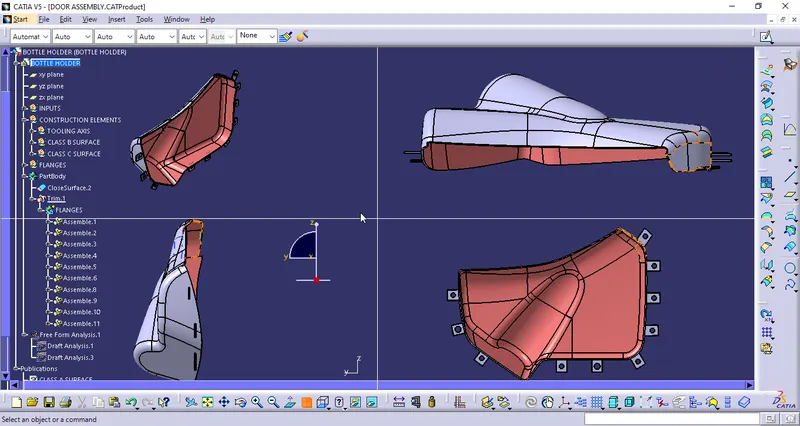
Multi View
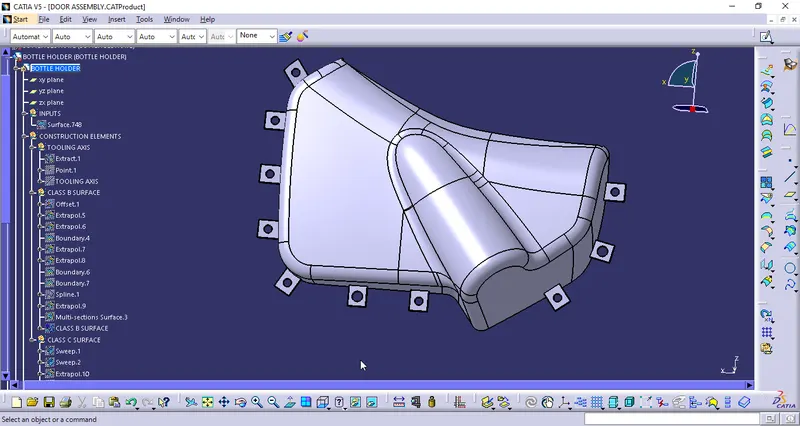
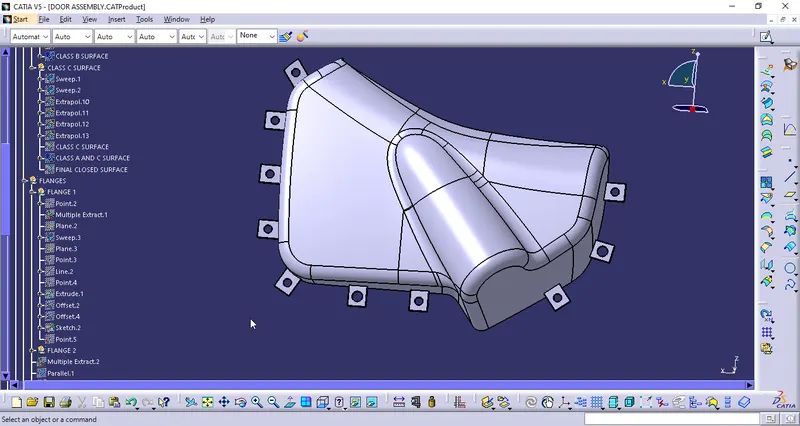
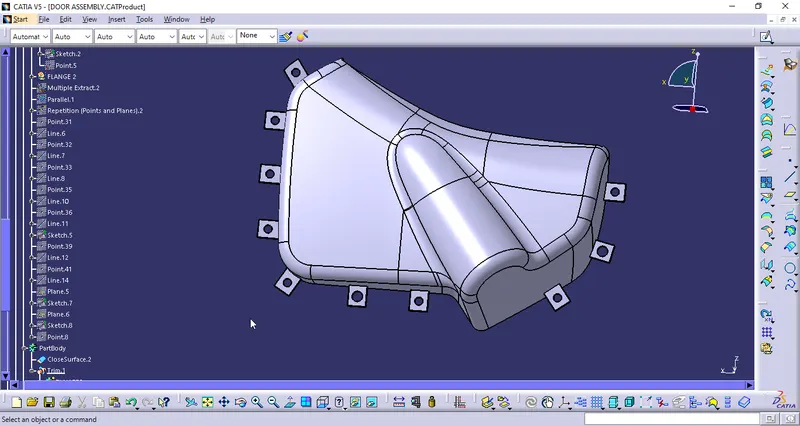
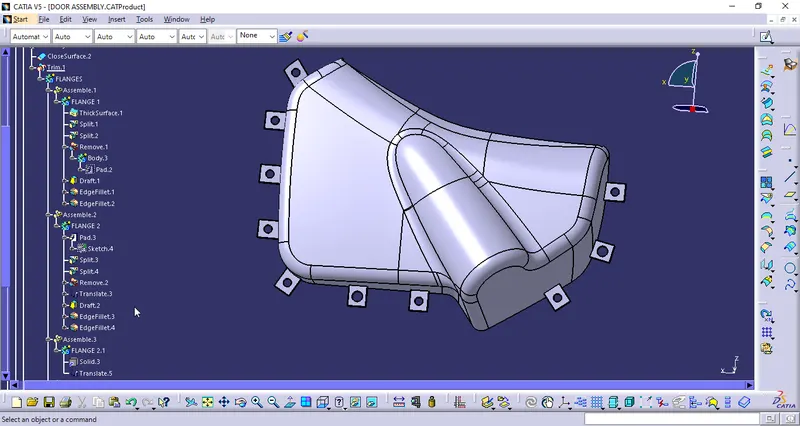
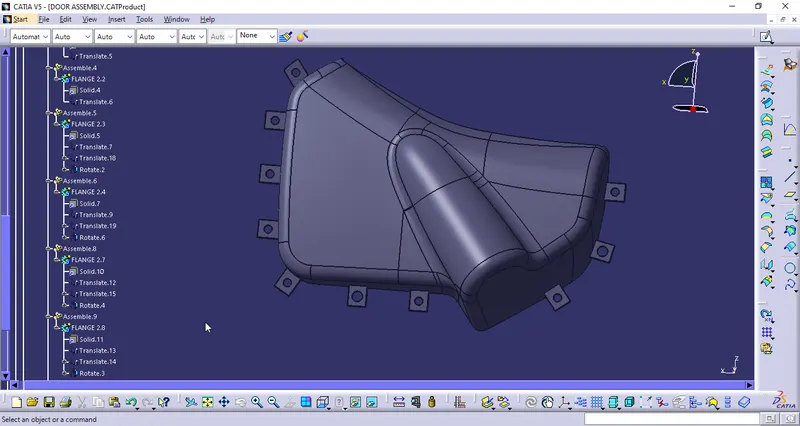
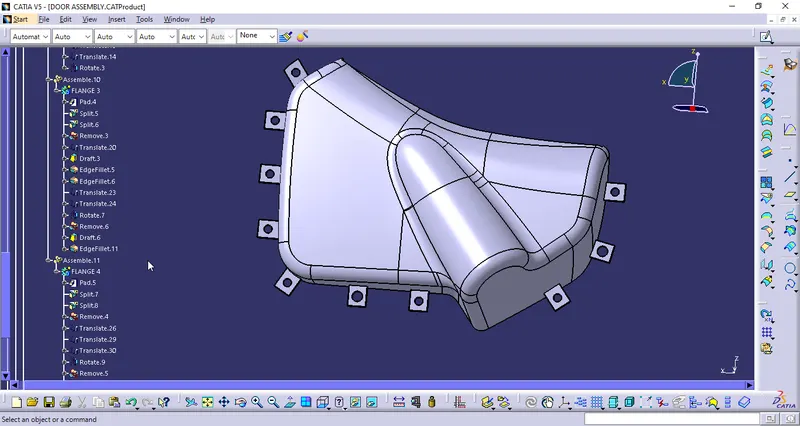
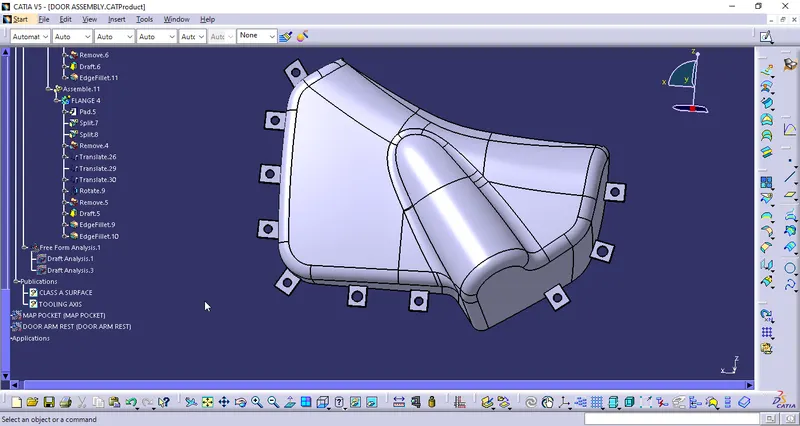
Tree Structure
LOWER SUBSTRATE
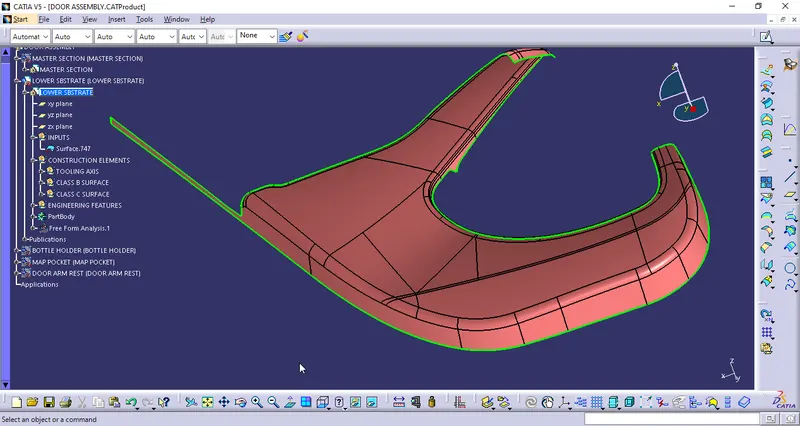
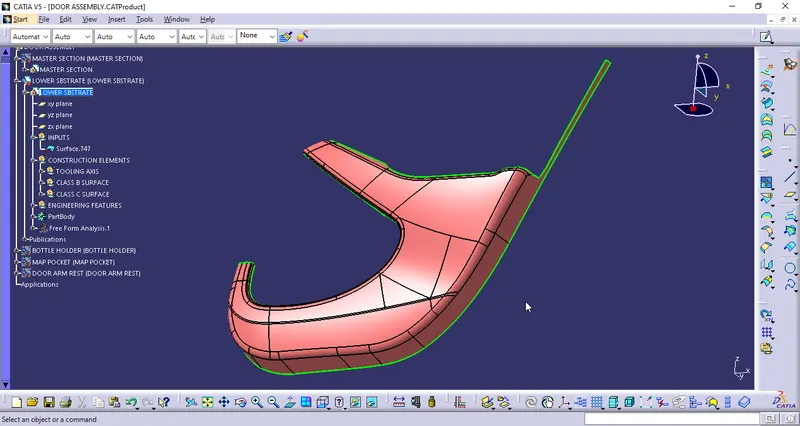
CLASS A SURFACE:
- Check the Class A surface for the patch works or any Boundary in the Class A surface.
- Confirms that there is no other boundary and patches on it.
- Publish the Modified Class A surface and proceed for part body creation.
Class A Surface Inputs
TOOLING AXIS:
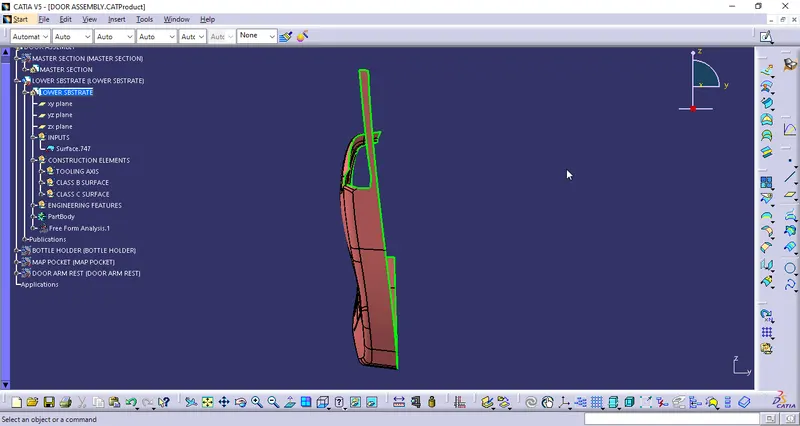
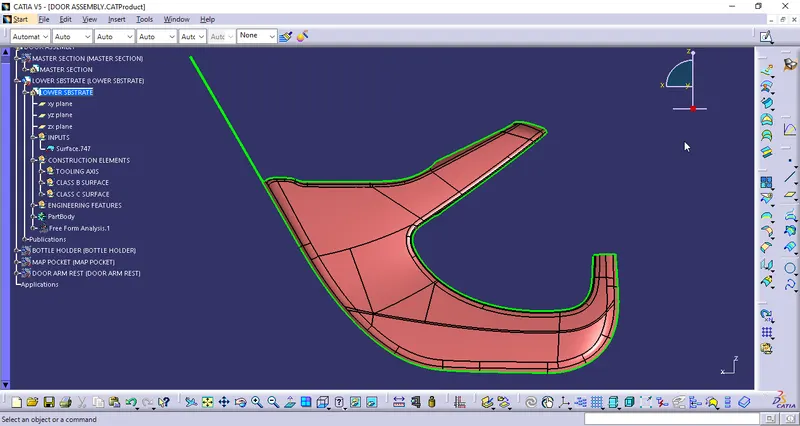
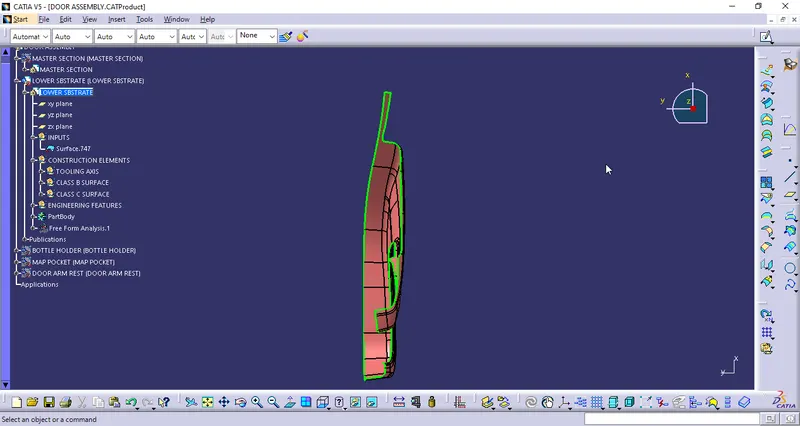
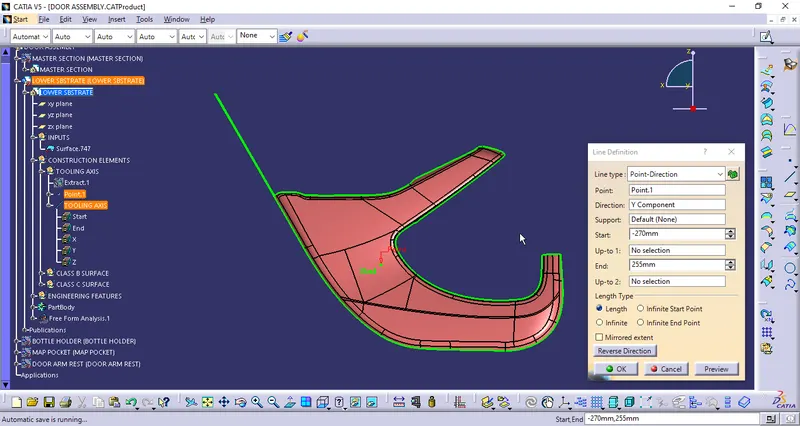
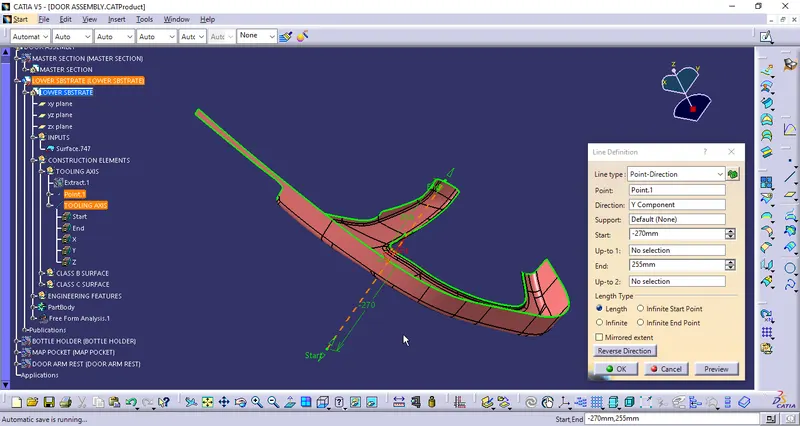
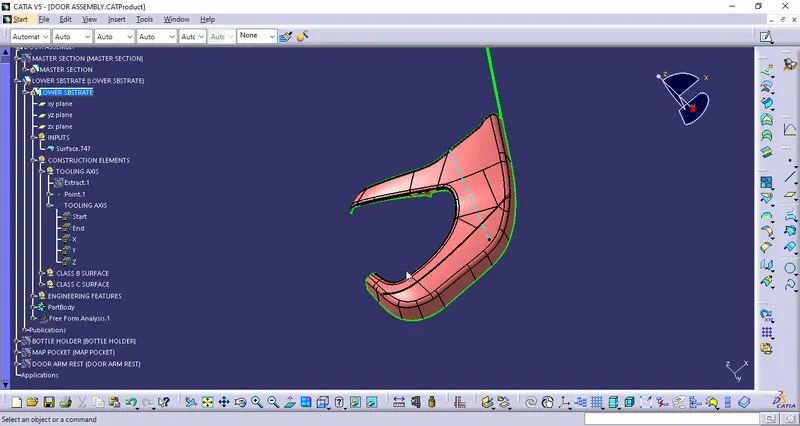
- Check the all the possibile directions for the tooling axis and draft directions and confirms the Y direction as the suitable one.
- Extract the base surface and create a point on it.
- Create a line in the Y-Direction .
X-Direction
Y-Direction
Z-Direction
Line in Y Direction as Tooling Axis
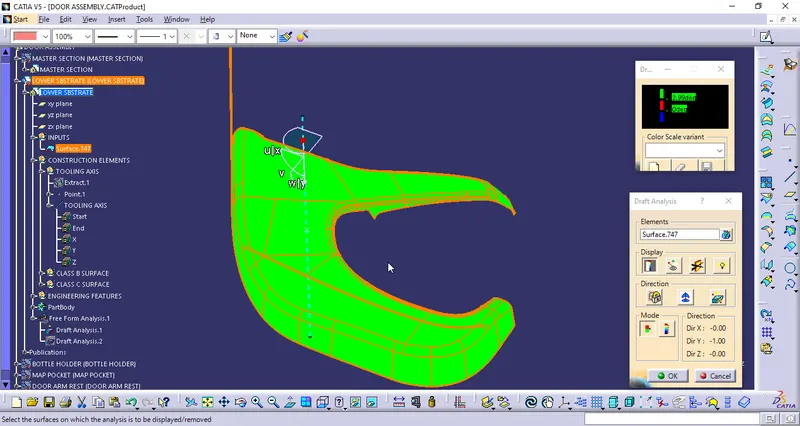
DRAFT ANALYSIS of Class A surface:
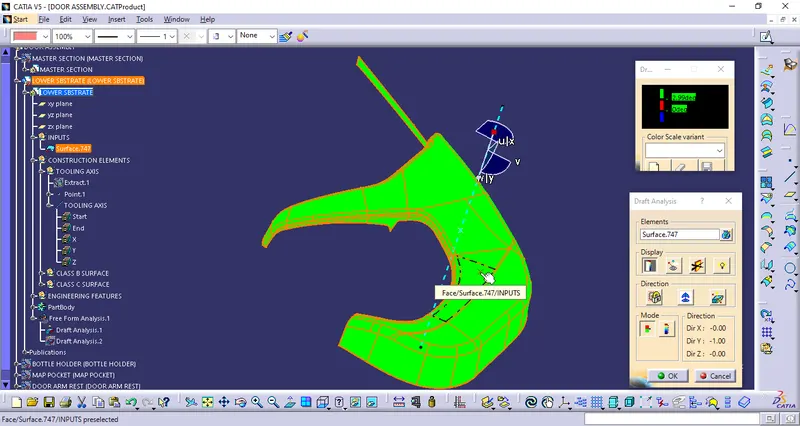
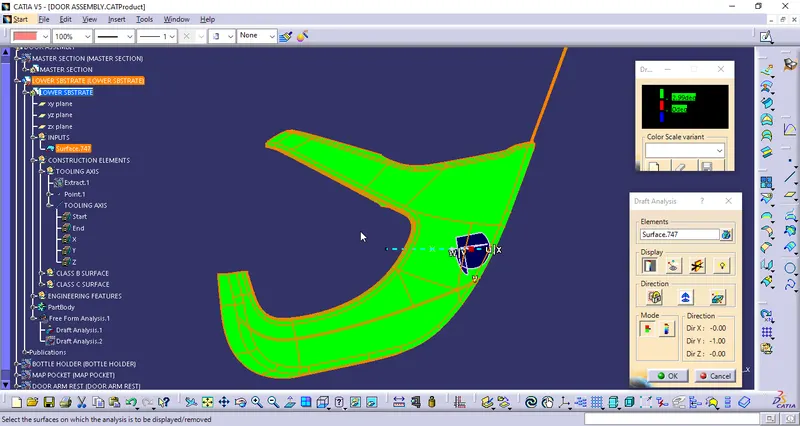
- Select into the Material Mode and Insert the Feature Draft Analysis.
- Select the Compass place in the Tooling Axis Direction and Activate the Compass , adjust the compass to the Tooling Axis Direction.
- Provide the Minimum Draft angle is 3Deg. If some patches are Created them provide draft angle as 2.9 or 2.95Deg.
- Select the surface So that the Green Area that is Draft angle is more than 3Deg angle and it is Manufacturable.
Draft Analysis on Tooling Axis
CLASS B SURFACE:
Class B surface is mostly the not visible surface and it is the back of the Class A surface.
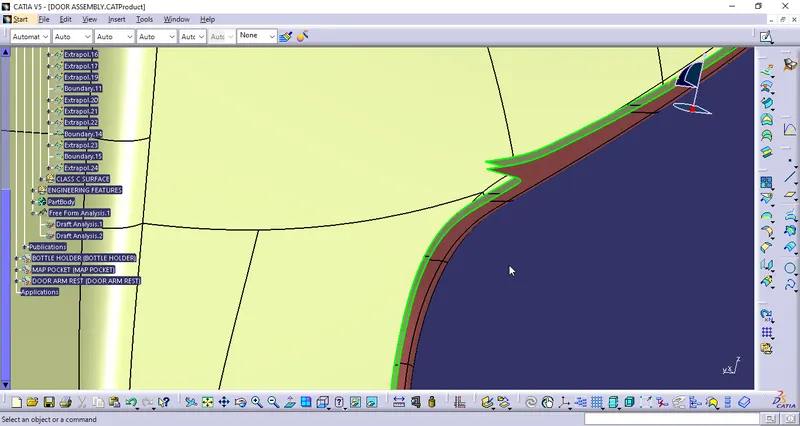
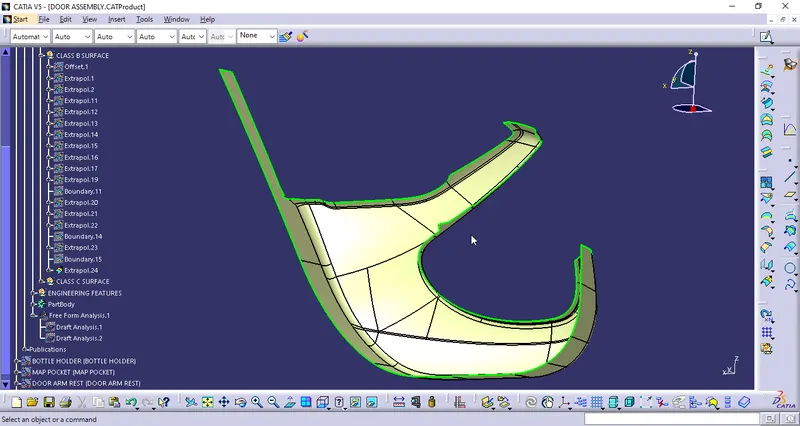
- Offset the Class A surface for 2.5mm (Thickness of Component is 2.5mm).
- The offset surface has the Patches that the minimum fillet value placess cant be offset.
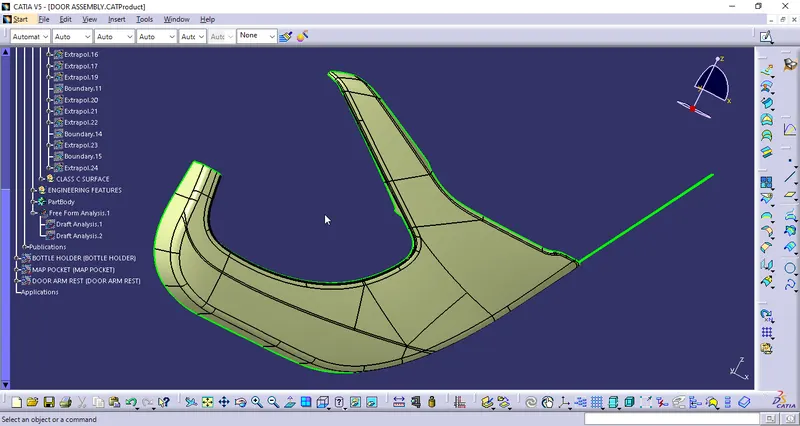
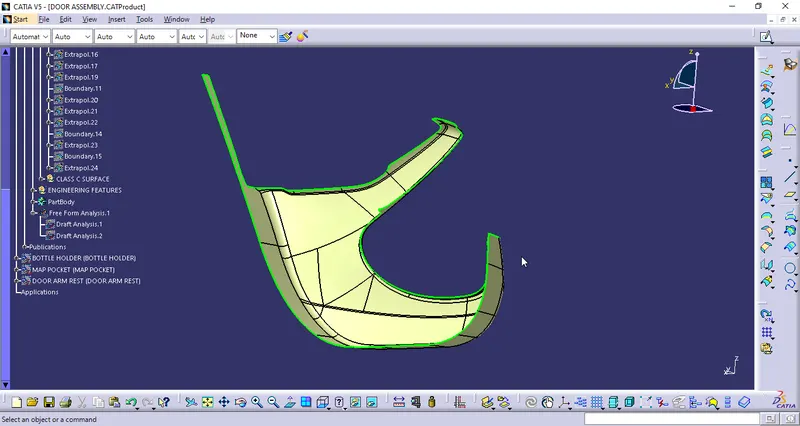
- All The Patched surfaces are Extarcted by using the Extract & Multi Extract Commands.
- Then the Surfaces are Extrapolated untill the Intersection done.
- Then the both Intersection Surfaces are Trimed by using Trim command.
- All the surfaces are Checked for the patches.
- Cross checked gap between the two surfaces Class A and Class B surfaces found that to be 2.5 mm.
- Edges on the Class B surface are Extrapolated to get an intersection with Class C Surface.
Offset Surface
CLASS C SURFACE:
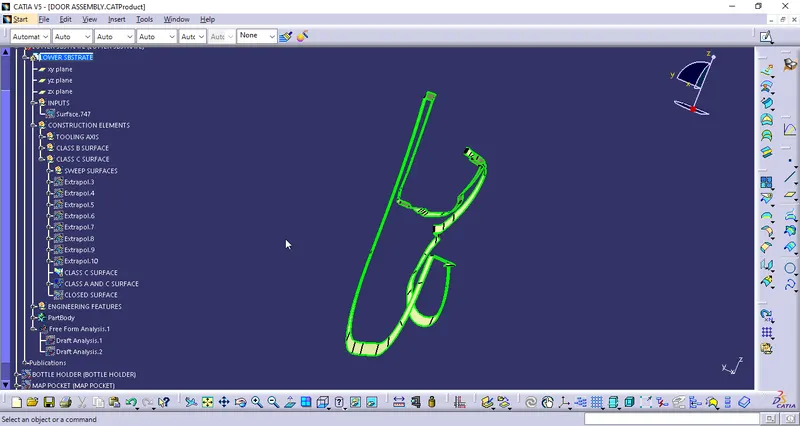
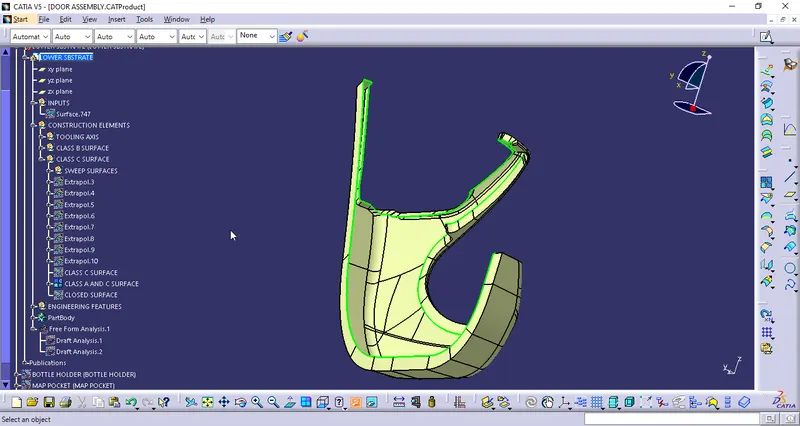
Class C Surface is that connect the Class A Surface and Class B Surface.
- Create a boundary on the Class A surface at the individual corner and then Sweep it individually to avoid the patches.
- By using the Sweep Command with the reference of Class A surface and angle of 90Deg to it. It is done only when the surface is perpendicular to Tooling Axis.
- The Class C surface that is parllel to the Tooling Axis is done by the Draft Direction with the 3Deg Draft Angle.
- Create a Joining surface between the Sweeped Surfaces by using the Multisection Surface and Fill commands.
- The thickness or length of the Class C Surface is 4mm minimum, so that it will be trimed easily with Class B Surface.
- Join the Class C surfaces and trim them to form it.
- Join the Class C surface with the Class A surface by the Merging distance as 0.003mm.
Class C surface
Class A & C surface
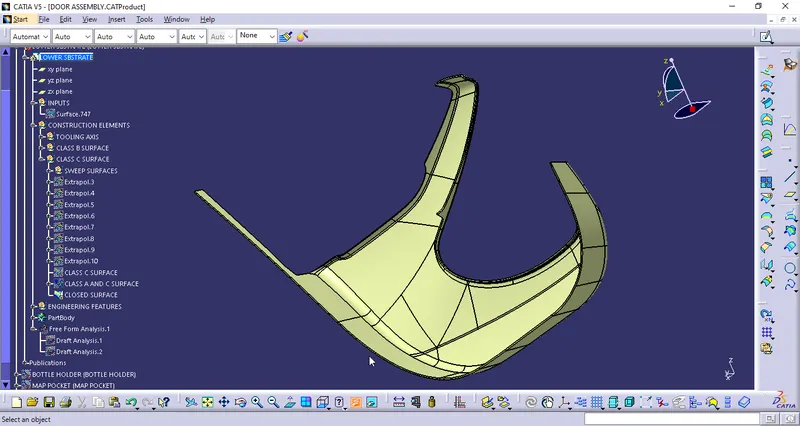
CLOSED SURFACE BODY:
- Now trim the Class A&C surface with the Class B surface.
- The Trimed surface is formed.
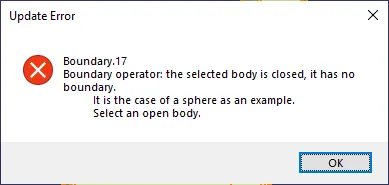
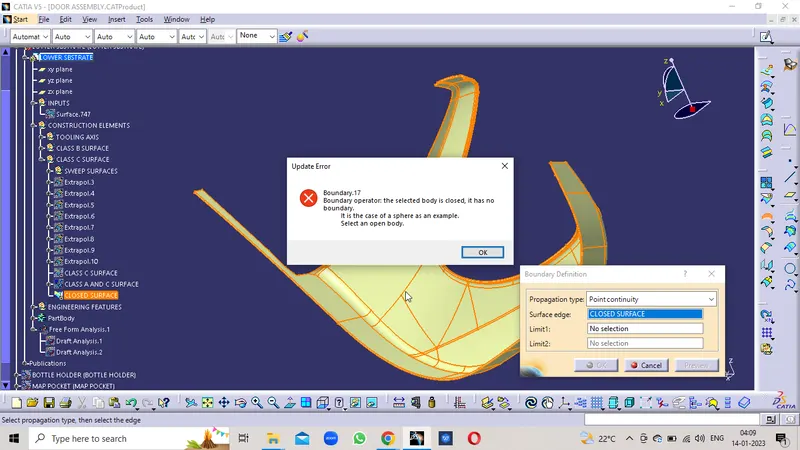
- Created a Boundary on the Trimed Surface so that it enssures that no boundary formed. Confirms that it is completely closed.
- By using the Closed surface Command in the Part Body Design to the surface body.
- Now the Solid Body is formed.
LOCATORS & HEAT STAKES:
- Created a sketch using the Position Sketch and refence plane and point the sketch is drawn.
- Created a solid Body in the part Design by using the commands Pad.
- Apply the Solid Features to it like Edge Fillet, Draft Angle, Chamfer etc to it
- Create a multi extract Curve on the Edges and parllel curve it to the flanges as per the master section provided.
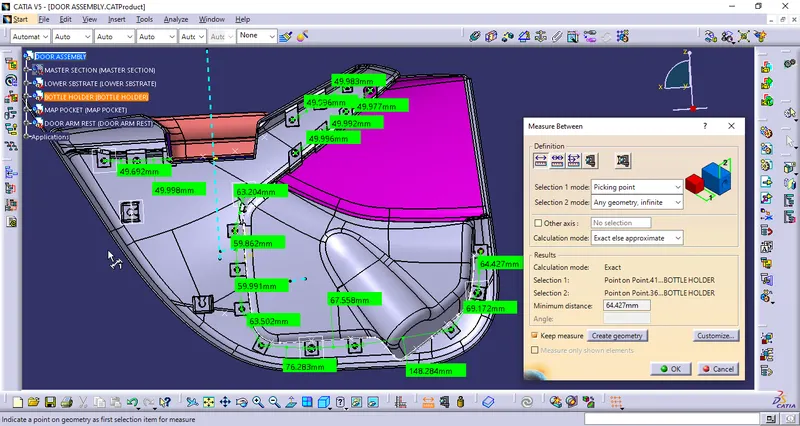
- Replicate the points of spacing of 50 to 60 mm.
- Paste as a special link and Translate them to the points as required.
- Assembly the Locators and Heat Stakes as one Body separately.
- Unitrim with the main Part Body.
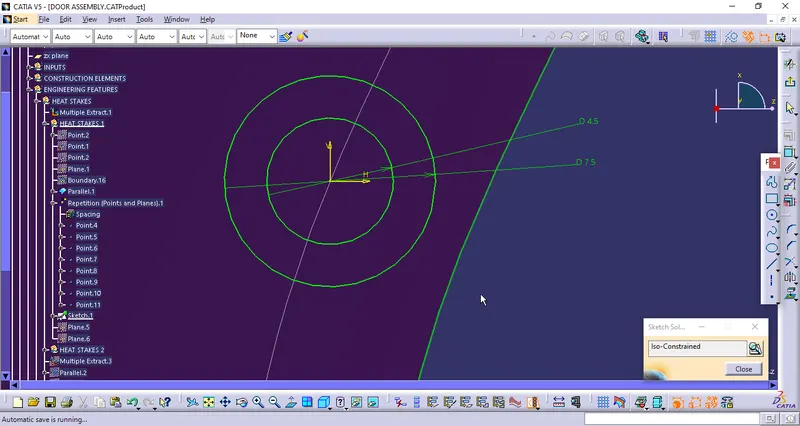
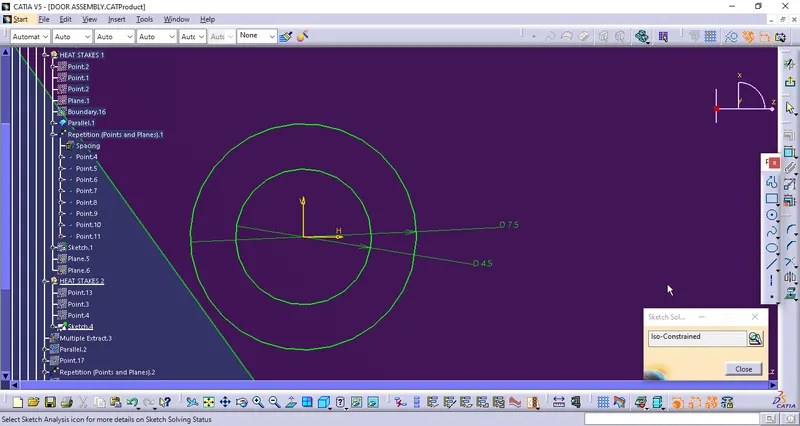
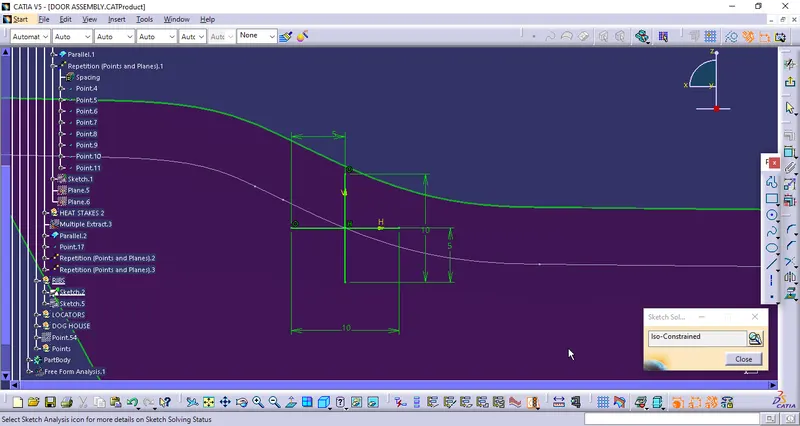
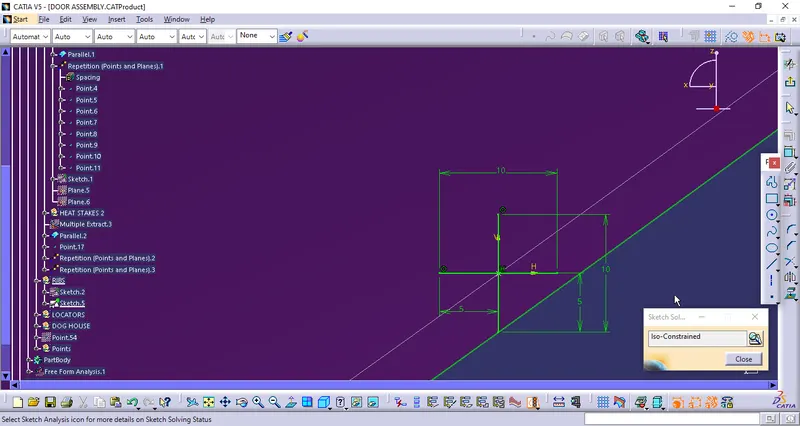
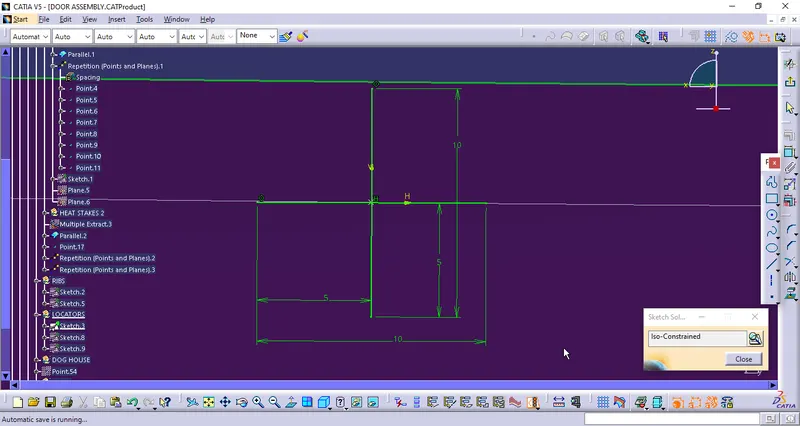
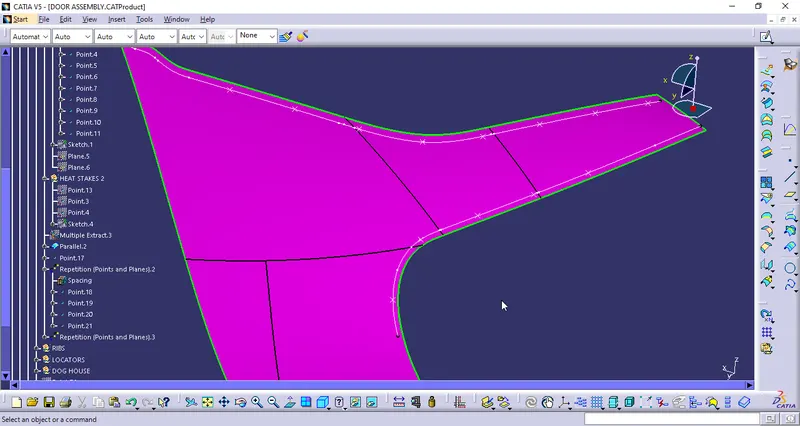
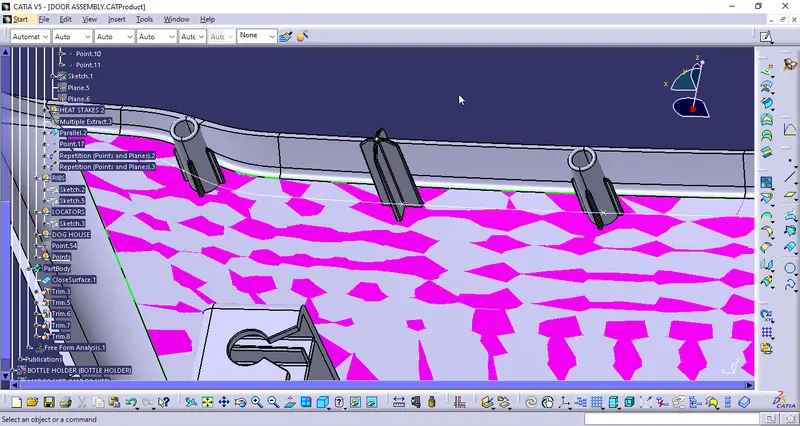
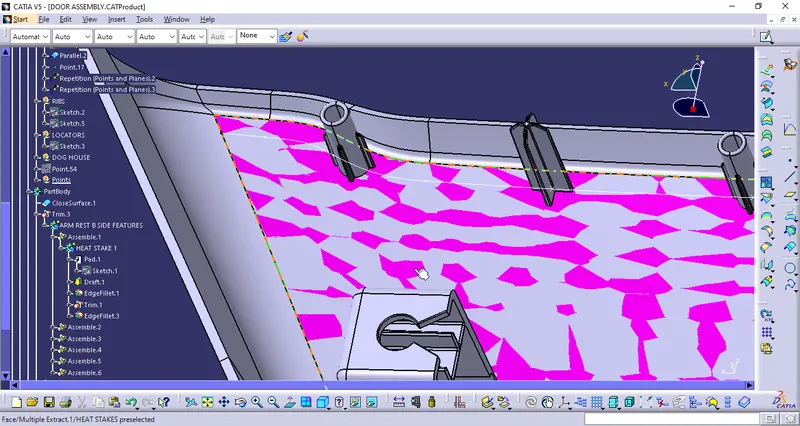
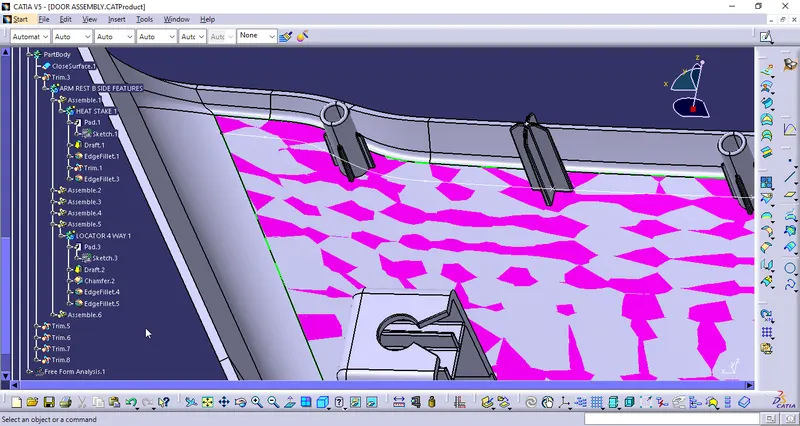
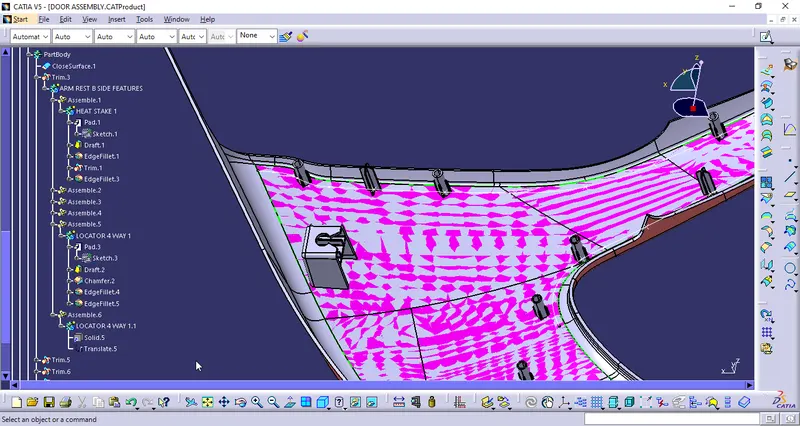
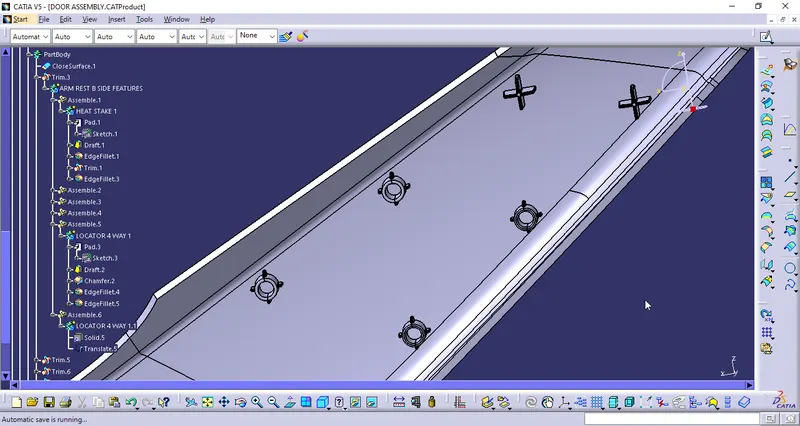
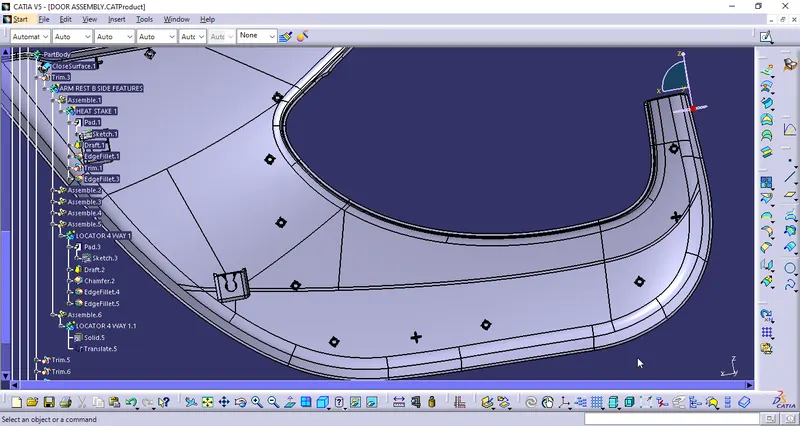
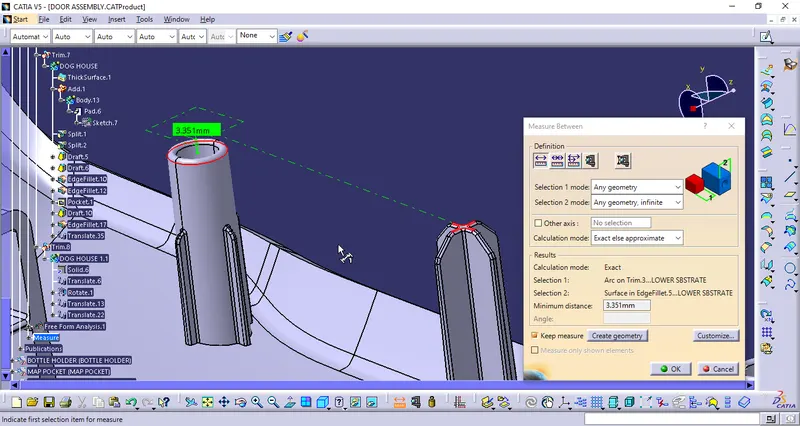
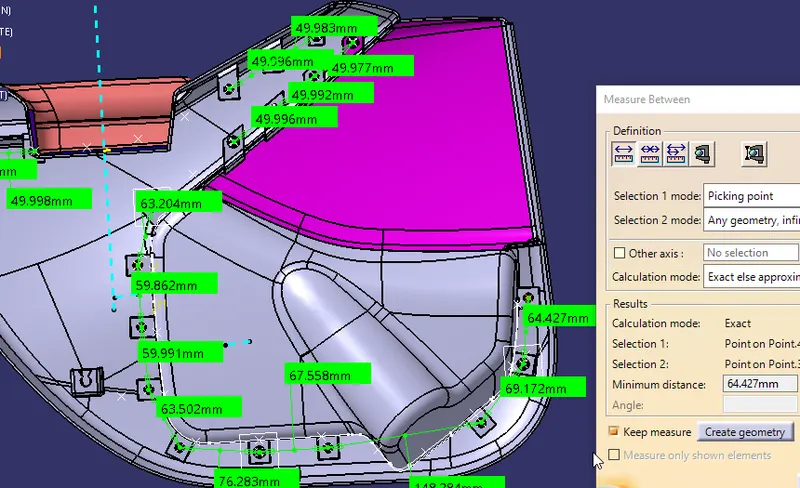
Maintain the gap between the Heat stakes and locators about 50mm Minimum.
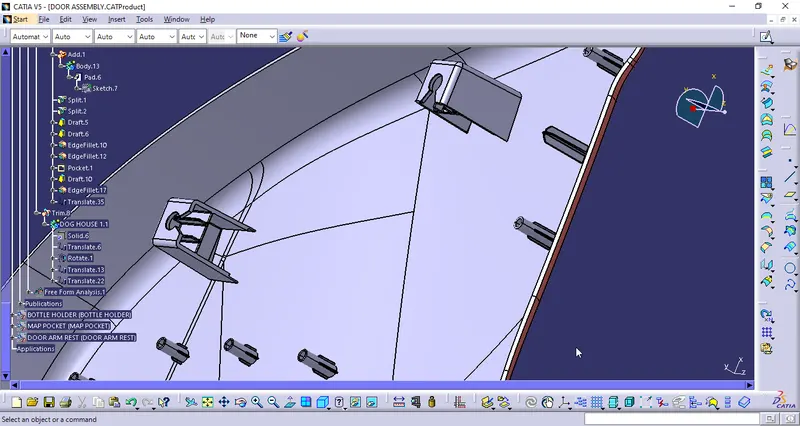
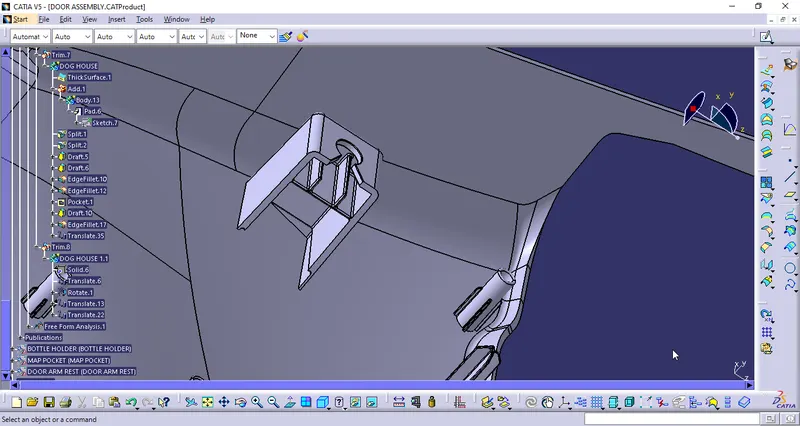
Dog House:
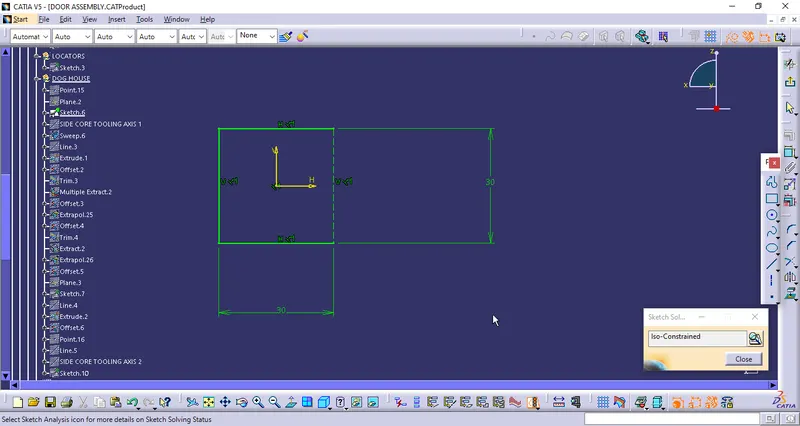
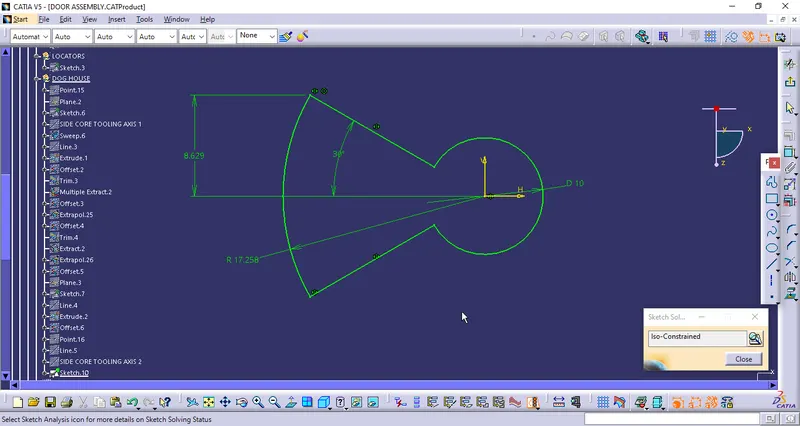
- Create Sketch of Dog House And Iso constrained it in the Position Sketch
- Extrude It to the certain height.
- Offset the base plane and Trim with the Extruded Profile.
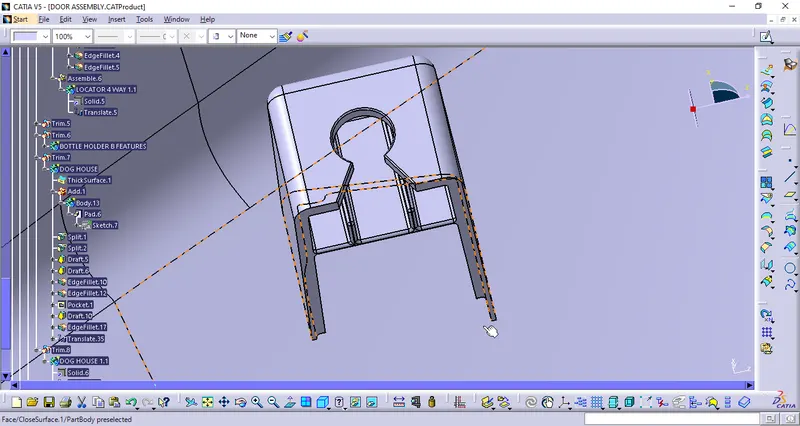
- Now Thick Surface The Closed Profile and Split up the Required Width .
- Now Prowide The Draft Angle of 1.5Deg outer withTooling Axis
- Drat analysis0.5Deg inner with reference as Back side of profile as neutral element.
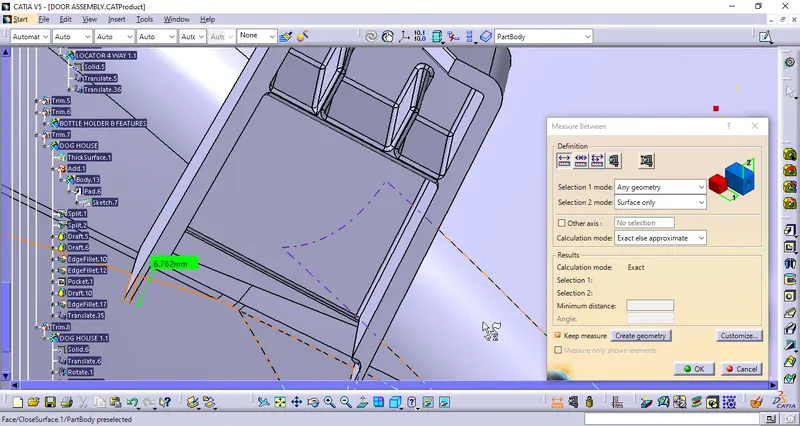
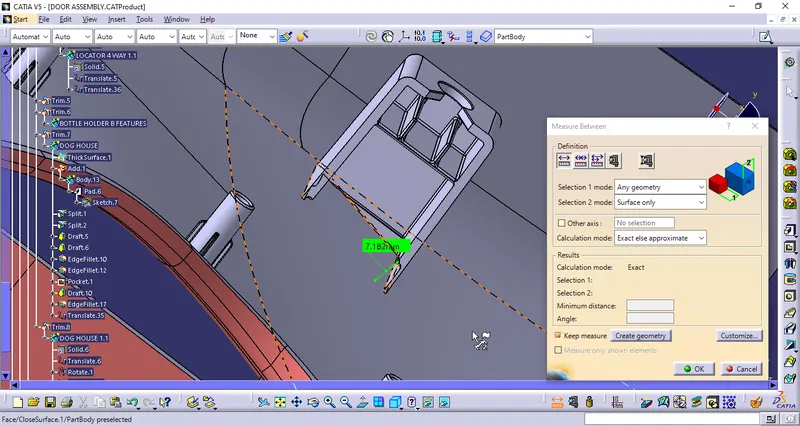
- Now create a cut profile at the bottom side and split it for the Required width of 1mm and at a height of 5mm.
- Now prowide the Fillet Radius as 1mm inner and 3mm outer and 0.5 at the cut profiles.
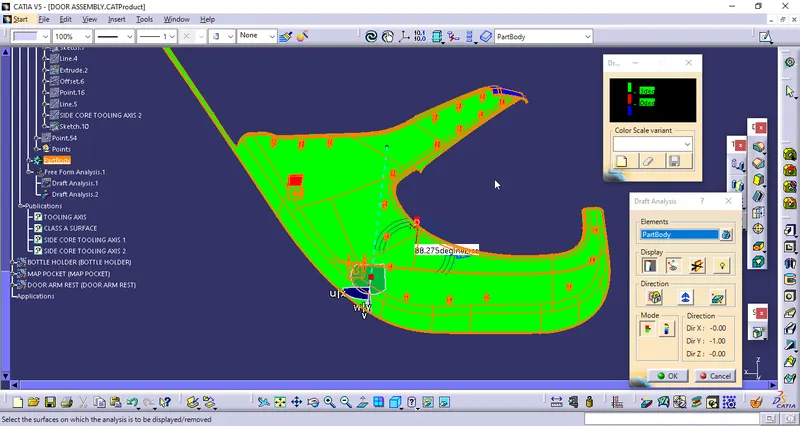
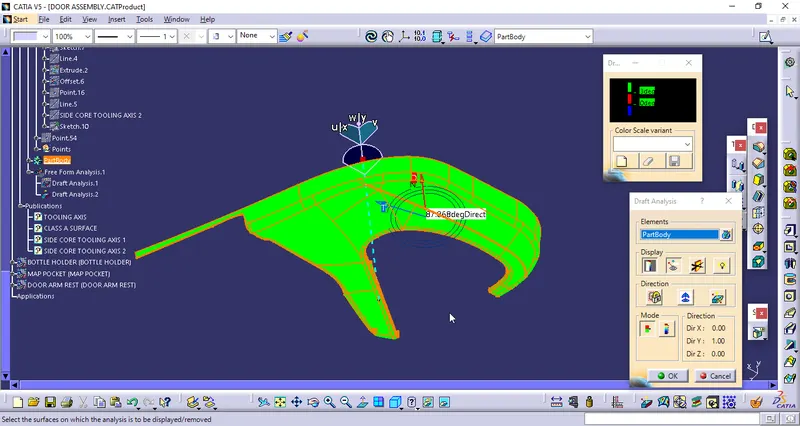
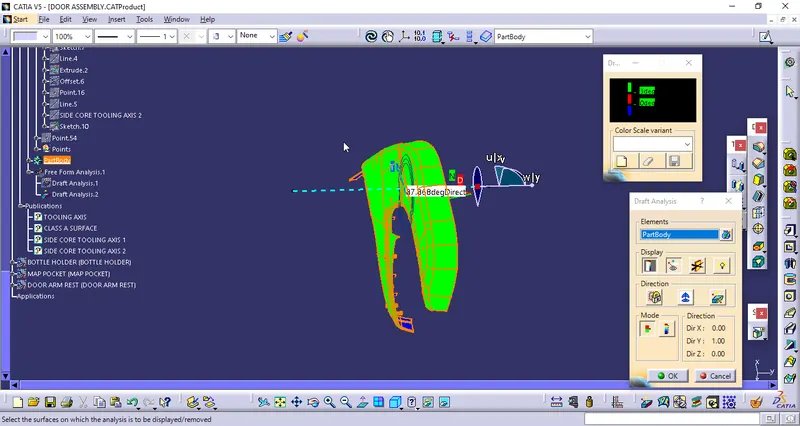
- Now perform the Draft Analysis for Dog House and For Component.
- Unitrim it with the PartBody
- Translate it to required points and create the Side core tooling axis
Dog House
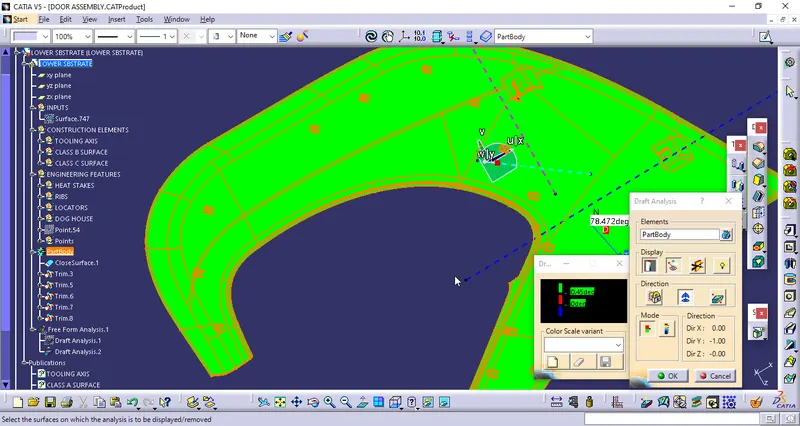
DRAFT ANALYSIS OF LOWER SUBSTRATE:
- Select the Draft Analysis to the ClOSED SURFACE.
- Select the Axis and place the Axis line along the Tooling Axis direction, and activate the compass.
- Select the Draft angle degree as 3Deg or 2.9Deg minimum.
- Selected the Surface and found in Green Colour in all the surface area in the Draft Direction.
- Checked the inversion of Drafting to the Core side and Cavity side.
- Cross checked the angle of draft at all surfaces and found that is more than 3 deg.
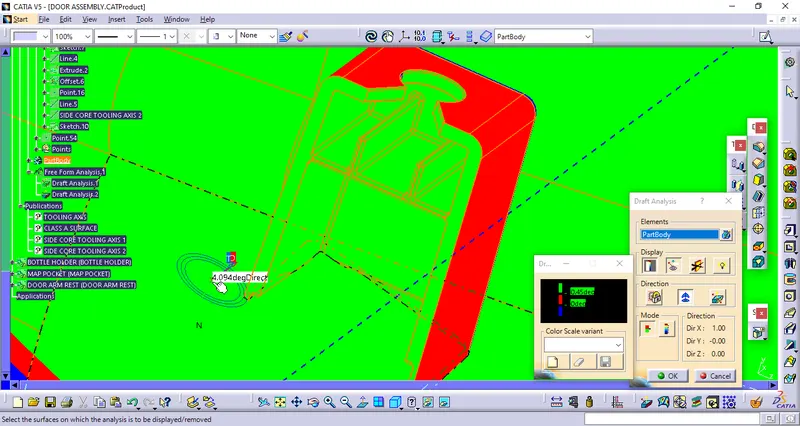
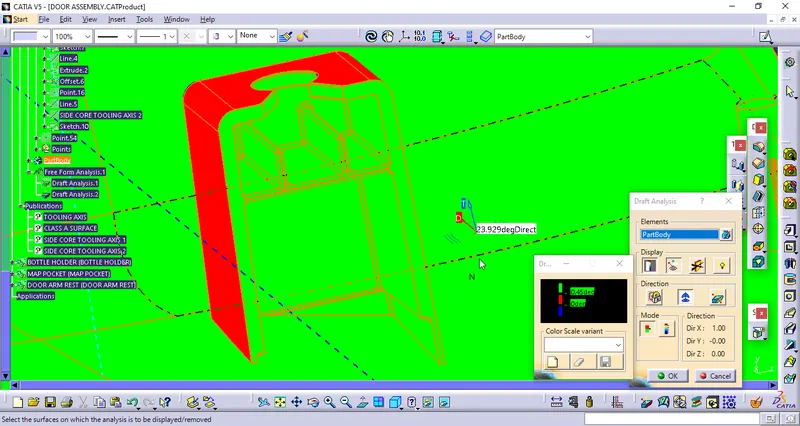
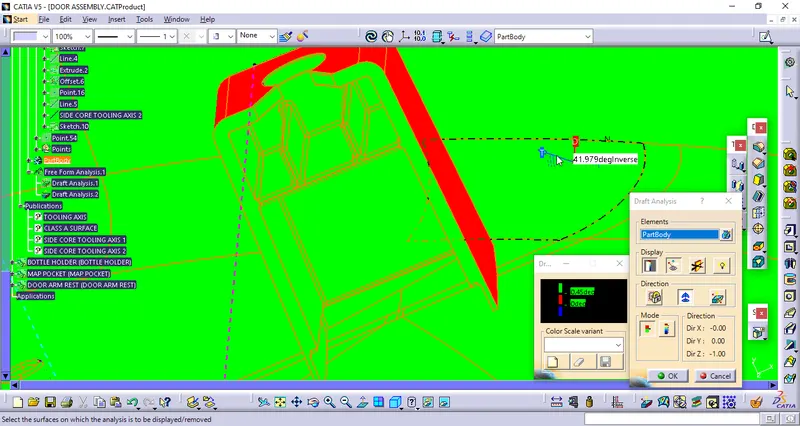
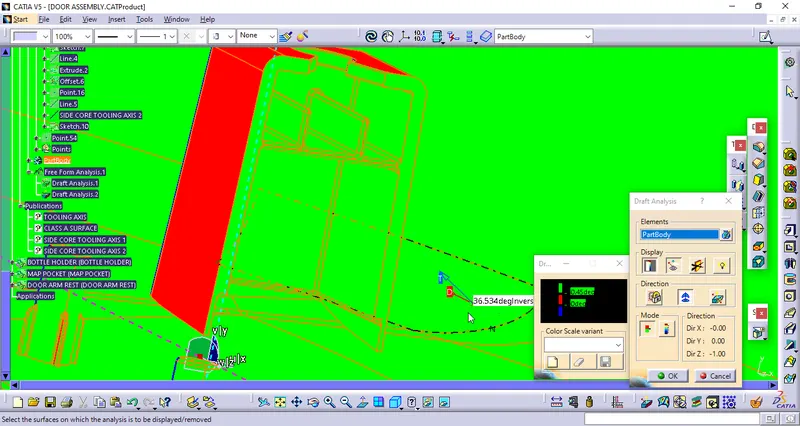
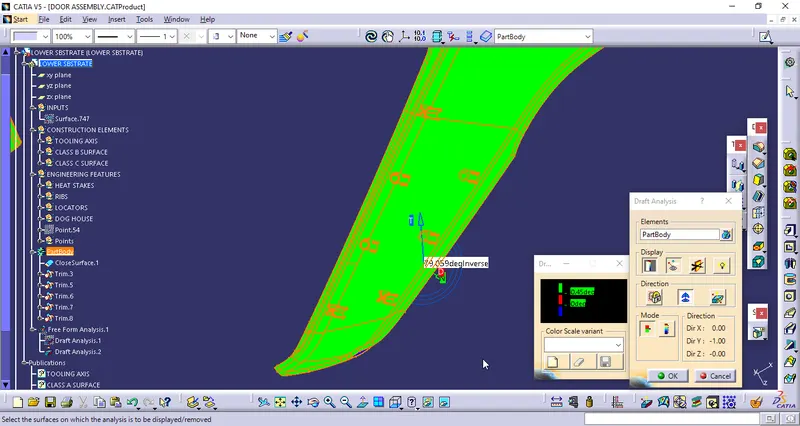
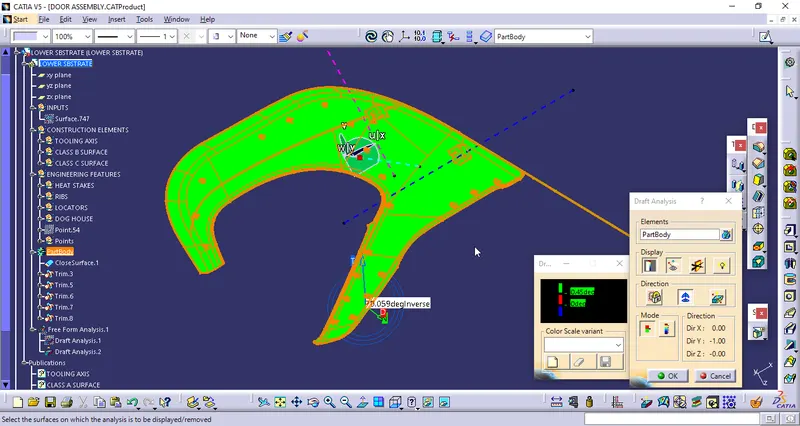
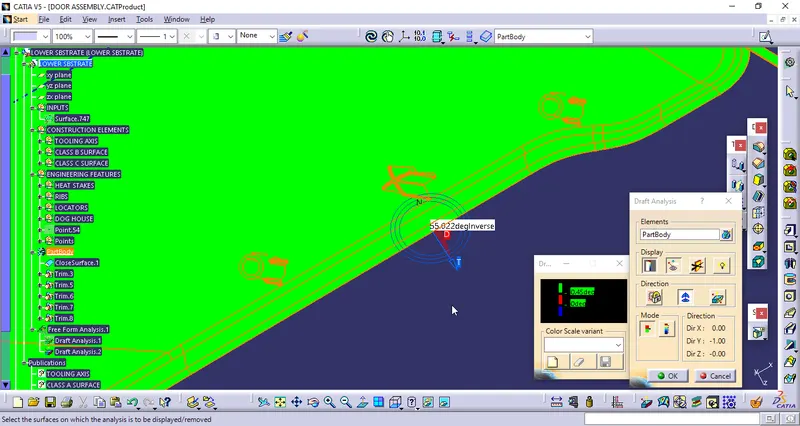
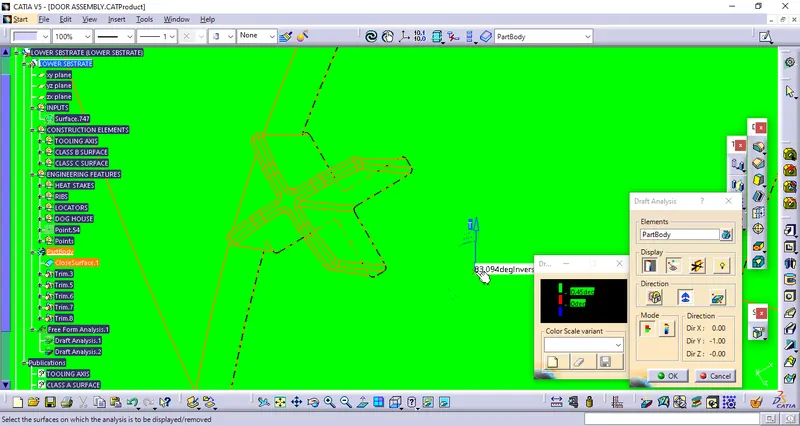
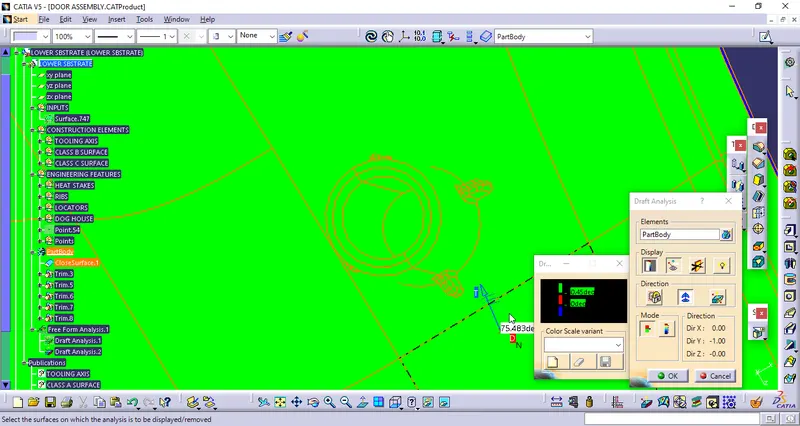
- Checked the Draft angle as 0.48Deg that is approx to 0.5Deg for the Heat Stakes, Locators and Flanges are clearing the Draft Analysis in the same Tooling Axis Direction with Draft angle of 0.5Deg.
- The Flanges are also cleared the Along the Side core tooling axis.
Draft Analysis of Lower Substrate with 3Deg Draft Angle
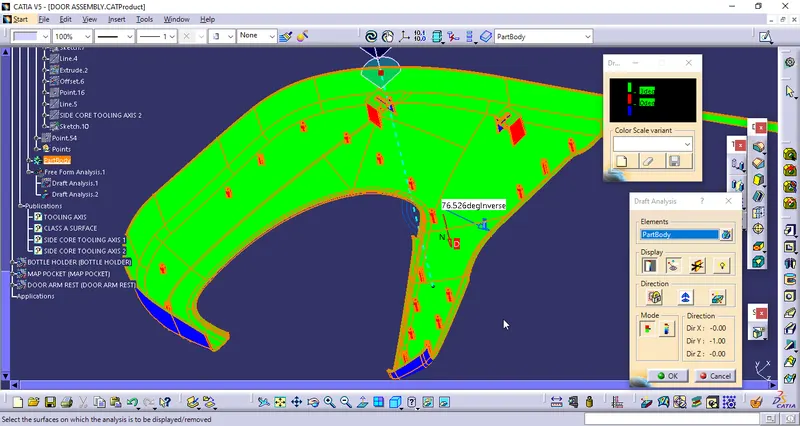
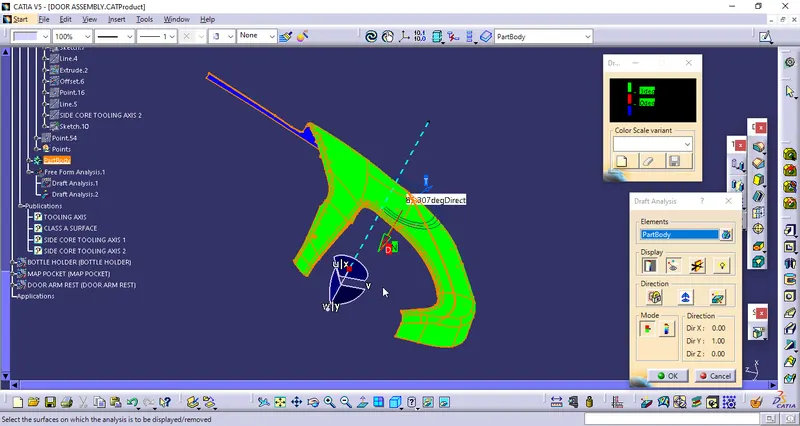
Dog House draft angle of 1.5Deg outer side with Tooling Axis
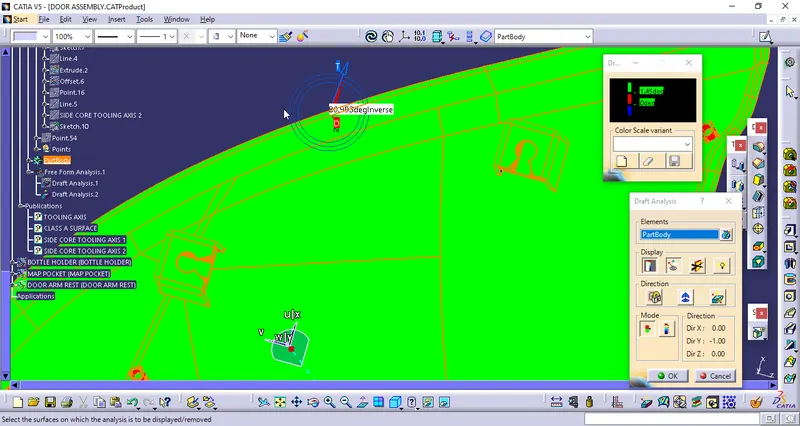
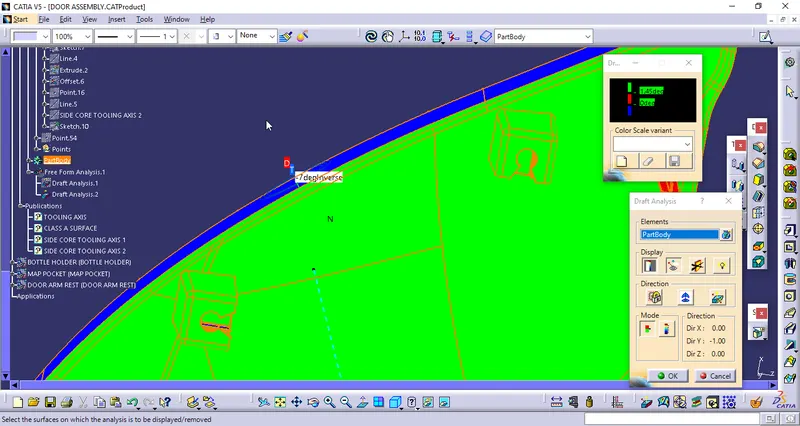
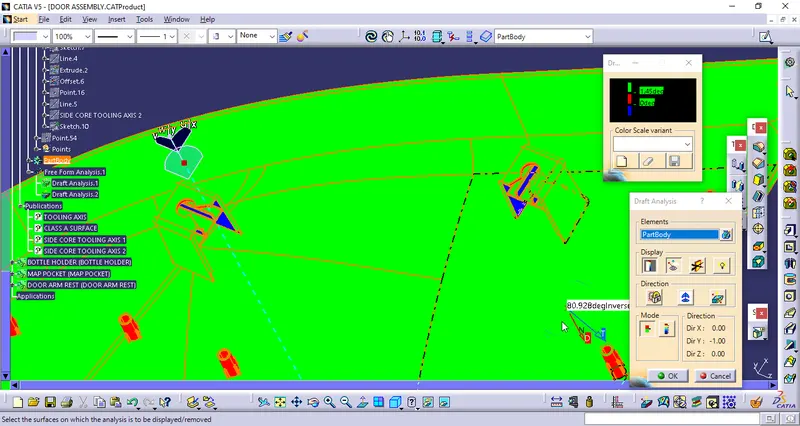
Dog House 1 Inner side with side Core Tooling Axis 1 Of Draft Angle of 0.5 Deg
Dog House 2 Inner side with side Core Tooling Axis 2 Of Draft Angle of 0.5 Deg
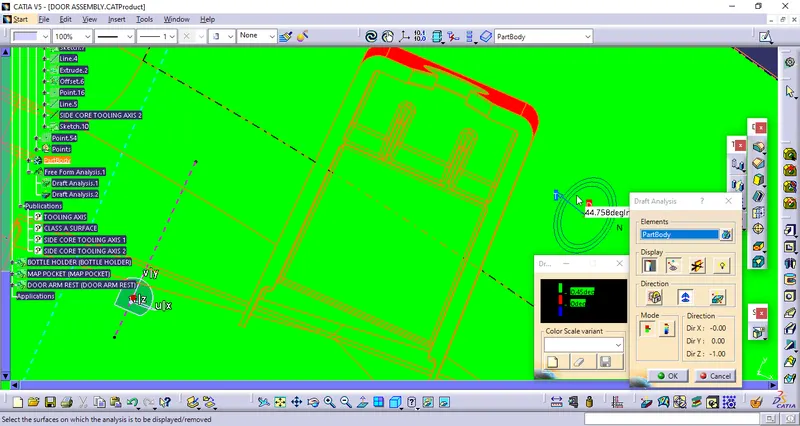
Heat Stakes , Locators draft Angle of 0.5Deg
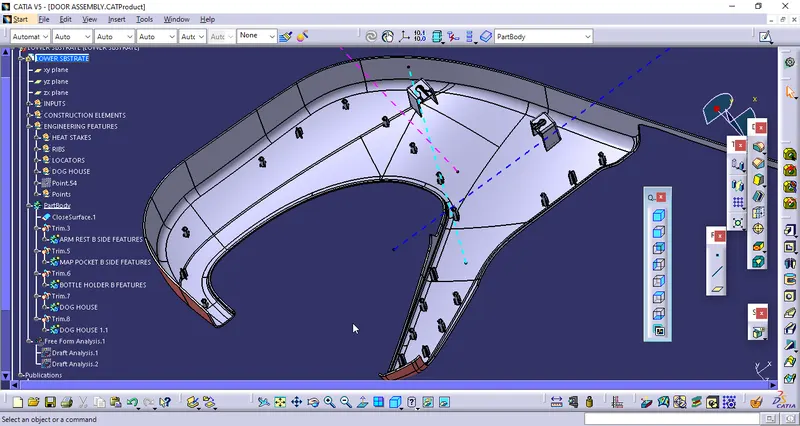
ISOMETRIC VIEW
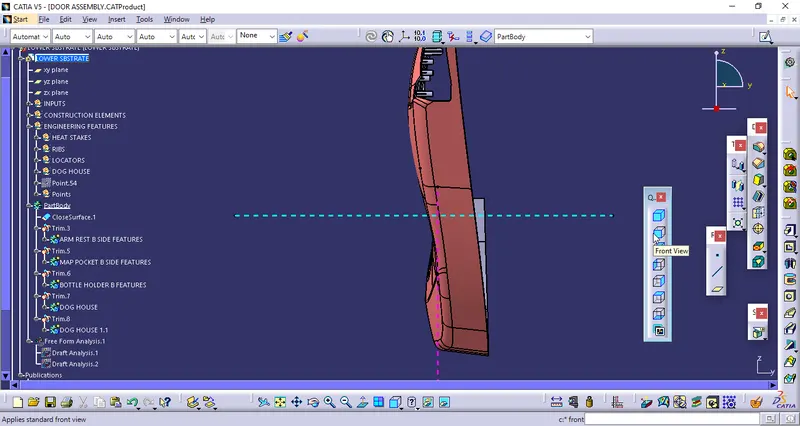
TOP VIEW
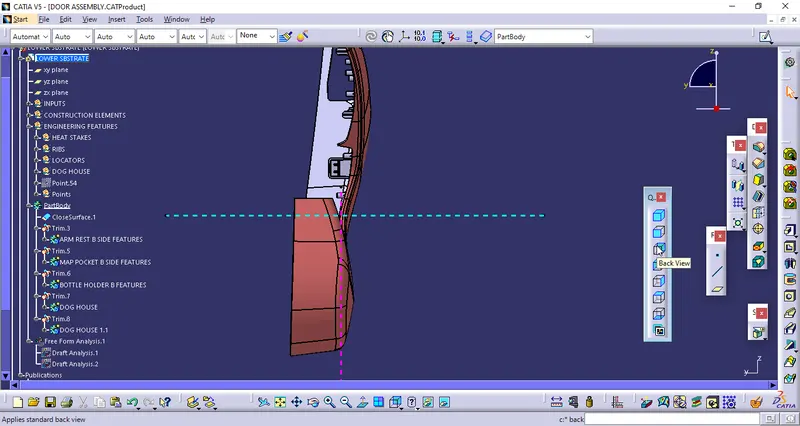
BACK VIEW
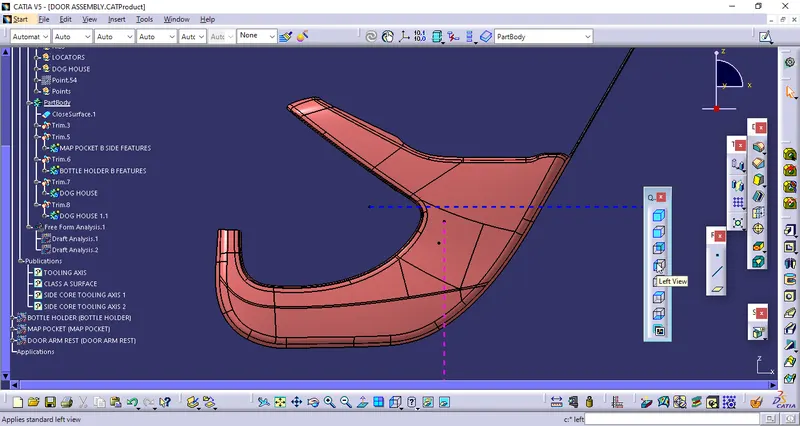
LEFT VIEW
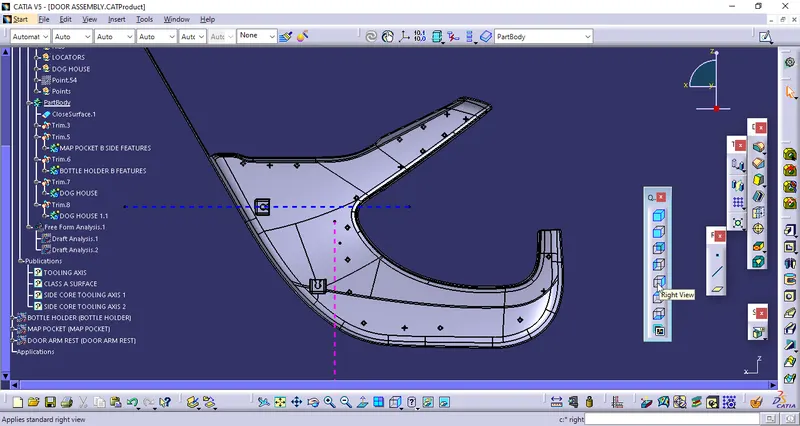
RIGHT VIEW
TOP VIEW
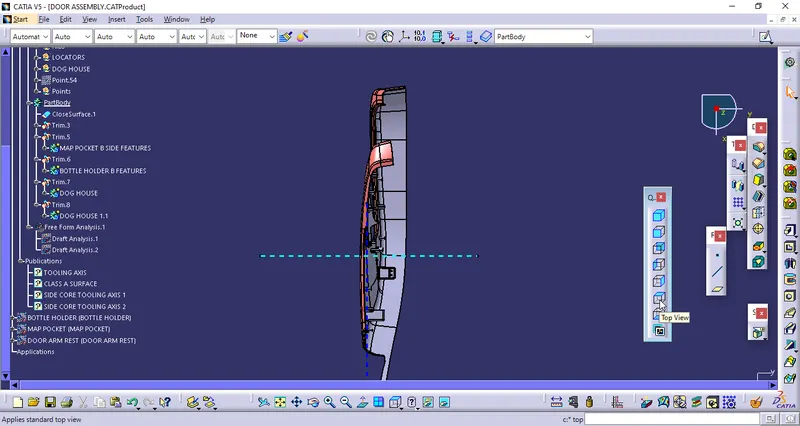
BOTTOM VIEW
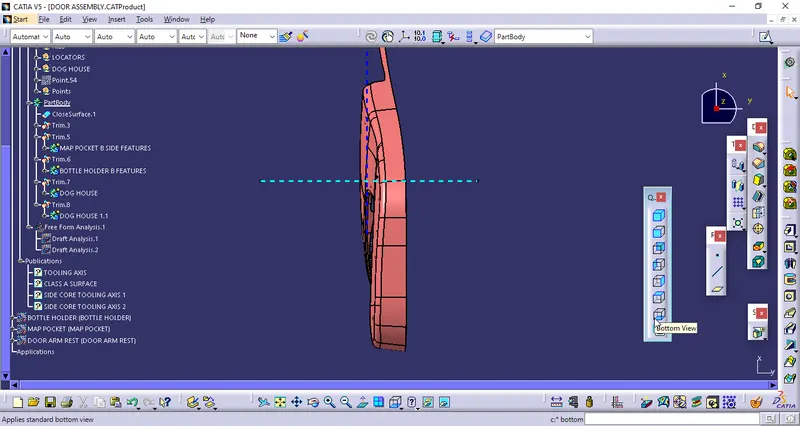
MULTI VIEW
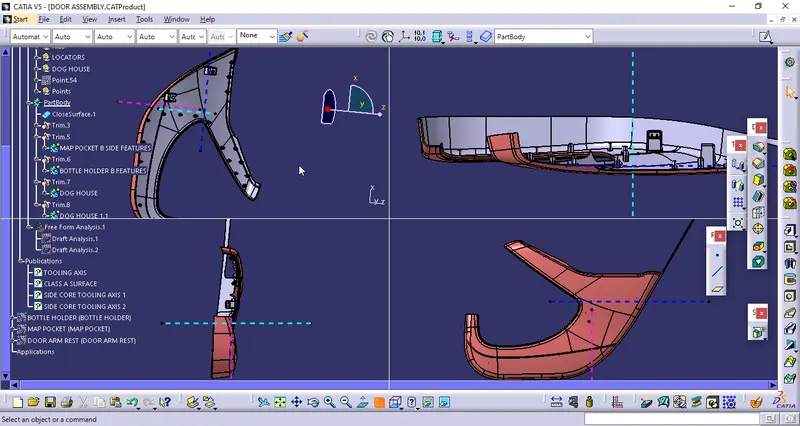
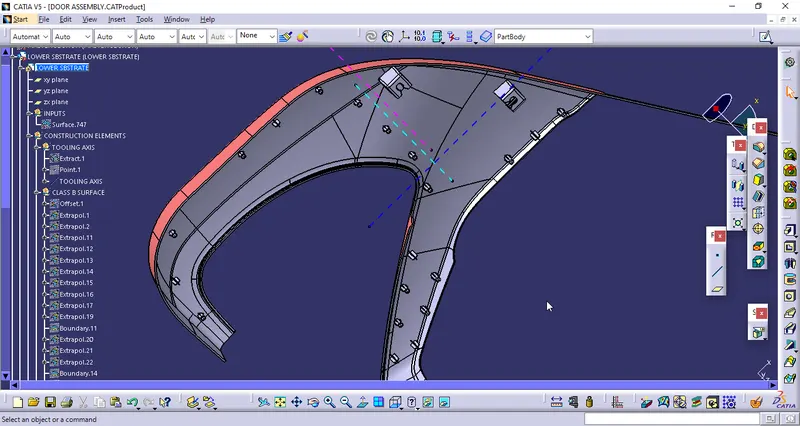
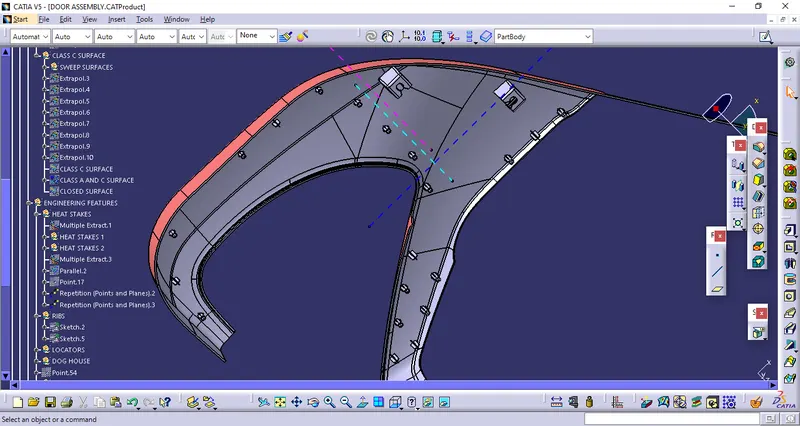
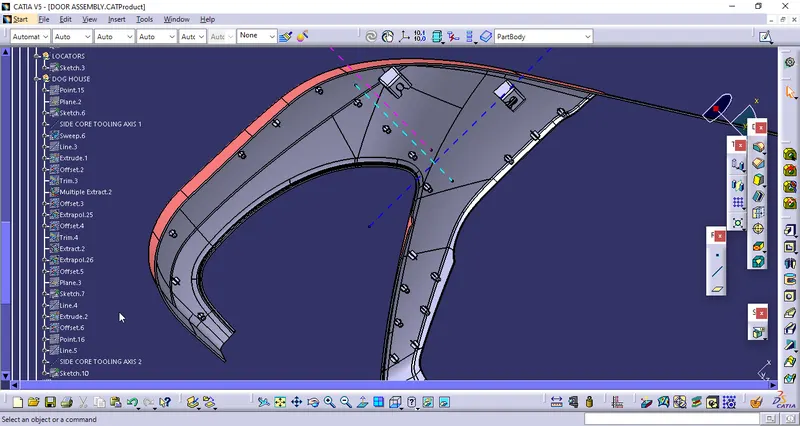
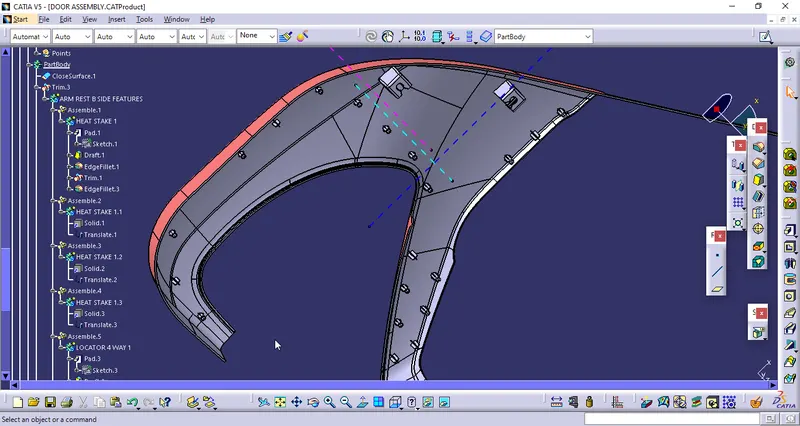
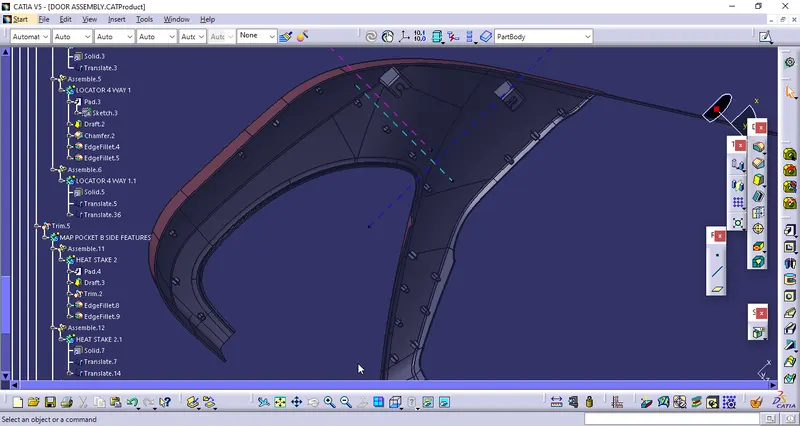
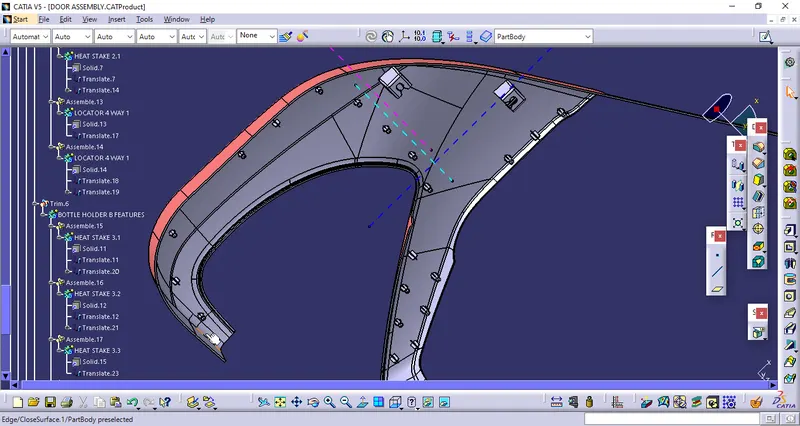
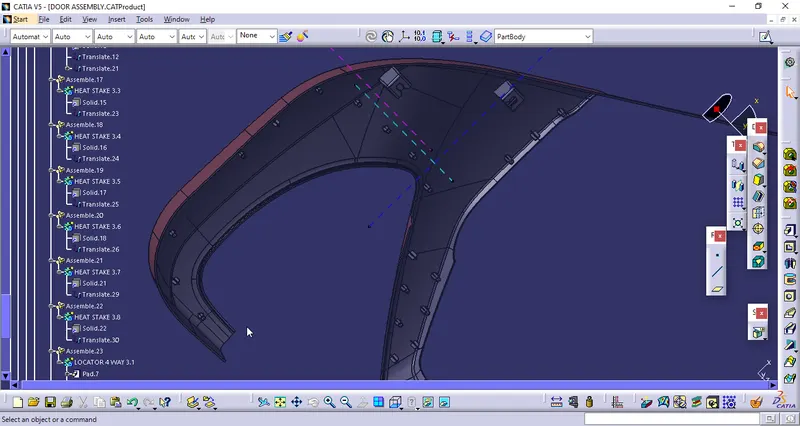
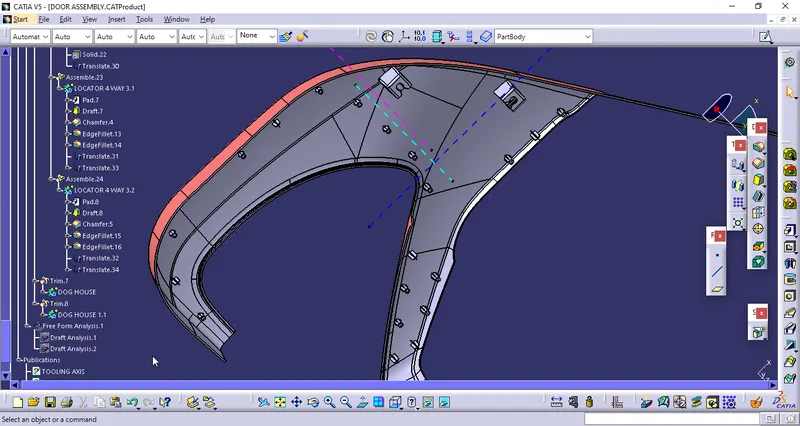
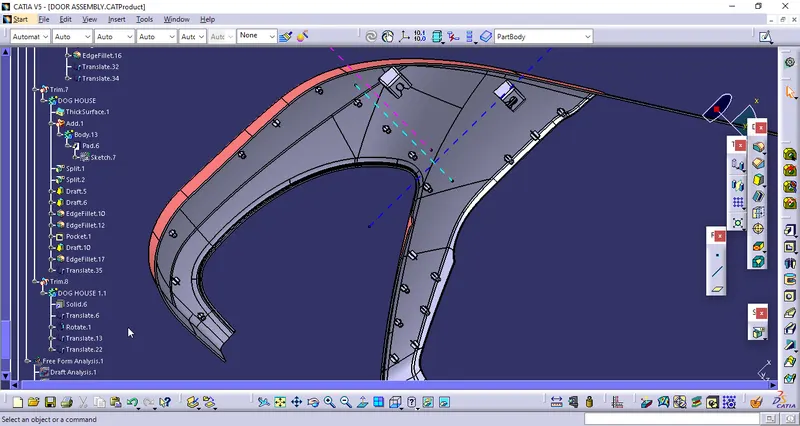
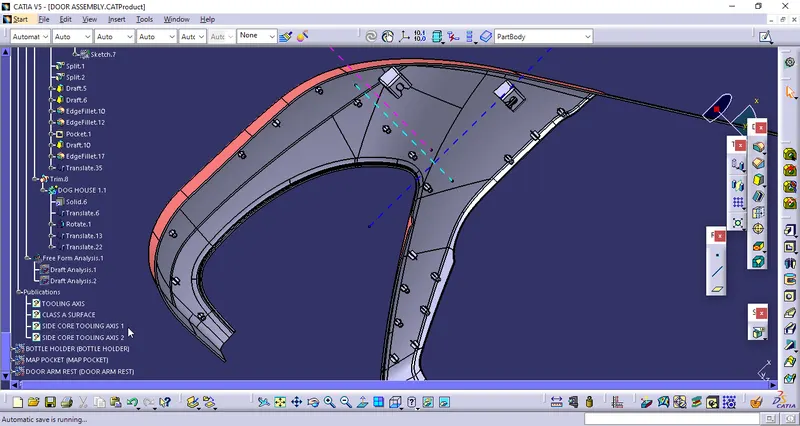
TREE STRUCTURE
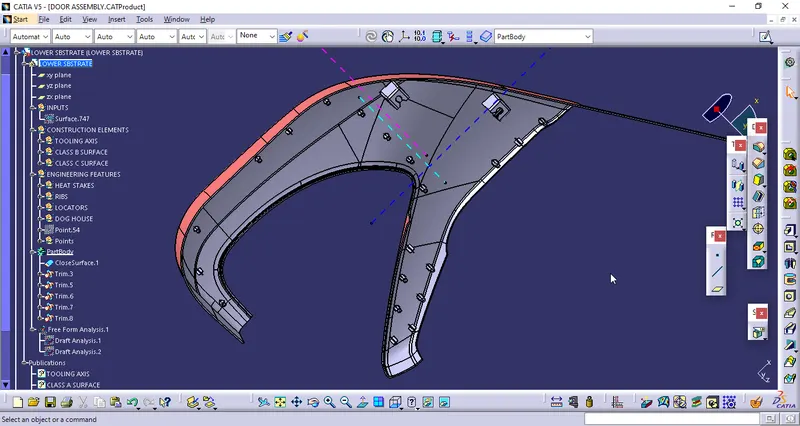
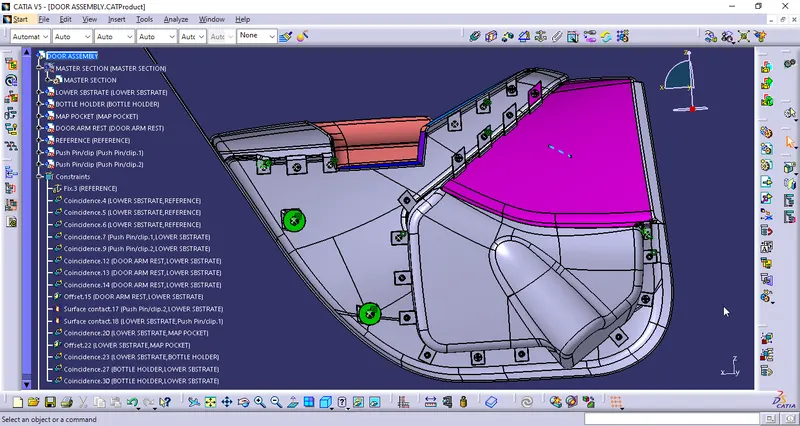
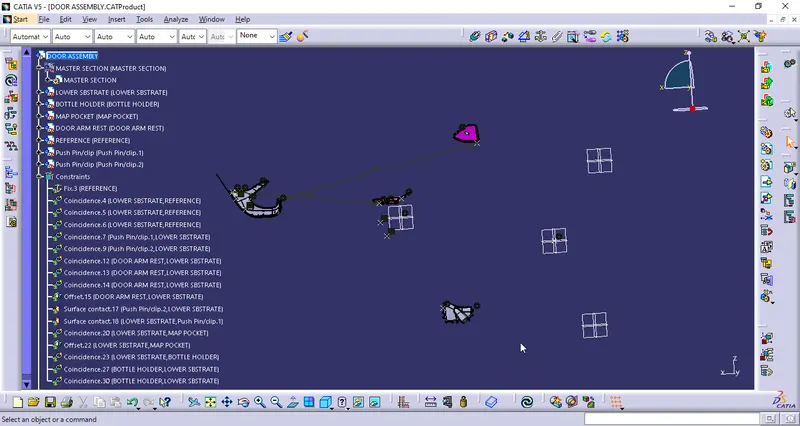
ASSEMBLY OF COMPONENTS :
- Publish the Planes , orgin points, axis , and reference points
- Create the separate part file as the reference and skeleton
- Fix the Planes and orgin on the constrains
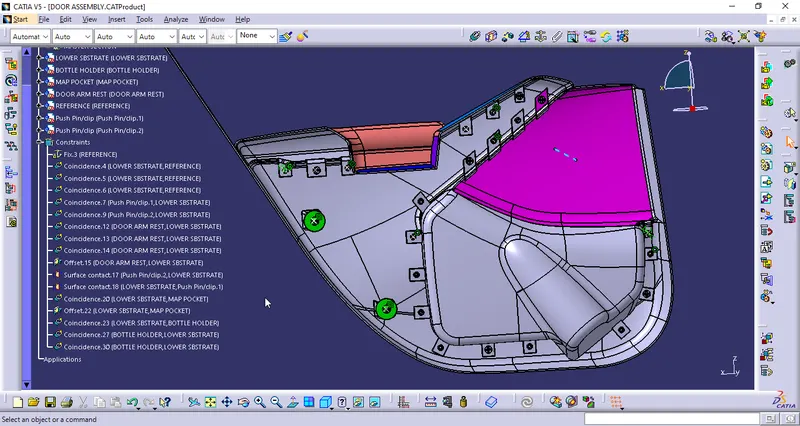
- Constrain the individual parts with the base skeleton and respective parts.
- constrain the parts with reference to the Planes , points and axis as reference.
- Check the Manipulation option to the indiviual parts in the all possible 12 Degress of freedom.
- Confirms the parts dosent move in all directions
- Now check the Explode of all parts and update them.
- Confirm that the all parts are in the correct position.
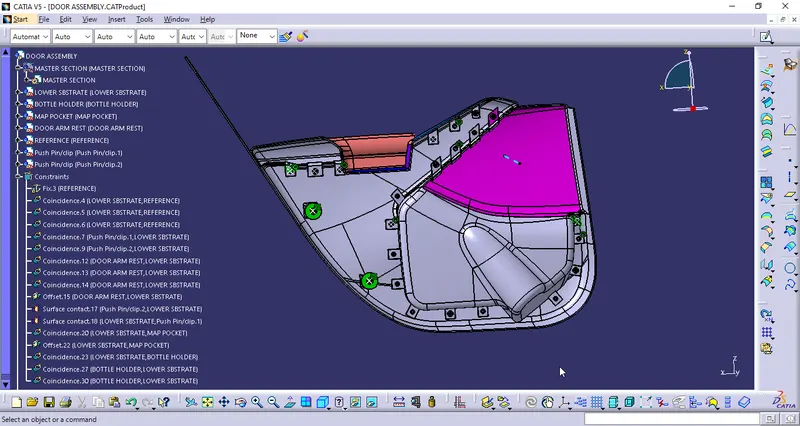
Exploded Parts
Updated Parts or Assembled ones
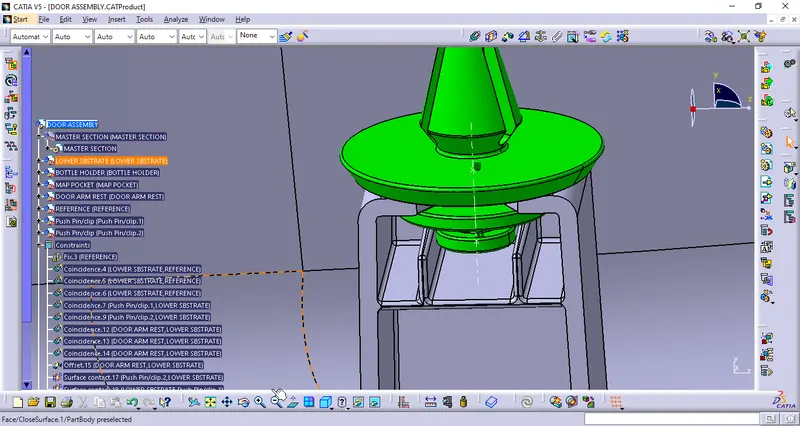
Push Pin on Dog House
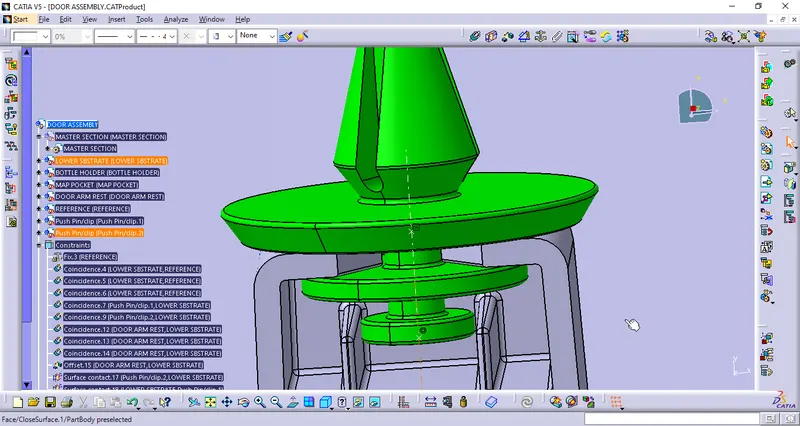
Tree Structure
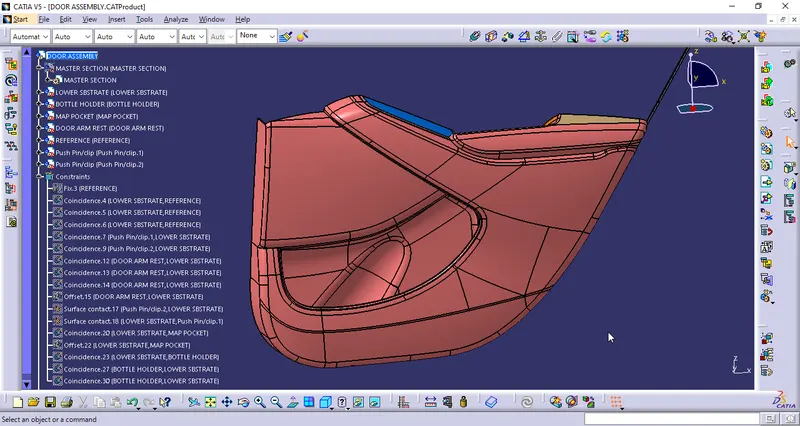
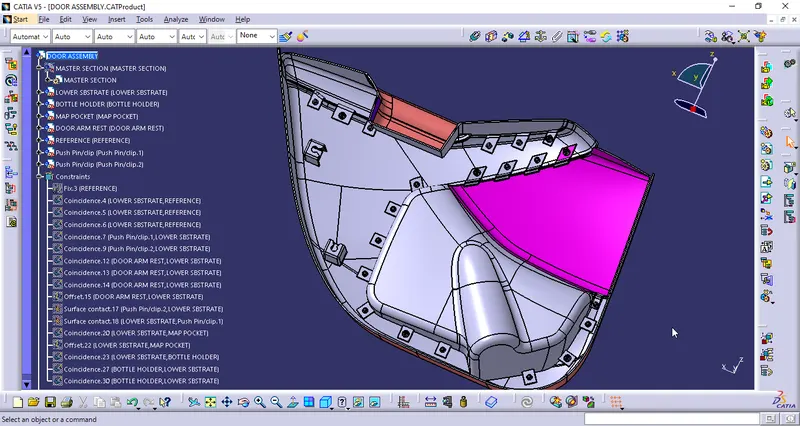
Isometric View
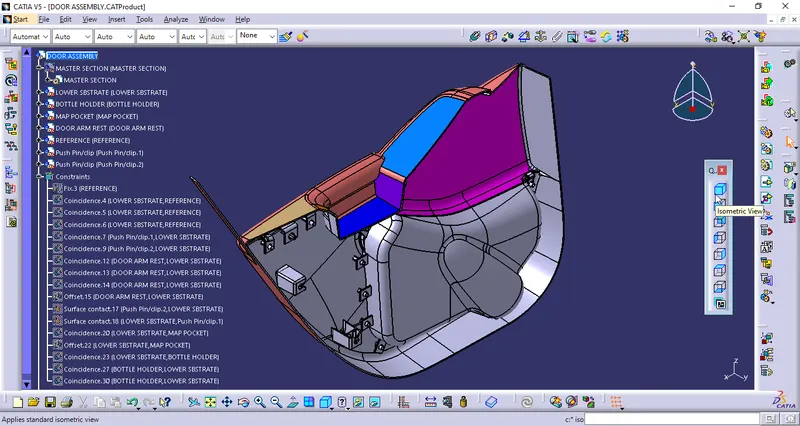
Front View
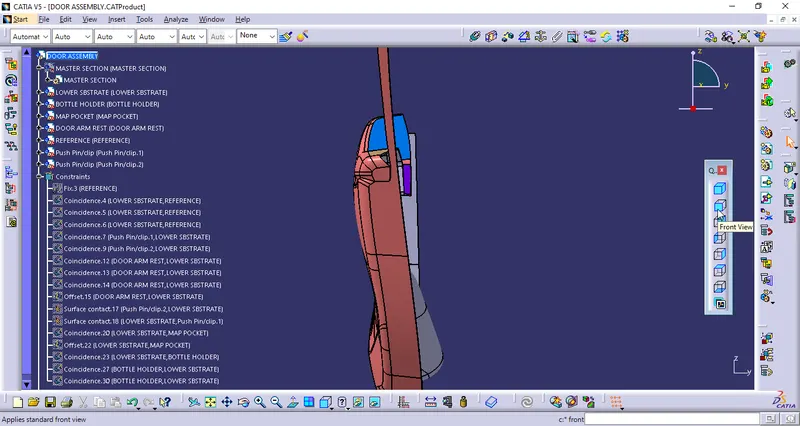
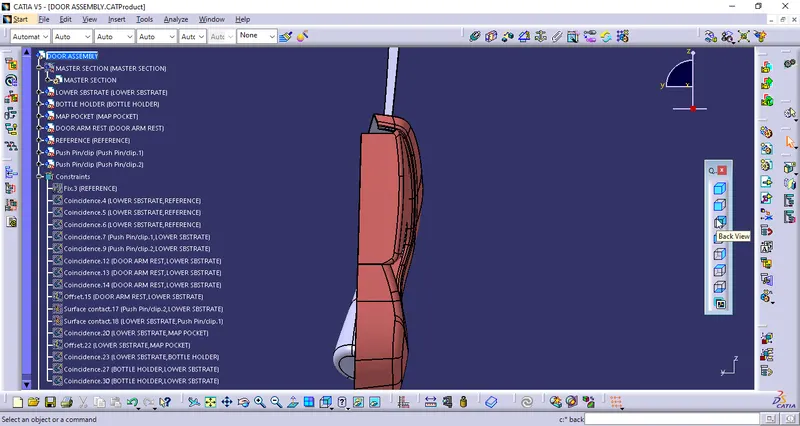
Back View
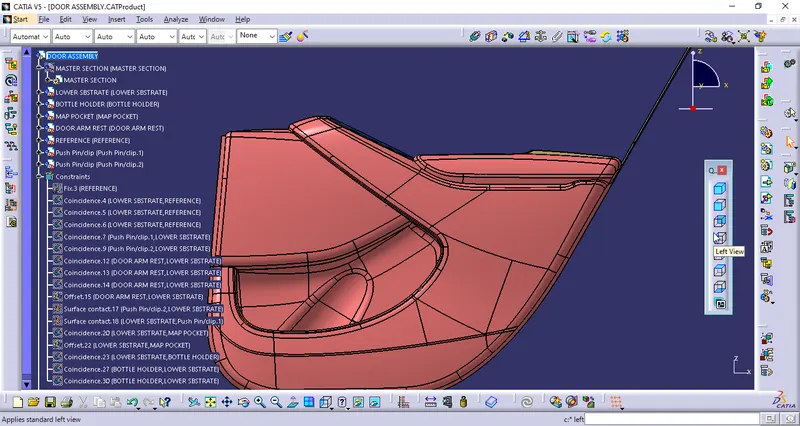
Left View
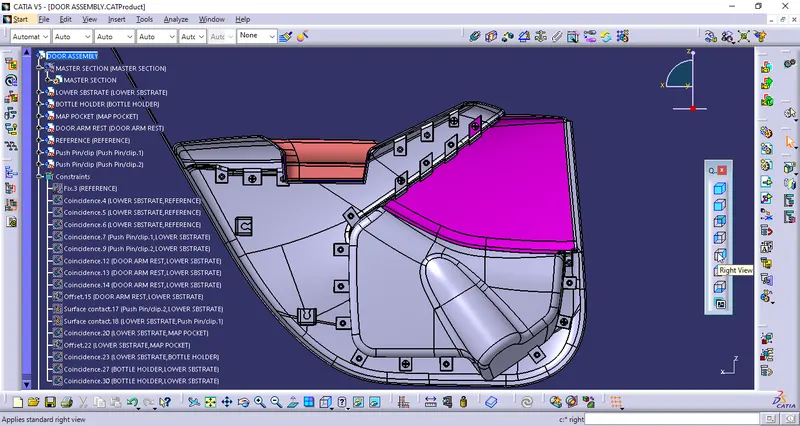
Right View
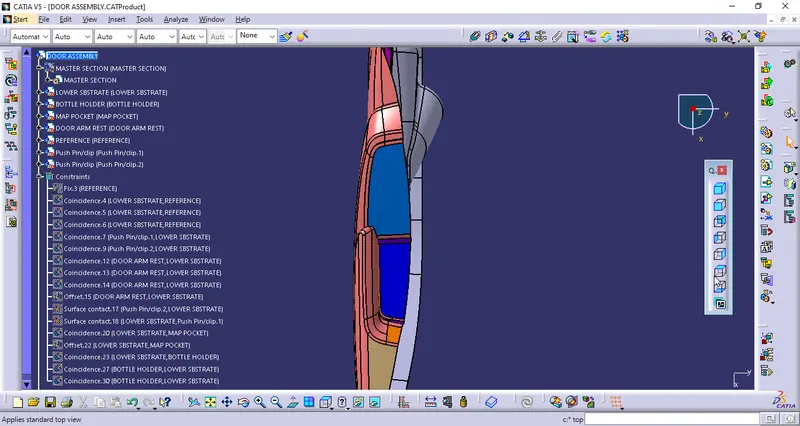
Top View
Bottom View
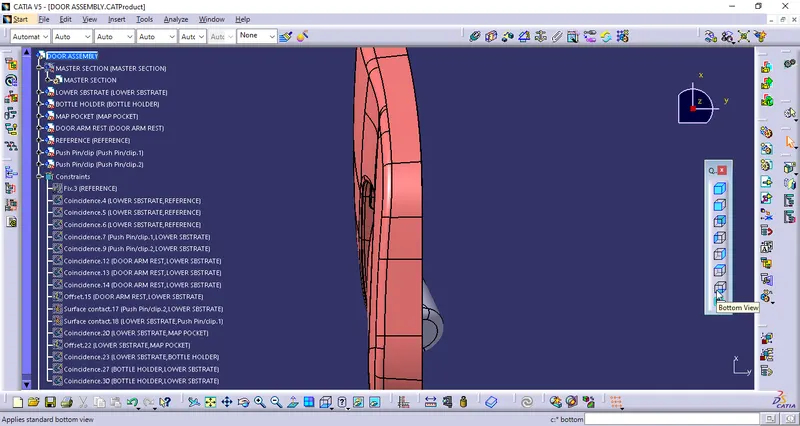
Multi View