Week 1 Challenge
1.
- Write the steps involved to upload a .std file through web mail?
- Open Stadd Pro Window.
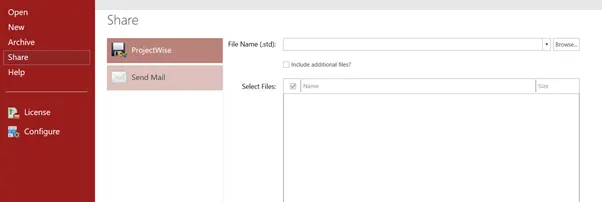
- In the Left corner We have an Option called Share below the Archive.
- Click on it.
- There we fined the share in mail option with .std file format.
- We can directly share the file in mail.
- Name the different materials that can be designed using STAAD Pro.
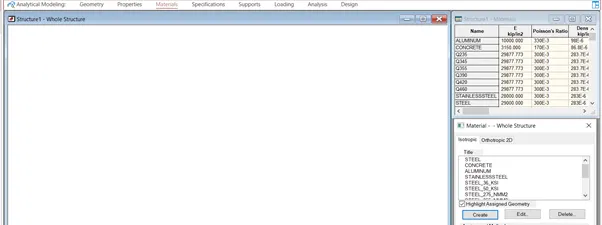
- STADD Pro is Software where we can create Multi Materials for our Project.
- STADD Pro default have Some Materials in it. Namely Concrete, Steel, Aluminium Etc.
- We can also create different materials by using create new and providing the Material Properties.
- Is it possible to capture images in STAAD Pro? If yes how?
- Yes, we can Capture the Image in STADD Pro Itself.
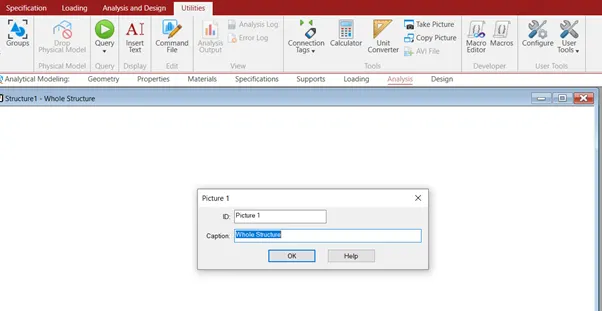
- Open STADD Pro and go to Utilities.
- In the tab we have, Take Picture Option.
- Click on it and we can take the picture of the model.
- This picture is saved in the selected path.
- Name the three ways by which you can create a model.
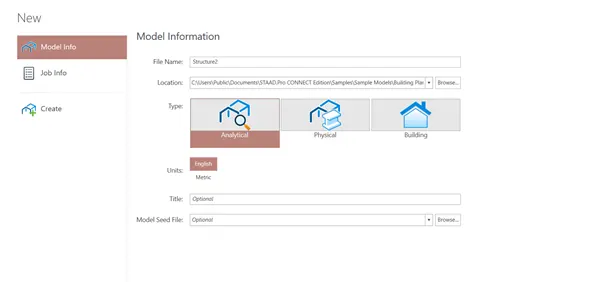
- While Opening the STADD Pro New file we have three models.
- Analytical Model, Physical Model, and Building Model.
- Analytical Model is used for Analytical Purpose.
- Physical Model is used to display how the building will react for different physical conditions.
- Building Model is used if we have typical loading pattern, Typical Loads, Typical Floors.
- Write the steps followed to assign properties in a model.
- To create Property. First draw a beam by using grids.
- Then go to properties tab.
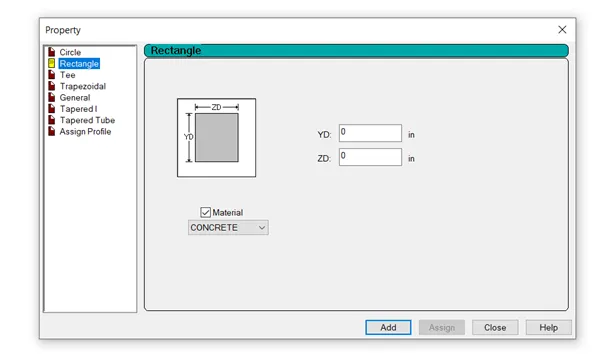
- Click on create and rectangular section.
- Then Give dimensions for the section.
- And select the Material property.
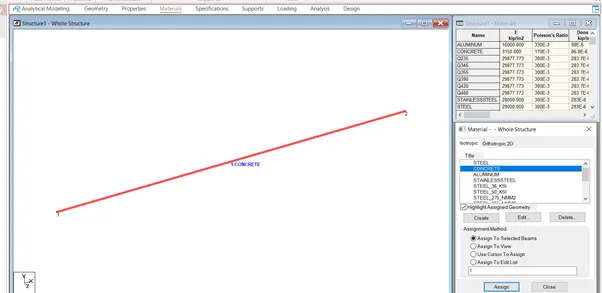
- Then select Use courser to assign option and click on the beam to assign the material Property.
2.
- Name any six design parameter involved in RCC design.
- Clear – it is used to provide Clear cover to the member.
- Fc – Compressive Strength of Concrete
- Fy – Yield Strength of Reinforcement
- MaxMain – Maximum Main Reinforcement
- MaxSec- Maximum secondary Reinforcement
- MinMain – Minimum Main Reinforcement
- MinSec – Minimum Secondary Reinforcement
- What are the different cursor types available in STAAD Pro?
- Node Course
- Beam Courser
- Plate Courser
- Solid Courser
- Geometry Courser
- Physical Member Course
- Plates & Solids Courser
- How will you generate different views for a model? State the steps involved.
- In STADD Pro View tab we have Different views.
- Front View, Back View, Right View, Left View, Top View, Bottom View, Isometric View.
- We also have Zoom In and Out, Dynamic Zoom.
- We also have view manager where we can Save view, Rename view, Add view, Export View.
- We have different display options also.
- Explain the procedure to define a “Simply Supported” condition in STAAD Pro
- Once the material is assigned.
- Then go to supports.
- Then create support. Use Pinned support and click add.
- Then select the support and choose option of use courser to Assign.
- Then click on the Beam left and right corner.
- Thus the support is assigned to the beam.
- Name any five topics that you will include while creating DBR.
- Introduction
- Structural Layout
- Loads and Load Combinations
- Analysis and Design Methodology
- Appendix
- Describe the term “Multi material design” of STAAD Pro.
- STADD Pro offers multi material design, Since it have Default materials like Concrete, Steel, Timber, Aluminium in it.
- We can also define the different kinds of materials which we are going to use in our project.
- By giving the Material Properties and Design Properties we can create a new material and assign it to the member.
- Hence We say Multi Material Design.
3.
- Name the structure systems in STAAD Pro? Explain each system?
- There are Four Structural Systems in STADD Pro
- Space
- Plane
- Truss
- Frame
- Space is a 3D framed Structure with Loads applied in any Plane.
- In plane the Geometry is in 2 D and Loading is given in 2D only
- In Frame the Geometry is in 2D and the Loading is given Perpendicular to XZ plane.
- Truss is 3D structure where there is only Axial member force and there is no bending.
- Explain the coordinate system adopted in STAAD Pro software.
- In STADD We have Global Co-ordinate System of X in Horizontal, Z in Lateral and Y in Vertical.
- The Local Coordinate System always varies as per the material.
- The X axis is always Longitudinal to the material. Whereas the Y and Z axis are Varies.
- While applying load it is important to check the Orientation of beam to assign the load in Local axis.
- It is better to Assign Loads in Global axis.
- If we assign load to the local axis and it is changed then the load also changed.
- Elaborate DBR and its uses.
- DBR is Design Basis Report.
- It is a report to be generated on the project to get a detailed procedure of the project.
- Structural Layout of the project. Placement of Columns and Beams and their Geometry.
- It also have the Assumptions made and the detailed explanation for the assumption.
- What are the loads and load combinations used in the project.
- The Design Parameters considered. Analysis and Design Methodology which is considered in the particular project.
- Results of Analysis and Design.
- These data’s to be documented.
- DBR is used for future reference. It gives the information like where the project is located, who is the client etc.,
- Or anyone who is joining at the mid of the project, he can go through the DBR and get a clear idea of the project.
- If there is and doubt in the project, we can refer the DBR.
- It also gives Materials considered in the project, and Details of vendor.
- Explain the different types of analysis options in STAAD pro.
- Perform Analysis It is the first model analysis. It is used for Primary analysis.
- It is first model LINEAR Analysis.
- P Delta Analysis it is the second order Iterative analysis. It Calculates the moment with respect it the load and the deformation.
- Perform Cable Analysis, in this, every member is assigned as a cable and analysed.
- Perform Imperfection Analysis, it is used whenever the member is imperfect.
- Non Linear Analysis, It is iterative analysis. It is applied for geometry and it will not consider the plastic hinges while carrying the analysis.
- Generate Floor Spectrum, It is used for High rise building where we assign diaphragm for each floor and study the stress variation.
- Perform Direct Analysis, It is performed on basis of AISI code it is an Iterative Analysis
- Perform Pushover Analysis, it is used to analysis the earthquake load and to study the deformation of structure.
- Perform Buckling analysis, it is used for considering the buckling of the member.
- Explain the difference between Fixed and Fixed But condition.
- Every support has, 3 translational movements and 3 rotational Movement.
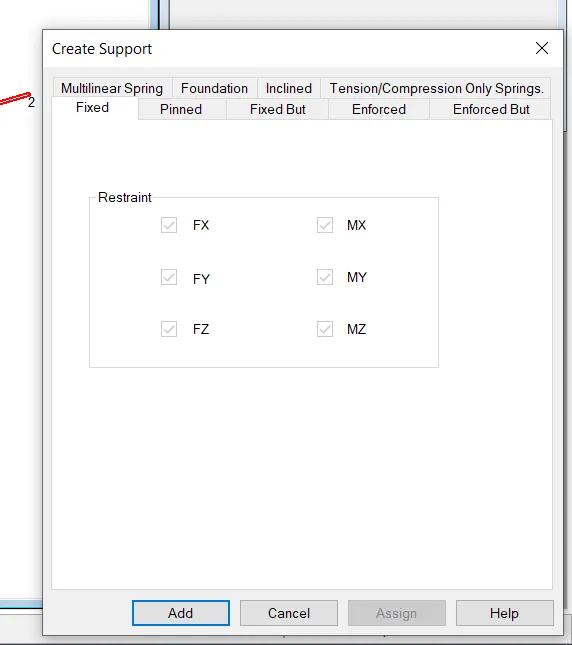
- In Fixed Support Both the Translational and Rotational Movements are restrained in all the three directions.
- Hence there is no movement allowed in the fixed support.
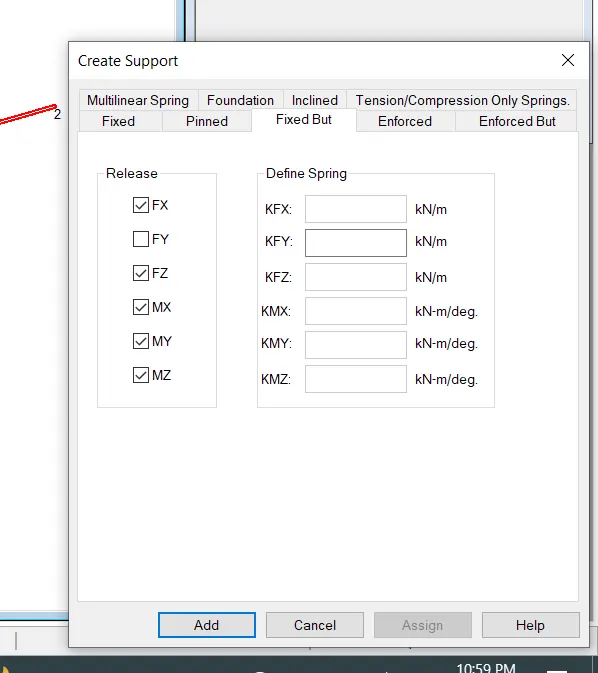
- In Fixed But we can define Roller Support by Restricting the Parallel Forces and Movements.
- In fixed But we can also provide Spring Constant to the support.
1.
Aim
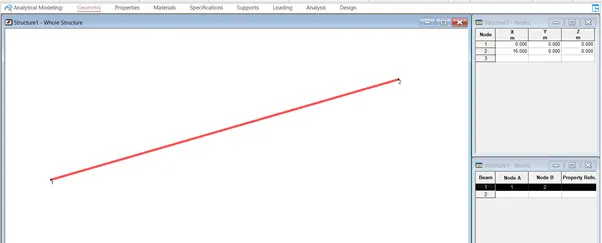
To create a STADD Model with beam of span 16m. Support Condition one end Fixed and other end is Fixed But (Roller). A point load of 50KN acts at mid-point. Also to Draw a Shear force and Bending Moment Diagram.
Procedure
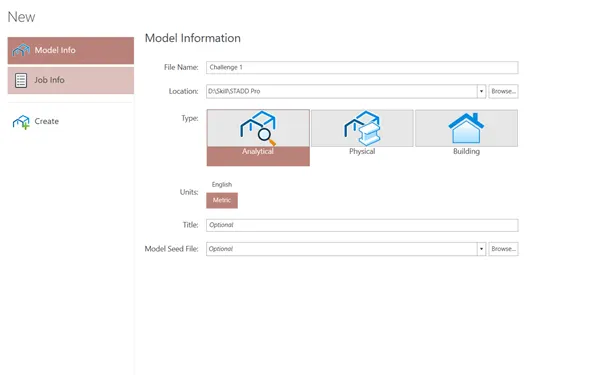
- Open STADD Pro. Click on New model.
- Then use Grids, Beam Grids and give start point as 0,0 and End as 16m,0
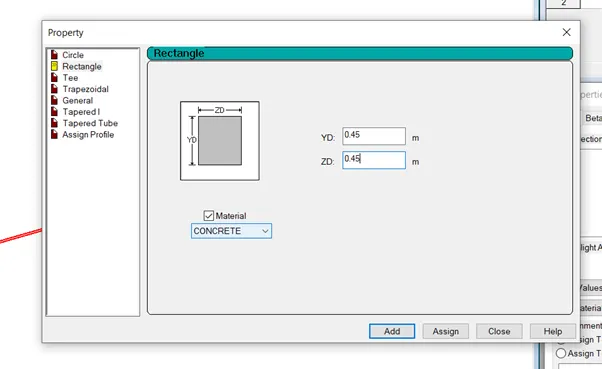
- Then properties create new.
- Rectangular beam of 450 x 450 then give material as Concrete.
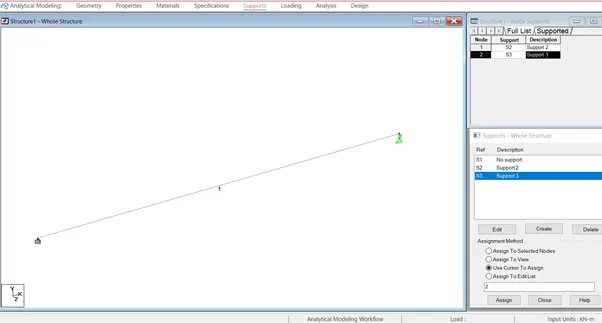
- Got to Support and then create fixed and Rotational Support.
- Then Assign both supports to both ends respectively.
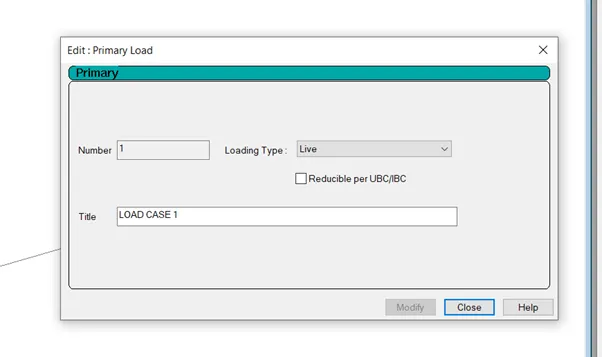
- Then give load. Create load case give live and add.
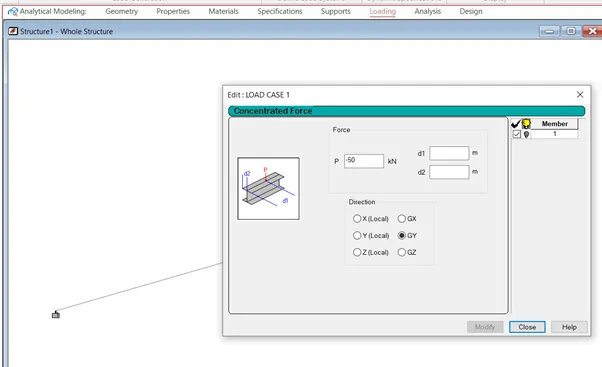
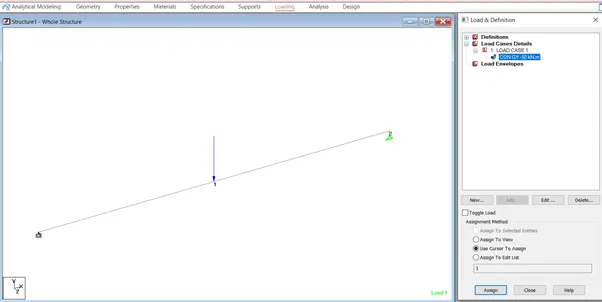
- Then edit load case give concentrated load of 50KN.
- Then use courser to assign and click on mid of beam.
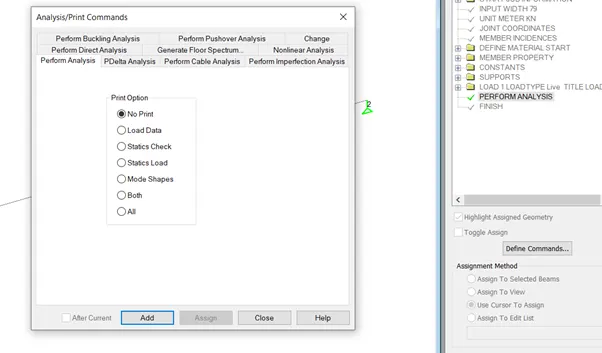
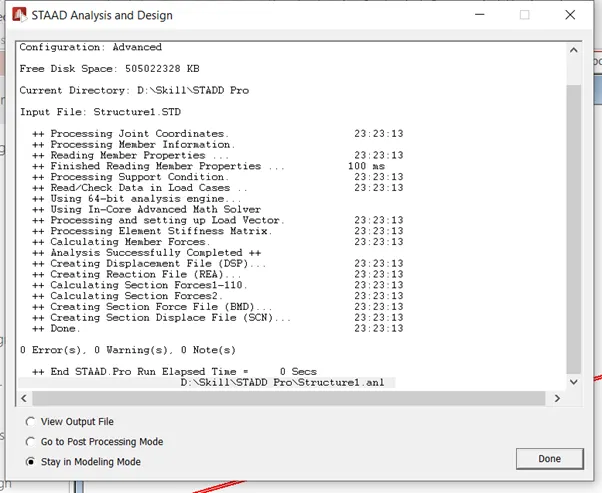
- Then go to analysis and perform analysis and then run.
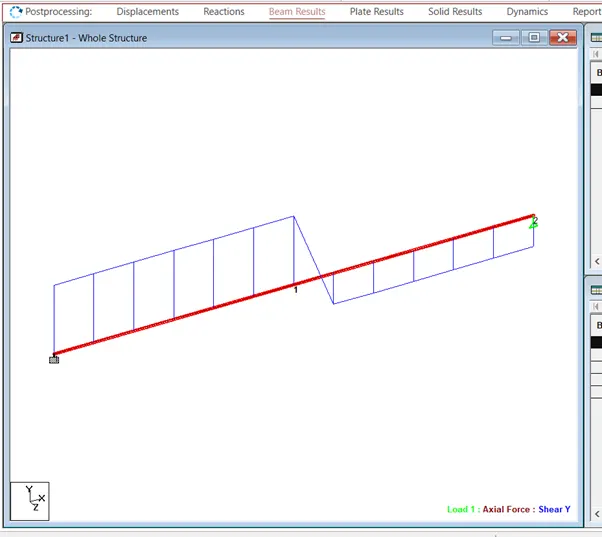
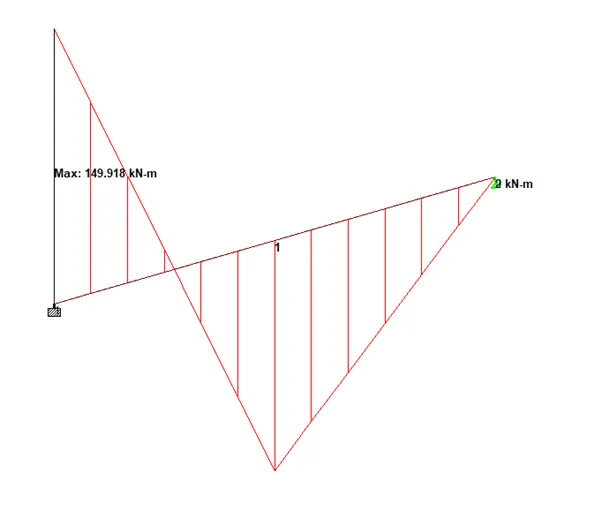
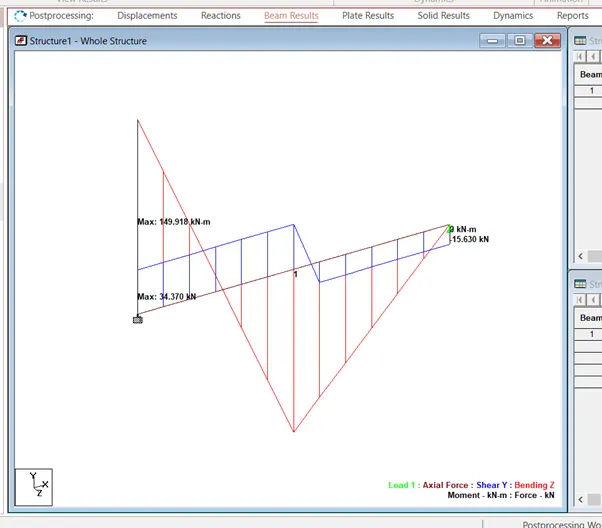
- Then take the output and shear force and bending moment diagram.
Input
Output & Result
Thus the Shear force and Bending Moment diagram are taken.