Usage of Navigation tool , Timeliner and Clash Detection test using Naviswork
A1) Aim: To export architectural and structural model created in week 06 and 08 to Navis works cache file.
Introduction: Navisworks is a autodesk software which is used to View, review, clash detect, simulate and coordinate. It is also used to manage the project. In this task we will export the architectural and structural model to Navis works cache file and open the exported file to do the further task in Navisworks.
Procedure
- Open the Architectural or Structural model and go to Revit file > Export > NWC, as shown in fig A11.
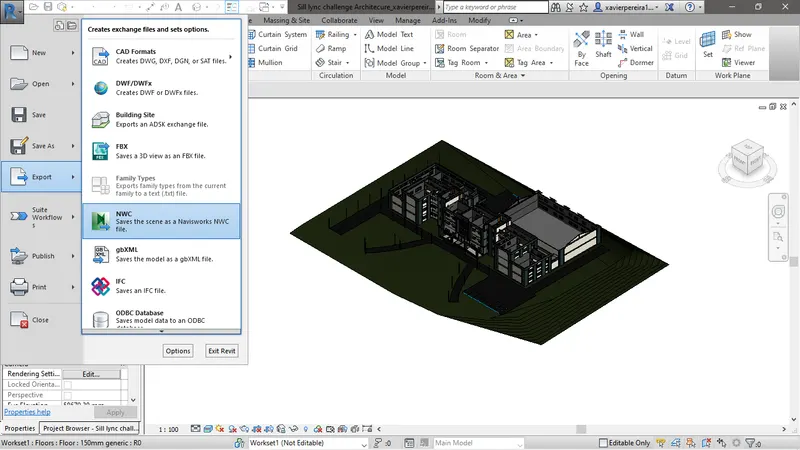
Fig A11 Location of NWC
- Choose the location to export the file and click on save as shown in fig B11
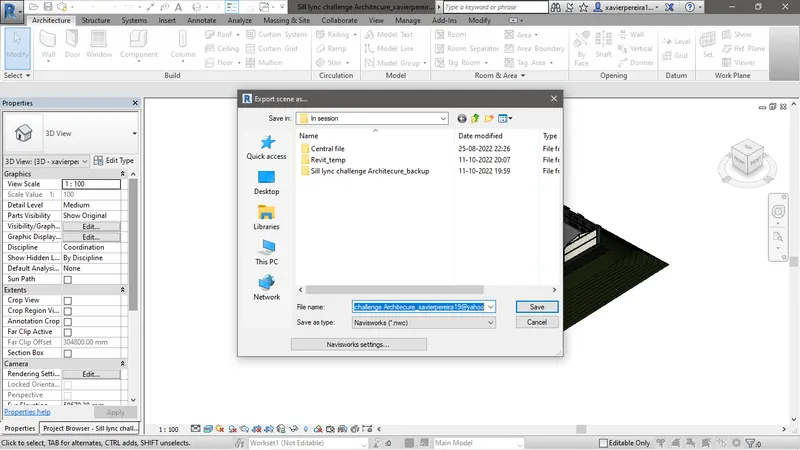
Fig B11 Browsing location to save exported file
- Further we can see that the process of exporting takes place.
- Now a NWC file for architectural model and structural model is created as shown in fig C11.
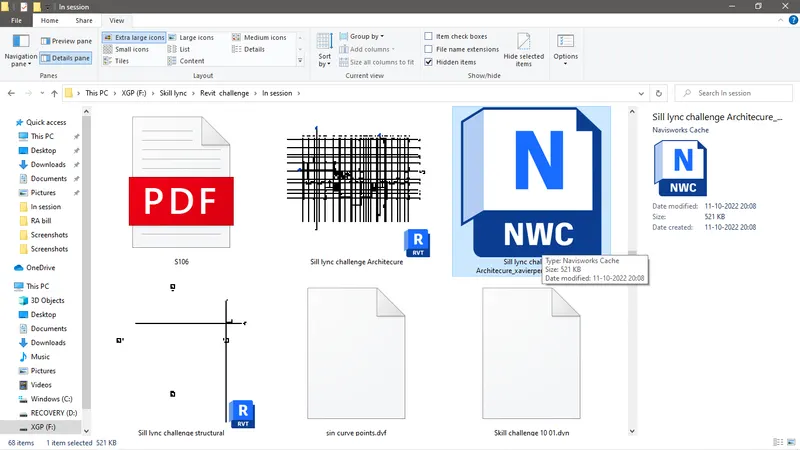
Fig C11 Location of saved exported NWC file
Conclusion
The Revit model is now exported to Navisworks as shown inf fig D11.
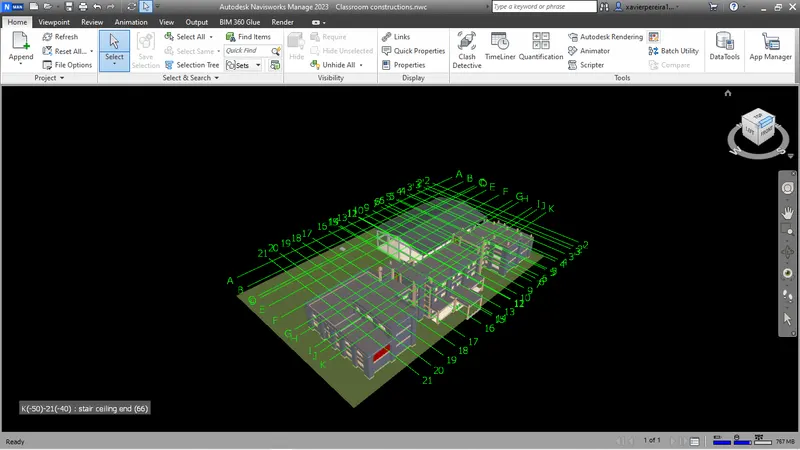
Fig D11 View of Architecutral file in Navisworks
A2) Aim: To walk around the rooms and record the animation using the navigation tool in Navisworks.
Introduction: In this task we will walk around the room and record the animation. This will help us find out the clashes and the changes that is required to be done. In this animation we will see that it is based on real time where a person walking through the model having collision and gravity effect.
Procedure:
- Set the camera from the point we would like to start as shown in fig E11.
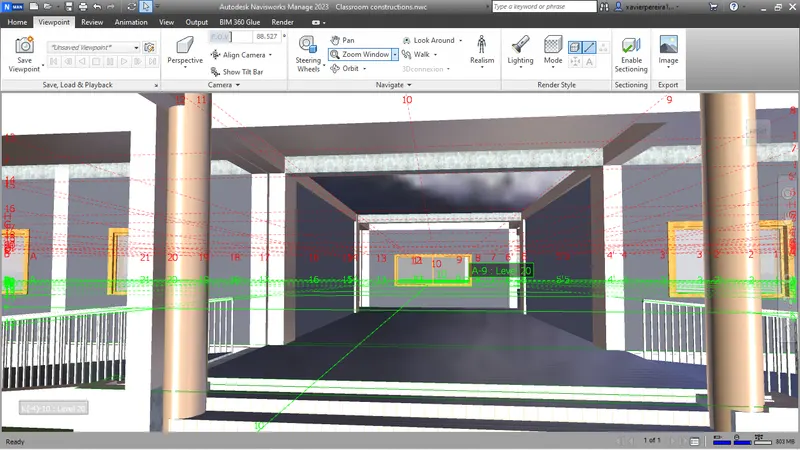
Fig E11 Positioning the start point of the walk through.
- Go to Viewpoint tab > Navigate panel > Walk as shown in fig F11.
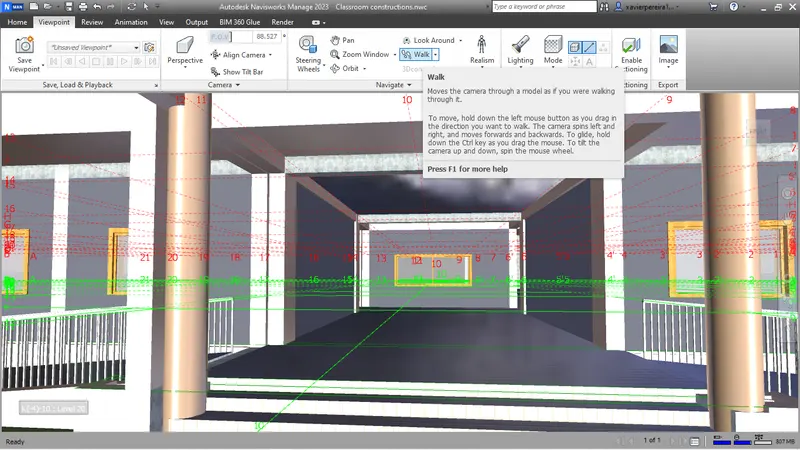
Fig F11 Location of wall feature.
- Now go to Viewpoint tab> Navigate panel> Realism drop down> check the Collision, gravity and third person. As shown in fig G11. The collision and gravity gives the effect of real time animation where all the elements in the model are impenetrable. We can walk on the staircase and a person to be noticed.
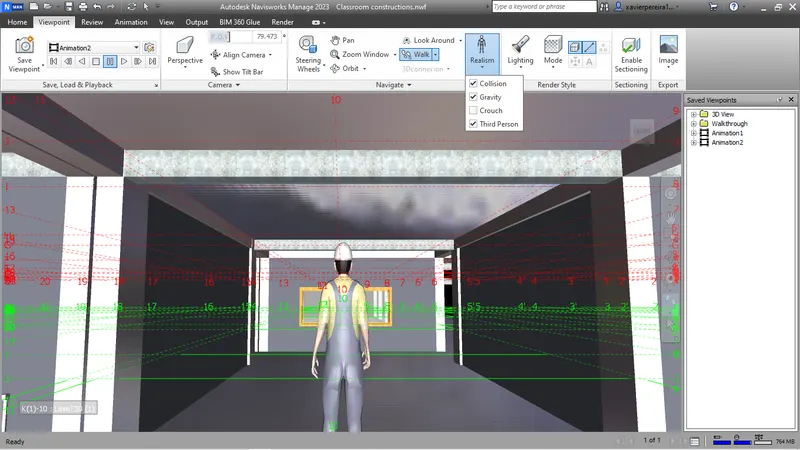
Fig G11 Location of Realism feature.
- To record the animation go to Viewpoint tab> Save, load and playback panel> save viewpoint drop down > Record. The Animation starts recoding as shown in fig H11.
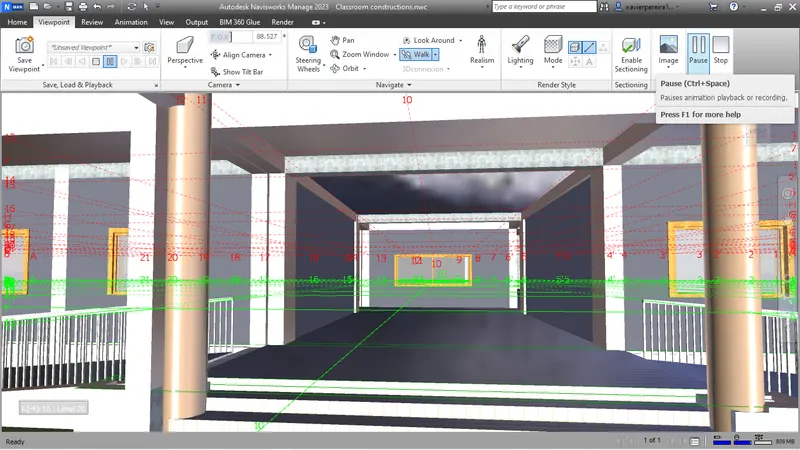
Fig H11 Recording feature
- Using mouse and arrow key we can move around the model and see each rooms.
- During the walk it is noticed that a particular room wall is not attached to top as shown in fig I11.
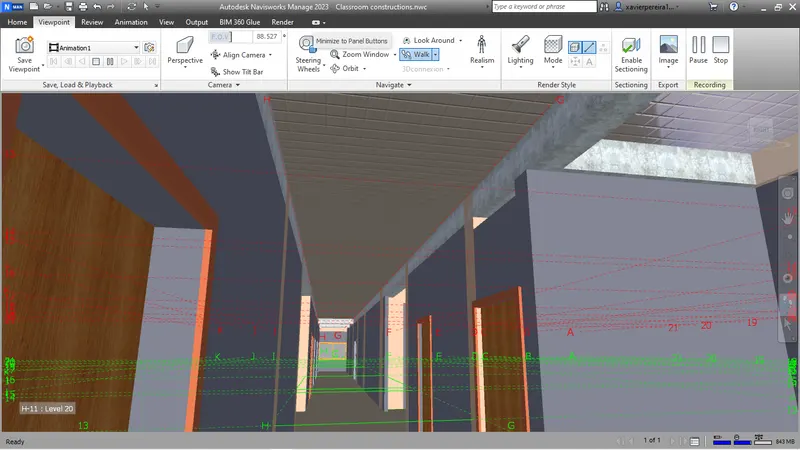
Fig I11 Wall defect identified.
- Fig J11 shows the view of the auditorium.
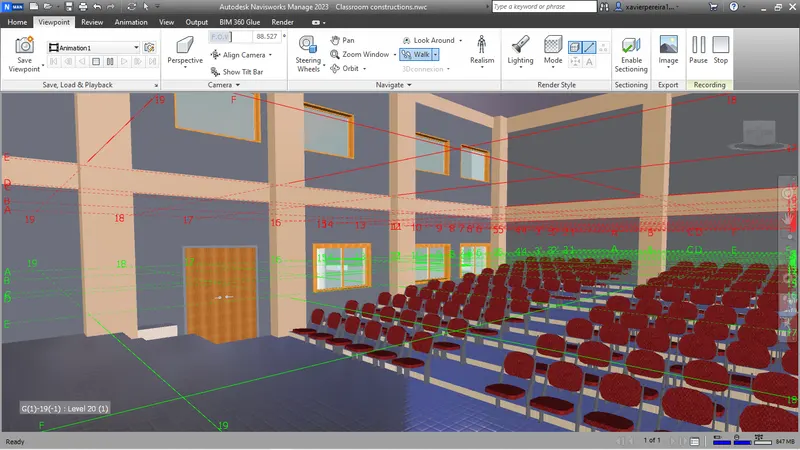
Fig J11 View of auditorium through walkthrough.
- To export the animation go to Animation tab> select the animation in animation drop-down in playback panel and then click on export animation in export panel as shown in fig K 11.
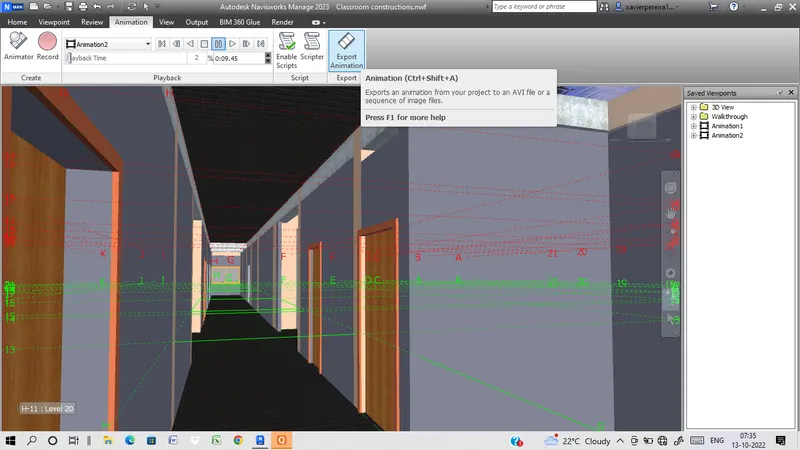
Fig K11 Location of Animation export.
- Now select window AVI in Format drop down Animation export as shown in fig L 11.
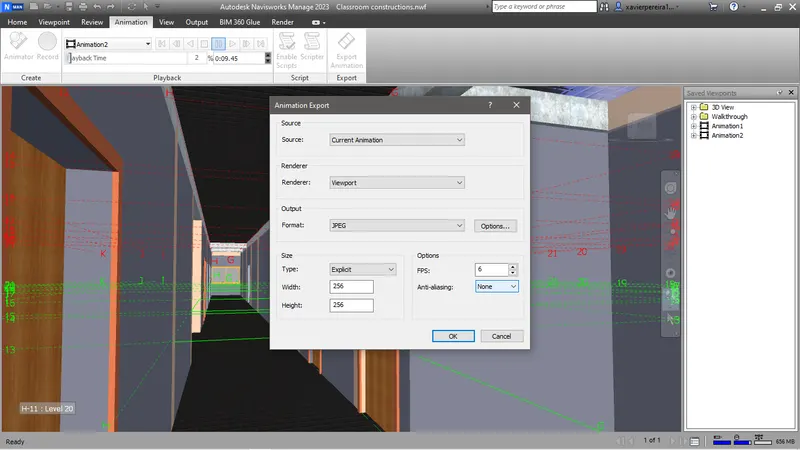
Fig L11 Export animation setting.
- Save the file in required location.
- Animation begins exporting to saved location as shown in fig M11.
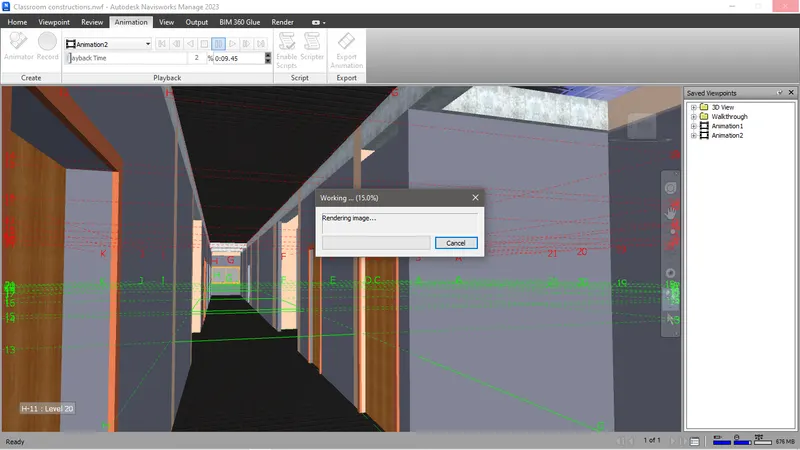
Fig M11 Animation export being processed.
Conclusion
An animation of walkthrough is created in Navis works.
A3) Aim: To create Realism animation using navigate tools.
Introduction: In this task a third person is being displayed walking around the model with a collision and gravity effect.
Procedure:
- The procedure for this task is explained in previous task of this challenge.
Conclusion
An animation for 2nd task and 3rd task is created simultaneously in 2nd task.
A4) Aim: To run the clash detect on the model and act upon the result.
Introduction: Clash detection in Navisworks is the major feature to detect the clashes between 2 elements in the model and resolve accordingly. In this task the model will undergo clash detection and act accordingly to the result achieved.
Procedure:
- To conduct the clash detection between architectural and Structural model, we require to append the structural model in Navisworks and to do that we have to go to append under home tab as shown in fig N 11.
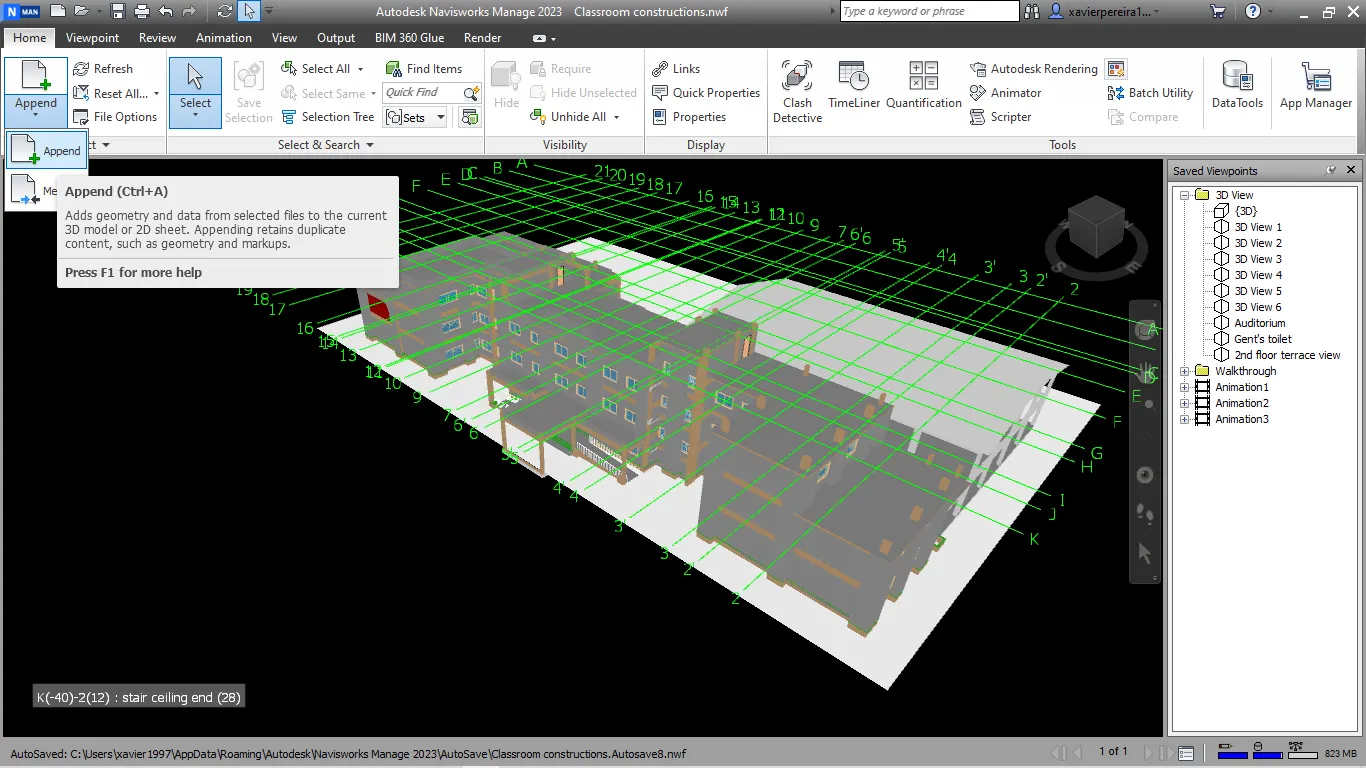
Fig N11 Location of append feature.
- The system will direct us to file to select the structural model and append to Navisworks.
- Now to Run clash detection go to clash detective under home tab as shown in fig O 11.
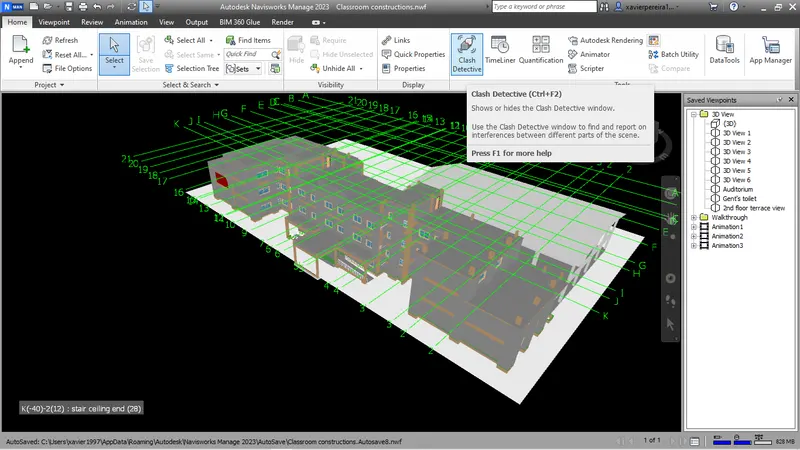
Fig O11 Location of clash detective feature.
- A clash detective dialogue box opens up. Now Click on Add test as shown in fig P 11.
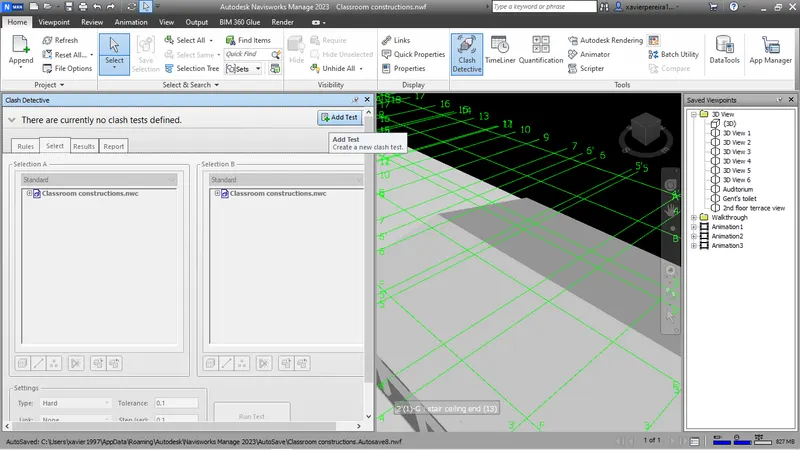
Fig P11 Process of clash detection..
- Select architectural file in section A and structural file in section B.
- Select surfaces and click on Run Test to run the detection test as shown in fig Q 11.
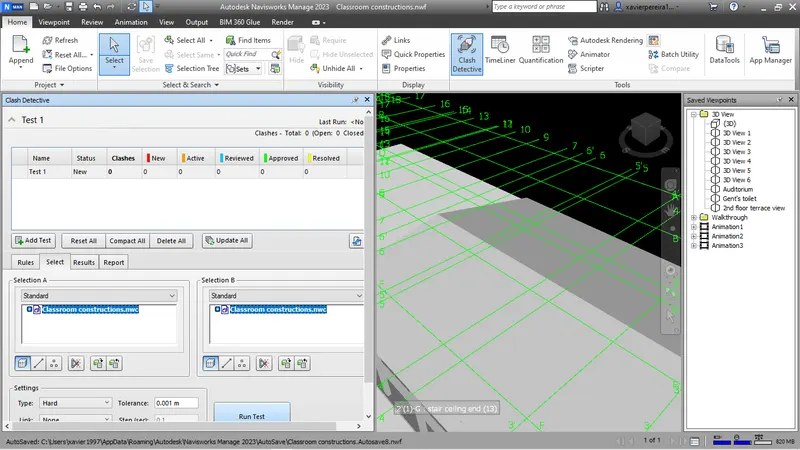
Fig Q11 Selection of model to run clash detection test.
- The result is that it has detected 2532 numbers of classes as shown in fig R 11 and upon reviewing this clashes can be neglected as it doesn't concern in the view of the model.
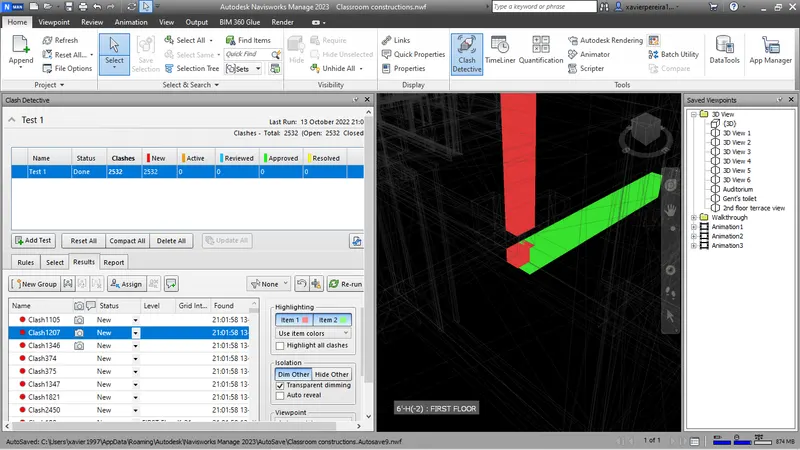
Fig R11 Result of clash detection test.
Conclusion
The clashes that is negligible are stated with Approved as shown in fig S 11.
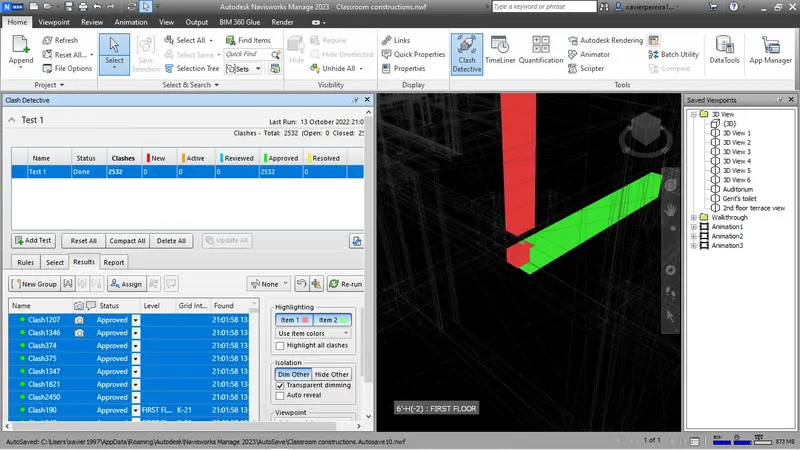
Fig S11 Action on clash detection report.
A5) Aim: To create a schedule by using Timeliner features in Navisworks and record the simulation.
Introduction: In Navisworks, Timeliner is a feature where we can schedule the execution of the model from date to date and see the simulation of the progress.
Procedure
- Before proceeding to time liner first activate the selection tree under the home tab. This feature provides the details of the model element beginning from the bottom to top as shown in fig U 11.
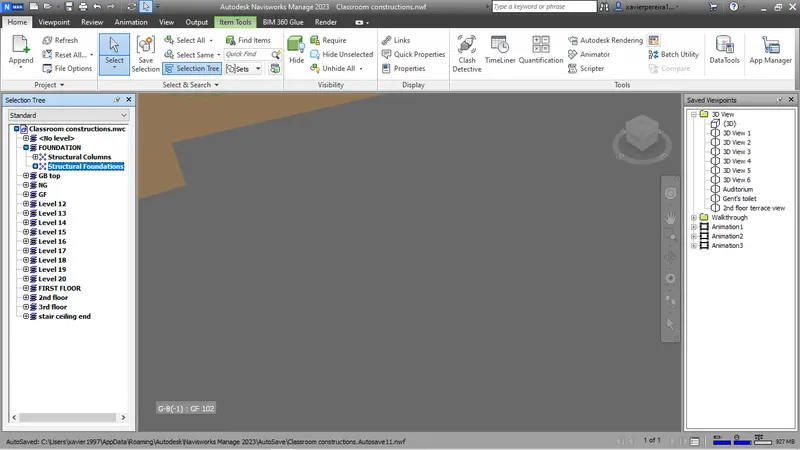
Fig T11 Location of selection tree feature.
- To schedule the model project go to Home tab > Tools panel > Timeliner as shown in fig U 11.
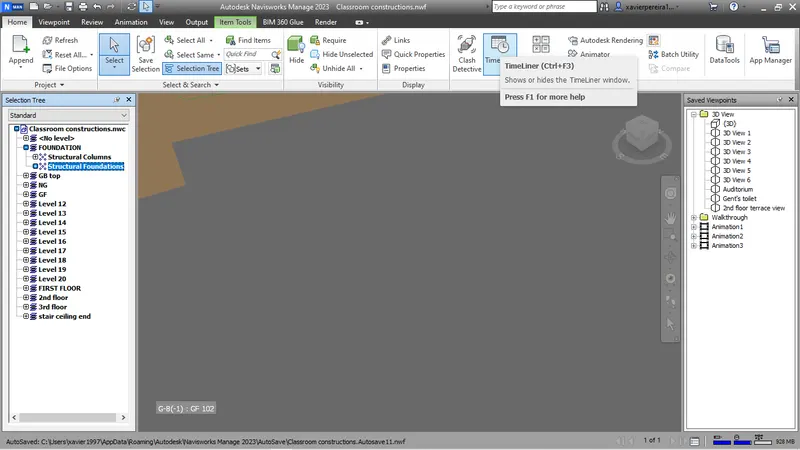
Fig U11 Location of Timeliner feature.
- A Timeliner dialogue box opens up as shown in fig V 11.
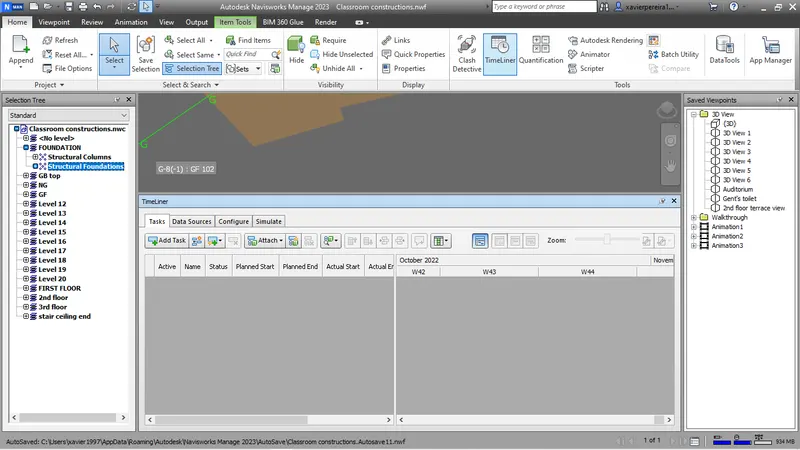
Fig V11. Timeliner dialogue box.
- Click on add task a Task is added below as shown in fig W 11.
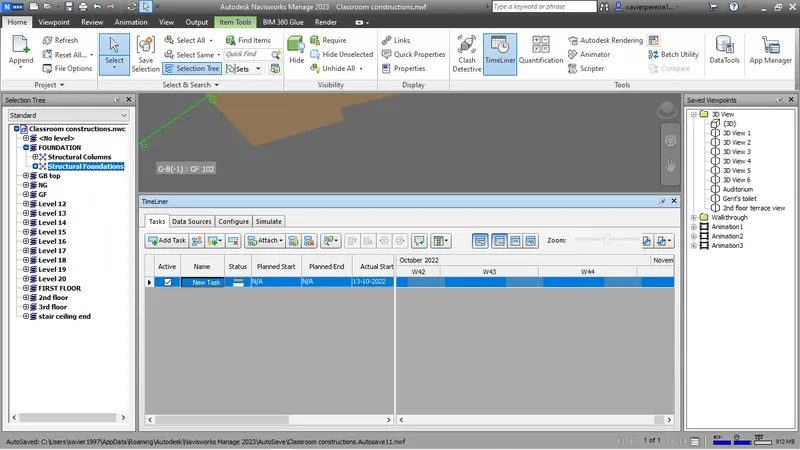
Fig W11 Process of scheduling project.
- Name the task as required, provide planned start and end and then actual start and end, Task type as construct, Attach the details from selection tree for the particular task as shown in fig X 11.
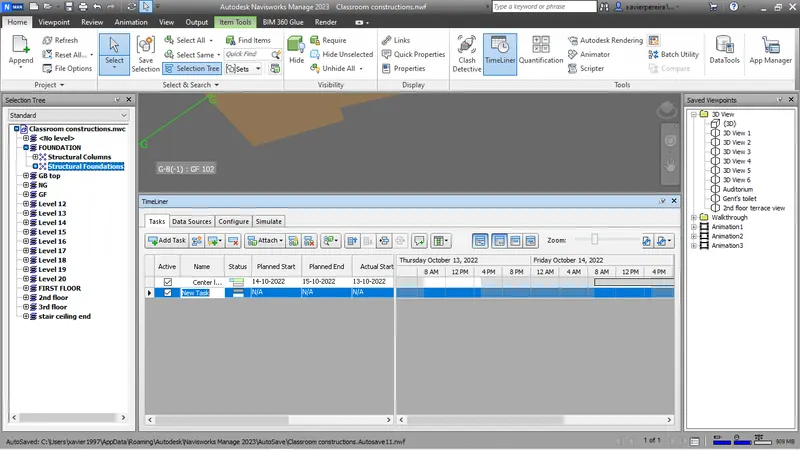
Fig X11 Filling up the details
- Similarly create additional task for rest of the work as shown in fig Y 11.
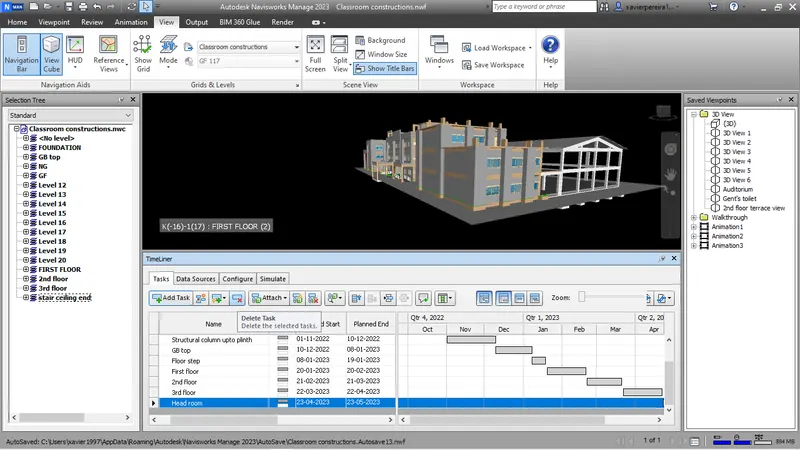
Fig Y11 Additional task added.
- Now go to Simulate tab in Timeliner dialogue box and we can play the schedule simulation and export the animation as shown in Z11.
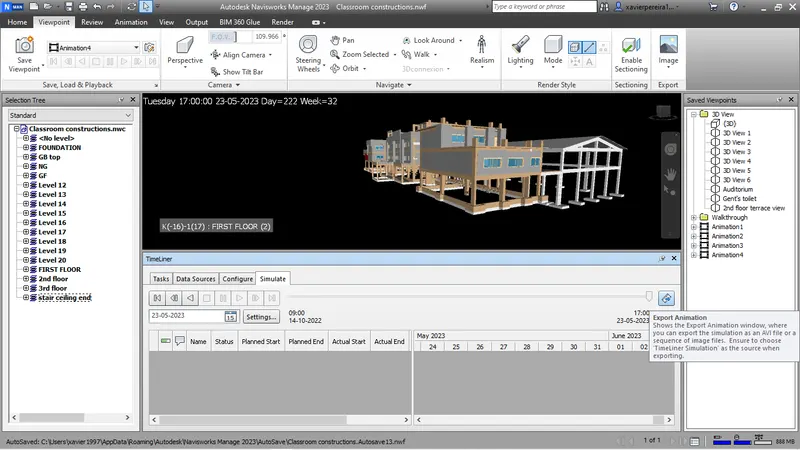
Fig Z11 Process of Timeliner simulation.
Conclusion
A schedule of the model is created and it simulation is exported in required location.