Usage of Navigation tool , Timeliner and Clash Detection test using Naviswork
1) Use the Architecture/ Structure Project file developed by you in Week 6 to 8. Export the Revit architecture and structure model to Navisworks Cache file following the export settings discussed in class
Ans 1.
INTRODUCTION: Exporting the Revit model to Navisworks Cache file
AIM: To export the Revit Structural or Architectural model to Navisworks cache file.
PROCEDURE:
- Open the required Revit Structural model created earlier in the Revit.
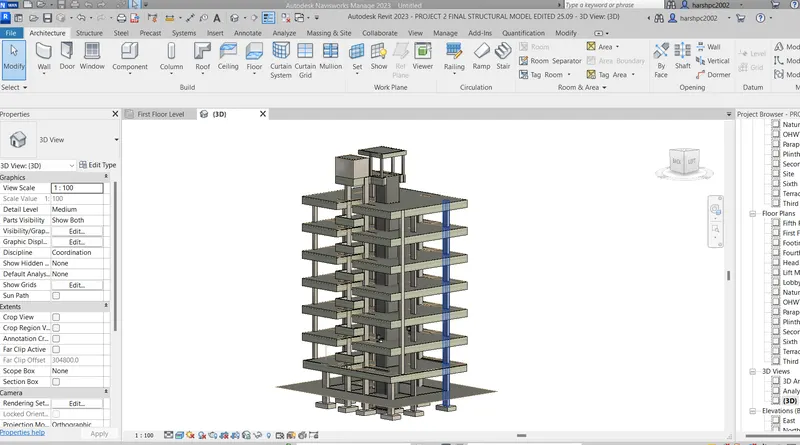
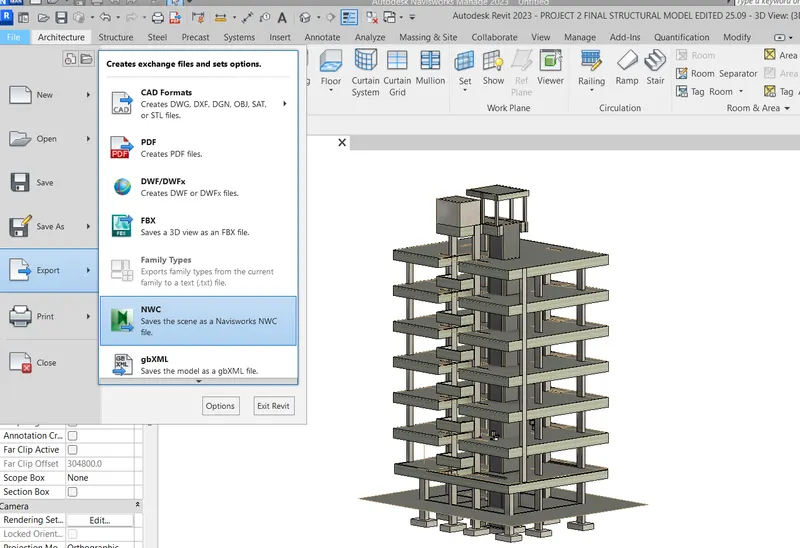
- From the File menu click on the Export Tab and select the NWC which saves the file as Navisworks file to the required folder selected.
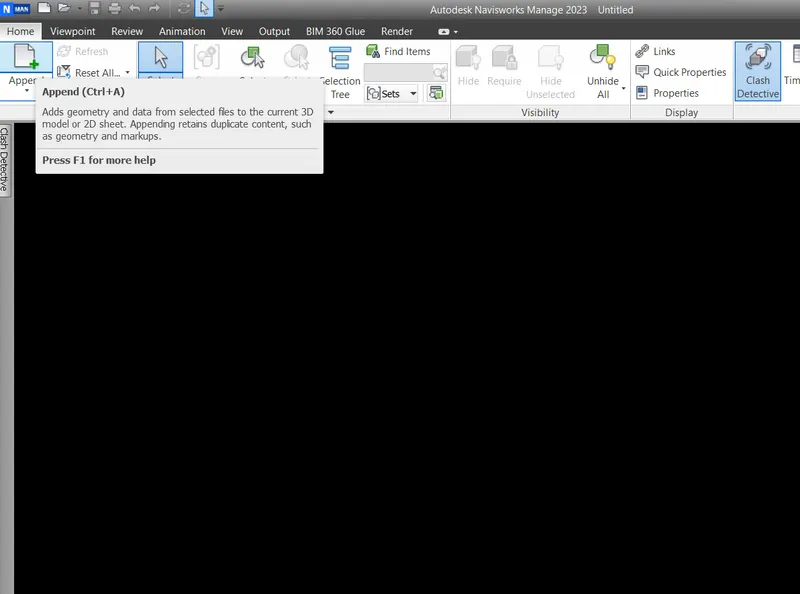
- Open Navisworks manage file
- Click on Append on Home Tab to add the required converted Revit model to NWC file
- Select the saved NWC file from the folder where the NWC file was saved from Revit model
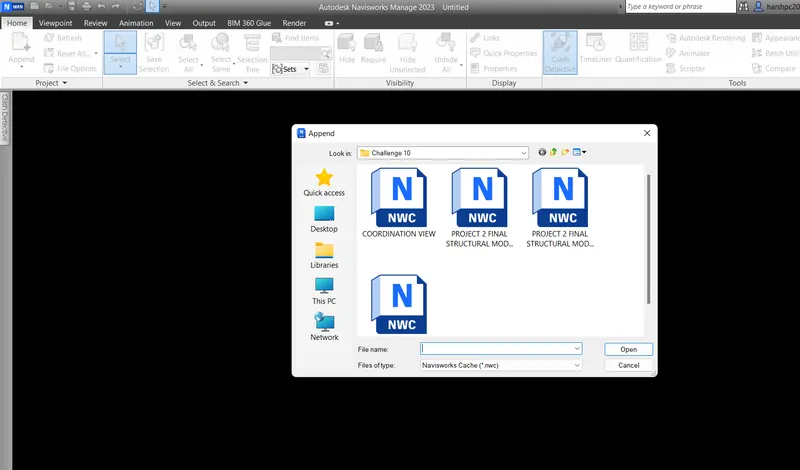
- Open the saved NWC file by using Append tab.
- The structural model opened in Navisworks is shown below.
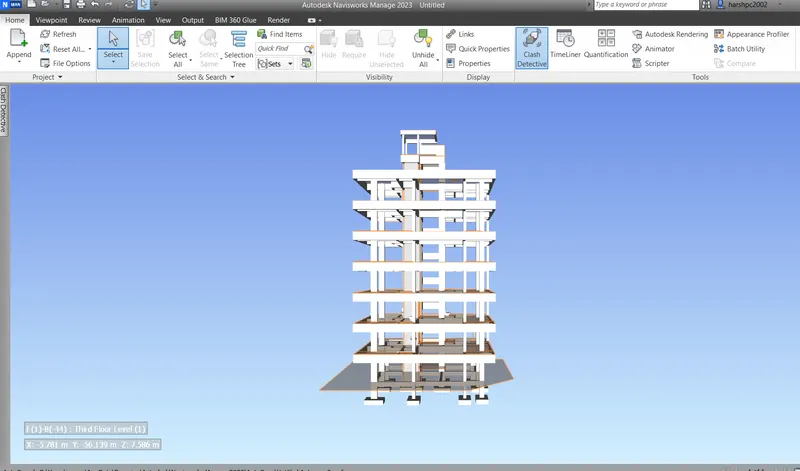
CONCLUSION: Thus we have exported the Structural model created in Revit to the Navisworks by creating the NWC file.
2) Use Navigate Tool to walk around the model and walk through the rooms created and record your moving as animation in your Navisworks file
Ans 2.
INTRODUCTION: Walk through using the navigation tool and recording as animation in Navisworks file
AIM: To use Navigate tool to walk around the model and the walking through the rooms created and recoding the move as animation in Navisworks file
PROCEDURE:
- Export an architectural model to Navisworks
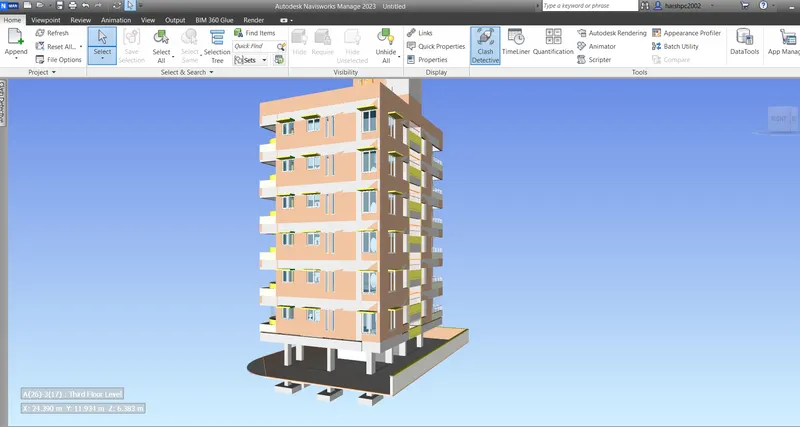
- Go to the Viewpoint tab
- Click on the Walk icon for navigating through the building and rooms
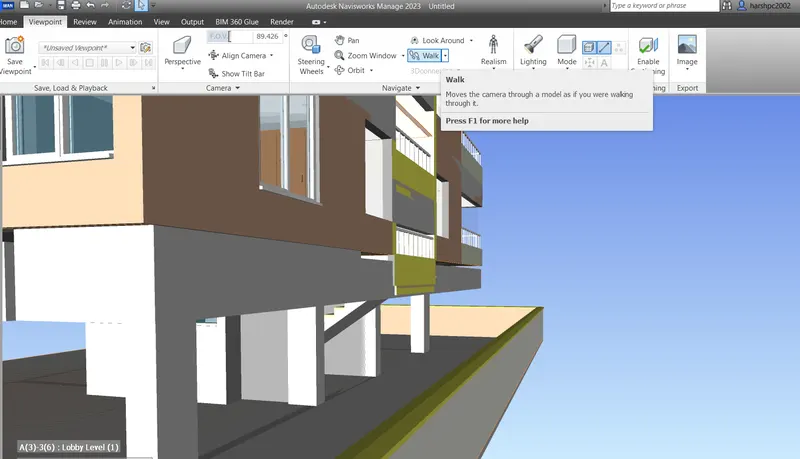
- Move the cursor up to navigate forward and down to navigate backward and left and right side to turn left or right side
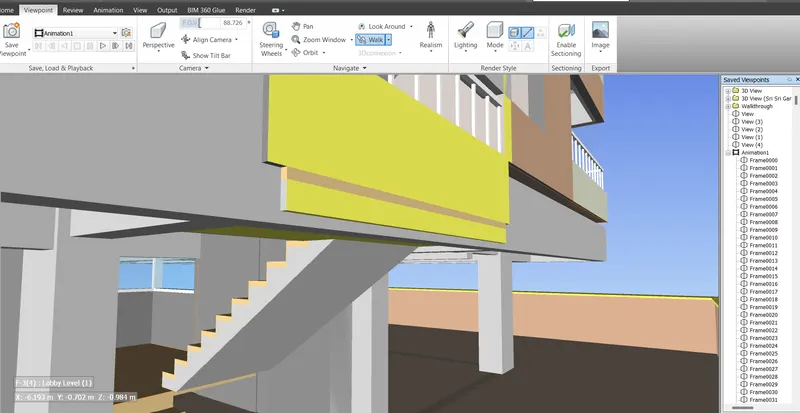
- Click on the Save Viewpoint tab and select record option
- The recording of the walkthrough will start in animation and can be stopped when finished
- The required viewports with names of the rooms can be selected and saved.
- The animation can be played to view the walkthrough
- The screenshots of playing of animation of walkthrough are attached below
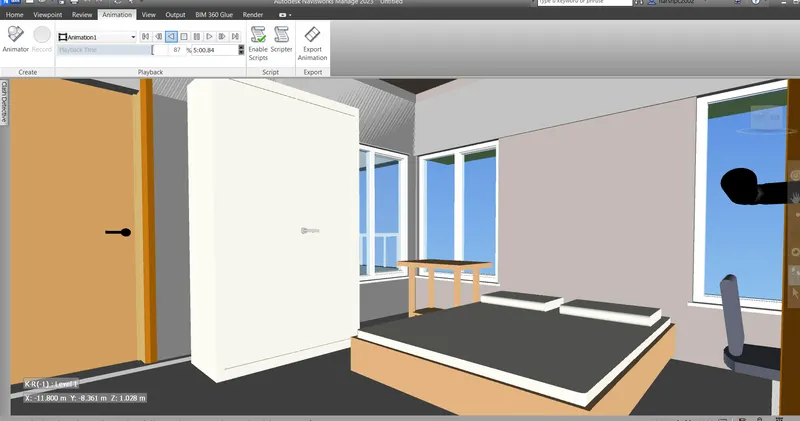
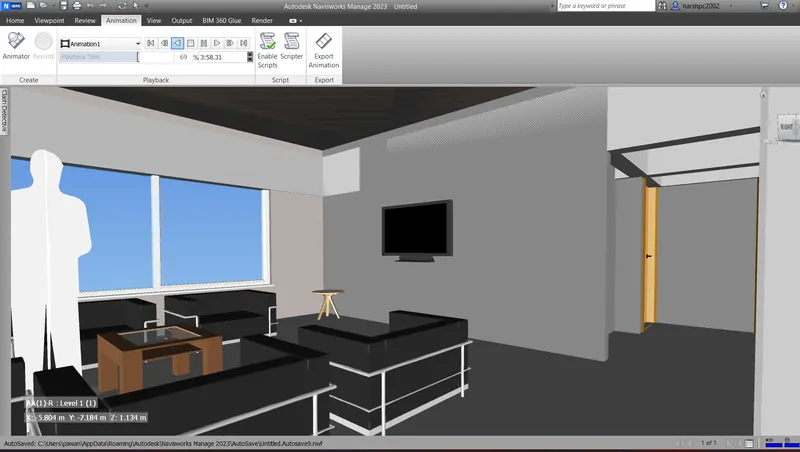
- The animation can be exported and saved to the folder in AVI format as shown below
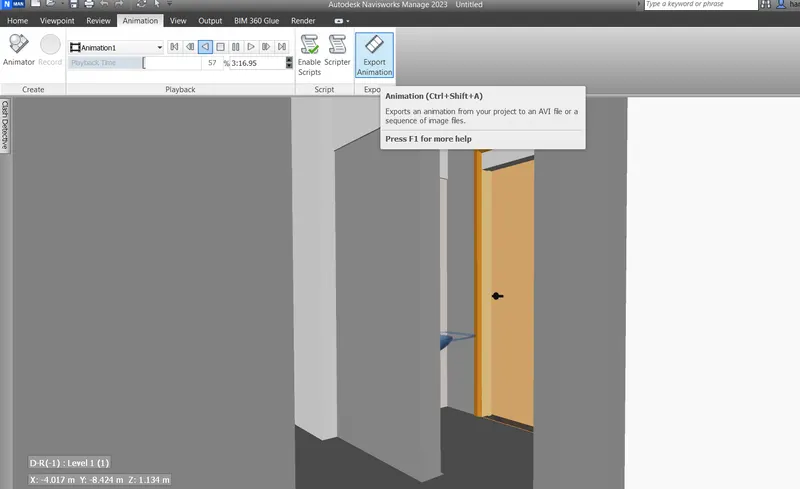
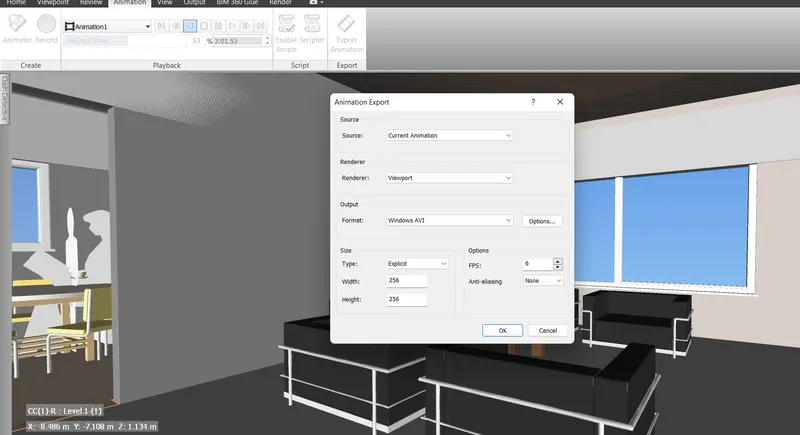
CONCLUSION: Thus we have created the walk around the building and walkthrough the rooms by using navigate tools in navisworks and recorded the animation and saved to the folder.
3) Use Navigate tool to use Realism feature to walk through the model and record your moving as animation in Navisworks file
Ans 3.
INTRODUCTION: Creating Walk through the model and recording the move in animation using Realism feature in Navisworks file
AIM: To use navigate tool to use Realism feature to walk through the model and record the moving as animation in Navisworks file
PROCEDURE:
- In the architectural model go to the Viewpoint tab and select Realism
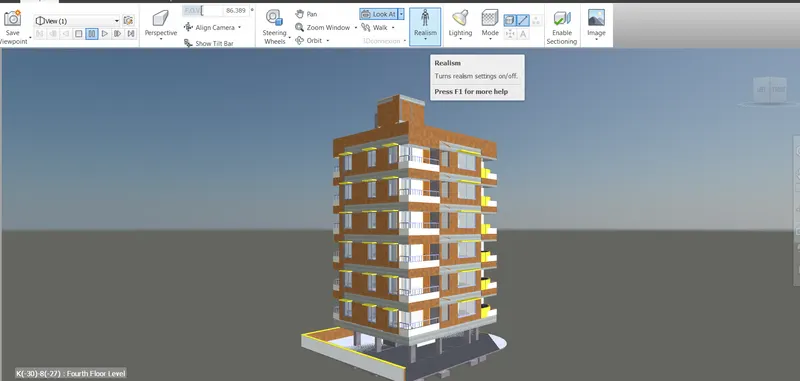
- In Realism select Third person
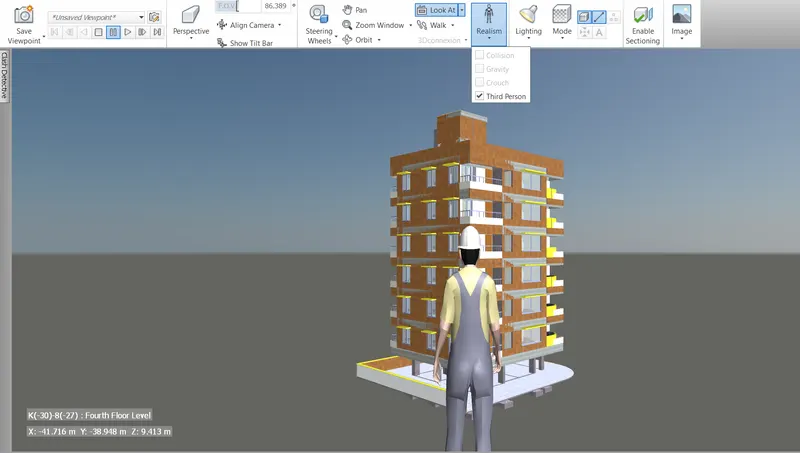
- Select Walk tool and the model can be navigated with cursor movements
- To record the walk through in animation click on Save Viewpoint and click on Record
- The recording will be started for the walk through the model
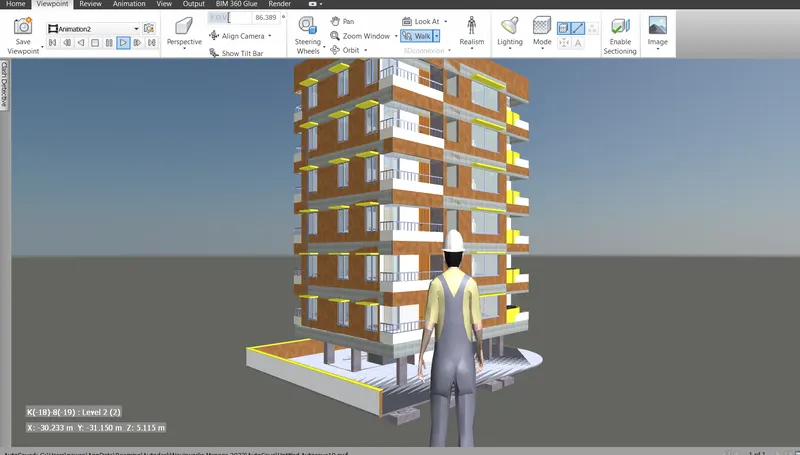
- The Third person can be seen moving around the model in the walk through
- Screenshots of the various views of the walk through animation is shown below
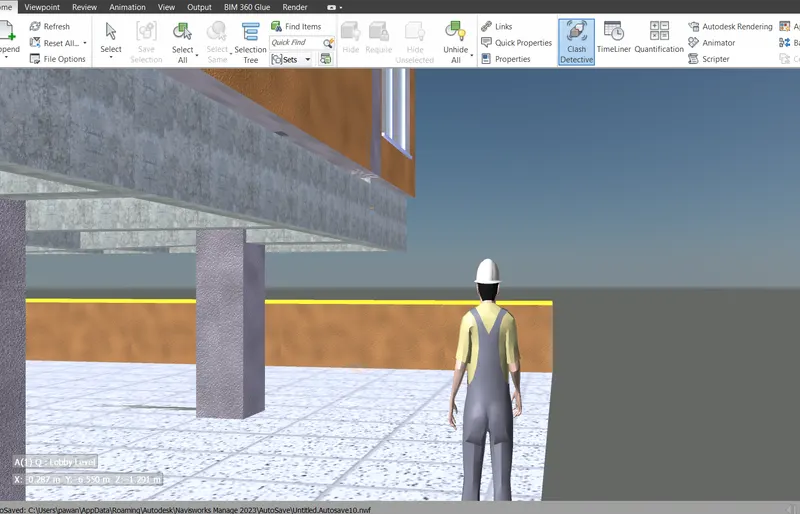
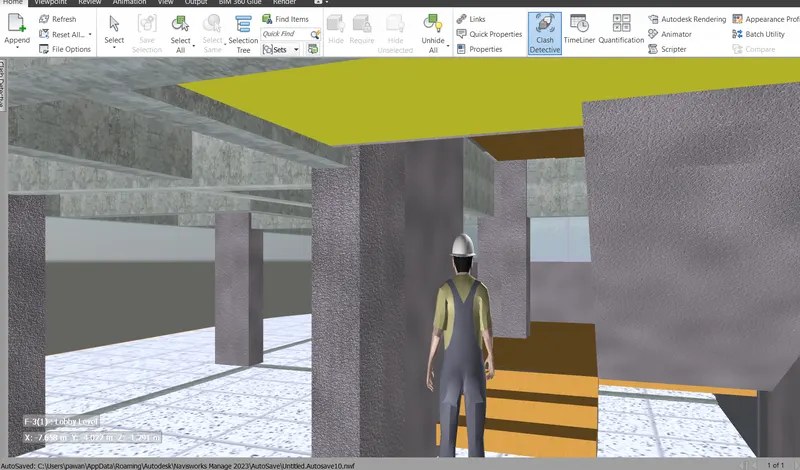
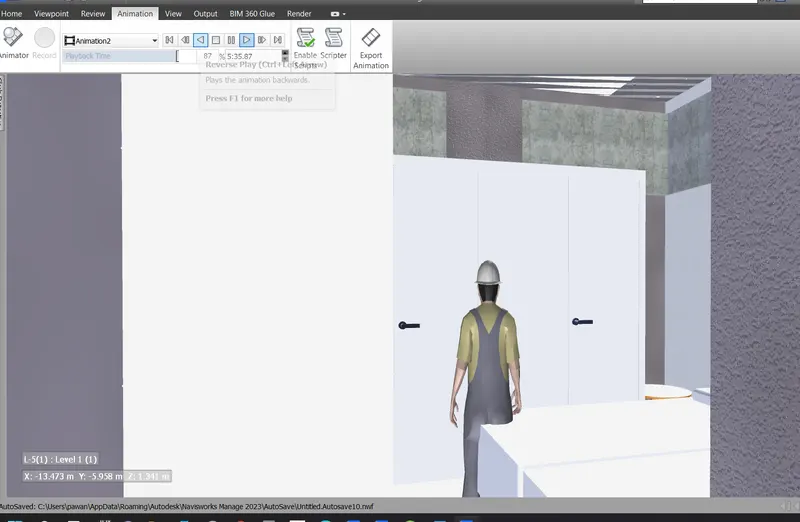
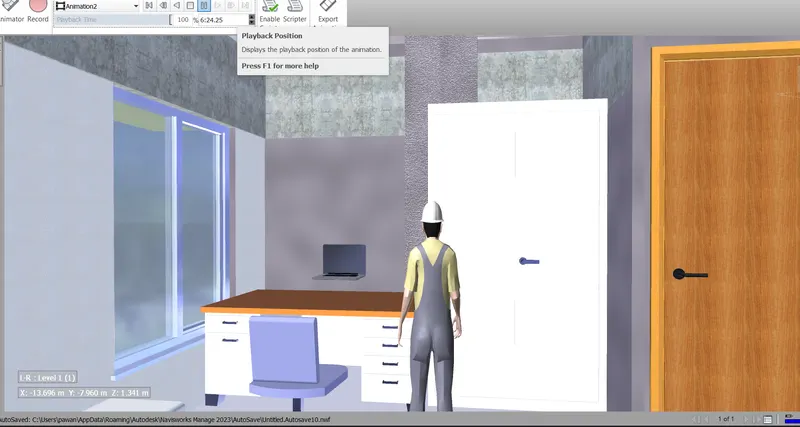
CONCLUSION: Thus we have used the Realism feature in Navigate tool to create walk through the model and recorded the moving in animation in Navisworks file.
4) Embed both architecture and structure *.nwc file to your Navisworks file. Create a clash detection test between the two models
a. Run the Clash Detection Test
b. Study the clashes between the two models
c. List which of the clashes could be approved
d. List which of the clashes could be neglected ( will be taken care later)
e. List which of the clashes can be resolved
f. Save the results after color coding the clashes to the Navisworks file
g. In case of resolution annotate the clash and save the view to defined views in Navisworks
Ans 4.
INTRODUCTION: Embedding Structural and Architectural models in NWC file to Navisworks file and creating clash detection test
AIM: To embed architectural and structural NWC files to Navisworks file and creating clash detection, studying clash detection and listing the clashes as approved, neglected, resolved status and saving the results.
PROCEDURE:
- Append the Structural model NWC file to the Navisworks file
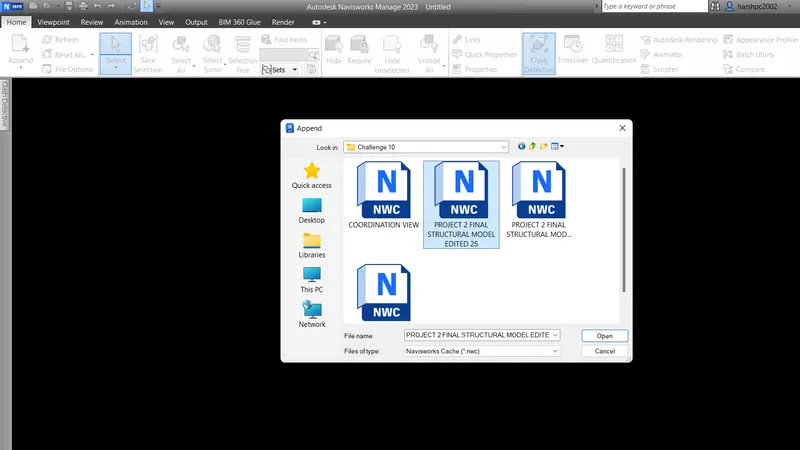
- Append the Architectural model NWC file to the Navisworks file
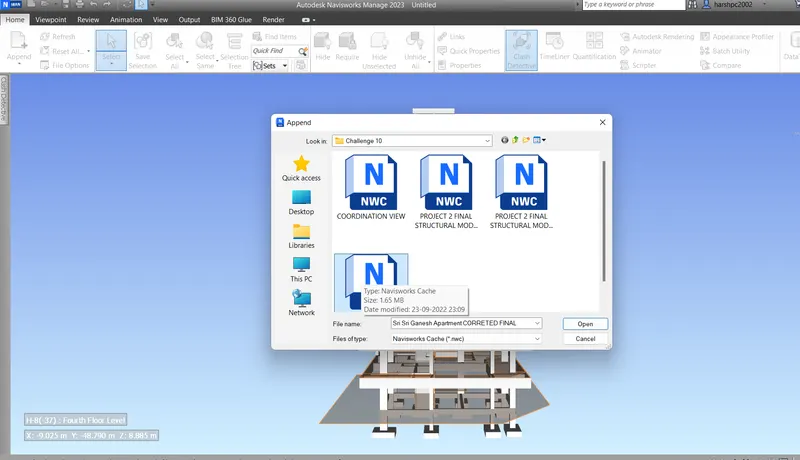
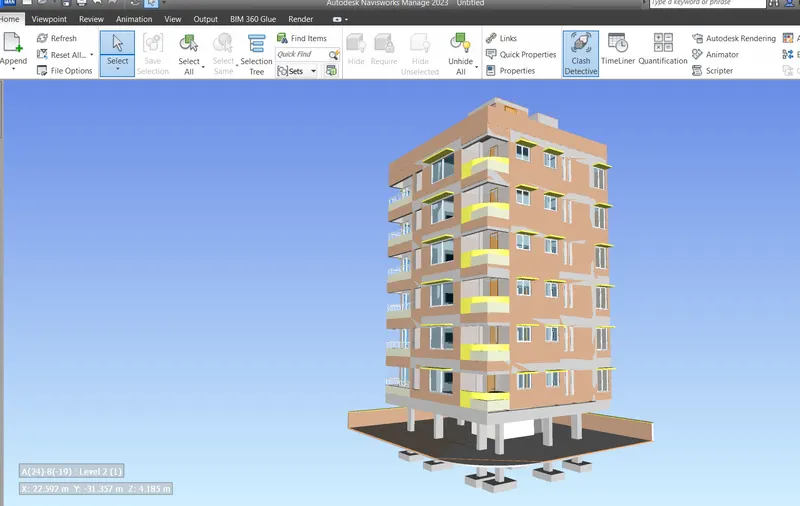
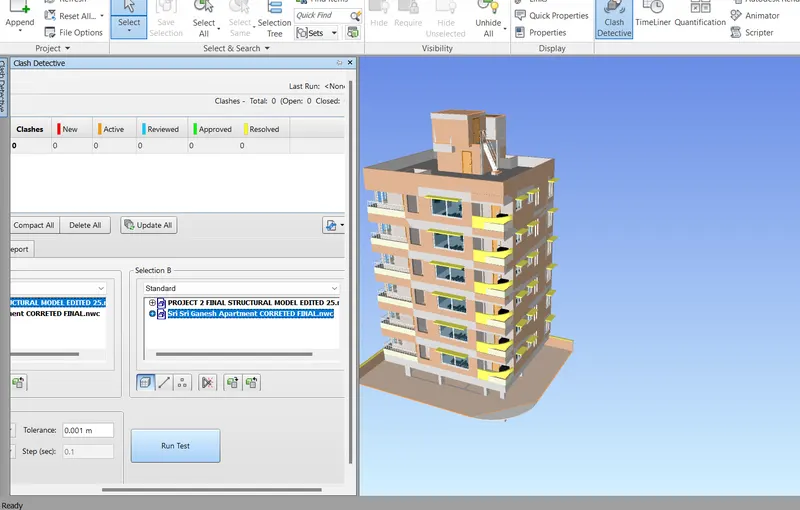
- The architectural and structal models are viewed in the Navisworks file as below combined model
- In Home tab click on ghe Clash Detector tool
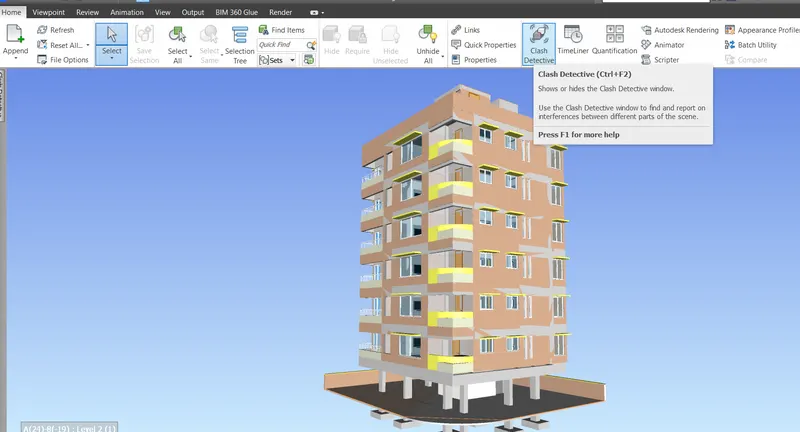
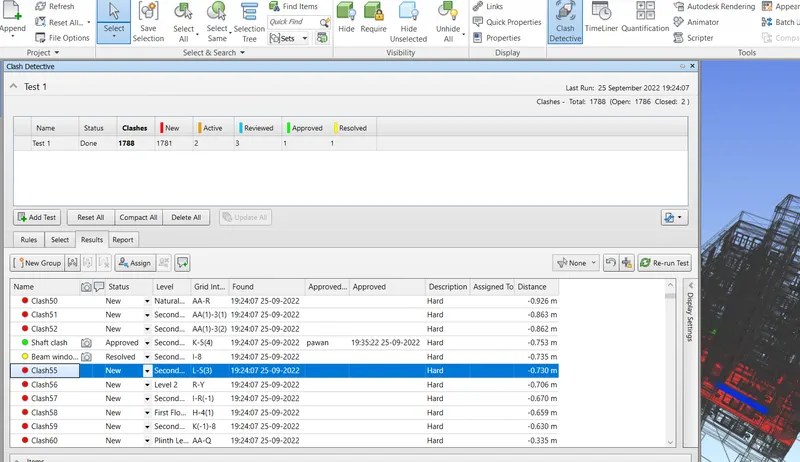
- The list of appended drawing is seen in the Clash Detective table as Selection A & B
- On right corner click on Add Test to run the clash detective
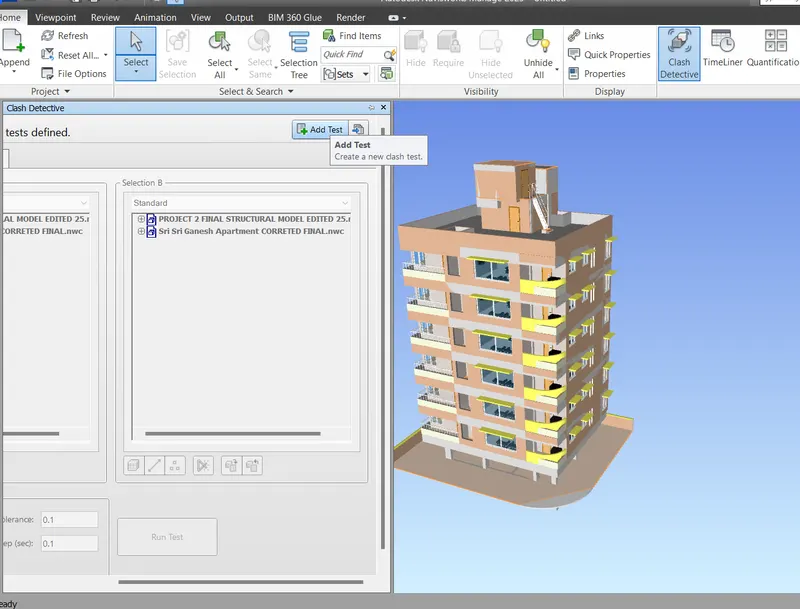
- Select the models for which the Clash detection is to be run
- Click the Run Test tab at bottom
- The list of Clashes with the summary showing number of clashes is generated as shown below
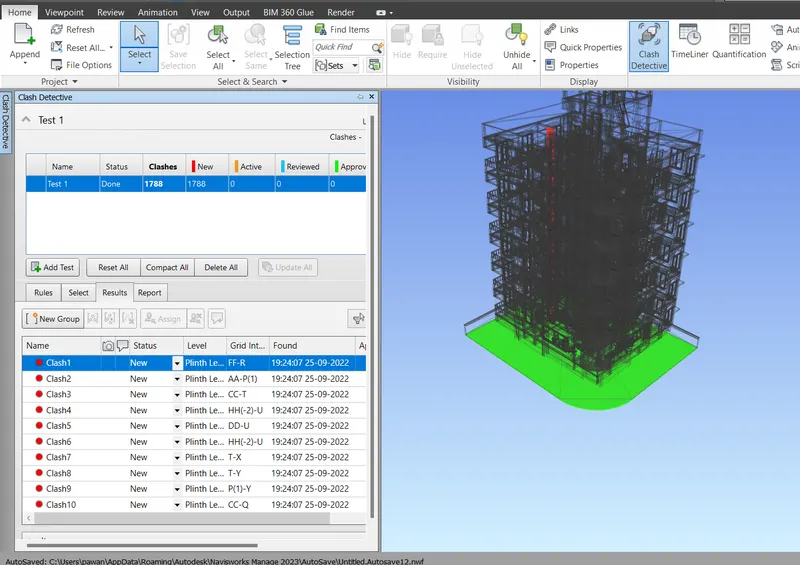
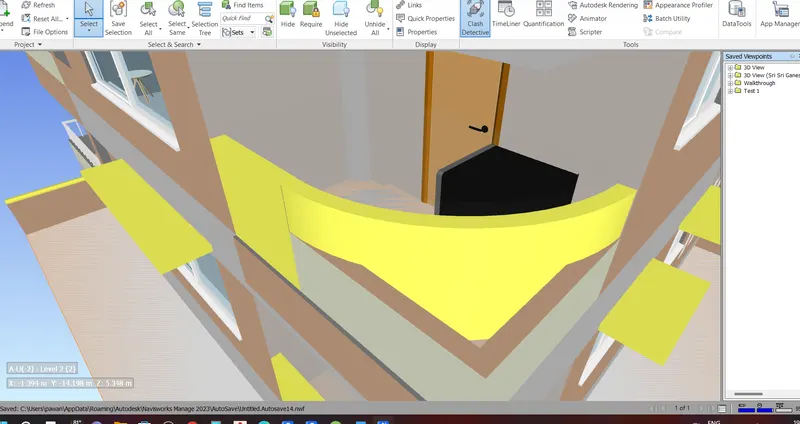
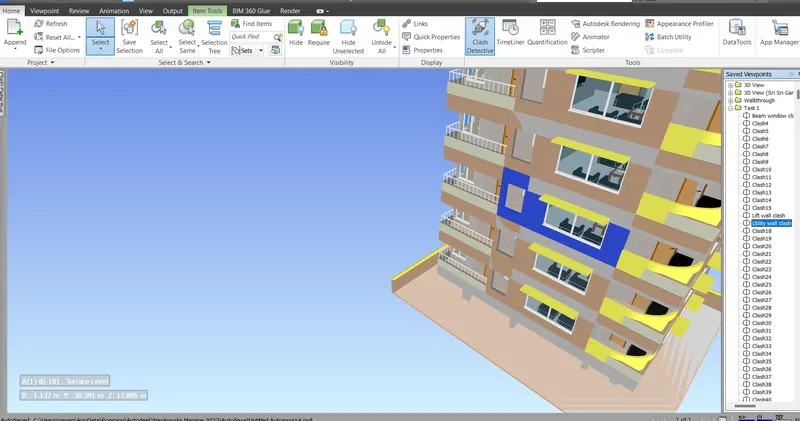
- Click on the clash to view the location of clash on the model.
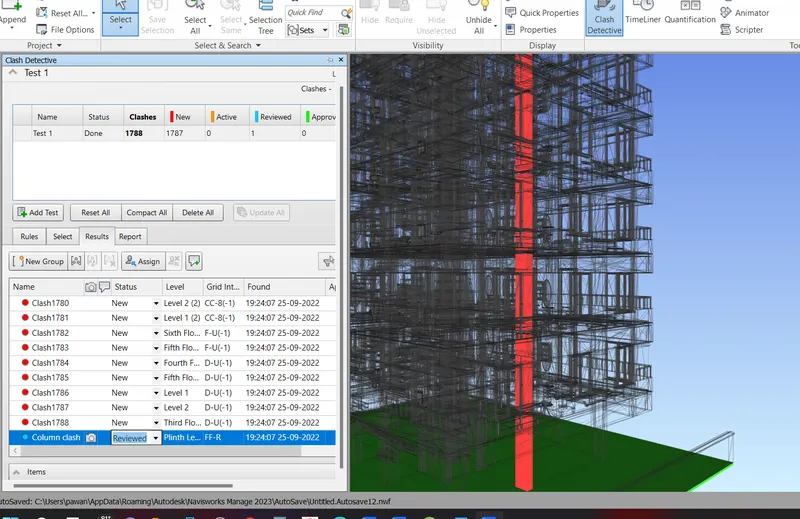
- We can save the Viewpoint of the clashes, rename them and assign the task for the clash as Active, Reviewed, Approved or Resolved
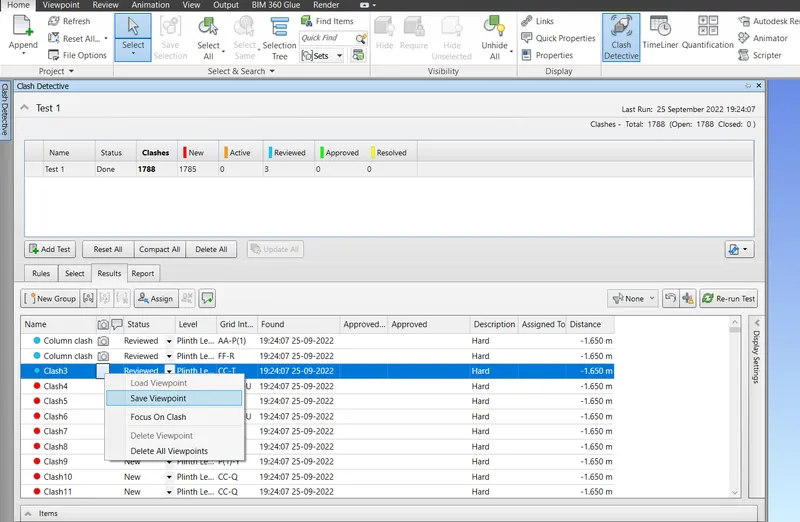
- The review of some of the clashes and action taken is shown in the screenshots below
- The color coding of the action taken on the clashes is seen in the summary and also near the clash name
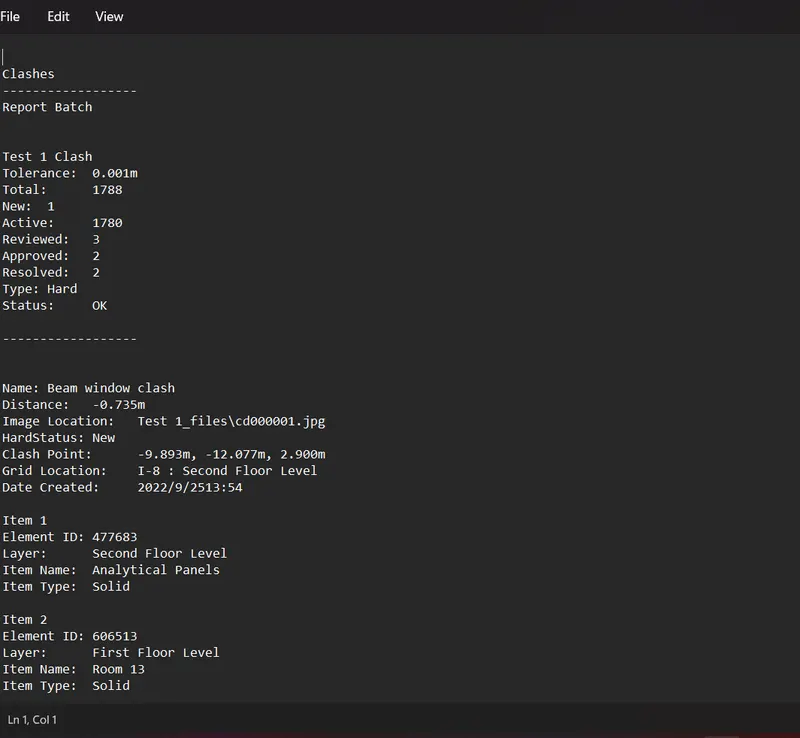
- The test report of all the clashes with the grid point, distance, location, level etc can be saved and printed as text format by exporting to folder
- The report can also be generated in tabular form HTML file showing the views of all the clashes and can be exported to the folder and saved as shown below
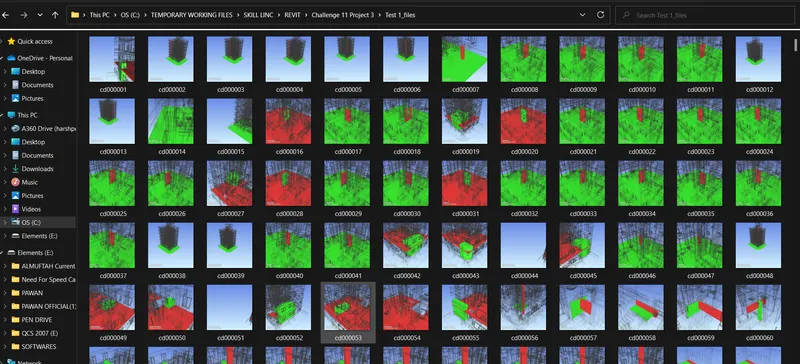
CONCLUSION: Thus we have embedded the structural and architectural NWC files in the Navisworks file and created clash detection report and assigned the clashes as approved, neglected, resolved status and saved the results
5) Using the Timeliner feature in Navisworks prepare a schedule for the project developed in week 6 to 8 by adding reasonable assumptions for task start date and end date and simulate the task completion as a visual simulation. Record it and save the timeline simulation to Navisworks file
Ans 5.
INTRODUCTION: Using Timeliner feature in Navisworks and preparing schedule for the project and creating visual simulation
AIM: To prepare a schedule for the project using the timeliner feature in Navisworks and creating visual simulation and recording the same and saving to Navisworks file.
PROCEDURE:
- Open the required project from NWC file for which the timeline schedule is to be prepared
- Here we have selected the G+1 structural model for scheduling
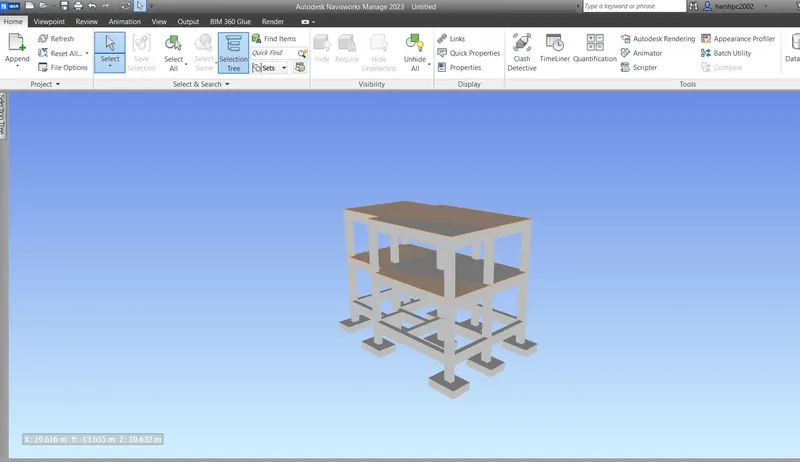
- In Home tab click onthe Timeliner tool
- The Timeline table will be opened.
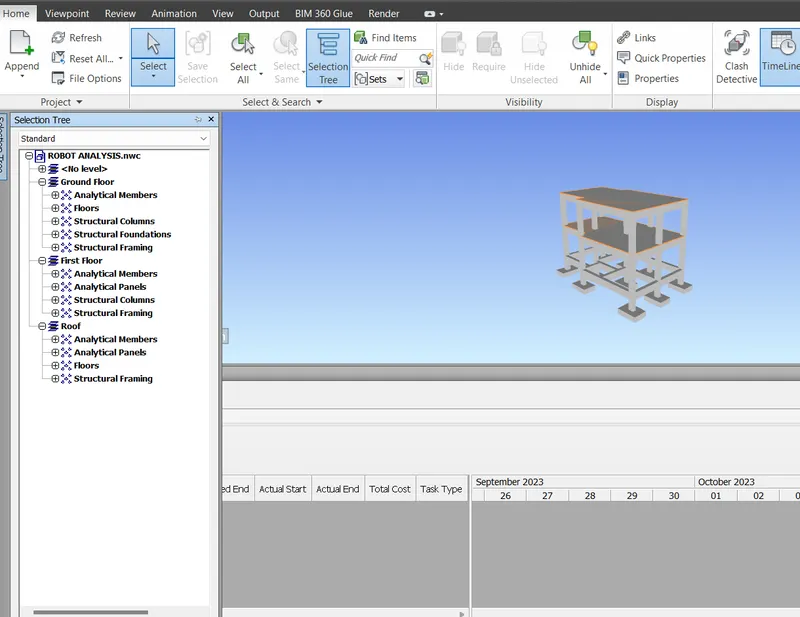
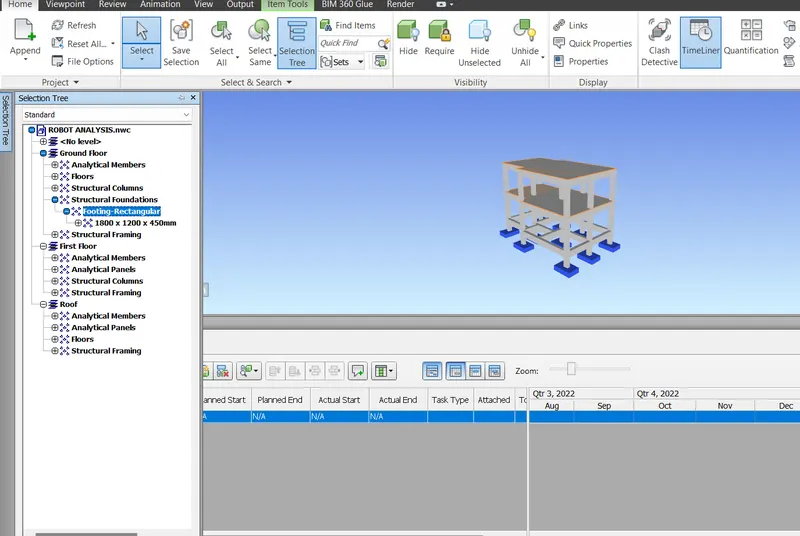
- The Selection Tree for the model elements will also be formed on left side
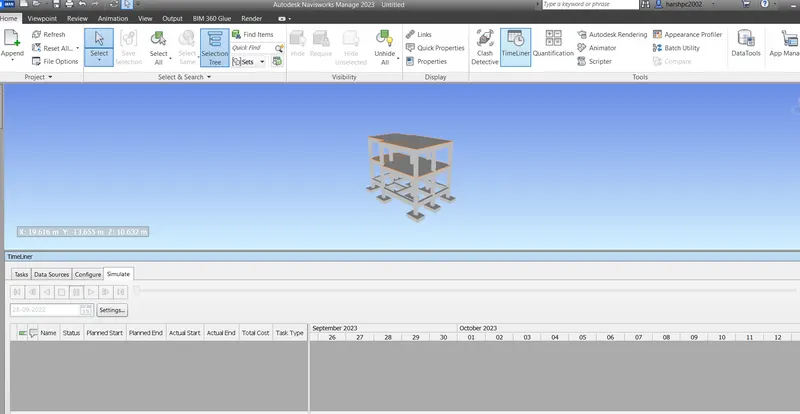
- Selection Tree consists of all the elements of the model at all levels
- In Timeliner table click on Add task
- A New task will be added to the table
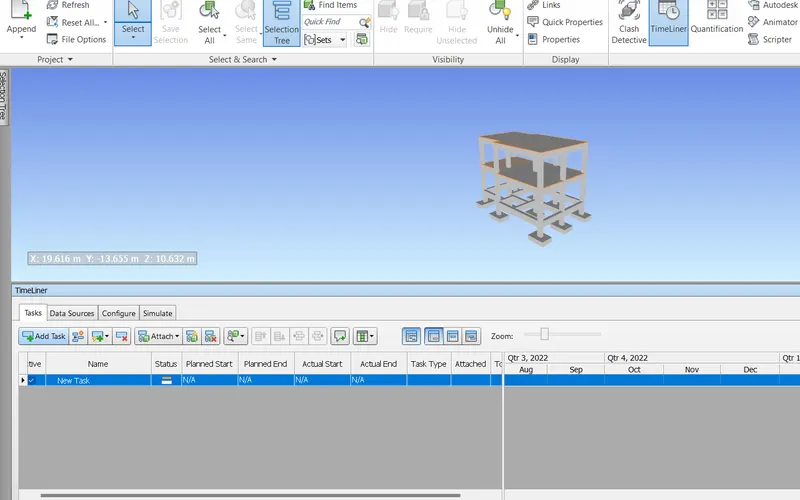
- Change the name of task to Footings
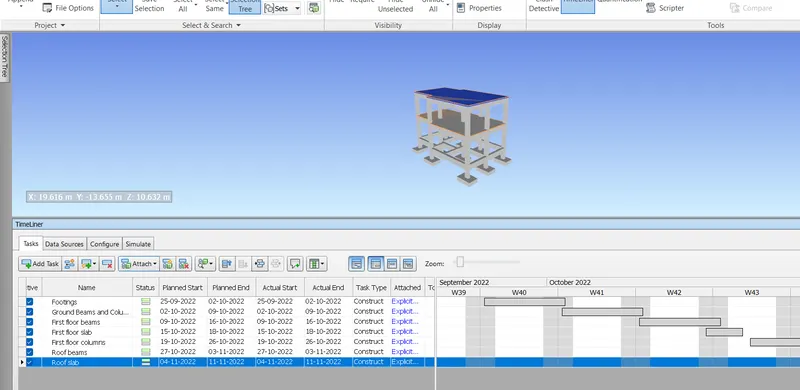
- Add new tasks and rename them to the other elements like beams, columns, slab etc
- Provide the Planned Start date and Planned End date and Actual Start and End dates for each elements
- From Selection Tree select the elements and the in the Timeliner table select the Task element and click on Attach the selected elements from model to the Task.
- It will show as Explicit in the Attached column of timeliner
- Thus all the Tasks for all elements are created in the Timeliner with the start and end dates as shown below.
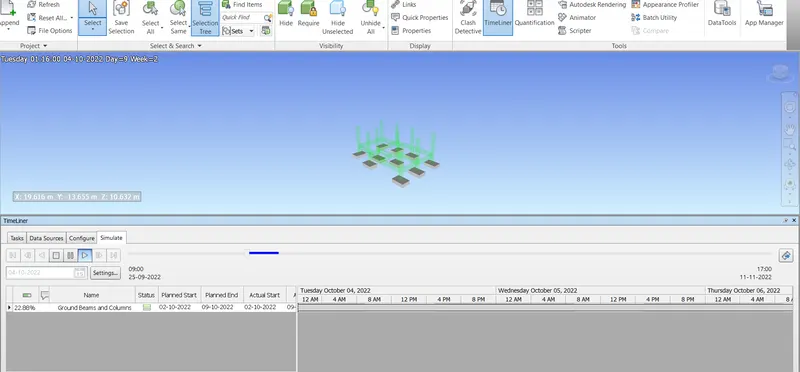
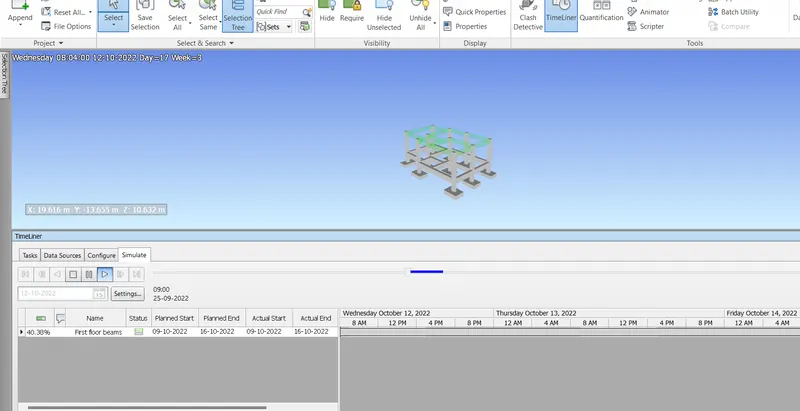
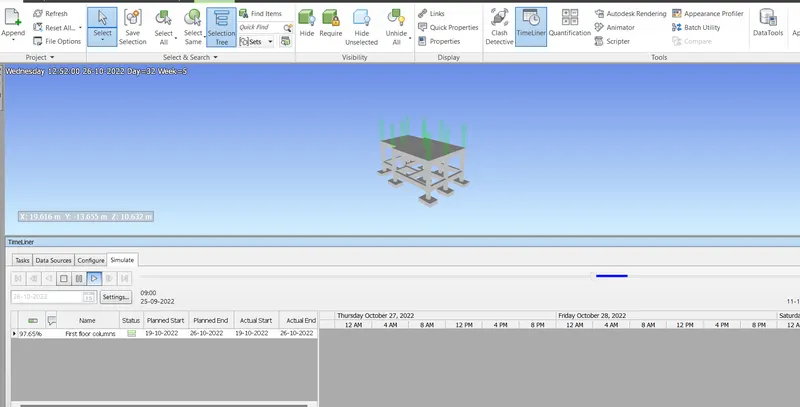
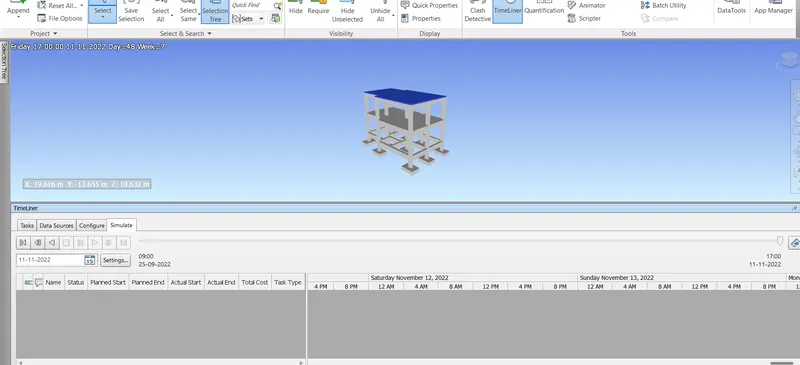
- Now the Visual Simulation can be run by clicking on Simulate tab
- The Simulation will run the Timeliner schedule and the elements will be created in the sequence as per the given dates schedule to complete the structure model to visualise the actual sequence and the timeline for the project.
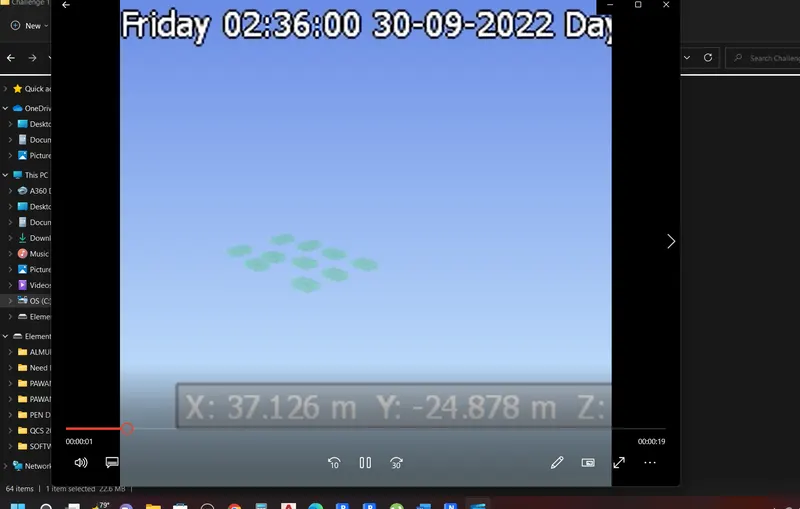
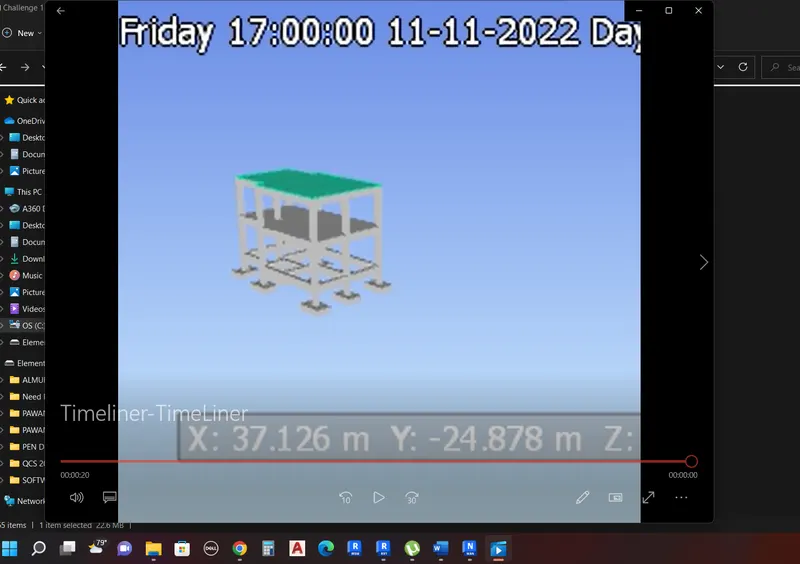
- The screenshots of various stages of simulation are shown below
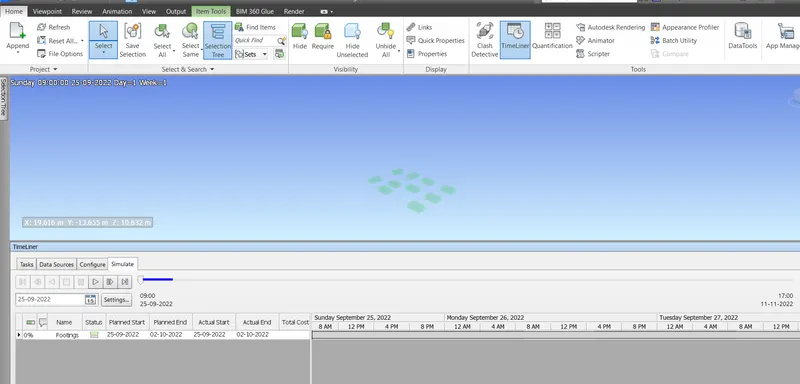
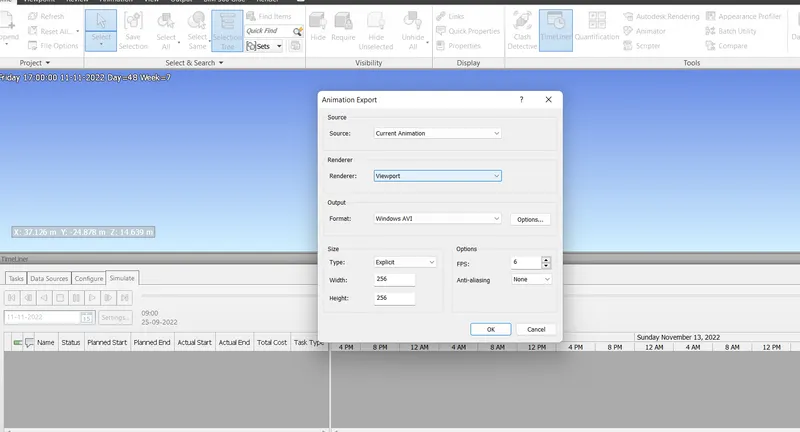
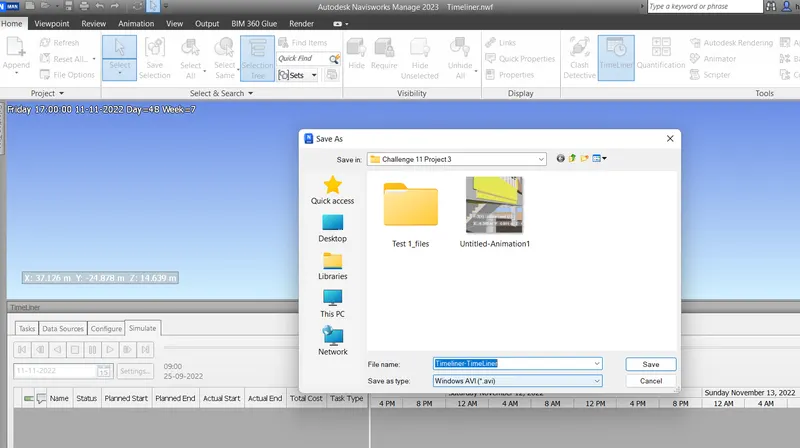
- The Simulation file can be saved in AVI format by exporting to the required folder as shown below.
- The Simulation can be run as a Media file showing the sequence of activities and the timeline for the activities as per the schedule.
CONCLUSION: Thus using the Timeliner feature in Navisworks we have prepared schedule for the project and created visual simulation and recorded the same and saved to Navisworks file.