Usage of Navigation tool , Timeliner and Clash Detection test using Naviswork
1) Use the Architecture/ Structure Project file developed by you in Week 6 to 8. Export the Revit architecture and structure model to Navisworks Cache file following the export settings discussed in class.
Aim:
To export the revit architecture and structure model to navisworks cache file.
Introduction:
Navisworks is a review and coordination software and it is used to improve the BIM project delivery. Navisworks is used for coordination and clash detection test, Reviewing the model, simulation and analysis purposes and quantification purposes.
Procedure:
- Open revit software.
- Open the architectural and structural project created in week 7.
- Click the file menu.
- Select 'export' option.
- Then select 'NWC'
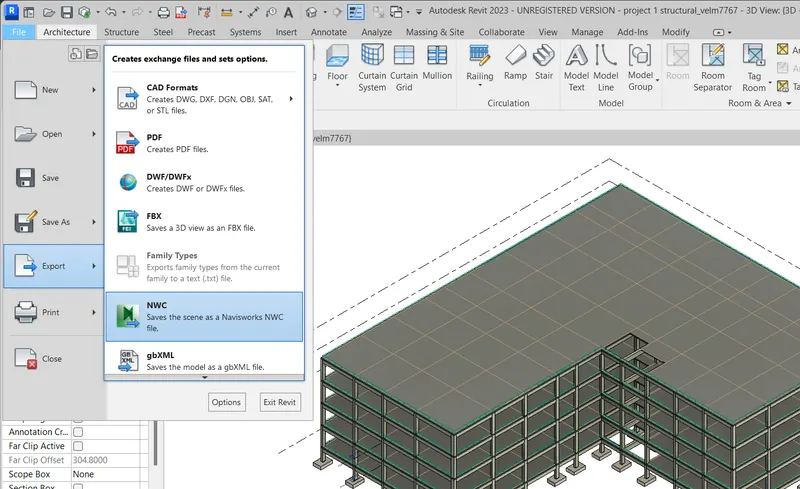
- Now the 'Export scene as' dialouge box is opend.
- Select the 'save as type' as 'Navisworks (*.nwc)'
- Type the file name as 'Structural'
- Click save button.
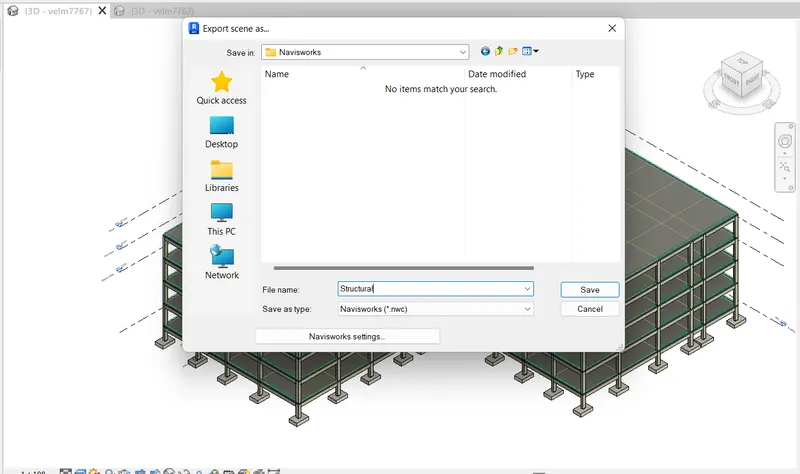
- The file is exported as navisworks cache file.
- Similarly export the architectural file as navisworks cache file.
- Open architectural file.
- Select export option in the file menu and select NWC.
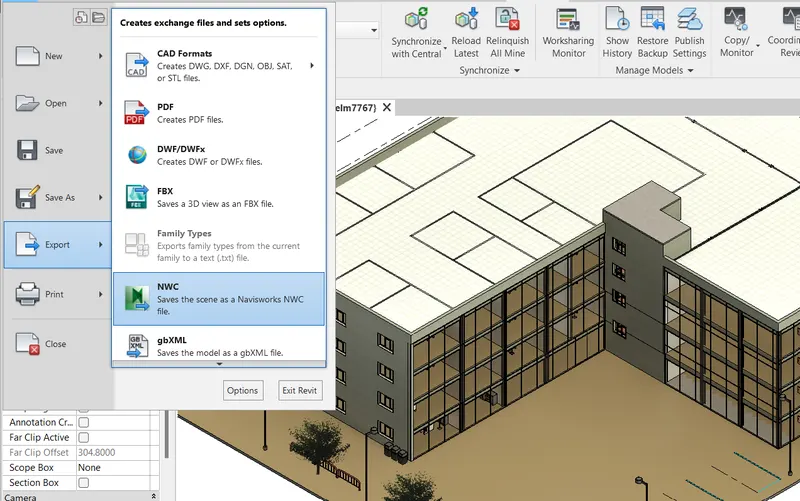
- Save the file as navisworks (*.nwc)
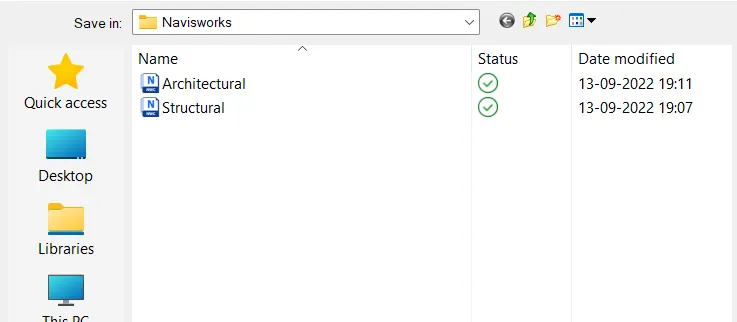
- Now both the architectural and structural file is exported as navisworks cache files.
- We can open the file in navisworks and do the operations like reviewing, clash detection test.
Result:
The revit architectural and structural model is expoted to navisworks cache file.
2) Use Navigate Tool to walk around the model and walk through the rooms created and record your moving as animation in your Navisworks file.
Aim:
To use navigate tool to walk around the model and walk through the rooms created and record the moving as animation in navisworks file.
Introduction:
The walk option in navisworks is used to move through the model and we can find the clash between the elements visually. We can save the view by the use of viewpoint option and used to clarify the clashes.
Procedure:
- Open the navisworks software.
- Click the file menu and select open option.
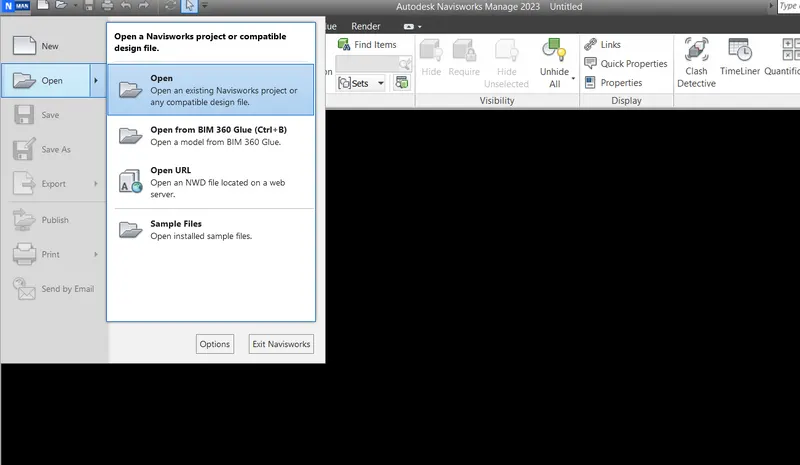
- Select the architectural.nwc file and click open.
- The Architectural.nwc file is opened in nawisworks software.
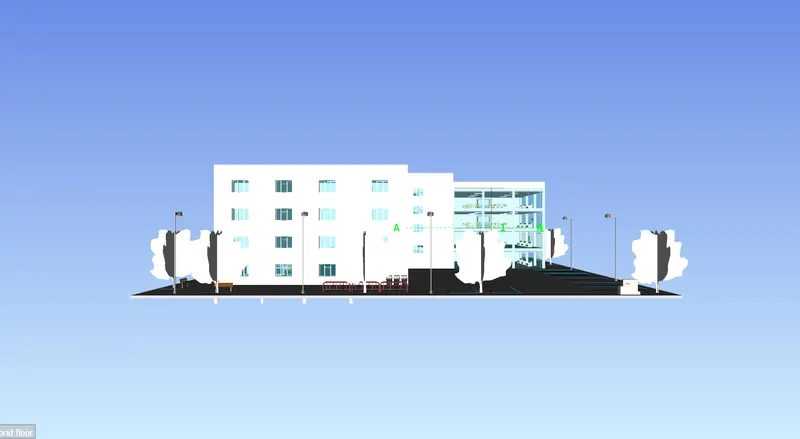
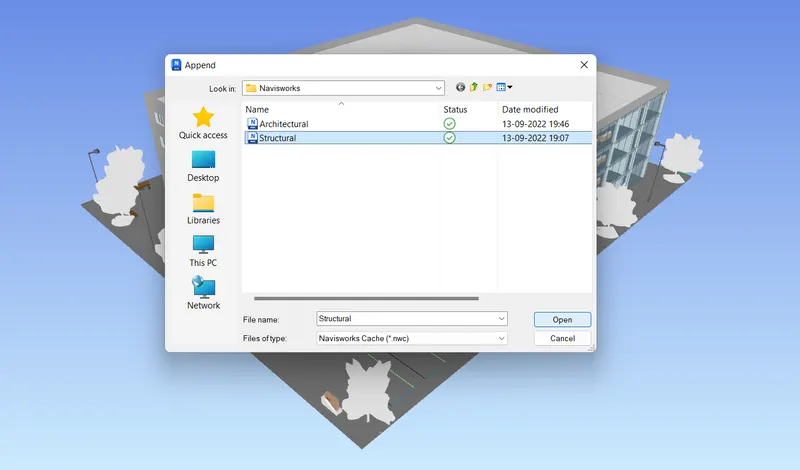
- Click appened option under the home tab.
- Select the Structural.nwc file and click open.
- Now the structural.nwc file is appened with the architectural file.

- Select walk option under the viewpoint tab.
- Dropdown the save viewpoint option under viewpoint tab.
- Click record option, this will record the walk as animation by frame br frame.


- Start walk around the model by click the mouse button or by using keyboard buttons.
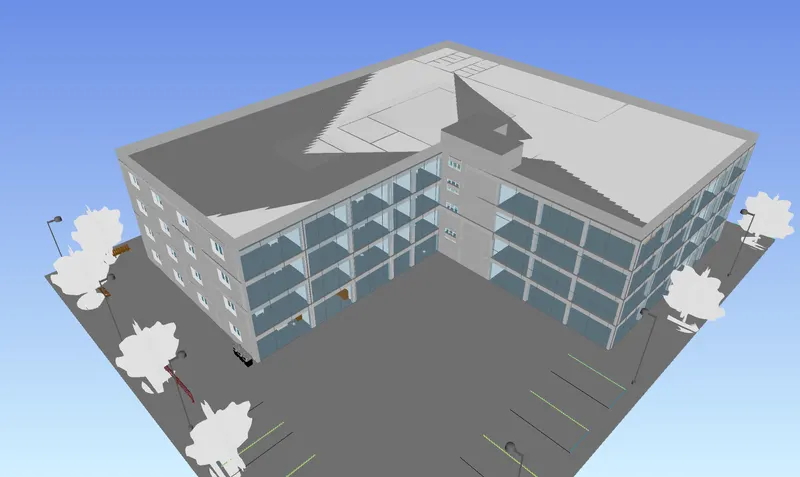
- Walk through the rooms created.
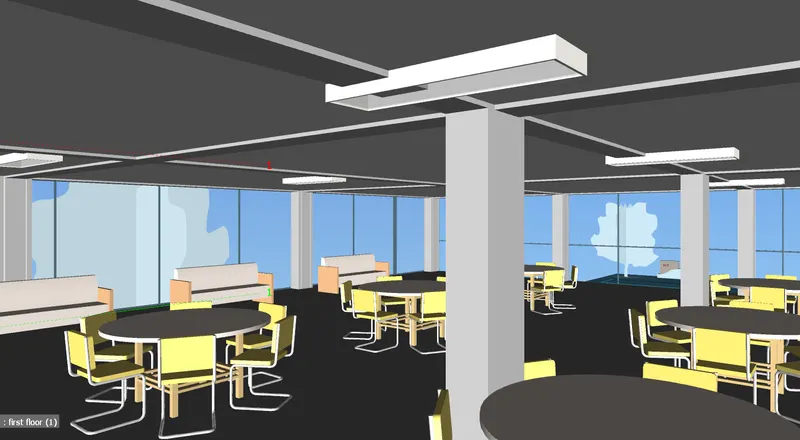
- The walk in animation is saved in the saved viewports.
- The animation is saved frame by frame.
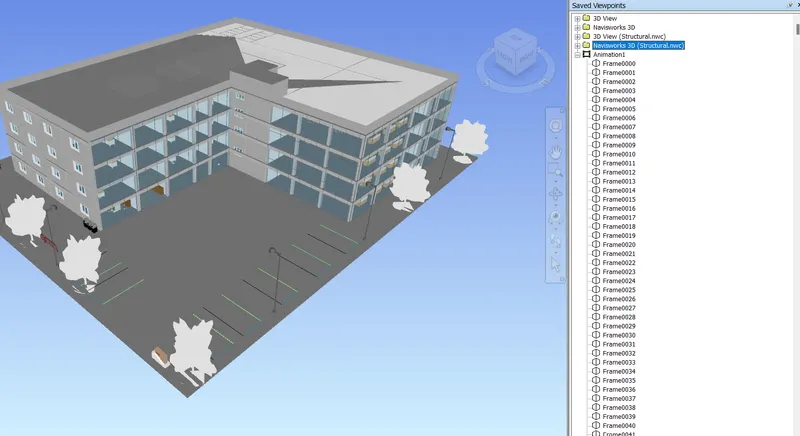
Result:
Walk around the model and walk through the rooms created is done by using the navigate tool and the moving is recored as animation in navisworks file.
3) Use Navigate tool to use Realism feature to walk through the model and record your moving as animation in Navisworks file.
Aim:
To use realism feature to walk through the model and record the moving as animation in navisworks file.
Introduction:
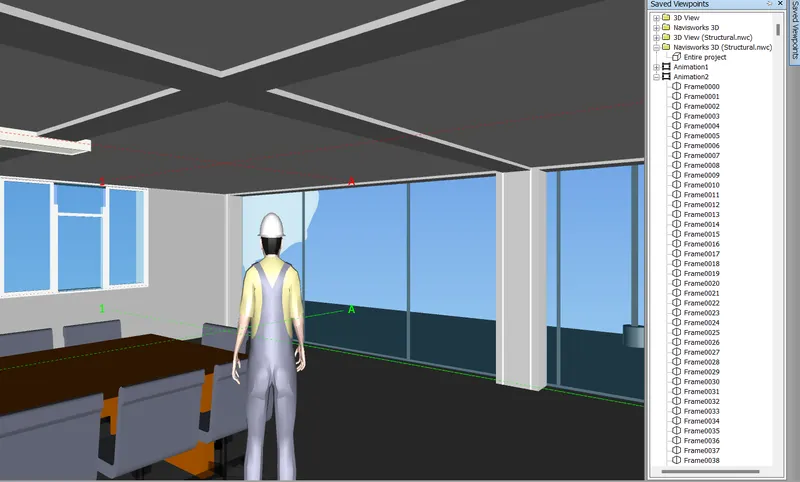
Realism feature enables the gravity, collision and third person. It will helps to walk the model in a reality manner. Like the walk option we can save the view and used to clarify the clashes.
Procedure:
- Drop down the realism option under the viewpoint tab.
- Check collision, gravity and third person.

- Now dropdown the save viewpoint option under viewpoint tab.
- Click the record option.
- This will record the walk through in the animation form.
- Select walk option under viewpoint tab.
- Start walk through the model.
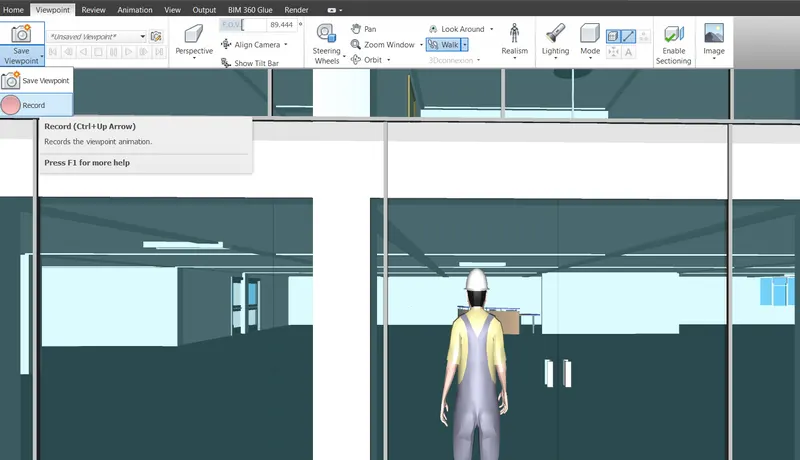
- The walk through helps to find the clashes of elements.
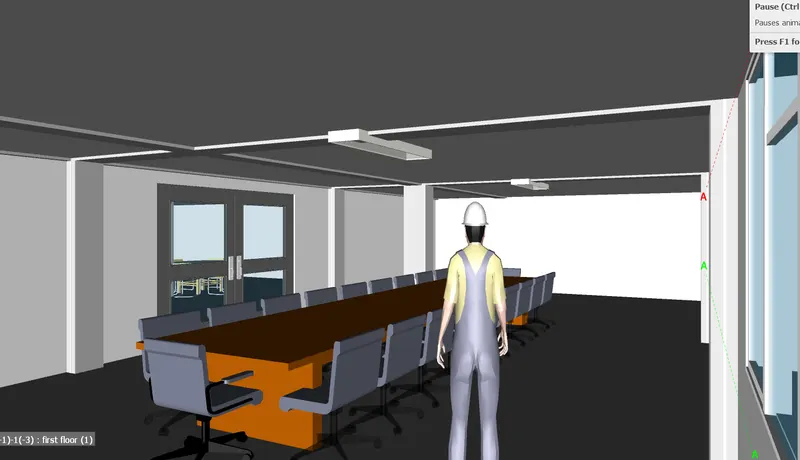
- The walk through is saved as a animation file.
- The animation will be saved by frame by frame.
- We can export the animation file.
Result:
Walk through the model is done by the use of realism feature and the moving is recorded as animation in navisworks file.
4) Embed both architecture and structure *.nwc file to your Navisworks file. Create a clash detection test between the two models
a. Run the Clash Detection Test
b. Study the clashes between the two models
c. List which of the clashes could be approved
d. List which of the clashes could be neglected ( will be taken care later)
e. List which of the clashes can be resolved
f. Save the results after color coding the clashes to the Navisworks file
g. In case of resolution annotate the clash and save the view to defined views in Navisworks
Aim:
To create a clash detection test between architectural and structural model.
a. Run the Clash Detection Test
b. Study the clashes between the two models
c. List which of the clashes could be approved
d. List which of the clashes could be neglected ( will be taken care later)
e. List which of the clashes can be resolved
f. Save the results after color coding the clashes to the Navisworks file
g. In case of resolution annotate the clash and save the view to defined views in Navisworks
Introduction:
The clash detective tool enables to search through the entire project model, identify the clashes earlier in the design stage. Clash detection aids to identifying, inspecting and reporting the clashes in the project model effectively. It is useful in checking work status and wanes down human errors during model inspections. Clash detection is important in BIM because it integrates several discipline models.
Procedure:
a. Run the Clash Detection Test
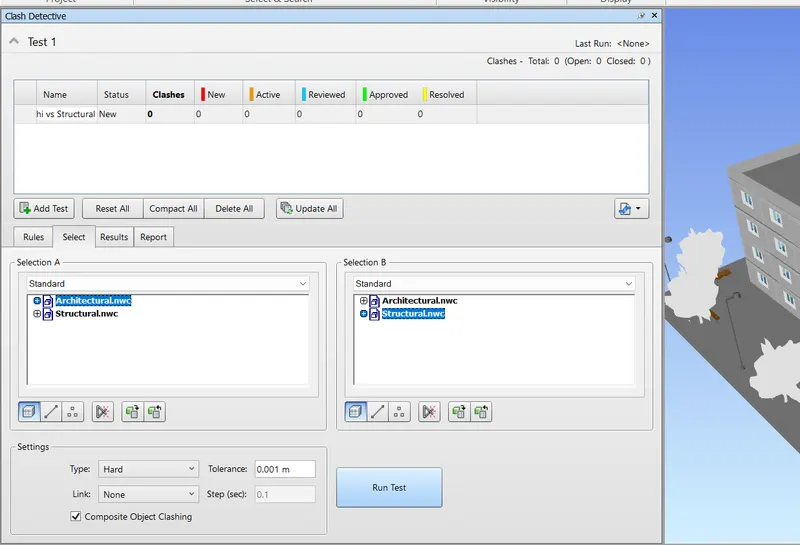
- Select 'clash detective' option under the home tab.

- Clash detective dialouge box is opened.
- Click add test.
- Rename the test as 'Archi vs structural'
- Select selection A as Architectural.nwc and selection B as Structural.nwc
- Make sure the selection of surface.
- Click 'run test'
b. Study the clashes between the two models
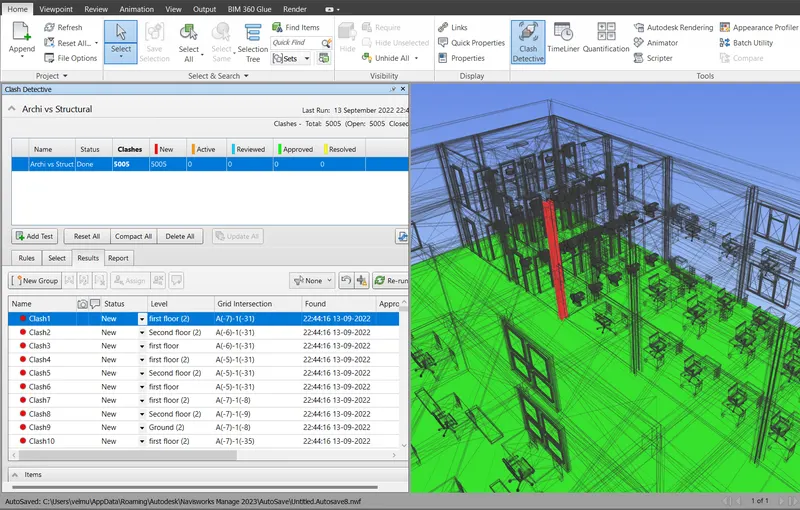
- Now the test will run and the resuts are shown.
- Study the clashes between the models.
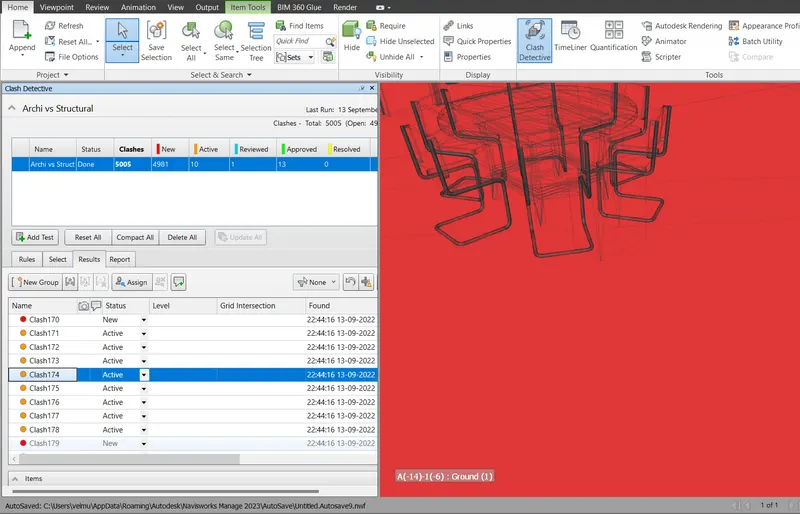
c. List which of the clashes could be approved
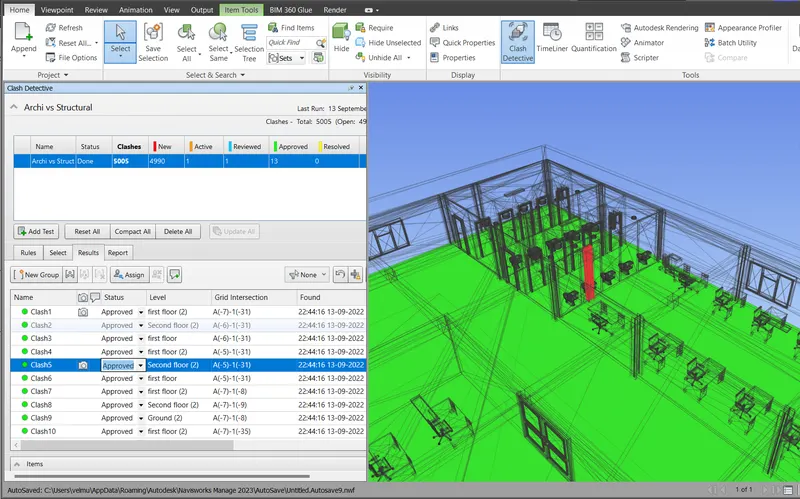
- The clashes are part of construction will be approved and these clashes are no more appear.
- Once the clash status is approved, the color is changed to green color.
d. List which of the clashes could be neglected ( will be taken care later)
- The clashes will not affect the model is to be neglated and it will be taken care later.
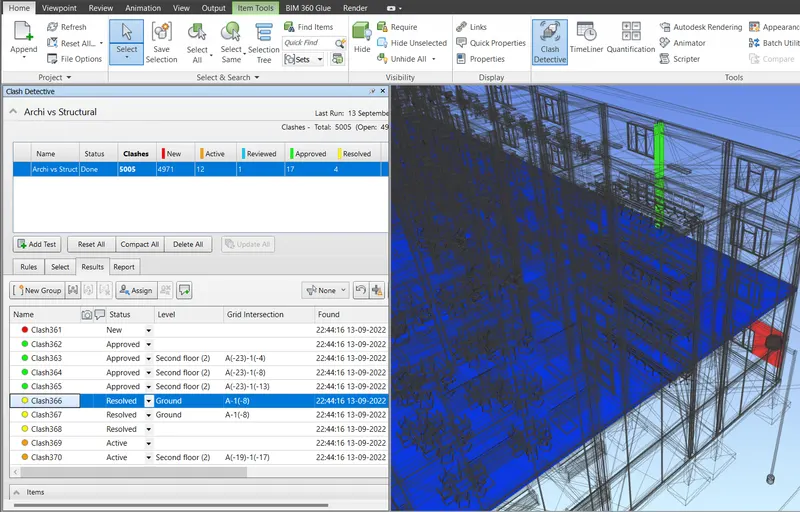
e. List which of the clashes can be resolved
- The clashes is marked as resolved, the model boundary conditions are changed and these clashes are excluded from the clash detection test.
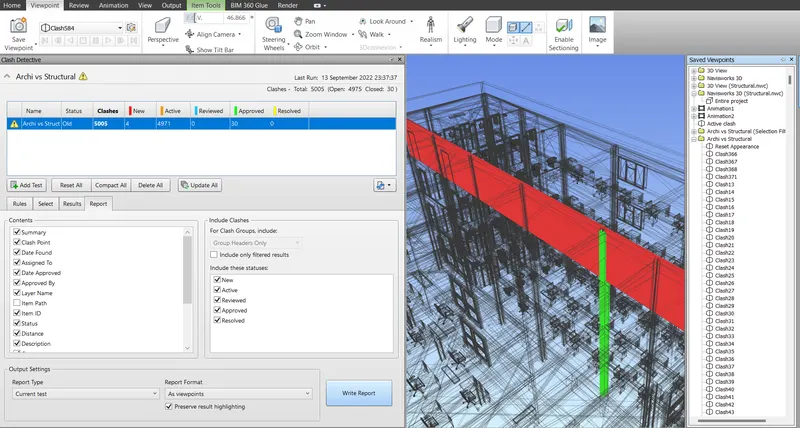
f. Save the results after color coding the clashes to the Navisworks file
- Once the clashes status are marked then the result can saved as text format, viewpoint, HTML format.
- Click report option in the clash detection dialouge box.
- Select the format and click write report.
- The report will saved in the viewpoints.
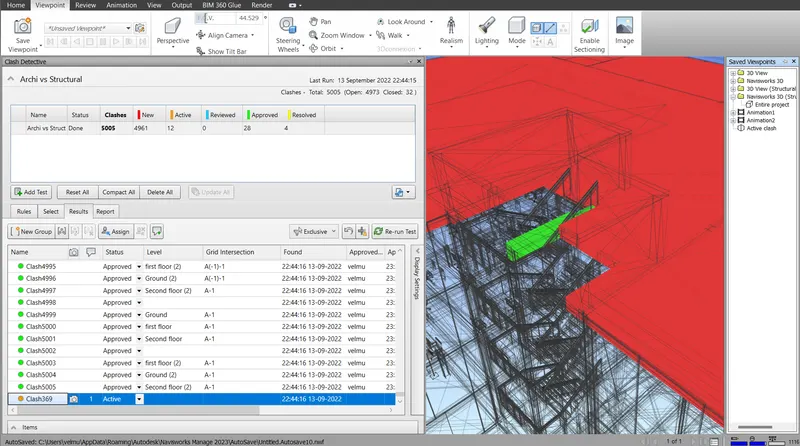
g. In case of resolution annotate the clash and save the view to defined views in Navisworks
- For make the resolution for the active status clash.
- We can add a command and saved the view to the viewpoints.
Result:
The clash detection test between architectural and structural model is created, performed and the results are saved.
5) Using the Timeliner feature in Navisworks prepare a schedule for the project developed in week 6 to 8 by adding reasonable assumptions for task start date and end date and simulate the task completion as a visual simulation. Record it and save the timeline simulation to Navisworks file.
Aim:
To prepare a schedule for the project and add tast startdate and end date and simulate the task completion as a visual simulation.
Introduction:
TimeLiner imports schedules from a variety of sources then connect tasks in the schedule with objects in the model to create a simulation. This allows to see the effects of the schedule on the model, and compare planned dates against actual dates. Costs can also be assigned to tasks to track the cost of a project throughout its schedule. TimeLiner also allows the export of images and animations based on the results of the simulation.
Procedure:
- Select timeliner icon under the home tab.
- The timeliner dialouge box will be opened.
- Then click the selection tree under home tab.
- This will helps to select the element and attach to the task.
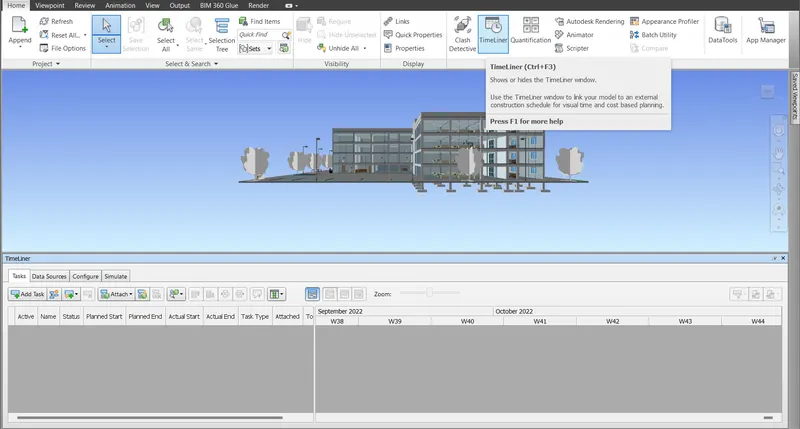
- Now click add task option in the timeliner.
- Then set the planned start date, planned end date and actual start date, actual end date.
- The select the element in selection tree and attach to the current selection.
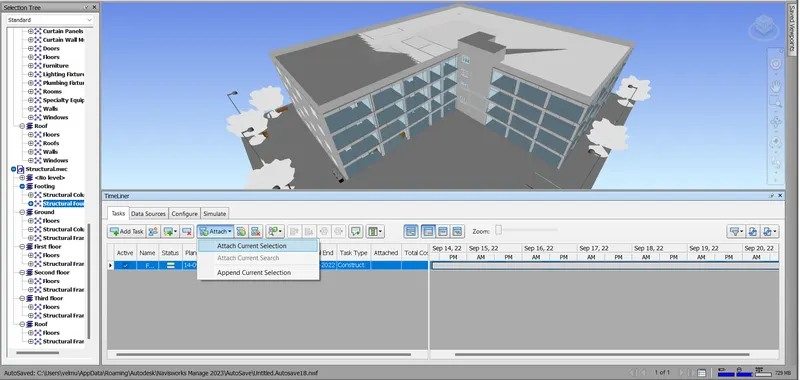
- Add more tasks that will start at the footing laying.
- End with the architectural walls and floors upto the foor level.
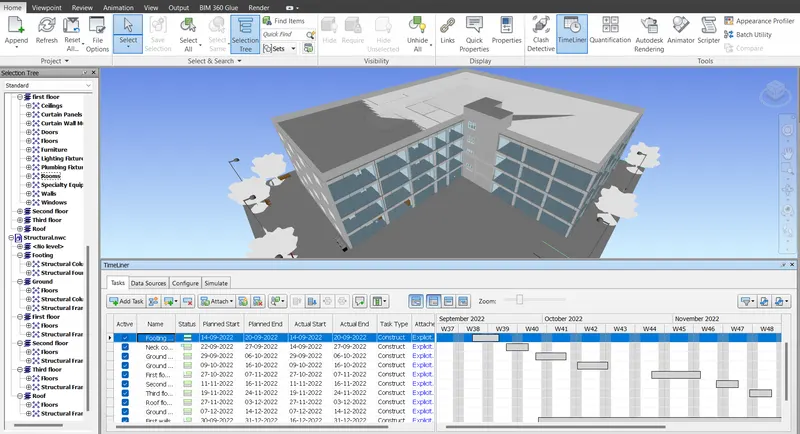
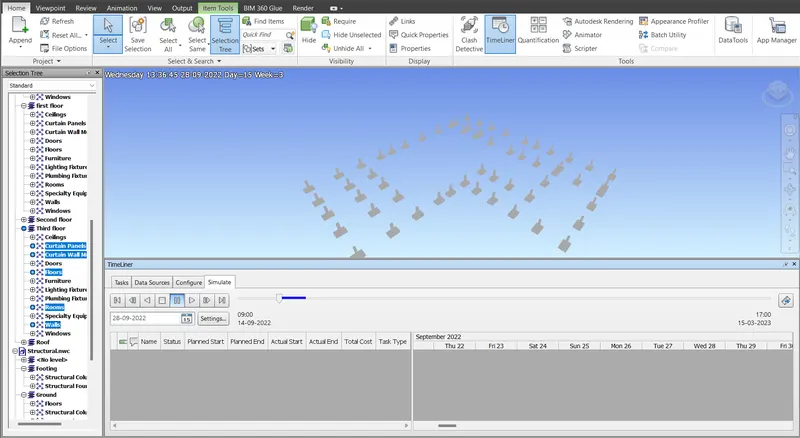
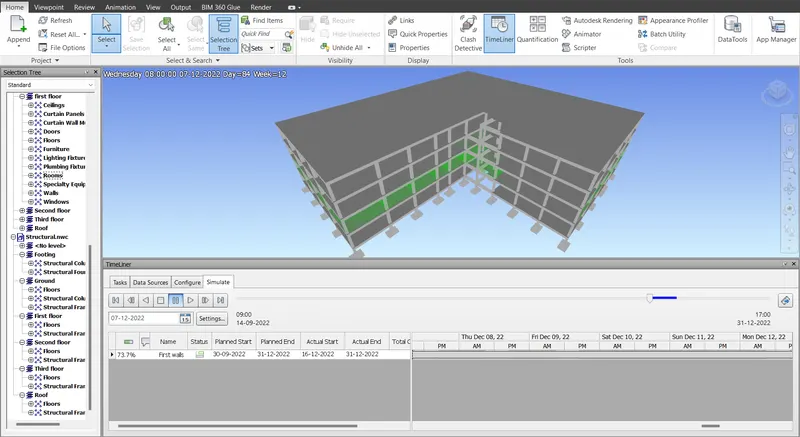
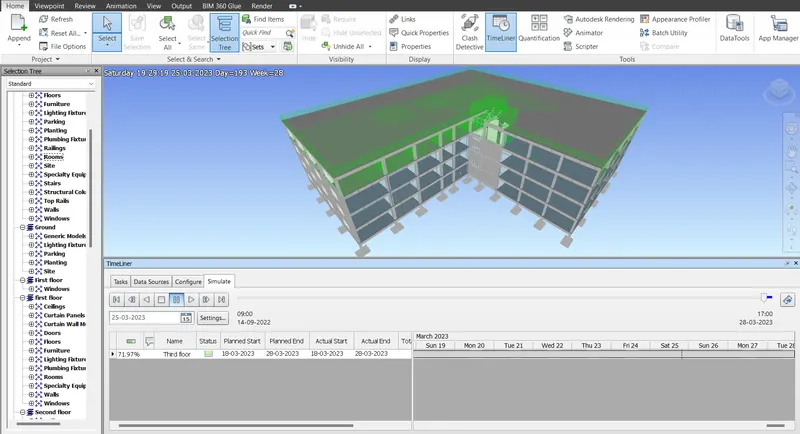
- Now select simulate option in the timeliner dialouge box.
- Next tap the play button the simulation will start.
- The simulation animation is played.
Result:
Schedule for the project is prepared and task start date and end date is added and the task completion is simulated as a visual simulation. The timeline simulation is saved to navisworks file.