Usage of Navigation tool , Timeliner and Clash Detection test using Naviswork
1Q]
AIM: -
Download the NAVISWORKS EXPORTER.
Export the Revit Architecture model and Structural model to Navisworks cache file.
PROCEDURE: -
Open the Google
Type NAVISWORKS EXPORTER
Click on Autodesk.com website link
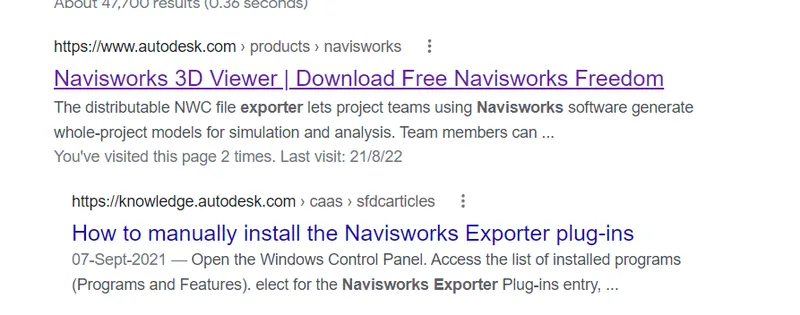
Scroll down to Navisworks Exporter download list
Click on the required Version
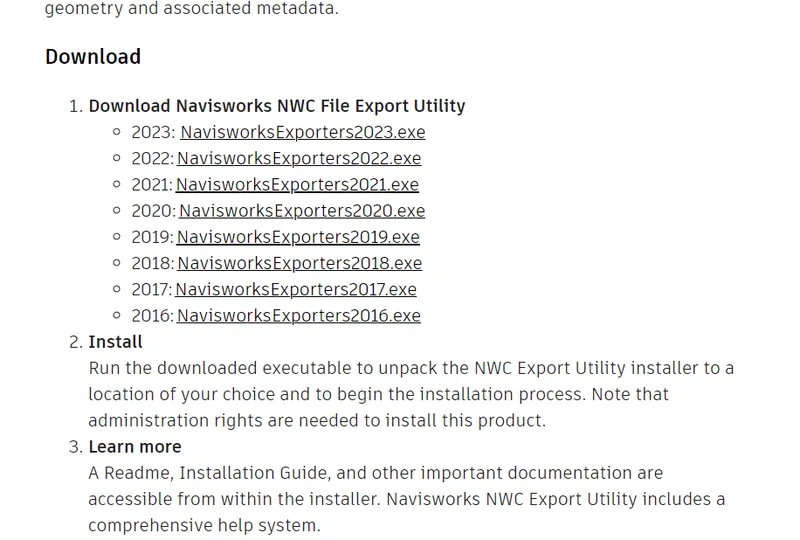
Download and install the software
Open the Revit File
Click on the FILE TAB
Go to Export option from the dropdown list
Here you can see NWC icon
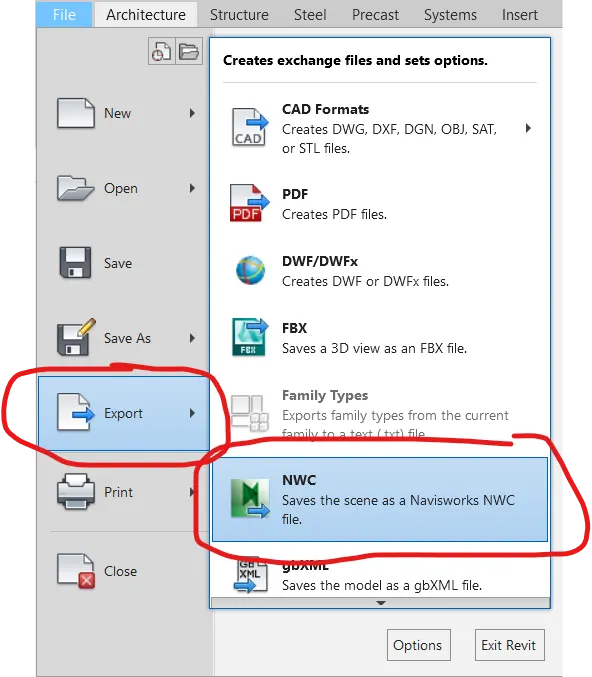
We successfully installed Navisworks Exporter
Open the Project 1 Architecture File in Revit
Click on the FILE TAB
Go to Export option from the dropdown list
Here you can see NWC icon
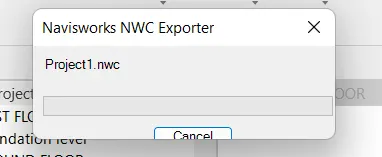
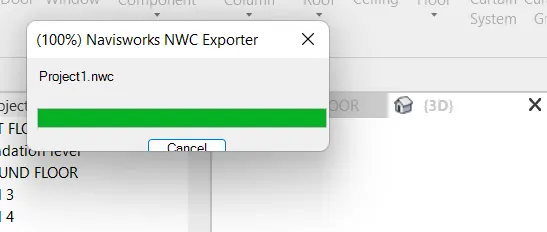
Click on the NWC icon
Save as dialogue box opens
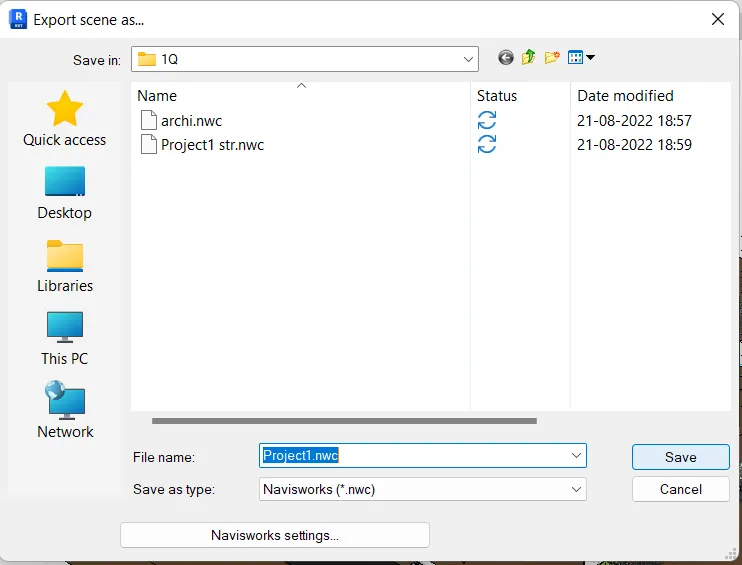
Save the file at desired location
Make sure that the file has extension of .nwc
RESULT: -
We downloaded and installed the NAVISWORKS EXPORTER.
Exported the Revit Architecture model and Structural model to Navisworks cache file.
2Q)
AIM: -
Use Navigate tool to walk around the model
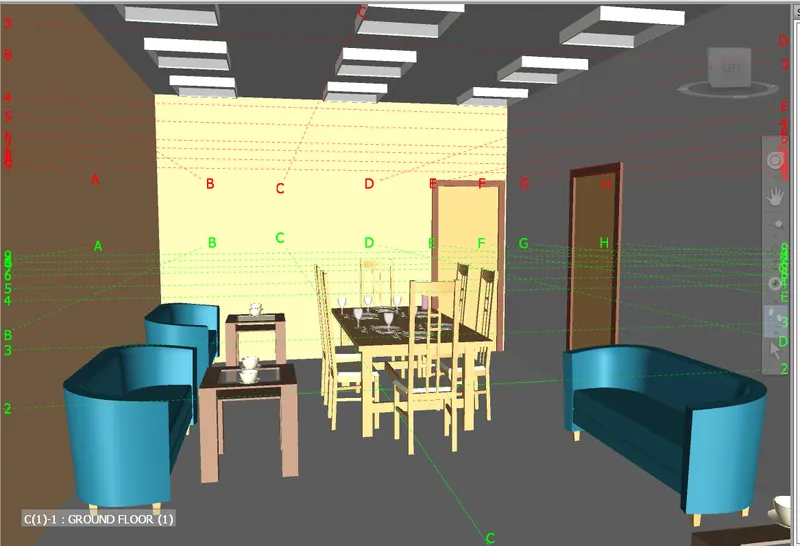
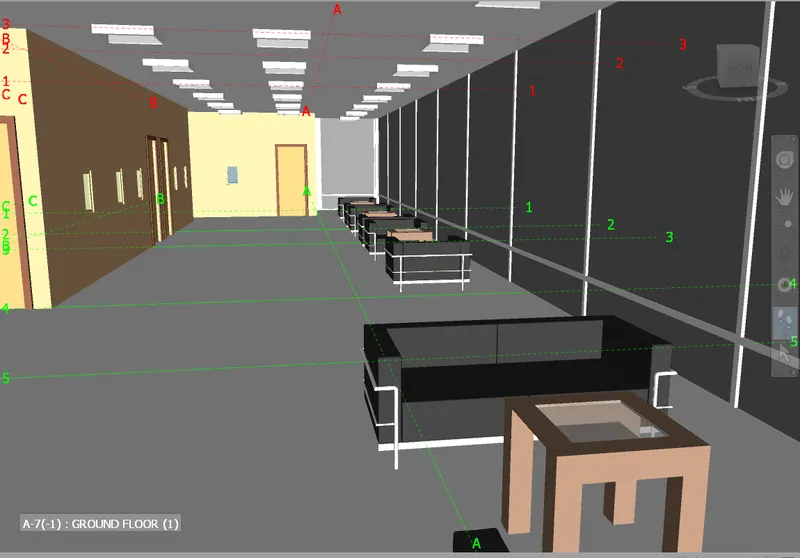
Walk through the rooms created
Record moving as Animation
PROCEDURE: -
Open Navisworks Manage
Click on Application Button
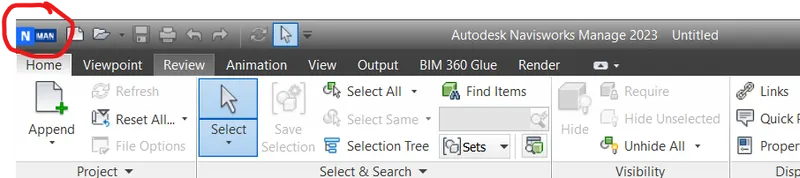
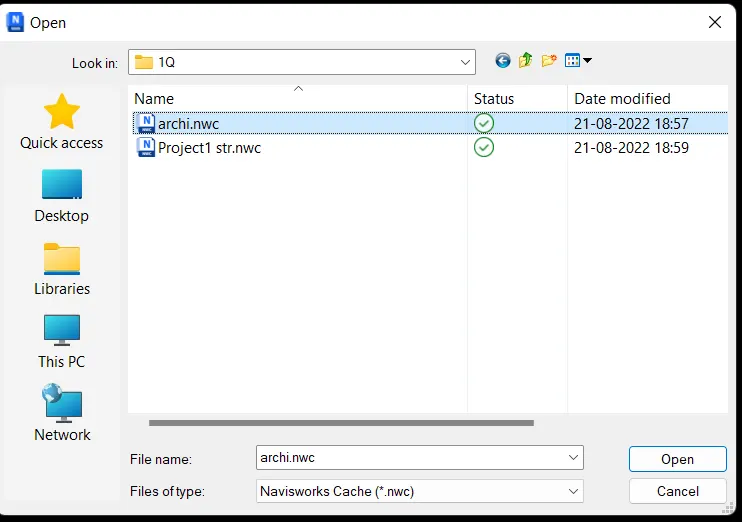
Select Open option from the dropdown list
Click on OPEN
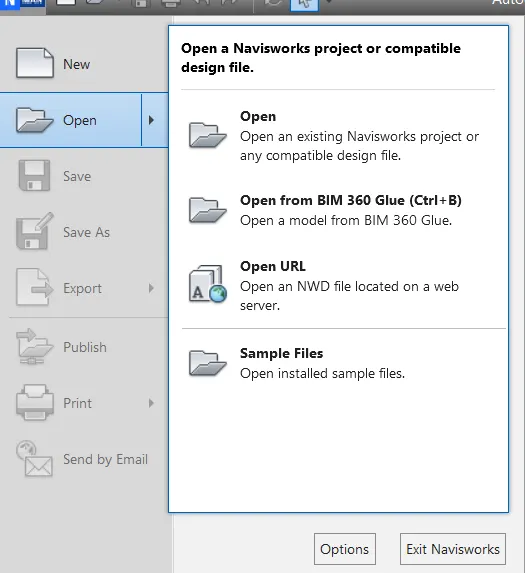
Dialogue box opens
Select the required file from the folder
Press Ok
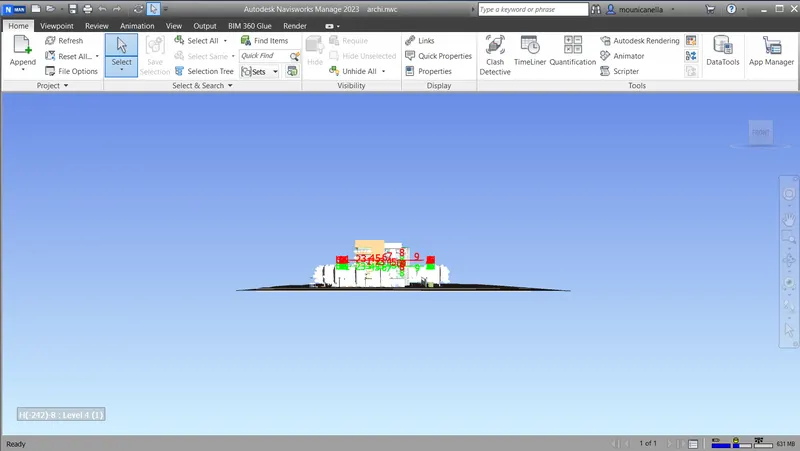
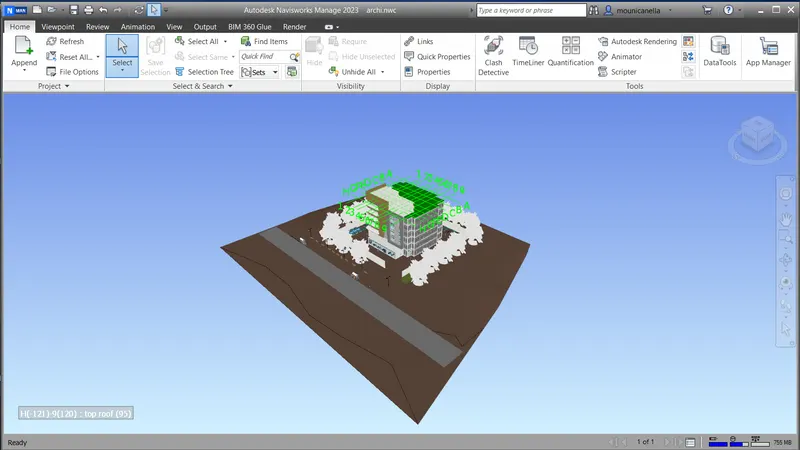
Click on View Point Tab
Go to Navigate Panel

Select Walk tool

Click on Save Viewpoint tool

Enter the name in the Saved viewpoints browser
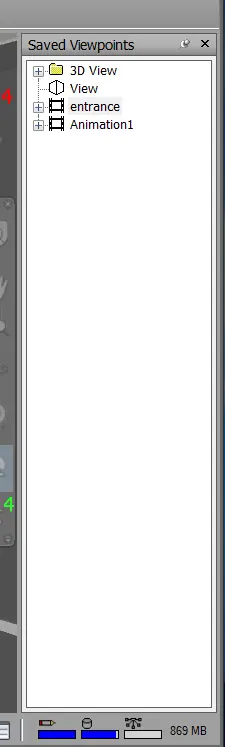
Click on Record option from the list in the Save Viewpoint tool
Using Arrow Keys move inside the building through each room
After finishing the Walk
Go to Recording Panel in Viewpoint Tab
Click on Stop

Name the Animation: Turn-around
To see the Record
Click on Animation Tab
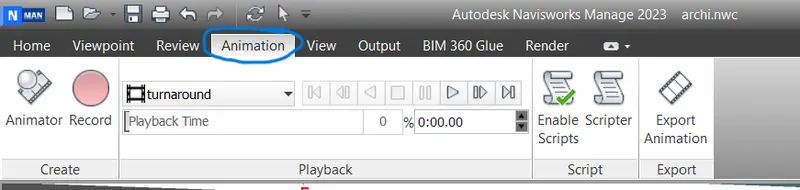
Click on Turn-around option in Saved viewpoint panel
Recorded Animation will be played
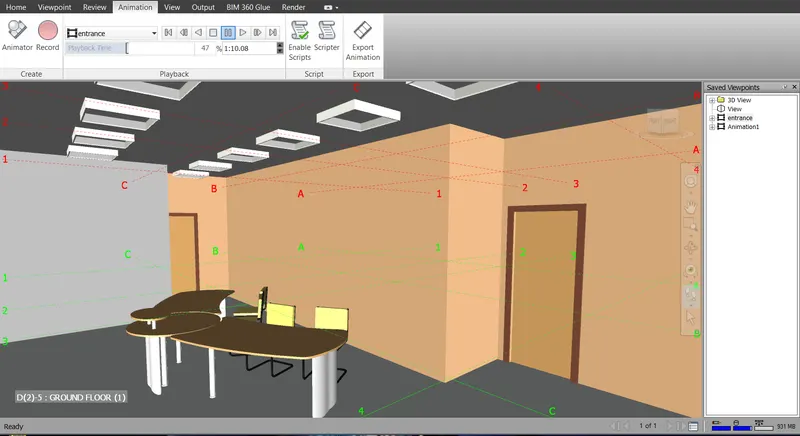
To export the Animation,
Go to Export panel
Click on Export Animation tool

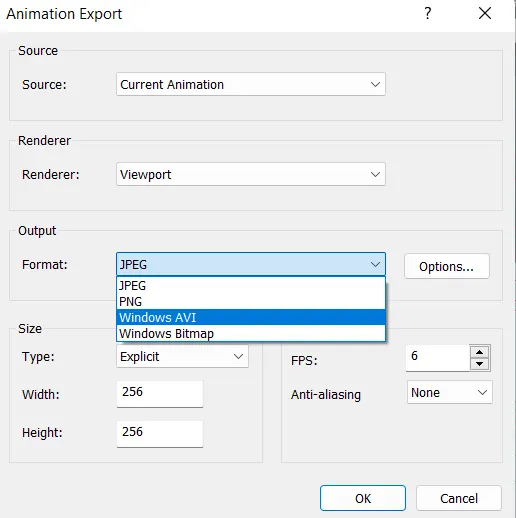
Animation Export dialogue box opens
Change the format: windows AVI
Press ok
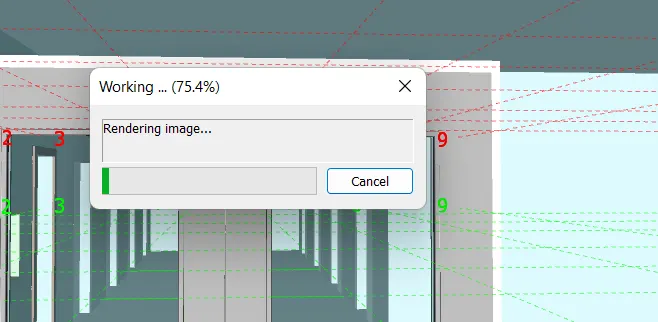
Animation will be saved.
RESULT: -
Used Navigate tool to walk around the model
Walked through the rooms created
Recorded moving as Animation
3Q]
AIM: -
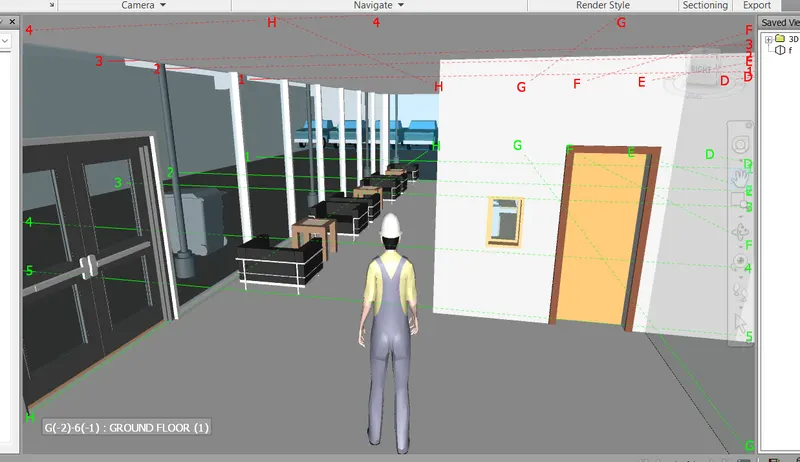
Use Realism feature to walk through the model
Record moving as Animation in Navisworks file.
PROCEDURE: -
Click on View Point Tab
Go to Navigate Panel
Click on Realism tool
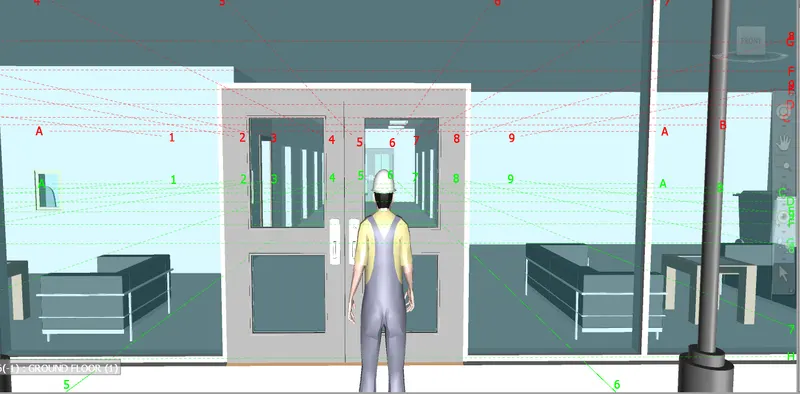
Select third person from the List.

Select Walk tool
Click on Save Viewpoint tool
Enter the name in the Saved viewpoints browser : Realism Anmtn
Click on Record option from the list in the Save Viewpoint tool

Using Arrow Keys move inside the building through each room
After finishing the Walk
Go to Recording Panel in Viewpoint Tab
Click on Stop

Name the Animation: Realism Anmtn
To see the Record
Click on Animation Tab
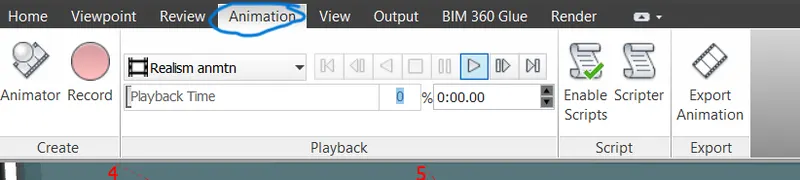
Click on Realism Anmtn option in Saved viewpoint panel
Recorded Animation will be played
To export the Animation,
Go to Export panel
Click on Export Animation tool
Animation Export dialogue box opens
Change the format: windows AVI
Press ok
Animation will be saved.
RESULT: -
Used Realism feature to walk through the model
Recorded moving as Animation in Navisworks file.
4Q]
AIM: -
Embed both Architecture and structure .nwc files to the Navisworks file.
Create a clash detection test between the two models.
Run the Clash detection Test
Study the Clashes between the Two models.
List which of the clashes could be approved.
List which of the clashes could be neglected.
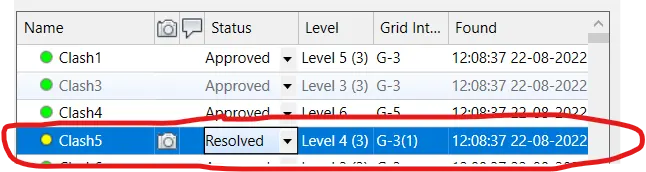
List which of the clashes can be resolved.
Save the Results after colour coding the clashes
In case of resolution annotate the clash and save the view to define views in Navisworks.
PROCEDURE: -
Open Navisworks file in which we already opened Architecture file
Click on HOME TAB
Go to Project panel
Click on APPEND tool
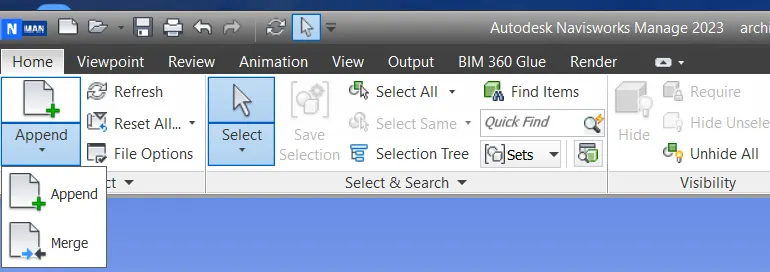
Append dialogue box opens
Select the Structural file.
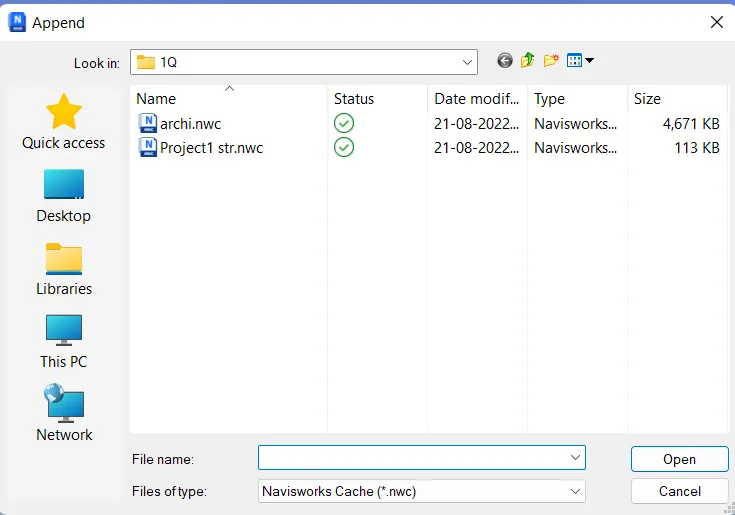
Press OK
Click on HOME TAB
Go to Tools panel
Select Clash Detective tool

Clash Detective dialogue box opens
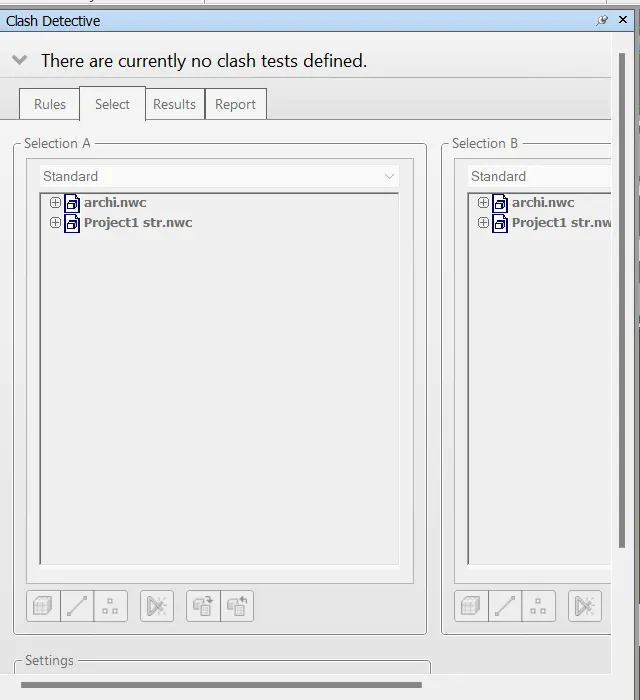
Click on Add Test option
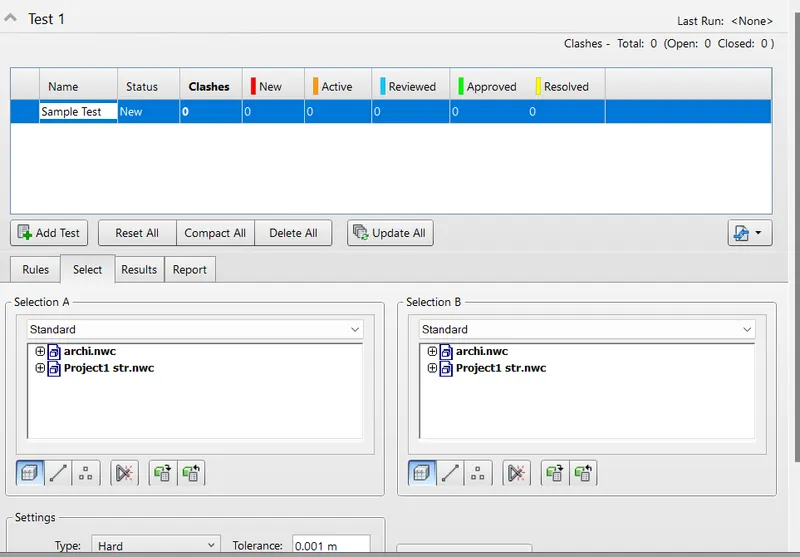
Edit the name: Sample Test
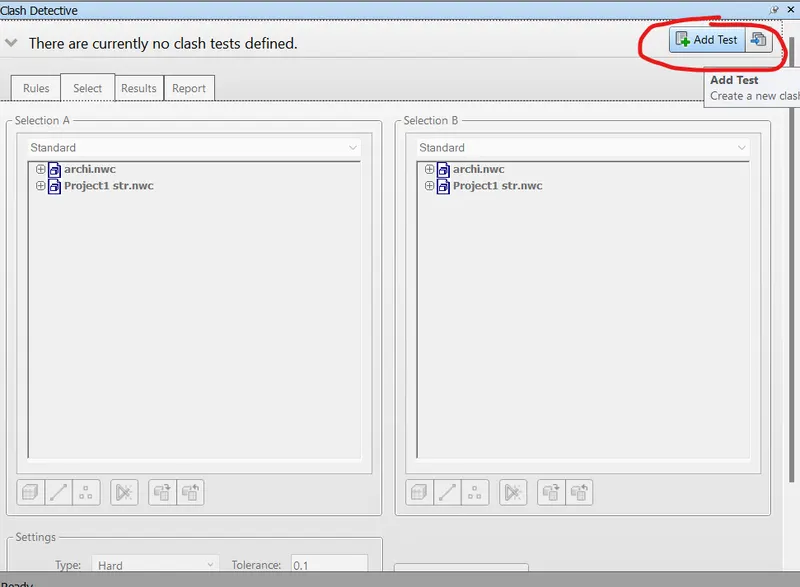
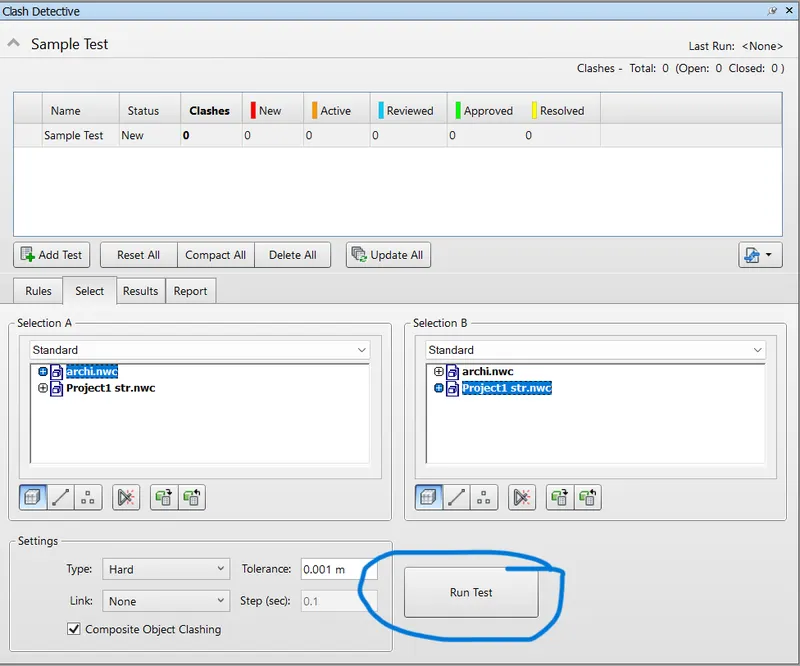
Under Section A, Select Architectural file
Under Section B, Select Structural file
Press RUN TEST
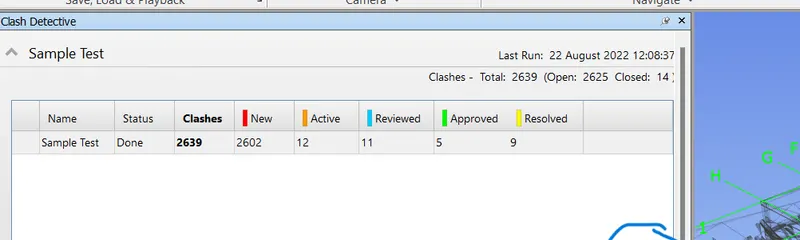
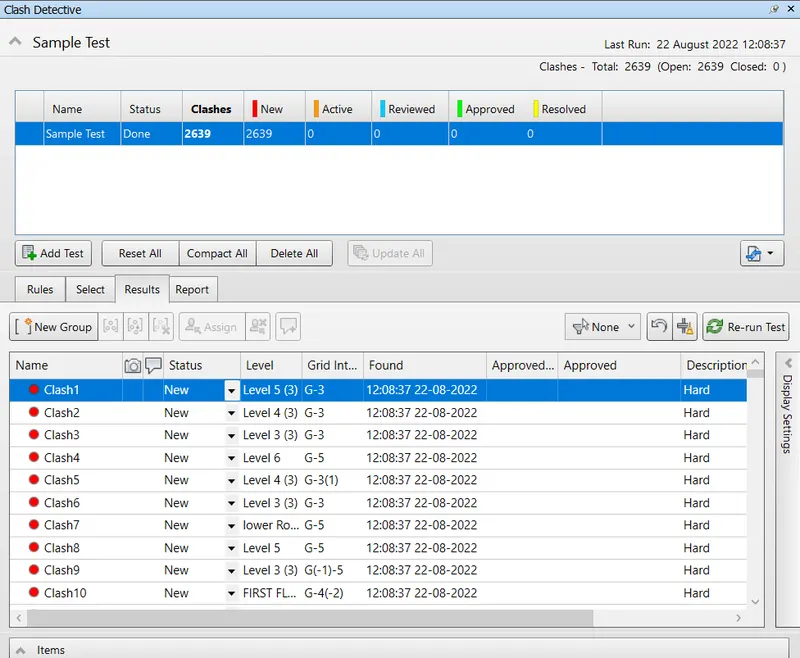
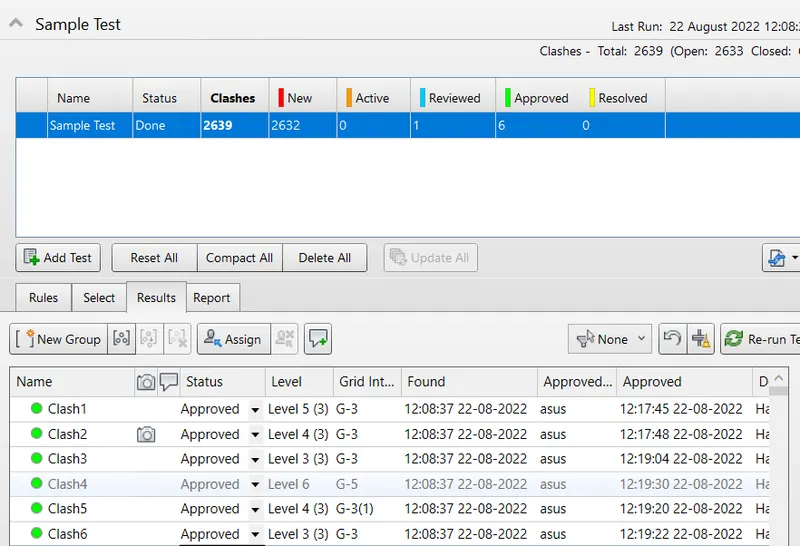
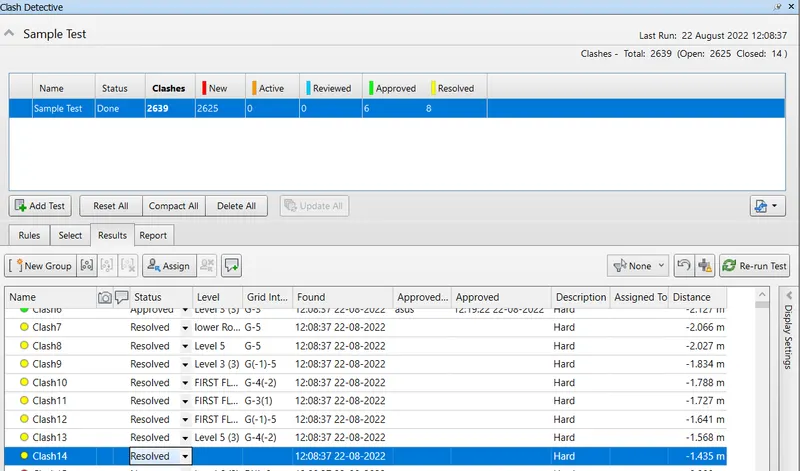
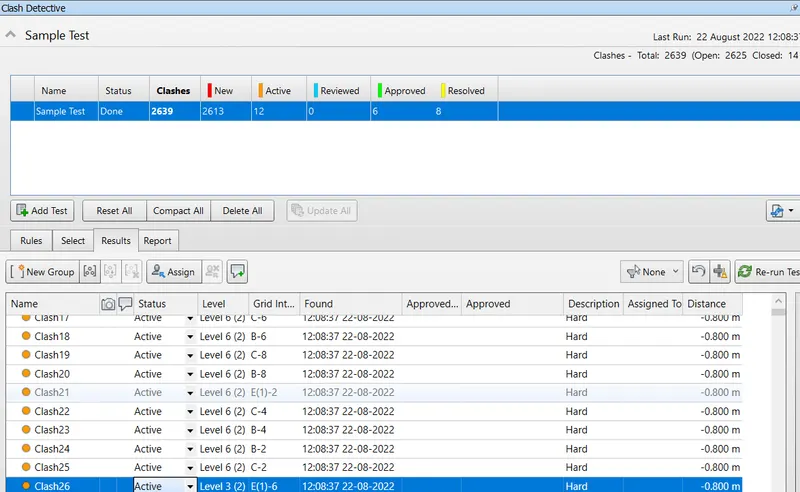
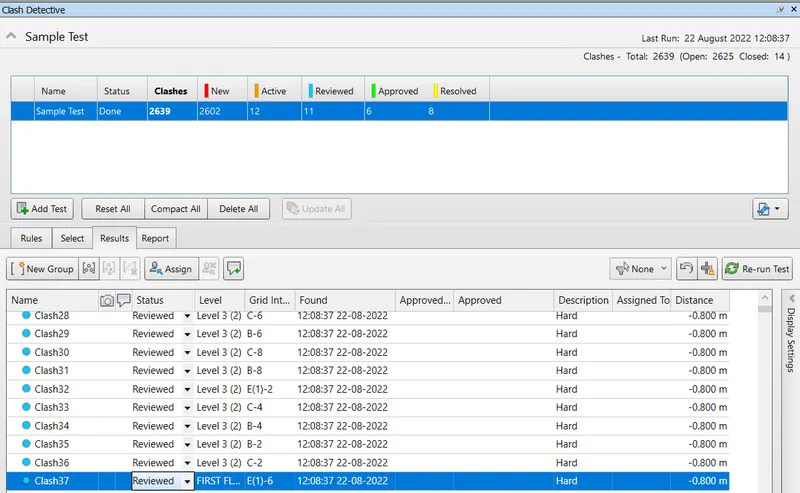
Report displays the Result:
Status
Clashes
New
Approved
Resolved
Active
- List which of the clashes could be neglected.
- List which of the clashes could be approved.
- List which of the clashes can be resolved.
Click on the icon Import/Export clash Test
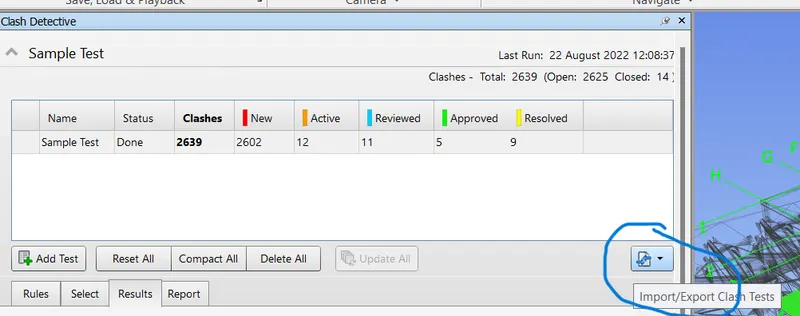
Dialogue box opens
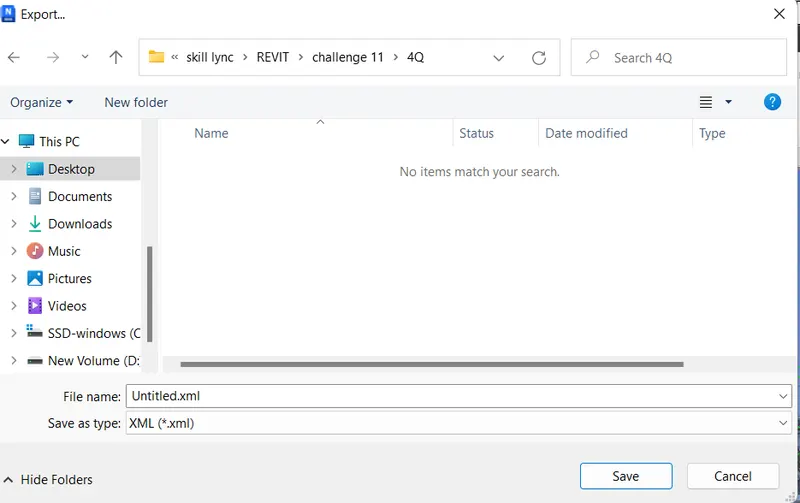
Save the Result
Press OK
RESULT: -
Embeded both Architecture and structure .nwc files to the Navisworks file.
Created a clash detection test between the two models.
Ran the Clash detection Test
Studied the Clashes between the Two models.
Listed which of the clashes could be approved.
Listed which of the clashes could be neglected.
Listed which of the clashes can be resolved.
Saved the Results after colour coding the clashes
5Q]
AIM: -
Prepare a Schedule for the Project using the Timeliner Feature.
Simulate the Task completion as a Visual simulation.
Record it and save the Timeline Simulation
PROCEDURE: -
Open the Navisworks
Click on HOME TAB
Go to Select and Search panel

Click on Selection Tree
Selection Tree browser appears on the screen
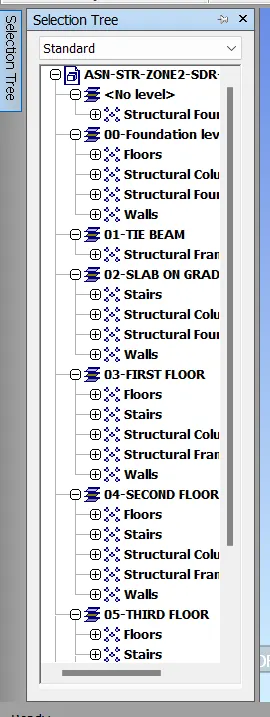
Go to Tools panel Select Timeliner

Timeliner dialogue box opens
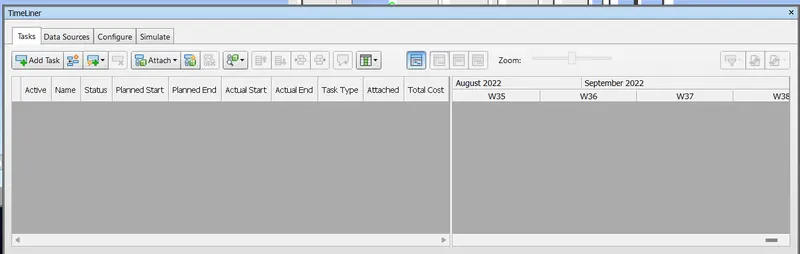
Click on Add Task
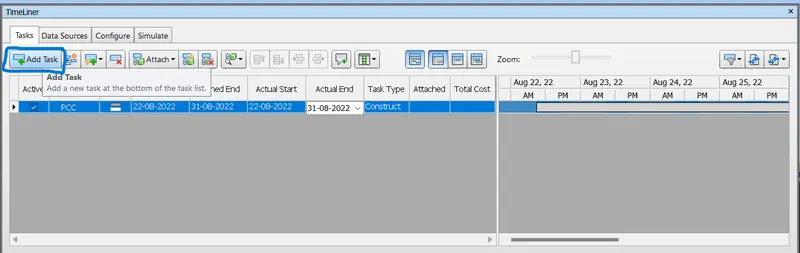
Edit the name: PCC
Task Type: construct
Planned Start: 21/08/2022
Planned End: 31/08/2022
Actual Start: 21/08/2022
Actual End: 21/08/2022
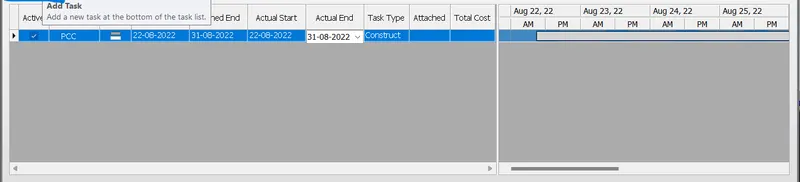
Click on Attach
Select Attach current selection
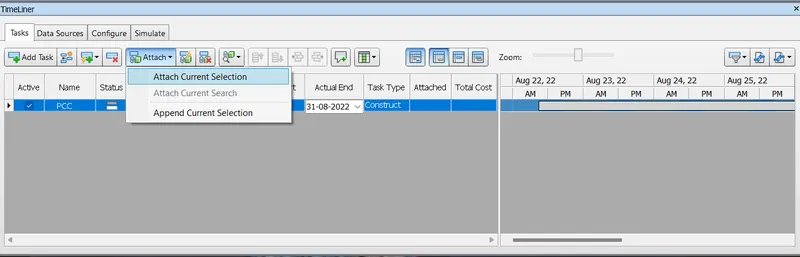
Click on Add Task
Edit the name: Foundations
Task Type: construct
Add All Tasks:
Click on Add Task
Edit the name: Columns
Task Type: construct
Click on Add Task
Edit the name: Tie Beams
Task Type: construct
Click on Add Task
Edit the name: GF-SLAB
Task Type: construct
Repeat the process for all the elements.
GF-COLUMNS
STAIRS-1
WALLS-1
FF-Beams
FF-SLAB
FF-COLUMNS
STAIRS-2
WALLS-2
TF-Beams
TF-SLAB
TF-COLUMNS
STAIRS-3
WALLS-3
Add all the elements of the building.
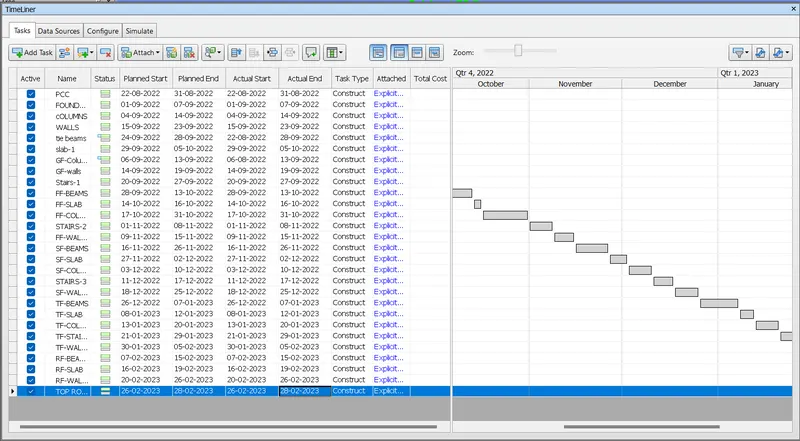
To generate Animation video, Click on SIMULATE
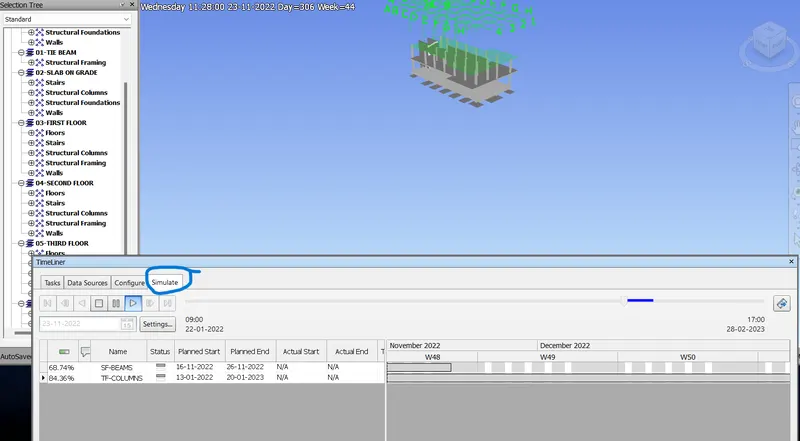
To Export the Animation
Click on Export

Export dialogue box opens
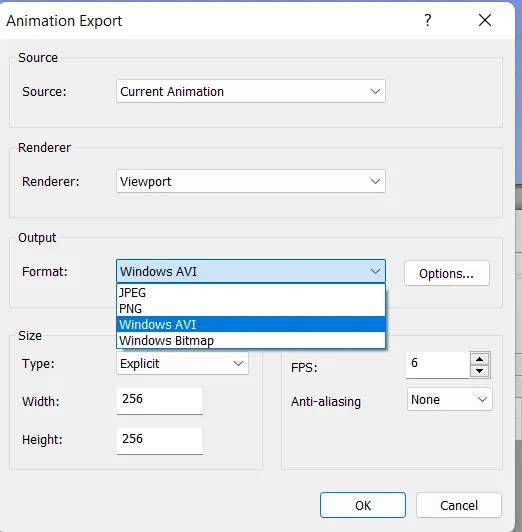
Save the file at the desired Location.
RESULT: -
Prepared a Schedule for the Project using the Timeliner Feature.
Simulated the Task completion as a Visual simulation.
Recorded and saved the Timeline Simulation