Usage of Navigation tool , Timeliner and Clash Detection test using Naviswork
1) Use the Architecture/ Structure Project file developed by you in Week 6 to 8. Export the Revit architecture and structure model to Navisworks Cache file following the export settings discussed in class.
Aim : To use Architectural and structural project files of week 6 to 8 and export the models into the Navisworks Cache file.
Introduction:
- Naviswork allows users to open and combine 3D models, navigate around them in real time and review the model using a set of tools.
- While navigating the models created in the Revit software using Navisworks software we have to first convert the Revit files into Navisworks Cache file.
- The procedure is shown below.
Procedure:
Step 1
- Open the Revit software, and open the architectural file created in week 6.
Step 2
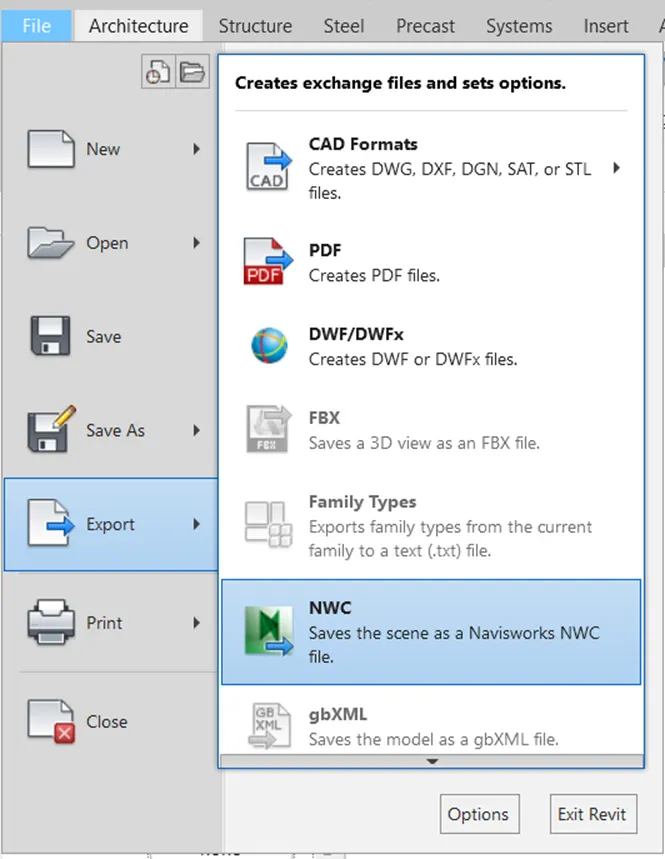
- Go to file menu, select the drop down of export option and choose the NWC option.
Step 3
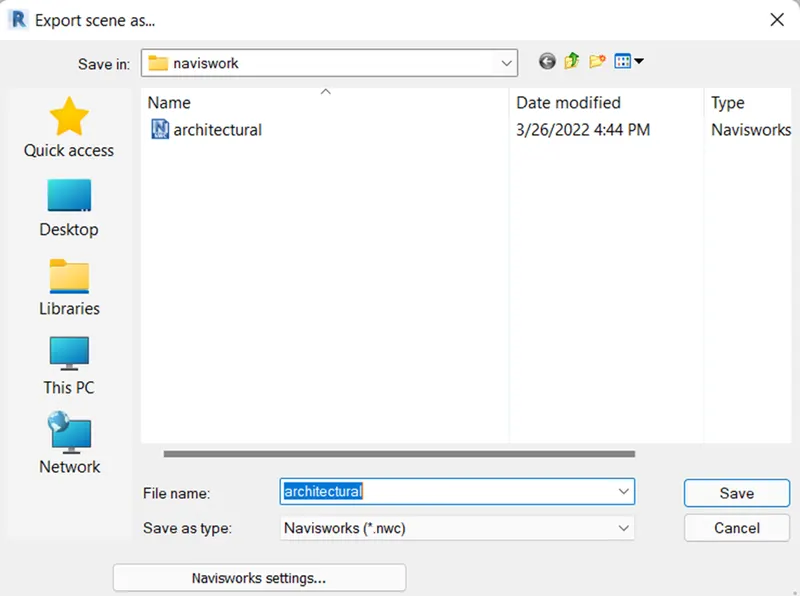
- Save the file as architecture in the destination folder as shown below.
Step 4
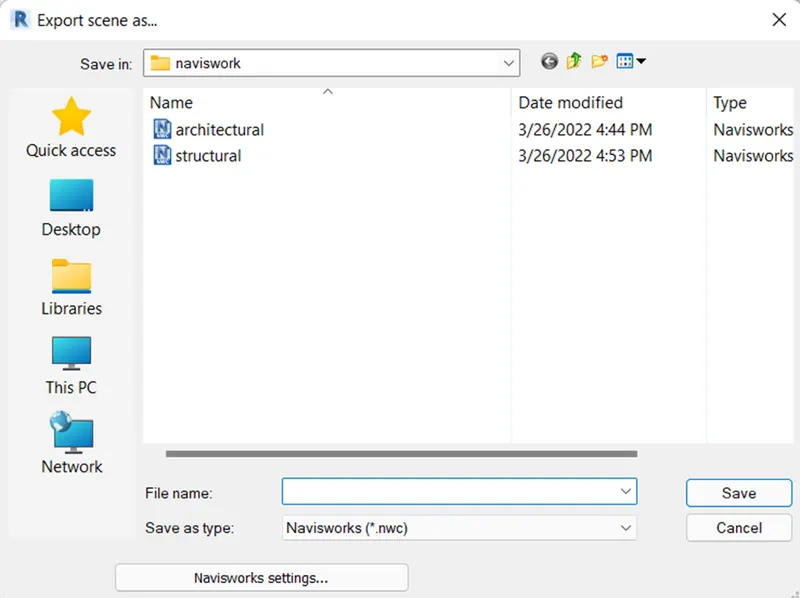
- Similarly open the structural file created in week 6 and export the structural file into the NWC format by following the similar procedure.
Result :
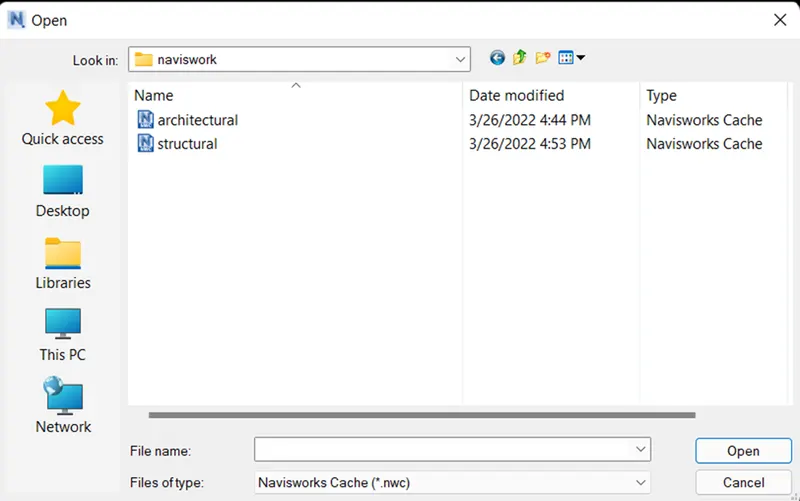
Therefore, the architectural and structural project files developed in week 6 to 8 are exported to Navisworks Catch file by using the export setting.
2) Use Navigate Tool to walk around the model and walk through the rooms created and record your moving as animation in your Navisworks file.
Aim :To use navigate tool to walk around the model and walk through the rooms created and record as animation in the Navisworks file.
Introduction :
- Navisworks software is used to navigate the Revit models using Navigate tool from the viewpoint tab to walk around the model and walk through the rooms created .
- We can also record the walk through the rooms as the animation in the Navisworks file.
Procedure :
Step 1
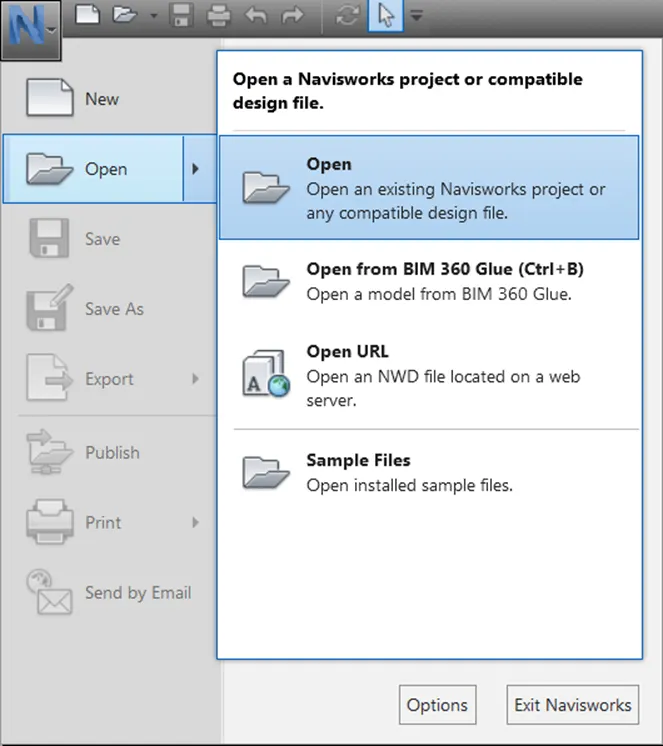
- Open the Navisworks software, go to application menu of Navisworks and select open.
Step 2
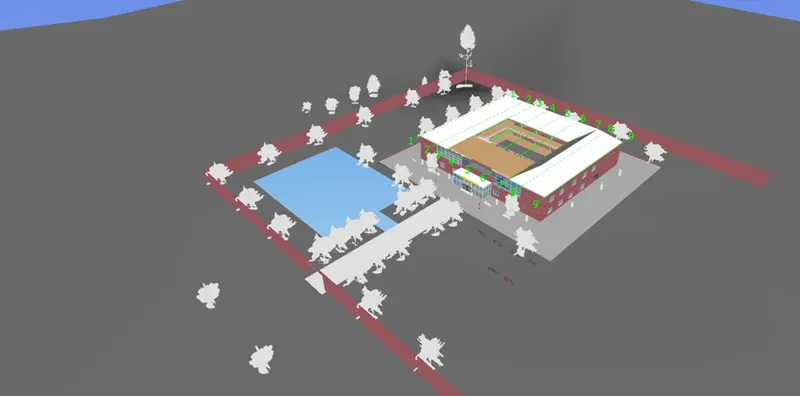
- Select the architectural file from Navisworks folder and select open to import the file.
Step 3
- For creating the walkthrough using the scroll button of mouse fix the start point of the walkthrough.
- Go to viewpoint tab, select the walk tool from navigate panel.

Step 4
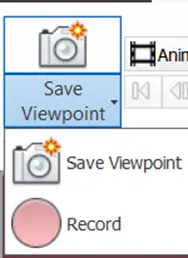
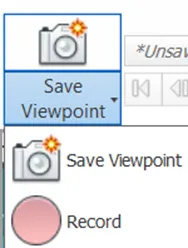
- To record the walk, click on the save viewpoint option from viewpoint tab and rename the view as per required name.
- Then go to viewpoint tool from viewpoint tab and select the record option from save viewpoint tool to record the animated video.
Step 5
- Using cursor and pan tool from camera panel navigate through the model from each room.
- For watching the recorded animated video, go to animation tab, select the view from saved view point window and click on the play button from playback panel.

Step 6
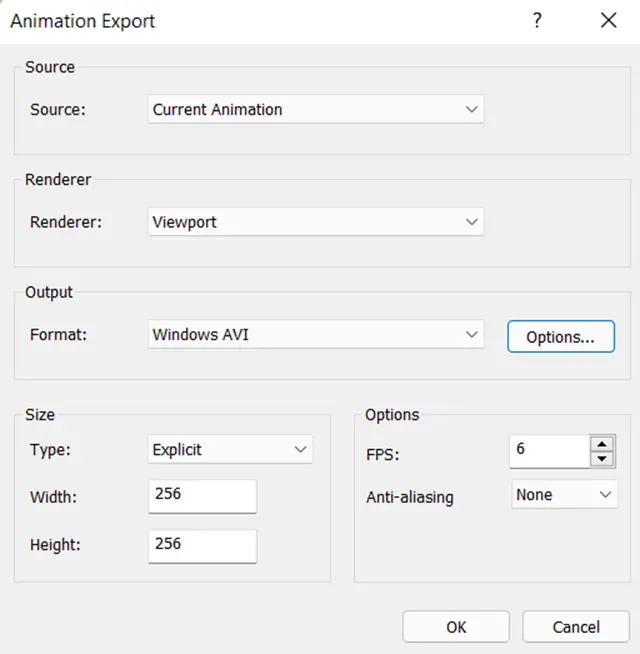
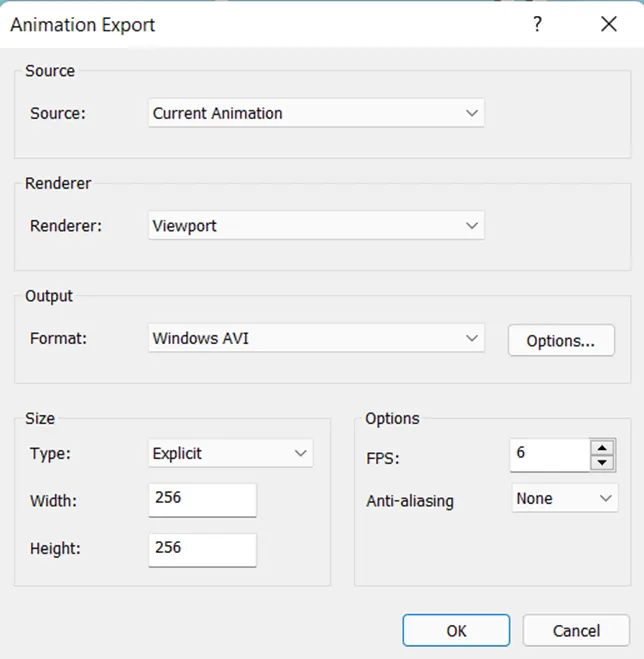
- For exporting animated video into the system select export animations tool from export panel of the animation tab by choosing the file format as windows AVI as per system and select ok.
Step 7
- Choose the destination folder and save the file with appropriate name in the system so that we can see the video without opening the Navisworks software.
Result :
Therefore, navigation tool is used to created walkthrough around the model and the moving is recorded in the Navisworks file.
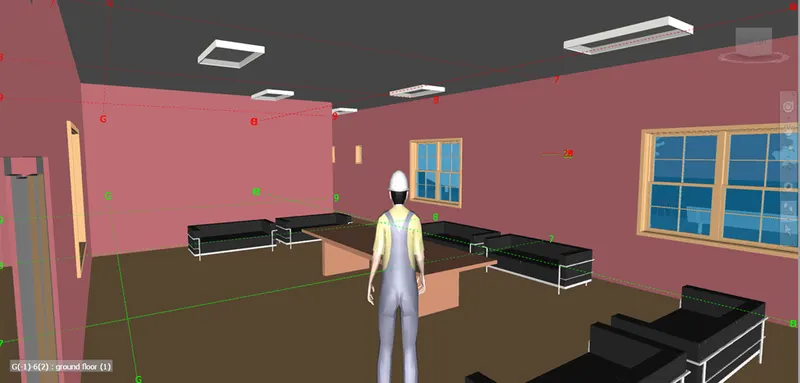
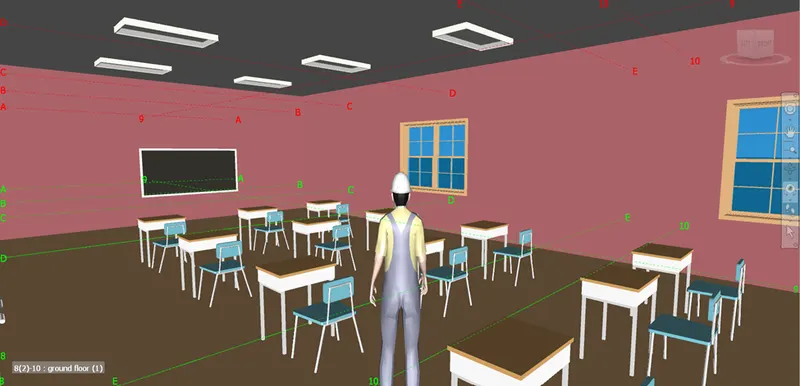
Some of the views of the walkthrough is shown below.
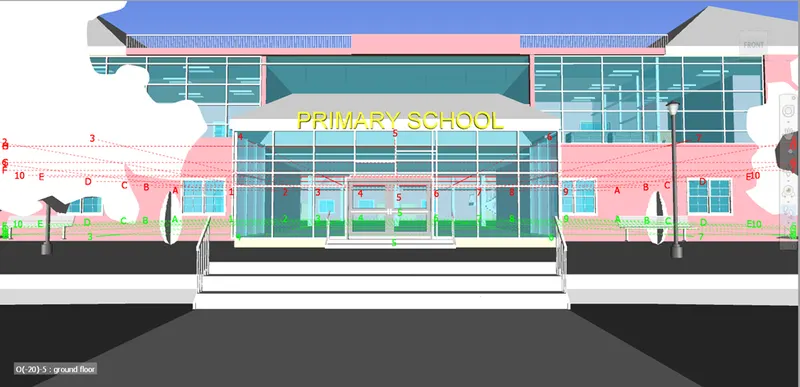
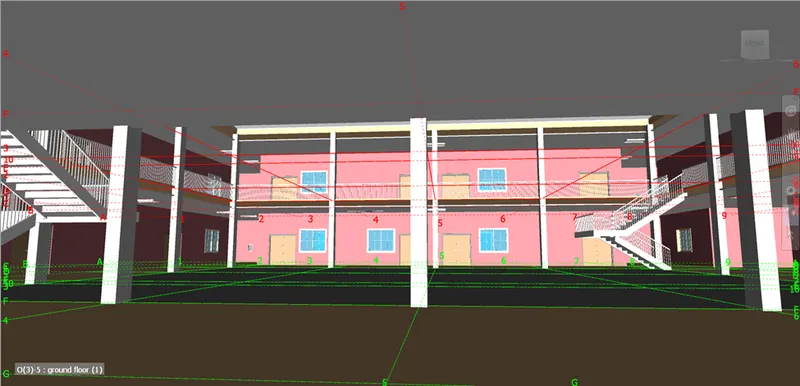
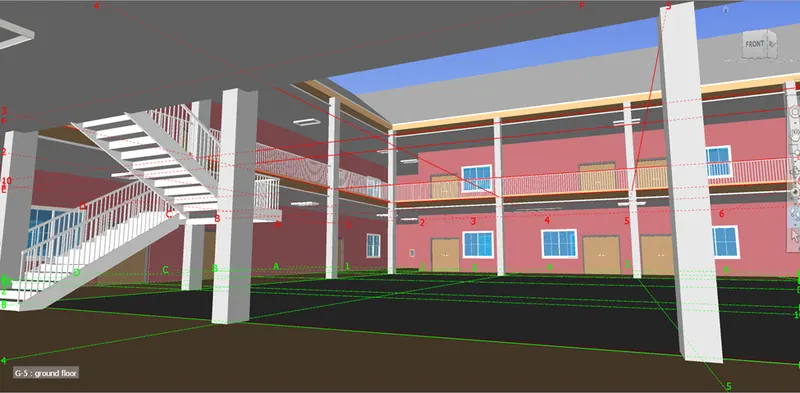
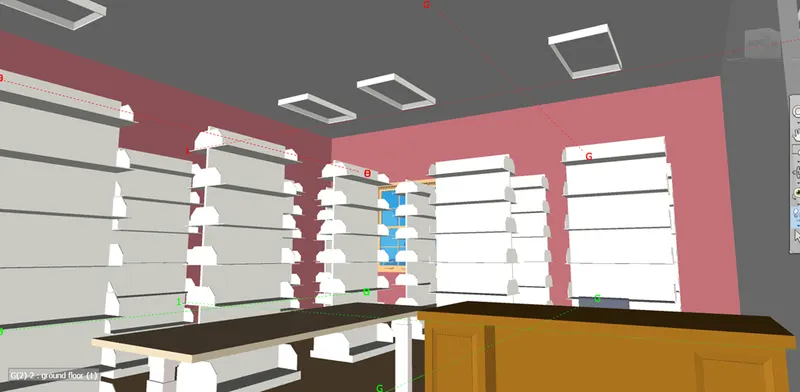
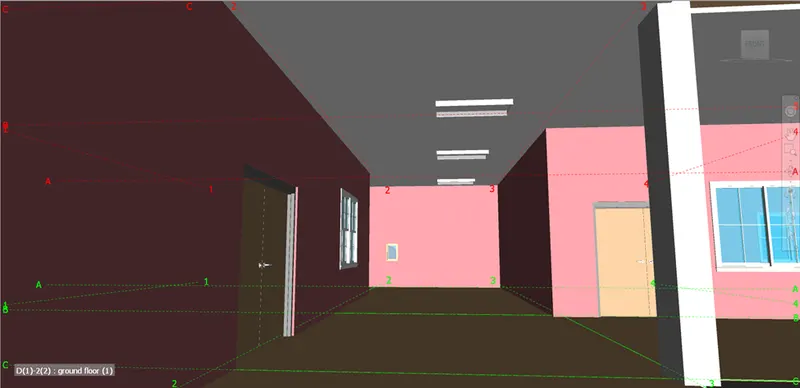
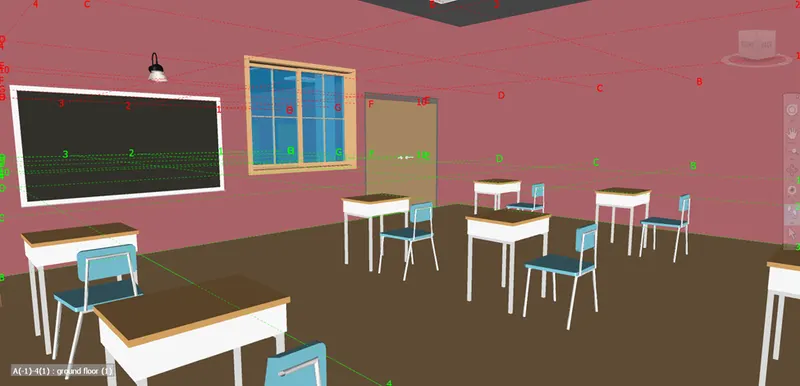
3) Use Navigate tool to use Realism feature to walk through the model and record your moving as animation in Navisworks file.
Aim : To use the navigate tool to use Realism feature to walk through the model and record the moving as the animation file in the Navisworks software.
Introduction :
- When we navigate a 3D model in the Navisworks, we can use the realism tools on the viewpoint tab from the navigate panel to control the speed and realism of navigation.
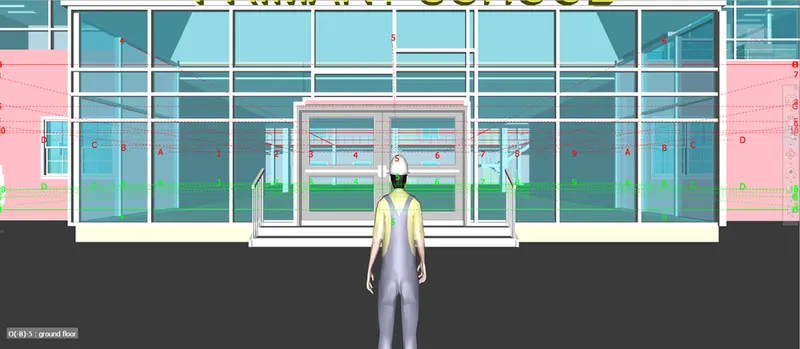
- Using this realism feature in the Navisworks we can walk through the model using the third person and record the moving of the third person as the animation in Navisworks file.
Procedure :
Step 1
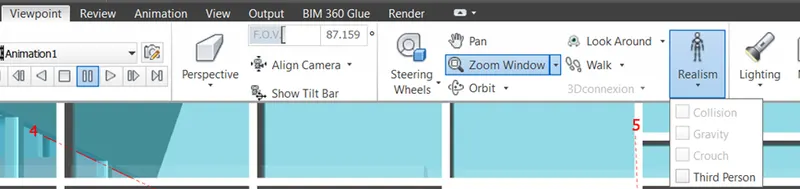
- For creating the realism feature, go to viewpoint tab, select the realism tool from navigate panel and select the third person then third person will appear on the screen.
Step 2
- Go to viewpoint tool and select save view and rename the view as per required name.
- Select the record option from save viewpoint tool of the viewpoint panel.
Step 3
- Select the walk option from navigate panel and walk through each room using mouse to create the walkthrough.
- After creating the recording click on the stop button to stop the recording.

Step 4
- To watch the recording click on the recorded animation video from saved viewpoint window and click on the play baton.
- Go to animation tab, select the export animation tool from export panel by choosing appropriate file format to create the animation video which can be seen without opening the Navisworks software.

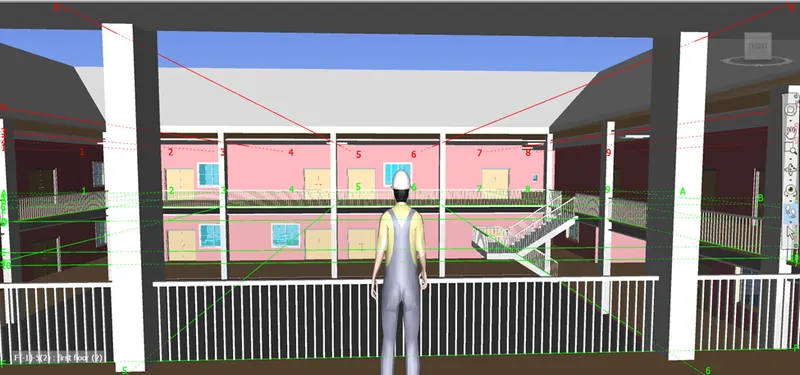
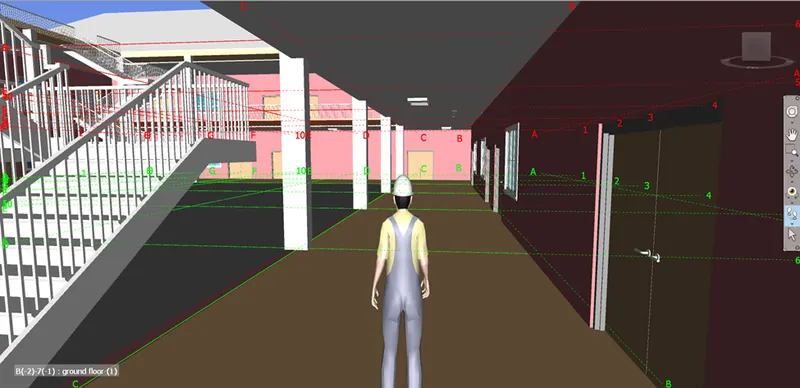
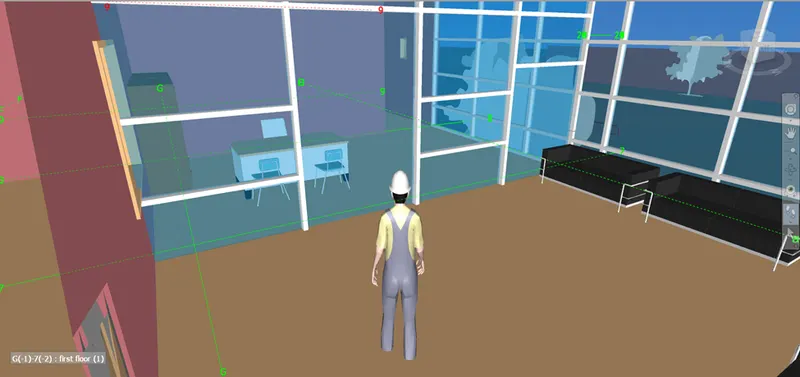
Result :
Therefore, realism feature in the Navisworks is used by using the navigate tool to create the walk through the 3D model and recorded the moving as animation Navisworks file.
4) Embed both architecture and structure *.nwc file to your Navisworks file. Create a clash detection test between the two models
a. Run the Clash Detection Test
b. Study the clashes between the two models
c. List which of the clashes could be approved
d. List which of the clashes could be neglected ( will be taken care later)
e. List which of the clashes can be resolved
f. Save the results after color coding the clashes to the Navisworks file
g. In case of resolution annotate the clash and save the view to defined views in Navisworks
Aim: To create a clash detection test by embedding both architectural and structural file to the Navisworks file.
Introduction:
- Autodesk Navisworks acts as a model aggregator as it brings together 3D models and associated design data into a single working environment for the purpose of design review, coordination analysis, stimulation of the model and presentation.
- There are many tools in the Navisworks such as Clash detective, Time liner, animator etc which allows as an interactive review of the virtual project model in order to validate and provide accurate predictions for construction and operation.
- Clash detection is allows as to identify, prevent and resolve the conflicts in the virtual model before the actual start of the construction and hence it reduces costs and schedule risks and minimizes proposed change order.
Procedure:
Step 1
- Open the Navisworks software, as the architectural file is already imported in Navisworks as shown below.
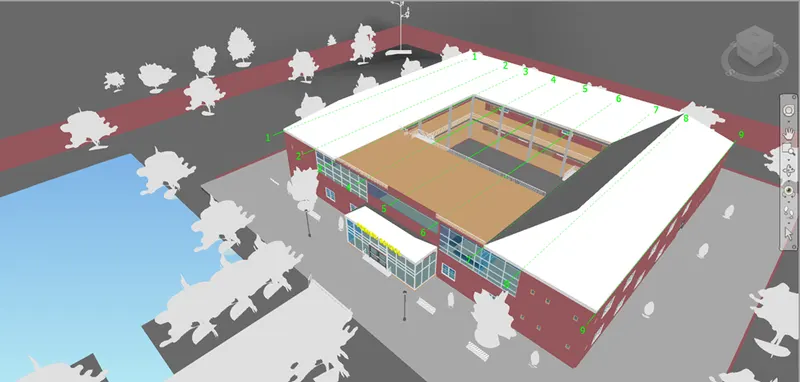
Step 2
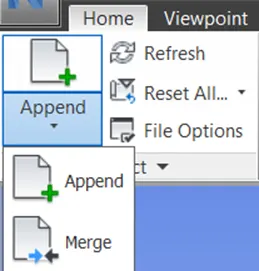
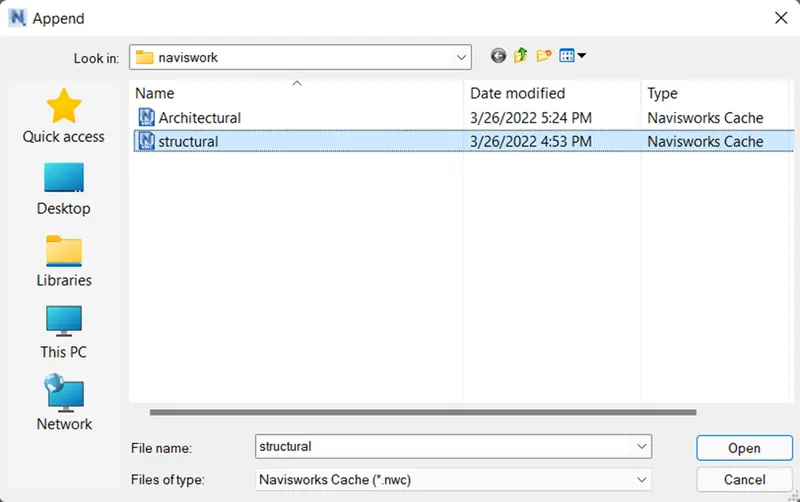
- To import the structural file, go to home tab, select the append tool, select the structural file from append dialog box and select open.
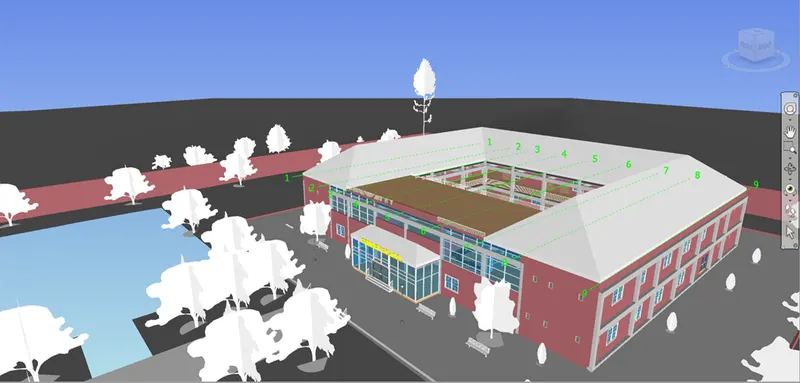
- The structural and architectural file imported together in the Navisworks as shown below.
Step 3
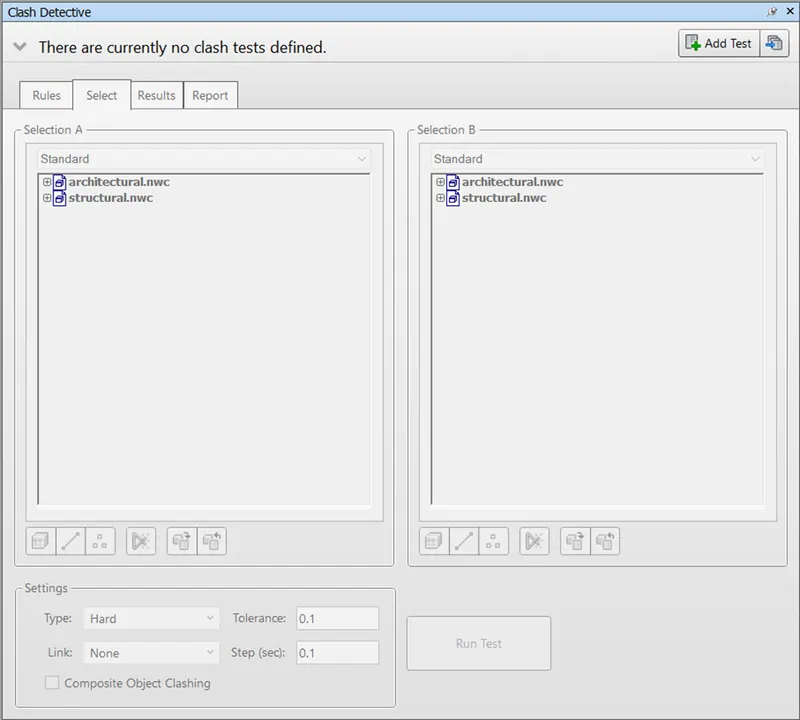
- Go to home tab, select the clash detective tool from tools panel it will open the clash detective dialog box.

Step 4
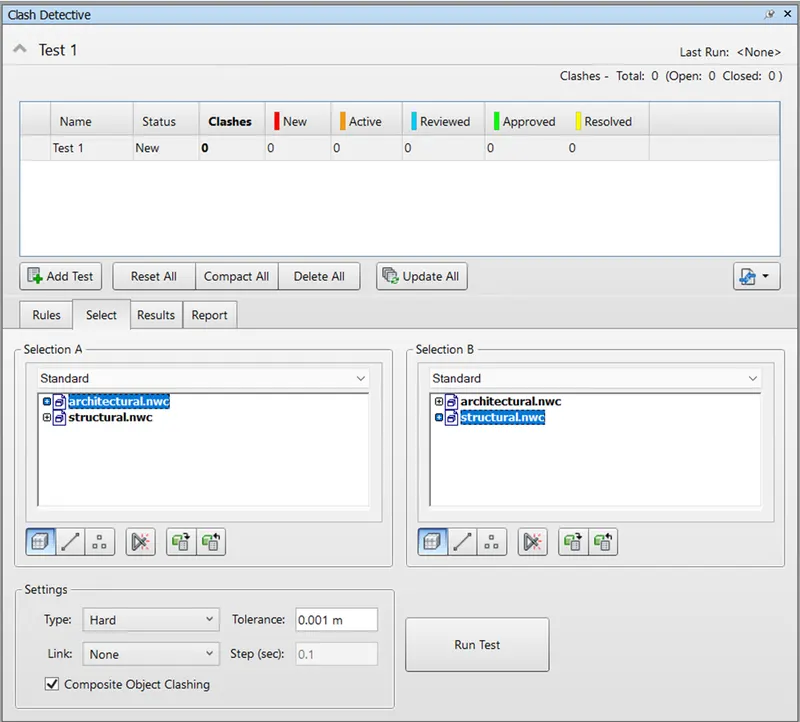
- Select the add test from clash detective dialog box.
Step 5
- Select the section A and section B file to run the clash detection and select run test to determine the clash detections from clash detective dialog box.
Step 6
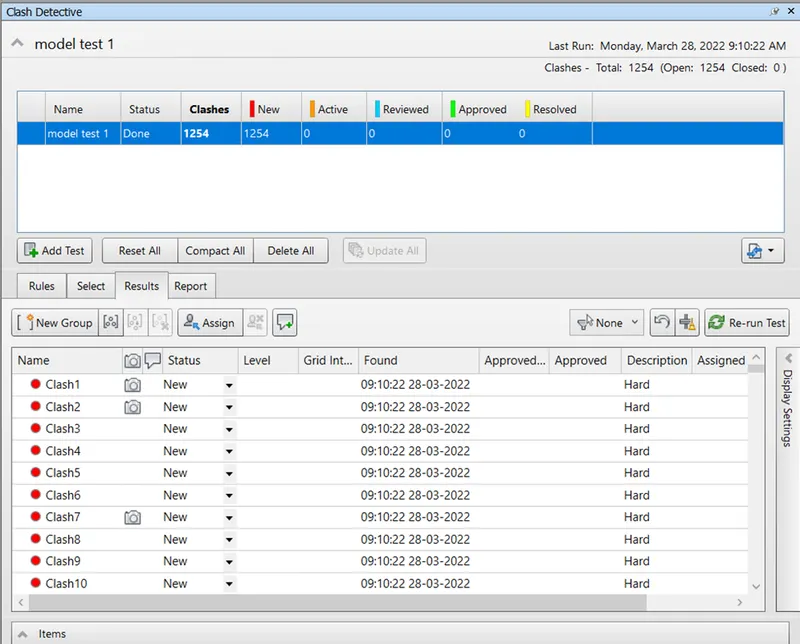
- The number of clashes detected in the model are 1254 which can be seen using clash detective dialog box by selecting individual clash as shown below.
Step 7
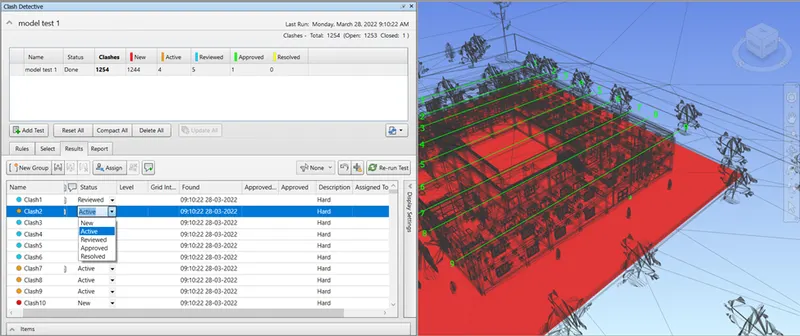
- List down the clashes which can be approved such as clash between wall and the columns, the clashes which can be resolved.
- Change the status of the clash from active to
- The status of clash can be changed as Active if the clash has been discovered in previous clash test but is still active means no solution has been provided till.
- Status can be changed to reviewed if clash that is already found in the previous test is reviewed in the new clash detection test.
- Status is approved if clash is approved, and it can be changed to resolved if identified clash is resolved.
- This status of the clashes can be changed to active, resolved or reviewed by using drop down of the status bar according to the respective clash modification, and progress of the work as shown below.
Result:
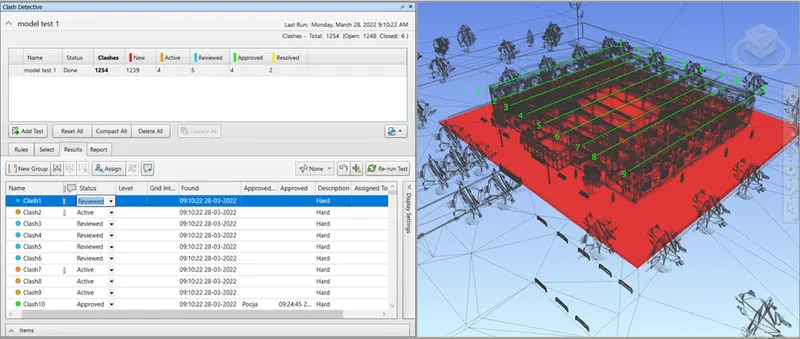
- Therefore, clash detection test is run between the both embedded structural and architectural model and clashes between two models are studied using Navisworks.
- The results of the clash detection test are as shown below.
5) Using the Timeliner feature in Navisworks prepare a schedule for the project developed in week 6 to 8 by adding reasonable assumptions for task start date and end date and simulate the task completion as a visual simulation. Record it and save the timeline simulation to Navisworks file.
Aim :
To prepare a schedule for the project developed in week 6 to 8 using Timeliner feature in Navisworks and simulate the task completion as visual simulation.
Introduction :
- Timeliner tool adds schedule simulation to Autodesk Navisworks. Timeliner imports schedules from variety of sources.
- We can then connect tasks in the schedule with object in the model. This allows to see the effect of the schedule on the model, and compare planned dates against actual dates.
Procedure :
Step 1
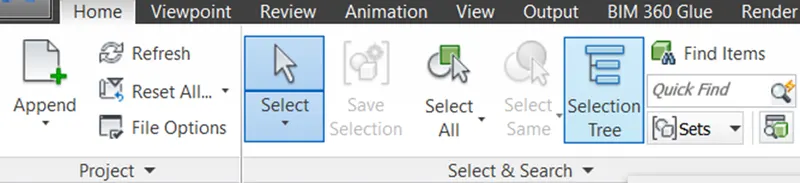
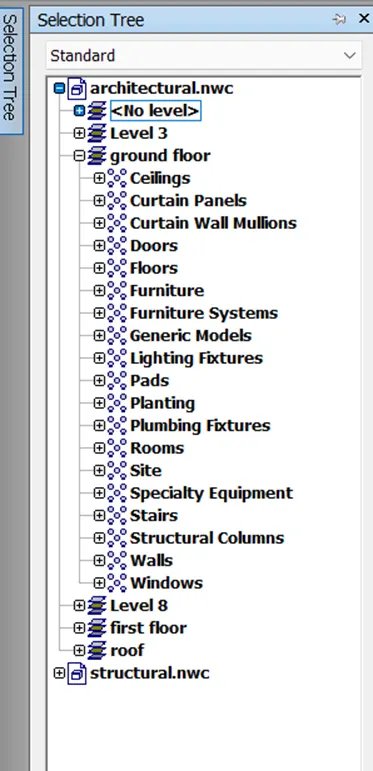
- Open the Navisworks software, select the selection tree from home tab it will open the selection tree window as shown below.
Step 2
- Go to Time Liner tool from the tools panel of the home tab of tool panel it will open the time liner window as shown below.


Step 3
- Select all the topographical site components and in the Timeliner dialog box, click on add task to add the new task in the time liner window.
- Rename the task as foundation level and assign the planned and actual start time periods to each task.
- Change the task type as construct from task type column.
- Select the task from selection tree and click on attach drop down in the Timeliner dialog box, from that select attach current selection option.
- Similarly add other tasks in the timelinear using similar procedure as shown below.

Step 4
- To see the animated video as per schedule click on the simulate option from the timeliner and click on the play icon the animated video created as per the prepared schedule.
Result:
Therefore, schedule for the project developed in week 6 to 8 is prepared using Timeliner tool in the Navisworks software as shown below and task completion is simulated as visual simulation.
