Usage of Navigation tool , Timeliner and Clash Detection test using Naviswork
AIM-1: Use the Architecture/ Structure Project file developed by you in Week 6 to 8. Export the Revit architecture and structure model to Navisworks Cache file following the export settings discussed in class
INTRADUCTION:Navisworks is a 3D design review product from Autodesk.Used primarily in construction industries to complement 3D design packages . Navisworks allows users to open and combine 3D models, navigate around them in real-time and review the model using a set of tools including comments, redlining, viewpoint, and measurements. A selection of plug-ins enhances the package adding interference detection, 4D time simulation, photorealistic rendering and PDF-like publishing.
PROCEDURE:
- Open the revit application then open the previous drafting designing drawing
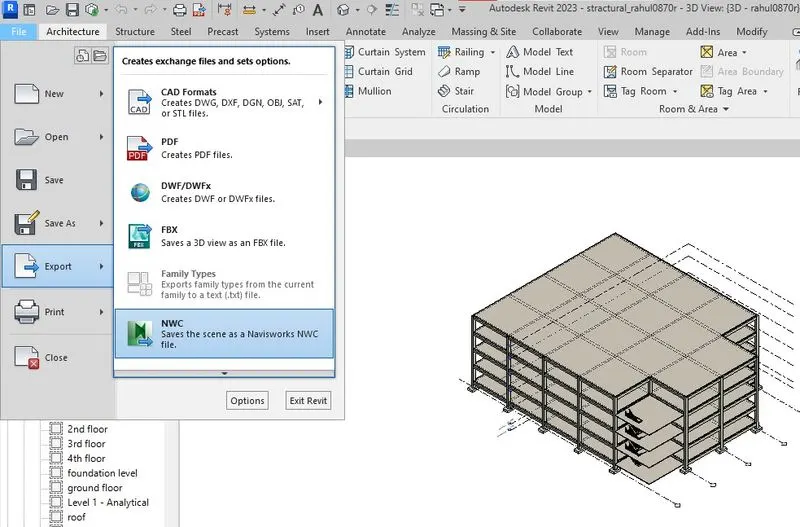
- then go to file tab in left up corner then we have to go to export rolling titles in that file menu then we contain multipile export option we have select NWC click on that select destination folder to NWC file created.
RESULTS:
AIM-2: Use Navigate Tool to walk around the model and walk through the rooms created and record your moving as animation in your Navisworks file
INTRADUCTION:Navisworks is a 3D design review product from Autodesk.Used primarily in construction industries to complement 3D design packages . Navisworks allows users to open and combine 3D models, navigate around them in real-time and review the model using a set of tools including comments, redlining, viewpoint, and measurements. A selection of plug-ins enhances the package adding interference detection, 4D time simulation, photorealistic rendering and PDF-like publishing.
PROCEDURE:
- Like previous process mention in the aim save architectural file then go to naviworks application
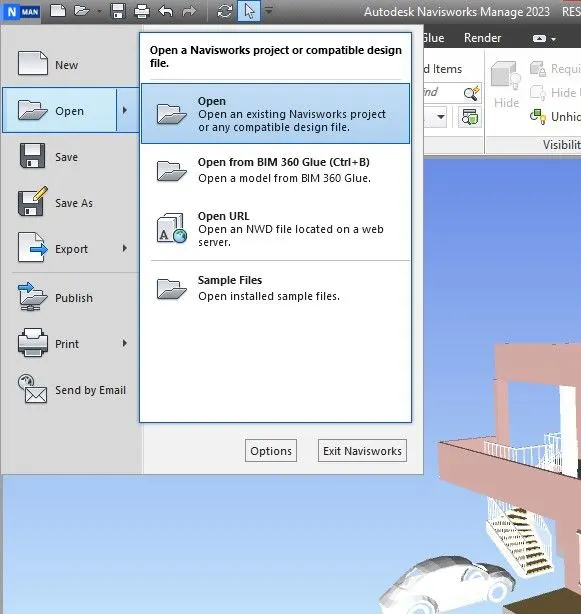
- go to file menu after click on the open option we get multiple open options appeared select open.
- then go to destination a file where we save it click on that click ok that file appeared in the working screen of navisworks
- after open the file go to in side of the house using mouse and roller option.

- then go to viewport tab select the walk option to walk with using curser moves where walkway also follow the curser
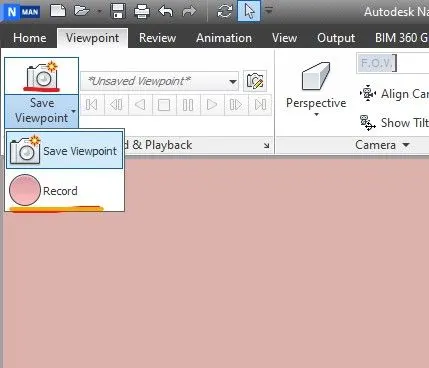
- then like mention above image click on the save viewport in scrolling titles record option available
- clcik on the record then go to viewport tab then we appeared walk option availabile

- click on ok then we start the walk through using move curser direction walks progress.

- these to icons marked are to mange the video record stop and pause the video.
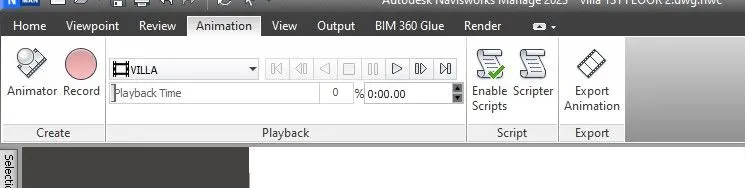
- after completed or stop the video we get multiple option available right of the working screen their onwareds we rename video.
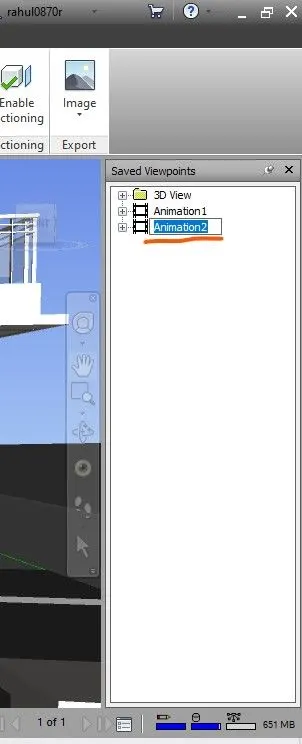
- afer that we go to the animation tab to get a video export option is available to export
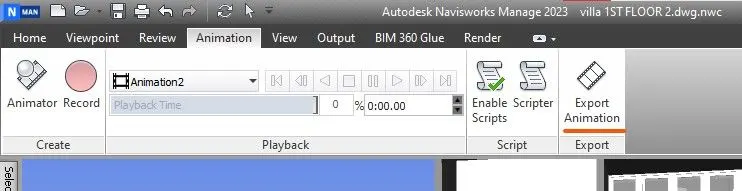
- we click on the icon we get another dailoge box related
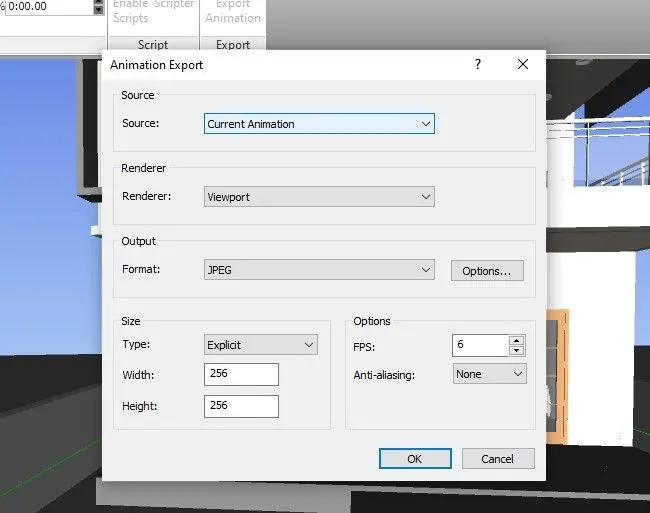
- in that we get video custamize options are available like source,render,formet and size,options click ok
- then we get a another dailogbox related destination video to be save.
RESULTS:
AIM-3) Use Navigate tool to use Realism feature to walk through the model and record your moving as animation in Navisworks file
INTRADUCTION:Navisworks is a 3D design review product from Autodesk.Used primarily in construction industries to complement 3D design packages . Navisworks allows users to open and combine 3D models, navigate around them in real-time and review the model using a set of tools including comments, redlining, viewpoint, and measurements. A selection of plug-ins enhances the package adding interference detection, 4D time simulation, photorealistic rendering and PDF-like publishing.
PROCEDURE:
- expot the revit file into NWC then open it in the navisworks application
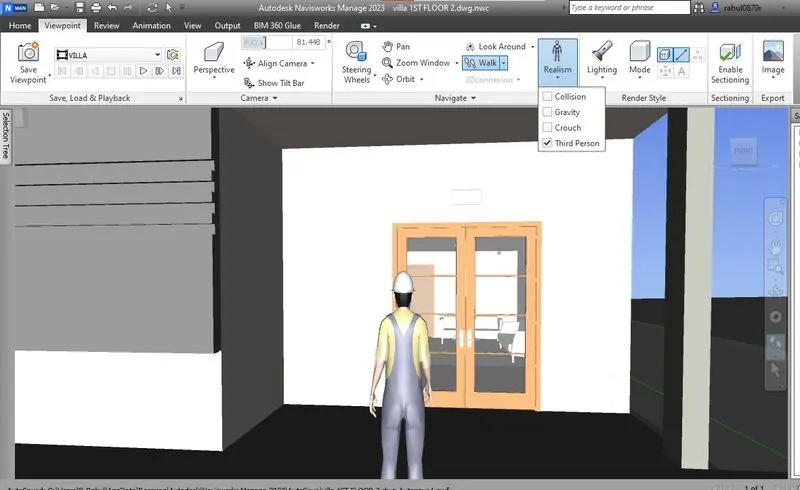
- then go to the viewport tab then select realism option we get rolling titles related realism then select the thirdperson option in that
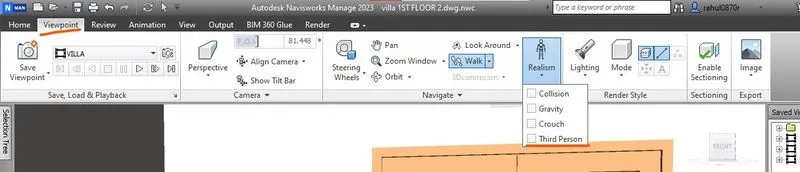
- then we tick the checkbox realism feuture is enables
- then after the follow same process of walkthrough and record it.
RESULTS:
AIM-4: Embed both architecture and structure *.nwc file to your Navisworks file. Create a clash detection test between the two models
a. Run the Clash Detection Test
b. Study the clashes between the two models
c. List which of the clashes could be approved
d. List which of the clashes could be neglected ( will be taken care later)
e. List which of the clashes can be resolved
f. Save the results after color coding the clashes to the Navisworks file
g. In case of resolution annotate the clash and save the view to defined views in Navisworks
INTRADUCTION:Navisworks is a 3D design review product from Autodesk.Used primarily in construction industries to complement 3D design packages . Navisworks allows users to open and combine 3D models, navigate around them in real-time and review the model using a set of tools including comments, redlining, viewpoint, and measurements. A selection of plug-ins enhances the package adding interference detection, 4D time simulation, photorealistic rendering and PDF-like publishing.
PROCEDURE:
- Open the stractural, architectural files in the revit then export bithe files in to NWC files
- then open that file stractural file open the naviswork application using open option available in file menu
- then go to home tab in naviswork working screen

- select append icon in that home
- then we select the arechitecture file to be uploaded
- then we go to home tab to select clash detection option
- then we get another option dailogbox contain related clashdetection
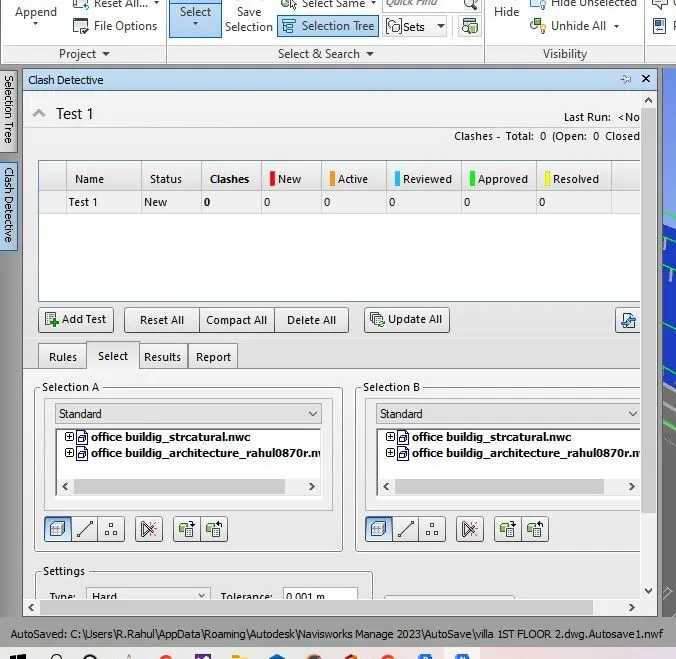
- then select selection-A element and another element in selection-B
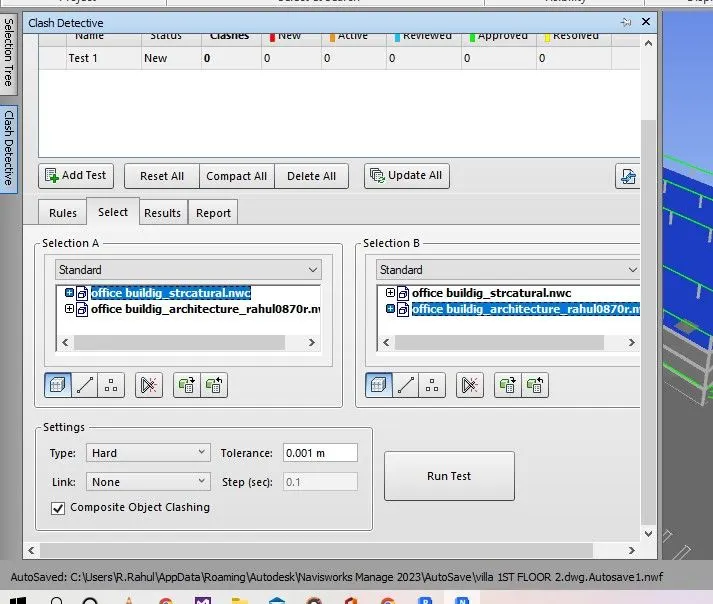
- then click on the run test option then results contains.
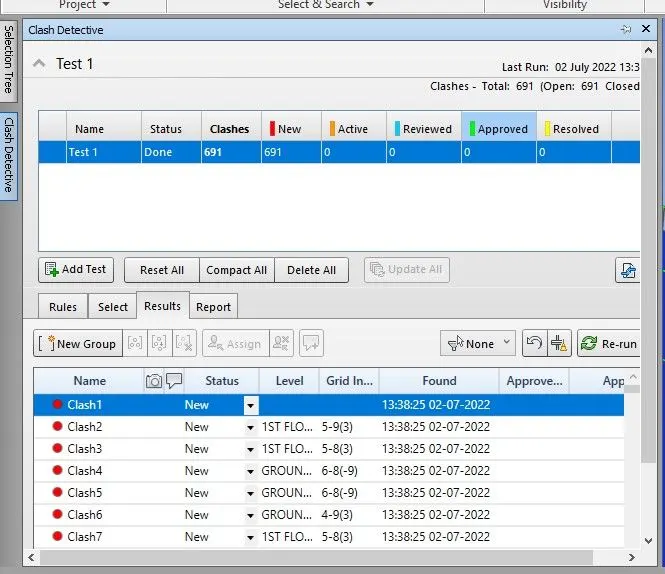
- in our project 691 clashes detected
- in clashes details mention clash detected location in point of time
- then select cash1 after go to status select rolling titles select the resolved or reviewed after test
- if that clash resolved then mention status of the project mention make status as resolved.
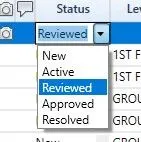
- then we change the stutus of theclashes that replecate details of clashes shows in the results tab.
- aim contains elements all things are detailexplanatio
RESULTS:
as per mention aim all elements and tasks are exicuted.
AIM-5: Using the Timeliner feature in Navisworks prepare a schedule for the project developed in week 6 to 8 by adding reasonable assumptions for task start date and end date and simulate the task completion as a visual simulation. Record it and save the timeline simulation to Navisworks file
INTRADUCTION:Navisworks is a 3D design review product from Autodesk.Used primarily in construction industries to complement 3D design packages . Navisworks allows users to open and combine 3D models, navigate around them in real-time and review the model using a set of tools including comments, redlining, viewpoint, and measurements. A selection of plug-ins enhances the package adding interference detection, 4D time simulation, photorealistic rendering and PDF-like publishing.
PROCEDURE:
- open the both files in naviworks and enble the selection tree in home tab

- after that select the timeliner in home tab then relate dailogbox is appeared in the working screen
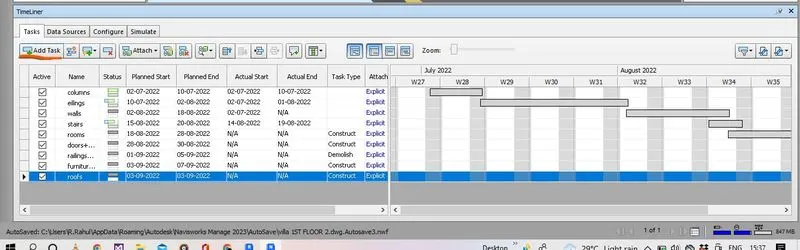
- then clcik on the add task button the task added to the working sheet
- then remane the task with alloted elemnts names then mention the task starting date ending date then.
- add the date as per planed and after realtime date
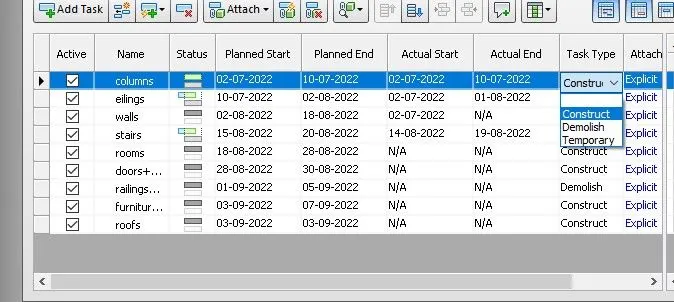
- mention task type also in shedule in this farmet add all the elements included in the constraction start point to end point
- using attach thing in the timeline dailog box asper we provided elements to be attached
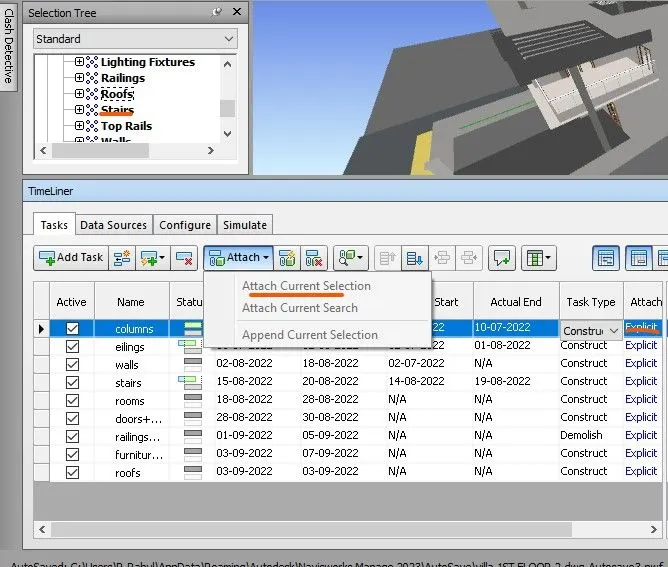
- as mention above select alloted element then click on the attach then we get the attach current selection option to file linked required field
- after these allotment process is completed till the all the elements to be linked
- comes simulate option in tilesline dailog box
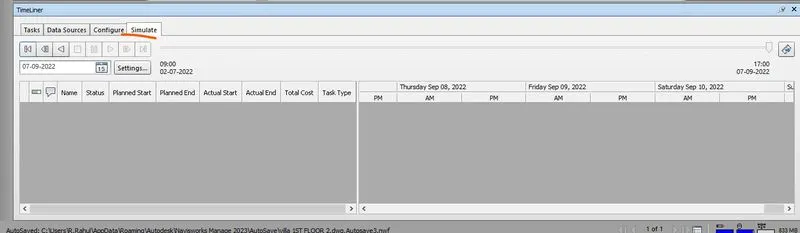
- after that we not get as persheduled over constraction elemts make automatecally created video that is simulation.
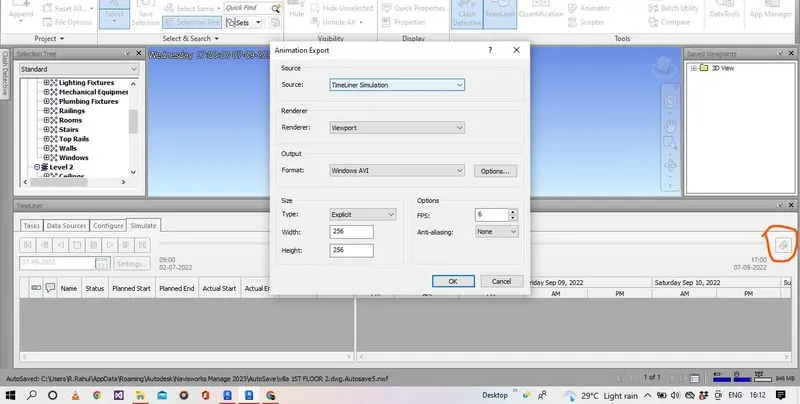
- click on the export option in timeline dailogbox in similate tab thse video is exported to another destination
- after click on the export option another dailogbox appeared animation export in that source select as timeline solution
- rendered aselect as viewport, select the farmet type as windows avi to these video save in video playing farmetclick then as for desitination plsce to save the file appeared
RESULTS:
AS MENTION AS IN AIM ALL THE TASK CLEARED IN THE PROCESS OF EXPLANATION ABOVE,