Usage of Collaborate tool in REVIT
1) Open an architectural template. Using the Manage tab set project base point and project shared coordinates for the project
AIM:
To create a project base point and project shared coordinates for the project in architectural template.
INTRODUCTION:
In revit, under manage toolbar their is a option to specify/establish/define coordinates using coordinate command under project location option.
It mainly has five option to define the coordinates for project:
• Acquire coordinates-it dertermines coordinate used in a link project and uses them for current project i.e., origin of linked project shared coordinates becomes the origin of host current project shared coordinates.
• Publish coordinates-Determines the coordinate used in the current model and uses them for a link model.
• reset shared coordinates-it eliminates the shared coordinate in the host model.
• specify coordinate at point-it relocates the model to true north by specifying coordinates of north/south, east/west and elevation.
• report shared cordinate-it displays shared coordinate of linked model within the host model.
PROCEDURE:
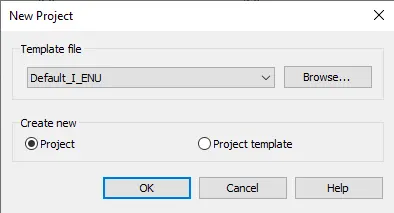
• go to file menu and select new.
• from template display select architectural template/default_1_eng and enter.
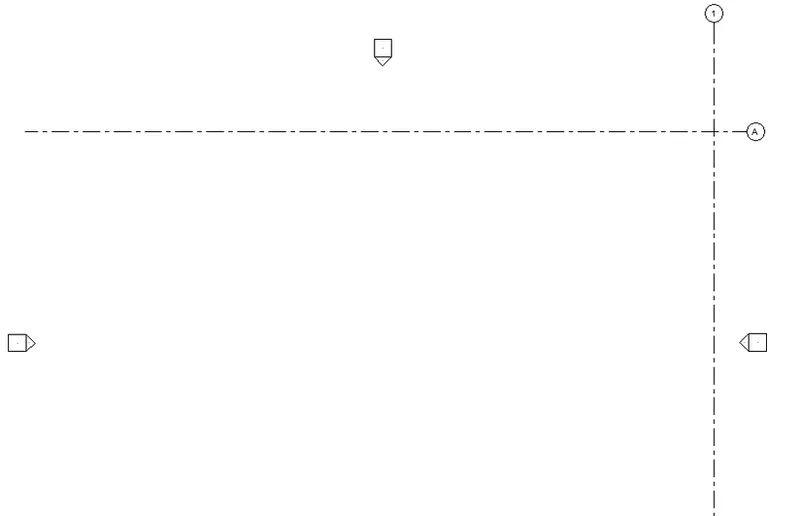
• select the grid option,draw a horizontal and vertical grid with name A and 1 respectively.
• Go to manage menu and specify cordinates at point from cordinates option.
• Click on vertical grid and enter coordinates as 0'0".
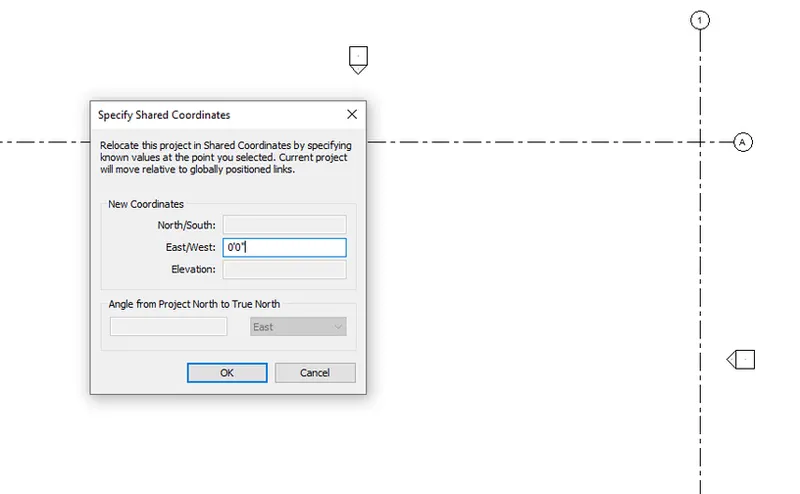
• Repeat the command and enter horizontal grid as 0'0"
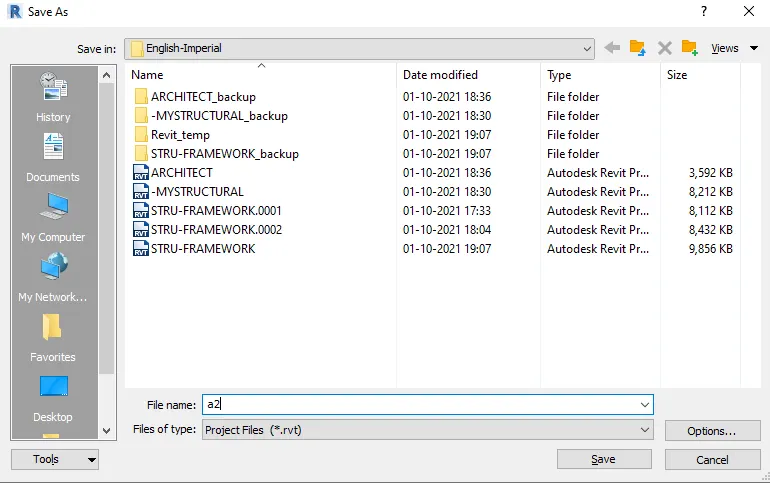
• Enter ctrl+s to save.
RESULT:
The project base point and project shared coordinates for the project is specifed as 0'0" using cordinates at point.
2) Open another new file but with a structural template. Using the manage tab set project parameters the same as the architectural model. Copy the parameters from the architectural model to the structural template or enter the parameters manually into the structural model
AIM:
• To create a project base point and project shared coordinates for the project in Structural template.
INTRODUCTION:
In revit, under manage toolbar their is a option to specify/establish/define coordinates using coordinate command under project location option.
It mainly has five option to define the coordinates for project:
• Acquire coordinates-it dertermines coordinate used in a link project and uses them for current project i.e., origin of linked project shared coordinates becomes the origin of host current project shared coordinates.
• Publish coordinates-Determines the coordinate used in the current model and uses them for a link model.
• reset shared coordinates-it eliminates the shared coordinate in the host model.
• specify coordinate at point-it relocates the model to true north by specifying coordinates of north/south, east/west and elevation.
• report shared cordinate-it displays shared coordinate of linked model within the host model.
PROCEDURE:
• Go to file menu and select new.
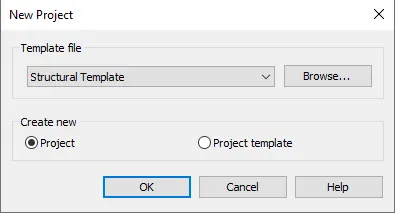
• from template display select Structural template and enter.
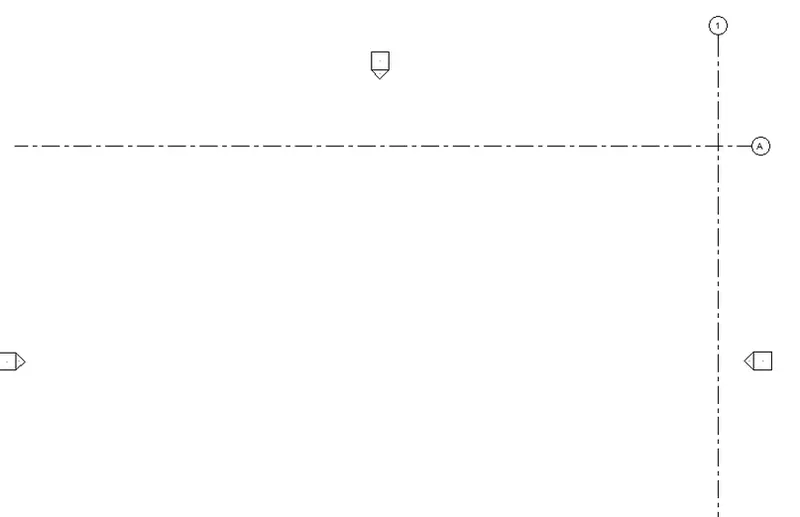
• select the grid option,draw a horizontal and vertical grid with name A and 1 respectively.
• Go to manage menu and specify cordinates at point from cordinates option.
• Click on vertical grid and enter coordinates as 0'0".
• Repeat the command and enter horizontal grid as 0'0"
• Enter ctrl+s to save.
RESULT:
The project base point and project shared coordinates for the project is specifed as 0'0" using cordinates at point.
3) Re-open the architectural model. Using the tools under the Collaborate tab make the architectural model a central model (enabling simultaneous working on the model)
AIM:
• To make the architectural model a2 a central model using collabrate tool.
INTRODUCTION:
• Collabrate toolbar in revit provide option to work under same file at same time with option to collabrate.
It enables collabrartion within the local network or cloud, which allows team member to work on the project simutaneously. We can edit and sync the model from anywhere throught internet connection.
PROCEDURE:
• go to file menu and click on open to reopen the file.
• select file named a2.
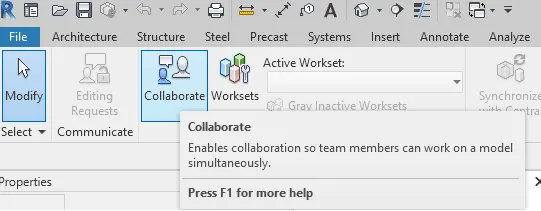
• now to go collaborate toolbar and click on collaborate with clouds.
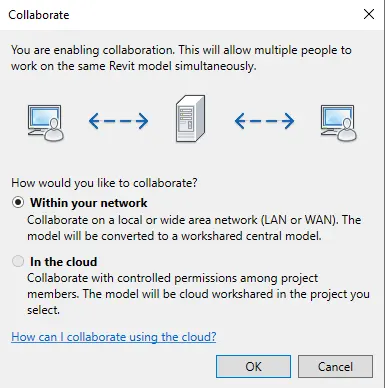
• from the display appeared select within your network and click ok.
• now go to file menu and click on save as.
• a display appears save as a central file,click ok.
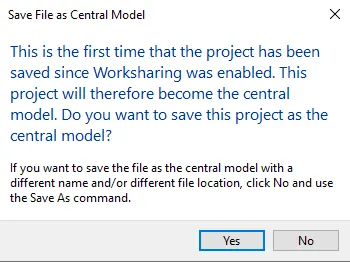
RESULT:
• The architectural file A2 saves as central file using collabrate tool.
4) Create the Grids Longitudinal and Transverse pattern for the project similar to the task done in Week 2
AIM:
• To create longitudinal and transverse grid pattern in architecture project named a2.
PROCEDURE:
• close the central file from previously done.
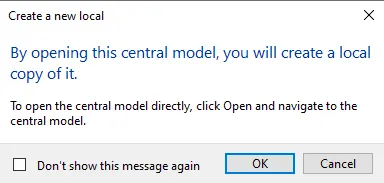
• reopen the file and select create a local copy.
• Create a new local
• now select grids from architectural toolbar.
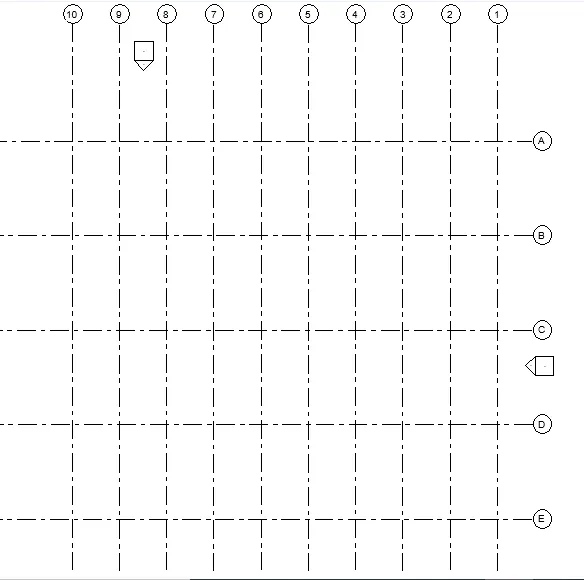
• draw transverse grids from A-E at offset distance 20
• similarly draw longitudinal grids 1-10 at offset distance of 10
RESULT:
• The longitudinal and transverse grids are created in local file of A2.
5) Synchronize the changes from the local copy to the central file of the architectural model.
AIM:
To synchronize the changes from the local copy to the central file of the architectural model.
INTRODUCTION:
synchorize option comes under collaborate toolbar in order to relinquish worksets or elemnets,add a comments about the last changes and automatically save the local model during this process.
PROCEDURE:
• Once the grids are done in local file.
• click on synchronize with cnetral option and select synchronize and modify setting.
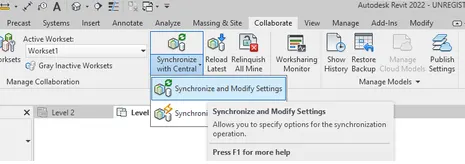
• From the display of synchronize select the compact central model and click ok.
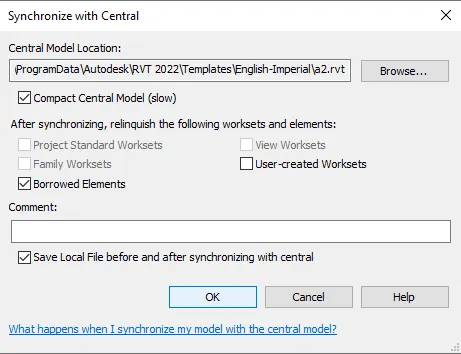
• it automatically save the changes to central file.
RESULT:
• The changes in local copy is synchronized ti the cnetral file of architectural model.
6) Open the structural model and use the collaborate tools to save the model as a central file.
AIM:
• To make the structural model s2 a central model using collabrate tool.
INTRODUCTION:
• Collabrate toolbar in revit provide option to work under same file at same time with option to collabrate.
It enables collabrartion within the local network or cloud, which allows team member to work on the project simutaneously. We can edit and sync the model from anywhere throught internet connection.
PROCEDURE:
• go to file menu and click on open to reopen the file.
• select file named s2.
• now to go collaborate toolbar and click on collaborate with clouds.
• from the display appeared select within your network and click ok.
• now go to file menu and click on save as.
• a display appears save as a central file,click ok.
RESULT:
• The Structural file A2 saves as central file using collabrate tool.
7) Under the Collaborate tab, select the grids and levels from the architectural model, and using Copy Monitor try to copy the grids to the structural model. See what happens when the copy monitored grid is moved around in the structural model
AIM:
To copy the grids from architectural model to strcutural modela2 to 52) using copy monitor option.
INTRODUCTION:
Copy monitoring tool comes under collaborate toolbar.lt monitore and coordinate the changes to the elemnets that affect teams from different displicines.it basical monito the chnages occured between the host project and linked model or within the project itself and notify team when one team move or change the elment.
PROCEDURE:
• Open the structural mdole s2 and link architectural project a2 using manage link option.
• go to collaborate toolbar in a2 project and click on copy/monitor option.

• select link and click copy option.
• select the grids and levels created.
• click on finish and now option strcutural model,grids and levels will be copied.
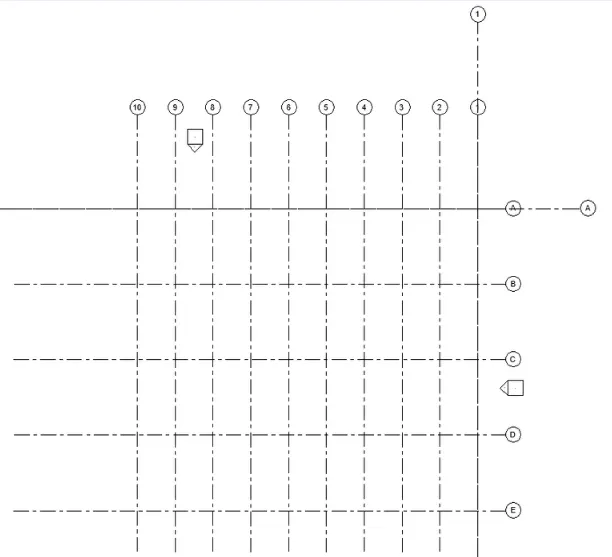
RESULT:
• The grids and level are copied tool and as a result the grids are copied to structural match same coordinates.
8) Create another new file with a construction template. Save the new file as a central model. This file will include both architectural and structural model. Under the manage tab, Click manage links to link both architectural and structural files. Save the file and close all the files.
AIM:
• To create a new construction template file and link both architectural and structural files using manage links tool.
INTRODUCTION:
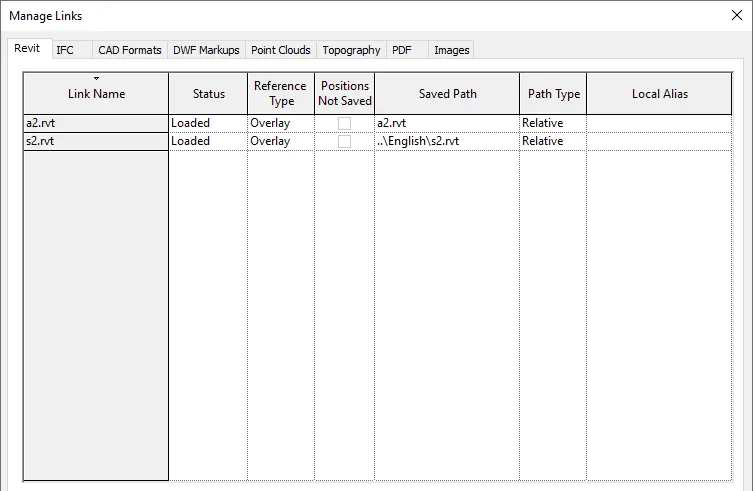
• Manage links is option provided in manage project section for linking files.It provides option for managining links to building model CAD file,DWg file and point clouds. It also links revit model and CAD files to the current project.
PROCEDURE:
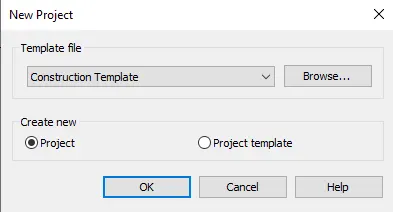
• open file menu and select construction template-ok.
• Save the file.
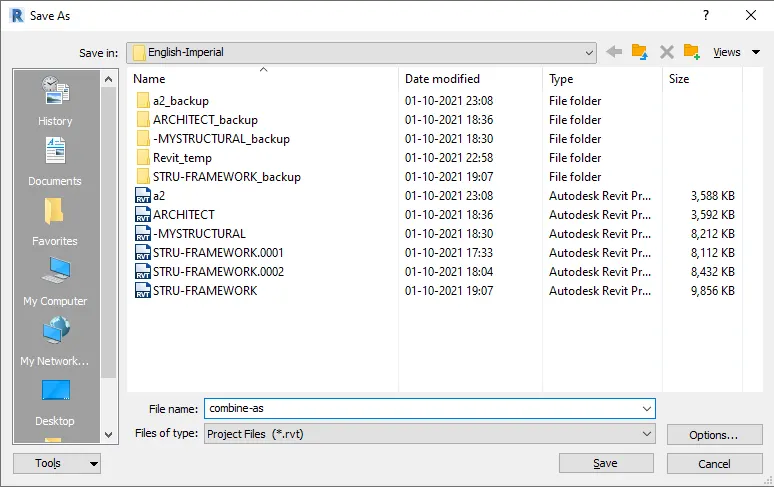
• now go to collaborate toolbar and click on collaborate.
• select within the network and save the file as central model.
• now go to manage toolbar and select manage links.

• click on add and select az it display an error of coordinate-click ok.
• repeat the same to link strcutural model-s2.
RESULT:
• The new construction template file is created and saved as central model. Also architectural and structural model is linked to new file using manage link tool.
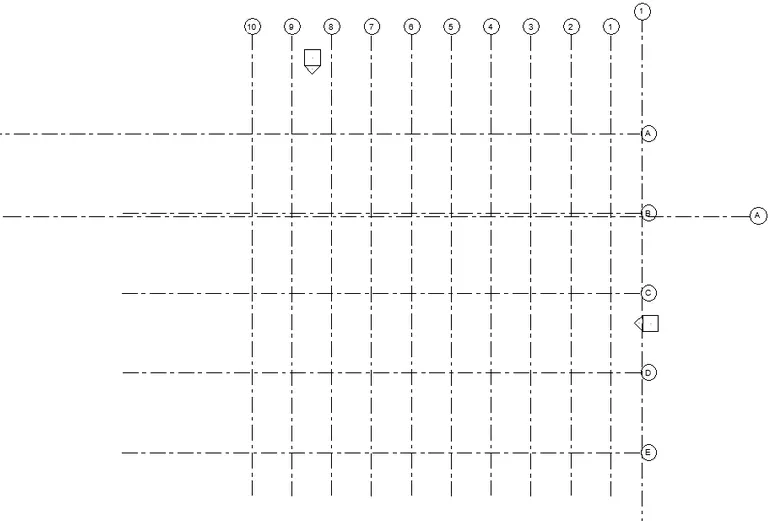
9) Are the grids from structural and architectural model matching in the construction template created? If yes the model is set up for project 2. If not work on the shared parameters and linking options under Manage links
( Hint: origin to origin, by shared coordinates or by project base point to base point ) to link the models in an appropriate manner
AIM:
To work on the shared parameters and linking options under Manage links in order to match the coordinates of both link.
INTRODUCTION:
While linking the model file, to locate the coordinates there are 3 option
• origin to origin
• by shared coordinates
• by project base point to base point
PROCEDURE:
• open the architectural file and go to manage toolbar.
• select the manage links and add structural model to it.
• by default it get added as origin to origin option.
• now select acquire coordinates from coordinate option and select the structural link.
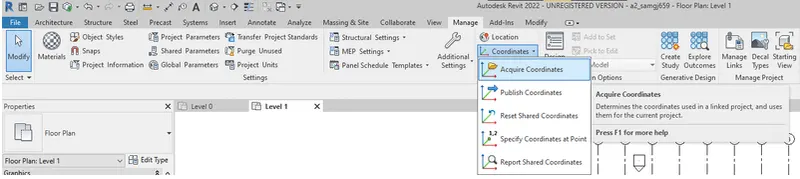
• now select the relocate coordinates and click first on architectural grids and then on strcutural grids
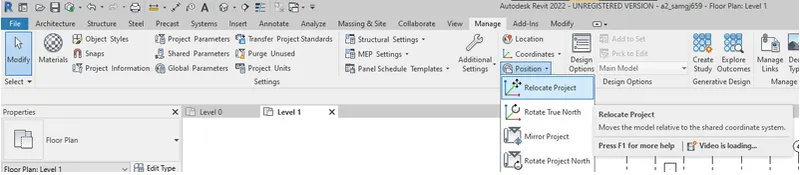
• now location of architectural is changed.
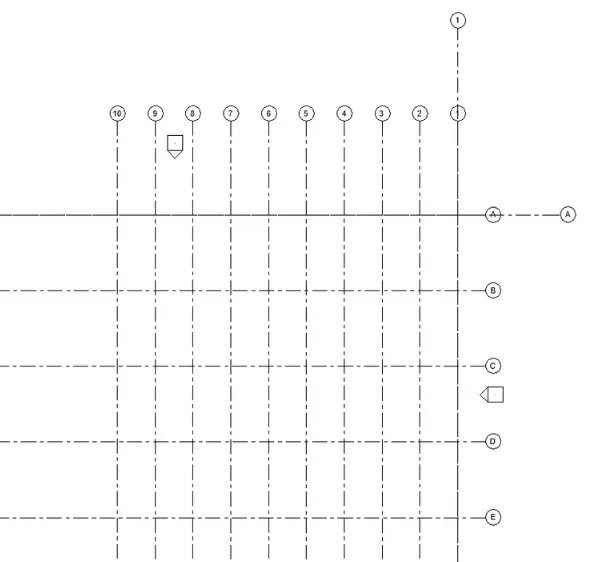
• click on save as/synchronize option to save the changes to central model.
• now go to construction template file go to manage link and relode the a2 file.
• now link on acquire coordinate and select a link.
• again link the s2 file,now it located by shared coordinate.
RESULT:
• The both structural and architectural files are matching in new construction template file with help of acquire,relocate and shared coordinate point option.
10) List a flow chart of a project tree set up in terms of Construction model, Architecture & Structure model, in this exercise and understand how many people can work on the same project using Revit simultaneously
CONSTRUCTION MODEL
• site analysis
• superviosr
• scheduling data
• quality controlling
• material
ARCHITECTURAL MODEL
• walls
• doors and windows
• interior design
• ceiling
• floor finishing
• staircase
STRCUTURAL MODEL
• foundation
• columns
• slab
• beams
• structural floor
• truss and braces
by using revit,
• site engineer
• project manager
• construction manager
• architect
• civil engineer
• inetrior designer
• structural engineer can work simantaneously without any delay.