Usage of Collaborate tool in REVIT
1):
Aim: Using the Manage tab set project base point and project shared coordinates for the project.
Introduction: Using the Manage tab set project base point and project shared coordinates for the project. By using Revit.
Procedure:
Step1:
- Select the new file option open or create a new architectural template and save at location.
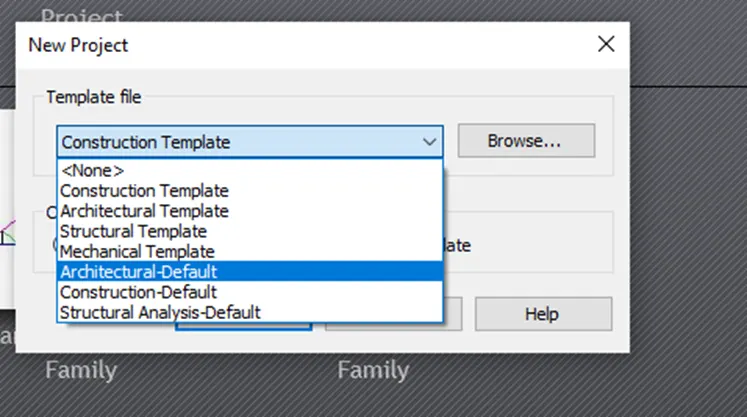
Step2:
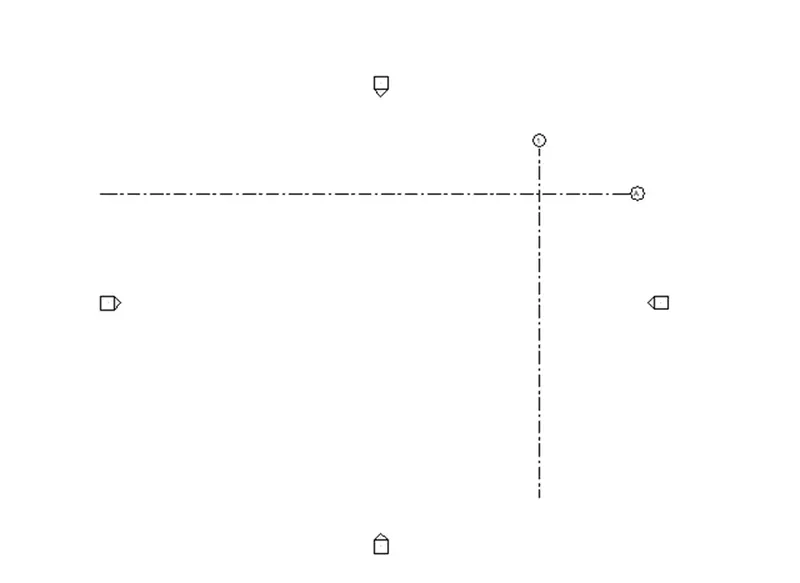
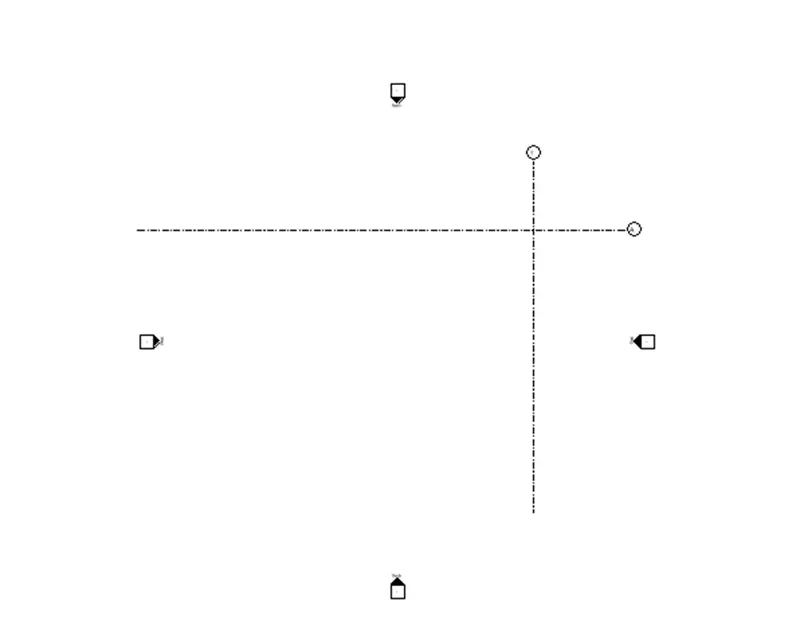
- From the Architectural tap select the grid option and draw the longitudinal and transverse grids and number as “A” and “1”
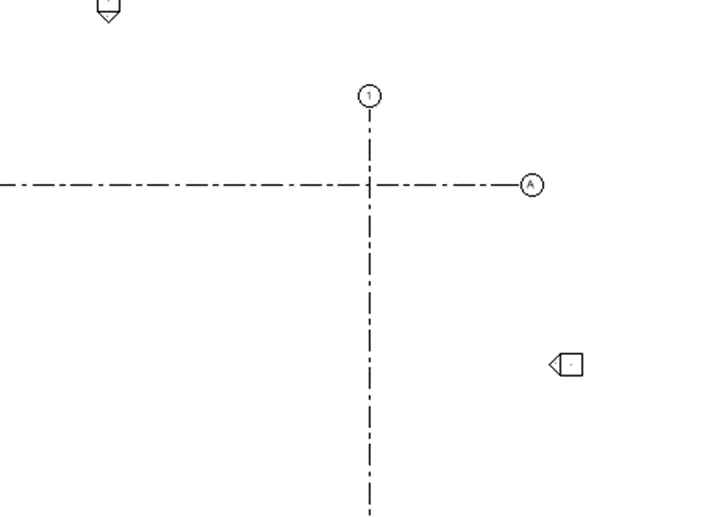
Step3:
- Next from the manage tab select the coordinate option and select specify the coordinate at point.
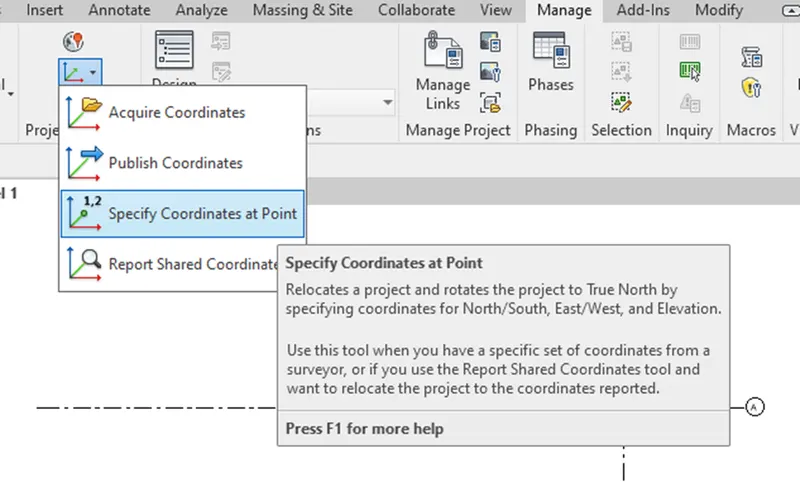
Step4:
- Then click on the gride one and set the coordinate. Set coordinate as 0’
- Similarly select another grid and set as coordinate o’
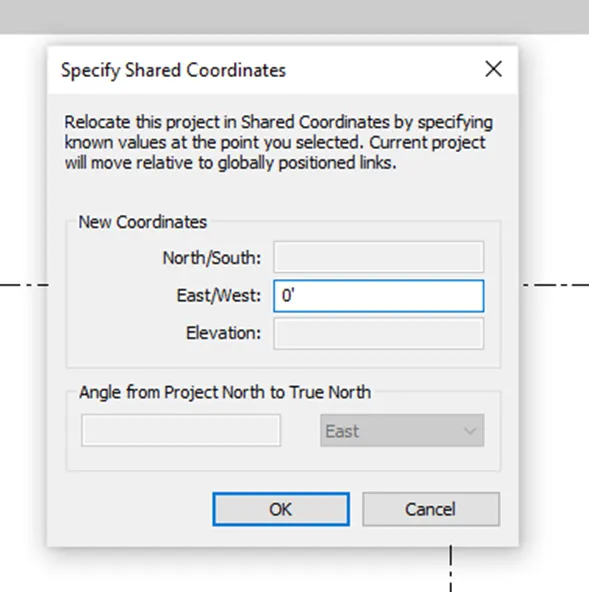
Result:
2):
Aim: To create a new structural template to set the parameters same as the architectural model.
Introduction: To create a new structural template to set the parameters same as the architectural model. By using Revit.
Procedure:
Step1:
Step1:
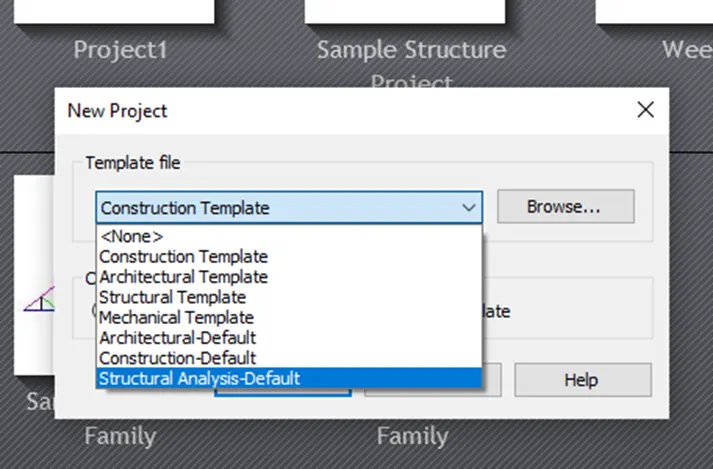
- Select the new file option open or create a new architectural template and save at location.
Step2:
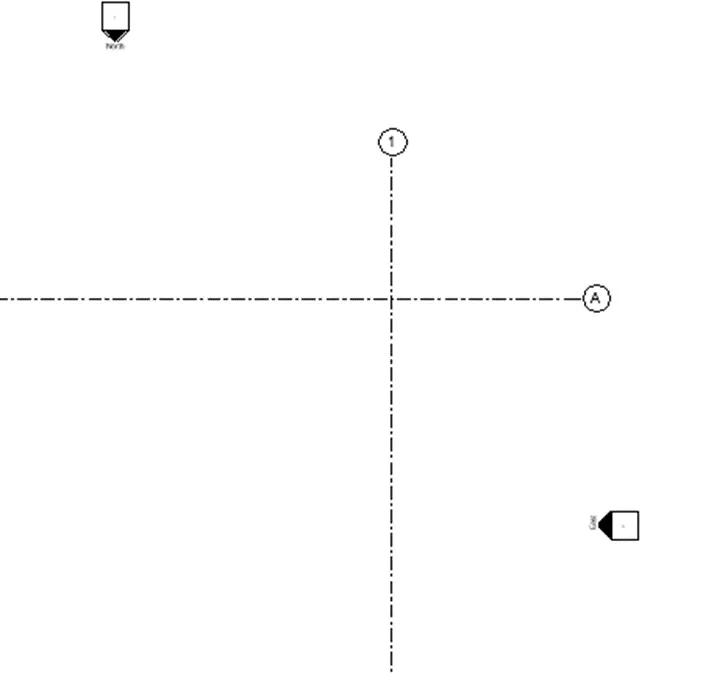
- From the Architectural tap select the grid option and draw the longitudinal and transverse grids and number as “A” and “1”
Step3:
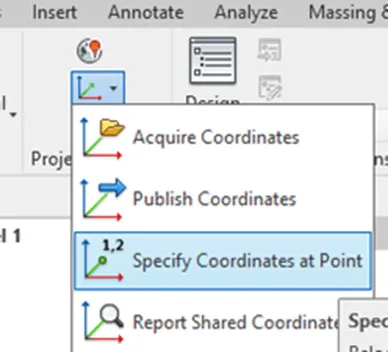
- Next from the manage tab select the coordinate option and select specify the coordinate at point or we can copy from the architectural model.
Step4:
- Then click on the gride one and set the coordinate. Set coordinate as 0’
- Similarly select another grid and set as coordinate o’
Result:
3):
Aim: To make the architectural model a central model. By using the under tool collaborate tab.
Introduction: To make the architectural model a central model. By using the under tool collaborate tab. By using Revit.
Procedure:
Step1:
- From the file option open the existing file of Architectural model.
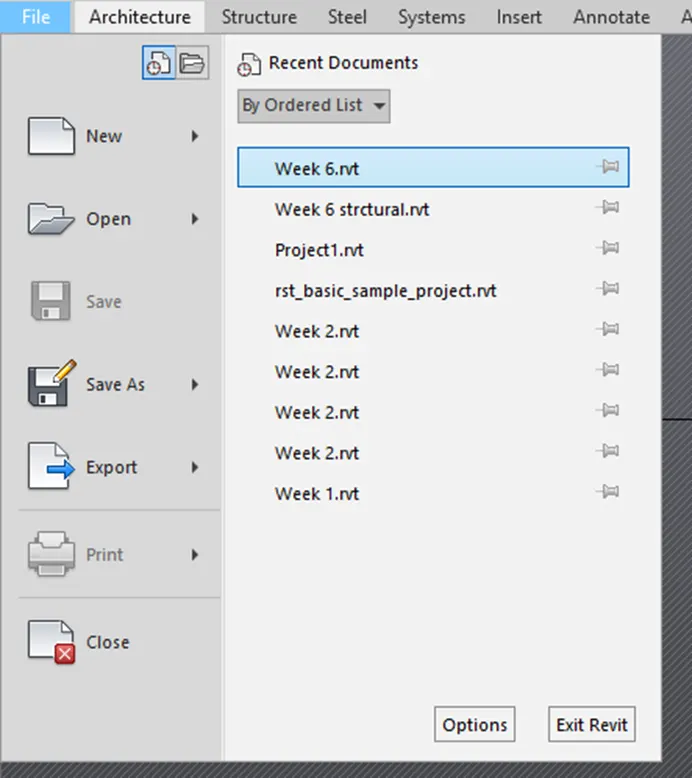
Step2:
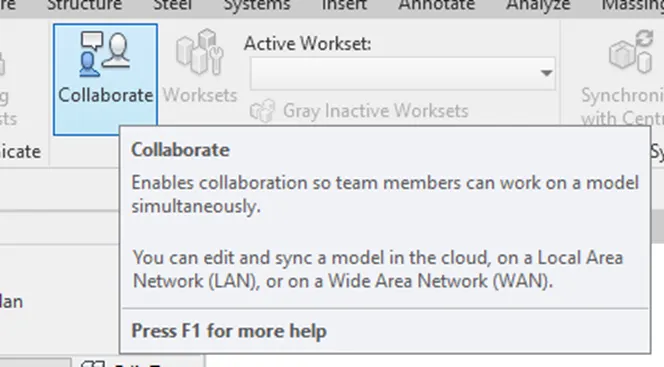
- Now go the collaborate tab and then select the collaborate option.
Step3:
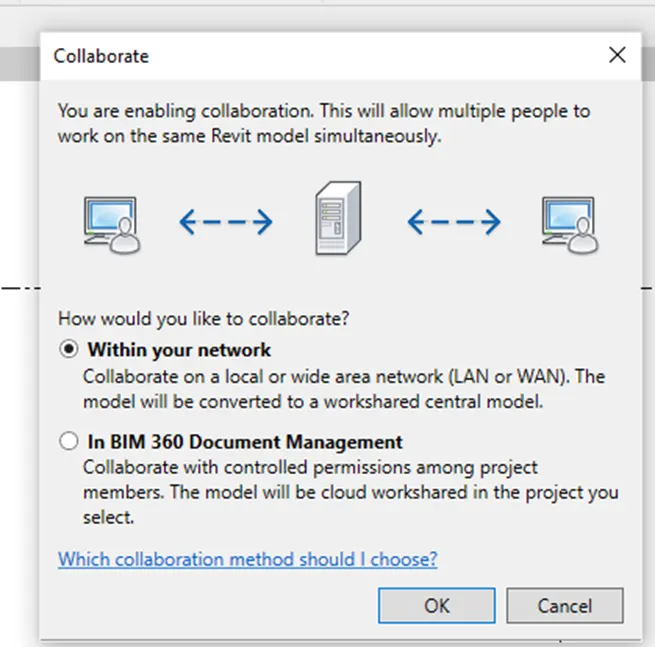
- Now a window will appears select the option with in your network to create a central file.
Step4:
- Now save the project a window will appears save the file as central file, click on ok.
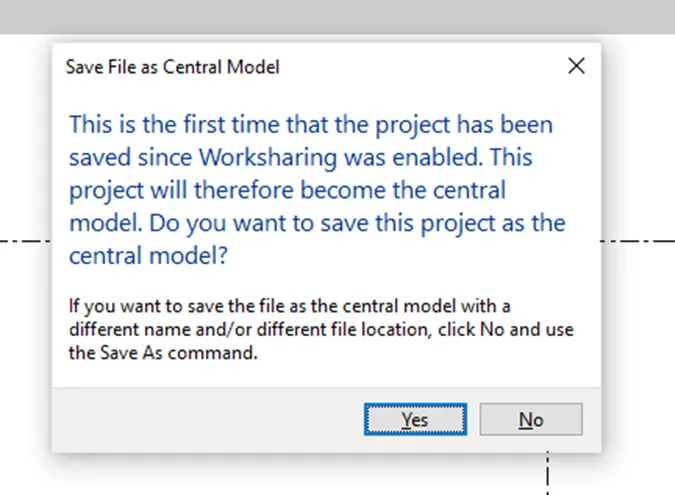
Result:
- The architectural model is successfully save as the central file.
4):
Aim: To create the Grids Longitudinal and Transverse pattern for the project similar to the task done in Week 2.
Introduction: To create the Grids Longitudinal and Transverse pattern for the project similar to the task done in Week 2.
Procedure:
Step1:
- From the file option open the Architectural model.
- Now from Architectural tab select the grid option to create grids.
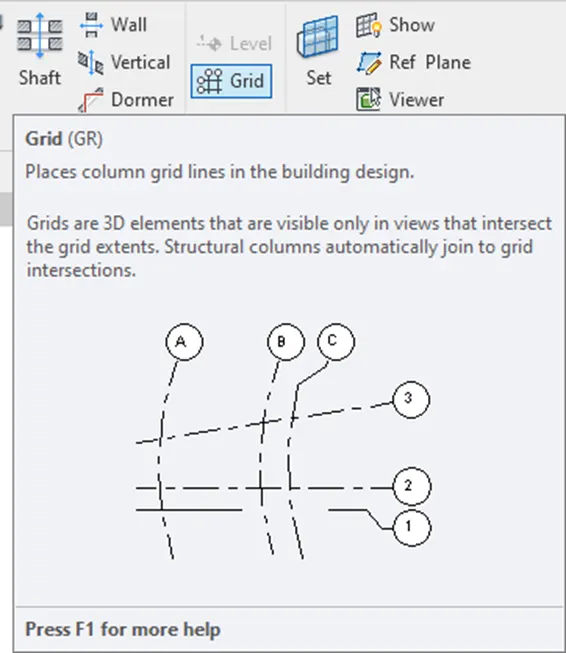
Step2:
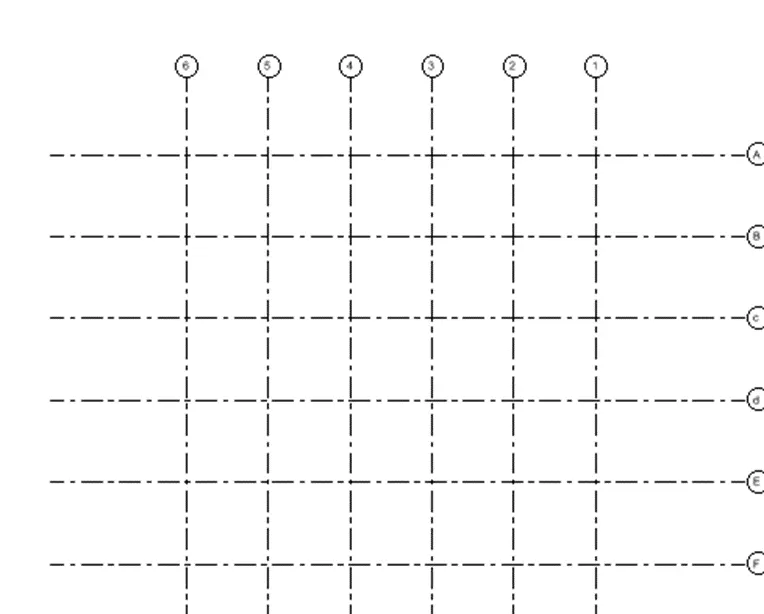
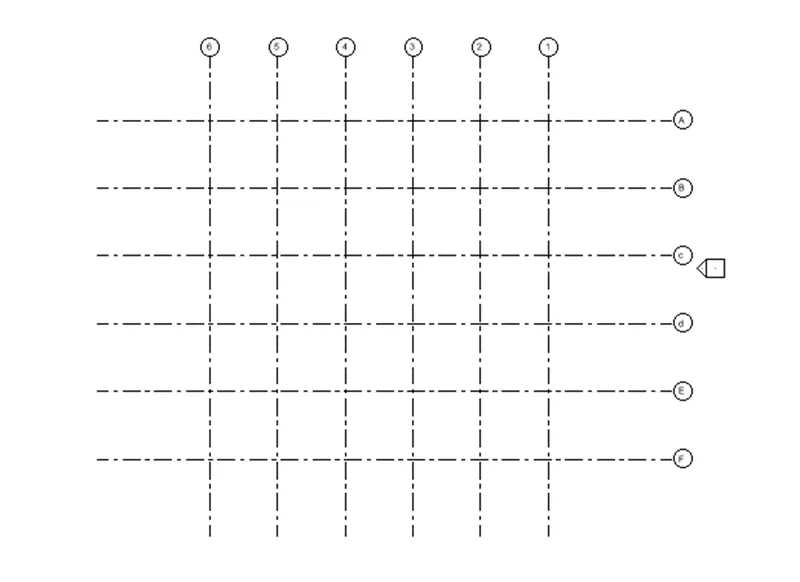
- After selecting the grid option create all the Longitudinal and Transverse gride at equal distance
- Then rename the as the 1,2,3….. and A,B,C….. as per the schedule.
Result:
5):
Aim: To synchronize the changes from the local copy to the central file of the architectural model.
Introduction: To synchronize the changes from the local copy to the central file of the architectural model.
Procedure:
Step1:
- Open the existing file of Architectural model.
- From the collaborate select the synchronize option.
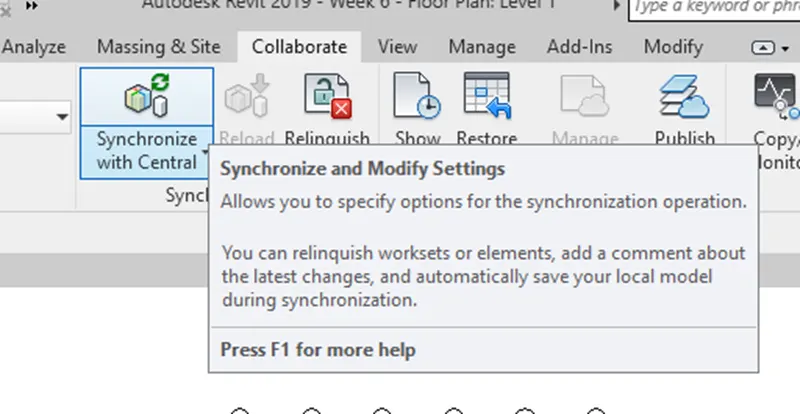
Step2:
- A window will appears with synchronize with central then click on ok.
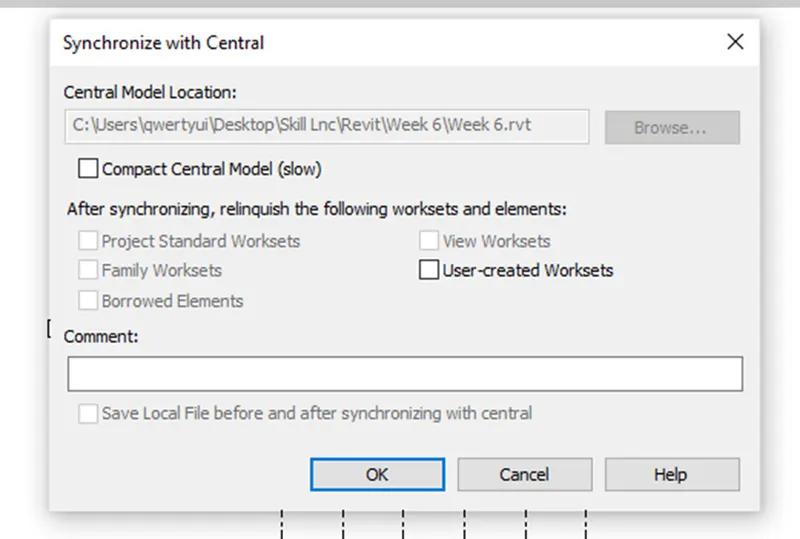
Result:
- Now it is synchronize from local file to central file.
6):
Aim: To open the structural model and use the collaborate tools to save the model as a central file.
Introduction: To open the structural model and use the collaborate tools to save the model as a central file.
Procedure:
Step1:
- Open the existing file of structural model.
- From the collaborate tab click the collaborate option
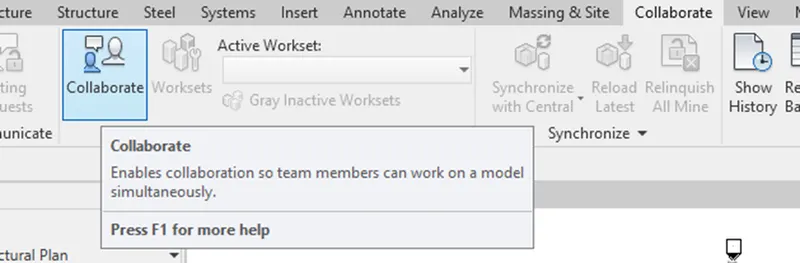
Step2:
- Now a window will appears select the option with in your network to create a central file. Click on ok.
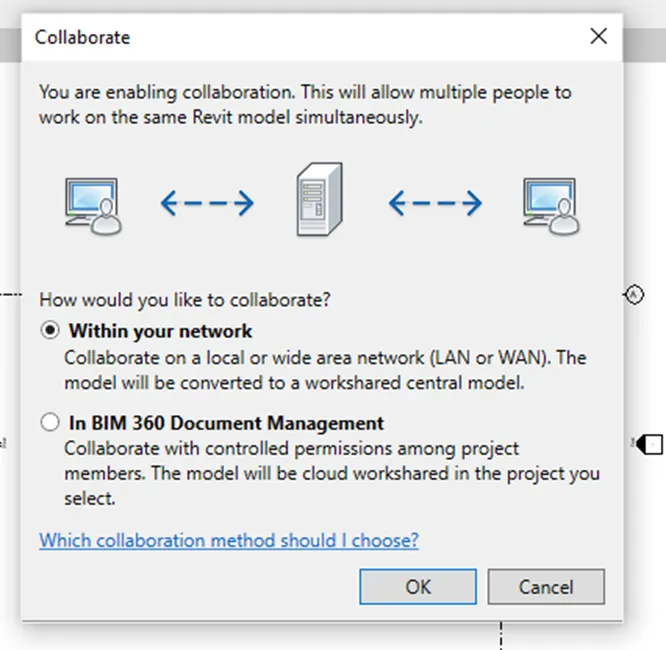
Step3:
- Now save the project a window will appears save the file as central file, click on ok.
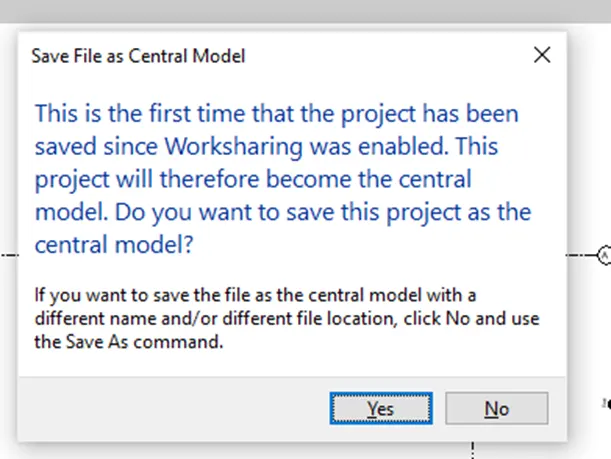
Result:
- The Structural model is successfully save as the central file.
7):
Aim: To select the girds and levels from the Architectural model and copy into Structural model.
Introduction: To select the girds and levels from the Architectural model and copy into Structural model.
Procedure:
Step1:
- Open the existing architectural model as we created earlier.
- From the manage tab add the structural model to current model.
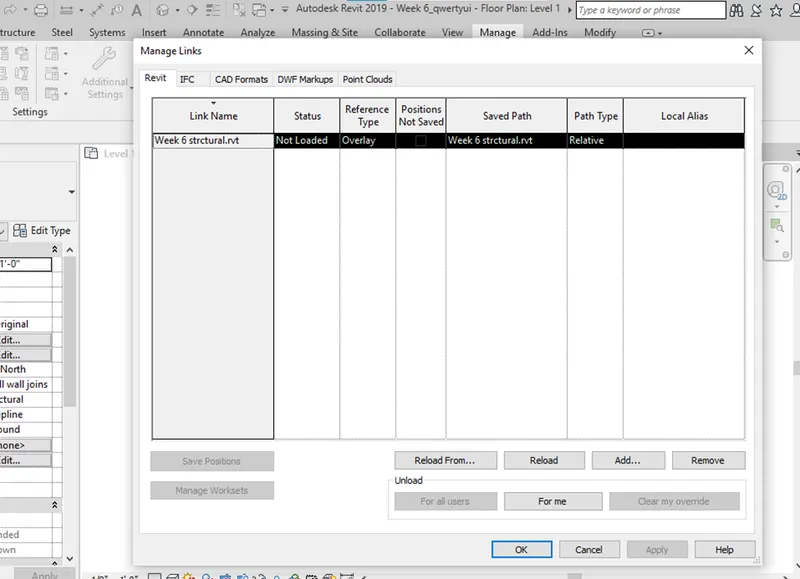
Step2:
- Now click on the add option then select the structural model from the save location.
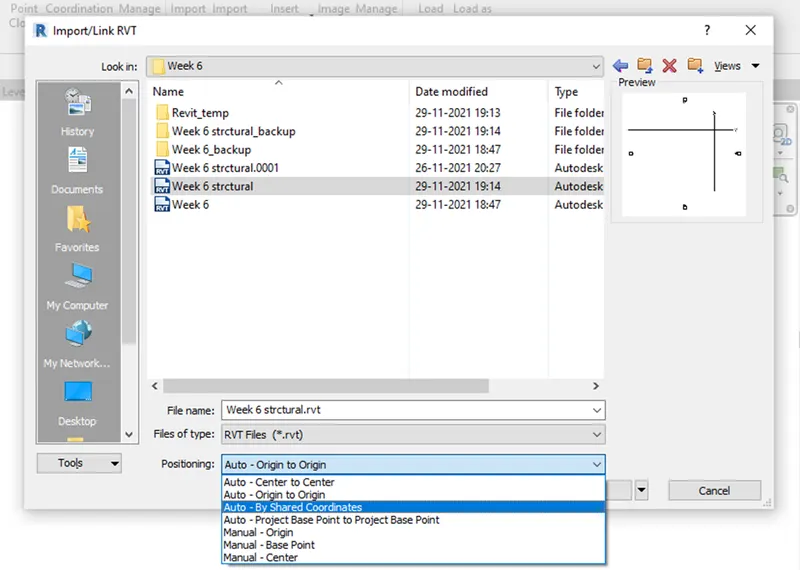
Step3:
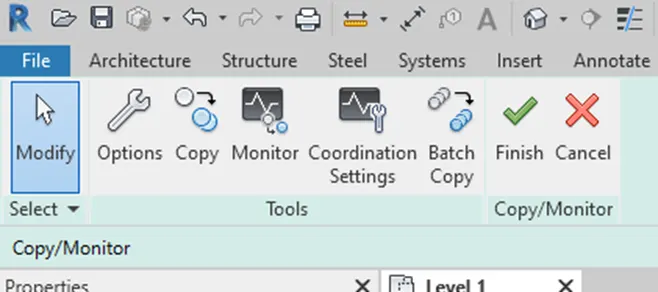
- From the collaborate tab select the copy/monitor option then select the select link option.
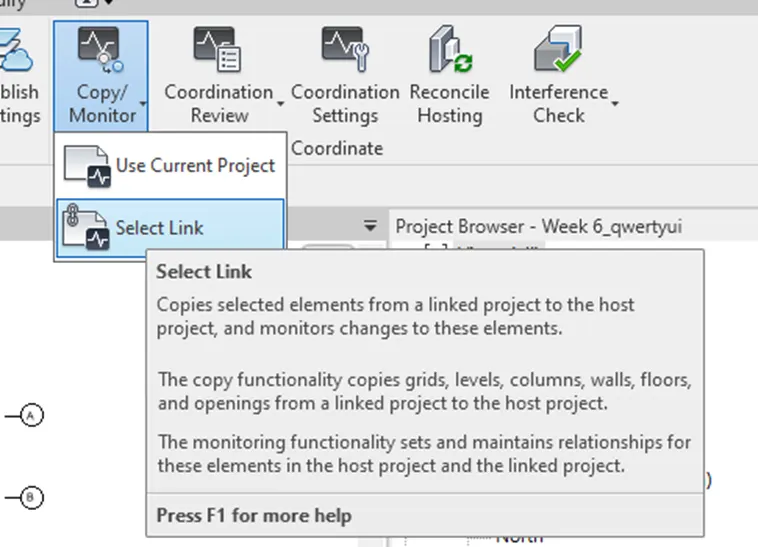
Step4:
- Now select the copy option then click on the finish the all the object are copied to the structural model
Result:
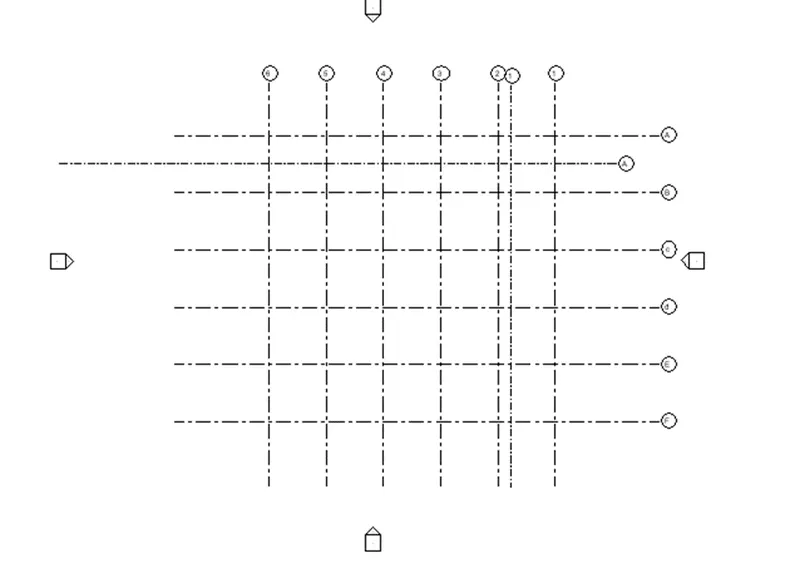
- Open the structural model which is linked with architectural model. Grids are copied to structural file.
8):
Aim: To create a new construction template and save as central file then link the both Architectural and Structural under manage and saving file.
Introduction: To create a new construction template and save as central file then link the both Architectural and Structural under manage and saving file.
Procedure:
Step1:
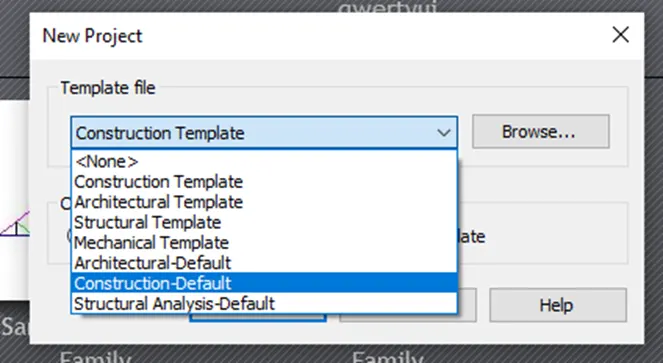
- From the file option click on the new and create a new construction template and save it.
Step2:
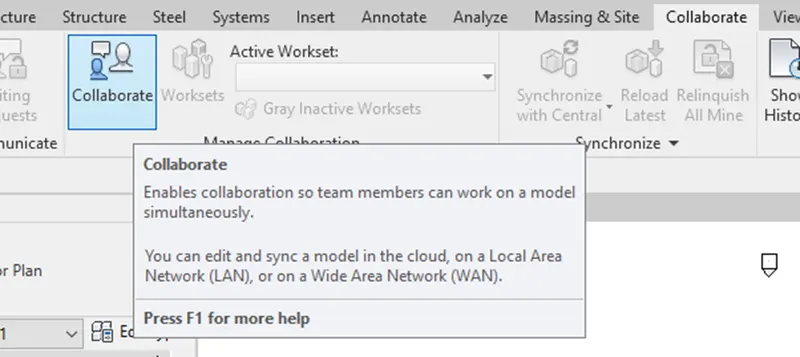
- From the collaborate tab click on the collaborate option.
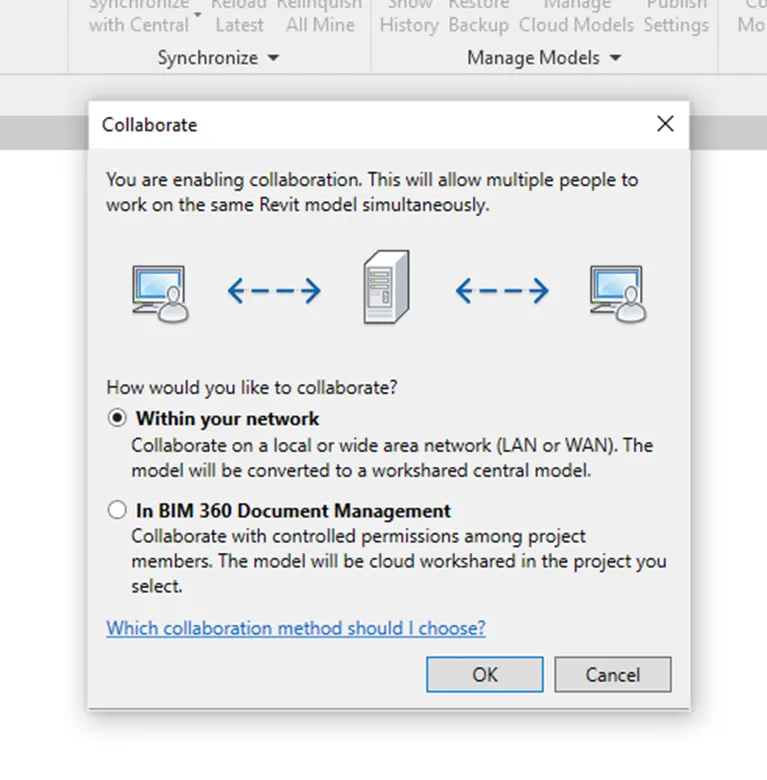
Step3:
- A new collaborate window will appears choose the with in your network option the click on ok.
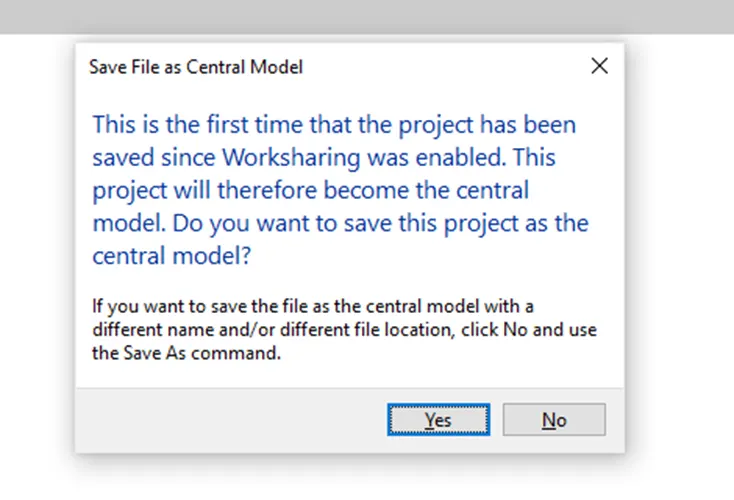
Step4:
- Now save the project to it as a central file.
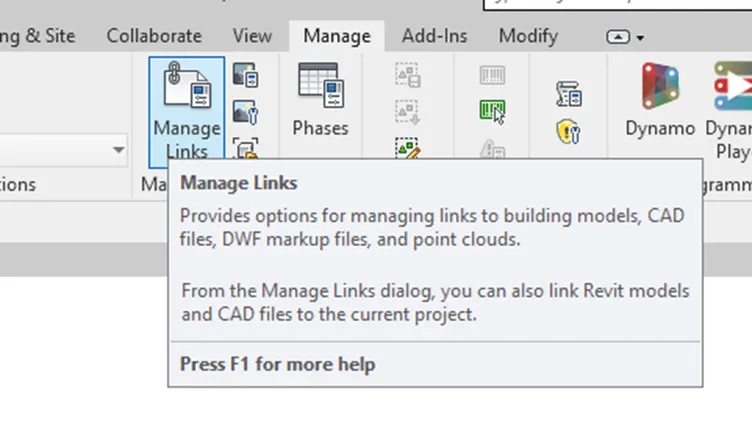
Step4:
- Now from the manage tab click on the manage link option to link the architectural and structural model
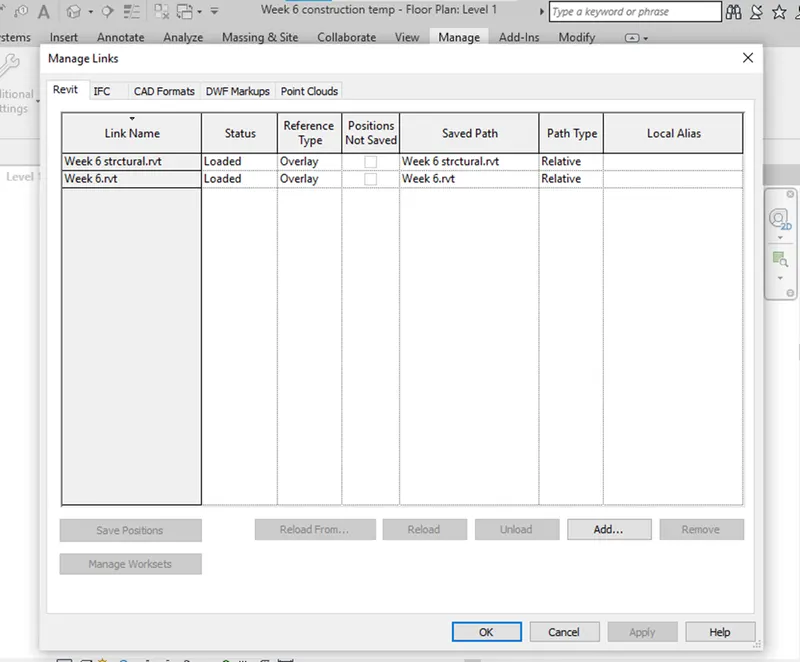
Step5:
- A manage link window will appear click on the add option to link the other revit model
- After adding the Architectural model and Structural model then click on ok
Result:
- The Architectural and Structural file are link with construction file.
9):
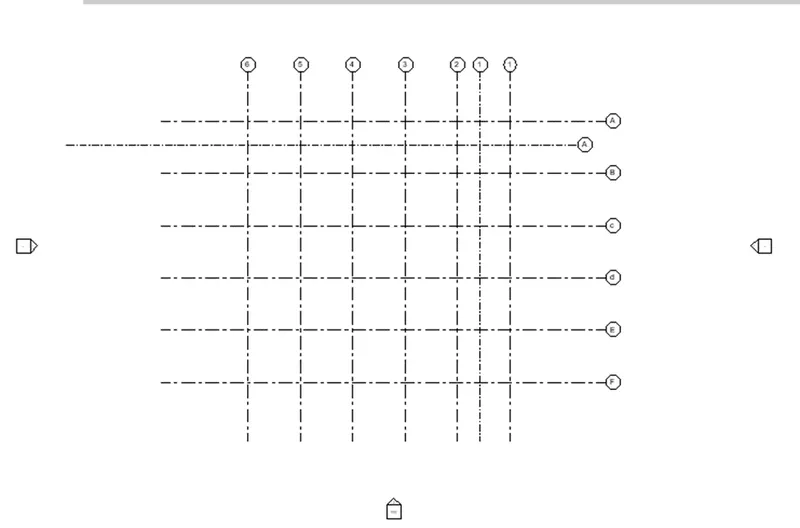
A): The grids are not matching we have to set the grid by using manage tab.
Aim: To set the shared parameter for matching between the link project.
Introduction: To set the shared parameter for matching between the link project. By using Revit.
Procedure:
Step1:
- From the file tab open the construction template.
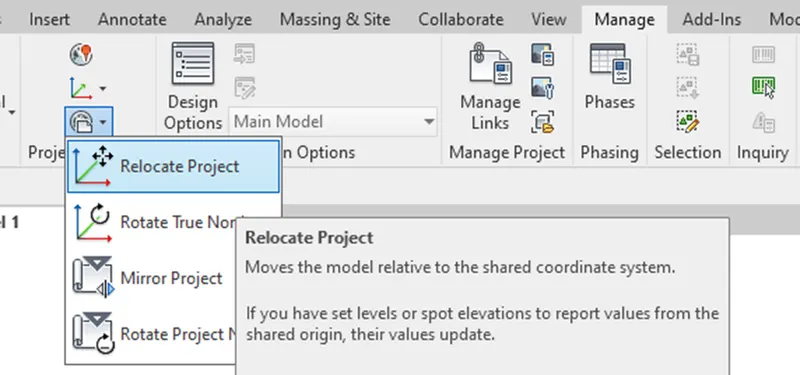
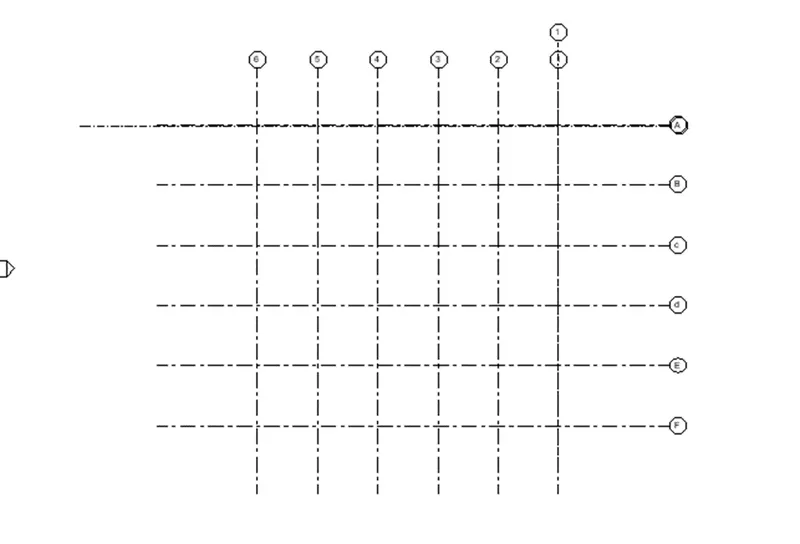
- From the manage tab click on the position option then select the relocate project option then click on the grid then drag it to the position of the other grid.
Result:
- The grid has matched perfectly.
10):
A): Flow chart of a project in term of construction model, architectural model and structural model.
Project
Construction model
Architectural Structural
Walls Foundation
Doors Columns
Windows Beams
Stairs & Lift Floors
Components trusses
Roof
Material