Usage of Collaborate tool in REVIT
Question 01) Open an architectural template. Using the Manage tab set project base point and project shared coordinates for the project.
Answer:
Aim: To set base point and shared coordinates to the project using manage tab in Architectural template.
Introduction:
The project base point is the common reference point for measuring distances placing the objects with respect to the one reference point.
When the multiple models and files of different origin have to combined in a single project, the positioning of these models and files play important role. Hence, we establish shared coordinated to place theses models perfectly in the required positions. Every Revit project ha internal co ordinates for all the elements that compose the model in that project.
Procedure:
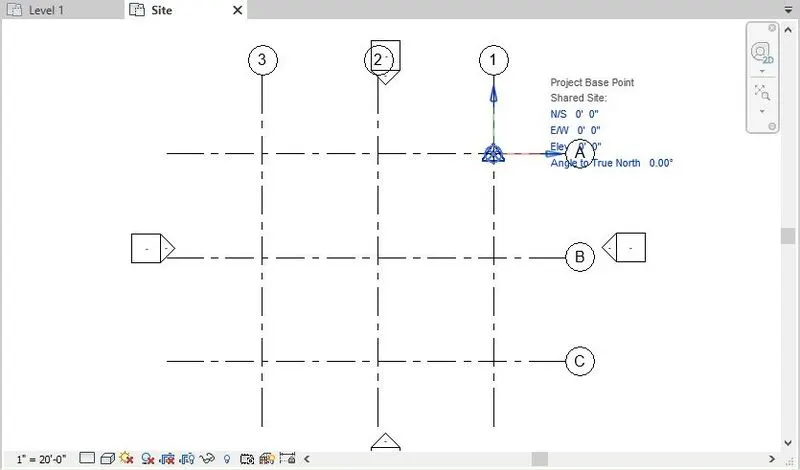
- Open new file with Architectural template. In the project browser, in the floor plans click on the ‘Site’. A new window with the name ‘site’ will be open. Now the Project base point will be seen.
- Now go to the ‘Architecture tab’ and click on grids. Now draw grids and rename them.
- Now click on the ‘project base point’ and move it to the point where Grids A and will meet. Now fix that as the project base point.
- Now for establishing shared coordinates, go to the ‘manage tab’ click on ‘coordinates’ and then click on ‘specify shared coordinates at point’
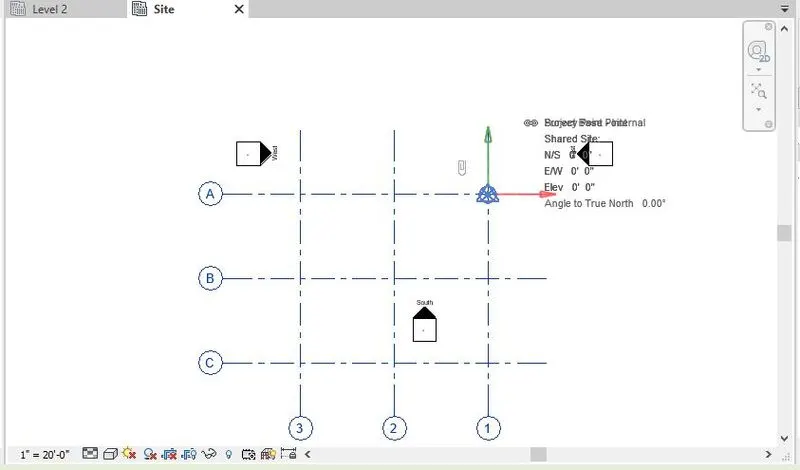
- Now click on the project base point to set the coordinates at that point.
Now set the North/South, East/West coordinates as 0’0”.
Result:
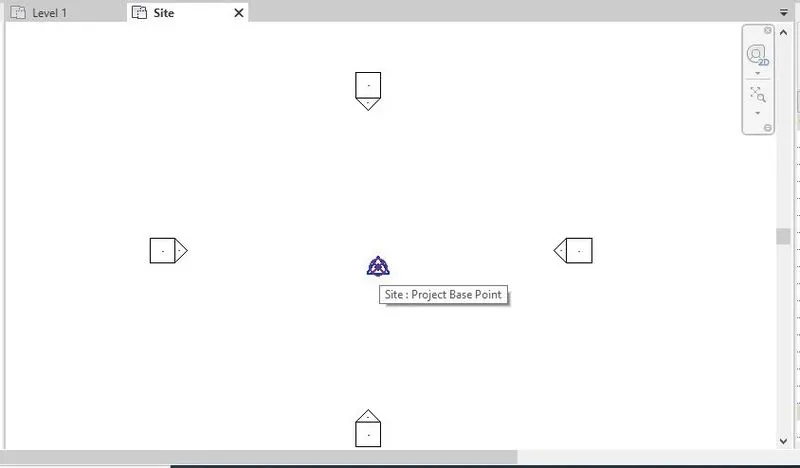
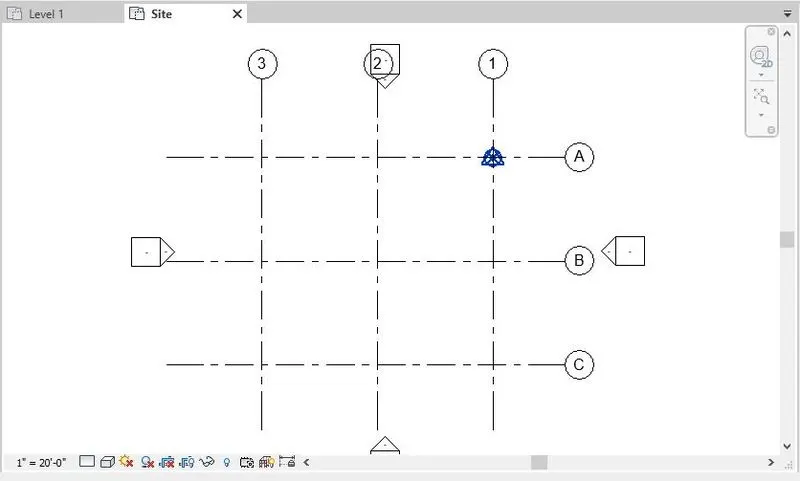
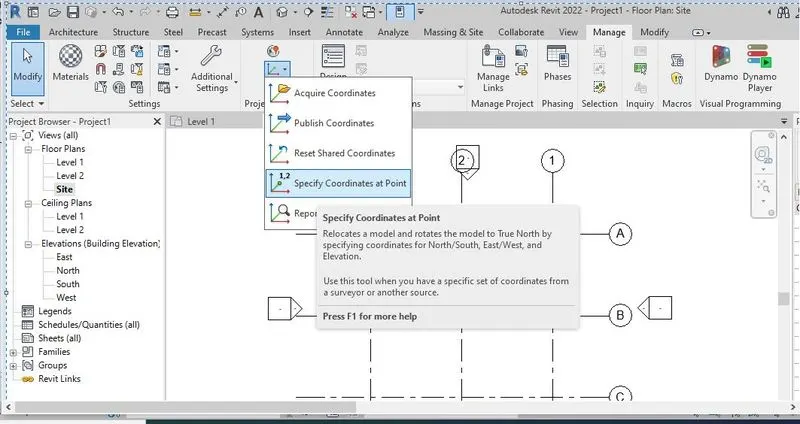
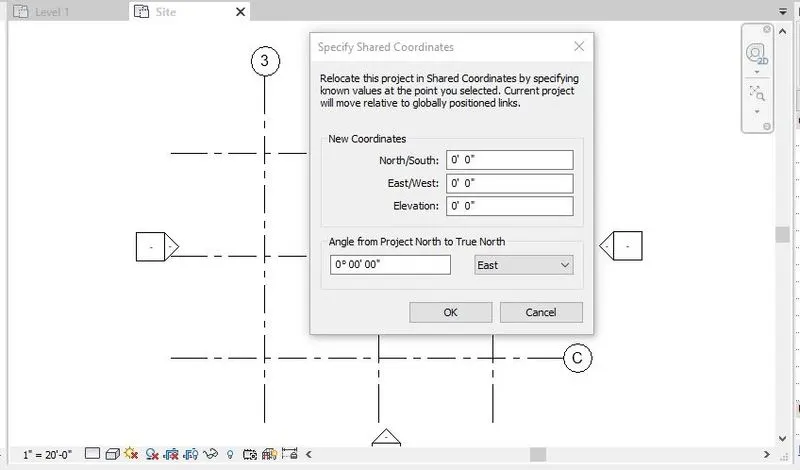
Question 02) Open another new file but with a structural template. Using the manage tab set project parameters the same as the architectural model. Copy the parameters from the architectural model to the structural template or enter the parameters manually into the structural model.
Answer:
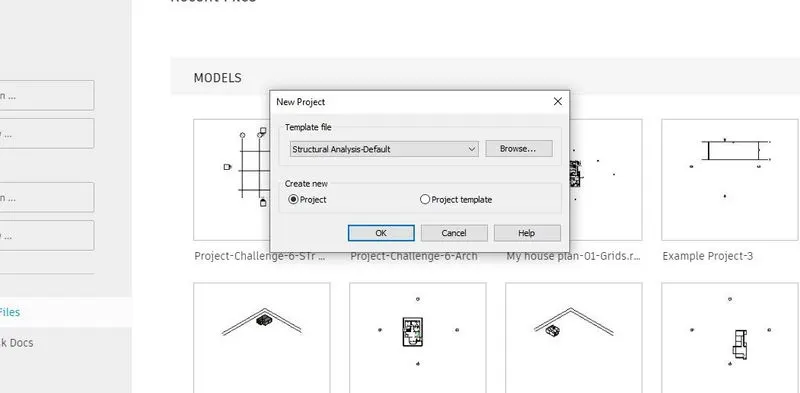
Aim: To open new file with Structural template and setting project parameters same as the Architectural model. Copy the project parameters from Architectural model to Structural model or enter the parameters manually into the structural model.
Procedure:
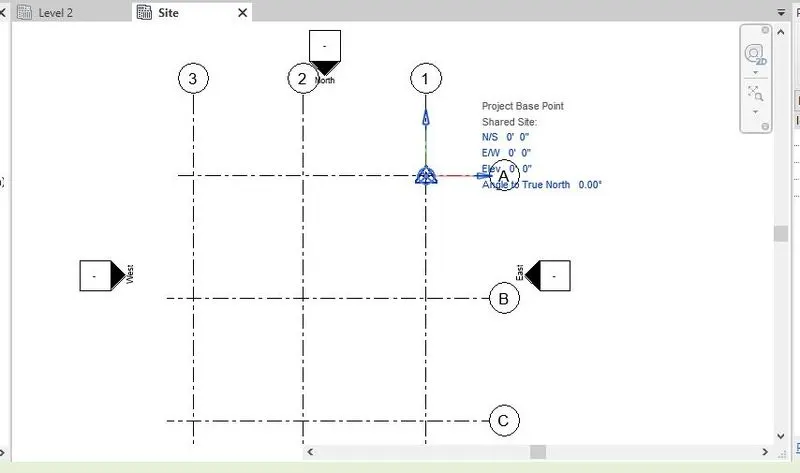
- Open new file with Structural template. In the project browser, in the floor plans click on the ‘Site’. A new window with the name ‘site’ will be open. Now the Project base point will be seen.
- Now go to the ‘Structure tab’ and click on grids. Now draw grids and rename them.
- Now click on the ‘project base point’ and move it to the point where Grids A and will meet. Now fix that as the project base point.
- Now for establishing shared coordinates, go to the ‘manage tab’ click on ‘coordinates’ and then click on ‘specify shared coordinates at point’
- Now click on the project base point to set the coordinates at that point.
Now set the North/South, East/West coordinates as 0’0”.
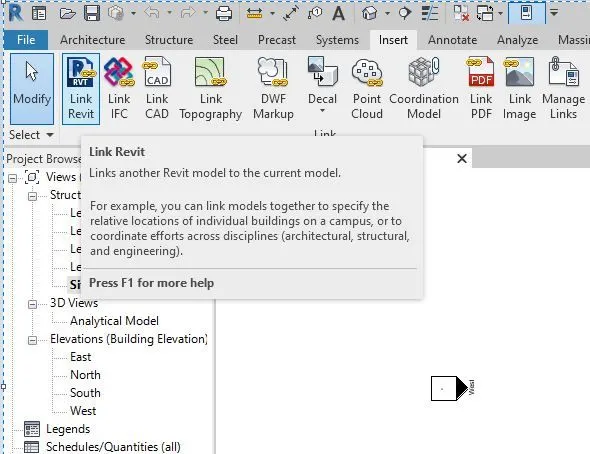
- To copy the project parameters from Architectural model to Structural model, first open a new file in the ‘Structural tab’. Now click on ‘insert tab’ and then on ‘Link Revit’.
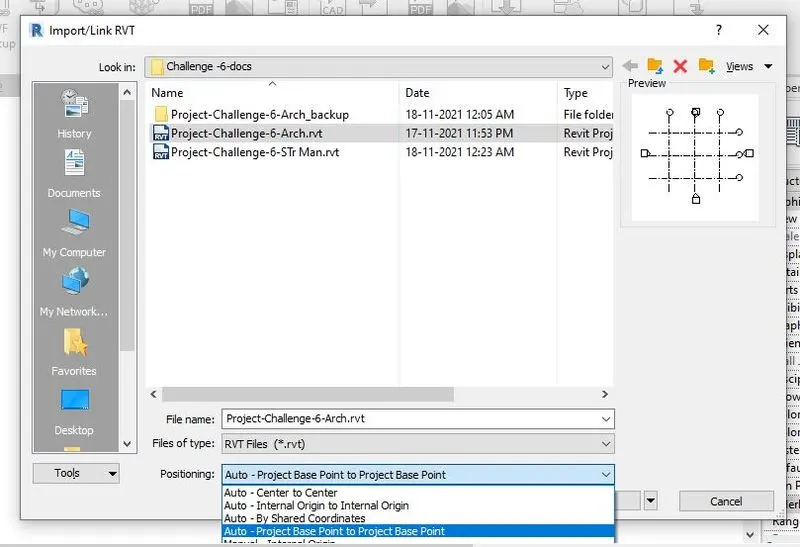
- A new window will appear in that import the architectural model and select the positioning as ‘project base point to project base point. Now click open.
- All the parameters from Architectural model are copied to the structural model.
Result:
Question 03) Re-open the architectural model. Using the tools under the Collaborate tab make the architectural model a central model. (enabling simultaneous working on the model)
Answer:
Aim: To reopen the ‘Architectural model’ and make it as central model using ‘collaborate tool’.
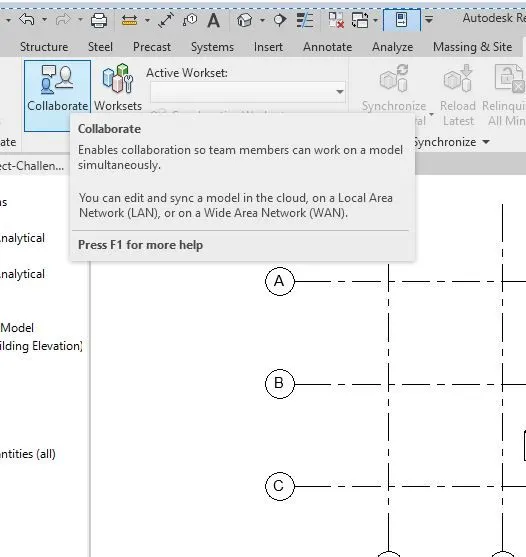
Introduction: Collaborate is a special tool that Revit Software provides through which we can link multiple Revit models together, allowing different team members to work in context.
Through work sharing, users on the same LAN can work together in the same Revit model in the same time.
Procedure:
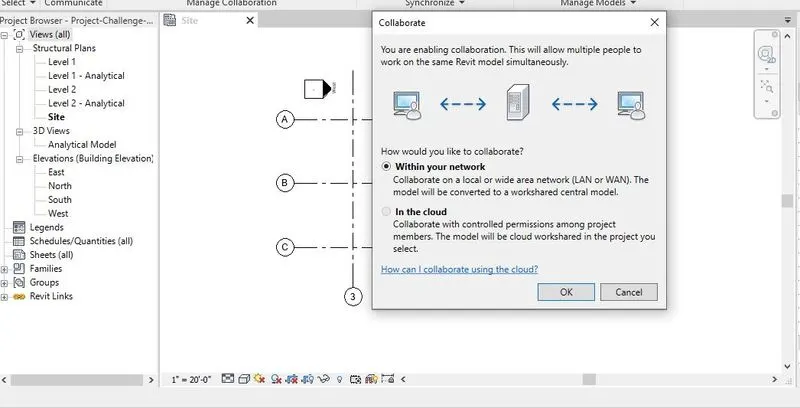
- Open the ‘Architectural tab’ of week 6. Now click on ‘collaborate tab’ and on icon ‘collaborate’
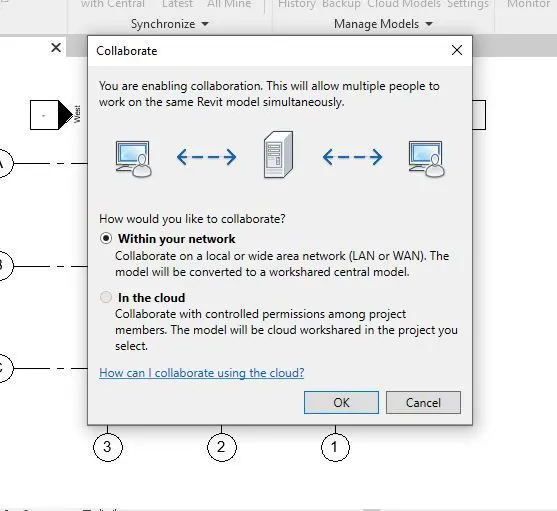
- A new window will appear, then click on through LAN and click ok.
- Now the project is ready to use simultaneously from different teams.
Result:
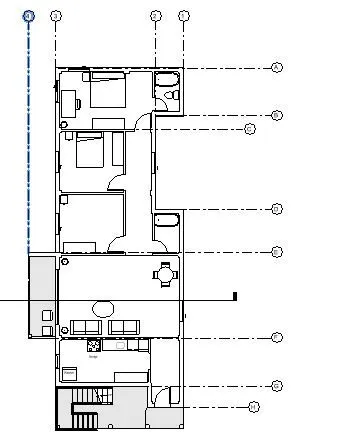
Question 04) Create the Grids Longitudinal and Transverse pattern for the project similar to the task done in Week 2.
Answer:
Aim: To set the Longitudinal and Transverse Grids to the project created in week 2.
Introduction: Grids are the Annotation elements which help us to organise the design. These Grids lines becomes the reference and framework to begin the modelling.
Procedure:
- Open the project created in week 2. Now go to the ‘Project browser’ and right click on the ‘ground floor level’ in the floor plans. Duplicate the view and rename it.
- Now go to ‘Architecture tab’ click on grids draw the Longitudinal Transverse Grids an rename them.
Result:
Question 05) Synchronize the changes from the local copy to the central file of the architectural model.
Answer:
Aim: To synchronise the changes from the local copy to the central file of the architectural model.
Introduction: When we are working on the work shared project, changed made in the local file has to be updated in central file the synchronize will help us to do so.
Procedure: To synchronize with the central model,
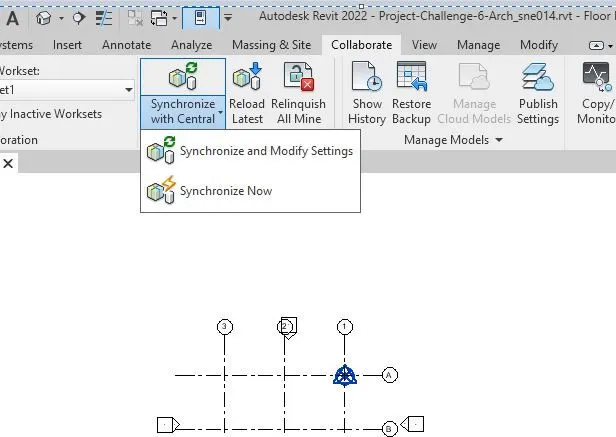
- Go to ‘collaborate’ toolbar and click on ‘Synchronize with central’ dropdown and click on synchronise now’ icon.
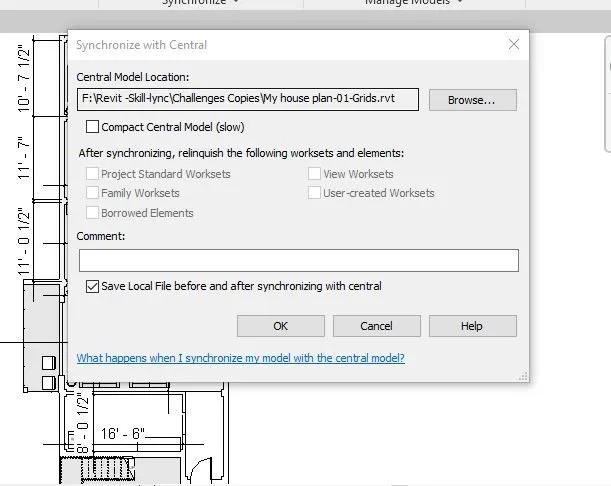
- If we want to modify the synchronize with central settings before synchronizing with central then press ‘synchronize and modify settings’.
- Then a new window will appear. Their select the location of the central file in ‘the central mode location’ tab. Then click ok.
Result:
Question 06) Open the structural model and use the collaborate tools to save the model as a central file.
Answer:
Aim: To save the model as a central file in structural model using the collaborate tool.
Introduction: Collaborate is a special tool that Revit Software provides through which we can link multiple Revit models together, allowing different team members to work in context.
Through work sharing, users on the same LAN can work together in the same Revit model in the same time.
Procedure:
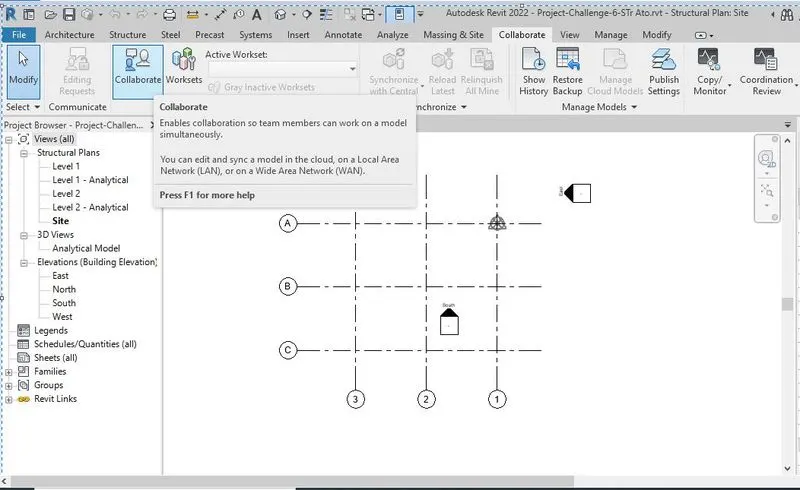
- Open the ‘project created in week 6 in structural template. Now click on ‘collaborate tab’ and on icon ‘collaborate’
- A new window will appear, then click on through LAN and click ok.
- Now the project is ready to use simultaneously from different teams.
Result:
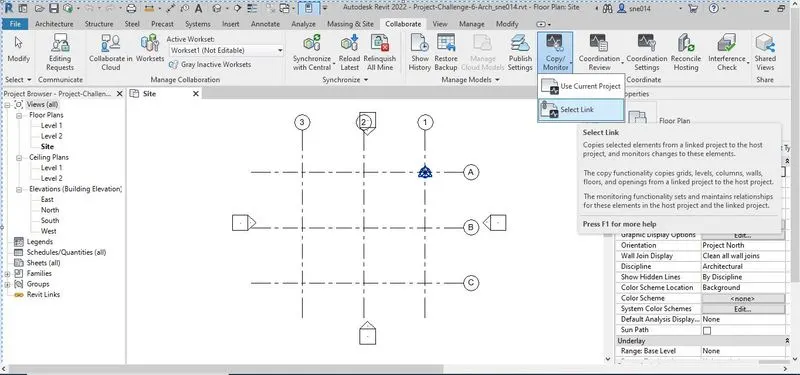
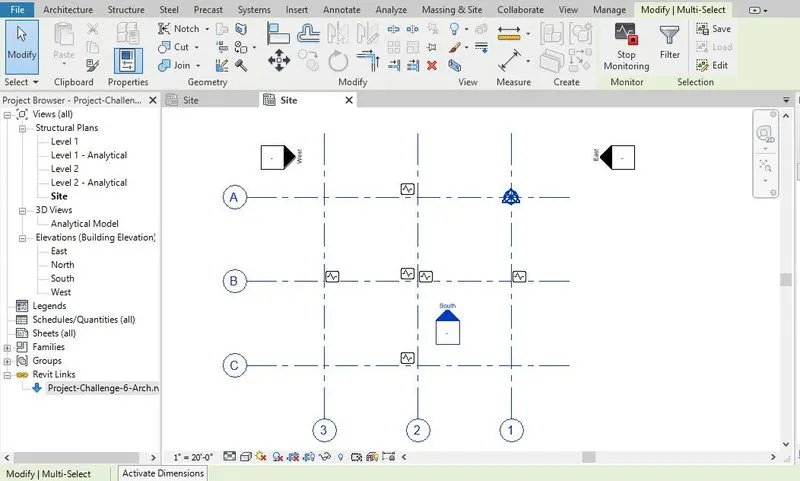
Question 07) Under the Collaborate tab, select the grids and levels from the architectural model, and using Copy Monitor try to copy the grids to the structural model. See what happens when the copy monitored grid is moved around in the structural model.
Answer:
Aim: Copying the Grids and Levels from Architectural model to Structural model using copy monitor under collaborate tab.
Introduction: If we want to copy elements from a linked model to the current model and changes in the elements to be monitored the we have to use copy monitor option from collaborate tool.
Procedure:
- Open the project created in week 6 in Architectural template.
- Now open Structural template and open the project which is earlier linked to the Architectural Project.
- Now go to ‘Collaborate tab’ click on the ‘copy Monitor’ drop down ‘select link’
- Then a tool bar will appear. From that click ‘copy’ Then select ‘Multiple’
And copy all the grids and then click on ‘finish’
- Now we are still in the ‘copy monitor’ option. Go to ‘Copy monitor’ toolbar and now click on ‘Finish’.
Result:
Question 08) Create another new file with a construction template. Save the new file as a central model. This file will include both architectural and structural model. Under the manage tab, Click manage links to link both architectural and structural files. Save the file and close all the files.
Answer:
Aim: To create new project in the ‘construction template’ and Link it to the “Architectural Project and Structural Project’ using ‘manage tab’
Introduction: When one or more projects are linked to each other, any changes made in the source file will automatically updated in the other drawings using Manage Link.
Procedure:
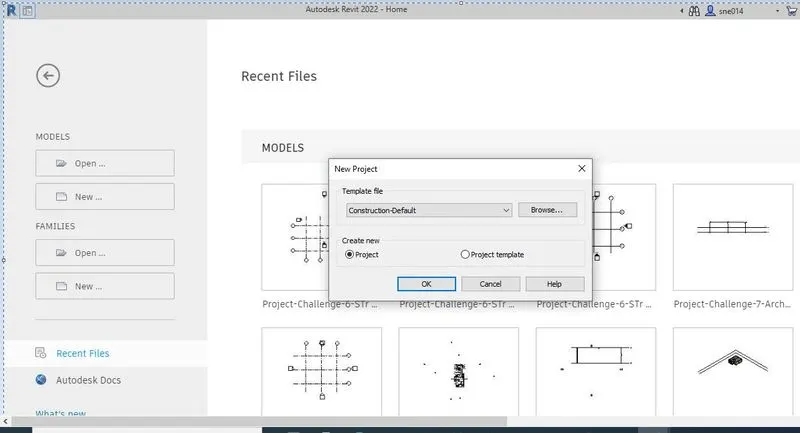
- Open a new project in the ‘construction template’.
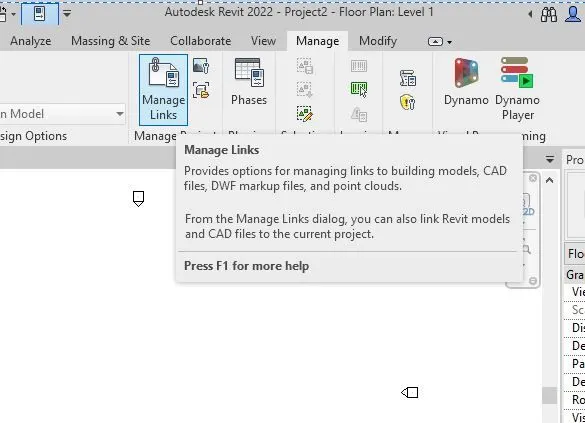
- Now go to the ‘Manage tab’ and click on ‘Mange Link’.
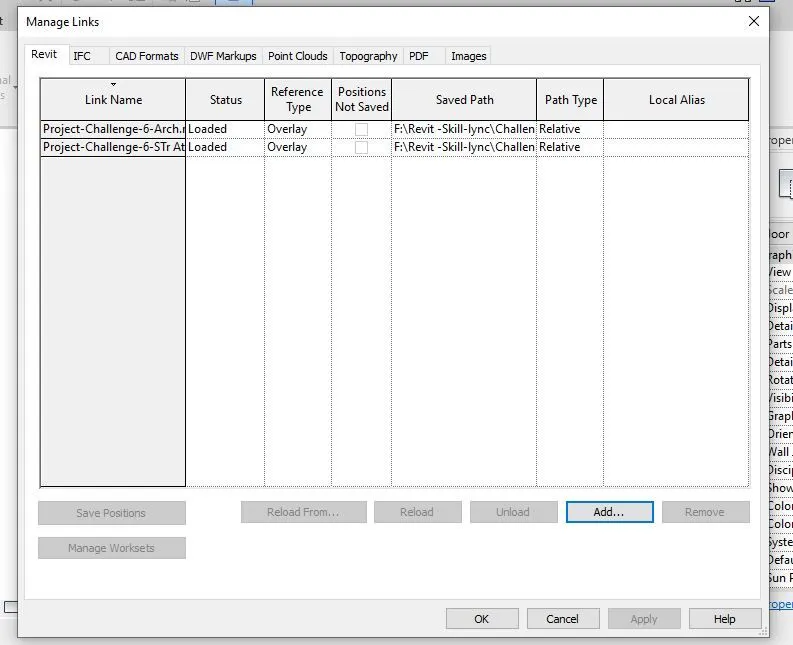
- A new window will appear their click on ‘add button’ to add Architectural drawing and structural drawing and click ok.
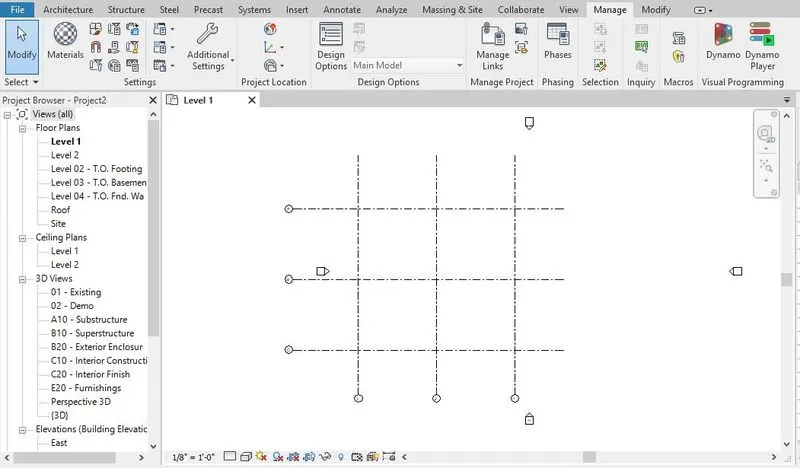
- Now the project in the construction template will be linked to both architectural and structural models and all the elements are also copied to construction drawing.
Result:
Question 09) Are the grids from structural and architectural model matching in the construction template created? If yes, the model is set up for project 2. If not work on the shared parameters and linking options under Manage links
( Hint: origin to origin, by shared coordinates or by project base point to base point) to link the models in an appropriate manner.
Answer:
Aim: To check whether the grids copied from Architectural template and Structural template are matching with each other.
Procedure:
open the project created in 6.08 challenge in construction template.
- Check the grids copied from ‘Architectural template and construction template. Are they matched. Yes they have been matched.
- The project is ready for set up for project 2.
Result:
Question 10) List a flow chart of a project tree set up in terms of Construction model, Architecture & Structure model, in this exercise and understand how many people can work on the same project using Revit simultaneously.
Answer:
List of activities to be handled in construction model to set up a project:
- Estimate of project costs.
- Final project budget.
- Schedule for the construction team.
- Schedule for how project will be executed.
- Communicate and collaborate with project stakeholders.
- Educate workers and teams about the contract details.
- Supervise all work specialists dealing with construction and regulation adherence
- Perform risk management.
- Health and Safety.
List of activities to be handled in construction model to set up a project are:
- Schematic Design.
- Design Development.
- Construction Documents.
- Bidding and Construction
- Construction Administration
Structural Model:
The main goal of Structural Analysis of a building is to make sure that the structure is capable of withstanding the Loads applied on it without any failure during its lifetime.
The building should be properly designed so that it should not cause any consequences in terms of expenses and most importantly any loss of lives.
The final intention of Structural Analysis is to build a safe, functional and economic structure.
** END OF DOCUMENT**