Usage of Collaborate tool in REVIT
1) Open an architectural template. Using the Manage tab set project base point and project shared coordinates for the project
ANS:
Aim: Opening an architectural template with the required Settings in Revit.
Tools Used: New, Browse, Save.
Procedure:
- In Revit, click the File Ribbon tab, hover the mouse over New, and then select Project.
- Select the Architectural template is in list of Project Templates, click Browse.
- In the Choose Template dialog box, navigate to the. rte file you've been working in.Click OK.
- The new "project" and give name as project 2
- Save the project.
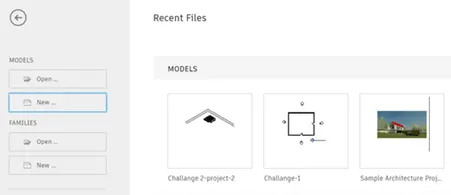
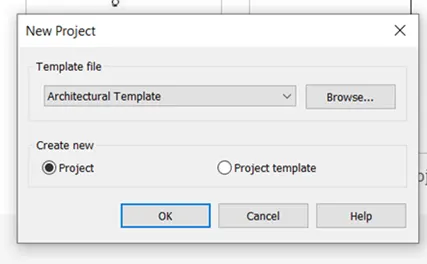
- Create the project. Use a project template provided or use a default template.
- Thus a file is now created and saved with proper information.
Result: A new File is Created with name architectural file and saved.
2) Open another new file but with a structural template. Using the manage tab set project parameters the same as the architectural model. Copy the parameters from the architectural model to the structural template or enter the parameters manually into the structural model
ANS:
Aim: Opening an Structural template with the required Settings and parameters in Revit.
Tools Used: New, Browse, Save.
Procedure:
- In Revit, click the File Ribbon tab, hover the mouse over New, and then select Project.
- Select the Architectural template is in list of Project Templates, click Browse.
- In the Choose Template dialog box, navigate to the. rte file you've been working in.Click OK.
- The new "project" and give name as project 6
- Save the project.
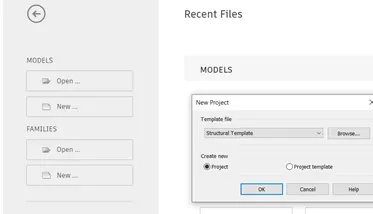
- Create the project. Use a project template provided or use a default template.
- Thus a file is now created and saved with proper information.
Result: A new File is Created with name Structural file and saved.
3) Re-open the architectural model. Using the tools under the Collaborate tab make the architectural model a central model (enabling simultaneous working on the model)
ANS:
Aim: Opening of an Architectural Project to use collabrate tab make the architectural model a central model in Revit.
Tools Used: Open,Colabrate, Save.
Procedure:
- In Revit, click the File Ribbon tab, hover the mouse over Open, and then select Project.
- Select the Architectural template is in list of Project Templates, click Browse.
- In the Choose Template dialog box, navigate to the. rte file you've been working in.Click OK

- Revit provides several different ways to collaborate with team members who are also using the software.
- You can link multiple Revitmodels together, allowing team members to work in context.
- Through work-sharing, users on the same local area network (LAN) can work together in the same Revit
- When collaboration needs to occur among users who are not in the same geographic location, use Revit Server or Revit Cloud Work-sharing.
- Revit Server connects offices who share a network but are not in the same geographic location.
- Revit Cloud Work-sharingis a cloud-based service that allows any Revit users inside or outside a network to collaborate on a Revit
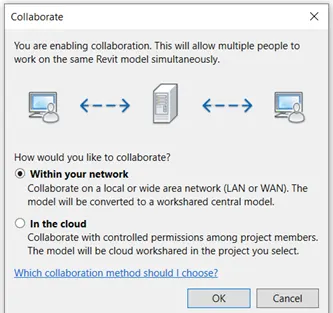
- Revit Server connects offices who share a network but are not in the same geographic location.
- Revit Cloud Work-sharingis a cloud-based service that allows any Revit users inside or outside a network to collaborate on a Revit
Result: The architectural model is openend, Using the tools under the Collaborate tab make the architectural model a central model which enabling simultaneous working on the model.
4) Create the Grids Longitudinal and Transverse pattern for the project similar to the task done in Week 2
ANS:
Aim: To Create the Grids Longitudinal and Transverse pattern for the project in Revit.
Tools Used: Save, Grid, View etc.
Procedure:
- On the ribbon, click (Grid). Architecture tab, Datum panel(Grid), Structure tab Datum panel (Grid)
- Click Modify | Place Grid tab Draw panel and select a sketch option.
- Use (Pick Lines) to snap the grid to an existing line, such as a wall.
- (Optional) Click Modify | Place Grid tab Draw panel(multi-Segment) to sketch grids requiring more than one segment.
- Click when the grid is the correct length.
- Revit automatically numbers each grid. To change the grid number, click the number, enter the new value, and press ENTER.
- You can use letters for grid line values. If you change the first grid number to a letter, all subsequent grid lines update appropriately.
- As you draw grid lines, the heads and tails of the lines can align to one another.

- Click when the grid is the correct length.
- Revit automatically numbers each grid. To change the grid number, click the number, enter the new value, and press ENTER.
- You can use letters for grid line values. If you change the first grid number to a letter, all subsequent grid lines update appropriately.
- As you draw grid lines, the heads and tails of the lines can align to one another.
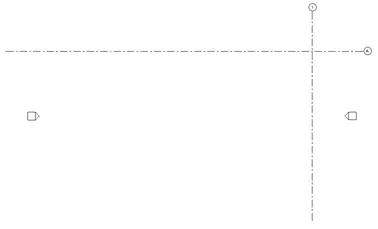
- If grid lines are aligned and you select a line, a lock appears to indicate the alignment.
- If you move the grid extents, all aligned grid lines move with it as shown above.
Result: The Grids Longitudinal and Transverse pattern for the project in Revit is Created as Shown above.
5) Synchronize the changes from the local copy to the central file of the architectural model.
ANS:
Aim: To Create and Synchronize the changes from the local copy to the central file of the architectural model in Revit.
Tools Used: Save, Manage,Synchronize, View etc.
Procedure:
- When working on a workshare project, use the Synchronize with Central tool to save your local changes to the central model.
- To Synchronize with Central: Click Collaborate tab - Synchronize panel - Synchronize with Central drop-down -(Synchronize Now).
- If you want to modify the Synchronize with Central settings before you synchronize with central: Click Collaborate tab - Synchronize panel - Synchronize with Central drop-down (Synchronize and Modify Settings). The Synchronize with Central dialog displays.
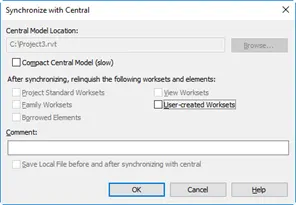
- In the Synchronize with Central dialog, verify the location of the central model.
- If necessary, click Browse to specify a different path for the central model. Specify the new path in the Central File Location dialog, and click OK.
- Select Compact Central Model to reduce file size when saving.
- Under After synchronizing, relinquish the following work sets and elements, select from the following options:
- To make your changed work sets and elements available to other users, select the appropriate check boxes.
- To synchronize the changes to central but keep the work sets and elements editable, clear the appropriate check boxes.
- If desired, enter a comment that is saved to the central model.
Result: The Project is now Sychronised for the local and as Shown above.
6) Open the structural model and use the collaborate tools to save the model as a central file.
ANS:
Aim: To Open the structural model and use the collaborate tools to save the model as a central file in Revit.
Tools Used: Save, Collaborate, Synchronize, View etc.
Procedure:
- In Revit, click the File Ribbon tab, hover the mouse over Open, and then select Project.
- Select the Architectural template is in list of Project Templates, click Browse.
- In the Choose Template dialog box, navigate to the. rte file you've been working in.Click OK
- Revit provides several different ways to collaborate with team members who are also using the software.
- You can link multiple Revitmodels together, allowing team members to work in context.
- Through work-sharing, users on the same local area network (LAN) can work together in the same Revit
- When collaboration needs to occur among users who are not in the same geographic location, use Revit Server or Revit Cloud Work-sharing.
- Revit Server connects offices who share a network but are not in the same geographic location.
- Revit Cloud Work-sharingis a cloud-based service that allows any Revit users inside or outside a network to collaborate on a Revit
- Revit Server connects offices who share a network but are not in the same geographic location.
- Revit Cloud Work-sharingis a cloud-based service that allows any Revit users inside or outside a network to collaborate on a Revit
Result: The structural model is Opened and use the collaborate tools to save the model as a central file in Revit as Shown in the above images.
7) Under the Collaborate tab, select the grids and levels from the architectural model, and using Copy Monitor try to copy the grids to the structural model. See what happens when the copy monitored grid is moved around in the structural model
ANS:
Aim: To Open the structural model and use the collaborate tools to save the model as a central file in Revit.
Tools Used: Open, mannage, copy monitor, copy, View etc.
Procedure:
- To copy elements for monitoring
- Open an existing model or create a new one.
- You will copy elements from another Revitmodel to this model.
- Prepare a view:
- Open a view where you will be able to see the copied elements.
- For example, use a floor plan view to copy grids, columns, walls, floors, and related openings for monitoring.
- In the view properties, for Discipline, select Coordination.
- This setting ensures that the view displays elements for all disciplines (architectural, structural, mechanical, and electrical).
- (Optional) If you plan to copy grids to the current model, delete existing grids.
- You cannot use Copy/Monitor for Multi segemnt grid,
- Link the model into the current model.
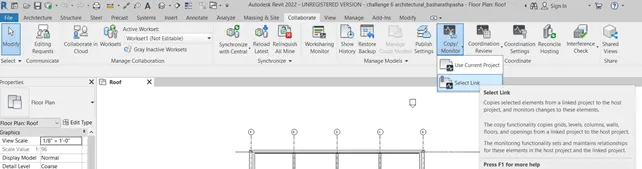
- Link the model into the current model.
- Pin the linked model in place, so that it cannot be moved inadvertently:
- In the drawing area, select the linked model.
- Tip:Move the cursor over the linked model in the drawing area. When its boundary is highlighted, click to select it.
- Click Modify | RVT Links tab, Modify panel(Pin).
- (Optional) Display the linked model in Halfone, so that you can distinguish its elements from elements in the current model.
- Start the Copy/Monitor tool:
- Click Collaborate tab, coordinate panel Copy/Monitor drop-down(Select Link).
- Select the linked model in the drawing area.
- Specify options for the elements to copy.
- For example, you can copy openings and inserts in walls and floors, or change the family type for copied elements.
- Copy the elements for monitoring:
- Click Copy/Monitor tab, Tools panel, (Copy).
- Select the elements to copy.
- To select multiple elements, on the Options Bar, select Multiple. Then select the elements in the drawing area, and click Finish on the Options Bar.
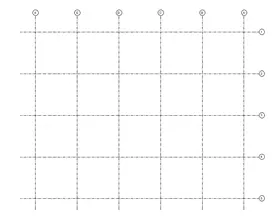
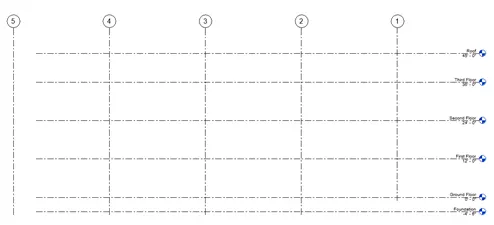
Result: The Structural Model is linked with the architectural model using manage link and copy the grids and level by using copy monitor in Revit as Shown in the above images.
8) Create another new file with a construction template. Save the new file as a central model. This file will include both architectural and structural model. Under the manage tab, Click manage links to link both architectural and structural files. Save the file and close all the files.
ANS:
Aim: To Create another new file with a construction template. Save the new file as a central model in Revit.
Tools Used: New, Open, mannage, copy monitor, copy, View etc.
Procedure:
- Open an existing model, and link another model to it.
- Open an existing model or start a new model, you will link another model into this model.
- Click Insert tab Link panel(Link Revit).

- In the Import/Link RVT dialog, select the model to link.
- Note:If you are using Revit Cloud Work-sharing, you can only link to a model in the current cloud project.
- For Positioning, specify the desired option.
- In most cases, you should select Auto - Origin to Origin.
- If the current model uses shared coordinates, select Auto - By Shared Coordinates. See shared posioning.
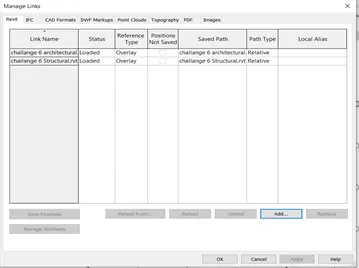
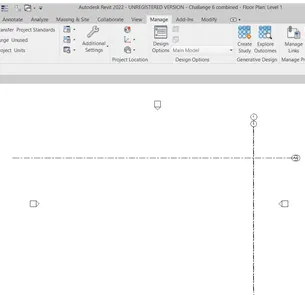
- See posion of open linked Click Open.
- If you cannot see the linked model in the drawing area, do the following:
- In the view properties, for Discipline, select Coordination.
- This setting ensures that the view displays elements for all disciplines (architectural, structural, mechanical, and electrical).
- (Optional) To display the linked model in halftone, for Visibility/Graphics Overrides, click Edit. On the Revit Links tab, for the linked model, select Halftone, and click OK.
Result: Another file is created as combined and the architectural and structural drawings are linked and adjusted to the common ordinates as shown in the above figures.
9) Are the grids from structural and architectural model matching in the construction template created? If yes the model is set up for project 2. If not work on the shared parameters and linking options under Manage links
( Hint: origin to origin, by shared coordinates or by project base point to base point ) to link the models in an appropriate manner
ANS:
Aim: To Create the grids from structural and architectural model matching in the construction template created in Revit.
Tools Used: New, Open, mannage, copy monitor, copy, Achvire ordinate, move ordinate, View etc.
Procedure:
- Open an existing model, and link another model to it.
- Open an existing model or start a new model, you will link another model into this model.
- Click Insert tab Link panel(Link Revit).
- In the Import/Link RVT dialog, select the model to link.
- Note:If you are using Revit Cloud Work-sharing, you can only link to a model in the current cloud project.
- For Positioning, specify the desired option.
- In most cases, you should select Auto - Origin to Origin.
- If the current model uses shared coordinates, select Auto - By Shared Coordinates. See shared posioning.
- See posion of open linked Click Open.
- If you cannot see the linked model in the drawing area, do the following:
- In the view properties, for Discipline, select Coordination.
- This setting ensures that the view displays elements for all disciplines (architectural, structural, mechanical, and electrical).
- (Optional) To display the linked model in halftone, for Visibility/Graphics Overrides, click Edit. On the Revit Links tab, for the linked model, select Halftone, and click OK.
Result: Another file is created as combined and the architectural and structural drawings are linked and adjusted to the common ordinates as shown in the above figures.
10) List a flow chart of a project tree set up in terms of Construction model, Architecture & Structure model, in this exercise and understand how many people can work on the same project using Revit simultaneously
ANS:
Aim: To List a flow chart of a project tree set up in terms of Construction model, Architecture & Structure model in Revit.
Tools Used: New, Open, mannage, copy monitor, copy, Achvire ordinate, move ordinate, View etc.
Procedure:
- In the Begining select the new option and then select a Architectural template and save the project as Challange 6 Architectural and save.
- Similarly select the new option and then select a Structural template and save the project as Challange 6 Structural and save.
- Now open the architectural drawing and draw the grid as Transverse and Horizontal as A and 1 Symultaneously.
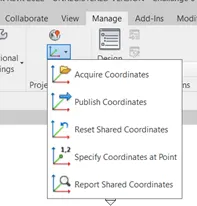
- then use the manage tab and ordinate tab and give ordinate as 0' and 0' in vertical and horizontal grid.
- Again open the Structural File and do the same in the structural file as done in the archetectural file and saved
- Now open the Archetecture file and use manage link in ribbon and select the structural file and add by shared ordinate.
- now use the ordinate menu and use aqurie coordinate and select the link file.
- so that the link attached is matched with the present drawing.
- Now the file is done Now the time for to create another file named combined in which both structural and Architectural can be managed symultaneously.
- now the file is then saved and so that any changes in both the drawing is changed Simultaneously.
- More than 6 Peoples can use the same model Simultaneously.
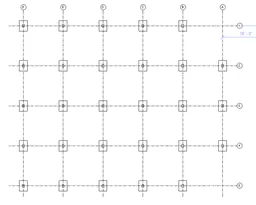
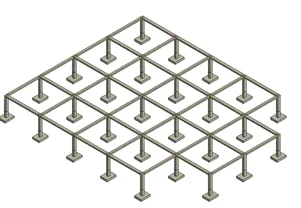
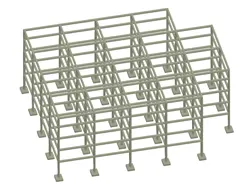
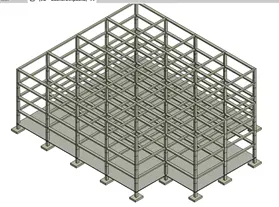
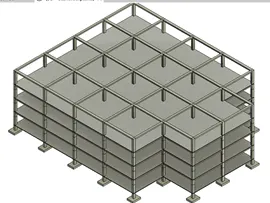
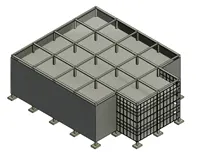
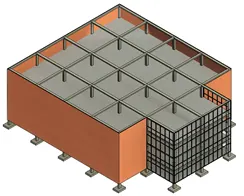
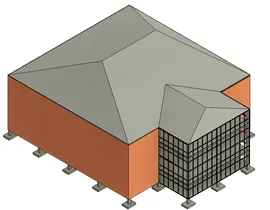
I have attached some images of the drawing which is drawn as practice purpose below,
----------------------------THE END------------------------