Usage of Collaborate tool in REVIT
1.AIM
To set project base point and project shared coordinates for the project using the manage tab in the architectural template
INTRODUCTION
- Autodesk Revit is a building information modelling software tool for architects , landscape architects , structural engineers , mechancial, electrical and plumbing (MEP) engineers, designers and contractors .
- The software allows users to design a building and structure and its component in 3D , annotate the model with 2D drafting elements , and access the building information from the building model's database.
- The revit sotware offers the following
- Revit customization and support
- Revit plugin development
- Revit mobile app development
- Custom Revit add-ins for MEP
- Some of the major advantages of revit are as follows
- parametric modelling
- collaboration
- coordination
- scheduling
- energy analysis
- rendering presentation
- construction documentation
PROCEDURE
STEP1
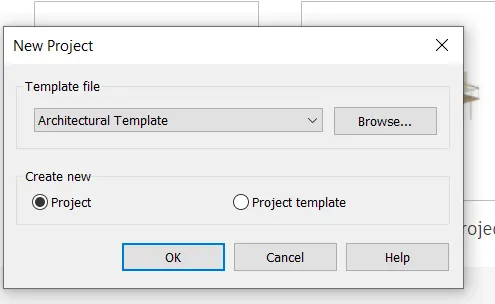
STEP2
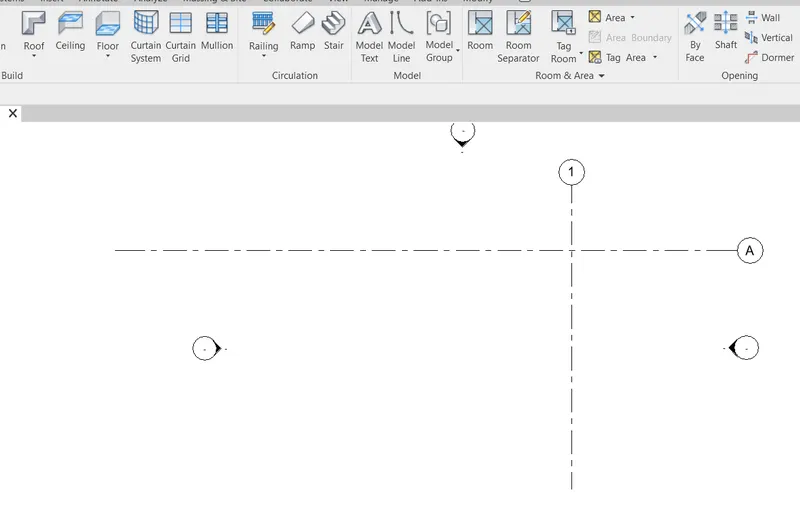
CREATING GRIDS
- Go to the architectural tab and from that select the grid option
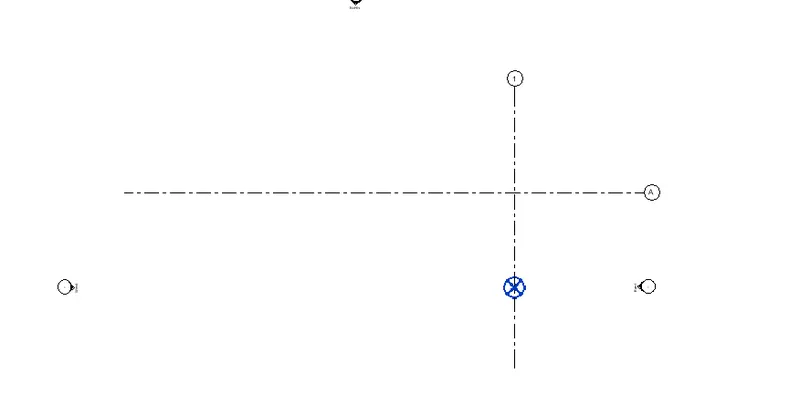
- draw a grid in horizontal and vertical manner , intersecting eachother
- Give name of the horizontal grid as A
- Give name of vertical grid as 1
STEP3
- Go to the manage tab and from that select specify the coordinates at point option
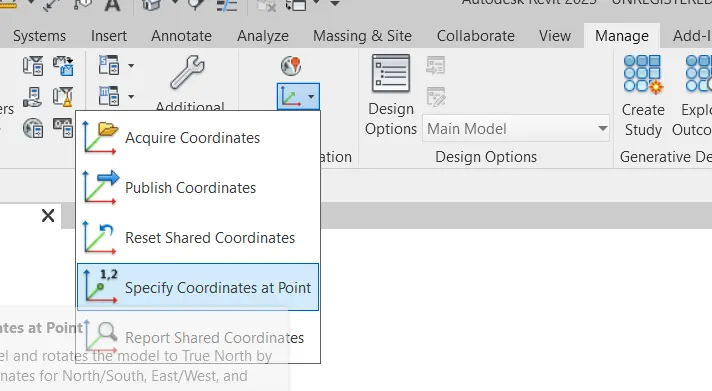
- then click on the horizontal grid , the specify shared coordinates tab will appears
- In that we need to enter the coordinates for north/south as 0
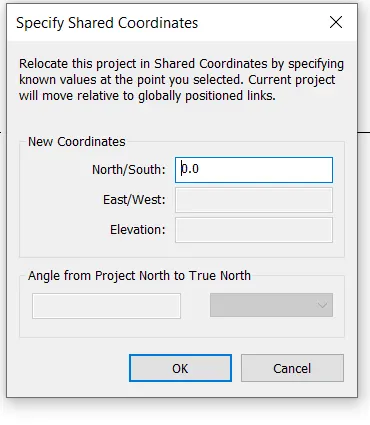
- then click on the vertical grid , the specify shared coordinates tab will appears
- In that we need to enter the coordinates for east/west as 0
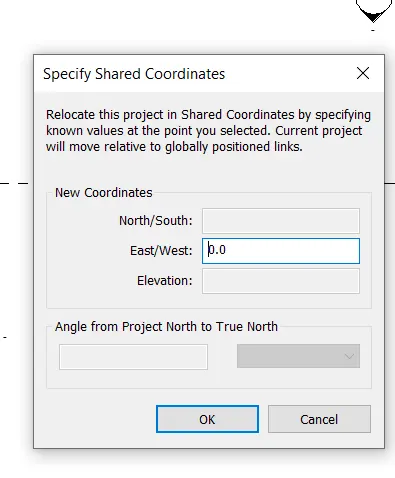
STEP4
- enter VG command and the visibility/Graphic tab will appear
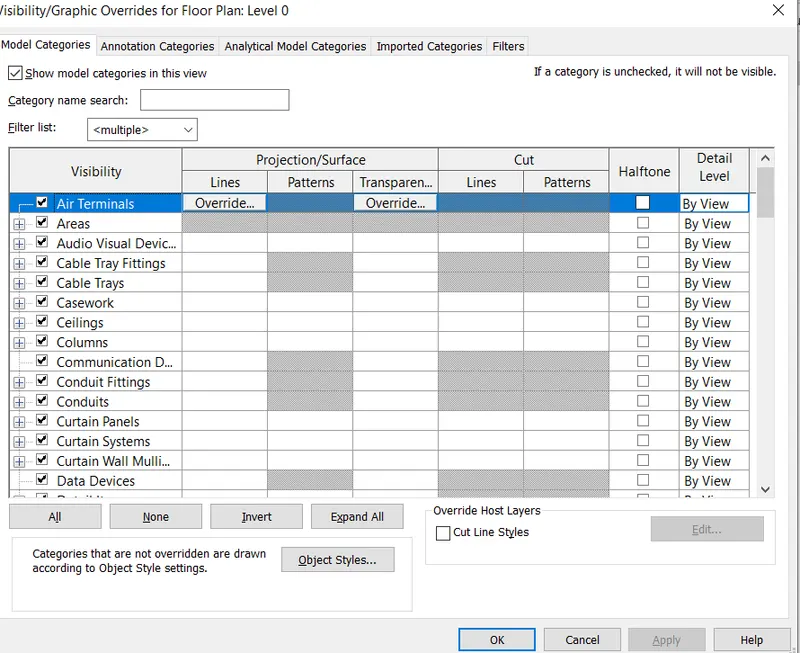
- from that select site
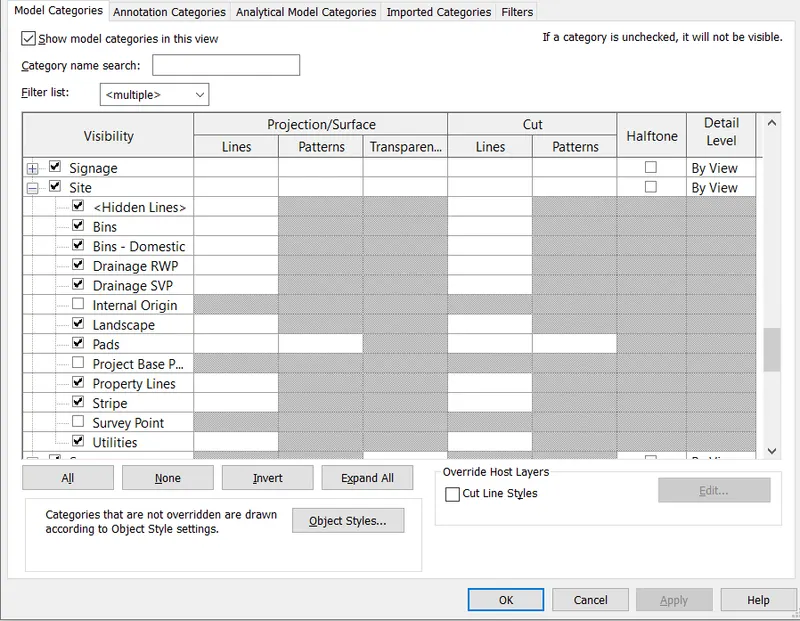
- from that select the project base point and then apply it
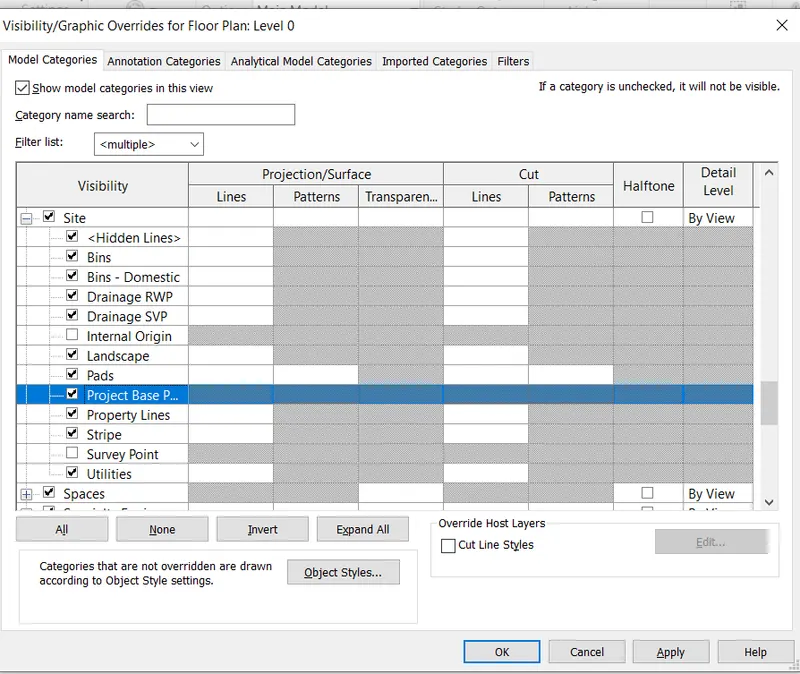
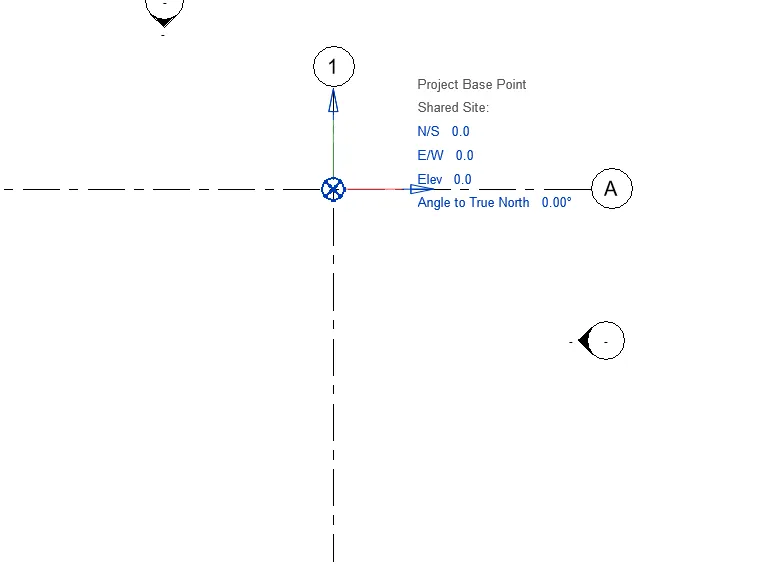
- finally save the project as 'project 41'
RESULT
Using the manage tab the project base point and project shared coordintes have been setup successfully for the project in the architectural template
-------------------------------------------------------------------------------------------------------------------------------------------
2.AIM
To set project base point and project shared coordinates for the project using the manage tab in the structural template
INTRODUCTION
- Autodesk Revit is a building information modelling software tool for architects , landscape architects , structural engineers , mechancial, electrical and plumbing (MEP) engineers, designers and contractors .
- The software allows users to design a building and structure and its component in 3D , annotate the model with 2D drafting elements , and access the building information from the building model's database.
- The revit sotware offers the following
- Revit customization and support
- Revit plugin development
- Revit mobile app development
- Custom Revit add-ins for MEP
- Some of the major advantages of revit are as follows
- parametric modelling
- collaboration
- coordination
- scheduling
- energy analysis
- rendering presentation
- construction documentation
PROCEDURE
STEP1
- Open rivet
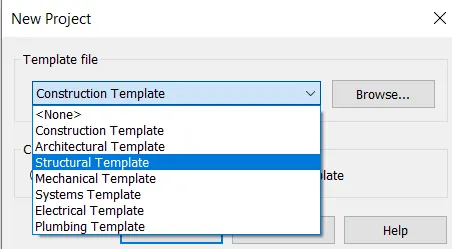
- Create a project using the structural template
- From the home page click on 'NEW'
- A dialogbox will appear from that select structural template
- Create new project
- Click ok
STEP2
CREATING GRIDS
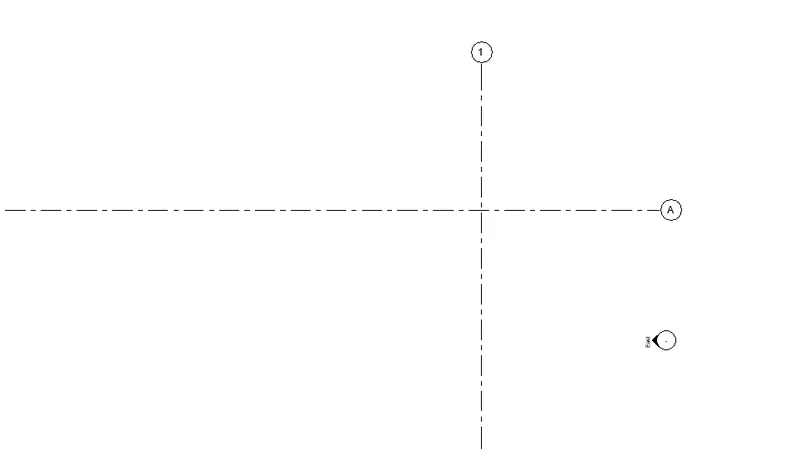
- Go to the structural tab and from that select the grid option
- draw a grid in horizontal and vertical manner , intersecting eachother
- Give name of the horizontal grid as A
- Give name of vertical grid as 1
STEP3
- Go to the manage tab and from that select specify the coordinates at point option
- then click on the horizontal grid , the specify shared coordinates tab will appears
- In that we need to enter the coordinates for north/south as 0
- then click on the vertical grid , the specify shared coordinates tab will appears
- In that we need to enter the coordinates for east/west as 0
STEP4
- enter VG command and the visibility/Graphic tab will appear
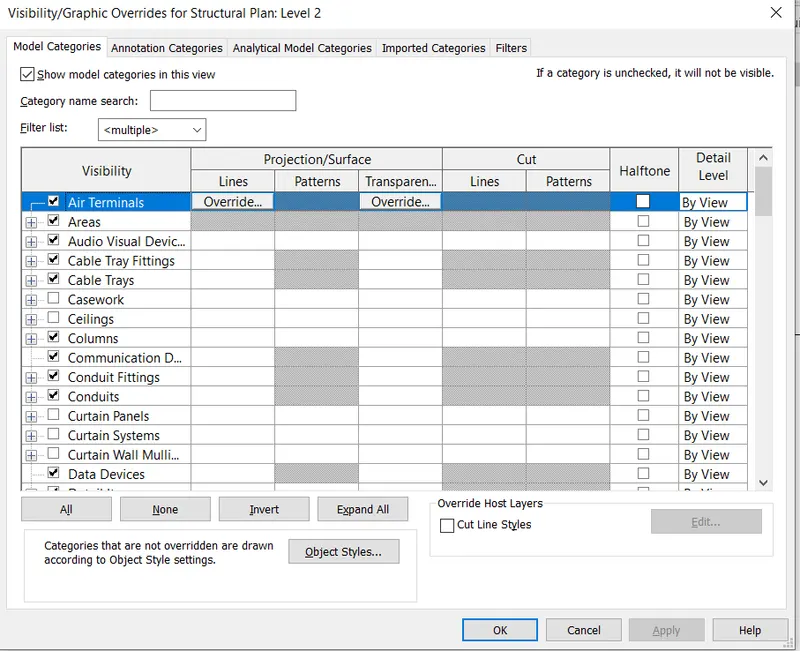
- Fom that select site
- then select project base point
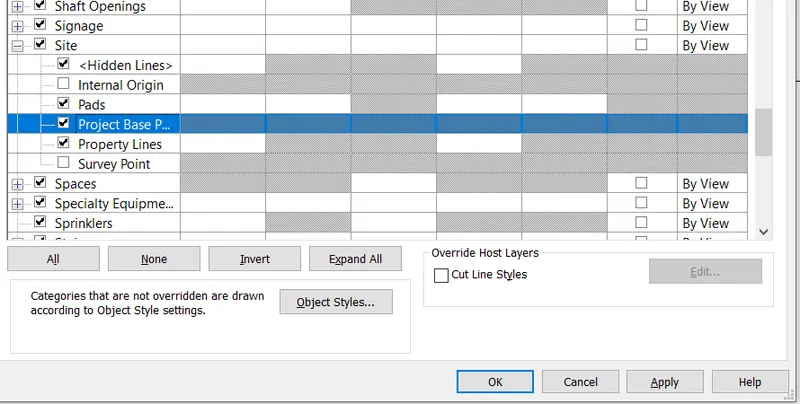
- apply that and click ok
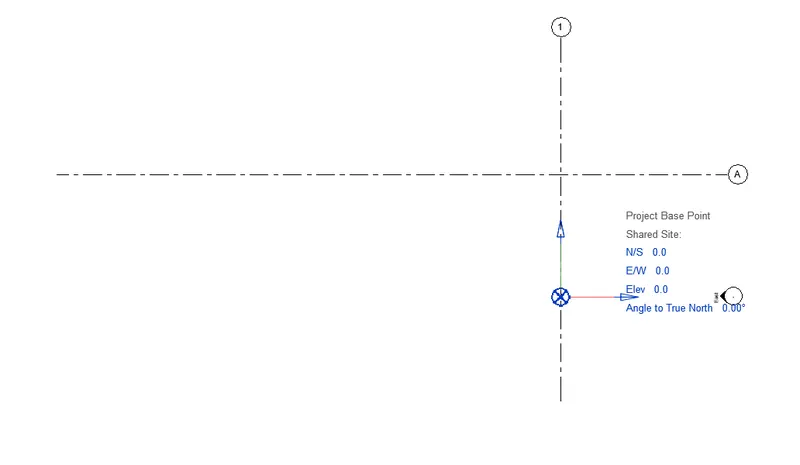
- finally save the project
RESULT
Using the manage tab the project base point and project shared coordintes have been setup successfully for the project in the structural template
------------------------------------------------------------------------------------------------------------------------------------------
3.AIM
To make the architectural model a central model using the collaborate tab
INTRODUCTION
- Revit allows several different ways to collaborate with team members who are also using the softwares
- Helps to link multiple revit models together , simultaneously allowing other team members to work in the background
- Users on the same local area network can work together in the same revit model using revit work sharing
- When collaboration needs to occur among users who are not in the same geographic location,use revit server or revit cloud work-sharing
- As alternative to using revit cloud work-sharing , you can use revit server to collaborate across a wide area network a file based work sharing to collaborate across a local area network
PROCEDURE
STEP1
- open revit
- From that open the previously created architectural template 'project 41'
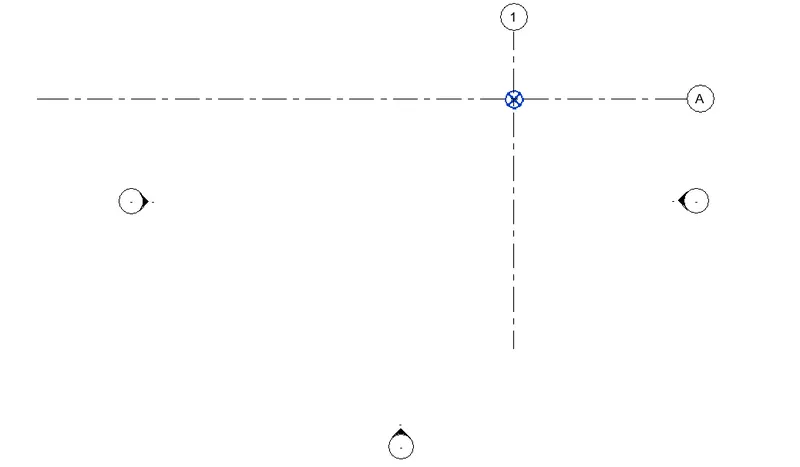
STEP2
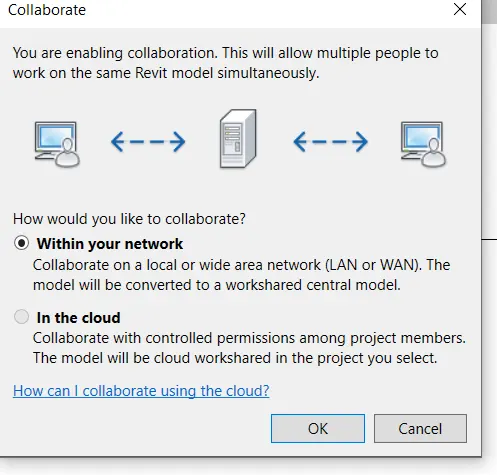
- Go to the collaborate tab and select collaborate
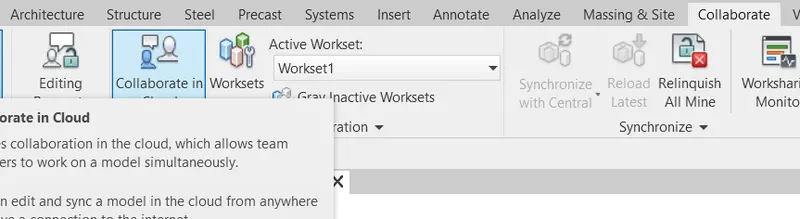
- a tab will appear and two options will be there
- from that select option within your network
- then press ok
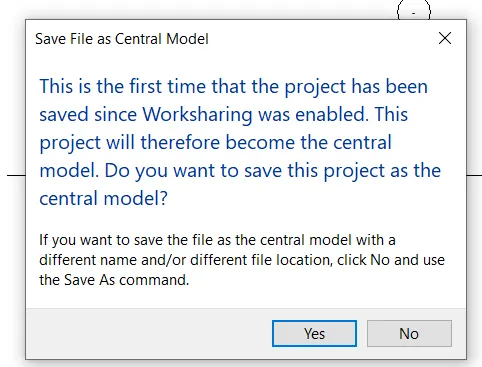
- next we need to save the project file as central model
- click save , dialog box will appear
- press yes
RESULT
Created an architectural model as central model using the collaborate tab
---------------------------------------------------------------------------------------------------------------------------------------------
4.AIM
To Create the Grids Longitudinal and Transverse pattern for the project similar to the task done in Week 2
INTRODUCTION
- Grids and levels are really the skeleton of building projects
- Grid lines are finite planes, we can drag their extents in elevation views so that they donot intersect the level lines
- Grids are used to host columns and walls
- Grids can be straightlines , arcs or multi segmented.You can hide grid lines after you add them
PROCEDURE
- Open the revit
- then from that open the previously created project , 'project 41'
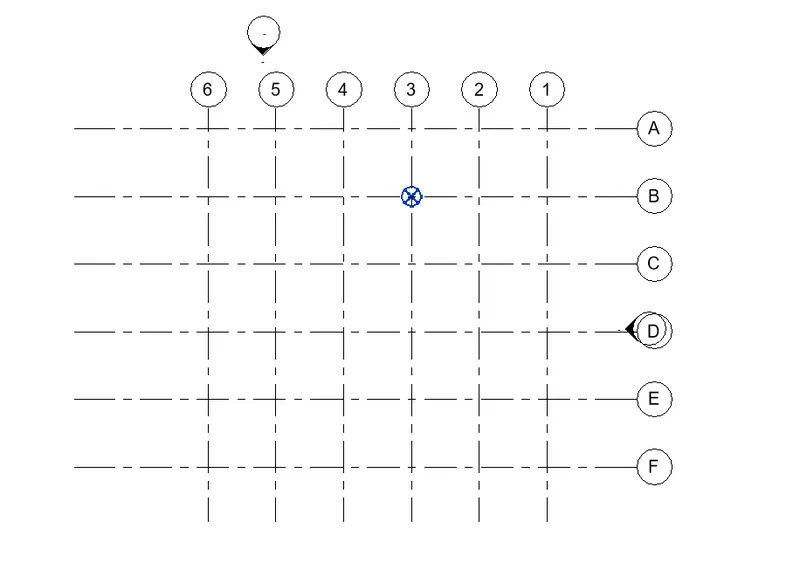
- Go to the architectural tab and from that select the grid option
- use pick line and offset the previously drawn horizontal and vertical grid 5times , horizontally and vertically
- rename it as A,B,C,D,E,F horzontally and 1,2,3,4,5,6 vertically
RESULT
Created the Grids Longitudinal and Transverse pattern for the project similar to the task done in Week 2
---------------------------------------------------------------------------------------------------------------------------------------------
5.AIM
To Synchronize the changes from the local copy to the central file of the architectural model.
INTRODUCTION
- The synchronize with central process loads changes from other files to the central file and then saves local changes to the central file
- The central file access plane of worksharing monitor displays the progress of the synchronize with central operation , which involves several distinct steps
PROCEDURE
STEP1
- open revit
- From that open the previously created architectural template 'project 41'
- using the collaborate tab file is collaborated and have saved to the project as central model in the previous question
STEP2
- synchronize option will be visible
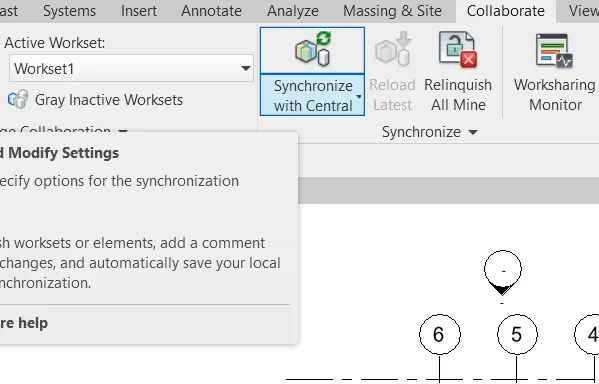
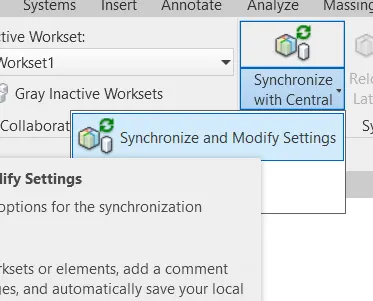
- After selecting the synchronize option a new tab will appear
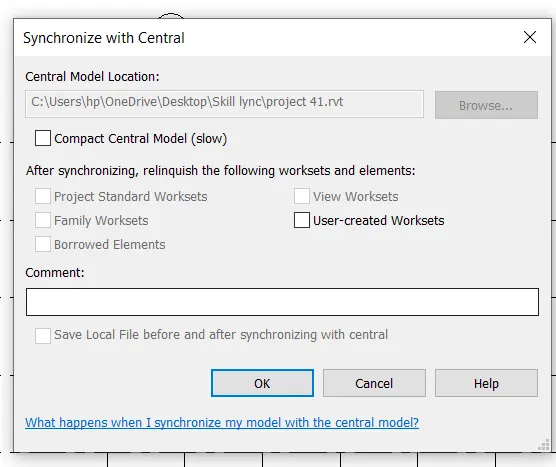
- click ok
RESULT
Synchronized the changes from the local copy to the central file of the architectural model.
------------------------------------------------------------------------------------------------------------------------------------------
6.AIM
To save the model as a central file using the collaborate tool in the structural model
INTRODUCTION
- Revit allows several different ways to collaborate with team members who are also using the softwares
- Helps to link multiple revit models together , simultaneously allowing other team members to work in the background
- Users on the same local area network can work together in the same revit model using revit work sharing
- When collaboration needs to occur among users who are not in the same geographic location,use revit server or revit cloud work-sharing
- As alternative to using revit cloud work-sharing , you can use revit server to collaborate across a wide area network a file based work sharing to collaborate across a local area network
PROCEDURE
STEP1
- open revit
- From that open the previously created structural template
STEP2
- Go to the collaborate tab and select collaborate
- a tab will appear and two options will be there
- from that select option within your network
- then press ok
- next we need to save the project file as central model
- click save , dialog box will appear
- press yes
RESULT
Saved the model as central file using the collaborate tool in the structural model
-------------------------------------------------------------------------------------------------------------------------------------------
7.AIM
To copy the grids from the architectural model to the structural model using copy monitor option
INTRODUCTION
- Grids and levels are really the skeleton of building projects
- Grid lines are finite planes, we can drag their extents in elevation views so that they donot intersect the level lines
- Grids are used to host columns and walls
- Grids can be straightlines , arcs or multi segmented.You can hide grid lines after you add them
- CopyMonitor is a tool to replicate and keep track of elements from one Revit model to another . Mostly used to tranfer grids and levels from a structural model to architectural model
PROCEDURE
STEP1
- Open the revit
- then open the structural that we have created before
- then go to the insert tab and from that select revit link
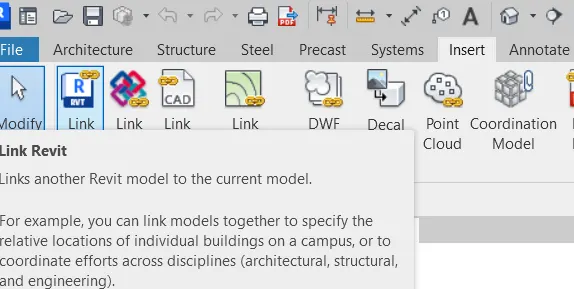
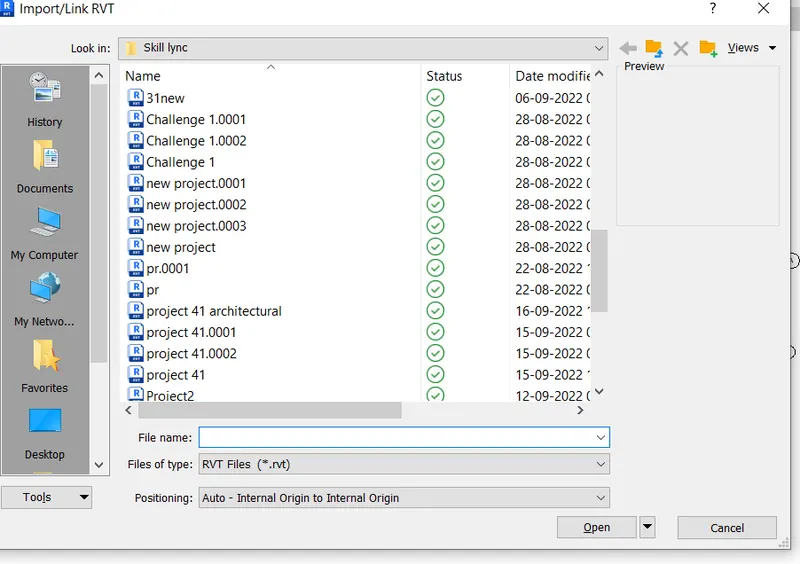
- select the architectural so that the architectural model is inserted to the structural model
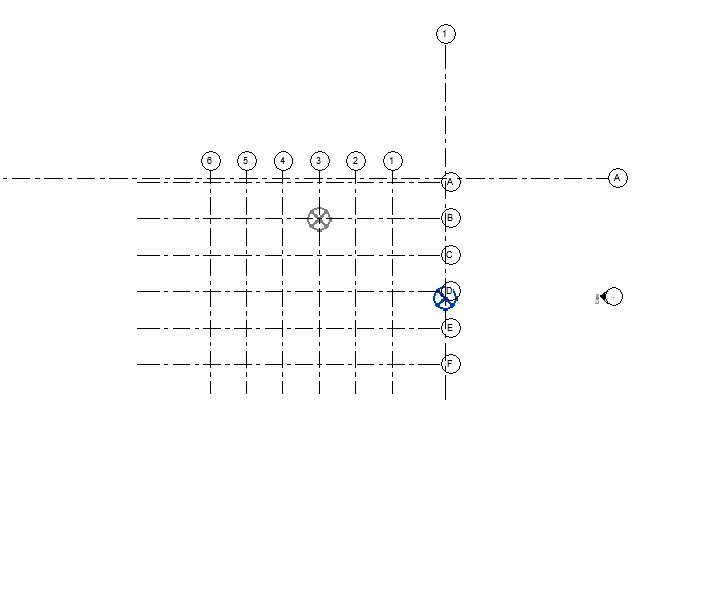
- architectural tab is linked to the structural tab not copied
STEP2
Copy/ monitor
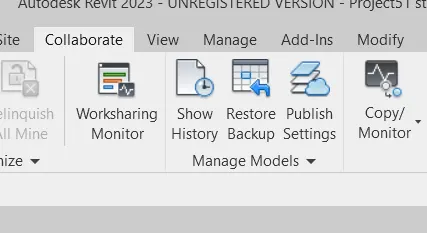
- For that go to the collaborate from that select copy/ monitor from that click'select link'
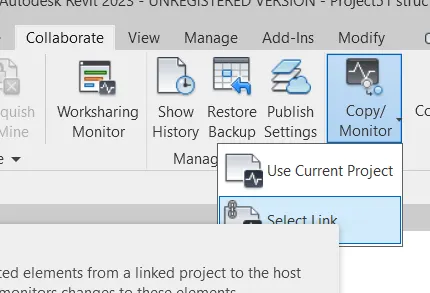
- Then click the copy option
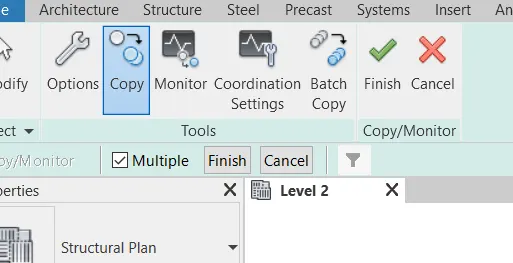
- Choose multiple and select all the grids in the architectural model and click finish
- then again select the copymonitor and click finish
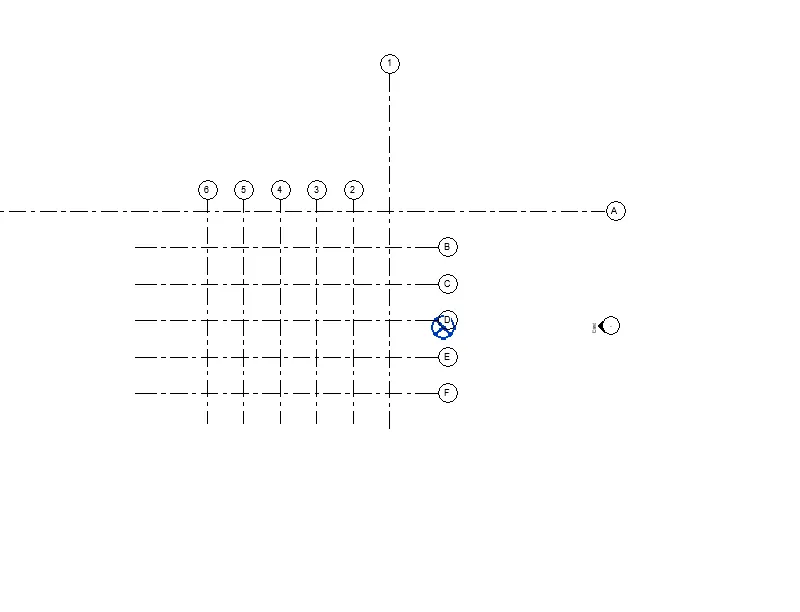
STEP3
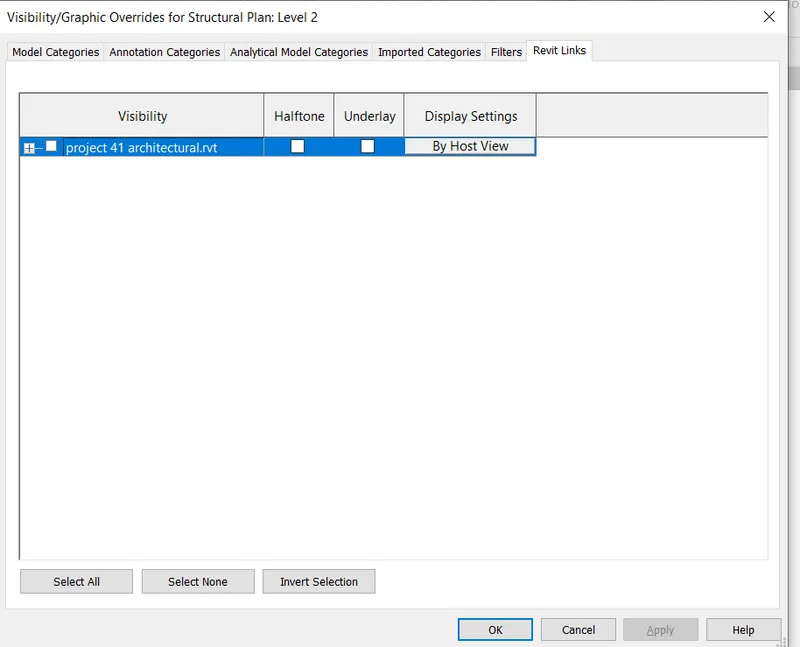
- For checking copied the link or not
- For that use VG command go to revit links
- then untick the architectural project and then click ok
- if the grids are visible then it is copied
RESULT
Copied the grids from architectural model to the structural model using the copy/monitor tool
--------------------------------------------------------------------------------------------------------------------------------------------
8.AIM
- To Create new file with a construction template and Save the new file as a central model.
- To link both architectural and structural files in a single project using the manage link tool
INTRODUCTION
- Autodesk Revit is a building information modelling software tool for architects , landscape architects , structural engineers , mechancial, electrical and plumbing (MEP) engineers, designers and contractors .
- The software allows users to design a building and structure and its component in 3D , annotate the model with 2D drafting elements , and access the building information from the building model's database.
- The revit sotware offers the following
- Revit customization and support
- Revit plugin development
- Revit mobile app development
- Custom Revit add-ins for MEP
- Some of the major advantages of revit are as follows
- parametric modelling
- collaboration
- coordination
- scheduling
- energy analysis
- rendering presentation
- construction documentation
PROCEDURE
STEP1
- Open rivet
- Create a project using the construction template
- From the home page click on 'NEW'
- A dialogbox will appear from that select construction template
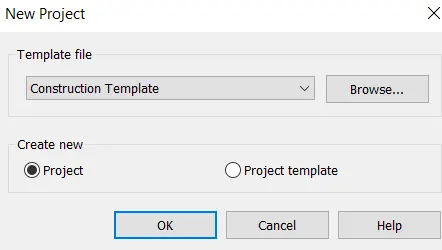
- Create new project
- Click ok
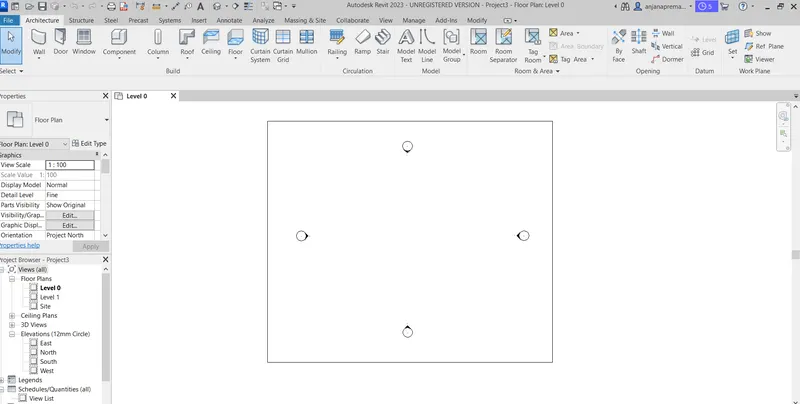
- Save the project
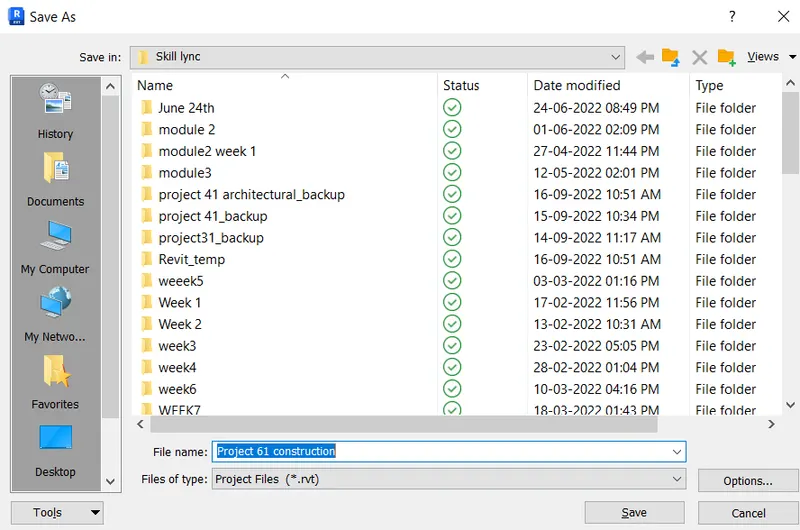
STEP2
- Go to the collaborate tab and select collaborate
- a tab will appear and two options will be there
- from that select option within your network
- then press ok
- next we need to save the project file as central model
- click save , dialog box will appear
- press yes
STEP3
- synchronize option will be visible
- After selecting the synchronize option a new tab will appear
- click ok
STEP4
- Go to the managetab and select the manage links
- And link the structural and architrctural model
- after clicking the ok button on the mangelinks the grids will be resulted
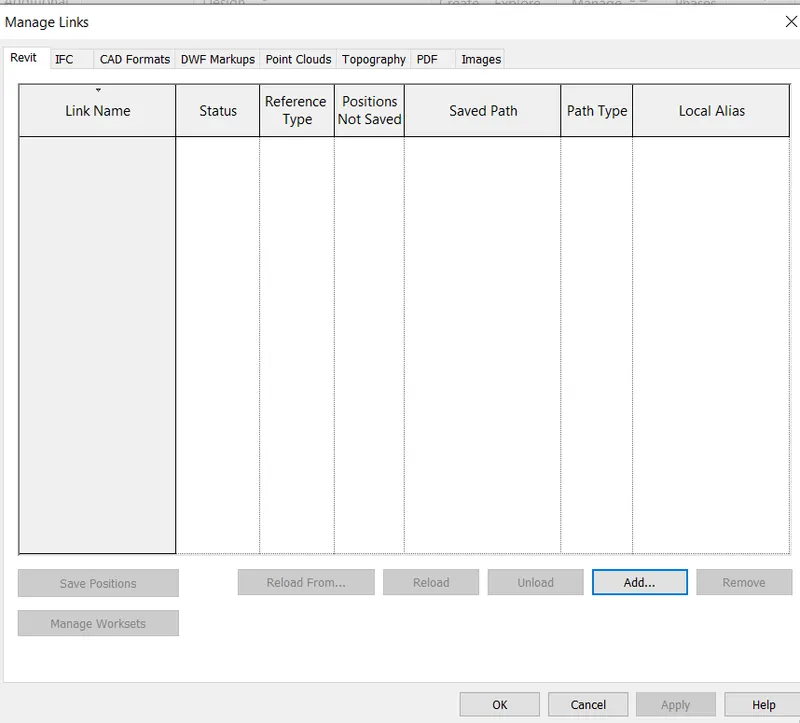
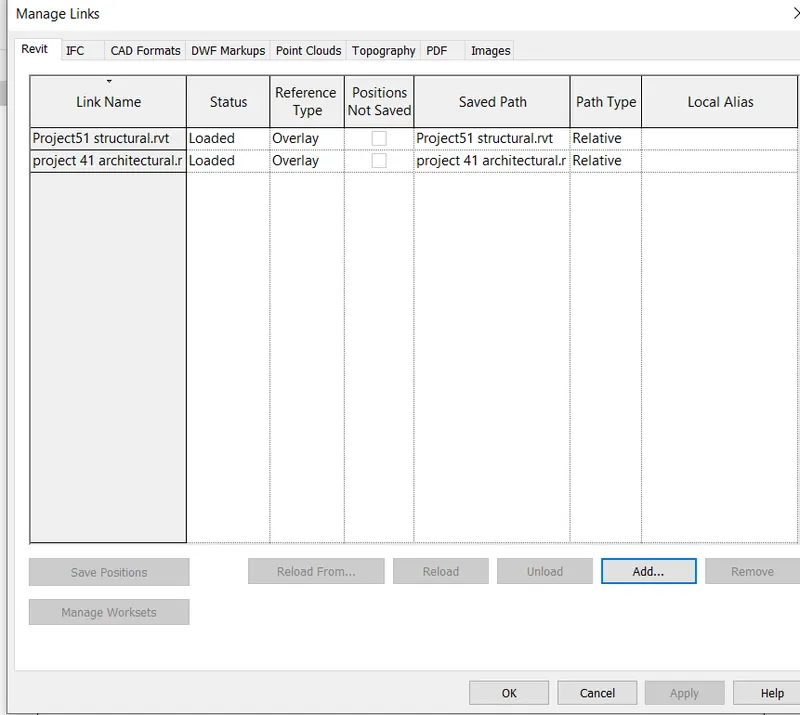
- Architectural and structural models are linked to the construction template
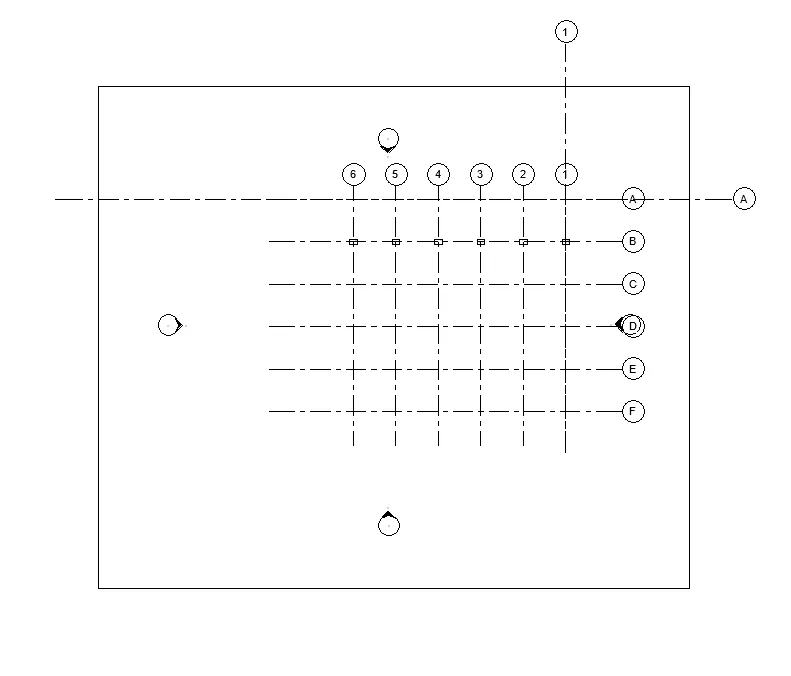
STEP5
Copy/ monitor
- For that go to the collaborate from that select copy/ monitor from that click'select link'
- Then click the copy option
- Choose multiple and select all the grids in the model and click finish
- then again select the copymonitor and click finish
STEP6
- For checking copied the link or not
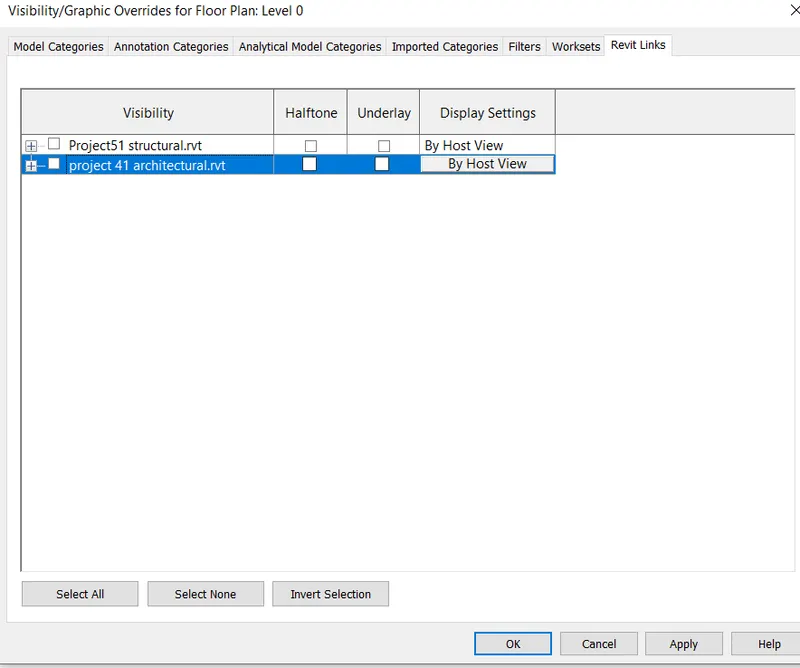
- For that use VG command go to revit links
- then untick the project and then click ok
- if the grids are visible then it is copied
RESULT
- Created new file with a construction template and Save the new file as a central model.
- linked both architectural and structural files in a single project using the manage link tool
------------------------------------------------------------------------------------------------------------------------------------------
9) Are the grids from structural and architectural model matching in the construction template created? If yes the model is set up for project 2. If not work on the shared parameters and linking options under Manage links
ANSWER-->
Yes, the grids from structural and architectural model matching in the construction template created successfully and my model is setup for project 2
-------------------------------------------------------------------------------------------------------------------------------------
10) List a flow chart of a project tree set up in terms of Construction model, Architecture & Structure model, in this exercise and understand how many people can work on the same project using Revit simultaneously
ANSWER-->
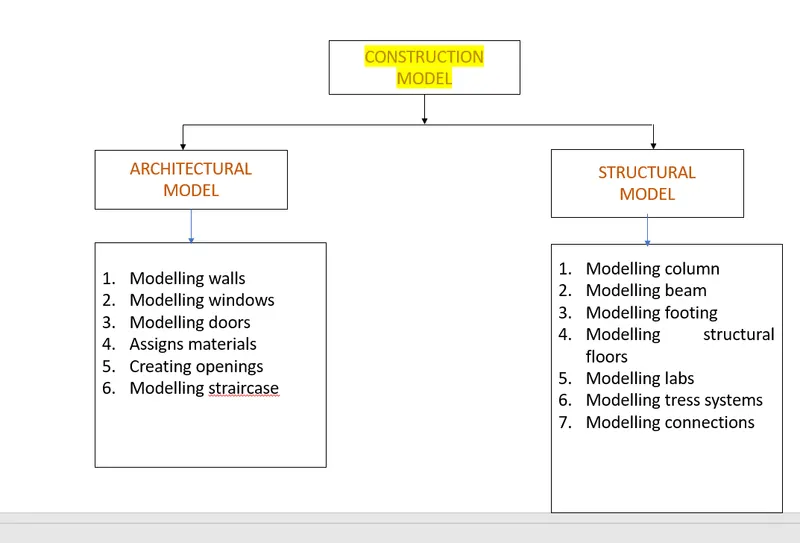
-------------------------------------------------------------------------------------------------------------------------------------