Usage of Collaborate tool in REVIT
1) Open an architectural template. Using the Manage tab set project base point and project shared coordinates for the project
AIM:
Using manage tab set project base point and project shared coordinates for the project in architectural template
INRTODUCTION:
In the architectural template set the project base point and project shared coordinate by using manage tab
PROCEDURE:-
- Open Revit 2023 software
- In the MODELS, select NEW from Autodesk Revit HOME tab
- Select Architectural Template from template file with creation of project
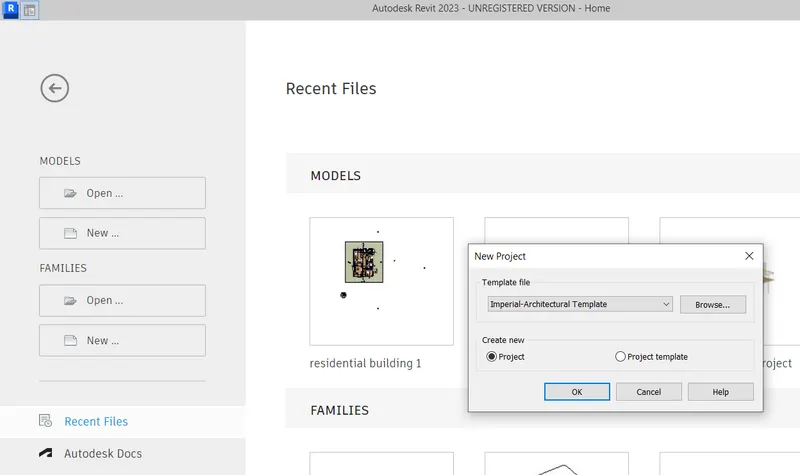
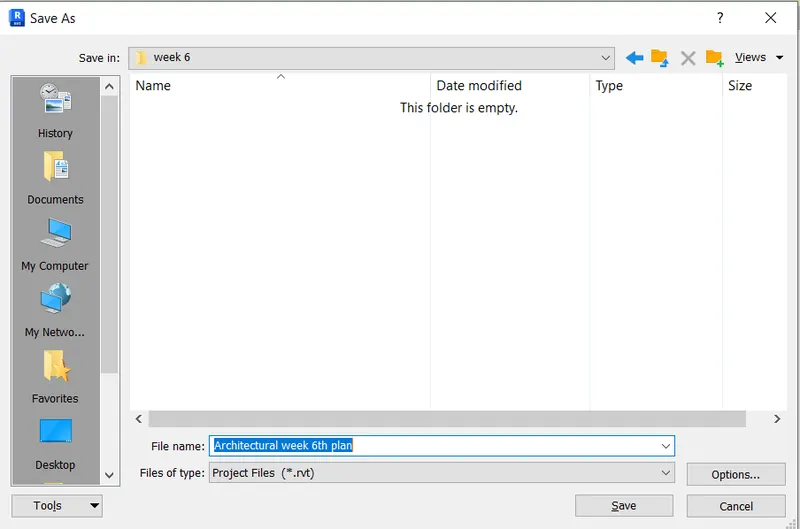
- And save the project as "Architectural week 6th plan"
- In the Architectural tab, go to Datum panel
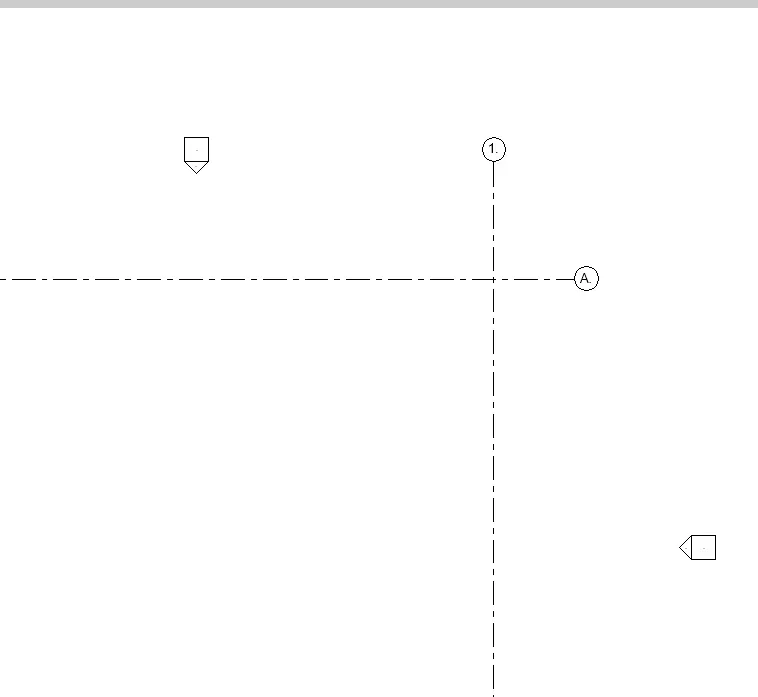
- Select Grid to DRAW in the drawing sheet

- Create horizonatal and vertical grids i.e transverse and longitudinal grid
- Change the name of vertical grid as 1 and horizontal grid as A
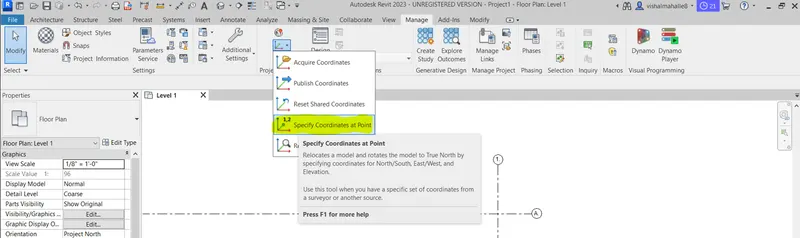
- Then, Go to Manage tab drop down the coordinate in the Project Location panel
- Select the Specify Coordinates at Point
- Click on horizontal grid enter the new coordinate for North/South As 0’-0”
- Similarly new coordinates for vertical grid (east-west ') as 0'0"
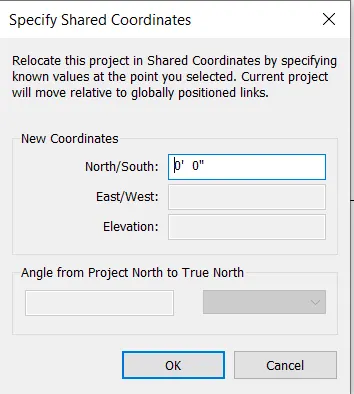
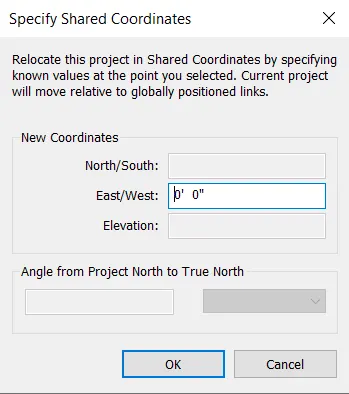
- Type V to involk the visibility graphics dialog box
- CLICK on Site and expand it and give check mark on Project Base Point then click OK
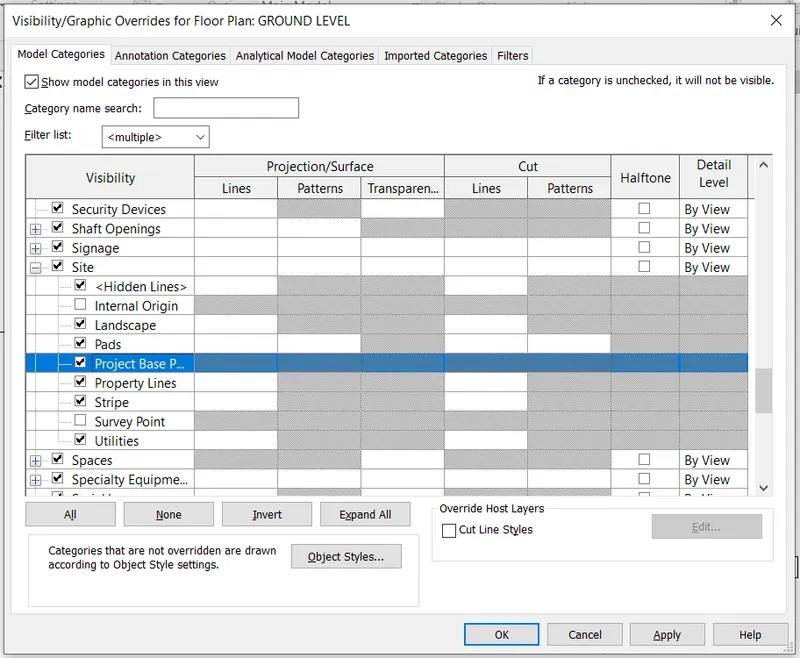
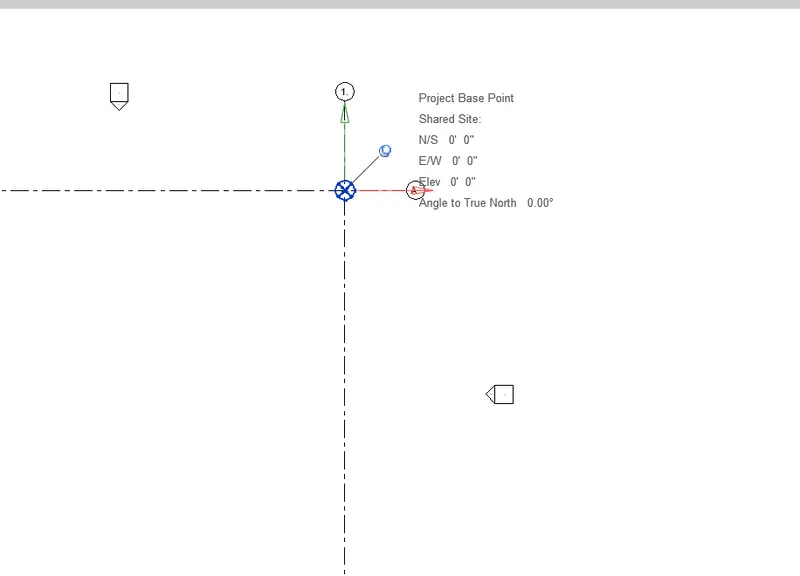
- Base point will show in the model sheet
- Click on the base point and unpinned if it is pinned
- Move the base point to the intersection of the GRIDS then pinned the base point for stabilization of grids
RESULT:
We created Architecture Template,Set Project Base point and Set Project Shared Coordinates.
2) Open another new file but with a structural template. Using the manage tab set project parameters the same as the architectural model. Copy the parameters from the architectural model to the structural template or enter the parameters manually into the structural model
AIM:
Using manage tab set project parameter in structural template same as the architectural model
INRTODUCTION:
In the structural template set the project parameter by using manage tab.
PROCEDURE:-
- Open Revit 2023 software
- In the MODELS, select NEW from Autodesk Revit HOME tab
- Select Structural Template from template file with creation of project
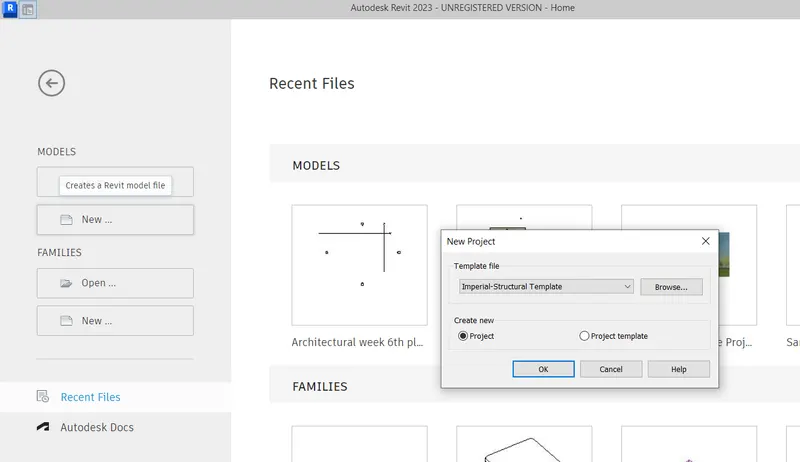
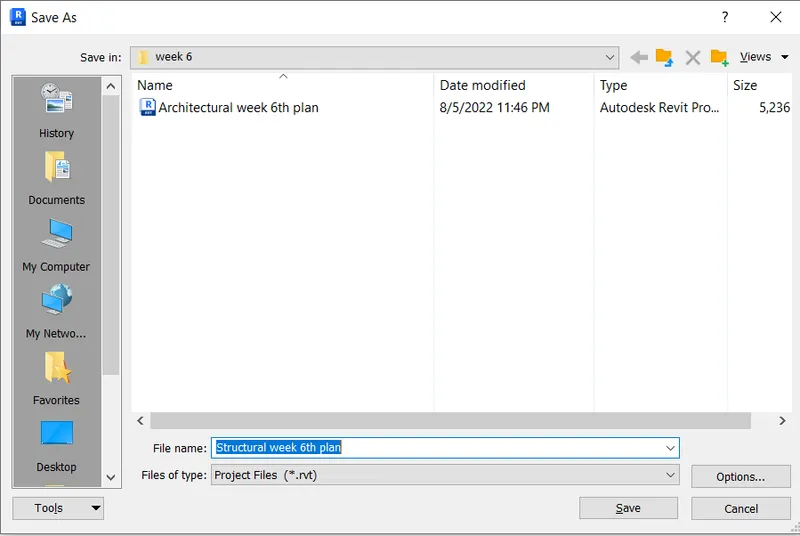
- And save the project as "Structural week 6th plan"
- In the Architectural tab, go to Datum panel
- Select Grid to DRAW in the drawing sheet
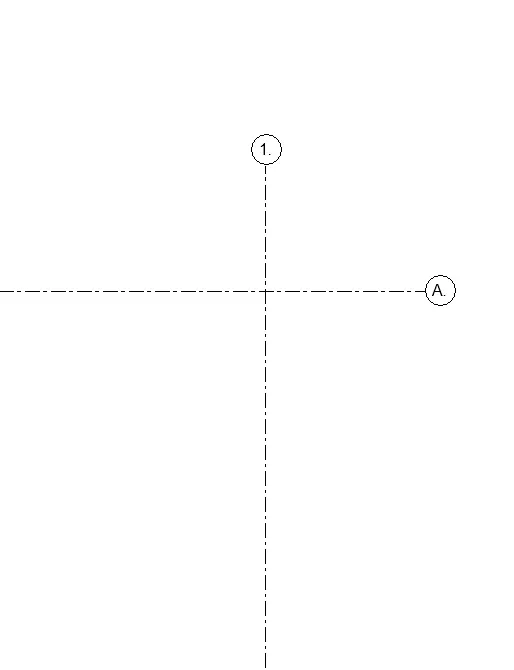
- Create horizonatal and vertical grids i.e transverse and longitudinal grid
- Change the name of vertical grid as 1 and horizontal grid as A
- Then, Go to Manage tab drop down the coordinate in the Project Location panel
- Select the Specify Coordinates at Point
- Click on horizontal grid enter the new coordinate for North/South As 0’-0”
- Similarly new coordinates for vertical grid (east-west ') as 0'0"
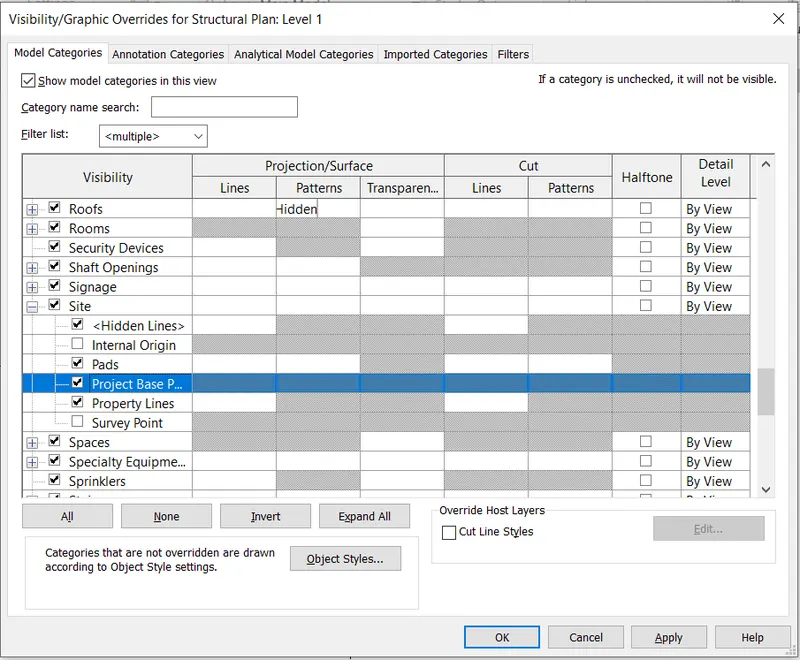
- Type V to involk the visibility graphics dialog box
- CLICK on Site and expand it and give check mark on Project Base Point then click OK
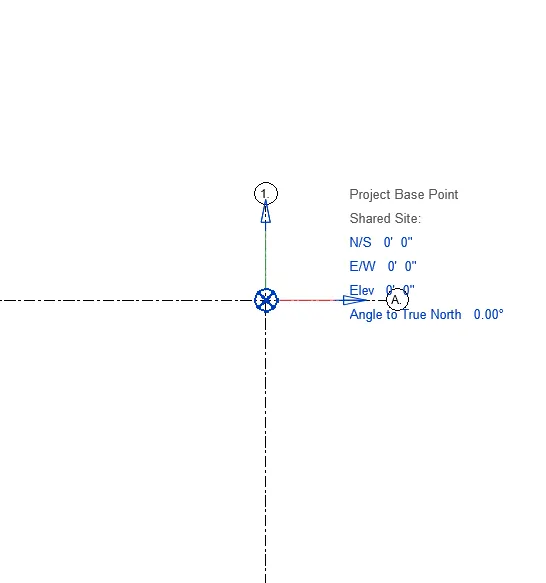
RESULT:
Following above procedure, we set the base point and project shared coordinate.
3) Re-open the architectural model. Using the tools under the Collaborate tab make the architectural model a central model (enabling simultaneous working on the model)
AIM:
Using collaborate tab make the architectural project model as central model
PROCEDURE:-
- OPEN the Revit software
- Click on open and select our existing drawing i.e "Archituctural week 6th plan"
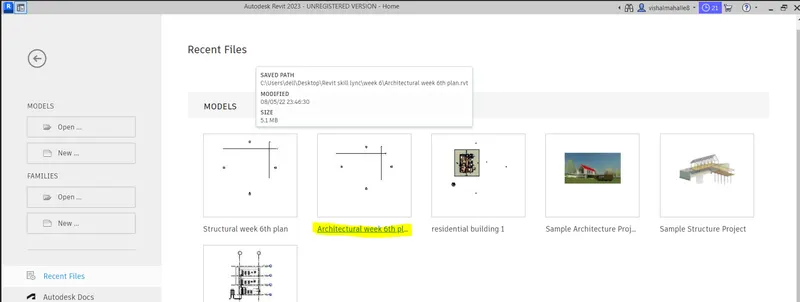
- Click on Collaborate tab from Collaborate option whic is in the ribbon

- Select within your network from collaborate dialog box or you can selectin the cloud option (risky for data leaking)
- so we are selecting"within your network " option
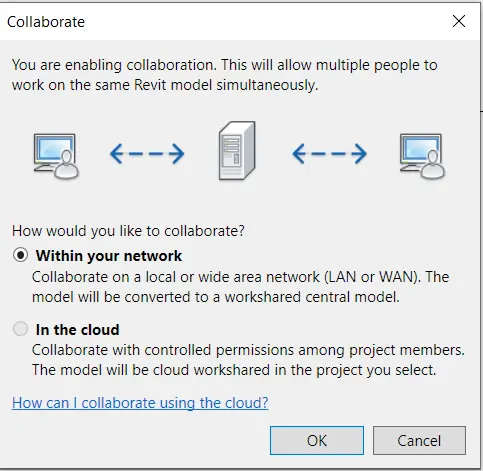
- once all process is done the earlier collaborate option chnages to "collaborate in cloud"

- finally ,save the project and select yes from save file as central model
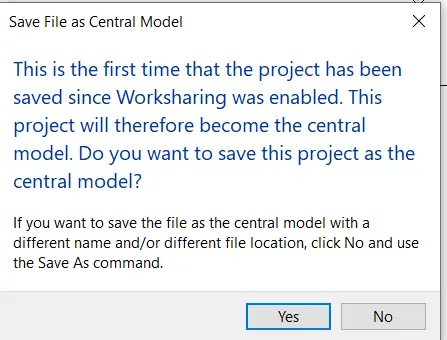
RESULT:-
BY using collaborate tab we make the architectural project model as central model
4) Create the Grids Longitudinal and Transverse pattern for the project similar to the task done in Week 2
AIM:
Create the grids longitudinal and transverse pattern for the project
INTRODUCTION:-
we done a 10' horizontal space grading and 20' vertical space grading in week 2 project, so we can reflect in this project also;these are;
Grids Transverse (horizonatal) Grids A, B,C,D, E @ 10’ spacing
Longitudinal (vertical) Grids from 1 to 10 @ 20’ spacing
PROCEDURE:-
- OPEN the Revit software
- Click on open and select our existing drawing i.e "Archituctural week 6th plan"
- Select the grid option from architectural tab
- give offset 10' to grid
- pick existing grid A and make grid B,C,D,E respectively
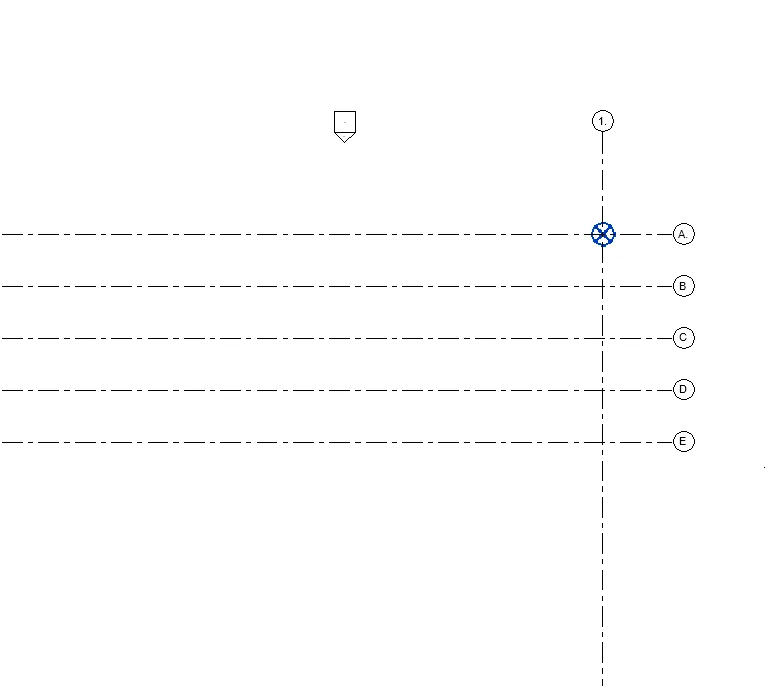
- Select the grid option from architectural tab
- give offset 20' to grid
- pick existing grid 1 and make grid 2,3,4,5,6,7,8,9,10 respectively
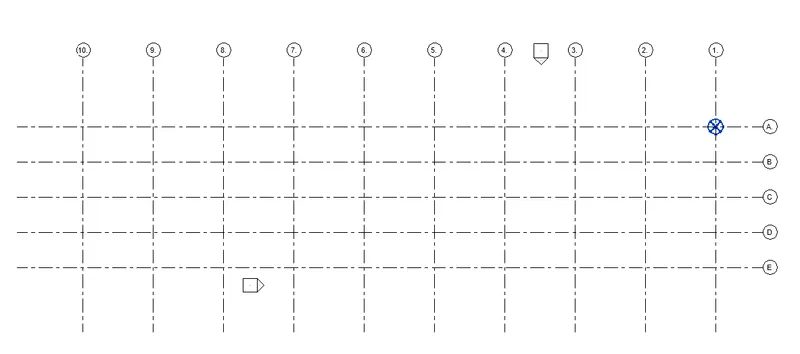
Result:
We created longitudinal and transverse grid pattern similar to that done in week 2.
5) Synchronize the changes from the local copy to the central file of the architectural model.
AIM:
The architectural model synchronizes the changes from the local copy to the central file
INRTODUCTION:
The process of synchronize the changes from the local copy to the central file is explained in below
PROCEDURE:-
- OPEN the Revit software
- Click on open and select our existing drawing i.e "Archituctural week 6th plan"
- Go to Collaborate tab drop down the Synchronize with Central form Synchronize panel
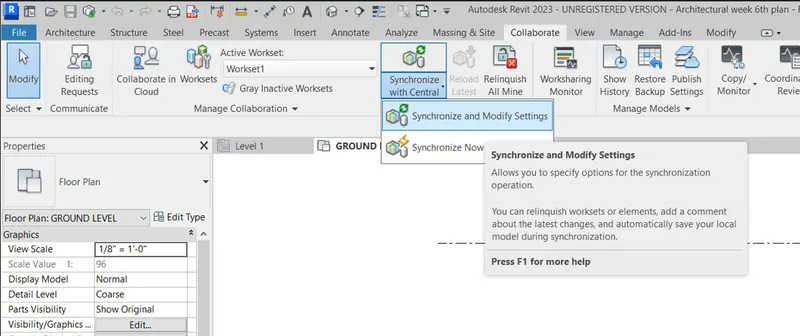
- Select the Synchronize and modify settings
- Check mark on the compact central model form Synchronize with central dialog box, OK
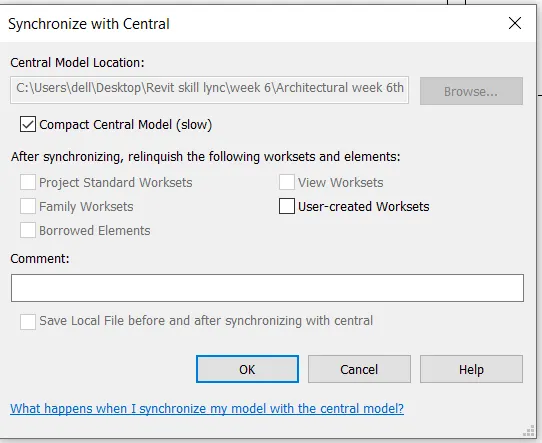
RESULT:-
We done ,Synchronize the changes from the local copy to the central file of the architectural model.
6) Open the structural model and use the collaborate tools to save the model as a central file.
AIM:
Using collaborate tool make the structural project model as central model
INRTODUCTION:
The process of making model as a central file by using collaborate tool are explained in below
PROCEDURE:-
- OPEN the Revit software
- Click on open and select our existing drawing i.e "Structural week 6th plan"
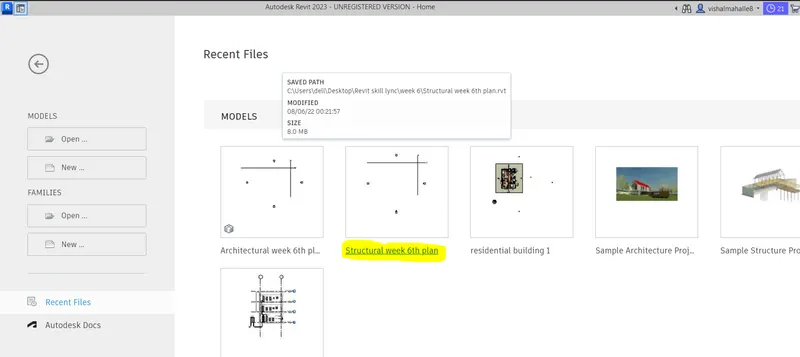
- Click on Collaborate tab from Collaborate option which is in the ribbon
- Select within your network from collaborate dialog box or you can selectin the cloud option (risky for data leaking)
- so we are selecting"within your network " option
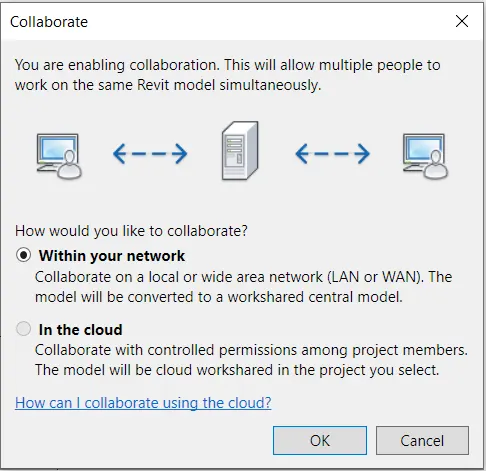
- once all process is done the earlier collaborate option chnages to "collaborate in cloud"

- finally ,save the project and select yes from save file as central model
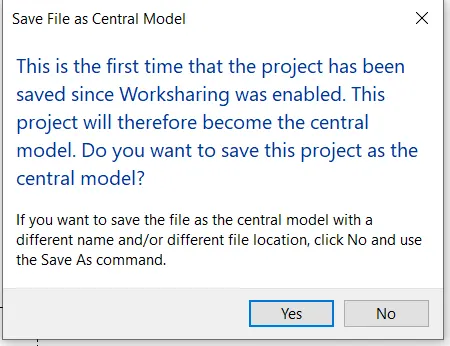
RESULT:-
BY using collaborate tab we make the Structural project model as central model
7) Under the Collaborate tab, select the grids and levels from the architectural model, and using Copy Monitor try to copy the grids to the structural model. See what happens when the copy monitored grid is moved around in the structural model
AIM:
Using copy monitor tool to copy the grids from architectural model to structural model
INRTODUCTION:
The process of copying grids from the architectural model to structural model is explained
PROCEDURE:-
- OPEN the Revit software
- Click on open and select our existing drawing i.e "Structural week 6th plan"
- Click on manage link from manage tab
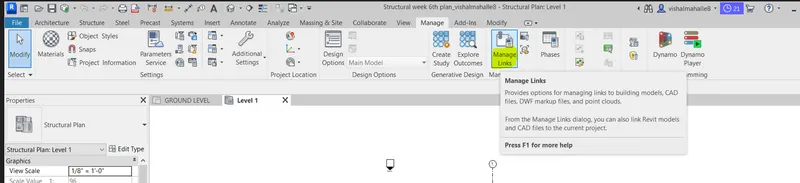
- In manage link dialog box, click revit (upper left )and click on add option
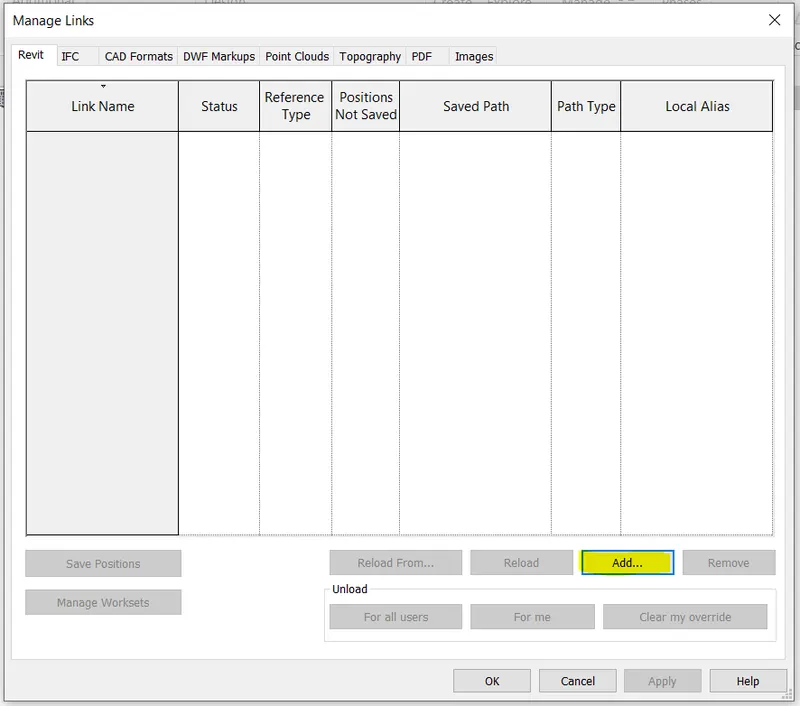
- After that select the existing file called "Architectural week 6th plan" from the computer as shown below;
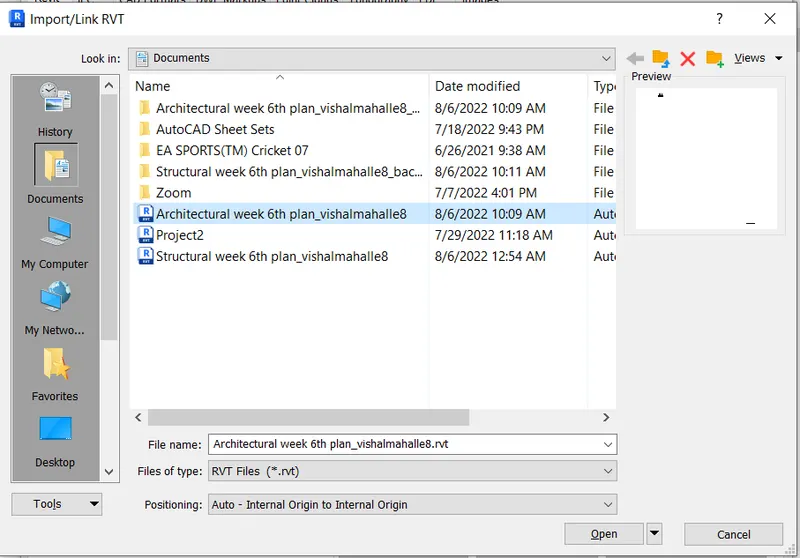
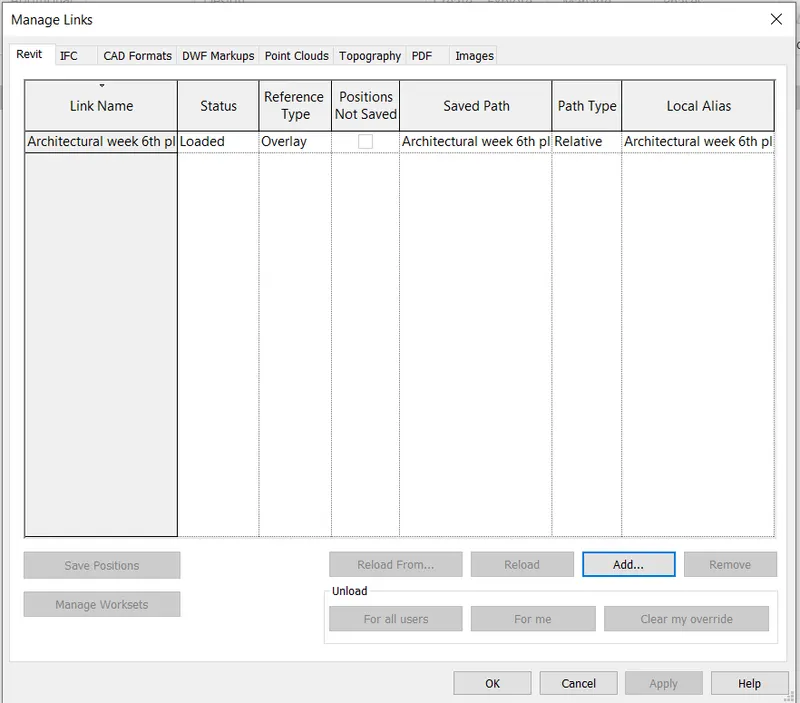
- After inserting architectural file into structural templete it appears in the manage link dialog box as below;
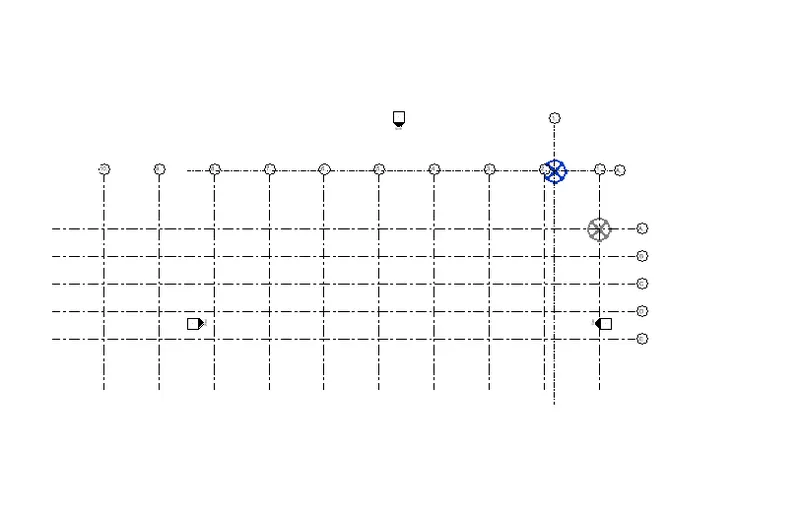
- The architectural templete is inserted in structural tab as below ;
- After that go to the collaborate tab in which click on copy monitor option
- in copy monitor option click on select link option
- and the click on inserted architectural grids in the drawing box
- then pick multiple option from the appeared ribbon and select all inserted architectural grids , and click on Finish twice one from ribbon and one from collaborate tab
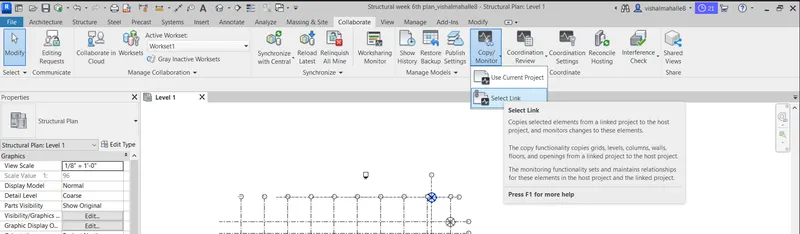
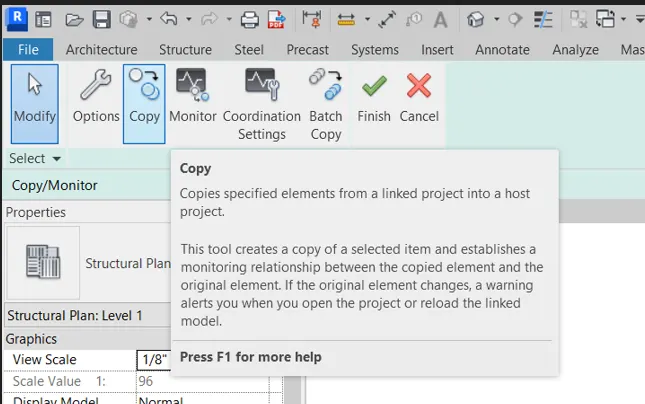
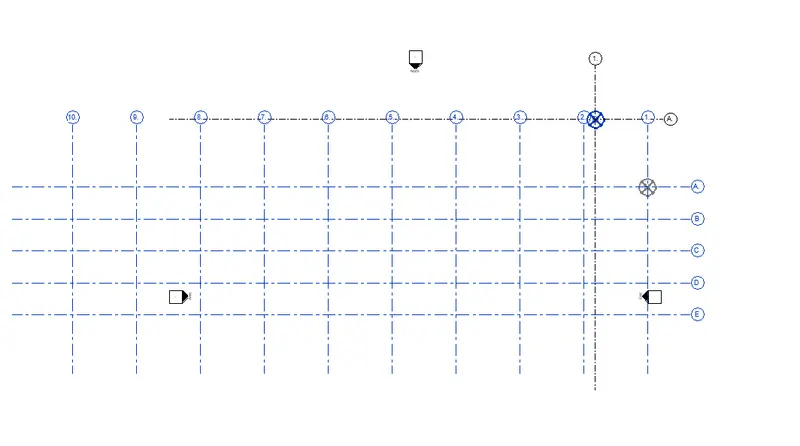
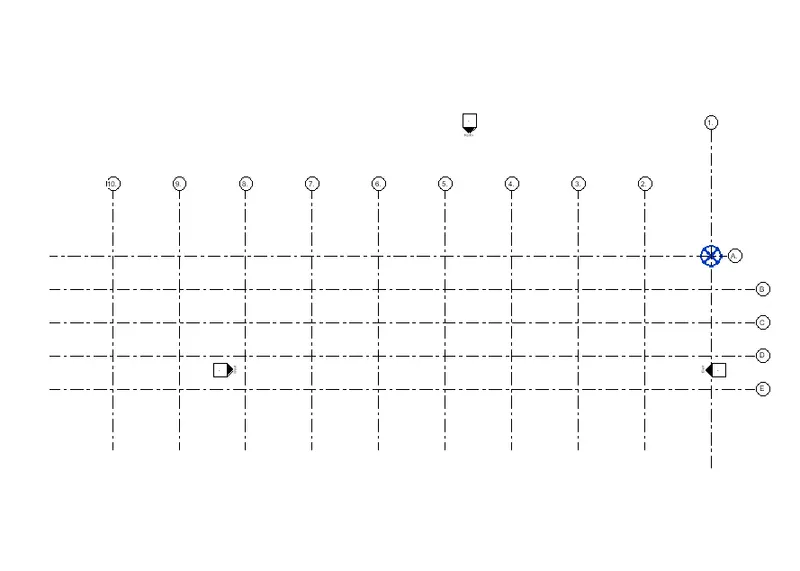
- Then we have a copied architectural templete to the structural templete as shown;
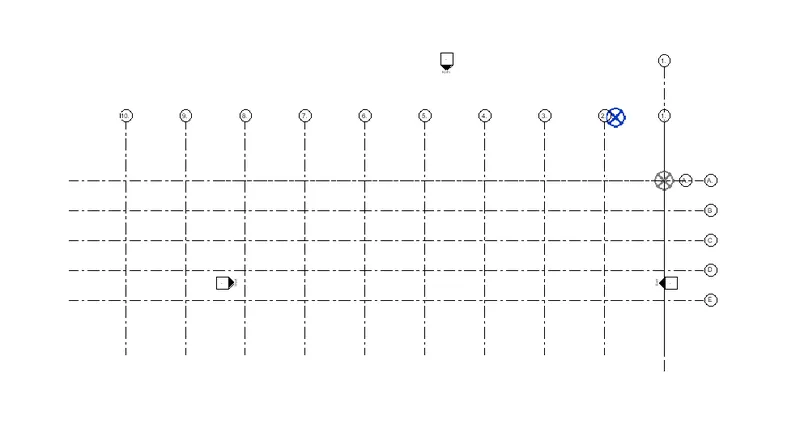
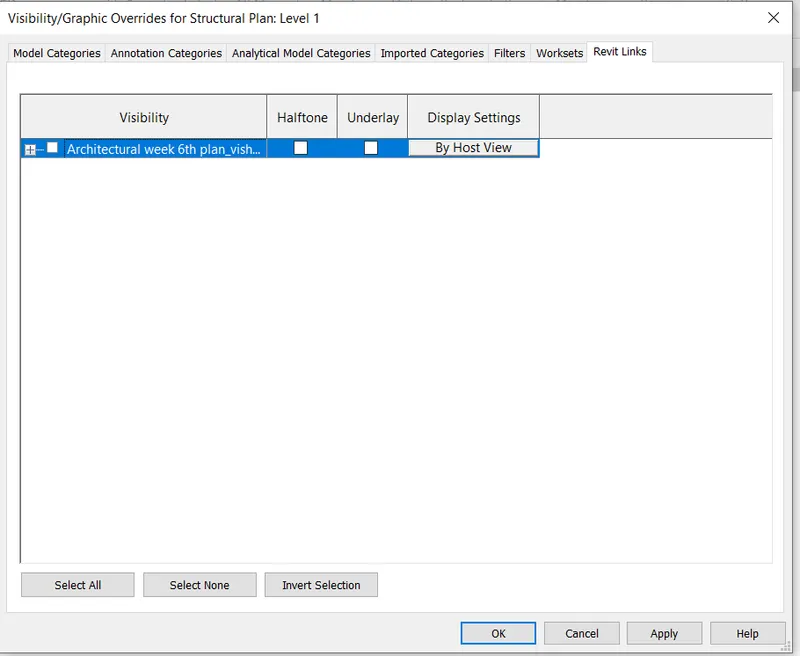
We can go to V i.e Visibility graphics dialog box and uncheck the Linked file and click Ok, then we have final appearance of the grid plan;
RESULT:-
We have succesfully copied a architectural templete grids to the structural templete
8) Create another new file with a construction template. Save the new file as a central model. This file will include both architectural and structural model. Under the manage tab, Click manage links to link both architectural and structural files. Save the file and close all the files.
AIM:
Using copy monitor tool to copy the grids from architectural model to structural model
INRTODUCTION:
The process of copying grids from the architectural model to structural model is explained
PROCEDURE:-
- Open Revit 2023 software
- In the MODELS, select NEW from Autodesk Revit HOME tab
- Select construction Template from template file with creation of project
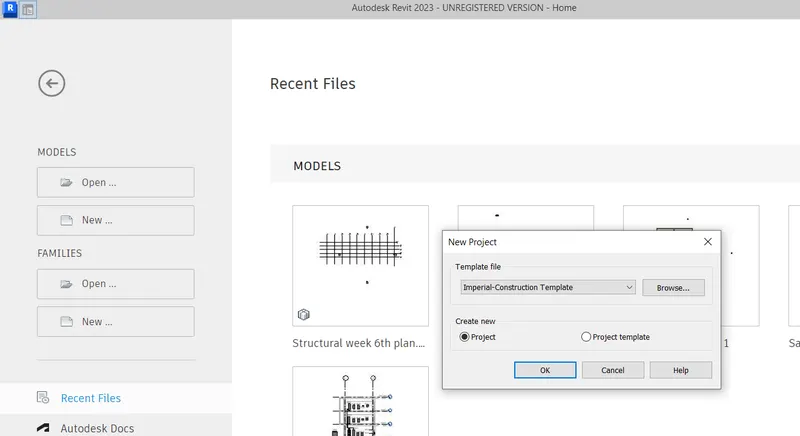
- And save the project as "Architectural week 6th plan"
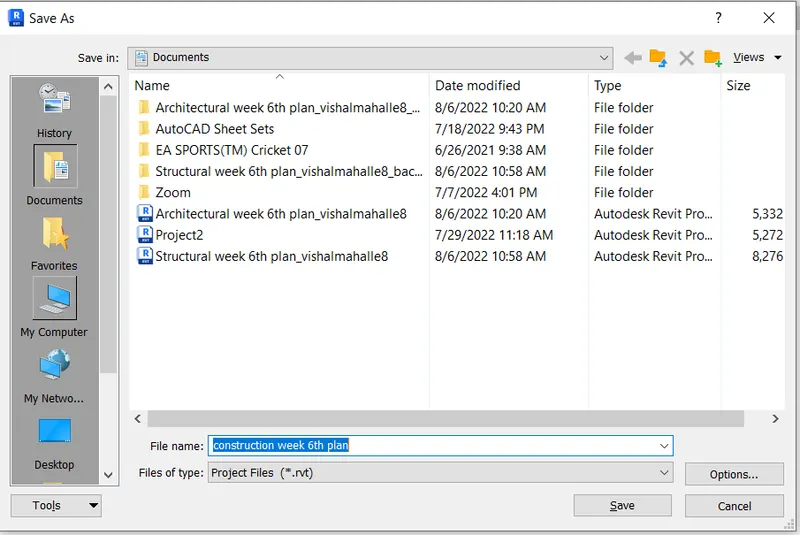
- Click on Collaborate tab from Collaborate option whic is in the ribbon
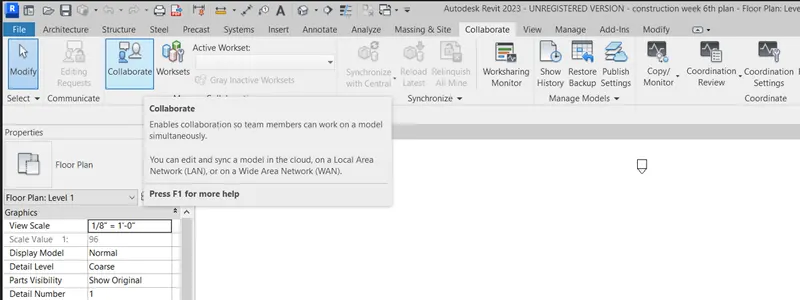
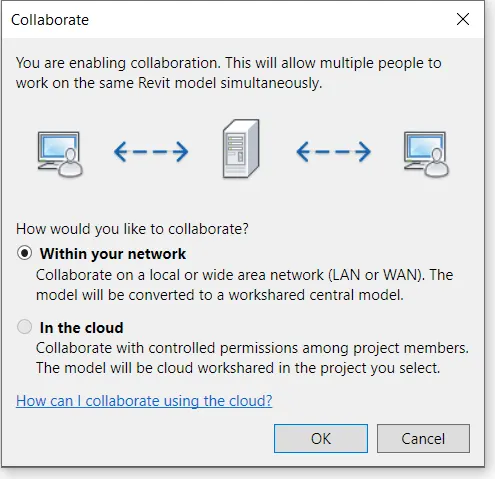
- Select within your network from collaborate dialog box or you can selectin the cloud option (risky for data leaking)
- so we are selecting"within your network " option
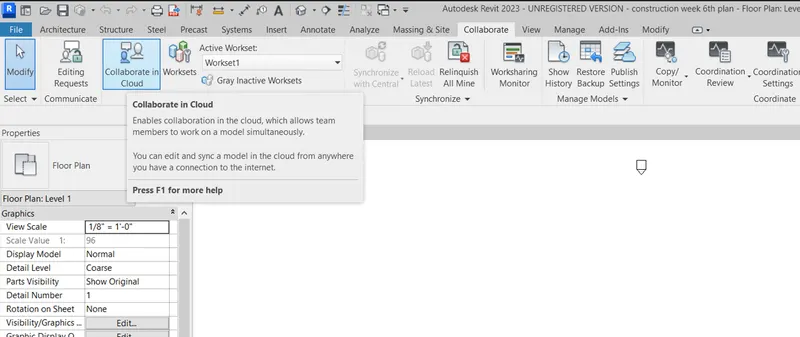
- once all process is done the earlier collaborate option chnages to "collaborate in cloud"
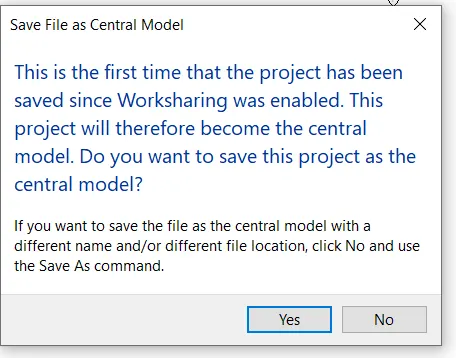
- finally ,save the project and select yes from save file as central model
- Click on manage link from manage tab
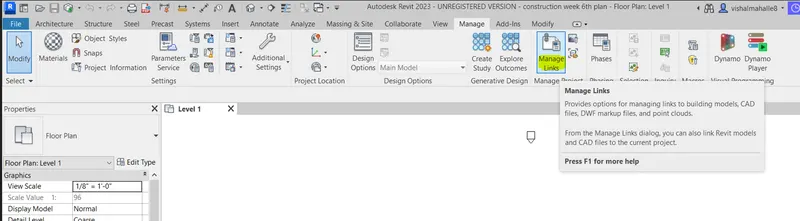
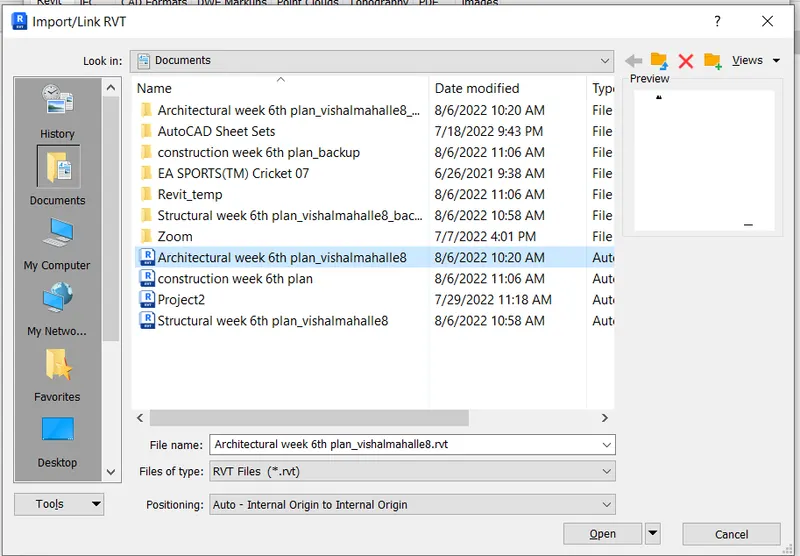
- After that select the existing file called "Architectural week 6th plan" from the computer as shown below;
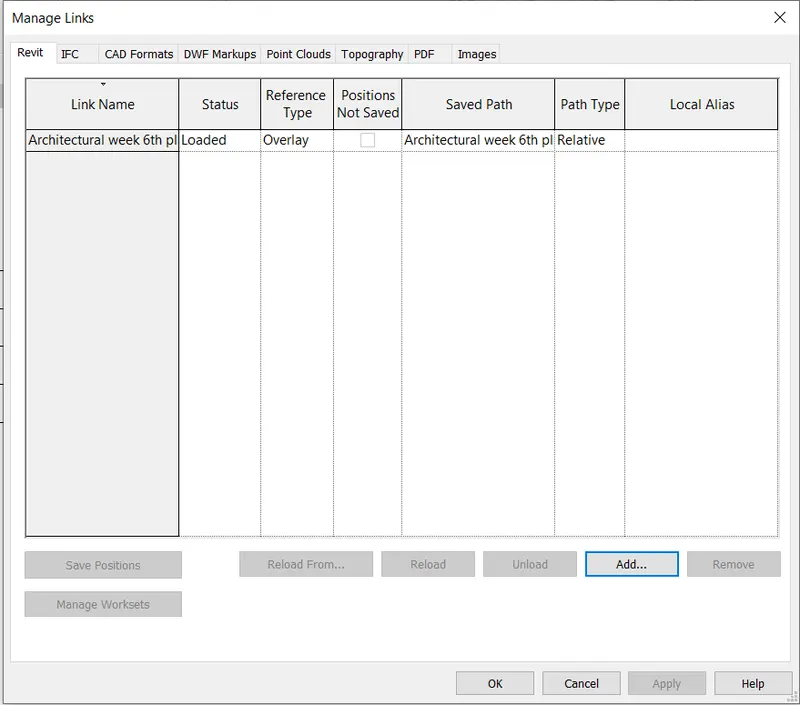
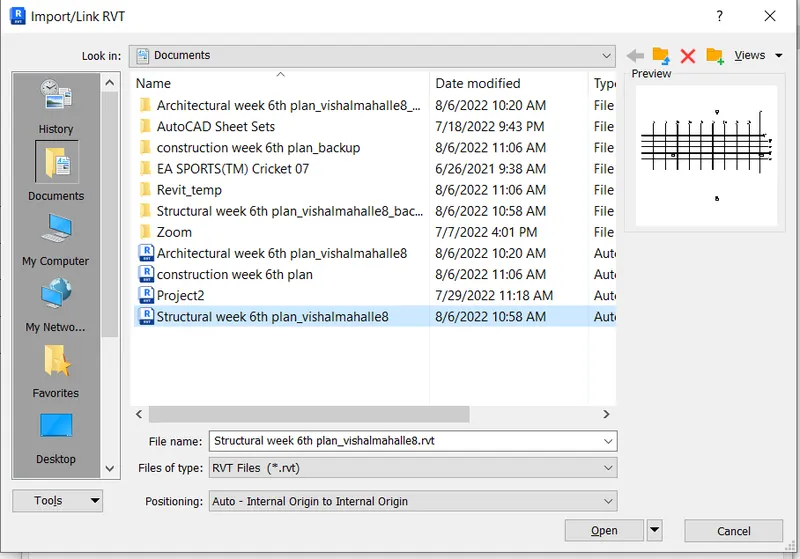
- similarly, select the existing file called "Structural week 6th plan" from the computer as shown below;
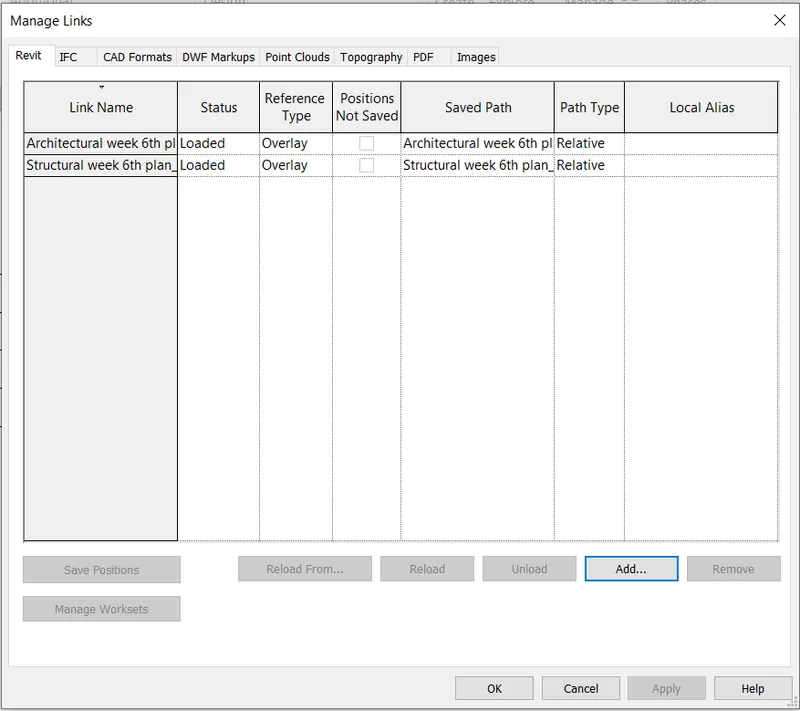
- the output we got on the constrction templete is as below;
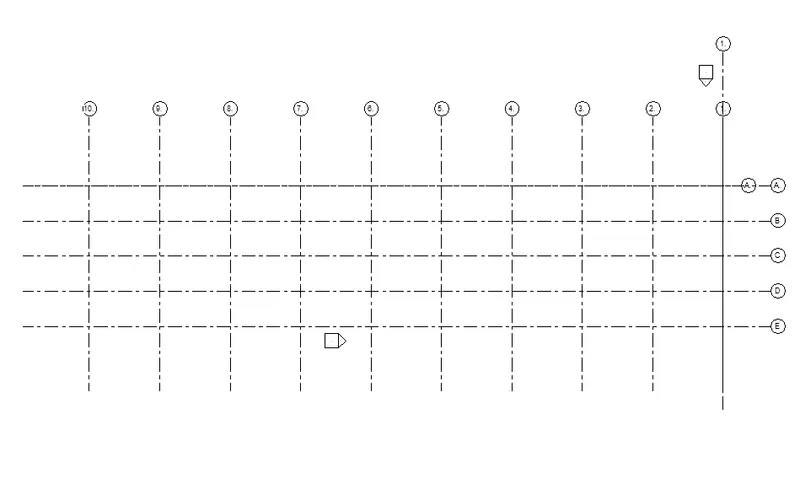
RESULT:-
We successfully insert or link the structural and architectural templete in a construction templete
9) Are the grids from structural and architectural model matching in the construction template created? If yes the model is set up for project 2. If not work on the shared parameters and linking options under Manage links
( Hint: origin to origin, by shared coordinates or by project base point to base point ) to link the models in an appropriate manner
AIM:-
To check whether the grids from the structural and architectural model matches in the construction template created.
PROCEDURE:-
- The output we got on the constrction templete is as below;
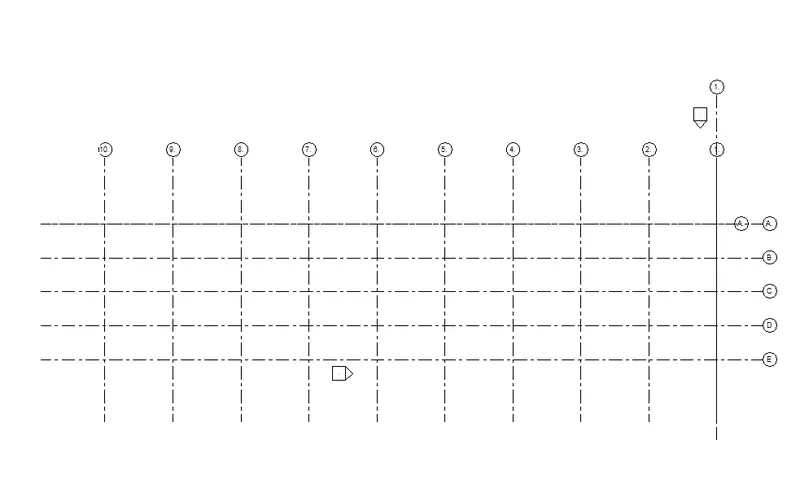
- Here, it is clearly visible that the architectural and structural template matches thoroughly in the construction template created. therefore, mymodel is set for the project 2.
10) List a flow chart of a project tree set up in terms of Construction model, Architecture & Structure model, in this exercise and understand how many people can work on the same project using Revit simultaneously
ANSWER:-
- As we know, Construction model is combination of both architectural model anad structural model.
- Flow chart is given as follows:
| CONSTRUCTION MODEL | |
| STRUCTURAL MODEL | ARCHITECTURAL MODEL |
|
|
|
|
|
|
|
|
|
|
|
|
|
|
People that can work on the same project using Revit simultaneously:
Revit allows multiple users to work simultaneously on one revit project. This can be achieved through worksharing. Using linked elements, project elements are separated into individually managed models that can be linked together. Members from various disciplines can work together in a revit project like:
- Architects
- Structural engineers.
- MEP engineers i.e, Mechanical, Electrical and Plumbing Engineers.
- HVAC engineers i.e Heating, Ventilating and Air Conditioning
The number of people working simultaneously may depend upon the type of project being done.