Usage of Collaborate tool in REVIT
1) Aim : To set a project base point in a new architural template.
Introduction: To start any project model a particular base point has to be set so that it helps in understanding the position of the elements and this point helps other disciplines to work accordingly.
Procedure:
- First open a Revit app> in Projects click on New> In new project dialog box select Architectural template of template file and click on OK.
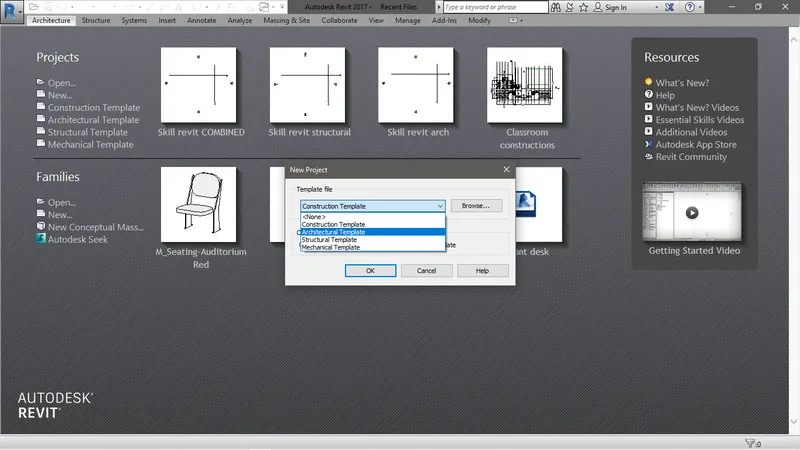
Creating Architectural template file
- Now in architecture tab go to grid from datum panel.
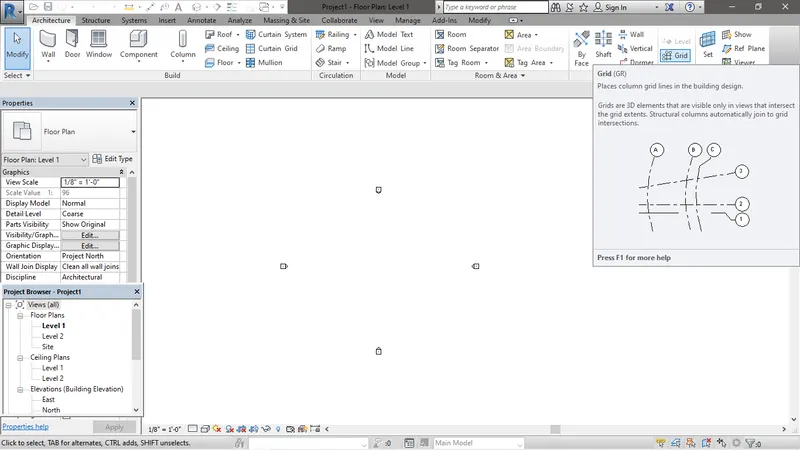
Locating of grid tools.
- Now set a grid line longitudinal and transverse with a line tool and name longitudinal grid with numeric and transverse with alpha.
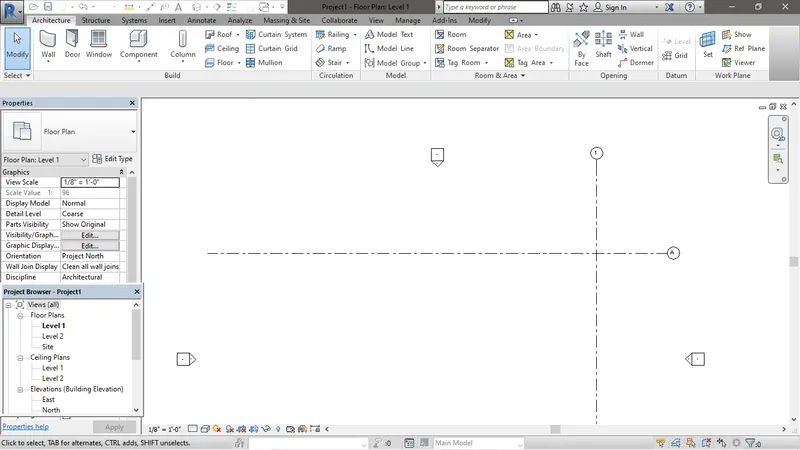 Setting of grid line
- To set co-ordinate go to Manage tab>Coordinates> Specify coordinate at point in project location panel.
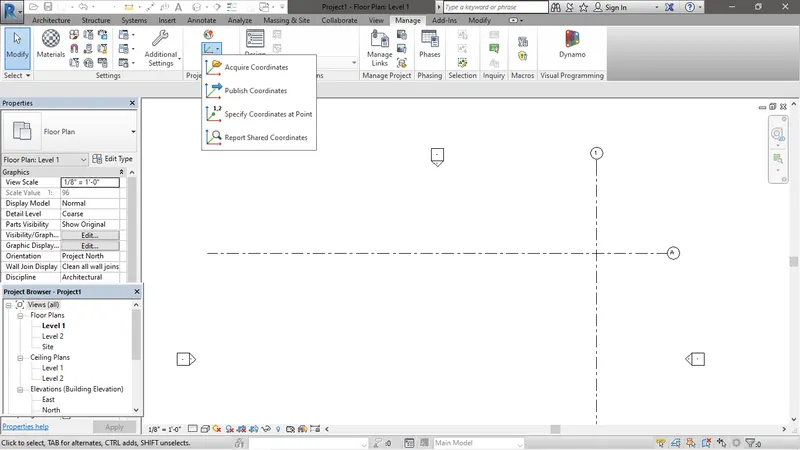
Specify coordinate at point tools.
- Now click on longitudinal grid line and specify the cordinate in East/West as 0 and click ok.
- Similarly click on transverse grid line and specify the coordinates in North/South as 0 and click ok
Result
As shown in the figure below it is been observed that the coordinates has been set to 0.
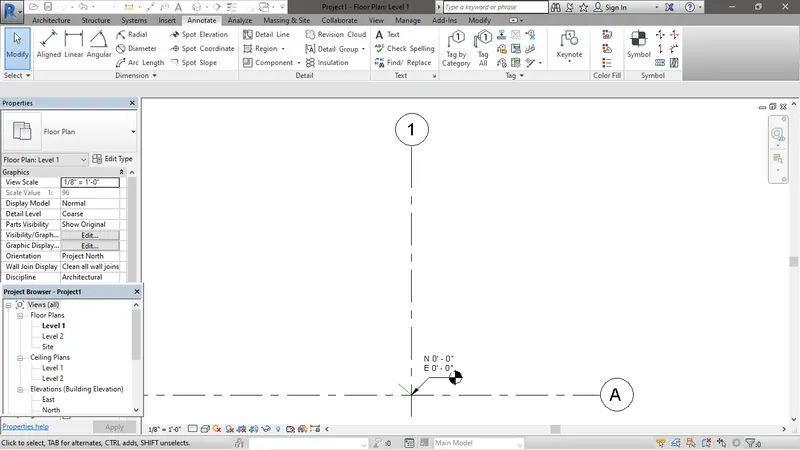
Coordinates are set to zero.
2) Aim: To set the parameter in structural template as done in architectural template.
Introduction: In the construction field both the discipline i.e. Architectural and Structural work hand in hand. Hence in the model designing both the discipline can work simultaneously by collabrating in Revit and understand the changes by synchronising.
Procedure:
- First open a Revit app> in Projects click on New> In new project dialog box select Structural template of template file and click on OK.
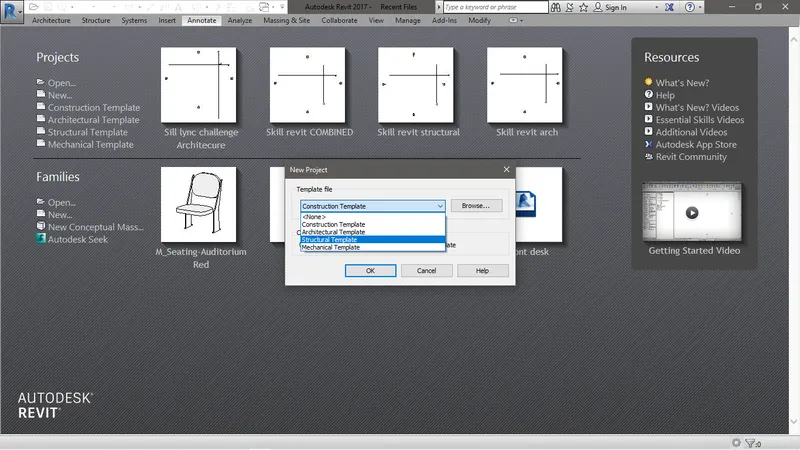
Process to create structural template.
- To copy the parameter saved in Architectural template go to Manage tab>Manage links in Manage project panel.
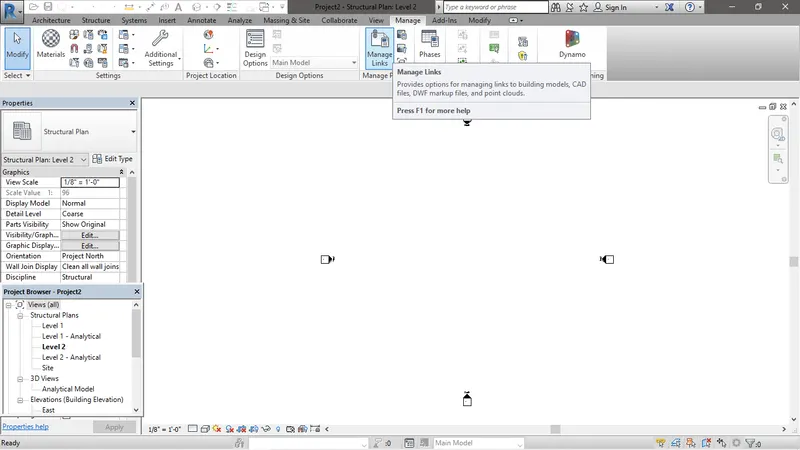
Process to open manage link.
- In manage links diaglog box go to Revit tab and click on Add.
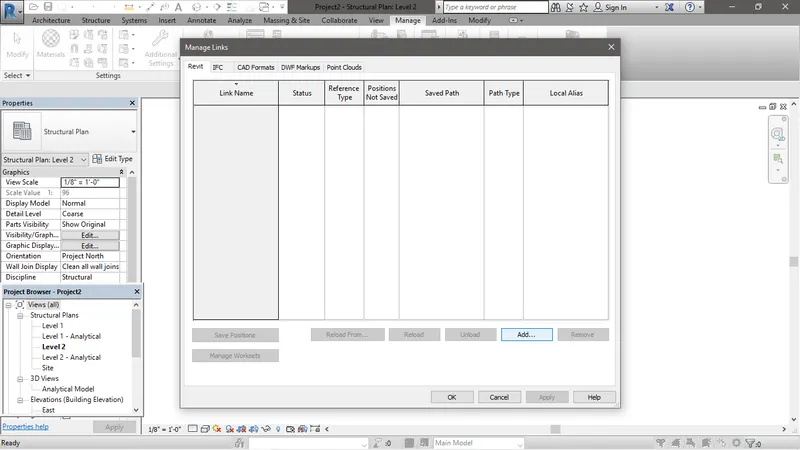
Click on add to browse model to link in this project.
- Now select the architectural template and click on Open and then Ok.
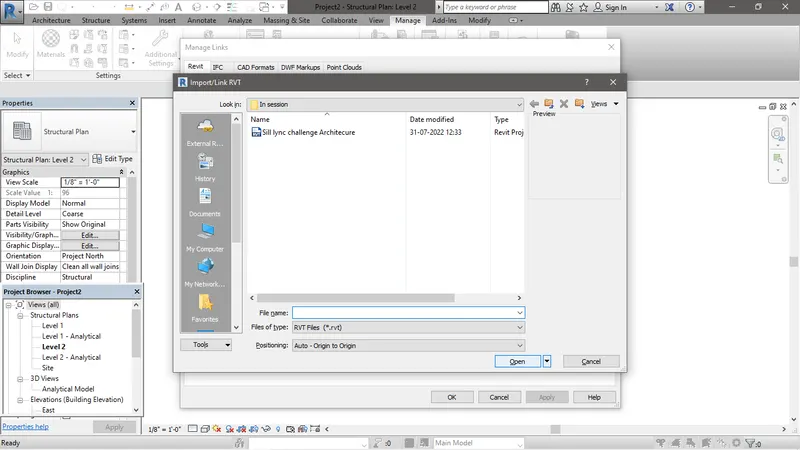
Selecting the architectural file to be linked from the browser to structural file
- It is observed that architectural template is being displayed as show in below figure.
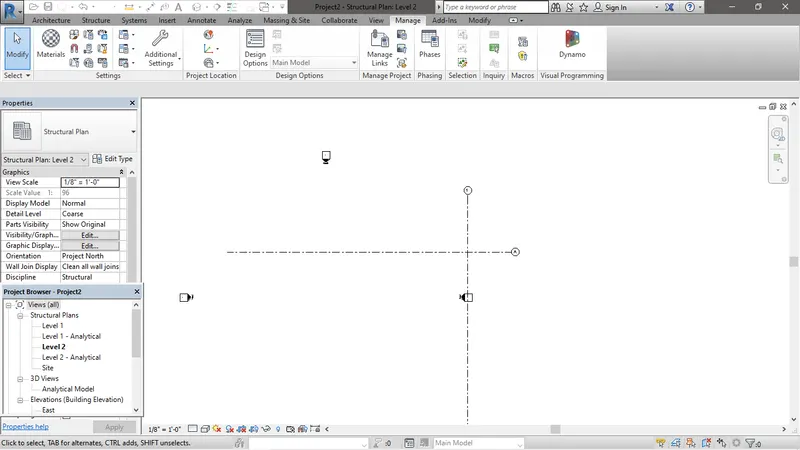
Architectural template linked and loaded in structural file.
- Now to copy the parameter from the linked model go to Collaborate tab> Copy/Monitor> Select link
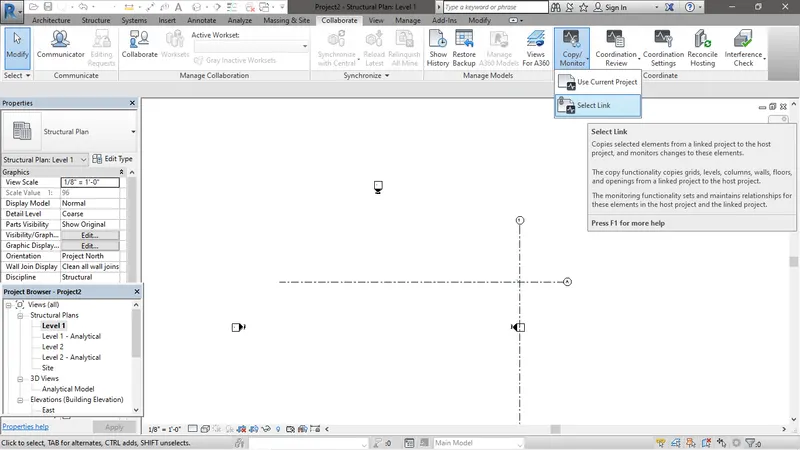
Location of Copy/Monitor to copy element from linked file
- And then click on the linked object to be selected to copy.
-
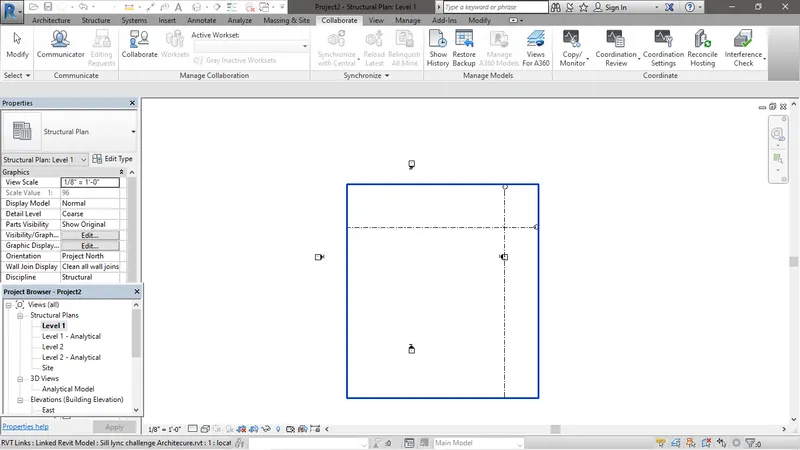 Selecting the linked object.
 - Now click on Copy in tools panel.
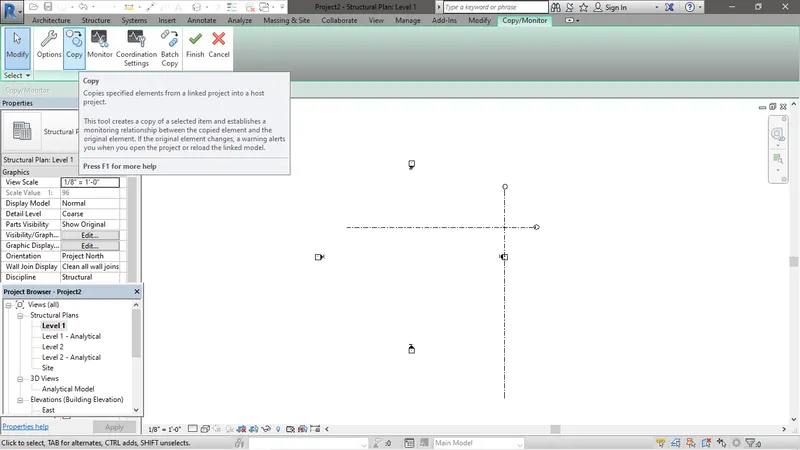
Click on Copy
- Check on multiple and select both the grid from the linked model > Finish.
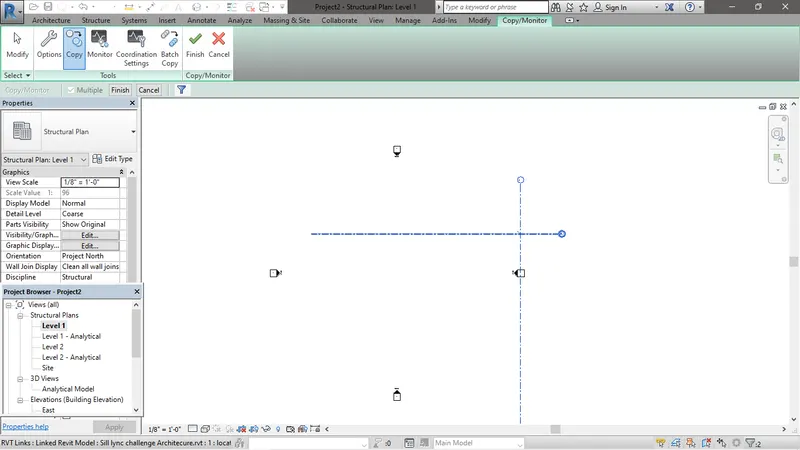
Elements selected to copy.
- Now to acquire coordinate from the linked model go to Manage> coordinates in project location>Acquire Coordinate and click on the linked model.
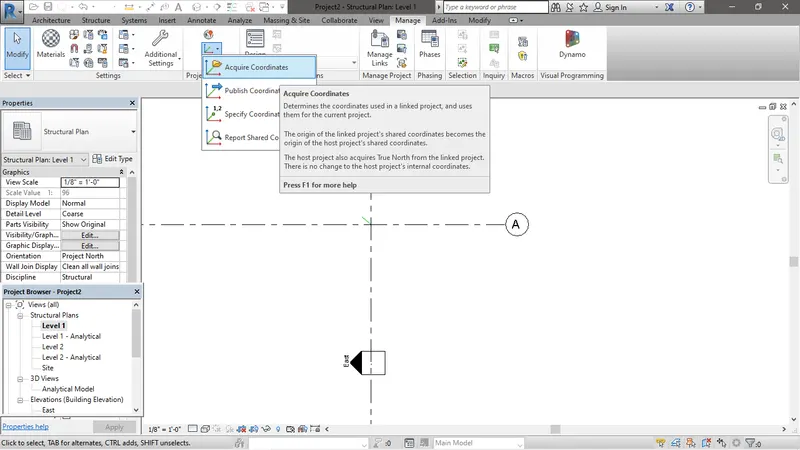
Process to acquire coordinate
Result
As in the figure below it is observed that the coordinates and the gridline parameter has been copied from the linked model.
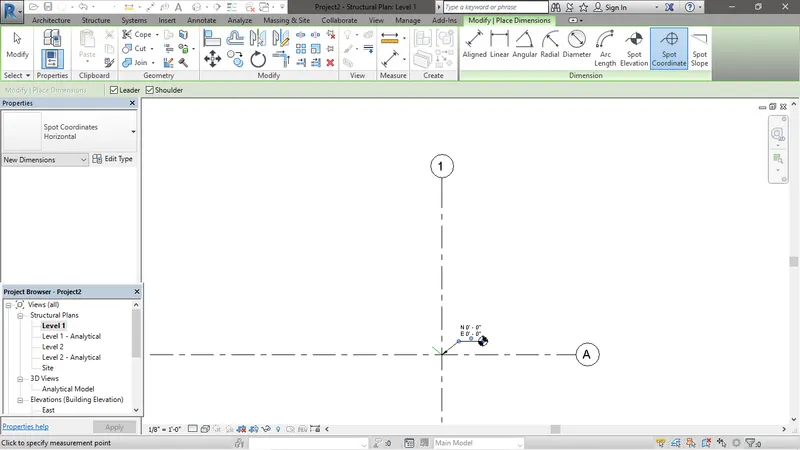
Parameter copied as per Architectural model by linking it
3) Aim: To create Architectural template a central file.
Introduction: Since multiple discipline is about to work on the same model simultaneously for that Revit introdiluced a tool call collabration where the file will be created as central file and multiple person can work on the same file simultaneously and save the changes. This will help in saving the time.
Procedure:
- Re-open the Architectural template and go to Collaborate tab> Collaborate in Manage Collaboration panel.
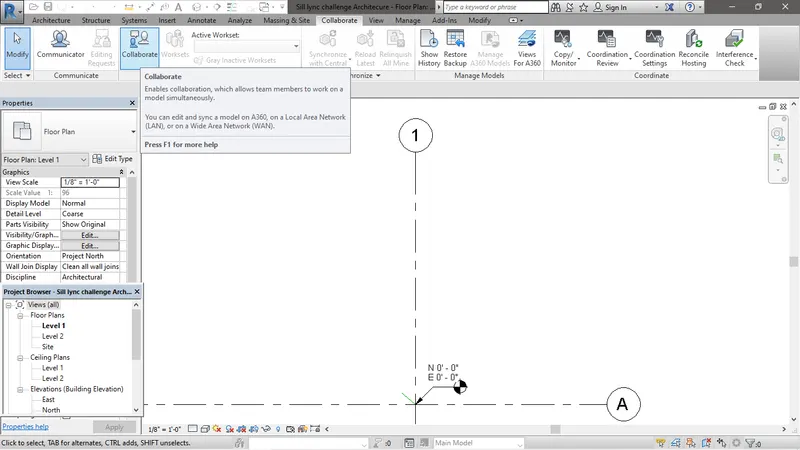
Process of Collaborating
- Now in Collaborate dialog box select "Collaborate within your network" for working within your network or select "Collaborate using A360" to work in the cloud. Click OK after selecting.
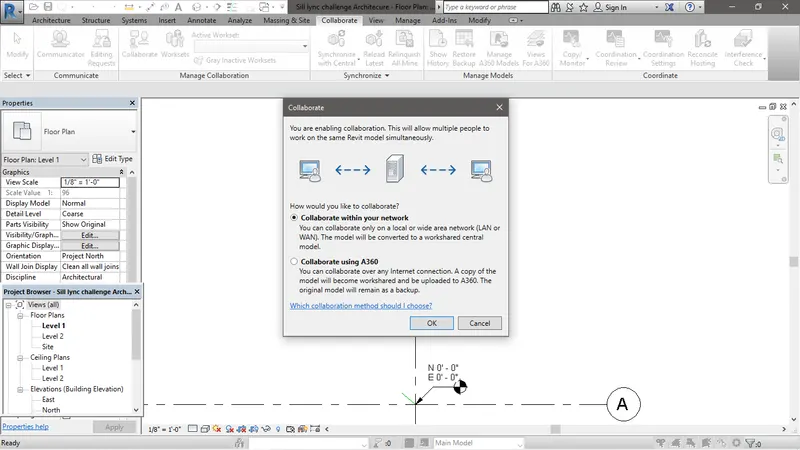
Collaboration of Architecural model.
- Now click on save and click yes to save the file as Central model.
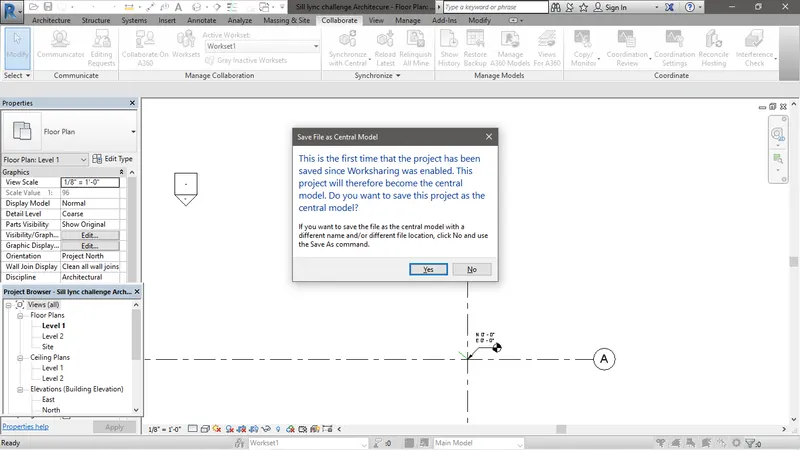
Saving Architecural file as central model
- Now in Collaborate tab click on Relinquish all mine in Syncronise panel so that others can work on it simultaneously.
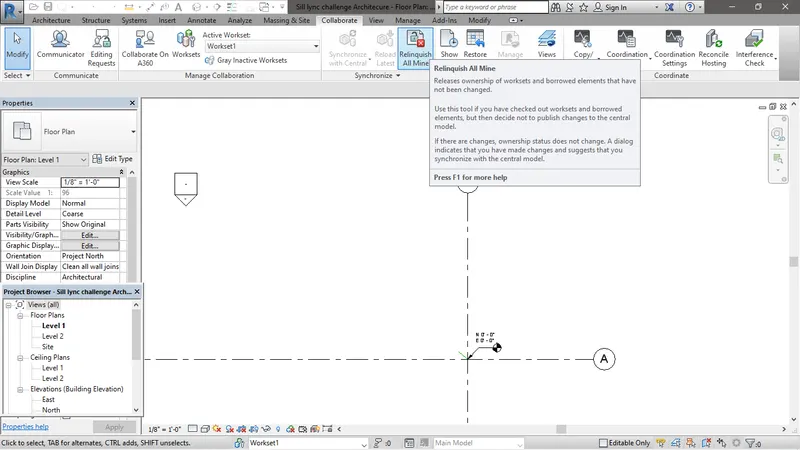
Relinquish all mine.
Result
The file has been saved as central within the network and multiple discipline can work on it simultaneously.
4) Aim: To create a grids in this project similar week 2 project.
Introduction: With the help of the week 2 project a grid will be placed in this project by linking week 2 project.
Procedure:
- In this the grids placed similarly to week 2 project by linking the week 2 project as explained in question 2 and copying the grids from the linked project and adjusting the copied grids as per the position of the current coordinate.
Result:
In this project the grids are placed similarly to week 2 project.
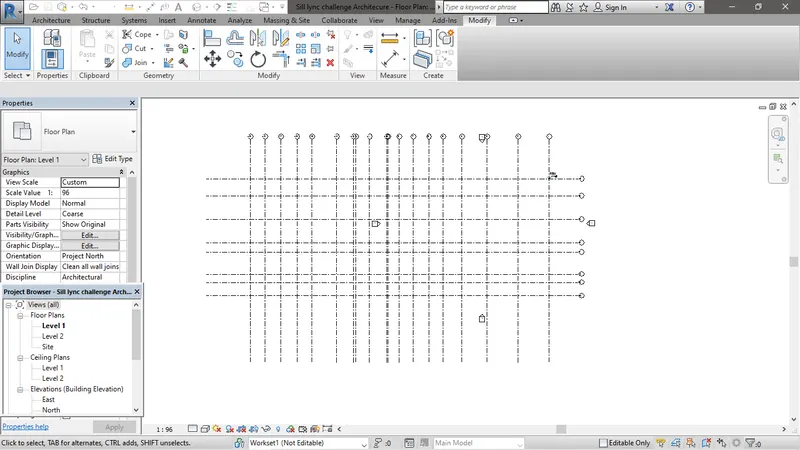
Grids copied from week 2 project in the architectural model.
5) Aim: To Syncronise the changes done in the model to central file.
Introduction: Here the central file is shared to every discipline so to understand any modifications done to the model. The model which has been modified locally has to be synchronised to the central so that once the other discipline reloads it they will understand the changes to do that following is the procedure shown.
Procedure:
- Go to Collaborate tab> Syncronise with Central> Syncronise now.
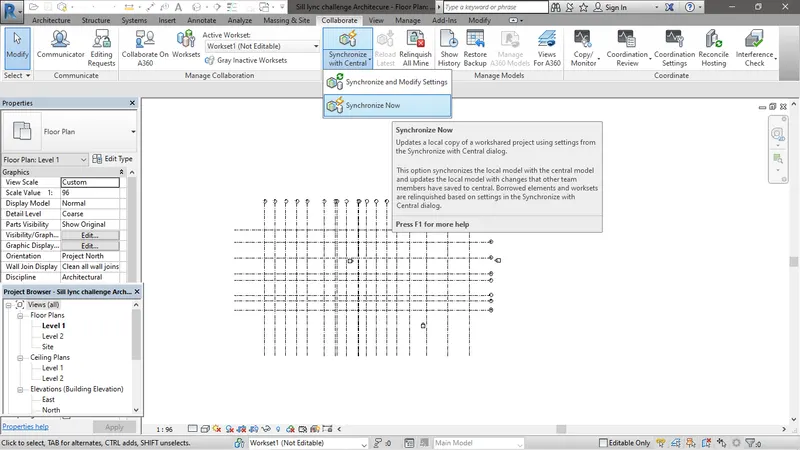
Syncronising project to central file.
Result
The file is now synchronised to the central file where the changes to be noticed as modified.
6) Aim: To collobrate the structural file and save it as central file.
Introduction: As architectural file was collobrated and saved as central same is done to the structural file too for easy working simultaneously. Both the files once collabrated it will be easy for the both the discipline for the changes done and work accordingly.
Procedure:
- Now open the structural file that was created and the following procedure is same as explained in question 03.
Result:
The files now saved as central file.
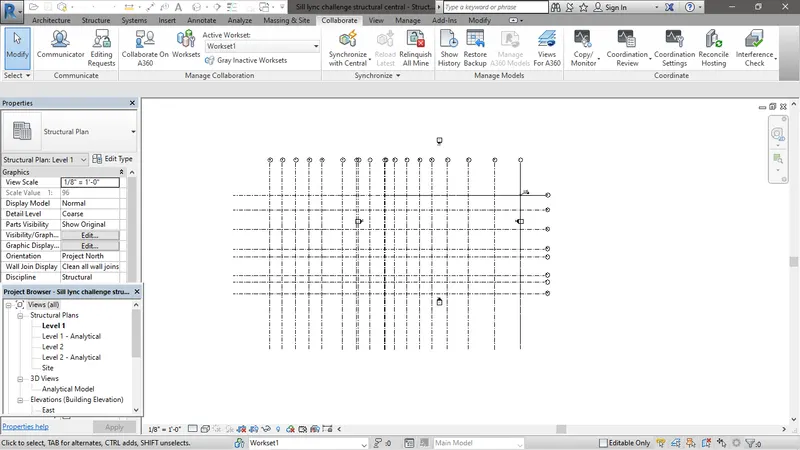
Structural file collaborated and saved as central.
7) Aim: To copy grid from Architectural model and paste it to Structural model and understand the result if the grid is moved in structural model.
Introduction: In this the process is carried out by linking the Architectural model to this project and copy the grid which is required to place structural elements so that the the position do not mismatch the architectural model.
Procedure:
- Here the architectural model is linked and the grid is copied to structural model as explained in question 02.
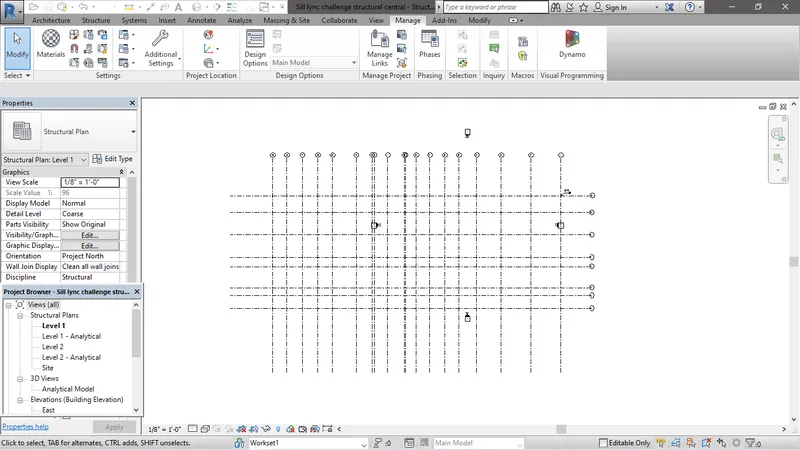
Grid from linked architectural model is copied to structural model
Result
It is observed that the grid has been copied to structural file from architectural file and the grid moves if we try to move it in the structural file as shown in below figure.
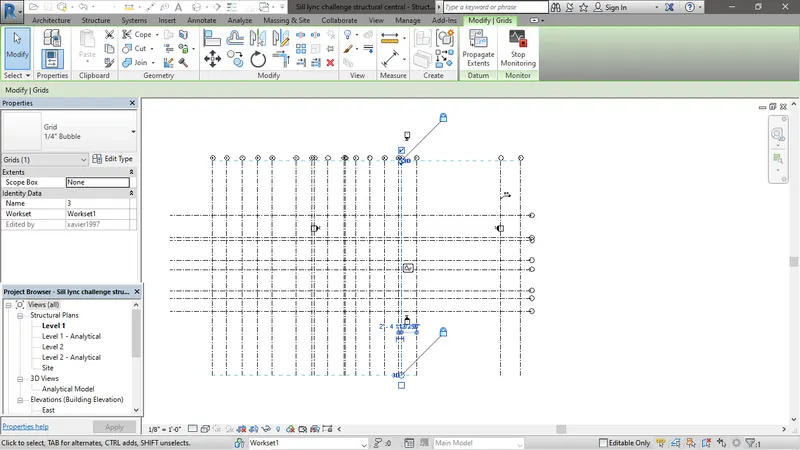
Result of copied grid to structural model from linked model after moving it.
8) Aim: To create a new file of construction template and link both the files that is architectural and structural.
Introduction: We know that the Architectural and structural are two different disciplines who works as per the design for the same model and this two discipline combine together to make a model complete. This together will show the exact view of the structure and analyze where changes required. Following is the procedure to link both the file in one single file.
Procedure:
- First open a Revit app> in Projects click on New> In new project dialog box select Construction template of template file and click on OK.
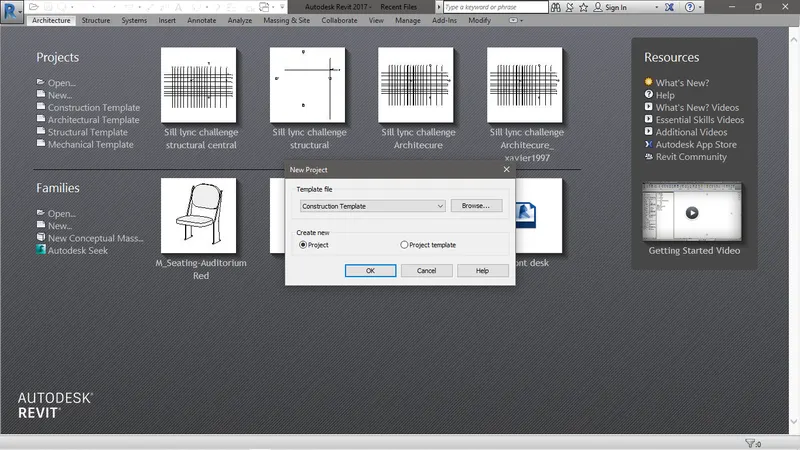 Creation of construction template file
- Go to Manage tab>Manage links and add both architectural and structural in the link and click OK.
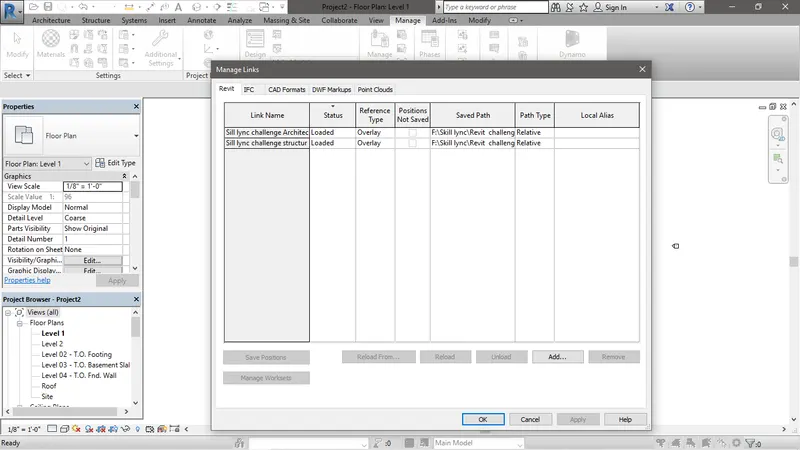
Linking of Architectural and Structural model
- Now go to save and save the file in the required location and close the file.
Result
Both architectural and structural file is linked in construction template and saved as Skill lync challenge combined as seen in below figure.
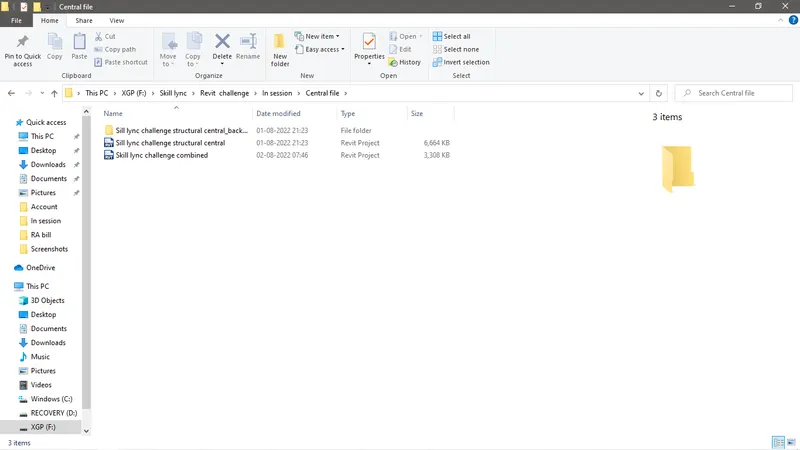
Skilly lync challenge combined file saved.
9) Aim: To check whether both architectural and structural file which is linked are matching each other positions.
Introduction: Since both the discipline that is architectural and structural will be created separately it is necessary that both the position match each other so that when they are combined it should be seen as single unit so before going ahead to create the model it is necessary to check whether the grid position in architectural and structural are the same and work accordingly.
Procedure:
- Go to the file where both Structural and Architectural files are linked and check the grids position.
Result
Looking at the below figure it is observed that the grid position of the file matches each other hence the project can go ahead for the further process.
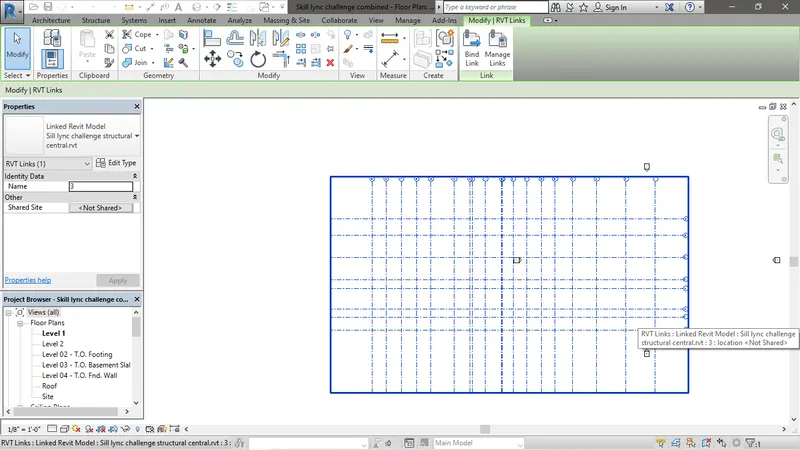
Grids of Architecural and Structural model Match each other
10) Aim: To explain work of architectural and structural discipline in the model.
Introduction: We know that Architectural and structural are two different disciplines which work together depending on each other with their parameters. Architecture only design the accessibility, functionality and view of the structure where as the work of structural is to provide skeleton to the structure to hold it strong. Following it is explained in flowchart the work of both the discipline.
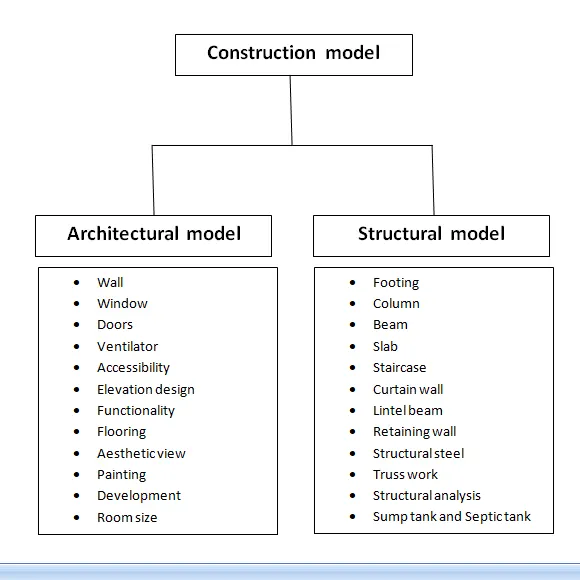
Flow Chart of a project tree