Usage of Collaborate tool in REVIT
1Q]
AIM: -
Create Architecture Template
Set Project Base point
Set Project Shared Coordinates
PROCEDURE: -
Open the Revit software
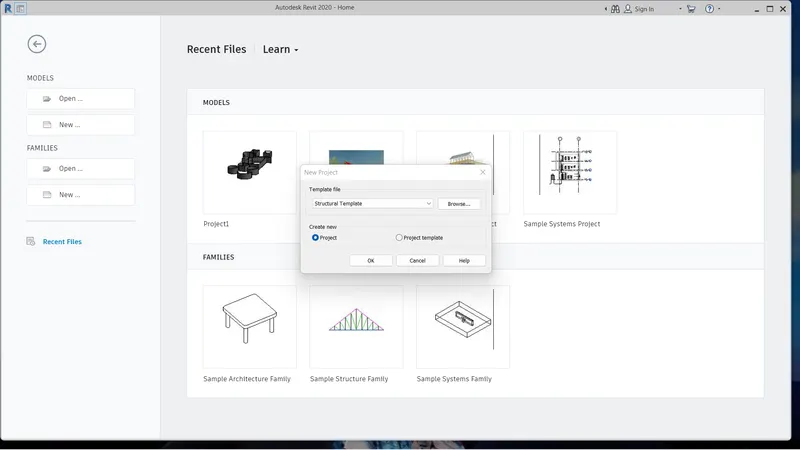
Click on NEW
New Project dialogue box opens
Select Architecture Template
Create: New Project
Press OK
Click on Architecture Tab
Go to Datum panel
Select Grid

Choose Line from the Draw panel
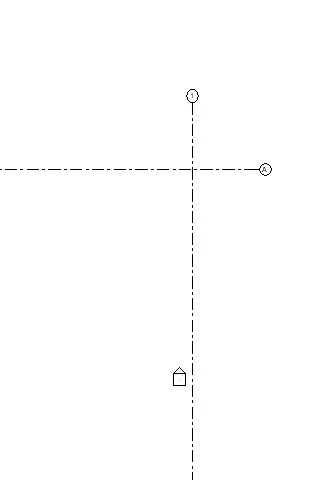
Draw Horizontal line on the model space and edit the name to “A”
Draw Vertical line intersecting the Horizontal line and name it as “1”
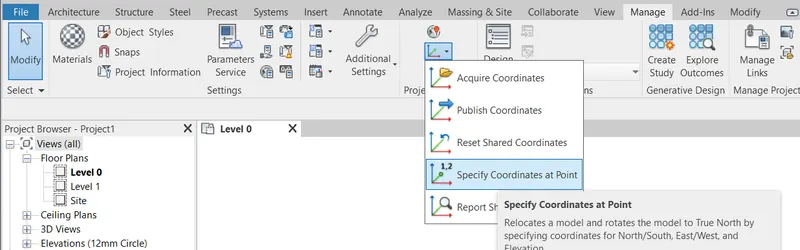
Click on MANAGE TAB
Go to Project Location panel
Select Coordinates tool and Choose Specify Coordinates at point option
Click on Grid line “1”
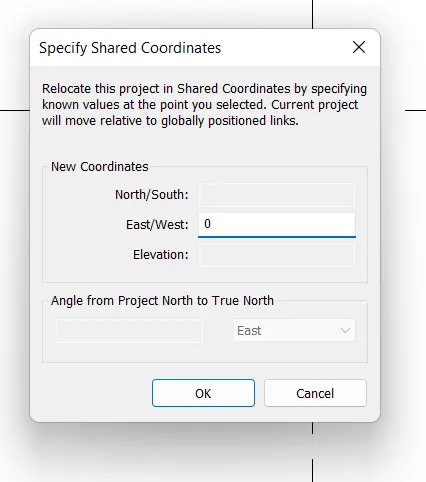
Specify Shared Coordinates dialogue box opens
Set New Coordinates
East/West: 0
Press OK
Select Coordinates tool and Choose Specify Coordinates at point option
Click on Grid line “A”
Specify Shared Coordinates dialogue box opens
Set New Coordinates
North/South: 0
Press OK
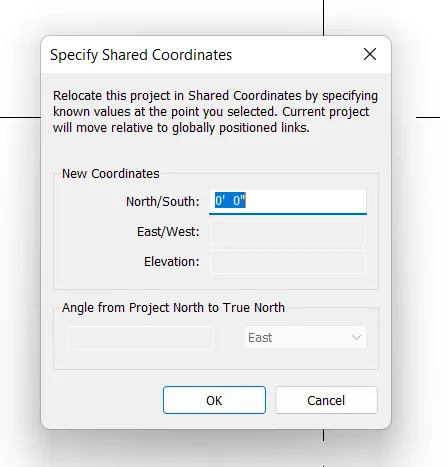
Type VG
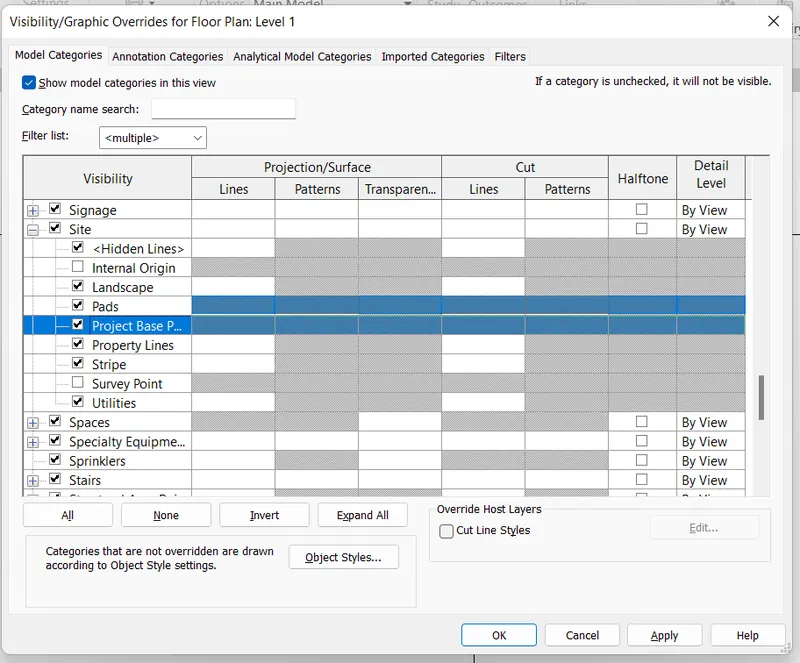
Visibility Graphics dialogue box opens.
Select SITE and Expand the list
Tick on Project base Point
Click on Apply and Press OK
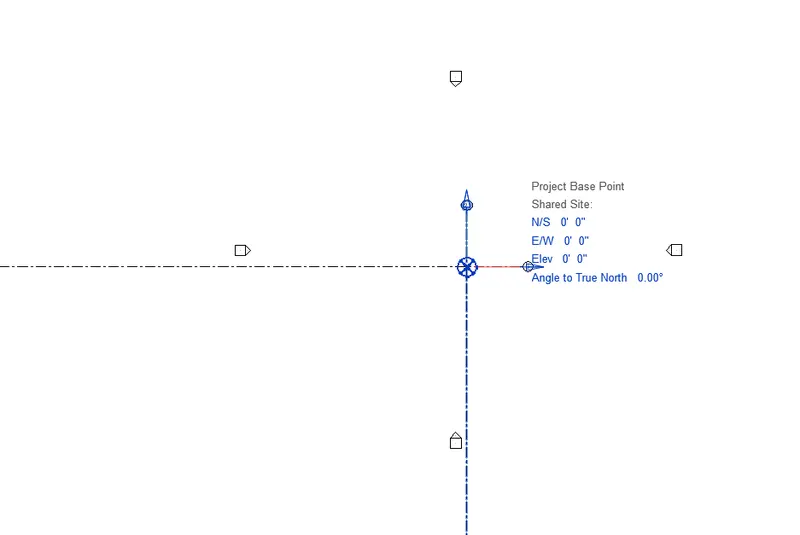
Base point appears on the model space.
Set the Base Point at the Intersection of Gridlines.
RESULT: -
We created Architecture Template.
Set Project Base point.
Set Project Shared Coordinates.
2Q]
AIM: -
Create Structural Template
Set Project Base point
Set Project Shared Coordinates manually
PROCEDURE: -
Open the Revit software
Click on NEW
New Project dialogue box opens
Select STRUCTURAL Template
Create: New Project
Press OK
Type VG
Visibility Graphics dialogue box opens.
Select SITE and Expand the list
Tick on Project base Point
Click on Apply and Press OK
Base point appears on the model space.
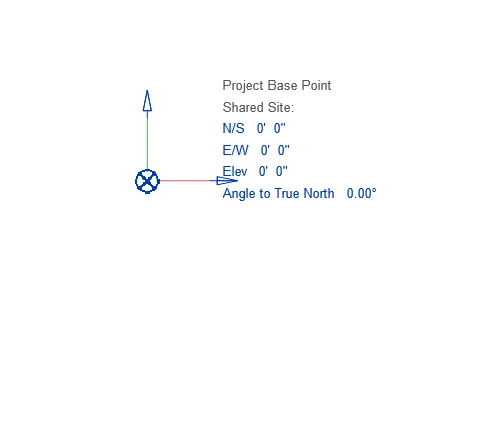
Draw Gridlines at Project base Point
Click on STRUCTURE Tab
Go to Datum panel
Select Grid
Choose Line from the Draw panel
Draw Horizontal line on the model space and edit the name to “A”
Draw Vertical line intersecting the Horizontal line and name it as “1”
Click on MANAGE TAB
Go to Project Location panel
Select Coordinates tool and Choose Specify Coordinates at point option
Click on Grid line “1”
Specify Shared Coordinates dialogue box opens
Set New Coordinates
East/West: 0
Press OK
Select Coordinates tool and Choose Specify Coordinates at point option
Click on Grid line “A”
Specify Shared Coordinates dialogue box opens
Set New Coordinates
North/South: 0
Press OK
RESULT: -
We created structure Template.
Set Project Base point.
Set Project Shared Coordinates.
3Q]
AIM: -
Re-open the Architecture File
Make the model a Central model under Collaborate Tab.
PROCEDURE: -
Open the Architecture File which we created previously.
Select COLLABORATE TAB
Go to MANAGE COLLABORATION panel
Click on Collaborate in Cloud tool
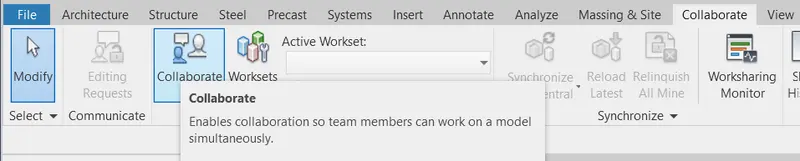
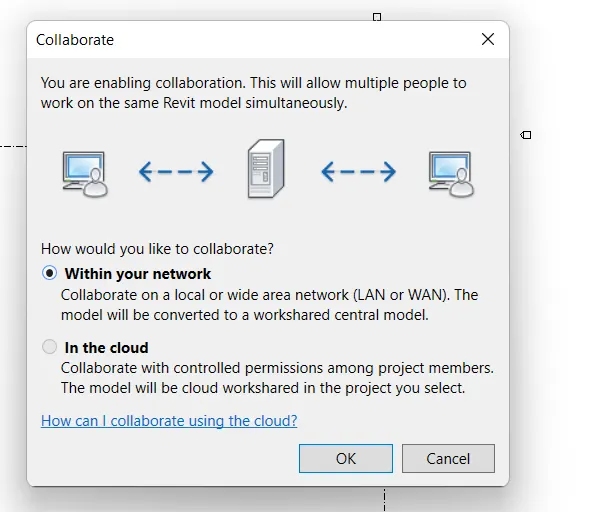
Collaborate dialogue box opens
Click on within your network option
Press OK
Click on SAVE option
Save file as Central Model dialogue box opens
Click on Ok
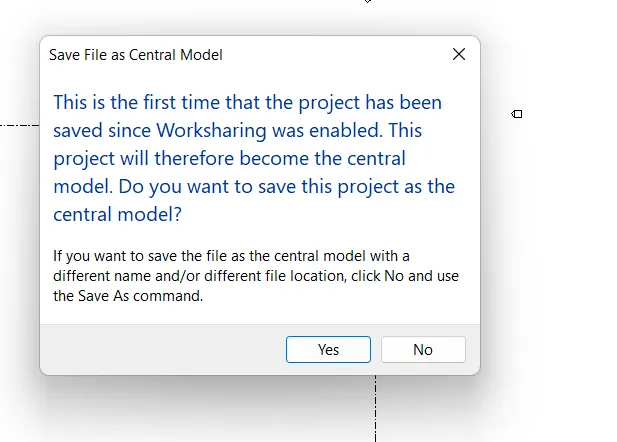
Now the File is saved as Central File
RESULT: -
We re-opened the Architecture File
Made the model a Central model under Collaborate Tab.
4Q]
AIM: -
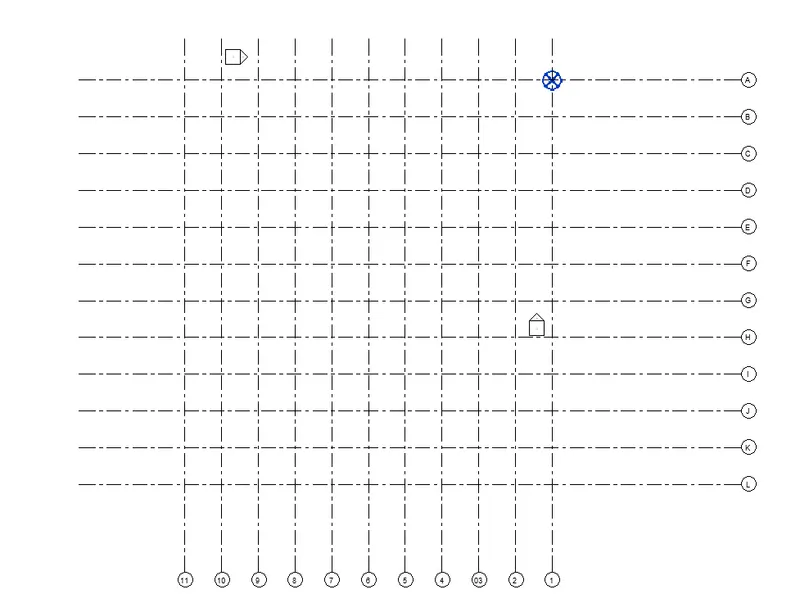
Create Gridlines in both directions in Central model.
PROCEDURE: -
Click on ARCHITECTURE TAB
Go to DATUM panel
Choose Grid tool
Set offset 10’ units.

Select Pick Line option from DRAW panel
Draw Gridlines horizontally
Edit the names to Alphabets
Press Escape 2 times.
Select Pick Line option from DRAW panel
Set offset 10’ units.
Draw Gridlines vertically
Edit the names to numbers
Press Escape 2 times.
RESULT: -
We created Gridlines in both directions in Central model
5Q]
AIM: -
Synchronize the changes from the local copy to the central file of the architectural model.
PROCEDURE: -
Select COLLABORATE TAB
Go to SYNCRONISE panel
Click on SYNCRONISE WITH CENTRAL tool
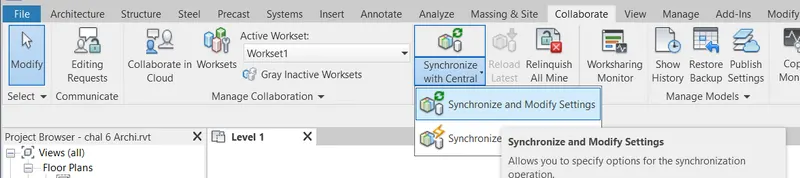
Choose Synchronize and Modify settings option from the dropdown list.
Syncronize with Central dialogue box opens
Tick on Compact Central Model option
Press OK
Changes will be synchronized with Central model file.
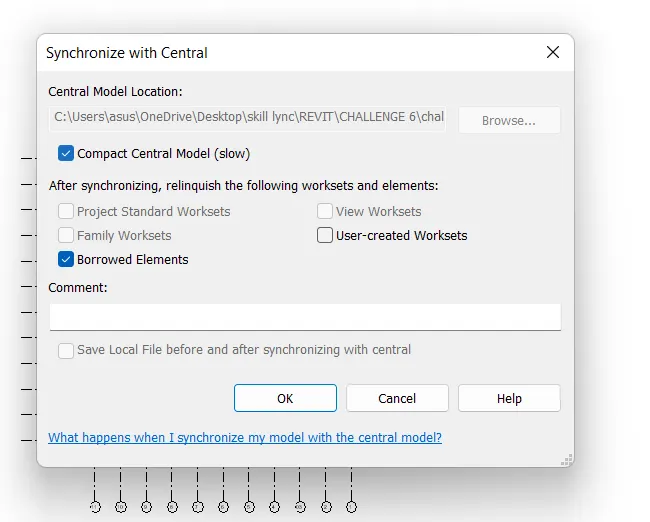
RESULT: -
We synchronized the changes from the local copy to the central file of the architectural model.
6Q]
AIM: -
Re-open the Structural File
Make the model a Central model under Collaborate Tab.
PROCEDURE: -
Open the Structural File which we created previously.
Select COLLABORATE TAB
Go to MANAGE COLLABORATION panel
Click on Collaborate tool
Collaborate dialogue box opens
Click on within your network option
Press OK
Click on SAVE option
Save file as Central Model dialogue box opens
Click on Ok
Now the File is saved as Central File
RESULT: -
We re-opened the Structural File
Made the model a Central model under Collaborate Tab.
7Q]
AIM: -
Copy the grids drawn in the Architectural file to the Structural model using Copy Monitor tool.
Observe the changes occurred in the Structural model.
PROCEDURE: -
Open the Structural File which we created.
Click on INSERT TAB
Go to LINK panel
Choose Link Revit tool
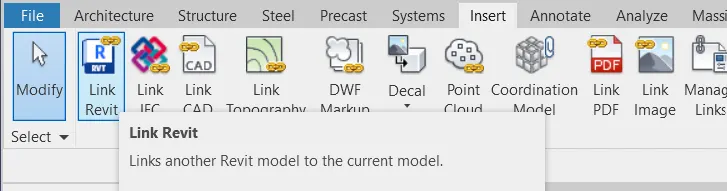
Import/Link RVT dialogue box opens
Select the Architectural File in which we drawn Gridlines.
Click on OPEN
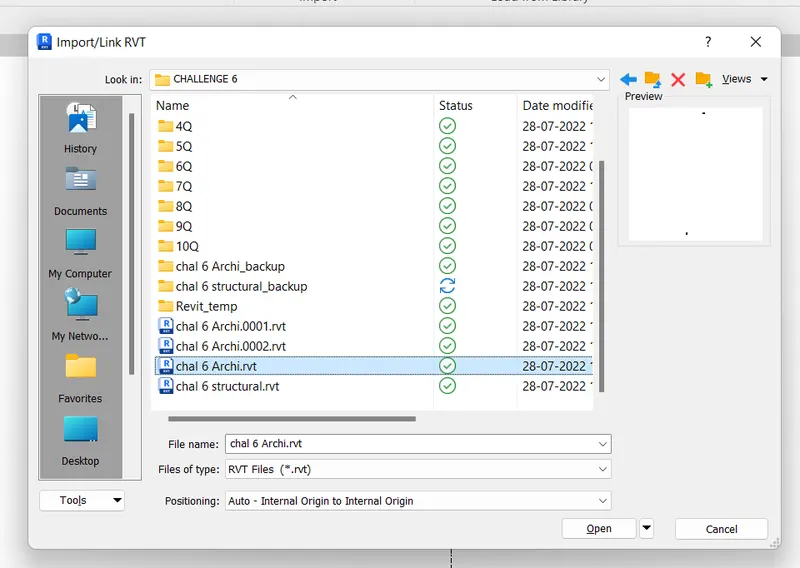
Architectural File is imported to the Structural File.
It is not copied to the Structural File.
Now, The Gridlines are imported to the Structural file.
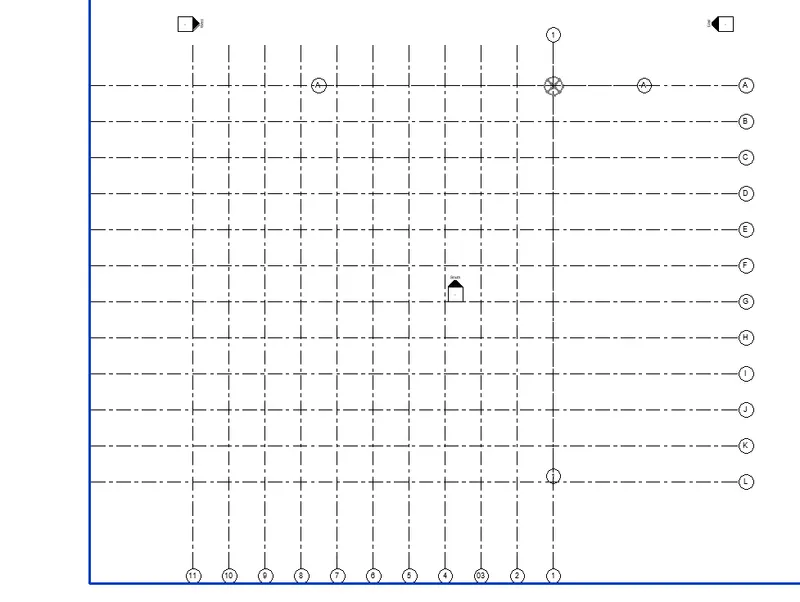
To Check whether the file is imported or copied,
Type VG
Visibility graphics dialogue box opens
Select Revit Links Tab
Untick on the Imported file.
Press Apply
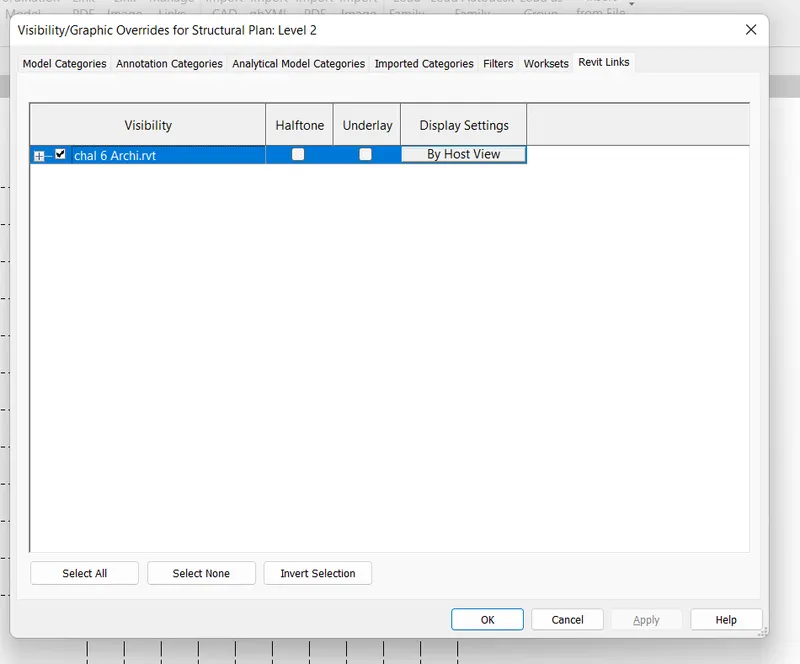
The Gridlines disappears from the Model space.
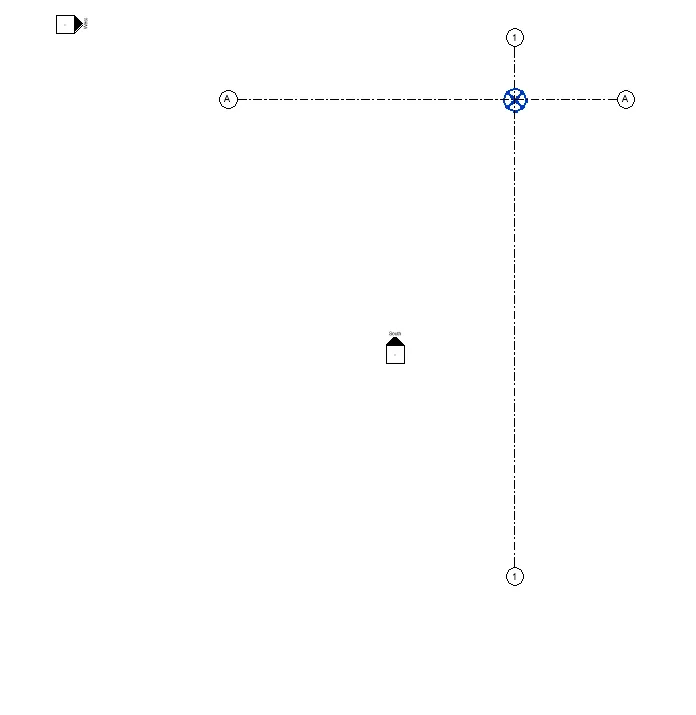
Now we have to copy these Gridlines to the structural file.
For that, Select COLLABORATE TAB
Go to Coordinate panel
Click on Copy/Monitor
Choose Select Link from the dropdown list

Click on the Link on the model space
Select COPY tool in the Ribbon tab
Tick on Multiple option
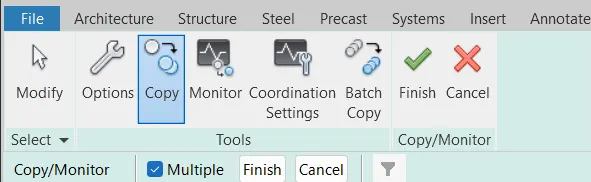
Select all the Gridlines in the Model space which are imported from the Architecture file.
Click on Finish then Click on COPY/MONITOR in the Ribbon tab.

Click on finish icon.
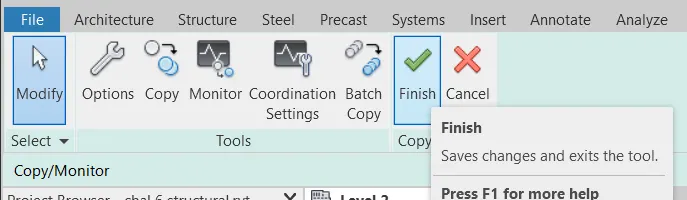
Now, The Gridlines are copied to the Structural File.
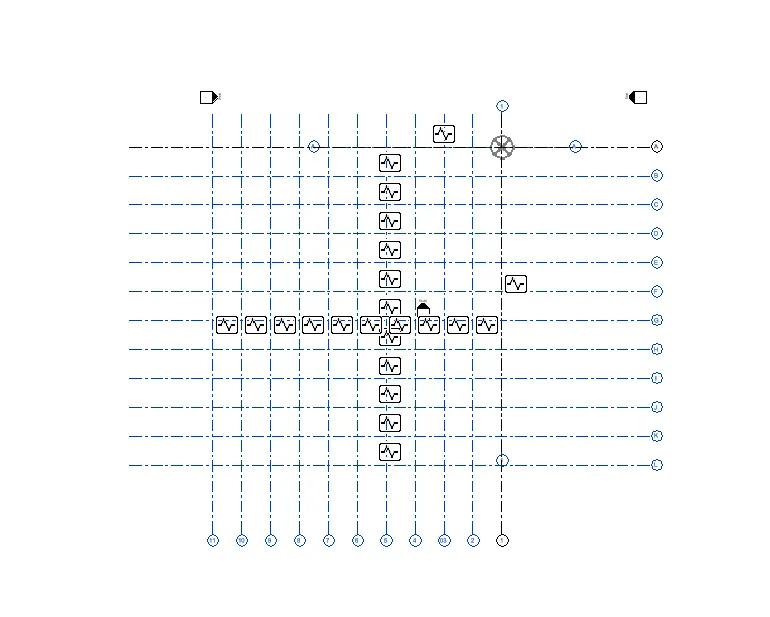
To Check whether the file is imported or copied,
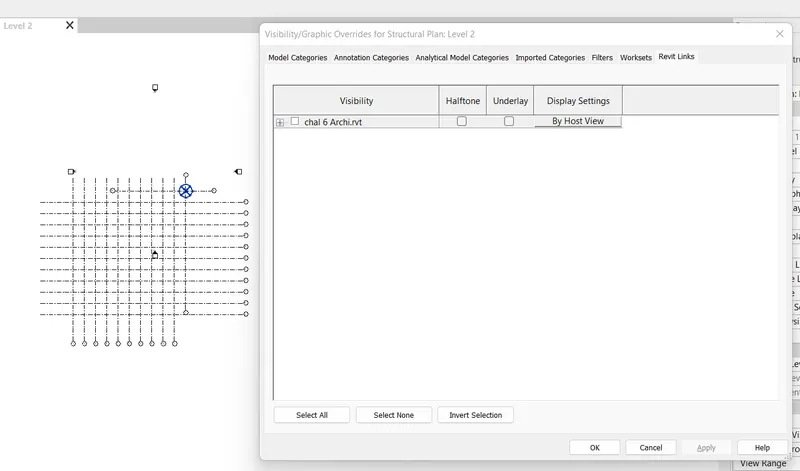
Type VG
Visibility graphics dialogue box opens
Select Revit Links Tab
Untick on the Imported file.
Press Apply
Now Gridlines won’t disappear from the model space.
So, the Gridlines are copied to the Structural File.
RESULT: -
We copied the grids drawn in the Architectural file to the Structural model using Copy Monitor tool under COLLABORATE tab.
We observed that by using INSERT TAB we can import the Gridlines. But to copy the Gridlines to the Structural File we have to use Copy/Monitor tool under Collaborate tab.
8Q]
AIM: -
Create new Project file: Construction Template
Save the file as Central model under Collaborate tab
Import both Structural file and Architectural file.
PROCEDURE: -
Open the Revit software
Click on NEW
New Project dialogue box opens
Select CONSTRUCTION Template
Create: New Project
Press OK
Select COLLABORATE TAB
Go to MANAGE COLLABORATION panel
Click on Collaborate tool
Collaborate dialogue box opens
Click on within your network option
Press OK
Click on SAVE option
Save file as Central Model dialogue box opens
Click on Ok
Now the File is saved as Central File.
Click on INSERT TAB
Go to LINK panel
Choose Link Revit tool
Import/Link RVT dialogue box opens
Select the Architectural File in which we drawn Gridlines.
Click on OPEN
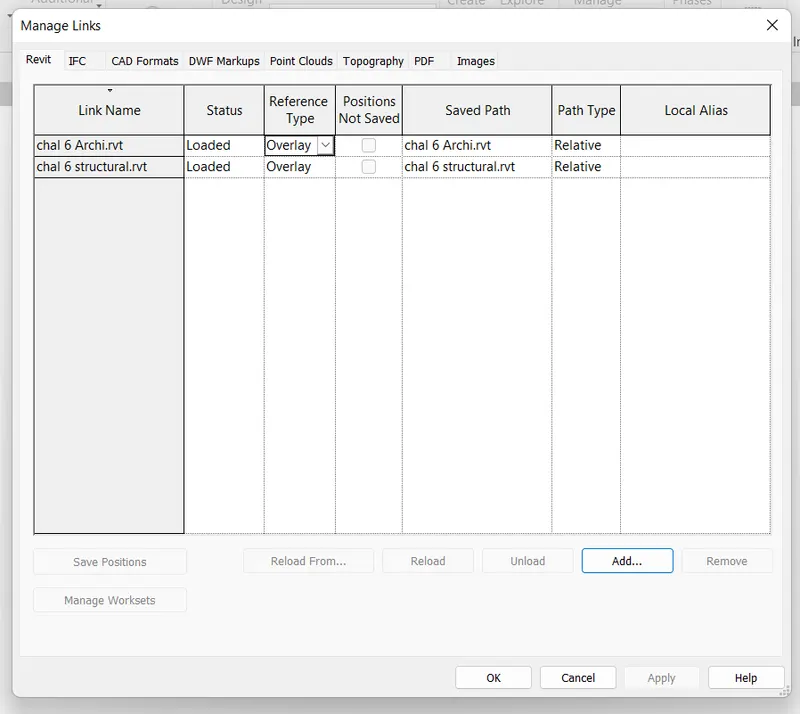
Architectural File is imported to the Construction File.
Click on INSERT TAB
Go to LINK panel
Choose Link Revit tool
Import/Link RVT dialogue box opens
Select the Structural File
Click on OPEN
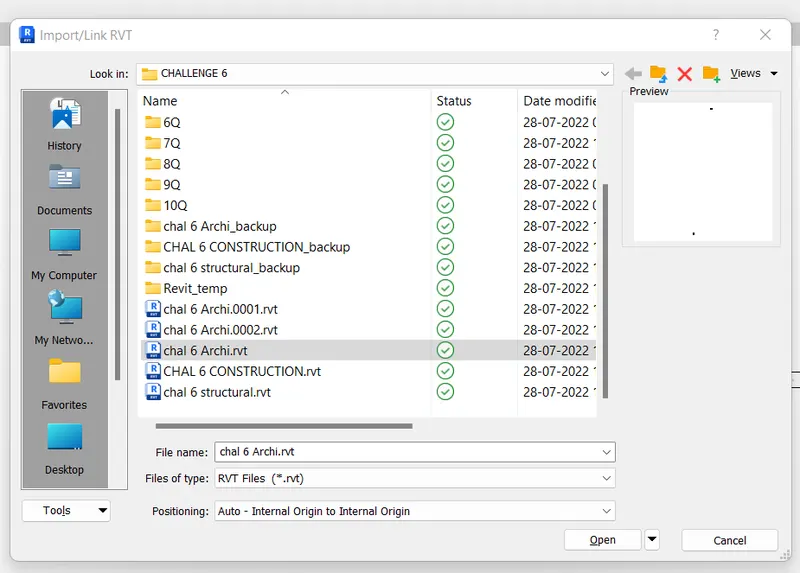
Structural File is imported to the Construction File.
Now, we linked both Architectural and Structural Files to the Construction File.
RESULT: -
We created new Project file using Construction Template
saved the file as Central model under Collaborate tab.
Imported both Structural file and Architectural file.
9Q]
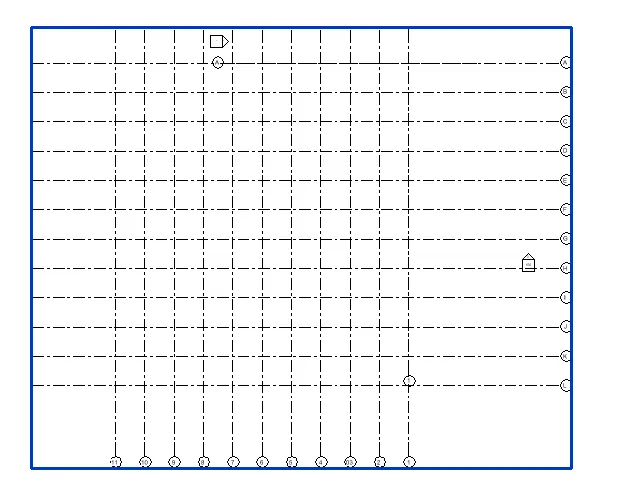
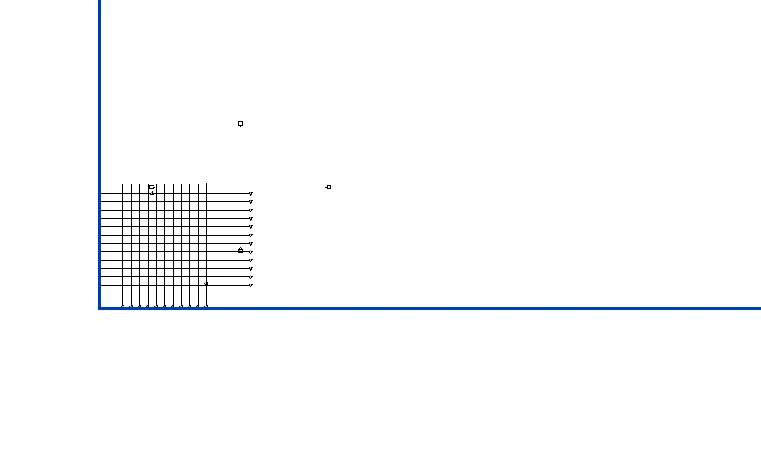
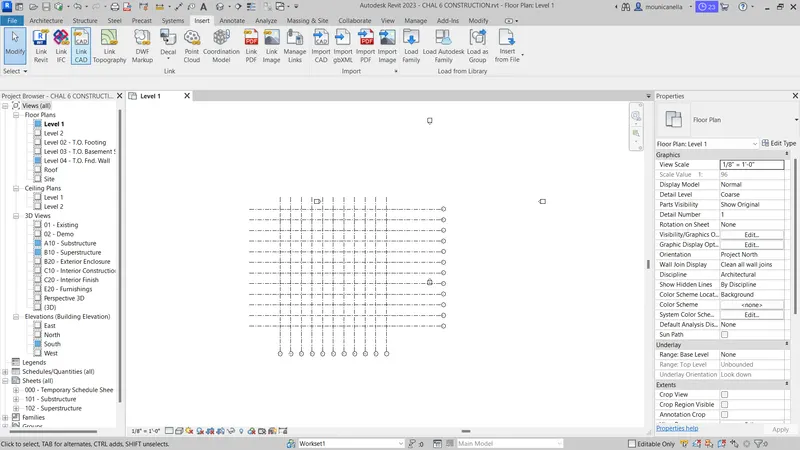
The Grids from the Structural model and the Architectural Model are matching in the Construction Template created.
The Model is ready for project 2.
No need to work on the shared parameters and linking options under Manage Links.
10Q]
| CONSTRUCTION MODEL | |
| ARCHITECTURAL MODEL | STRUCTURAL MODEL |
| Modeling Walls | Modelling Columns |
| Modeling Windows | Modelling Beams |
| Modeling Doors | Modelling Footings |
| Assign materials | Modelling Structural Floors |
| Modeling Architectural Flooring | Modelling labs |
| Modeling Architectural Roofing | Modelling Stress Systems |
| Modeling Arcitectural Ceiling | Modelling connections |
| Enables to provide geographic constions | Structural model in general develops the entire frame of a structure |
| Modeling Staircase | |
| Create Openings | |
| Architectural model in overall | |
| contribute Aesthetic bbeauty of a building | |
Revit allows multiple Discliplines to work together in single project.
Various number of people work on the same project simultaneously
Architect
Structural Engineer
Mechanical Engineer
Electrical Engineer
Plumbing Engineer
Quantity Surveyor
Security Specialist
Management etc
Number of people working on the project depends on the type of project and size of project.