Usage of Collaborate tool in REVIT
1) AIM: To open an architectural tab and set project base point and project shared cocordinates using manage tab for the project.
PROCEDURE:
- Go to desktop and select the Revit icon.
- Once the icon the selected then the below shown dialogue box will appear.
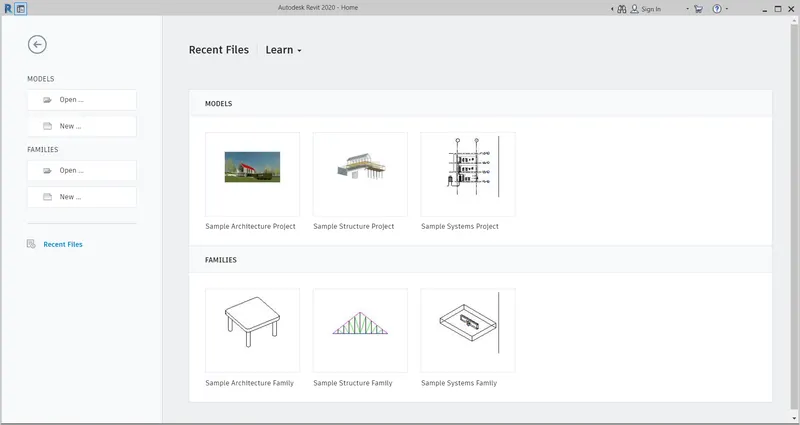
- Here click NEW option which is present in upper left hand side.
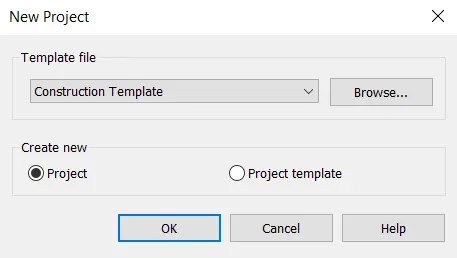
- The above dialogue option will appear.
- Here select the template file and type of project and click OK button.
- Then the drawing sheet will appear with different options to draw and with certain levels.
- Select architectural tab and select grids tool.
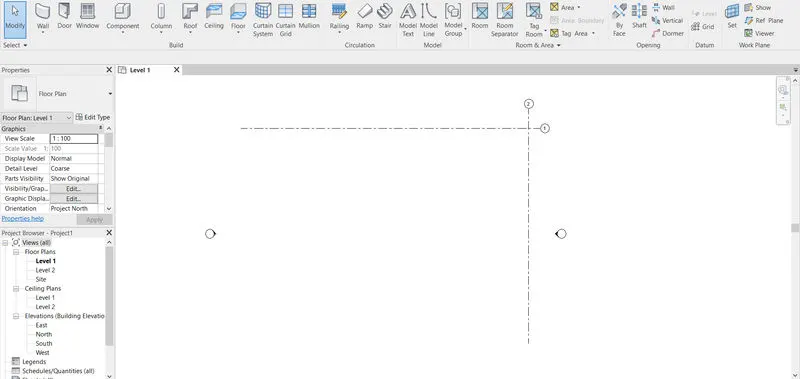
- Type the command VG (Visibility Graphic) the below shown Box will appear.
- There expand site and below shown options will appear.
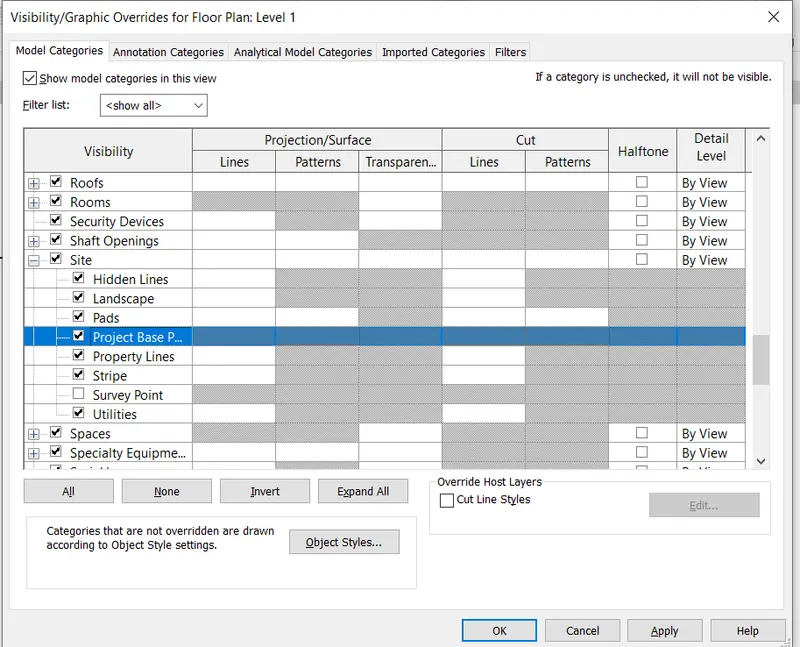
- Check the project base point and survey point
- Click ok and close the dialogue box
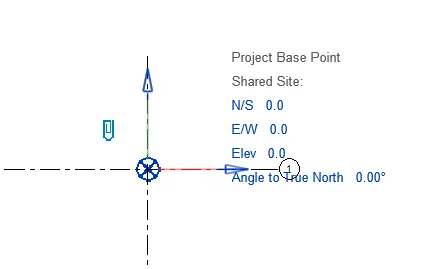
- Then a base point will appear in the screen.
- Now select that and drag it to the 0 cordinate.
- Then all the values beside the base point will also become Zero.
- After creating the base point and shared coordinates click save as
- Choose the destination folder and rename it
- Click Save
RESULT:
2) AIM: Open another structural template and set the project parameters as we did in the architectural model. Copy the parameters from architectural to structural model.
PROCEDURE:
- Go to desktop and select the Revit icon.
- Once the icon the selected then the below shown dialogue box will appear.
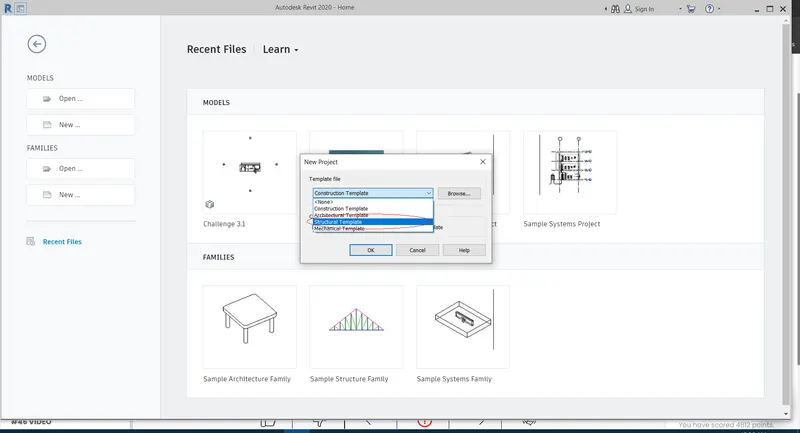
- The above dialogue option will appear.
- Here select the template file and type of project and click OK button.
- Then the drawing sheet will appear with different options to draw and with certain levels.
- Select architectural tab and select grids tool.
- Type the command VG (Visibility Graphic) the below shown Box will appear.
- There expand site and below shown options will appear.
- Check the project base point and survey point
- Click ok and close the dialogue box
- Then a base point will appear in the screen.
- Now select that and drag it to the 0 cordinate.
- Then all the values beside the base point will also become Zero.
- After creating the base point and shared coordinates click save as
- Choose the destination folder and rename it
- Click Save in the required name.
RESULT:
3) AIM: Re open the architectural model and using the tools under collaborate tab to make the architecturalmodel a central model.
PROCEDURE:
- Go to desktop and select the Revit icon.
- Open the architecture template which was created before.
- Select collaborate tab and click on collaborate tool.
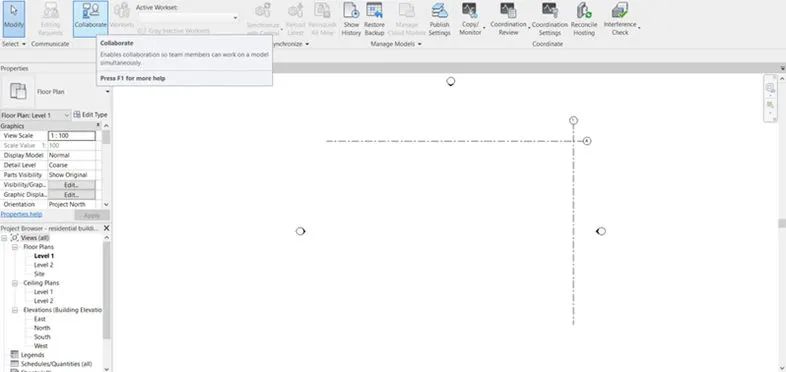
- Collaborate dialog box appears.
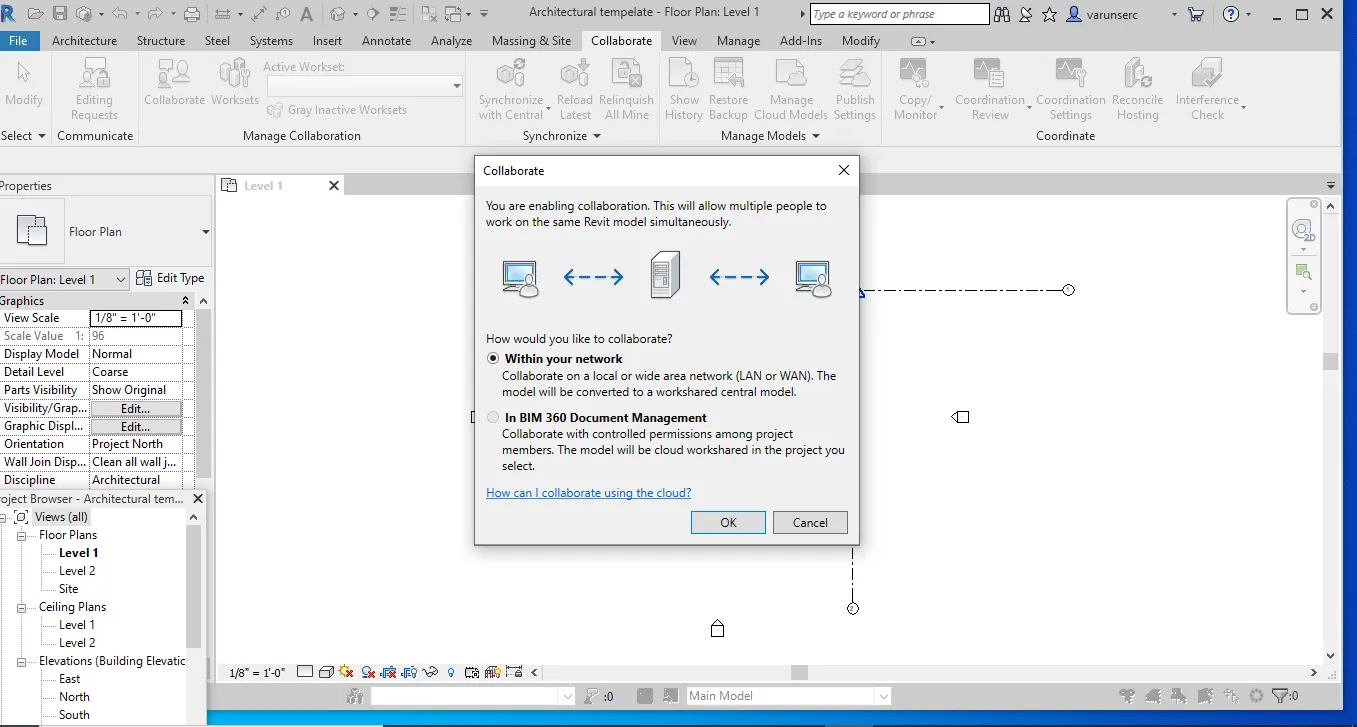
- Select within your network and click on ok option.
- After setting the colloborate click workset
- Check workset tool is it visible or not
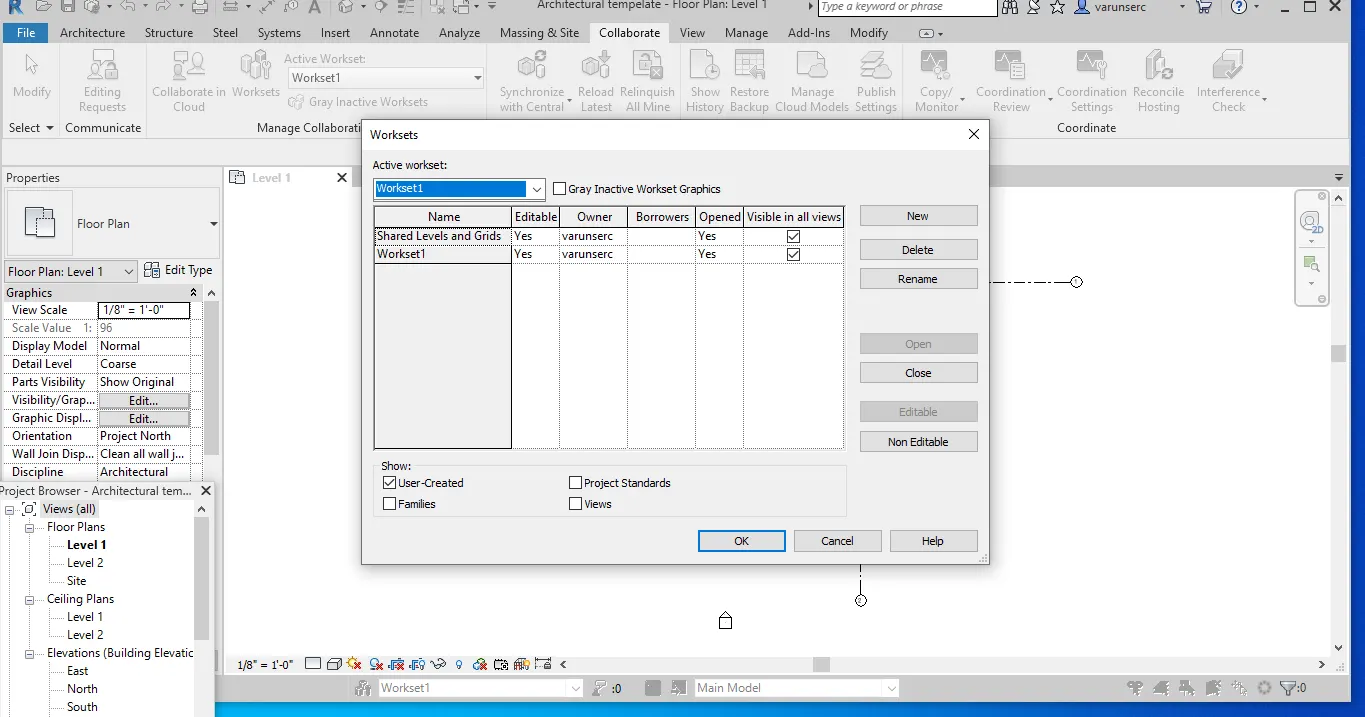
- Click ok
- Click Synchronize with central tool under manage tab
- click Save as and Choose the destination folder
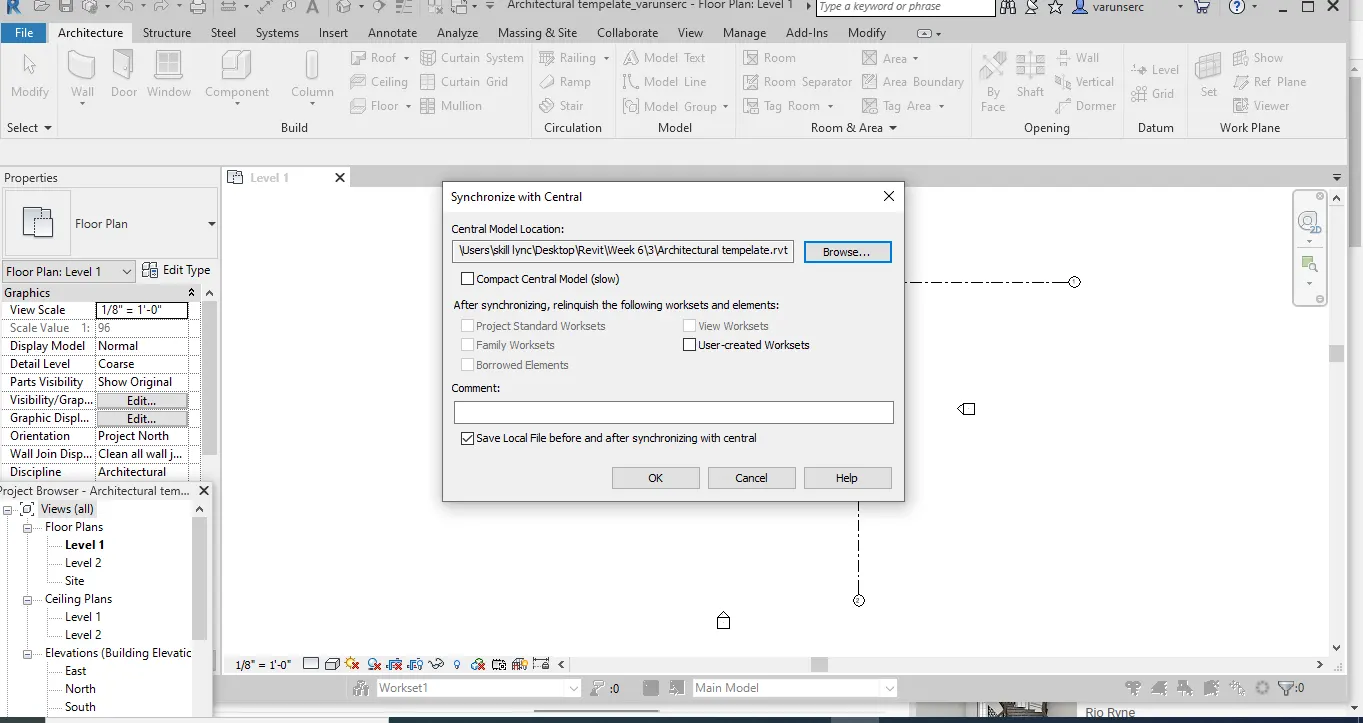
- After selecting all the needed things then click OK.
- After creating the central model click save as
- choose destination folder, rename it and click ok
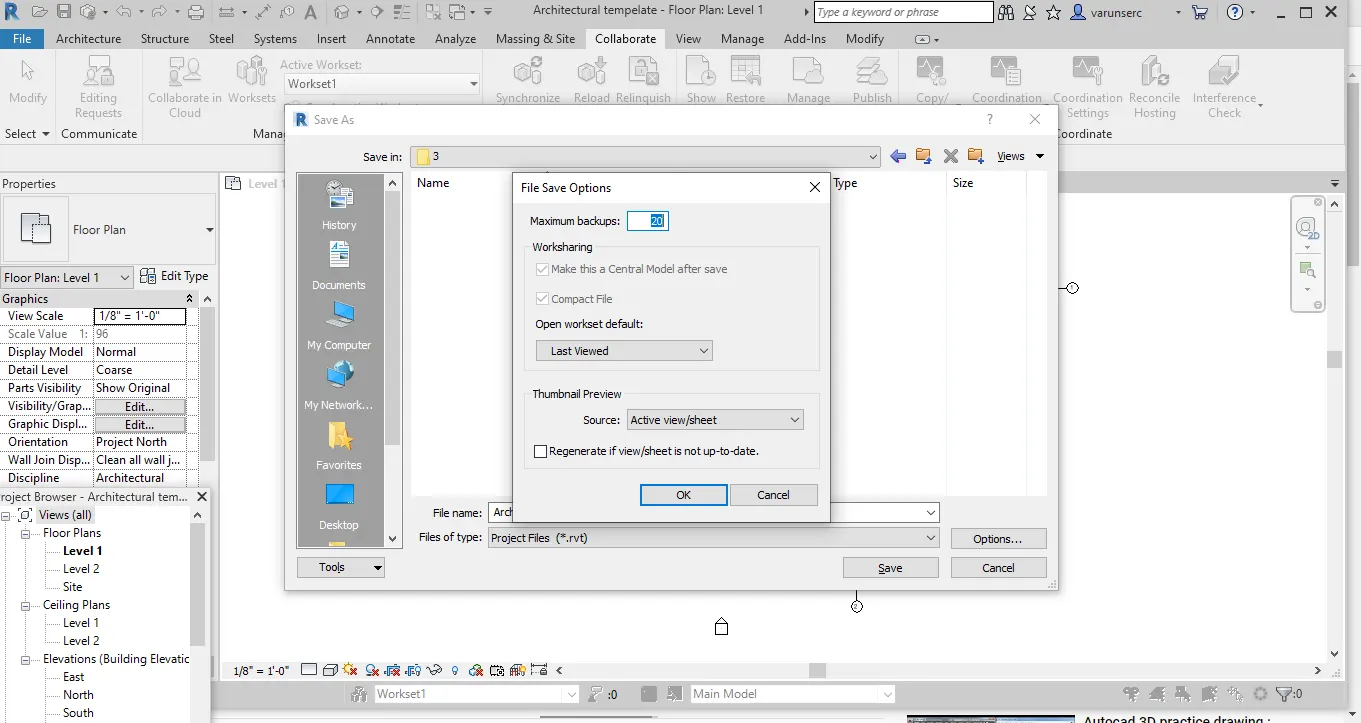
RESULT: The drawing will be saved in designated place as a Central model.
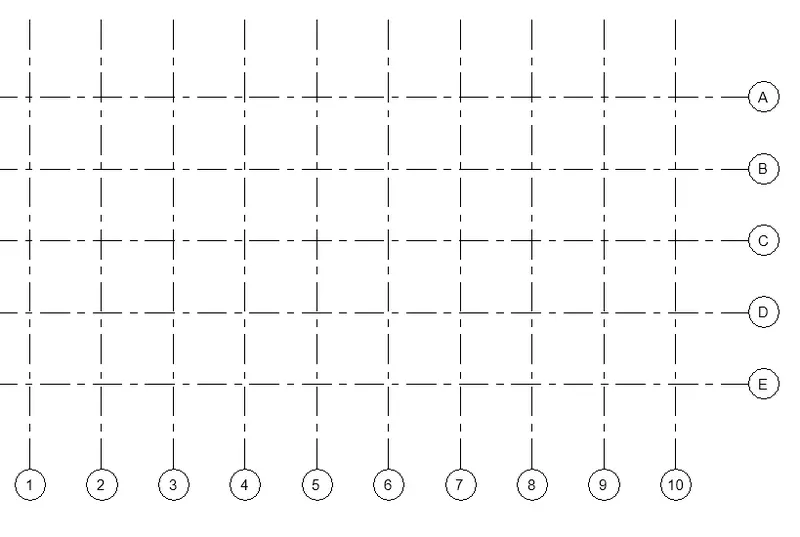
4) AIM: To Creating he Grids Longitudinal and Transverse pattern for the project similar to the task done in Week 2
PROCEDURE:
- Go to desktop and select the Revit icon.
- Open the central architecture template which was created before.
- Go to Architectural option in toolbar and then select grid option.

- The below shown options will come

- Here there are several options to do the grid so select the line method for once.
- Click the start and end point of the grid line and nest select the pick lines option and input the offset value as mentioned. Here the first line is drawn Horizontally.

- Then select the first drawn line as baseline and create the number of lines as required.
- Once the line is done to make a new one select the previously created line.
- There will be numbers in the circle edit it to alphabets.
- Double click the numbers and re-write it using required alphabets.
- Next we have to draw the longitudinal grid.
- The steps are all same as done for Transverse grid.
- The change is just to draw the first line vertically.
- The same procedure is followed as for transverse method.
- Here after drawing the first line change the naming because the grid will continue in Alphabetical order.
RESULT:
5) AIM: To synchronize the changes from the local copy to the central file of the architectural model.
PROCEDURE:
- For this first of all we have to open a local model of a Central model for editing purpose.
- Do all the neccessary required editings in the drawing.
- From collaborate tab select synchronize with central option.
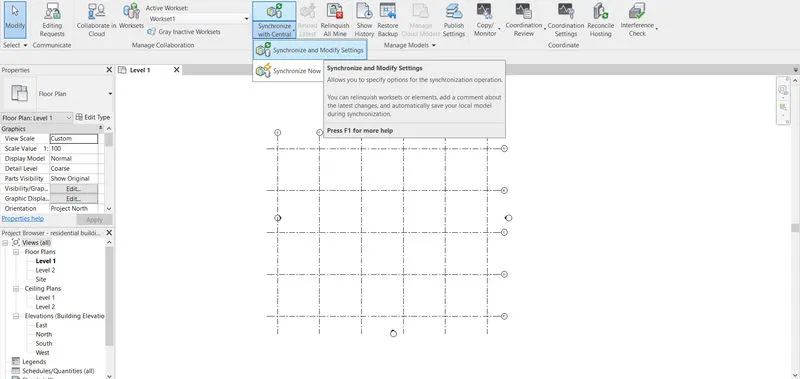
- Then select synchronize and modify settings option.
- Then synchronize with central dialog box appears and click on ok option.
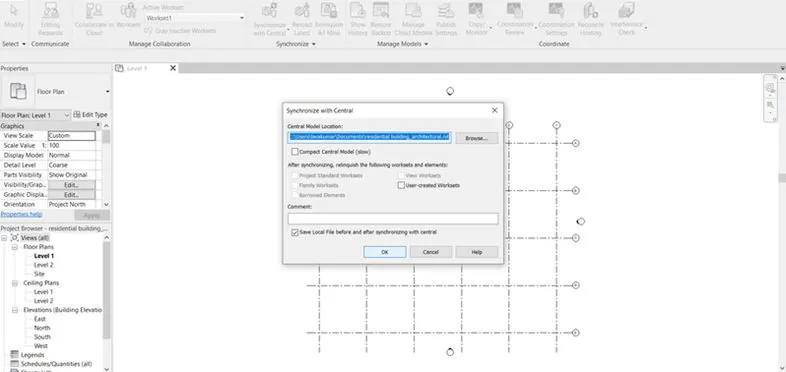
- The drawing will get synced with the central file.
- Now all the changes that has been mad will be saved in the main drawing or central drawing.
RESULT: With the above steps we can synchronize the changes from the local copy to the central file of the architecture model.
6) AIM: To open the structural model and using the collaborate tools to save the model as a central file.
PROCEDURE:
- Go to desktop and select the Revit icon.
- Click to open the structural model which is already created
- Once the previously saved model is open then follow the below steps to make it a central model.
- Select collaborate tab and click on collaborate tool.
- Collaborate dialog box appears.
- Select within your network and click on ok option.
- After setting the colloborate click workset
- Check workset tool is it visible or not
- Click ok
- Click Synchronize with central tool under manage tab
- Click Save as and Choose the destination folder
- After selecting all the needed things then click OK.
- After creating the central model click save as
- choose destination folder, rename it and click ok
RESULT: The Structural template model will be saved in designated place as a Central model.
7) AIM: To copy the grids and levels from architectural to structural model using copy monitor tool.
PROCEDURE:
- Open the architectural model which we created as a central model file.
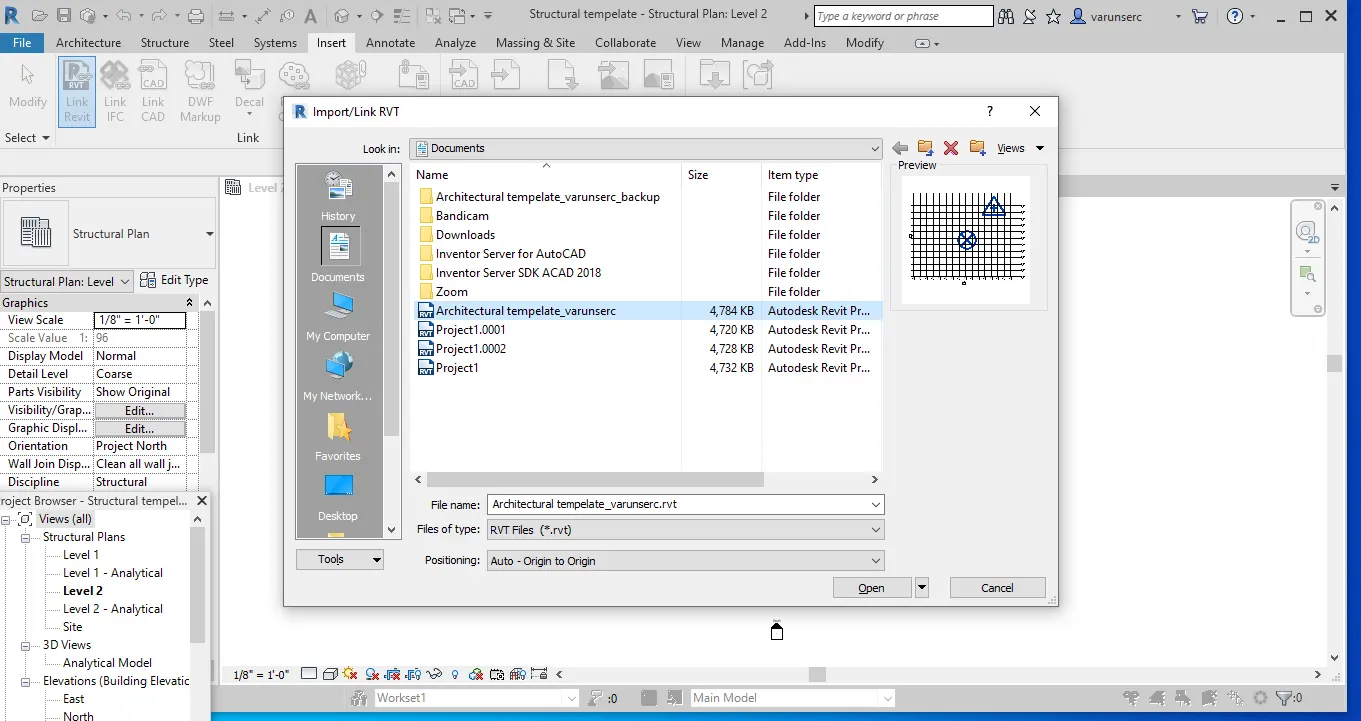
- Click link under manage tab
- Add the structural model into the current project using link option
- Click Copy monitor tool under colaborate tab and choose select link
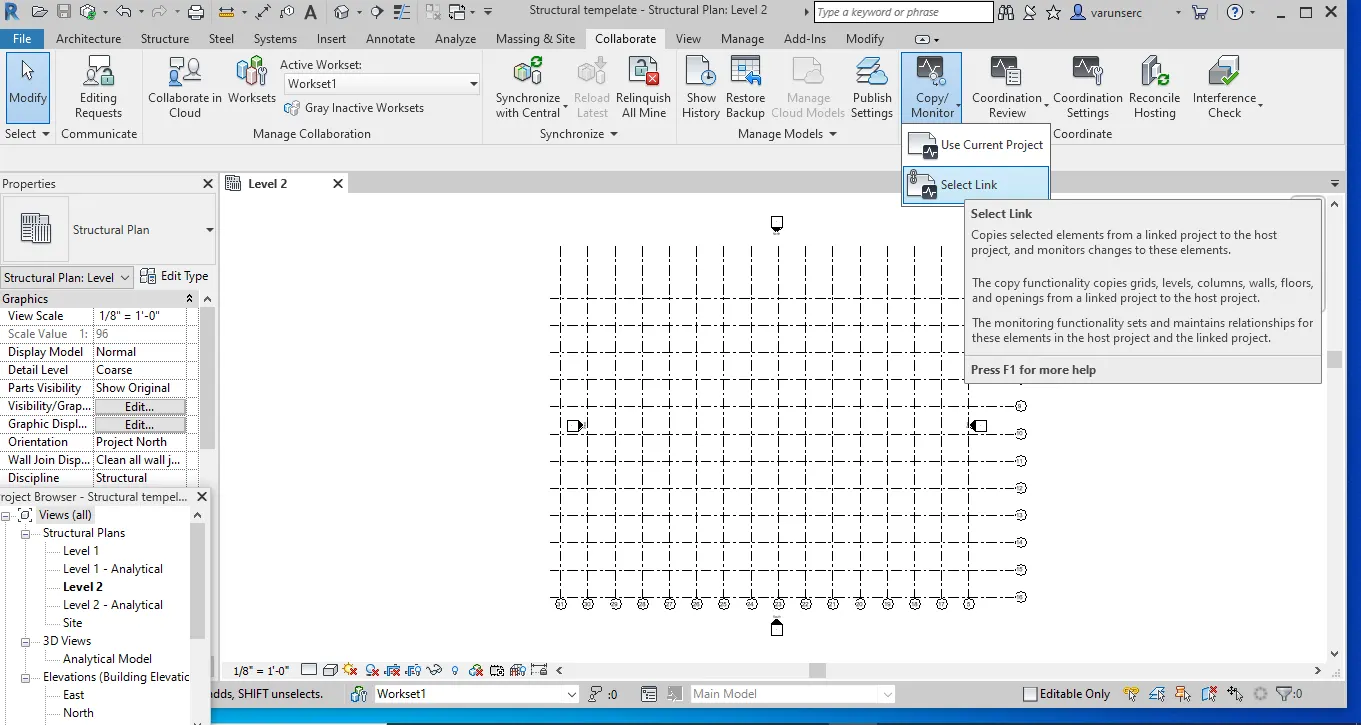
- Another dialogue options will appear there select copy option.
- Tick the multiple option so that we can copy all the object in a single click
- Select the object which we want to copy
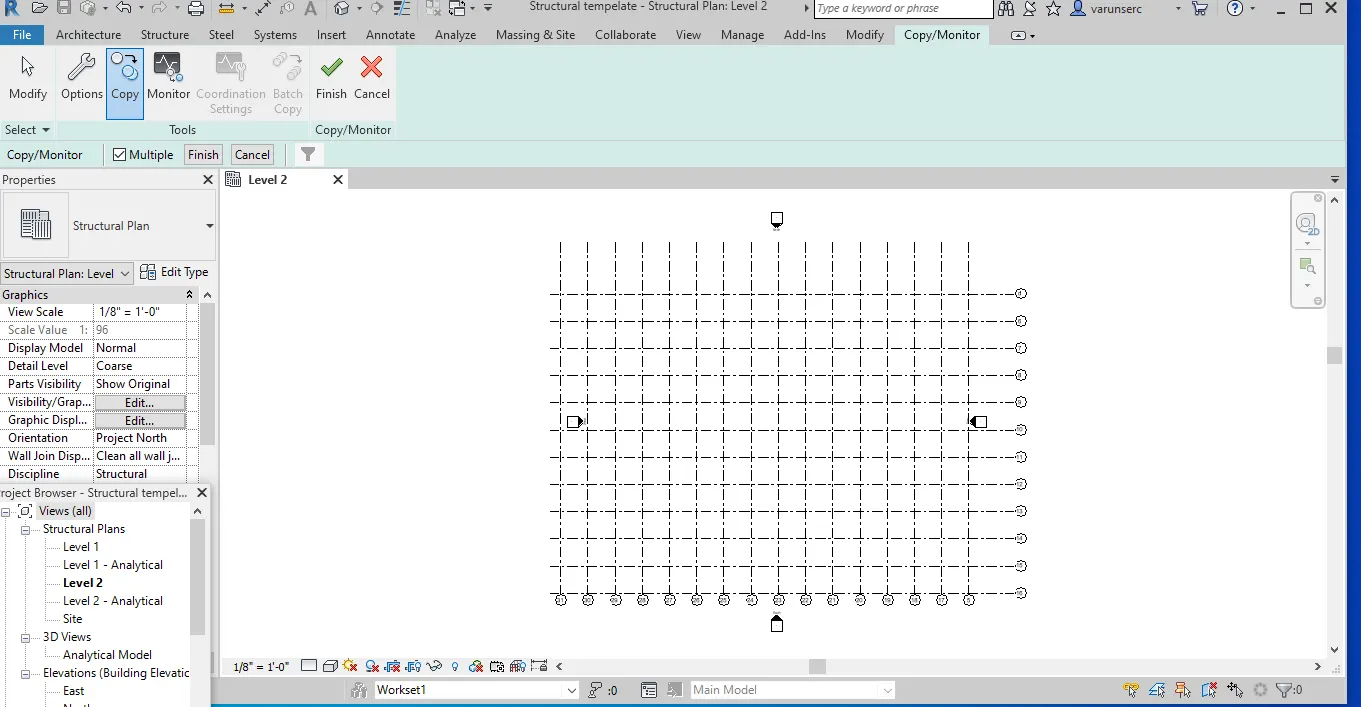
- Click the tick mark and complete the copy monitor process.
- Hence the objects from architecture to structure model completed sucessfully
RESULT: With the above steps we can copy the grids and levels from the architecture model to structural model using the copy monitor option under collaborate tab.
8) AIM: To create new construction template and save it as central model where both the architectural and structural models are present.
PROCEDURE:
- Open a new file and save it as construction template.
- Select Colloborate tool in collaboration tab .
- Select within your network option and click ok
- After setting the colloborate click workset
- Check work set tool is it visible or not
- Click Synchronize with central tool under manage tab
- Click Save as and Choose the destination folder
- Click ok
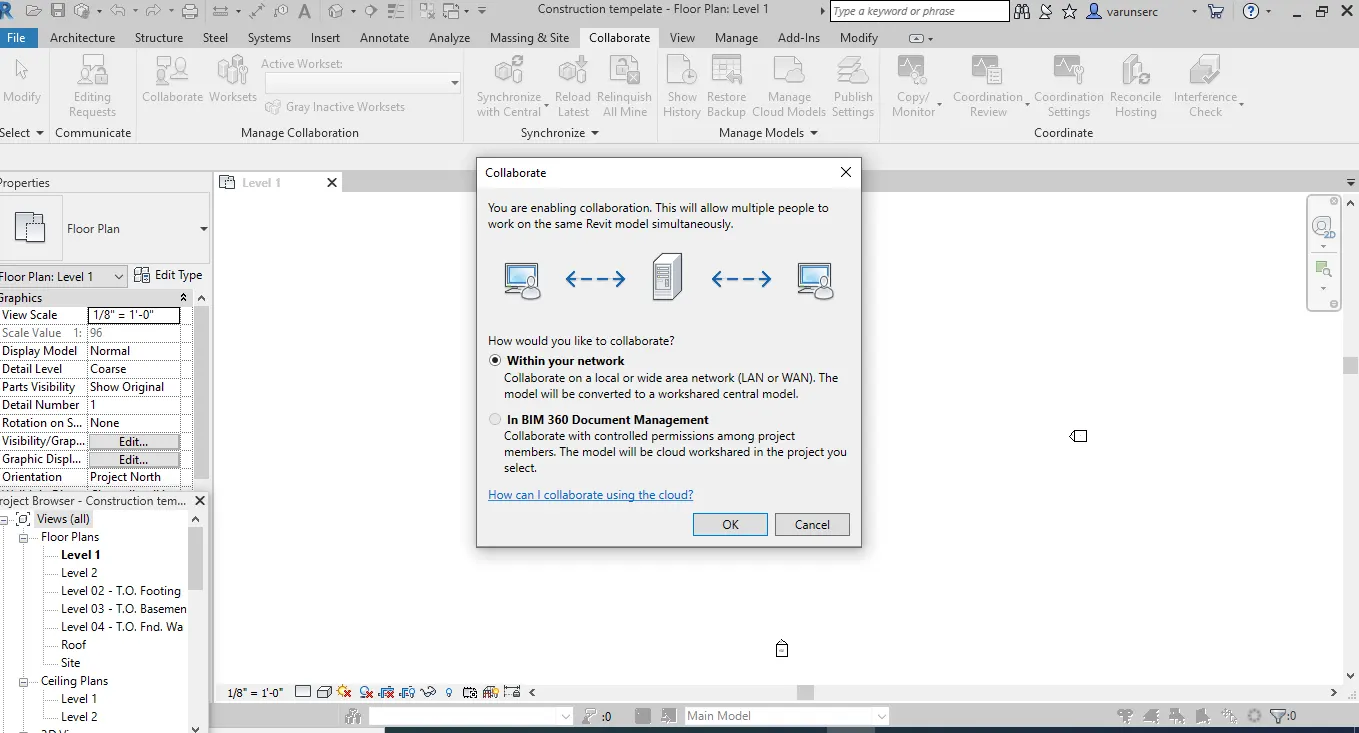
- After creating the colaboration and click save as
- Choose destination folder and rename it
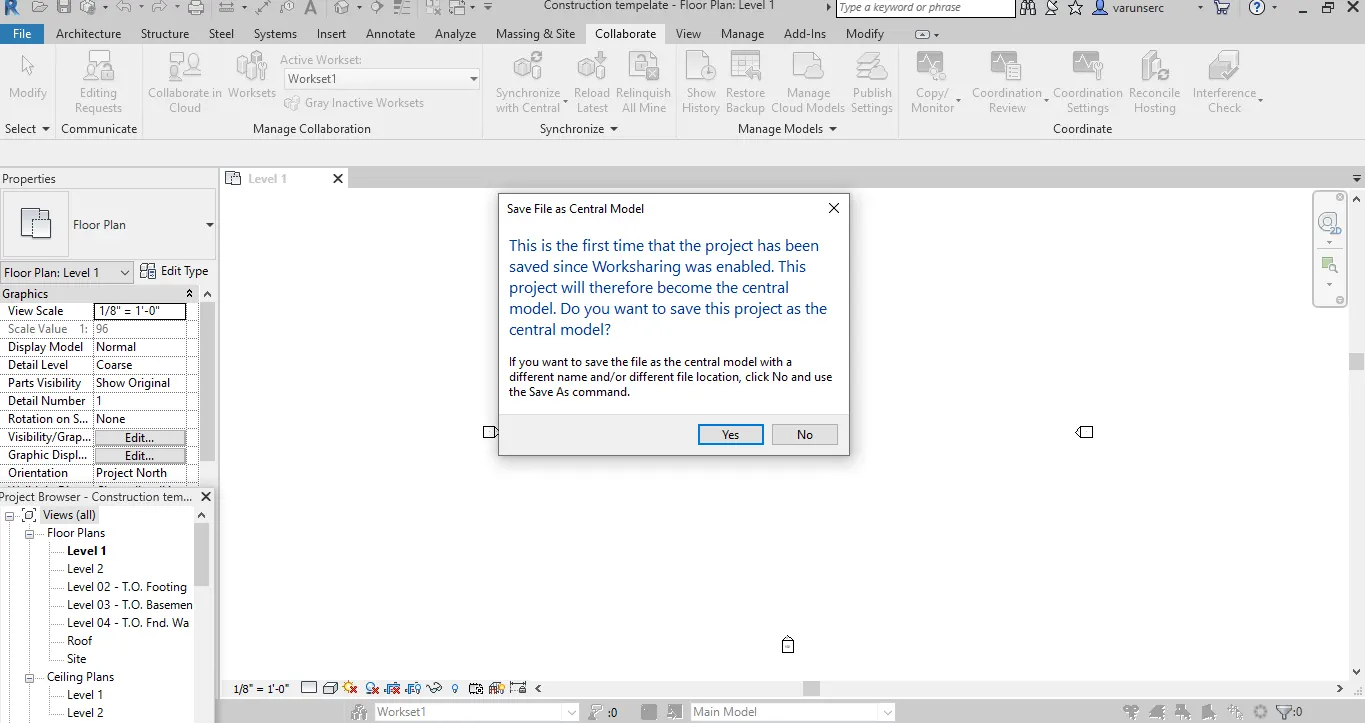
- Click link under manage tab
- Add the structural and architectural model into the current project using link option
- Click ok
- Click save as and save it
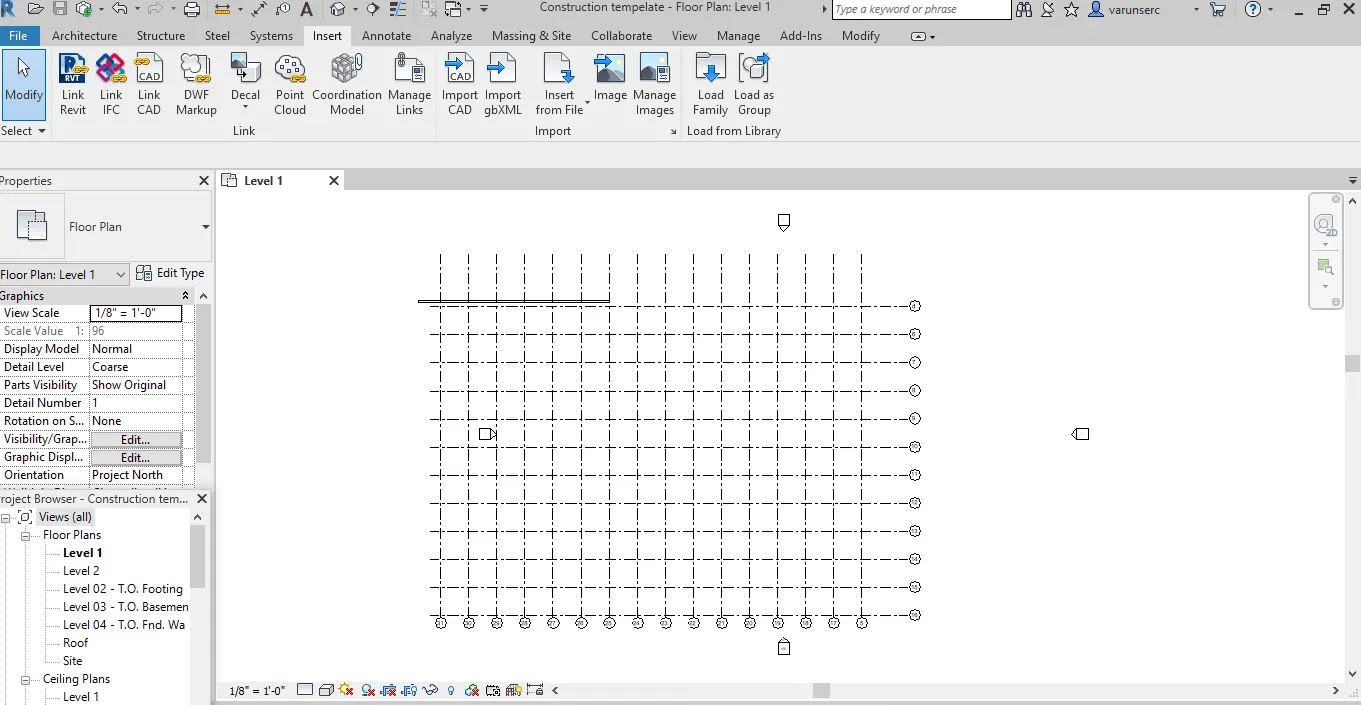
RESULT : We can create a new construction template and we can add the links where we can achieve both the structural and architectural templates in one file.
9) Here the grids from both architecture and structure are matching in construction template.
If the grids are not linking each other then follow the below steps.
PROCEDURE:
- Open a new architectural template.
- Select manage tab and click on manage links and select structural template drawing.
- We can see both the grids in the architectural template, but they willl not be matching/ coinciding.
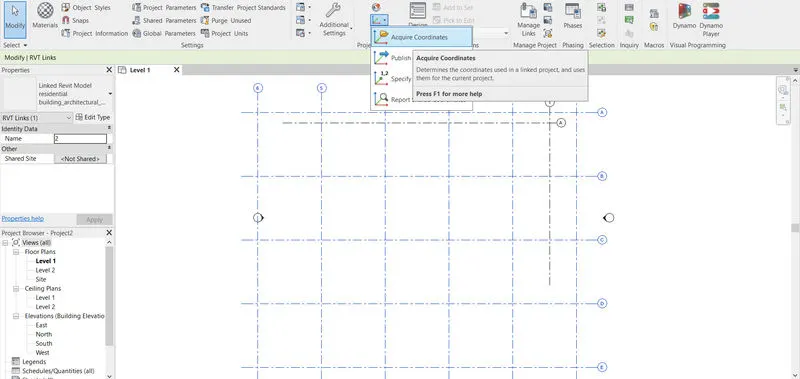
- Select the architectural grids and select Acquired coordinates and select the architectural template grid.
- using relocate option select the plave where we can to move the grids.
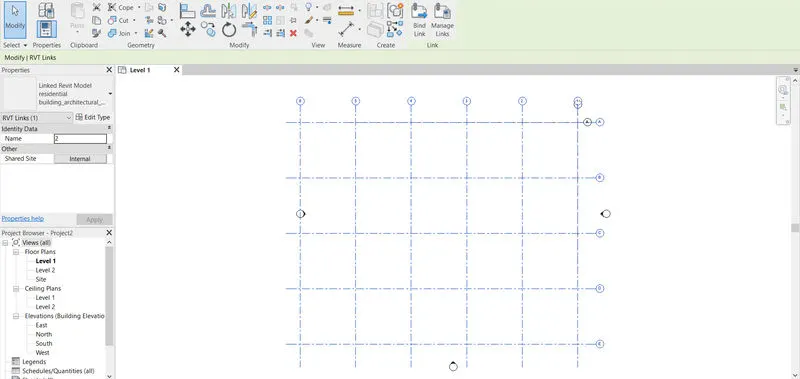
- After this process both the structural and architectural grids will will be coincided.
RESULT : After this process both the architectural and structural grids will be overlapped.
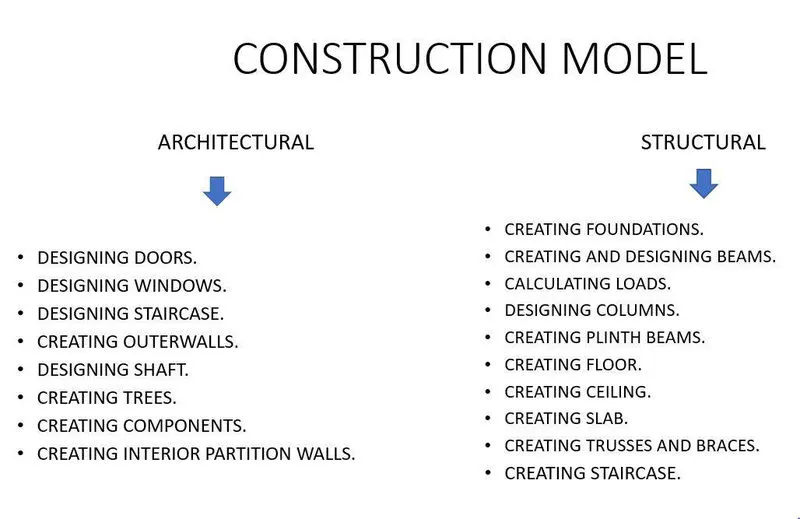
10) In the below flow chart we can observe a tree setup in terms of construction model