Usage of Collaborate tool in REVIT
1)
AIM:
- To use the Manage tab set project base point and project shared coordinates for the project in Architectural template.
PROCEDURE:
STEP 1:
- Open a New Architectural template in Revit from File-> New.
- Create two grids and name them from Datum panel in Architecture Tab.
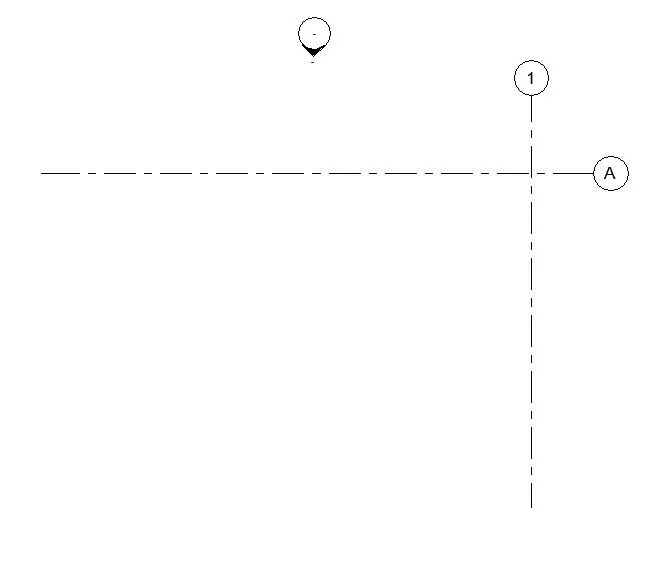
STEP 2:
- To specify coordinates at the grids that were created select Manage tab-> Coordinates-> Specify coordinates at point.
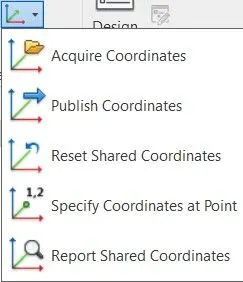
STEP 3:
- Select the grid and in the dialogue box that appears specify new coordinates as 0'0".
- When the Transverse grid is selected Specify new coordinates 0'0" in North/South.
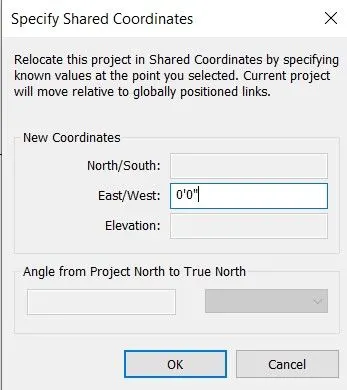
STEP 4:
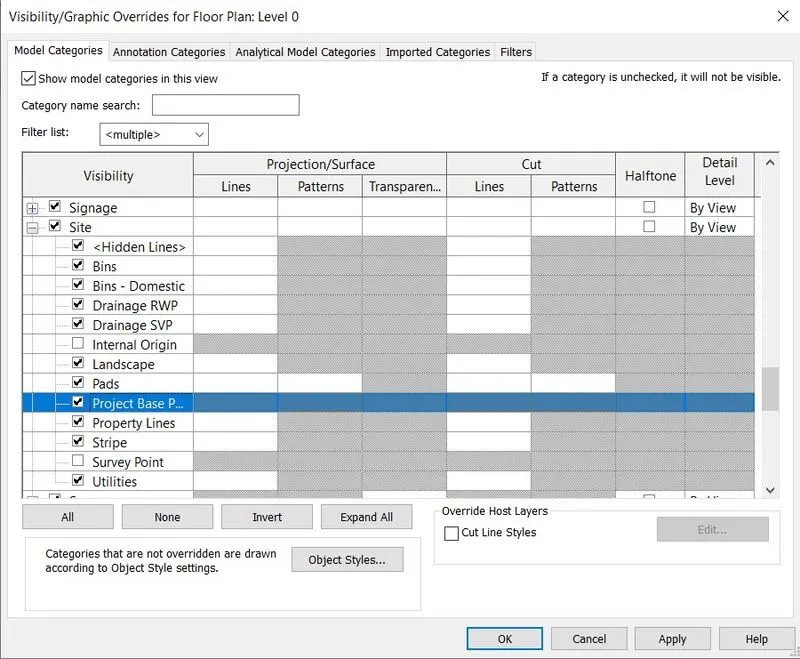
- To open Visibility/Graphics dialogue box VG command is given.
- In the dialogue box Select Site-> Project base point.
- Select the tick mark to make it visible and click on Apply and OK.
- The project basepoint is denoted on the screen.
- Click on it and drag it to the intersection of grids to create the project basepoint.
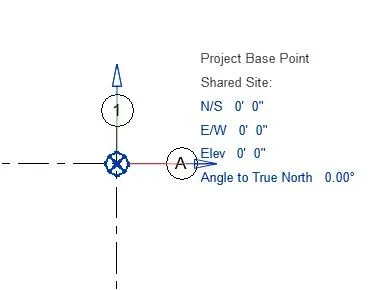
FINAL RESULT:
Project basepoint and Project shared coordinates have been set in the new project.
2)
AIM:
- To open a new structural template and using the manage tab set project parameters the same as the architectural model.
- To copy the parameters from the architectural model to the structural template or enter the parameters manually into the structural model.
PROCEDURE:
STEP 1:
- Open a New Structural template in Revit from File-> New.
- Create two grids and name them from Datum panel in Architecture Tab.
STEP 2:
- To specify coordinates at the grids that were created select Manage tab-> Coordinates-> Specify coordinates at point.
STEP 3:
- Select the grid and in the dialogue box that appears specify new coordinates as 0'0".
- When the Transverse grid is selected Specify new coordinates 0'0" in North/South.
STEP 4:
- To open Visibility/Graphics dialogue box VG command is given.
- In the dialogue box Select Site-> Project base point.
- Select the tick mark to make it visible and click on Apply and OK.
- The project basepoint is denoted on the screen.
- Click on it and drag it to the intersection of grids to create the project basepoint.
FINAL RESULT:
Project basepoint and Project shared coordinates have been set in the new Structural template manually.
3)
AIM:
- To Re-open the architectural model.
- To use the tools under the Collaborate tab make the architectural model a central model (enabling simultaneous working on the model).
PROCEDURE:
- Open the Architectural model previously saved from File-> Open-> Project.
- In the model select Collaborate tab-> Collaborate.
- The following dialogue box appears:
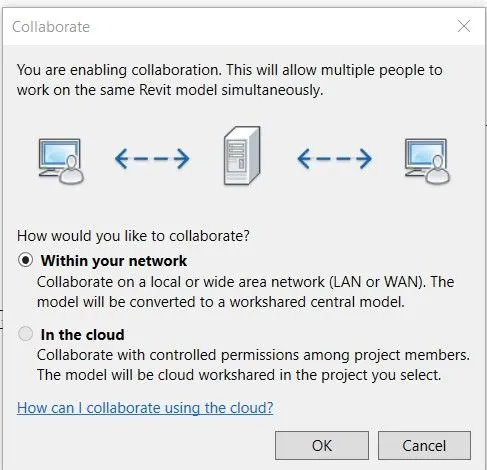
- Select Within your Network option and click on OK.
- Then to save the model click on Save option from file.
- In the dialogue box that appears select Yes to set the model as central model.
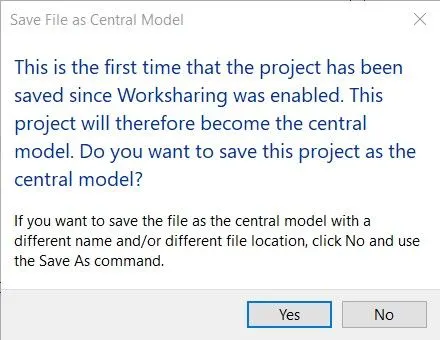
FINAL RESULT:
The Architectural model has been opened and saved as Central model using Collaborate tab.
4)
AIM:
- To create the Grids Longitudinal and Transverse pattern for the project similar to the task done in Week 2.
PROCEDURE:
- Open the Architectural model from File-> Open.
- Select Grids from Datum panel.
- Select pick line option from Draw panel and give an offset of 10' for the longitudinal grids.
- Select the exisiting grid line to create more grid lines with the specified offset.
- Repeat the same process for the longitudinal grids but specify offset as 20'.
- Rename the grids according to convention .
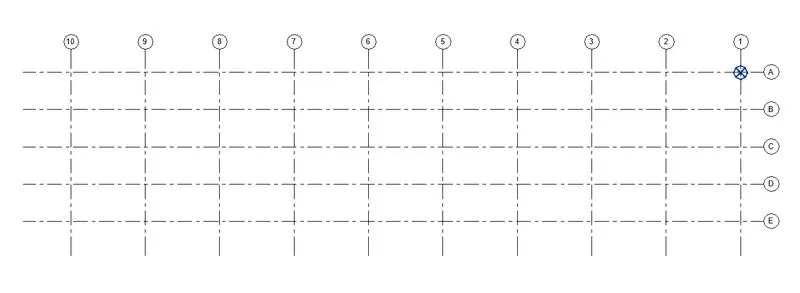
FINAL RESULT:
The Grids Longitudinal and Transverse pattern have been create as previously done in week 2.
5)
AIM:
- To synchronize the changes from the local copy to the central file of the architectural model.
PROCEDURE:
- In the Architectural model where the grids have been created select Collaborate tab.
- In the Collaborate tab select
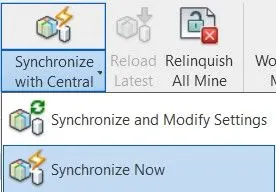
- Select the Synchronize Now option to synchronize current local model immediately with the cloud.
- To modify settings of the model to be saved select Synchronize and Modify settings option.
FINAL RESULT:
The changes have been syncronized from the local copy to the central file of the model.
6)
AIM:
- To open the structural model and use the collaborate tools to save the model as a central file.
PROCEDURE:
- Open the Structural model previously saved from File-> Open-> Project.
- In the model select Collaborate tab-> Collaborate.
- The following dialogue box appears:
- Select Within your Network option and click on OK.
- Then to save the model click on Save option from file.
- In the dialogue box that appears select Yes to set the model as central model.
FINAL RESULT:
The Structural model has been opened and saved as Central model using Collaborate tab.
7)
AIM:
- To select the grids and levels from the architectural model, and using Copy Monitor try to copy the grids to the structural model.
- To see what happens when the copy monitored grid is moved around in the structural model.
PROCEDURE:
STEP 1:
- Open the structural model from File-> Open.
- Select Manage tab-> Manage links.
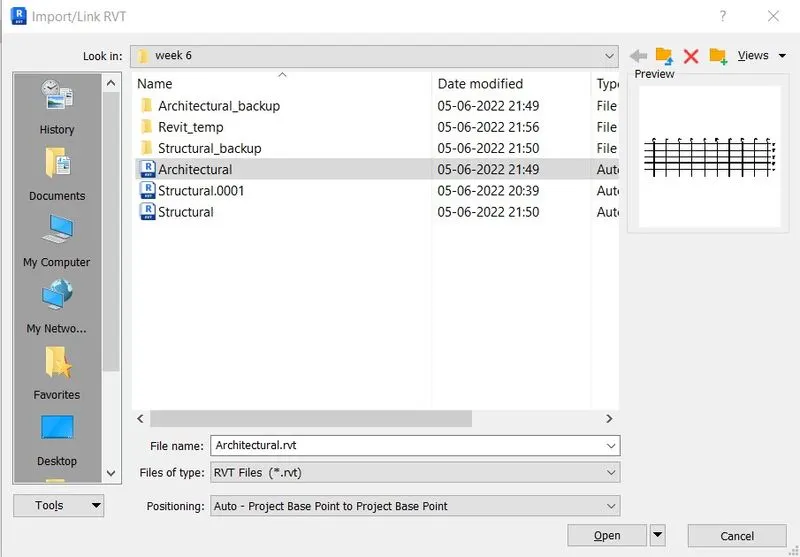
- In the dialogue box that opens select Add and link the Architectural model.
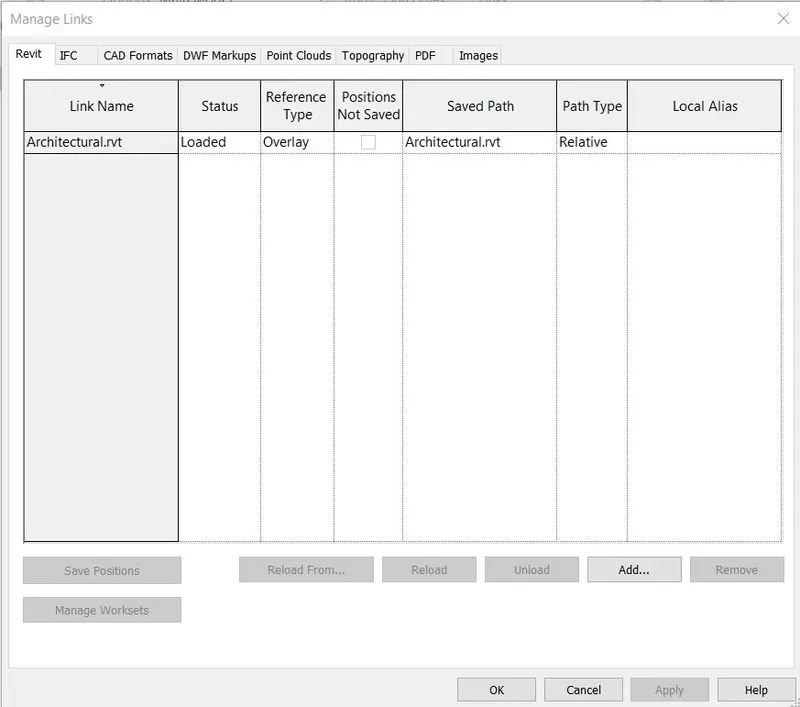
- In positioning select Auto- Project base point to Project base point and open the model.
STEP 2:
- Select Copy/Monitor from the Collaborate tab.
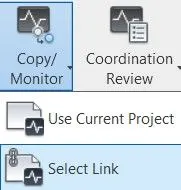
- Click on Select link-> Copy.
- Select the inserted link.
- Check the Multiple check box and select all the Grids.
- Click on Finish.
- To check if the Grids are copied from Architectural model to Structural model give VG command-> Revit links and uncheck the Architectural.rvt link.
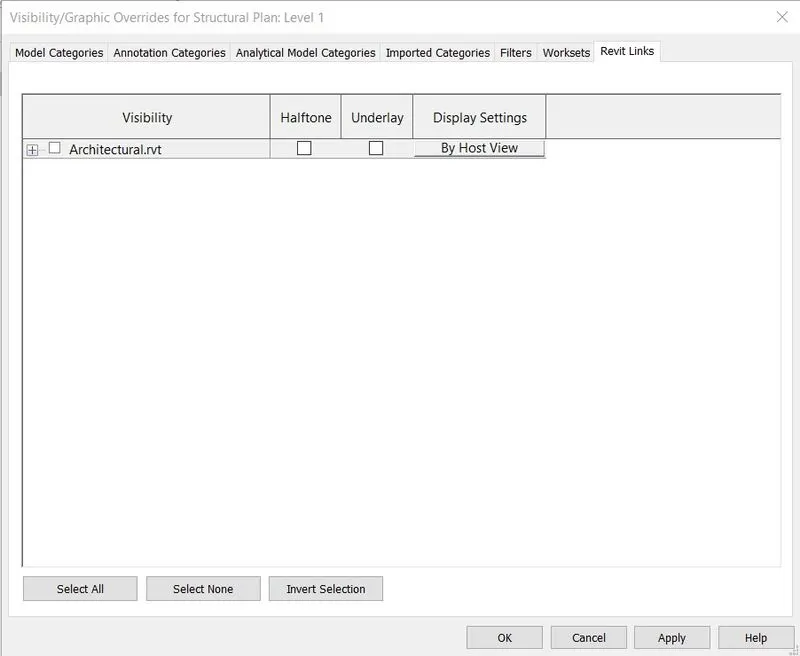
- The Grids are visible in Structural model therefore they have been succesfully copied.
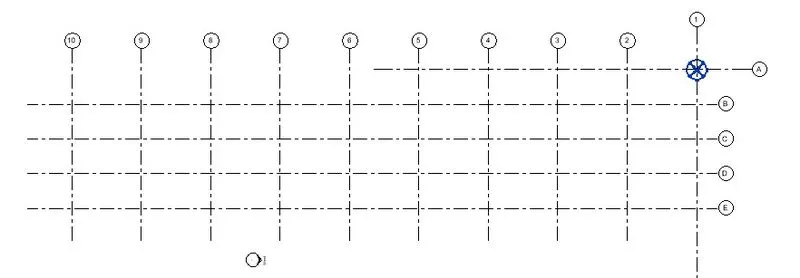
STEP 3:
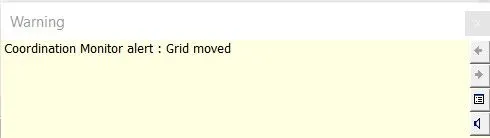
- When Grids are moved around the following warning appears indicating changes in the central model.
FINAL RESULT:
The grids and levels from the architectural model were copied to the structural model using Copy Monitor succesfully. What happens when a grid is altered has also been illustrated.
8)
AIM:
- To create another new file with a construction template and save the new file as a central model.
- To include both architectural and structural model in this file usig the manage tab.
- To save the file and close all the files.
PROCEDURE:
STEP 1:
- Select File-> New and open a Construction template.
- In the model select Collaborate tab-> Collaborate.
- The following dialogue box appears:
- Select Within your Network option and click on OK.
- Then to save the model click on Save option from file.
- In the dialogue box that appears select Yes to set the model as central model.
- The Construction model has been opened and saved as Central model using Collaborate tab.
STEP 2:
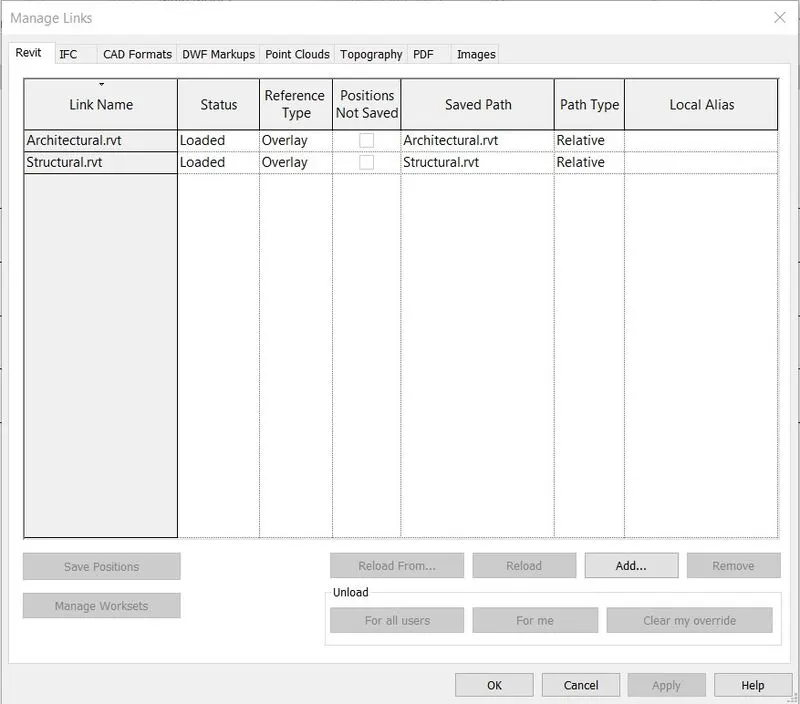
- Select Manage tab-> Manage links.
- In the dialogue box that opens select Add and link the Architectural and structural models.
- Click on OK.
FINAL RESULT:
A construction template has been opened and saved as a central model and the Architectural and Structural models have been added to the Construction model. succesfully.
9)
AIM:
- To check if the grids from structural and architectural model matching in the construction template created.
- To work on the shared parameters and linking options under Manage links ( Hint: origin to origin, by shared coordinates or by project base point to base point ) to link the models in an appropriate manner if they are not matching.
The Construction model:
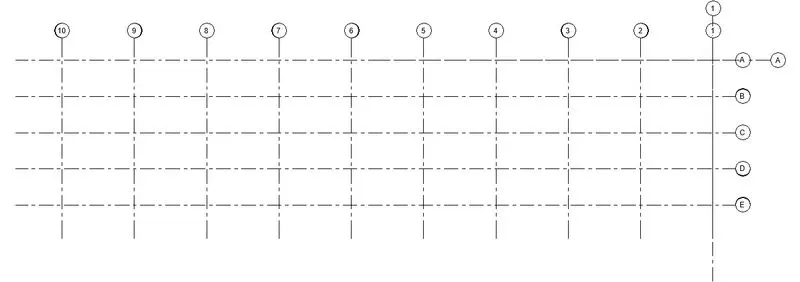
FINAL RESULT:
As seen in the Construction model the Architectural and Structural grids which were linked are matching and therefore ready for project 2.
10)
AIM:
- To list a flow chart of a project tree set up in terms of Construction model, Architecture & Structure model, in this exercise and understand how many people can work on the same project using Revit simultaneously.
Answer:
Flow chart of a Project tree:
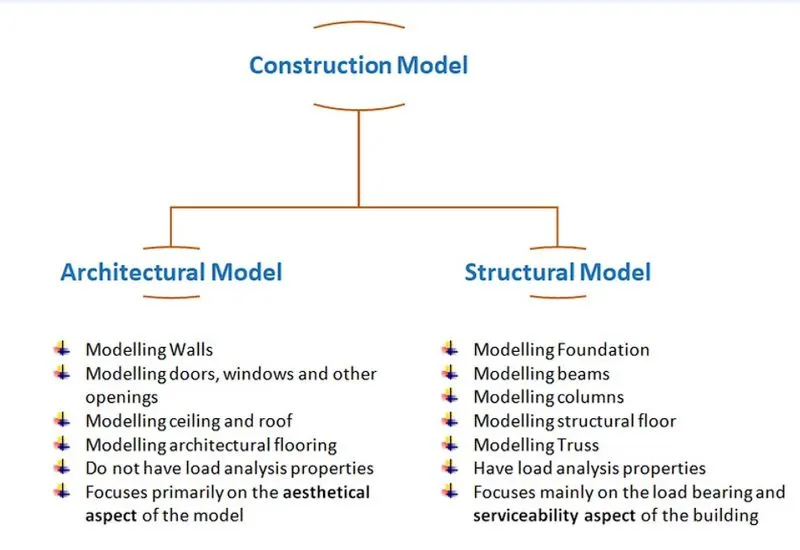
People who can work on the same project simultaneously can include:
- Architects
- Structural Engineers.
- Mechanical Engineers
- Electrical and plumbing Engineers. etc.