Usage of Collaborate tool in REVIT
Ans.1.
Open an architectural template. Using the Manage tab set project base point and project shared coordinates for the project
Aim :- Open an architectural template. Using the Manage tab set project base point and project shared coordinates for the project.
Introduction :- Open an architectural template. Using the Manage tab set project base point and project shared coordinates for the project.
Procedure :-
- Open architecture tab
- Open manage tab
- Click on project coordinates and then specific shared coordinates
- In north/south type 0'0".
- In east/west type 0'0".
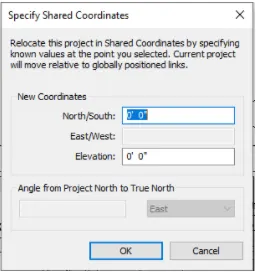
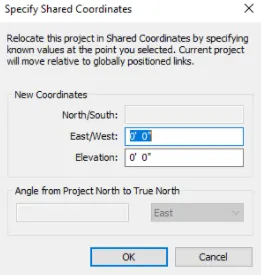
To create base point
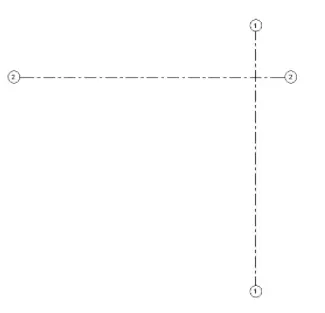
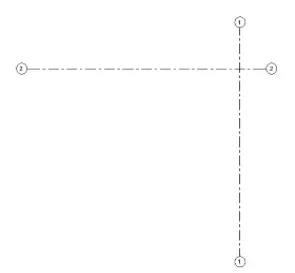
- Select architectural tab and select grid and draw grids
- Rename the grids
- Select the manage tab and select specify coordinates at point and select one grid specific as 0'0"
- Select specify coordinates at point and select another grid and specific as 0'0".
Result :-
The project base point and shared coordinates are created.
Ans.2.
Open another new file but with a structural template. Using the manage tab set project parameters the same as the architectural model. Copy the parameters from the architectural model to the structural template or enter the parameters manually into the structural model.
Aim :- Open another new file but with a structural template. Using the manage tab set project parameters the same as the architectural model. Copy the parameters from the architectural model to the structural template or enter the parameters manually into the structural model.
Introduction :- Open another new file but with a structural template. Using the manage tab set project parameters the same as the architectural model. Copy the parameters from the architectural model to the structural template or enter the parameters manually into the structural model.
Procedure :-
- Open new file.
- Click on structural template
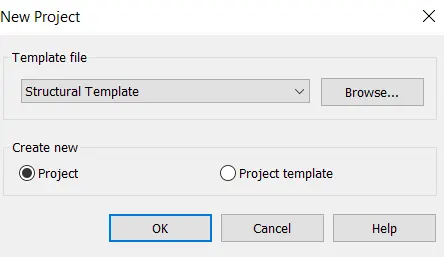
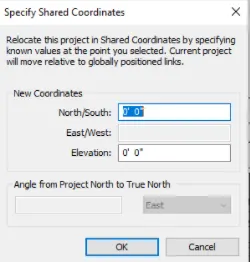
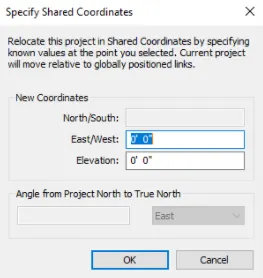
- Go to manage tab > project coordinates >shared coordinates
- In north/south type 0'0".
- In east/west type 0'0".
Result :-
The project parameters are created in Structural plan.
Ans.3.
Open another new file but with a structural template. Using the manage tab set project parameters the same as the architectural model. Copy the parameters from the architectural model to the structural template or enter the parameters manually into the structural model.
Aim :- Open another new file but with a structural template. Using the manage tab set project parameters the same as the architectural model. Copy the parameters from the architectural model to the structural template or enter the parameters manually into the structural model.
Introduction :- Open another new file but with a structural template. Using the manage tab set project parameters the same as the architectural model. Copy the parameters from the architectural model to the structural template or enter the parameters manually into the structural model.
Procedure :-
- Open the architectural template file in Revit.
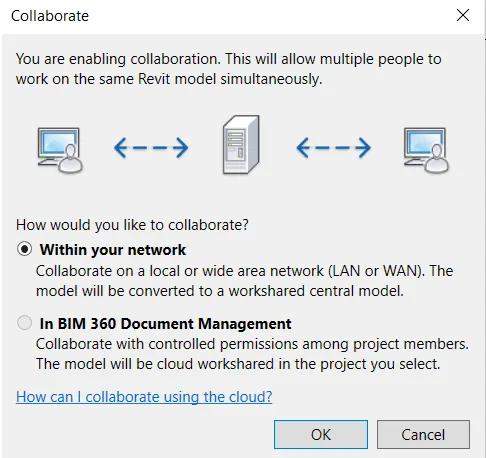
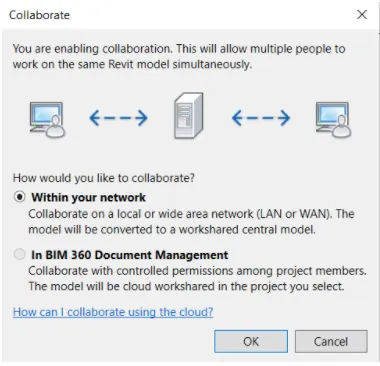
- Select collabrate tab and select collabrate.
- Two option will appear on screen.
- Select the option within the network and press ok
Result :-
The architectural model is made central model using collaborate tool.
Ans.4.
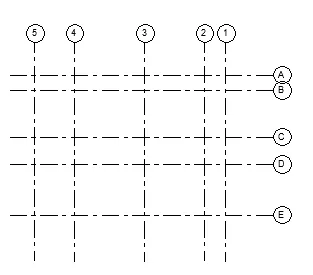
Create the Grids Longitudinal and Transverse pattern for the project similar to the task done in Week 2
Aim :- Create the Grids Longitudinal and Transverse pattern for the project similar to the task done in Week 2
Introduction :- Create the Grids Longitudinal and Transverse pattern for the project similar to the task done in Week 2
Procedure :-
- Open the architectural template file in Revit.
- Go to architectural tab > datum tab > grids
- Draw the grids in transverse and longitudnal direction according to plan of project.
- Reanme grids as per standards.
Result :-
The architectural grids are drawn.
Ans.5.
Synchronize the changes from the local copy to the central file of the architectural model.
Aim :- Synchronize the changes from the local copy to the central file of the architectural model.
Introduction :- Synchronize the changes from the local copy to the central file of the architectural model.
Procedure :-
- Open the file in Revit.
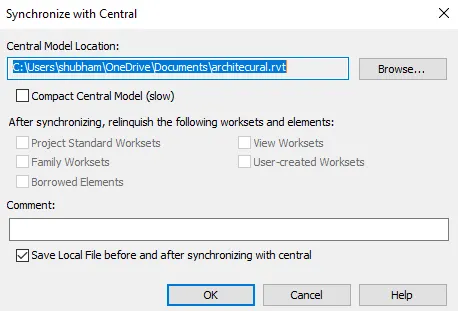
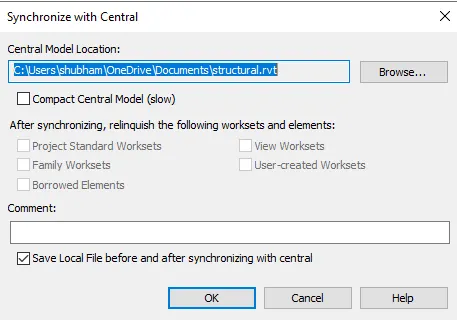
- Select manage tab and select Synchronize tab, then click OK
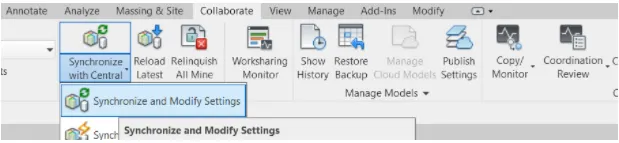
- The drawing will be Synchronize with central file
Result :-
The Synchronizeis done.
Ans.6.
Open the structural model and use the collaborate tools to save the model as a central file.
Aim :- Open the structural model and use the collaborate tools to save the model as a central file.
Introduction :- Open the structural model and use the collaborate tools to save the model as a central file.
Procedure :-
- Open the architectural template file in Revit.
- Select collabrate tab and select collabrate.
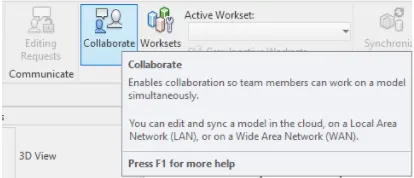
- Select the collabrate within your Network, save it as saving for first time it will make a Central file
- The Synchronize with Central and Modify
Result :-
The model is drawn .
Ans.7.
Under the Collaborate tab, select the grids and levels from the architectural model, and using Copy Monitor try to copy the grids to the structural model. See what happens when the copy monitored grid is moved around in the structural model.
Aim :- Under the Collaborate tab, select the grids and levels from the architectural model, and using Copy Monitor try to copy the grids to the structural model. See what happens when the copy monitored grid is moved around in the structural model.
Introduction :- Under the Collaborate tab, select the grids and levels from the architectural model, and using Copy Monitor try to copy the grids to the structural model. See what happens when the copy monitored grid is moved around in the structural model.
Procedure :-
- Open the architectural tab and select collabrate tab, select copy monitor and select link, so then our Structural drawing is linked
- Select grids and levels and select multiple and select copy
- Select finish command
- Open Structural template file and we can find grids and column in that file
Result :-
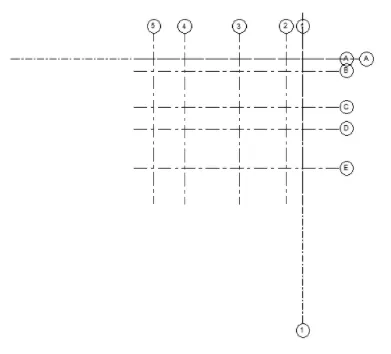
The Structural grids are drawn.
Ans.8.
Create another new file with a construction template. Save the new file as a central model. This file will include both architectural and structural model. Under the manage tab, Click manage links to link both architectural and structural files. Save the file and close all the files.
Aim :- Create another new file with a construction template. Save the new file as a central model. This file will include both architectural and structural model. Under the manage tab, Click manage links to link both architectural and structural files. Save the file and close all the files.
Introduction :- Create another new file with a construction template. Save the new file as a central model. This file will include both architectural and structural model. Under the manage tab, Click manage links to link both architectural and structural files. Save the file and close all the files.
Procedure :-
- Open new file and save it to Construction template.
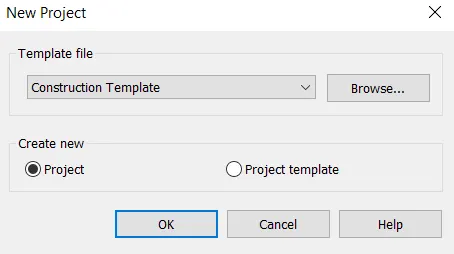
- Select collabrate tab and select collabrate file to central
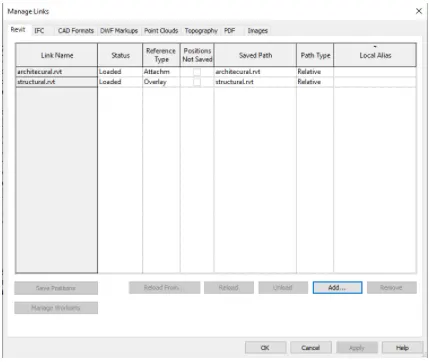
- Select mange tab and select manage link
- Select both Architectural and Structural template and press Ok
- Both file will open in combined form
Result :-
Ans.9.
Are the grids from structural and architectural model matching in the construction template created? If yes the model is set up for project 2. If not work on the shared parameters and linking options under Manage links
( Hint: origin to origin, by shared coordinates or by project base point to base point ) to link the models in an appropriate manner)
Aim :- Are the grids from structural and architectural model matching in the construction template created? If yes the model is set up for project 2. If not work on the shared parameters and linking options under Manage links ( Hint: origin to origin, by shared coordinates or by project base point to base point ) to link the models in an appropriate manner)
Introduction :- Are the grids from structural and architectural model matching in the construction template created? If yes the model is set up for project 2. If not work on the shared parameters and linking options under Manage links ( Hint: origin to origin, by shared coordinates or by project base point to base point ) to link the models in an appropriate manner)
Procedure :-
- Open the architectural template and select manage tab
- In manage tab, Select manage links, and select structural template drawing.
- Both grids will appear in arch templates and it si snot coincinding
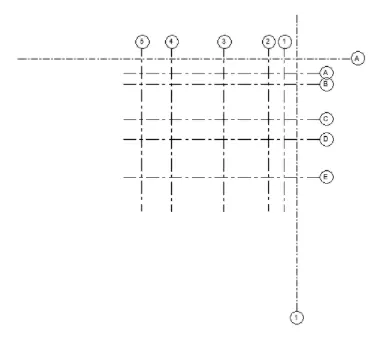
- Select arch grid and select acquire coordinates and select the arch template grid
- Select position icon and click relocate position and select intersection point of grid
- The grids will be positioned
Result :-
The grids are drawn.
Ans.10.
List a flow chart of a project tree set up in terms of Construction model, Architecture & Structure model, in this exercise and understand how many people can work on the same project using Revit simultaneously
Aim :- List a flow chart of a project tree set up in terms of Construction model, Architecture & Structure model, in this exercise and understand how many people can work on the same project using Revit simultaneously
Introduction :- List a flow chart of a project tree set up in terms of Construction model, Architecture & Structure model, in this exercise and understand how many people can work on the same project using Revit simultaneously
Procedure :-
- For Construction model flow chart is as follows
Site access
Logistic and storage
Quality control
Outstanding contract detail
Outstanding design- related changes
Healthy and Safety
- For Architectural model flow chart is as follows
Schematic design
Design development
Construction documnet
Bidding
Construction administration
- For Structural model flow chart is as follows
The primary objective is to make the structure capable of all applied loads without any failure throughtout ite life span.
Once the architecure or Engineer sets the function and layout of structure, many things have to sumerised by the Structural engineer
Result :-
The points are discussed above.