Usage of Collaborate tool in REVIT
1) Aim of these project is to set project base point and project shared coordinates in an architectural template.
Procedure:
a) Open the Revit and create a new file by opening an architectural template.
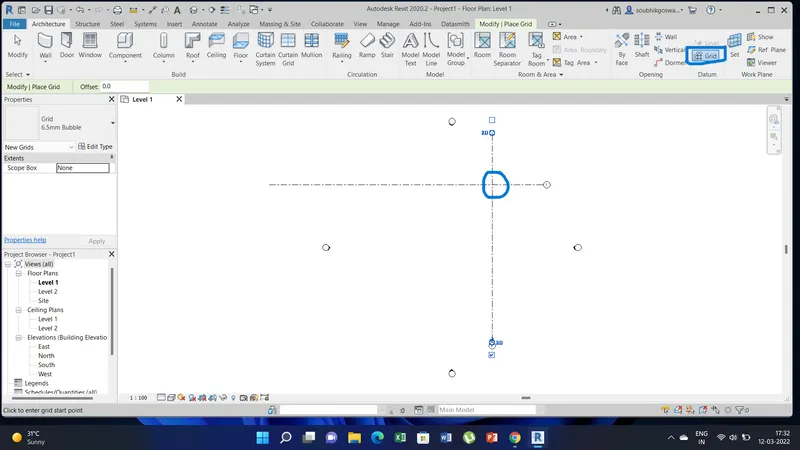
b) Now go the grid option in the ribbon menu under the architecture tab.
c) Create the grids in in both direction, than we will get a point where both the grid meets.
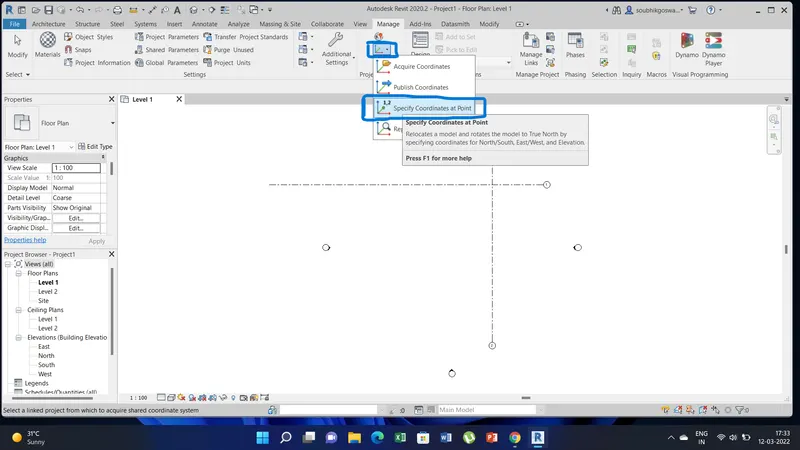
d) Now go to the manage tab and than select the coordinate option and than click the specify corrdinate at point.
e) Now a new tan will open up there we need to set eas/west to zero and than click ok.
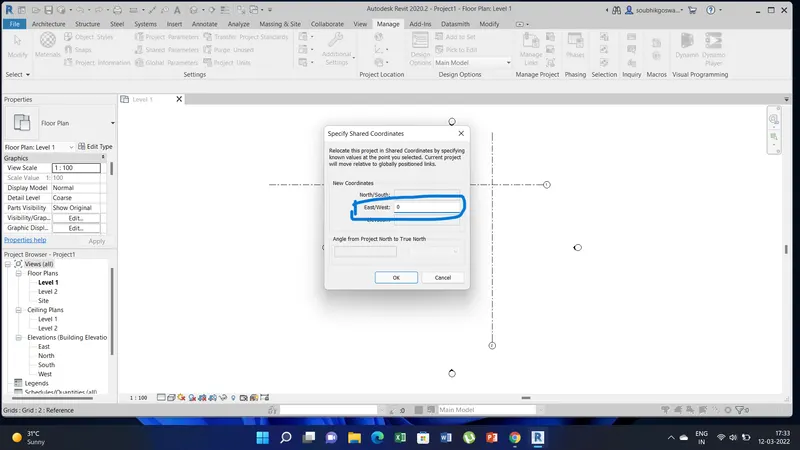
f) Now place the point in the interestion of the grid line.
g) Type the VG than the visibility graphics overides menu opens up. There we need to select the site option.
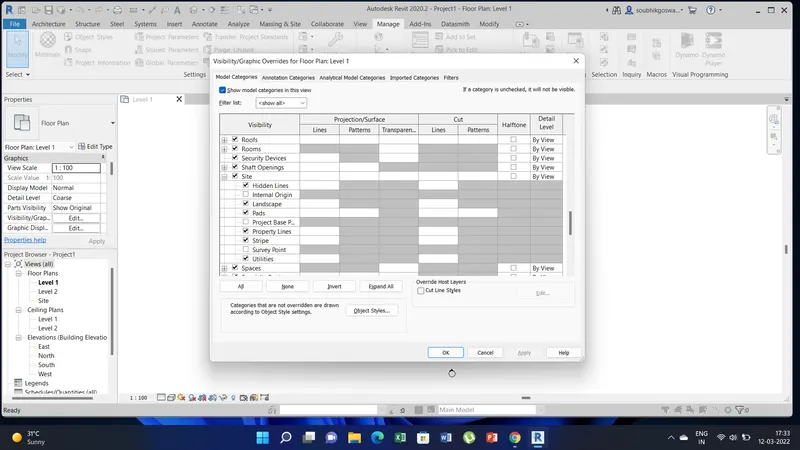
h) Than click the project base point option than click apply and ok.
i) Than we will see the project base point icon click and drag the icon to the intersection of the grid line it will show up all the details of the intial coordinate of the project.
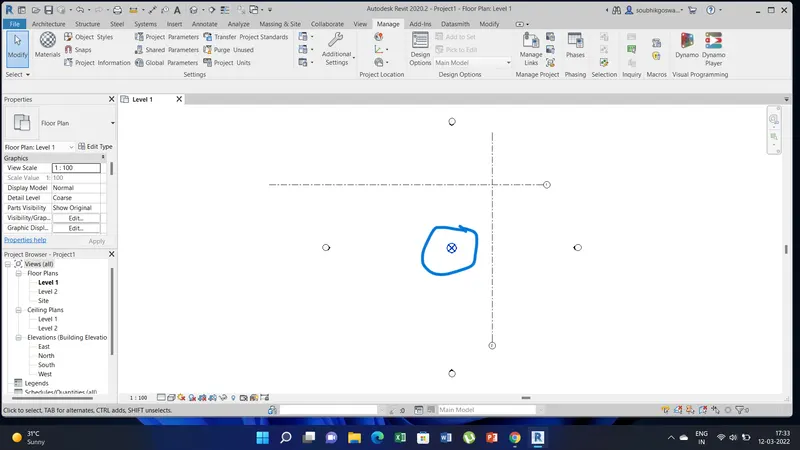
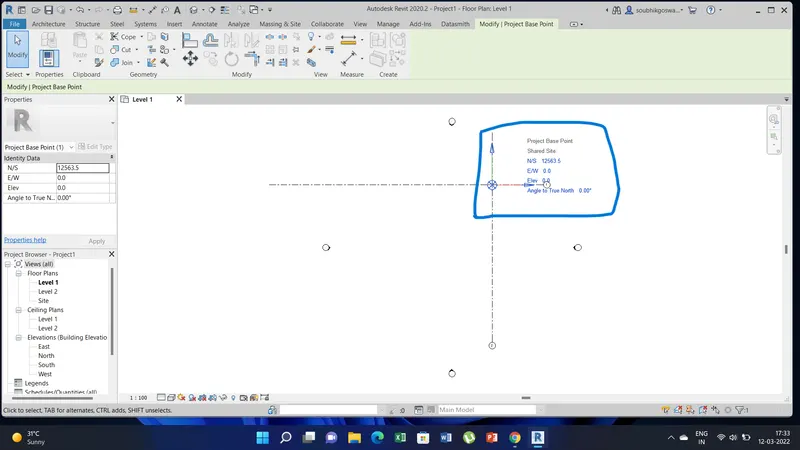
2) Aim of this project is to open another structural template and than set the project paramaters same as architectural model and than copy the parameters from the architectural model to the structural template or enter the parameters manually into the structural model.
Procedure:
a) Open the new file and create a new structural template just like architectural template.
b) Repeat the same steps as done in architectural template and than save the file as structural.
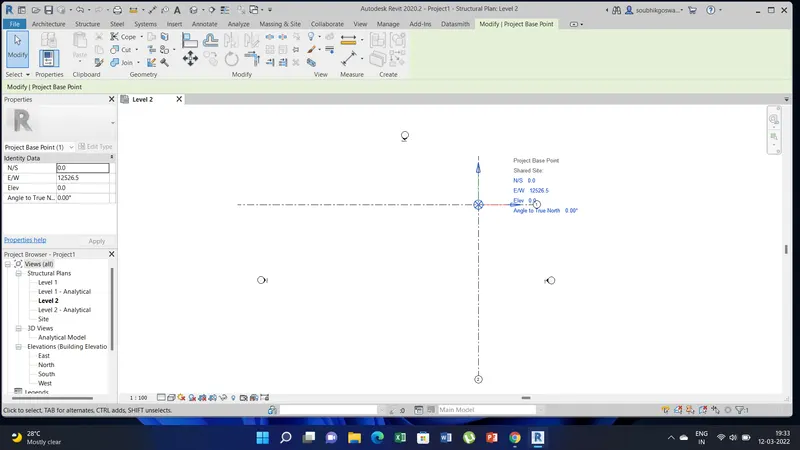
3) Aim of this project is to reopen the architectural model and by using the tools under the collaborate tab to make the architectural model a central model by enabling simultaneous working on the model.
Procedure:
a) Open the architectural file saved before.
b) Go to the collaborate tab and than select the collaborate option in the ribbon menu.
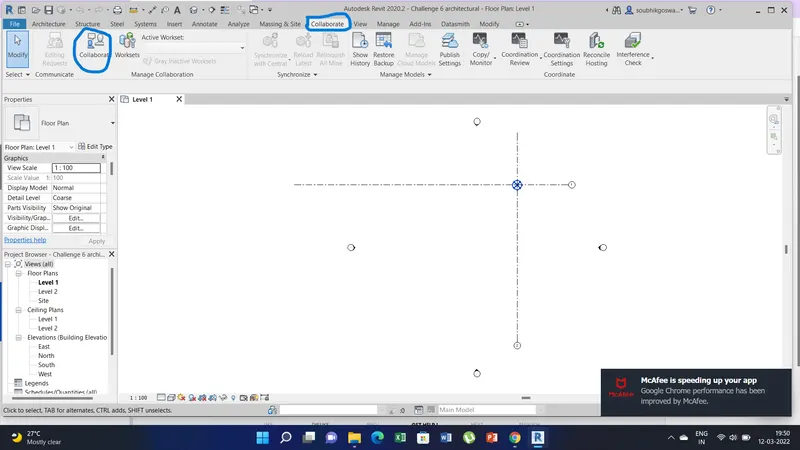
c) Than a pop up window appears with two option collaborate within network & cloud-Bim 360. I have selected collaborate within your network and than click ok.
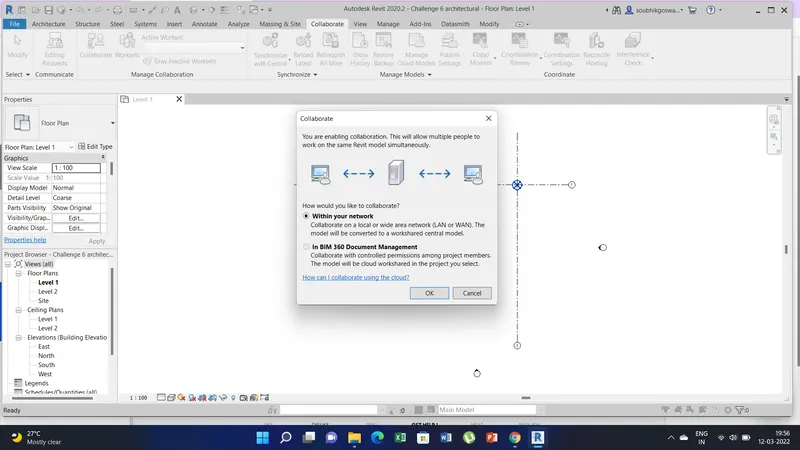
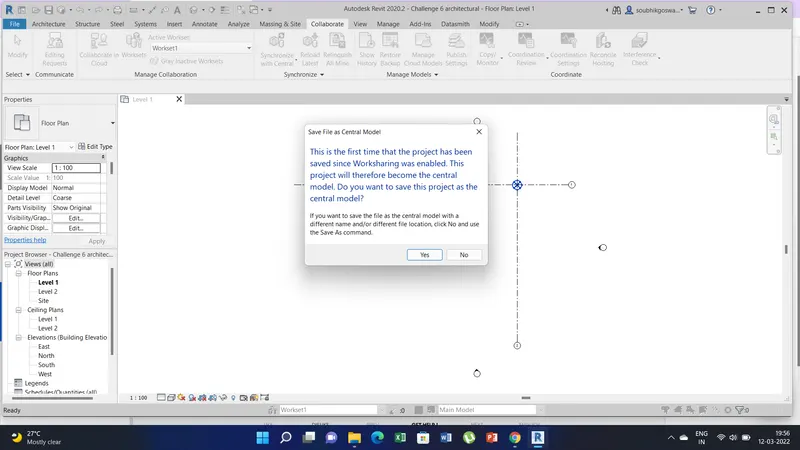
d) Now the file, while saving a pop up window appears. Click yes and it will collaborate.
4) Aim of this project is to create the grids longitudinal and transverse pattern for the project similar to the task done in Week2.
Procedure:
a) Open the architectural file saved before.
b) Go to the architecture tab and than click on the grib option in the ribbon menu.
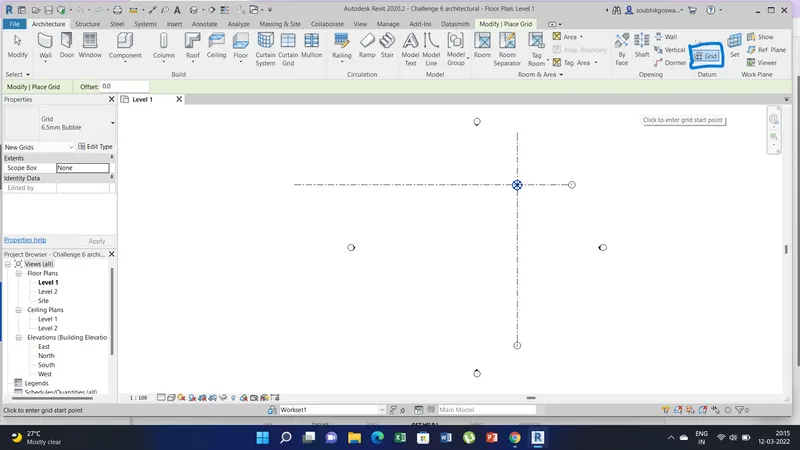
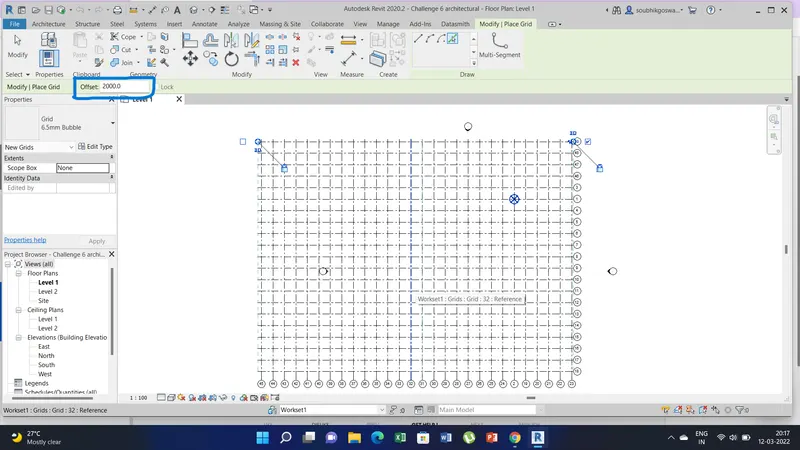
c) Now set the offset value as per spacing required in grid.
d) Now select the pick line option and click on face of the existing grid created before.
e) To create grids on right select the face of grid just right side of the existing grid vice versa for the left side.
f) Grids will be created and similarly for transverse grid follow the steps e. This is how we create grids in longitudinal and transverse by pick line option.
5) Aim of this project is to synchronize the changes from the local copy to the central file of the architectural model.
Procedure:
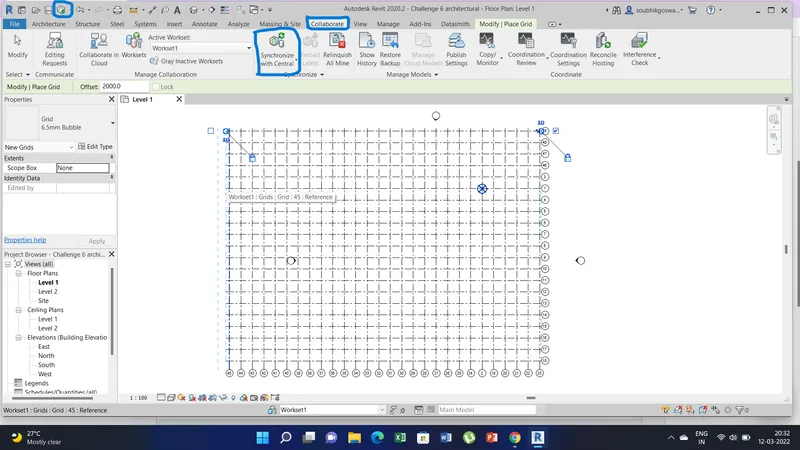
a) Go the collaborate tab and in ribbon menu select the option syncronize with the central. Same option is also there in the top menu bar.
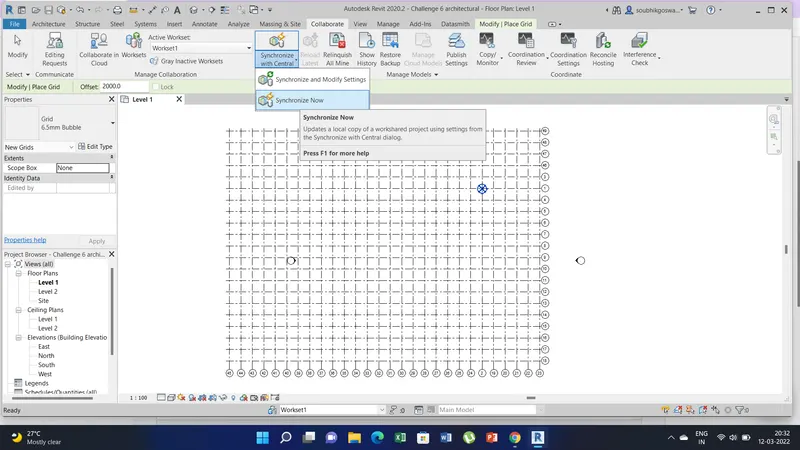
b) In the synchronize option we have two option synchronize with modify settings and synchronize now. For instant synchronize select the synchronize now option or to modify the settings select the synchronize with modify settings option.
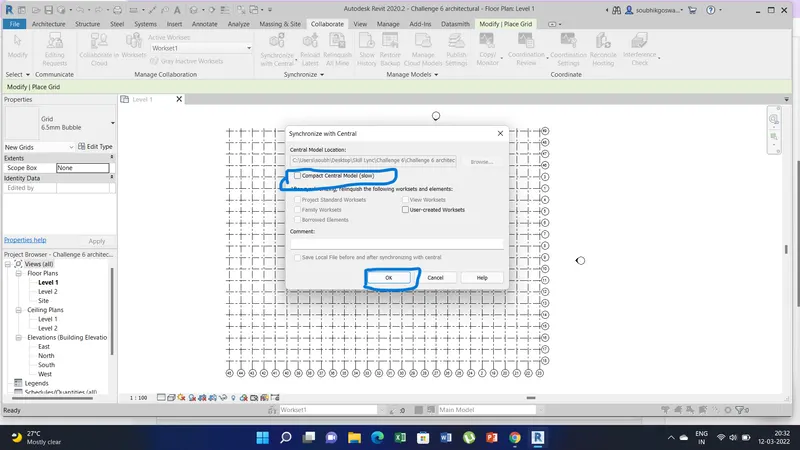
c) Now a pop up window appears there we need to tick the compact central model and than click ok. In this way we synchronize the central model file.
6) Aim of this project is to open the structural model and use the collaborate tools to save the model as a central file.
Procedure:
a) Open the structural file saved before.
b) Click on the collaborate tab and select the collaborate option from the ribbon menu.
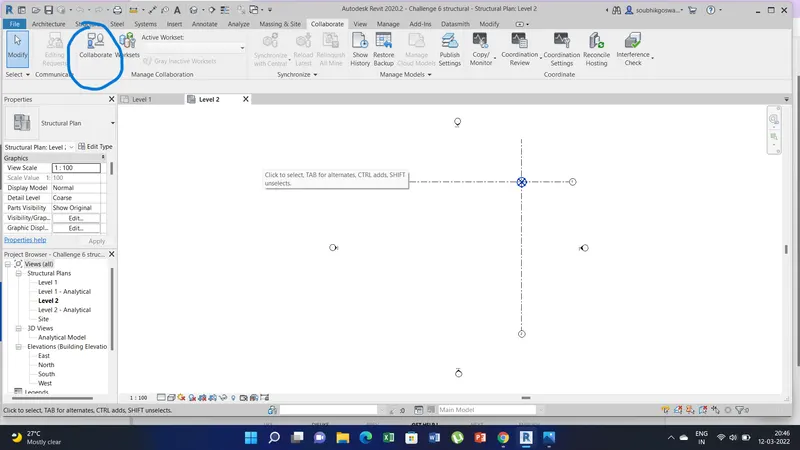
c) Now a pop window appears there we need to select the option within your network as done previously in the architectural file and than click ok.
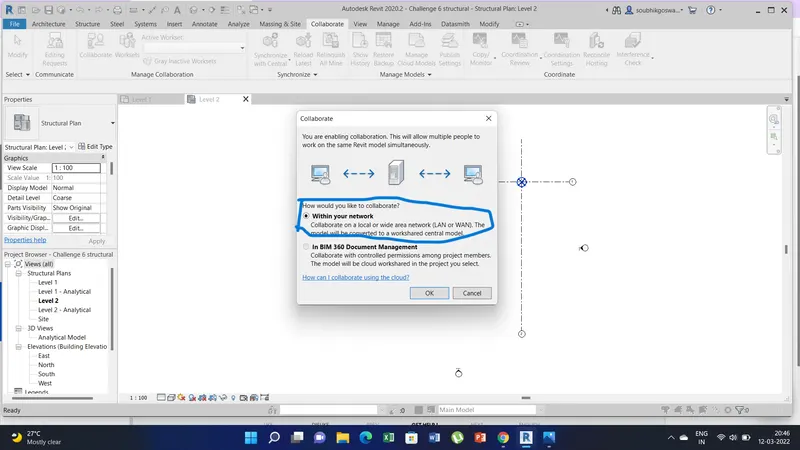
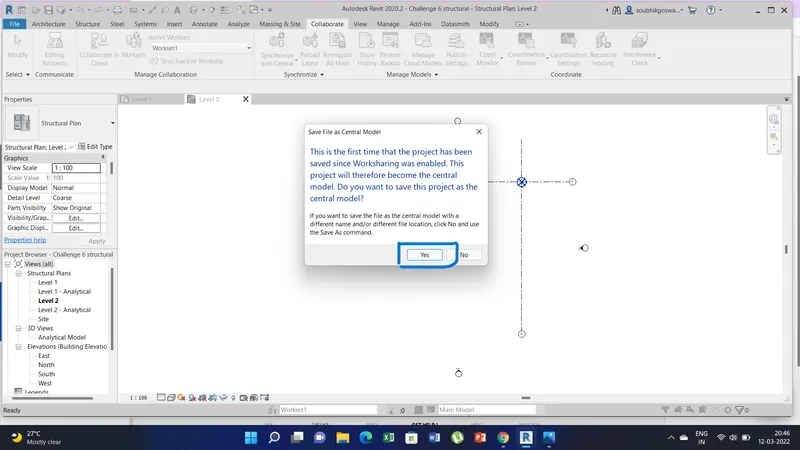
d) Now save the file than a pop up window appears there click yes. Now the structural model is collaborated and saved as central file.
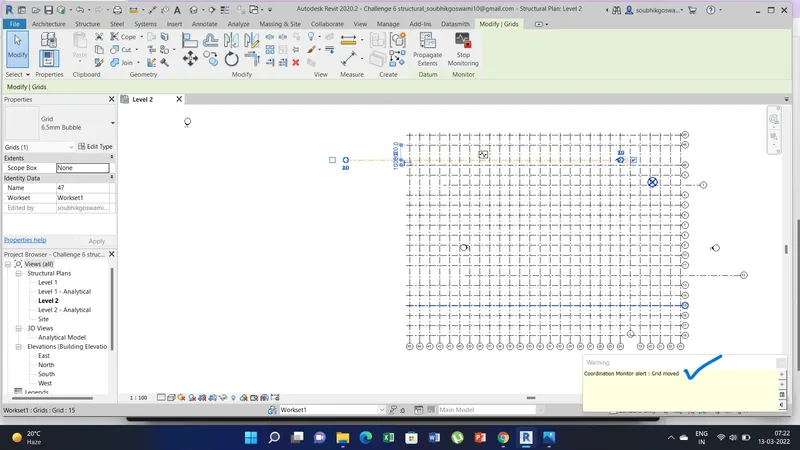
7) Aim of this project is by using the Collaborate tab,we have to select the grids and levels from the architectural model, and by using Copy Monitor to copy the grids to the structural model. And observe what happens when the copy monitored grid is moved around in the structural model.
Procedure:
a) First open the structural file and than go to the insert tab and select the link revit option from the ribbon menu.
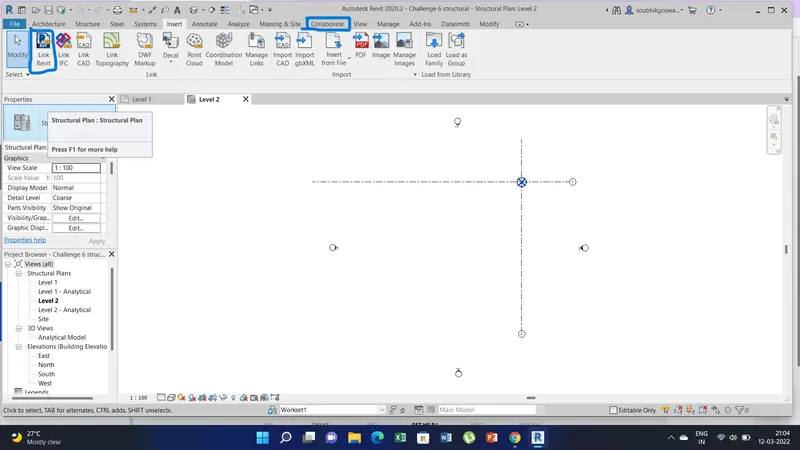
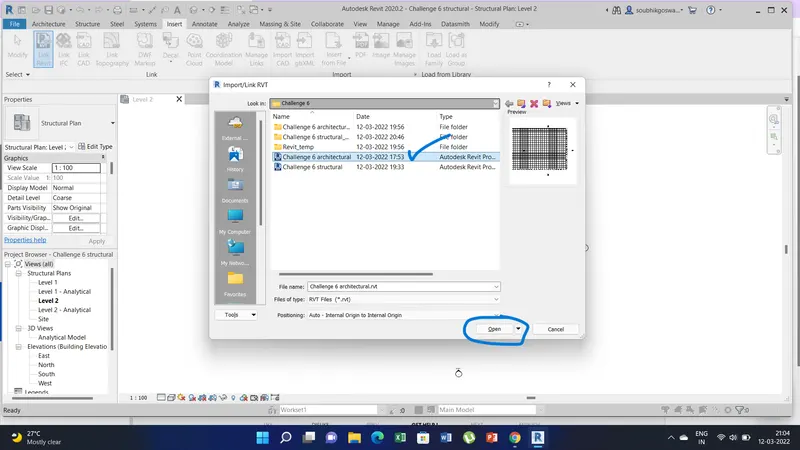
b) Now a pop up windows appears there we need to select the architectural file which was saved before and click open to link the architectural file to the structural file.
c) Now go the collaborate option and than select the copy/monitor option from the ribbon menu and select the "select link option"
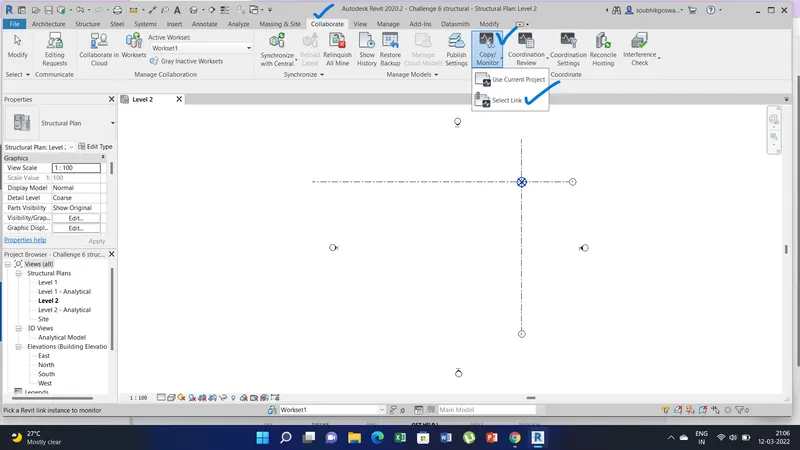
d) To check if the model has been copied or not type vg and select the revit link option and deselect the file and click apply. We can see the that the architectural model gets disappeared which show it has not been copied. Again type vg and reselect the file from the revit link option and click apply and ok.
e) When we click copy/monitor option copy and other option appears there first select the architectural model and than click the copy option and check the multiple option and click on finish.
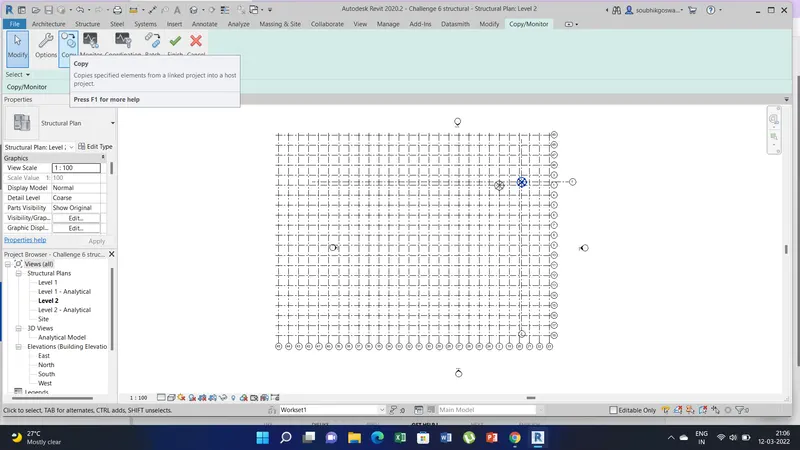
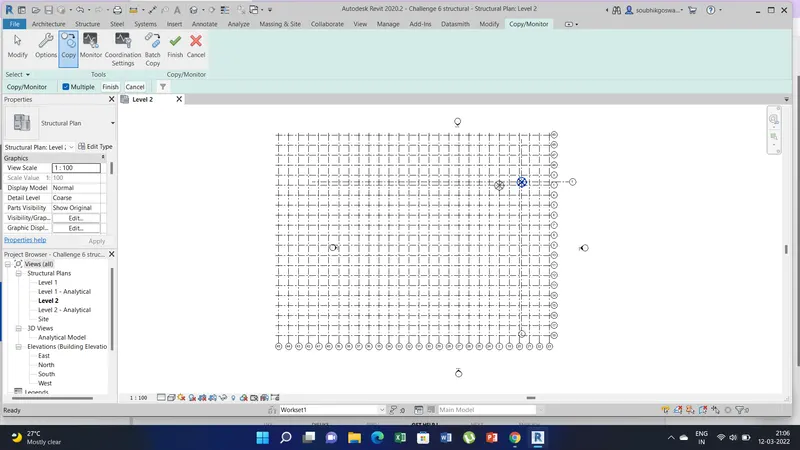
f) Again go to copy and monitor option and click the green tick. Now if you move the grid you get a notification coordination monitor alert.
8) Aim of this project is to create another new file with a construction template and than save the new file as a central model. And the file will include both architectural and structural model. And Under the manage tab, we need to manage links to link both architectural and structural files and than save the file and close all the files.
Procedure:
a) Go to the file option - new - project file. Than select the construction template and click ok.
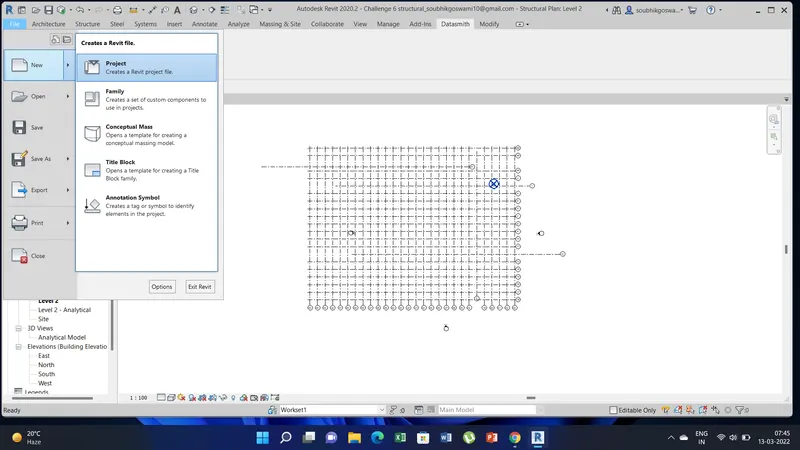
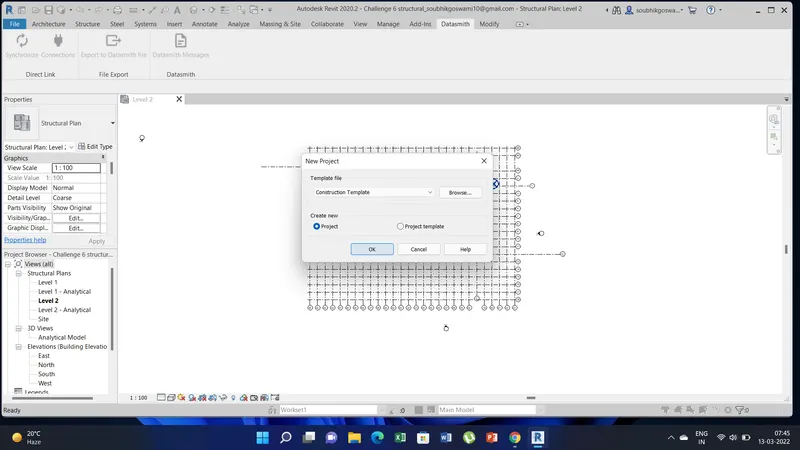
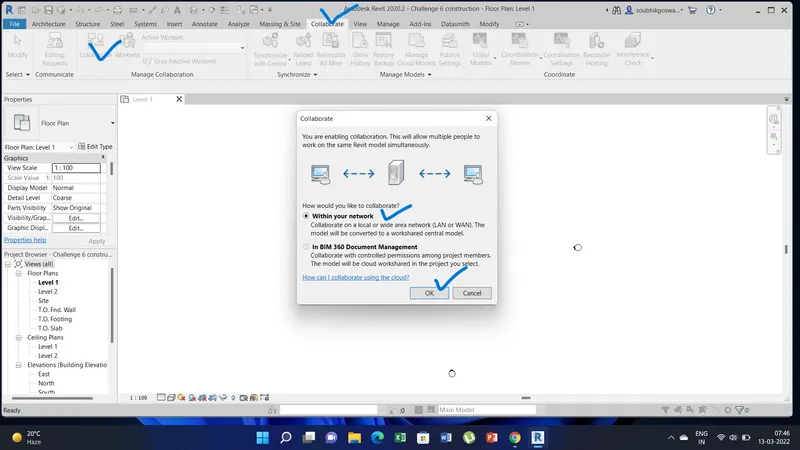
b) Now go to collaboration tab and than select the collaboration option in the ribbon menu.
c) Than a pop up window appears there select the the option within your network and than click ok as done before for architectural and structural file.
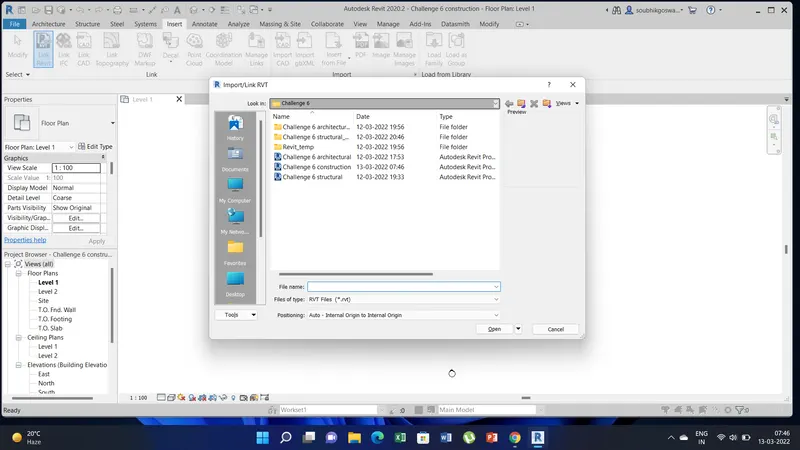
d) Now go to the insert tab there select the revit file link option in the ribbon menu. Link the architectural file than link the structural file one by one.
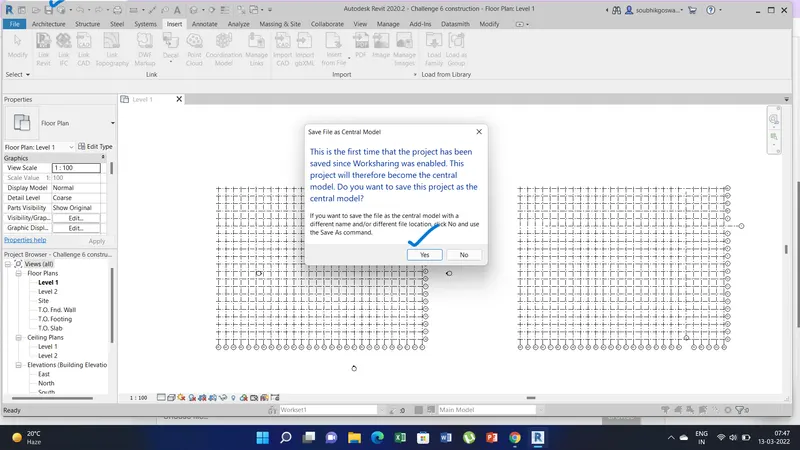
e) Now save the file and a popup window appears click yes.
9) Aim of this project is to check whether the grids of architectural and structural file are matching in the construction template.
Procedure:
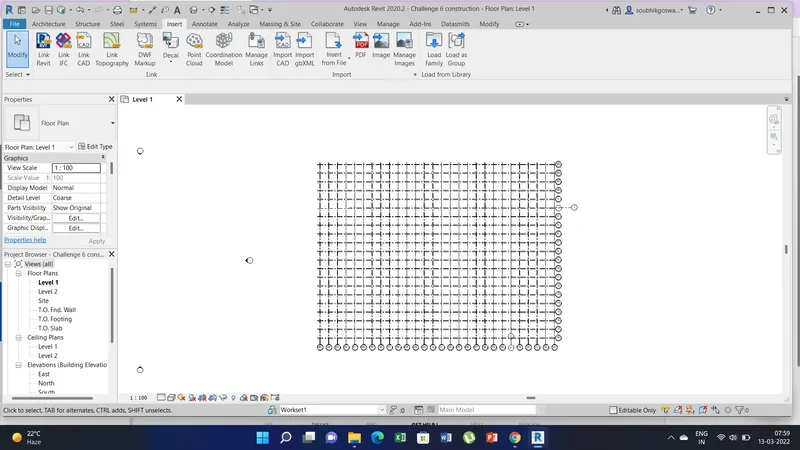
a) The architectural and structural file seems to match in the construction template.
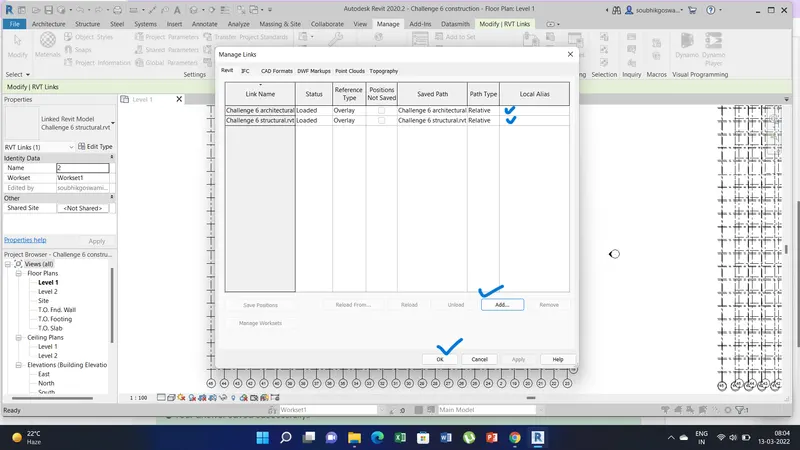
b) If it does not match than we need to go to the mange option there select the manage link option from the ribbon menu and select the architectural and structural file and link the file to match up with the construction template.
10) Aim of this project is to list out a flow chart of a project tree set up in terms of construction model, architecture & structure model,and understand how many people can work on the same project using Revit simultaneously.
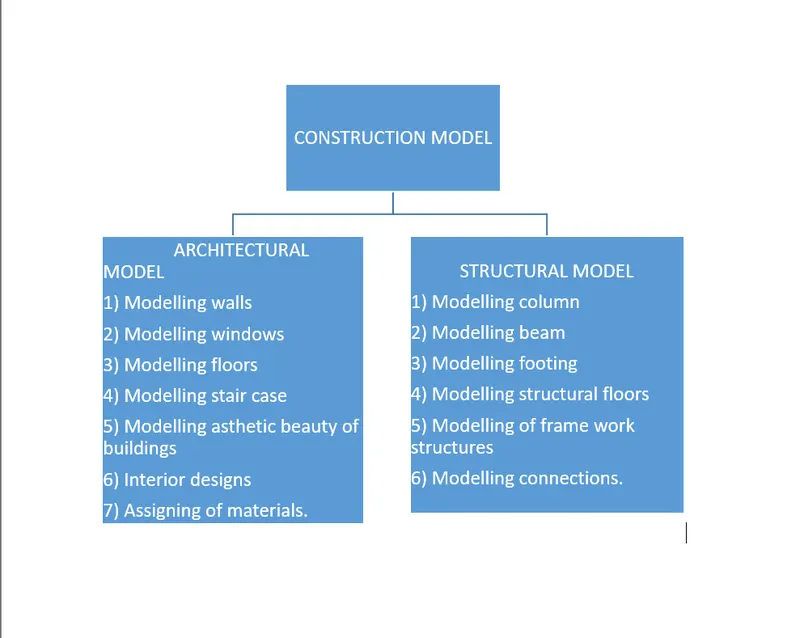
In revit multiple people can work simultaneously like architect, structural engineer, electrical etc. and it can be done by work sharing.