Creating Levels, Grids, Layout and model elements for a residential unit using REVIT
1) The aim of this project is to discuss about BIM & summarize the features of BIM. Also we will introduce here with the various benefits of using BIM over 2D CAD tools.
BIM: ‘BIM’ stands for Building Information Modelling. It is a process of creating and managing information on a construction project. It is a kind of digital description which includes a combination of rich 3d models and associated structured data. It basically represents a virtual presentation of building model.
Features of BIM:
- Easy access of information about building.
- Making the process more extensive and thus able to produce accurate cost and material estimates.
- More comprehensive overview of the project.
- Life Like views - Allows us to obtain various views from a building model and produce high quality & accurate drawings.
The main benefits of using BIM over 2D CAD tools is that it represents a complete design of building and provides detail information in a single database. It can also provide much more to the clients than we can do with CAD. Client can check the real time update on the project model which leads to quicker approval and more efficient project development. It allows to work in 5D over CAD i.e time and cost addition to length, breadth & Height.
2) The aim here is to understand the concepts of categories, families, elements, Instances in Revit. Here we will choose a category and then pick a family and element. And also understand the instances and how to insert it to Revit model.
Category: It schedules the family information and graphical representation within the project.
Family: A Family is a grouping of 2D or 3D information that serves to represent a discrete building or documentation element in the Project.
Elements, Instances: Each element you place in a drawing is an instance of a family type. Elements have 2 sets of properties that control their appearance and behavior: type properties and instance properties.
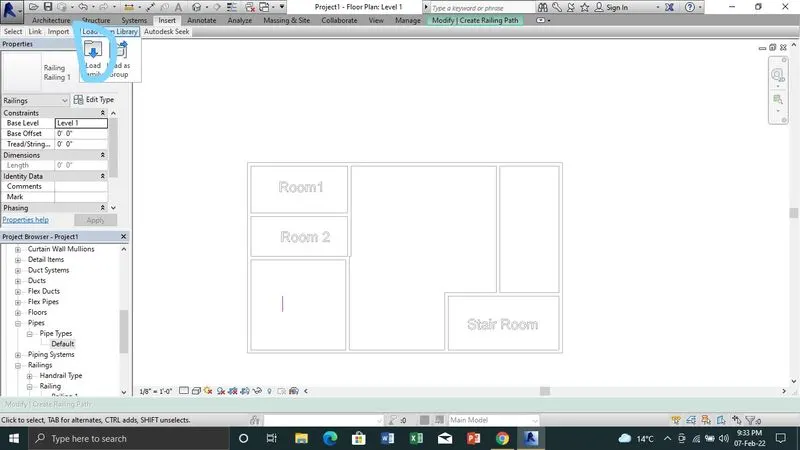
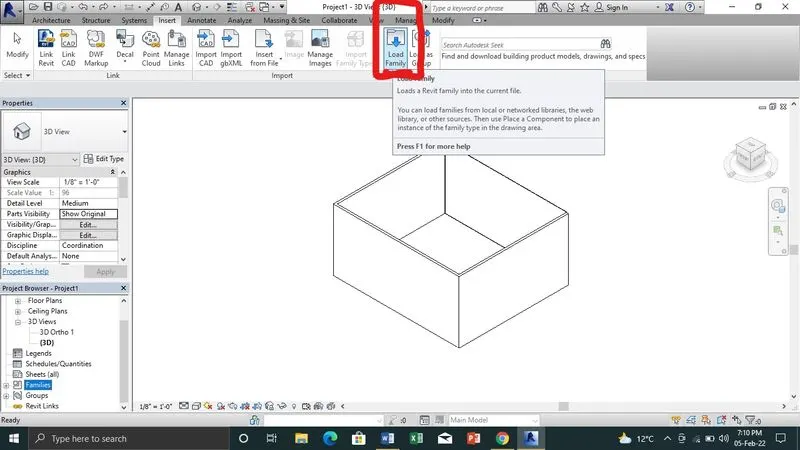
Steps: a) Opened the previous revit file. Go to inset tab. Under Insert tab go to load families. Here you can select the families available in revit doors, windows etc. Select the required type of familes-elements .
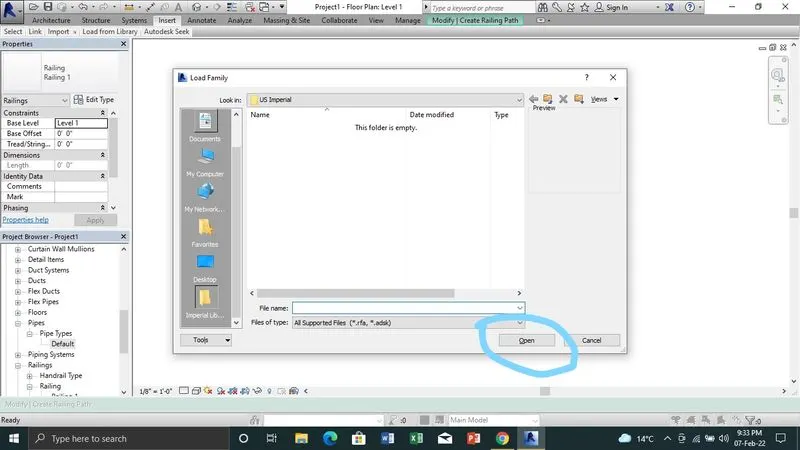
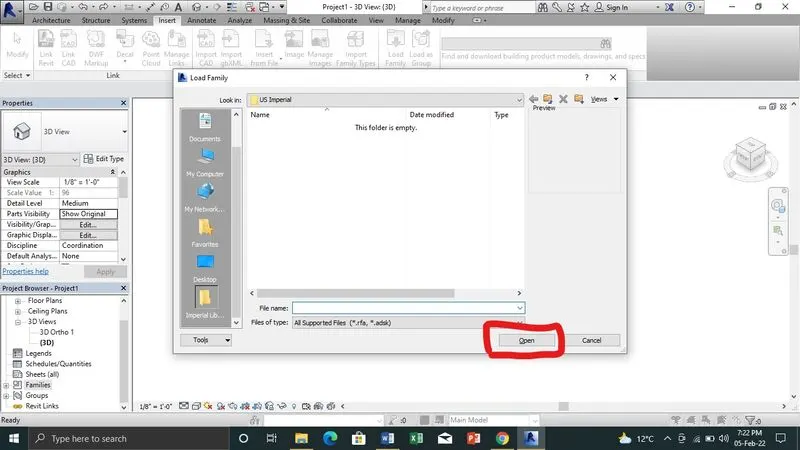
b) After that click on open and select type and place the element or instances in model plan.
3)Here the aim of this project is to understand the concept of setting up a project, how to open the revit file with the architectural template/ construction template. And also provide the appropriate name, complete the project information under the manage tab option and save the file by creating upto 3 backups.
Steps: a) First launch the revit software than you will get a screen like this shown below and select the New tab.
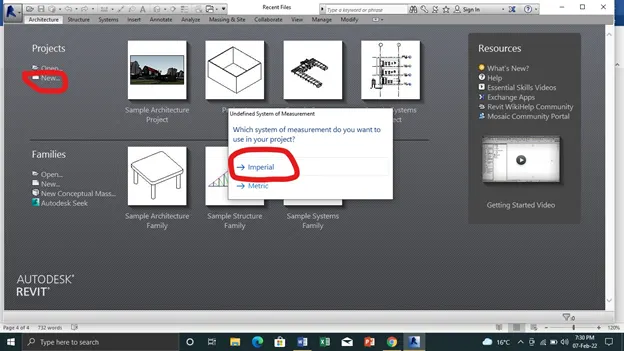
b)After that select project template and than click on imperial/ metric unit system.
c) Than under manage tab select settings and than click the project information tab.
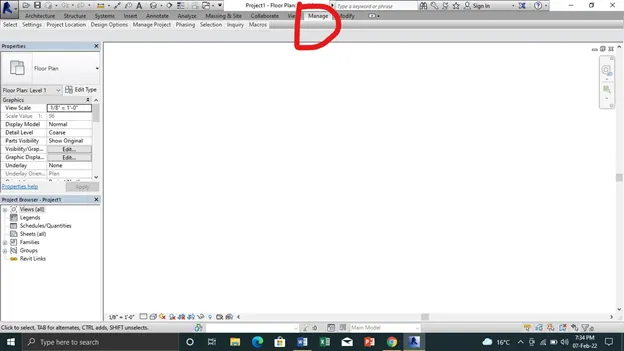
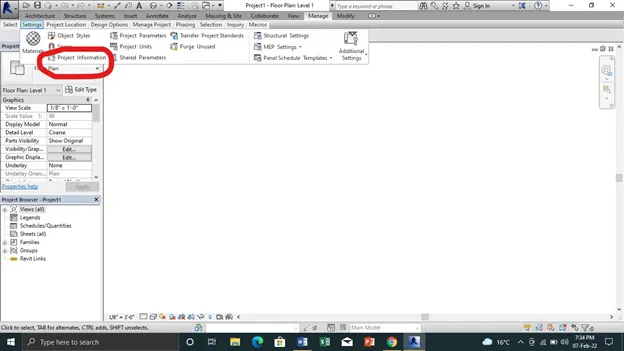
d)Than write the project parameters as shown below.
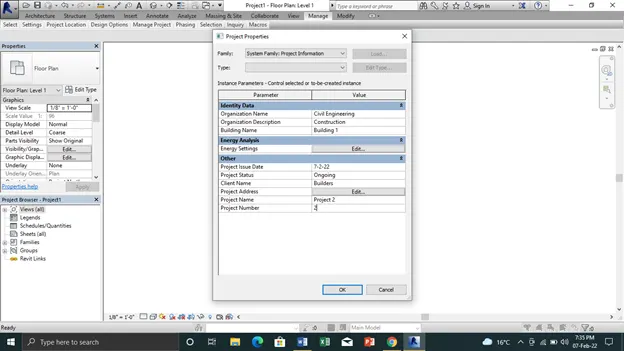
e)Than save the project with any name you want and select option tab and create backup option 3 and click on ok and save.
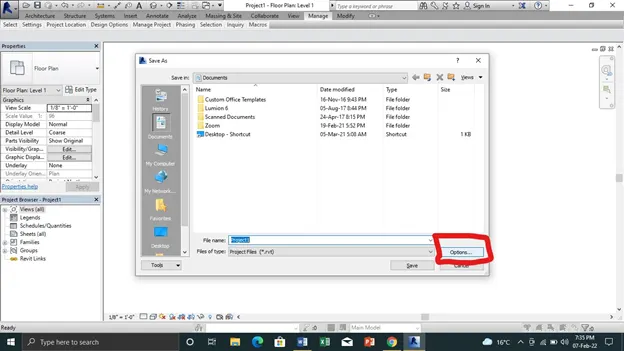
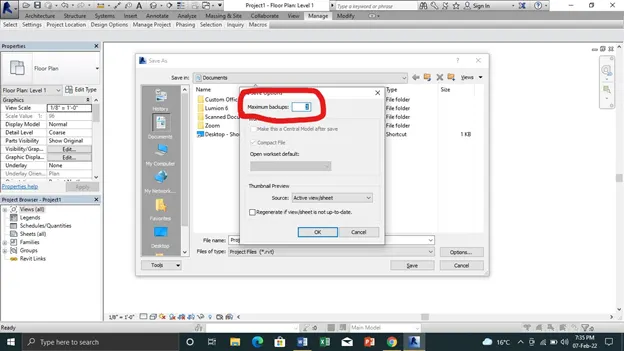
4) Aim of this project is to understand the concepts of level and grids and name the levels appropriately. Also we will create the various levels following GF, FF, SF, Roof levels at respective spacing as per question.
Steps: a)First and formost open new project-architectural template.
b) Than under project browser select the elevation option and than select east or as per site.
c) Than under architecture tab-datum levels option will be highlighted. click on the level option than create the appropriate levels and rename them as gf, ff, sf and roof level by double clicking on the level tag at 10' height respectively following the 10' offset option.
d) For creating grids project properties page than select floor levels GF. Create Transverse grid and rename them A,B,C,D,E at 10' spacing respectively. Similarly create longitudinal grid and rename them as 1,2,3,4,5....10 at 20' spacing respectively.
5) Aim of this project is to create a 3D model of residential building, access my own residential plan and create similar plan in revit.
Steps;
a) First create a new project file and name it as residential building and than save the file.
b) Create walls using architectural tab- wall option as per my residential building plan.
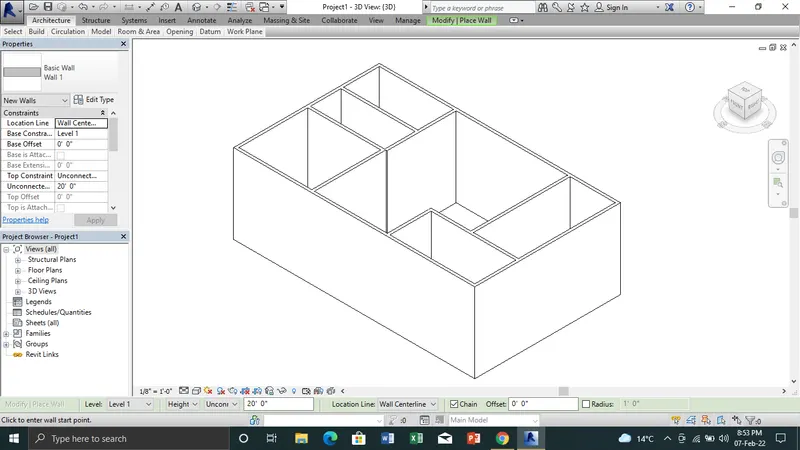
6) Aim of these project is to add details in previous residential plan. Provide dimensions of room, provide necessary details.
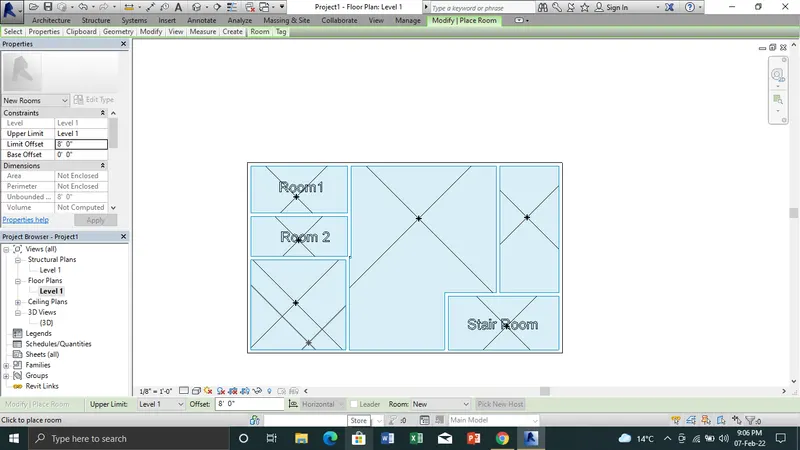
7) Aim of this project is to identify the residential model elements such as Door, Windows, Tables, Chair, Couch, Bed, Lamps from the library and insert them to the model.
Steps:
a) Go to insert tab and than select the load family option.
b) Than select the families and than select the respective elements you want to place in your model such as bed, couch etc.