Usage of Collaborate tool in REVIT
1) Open an architectural template. Using the Manage tab set project base point and project shared coordinates for the project.
Aim : To set the project base point and project shared coordinate for project in architectural template in Revit software.
Introduction
The project base point can be used to establish a reference for measuring distances and positioning objects in relation to the model.
When we combine multiple models and files in a single project, we use shared coordinates to establish the positions of the files in relation to each other.
Procedure :
step 1
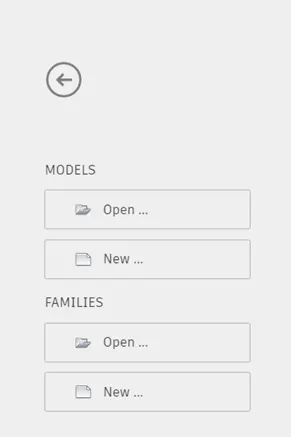
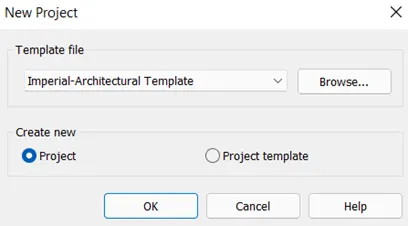
- open Revit software, select new option from model and create template file as imperial architectural template and select ok from new project window.
Step 2
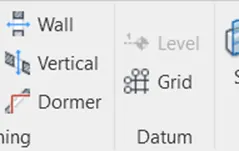
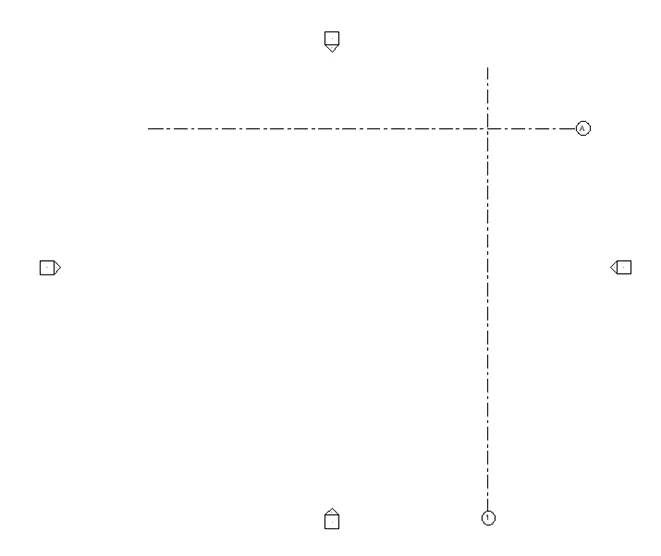
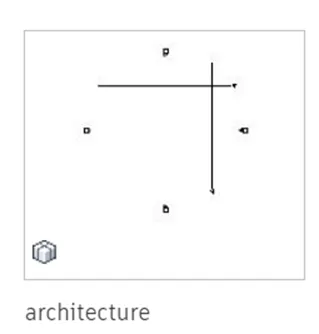
- Go to architecture tab, select grids tool from datum panel and draw one vertical and horizontal grid line and rename horizontal grid line with alphabet letter and vertical gri line with numerical as shown below.
Step 3
- Go to manage tab, select the coordinate tool from project location panel, select the specify coordinate at point option, select the grid line it will display the specify shared coordinate dialog box.
- Specify new coordinate as 0’0” and select ok.
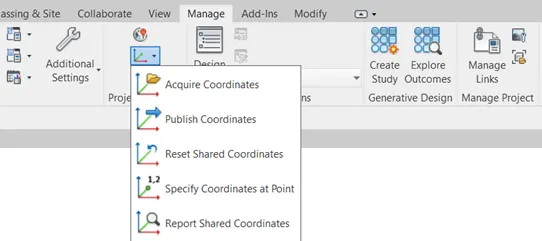
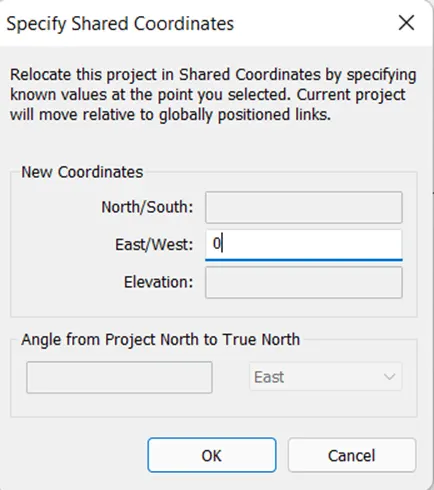
- Similarly select go to manage tab, select coordinate tool from project location panel, select specify shared coordinate, select another grid line and specify new coordinate as 0’0” ad select ok.
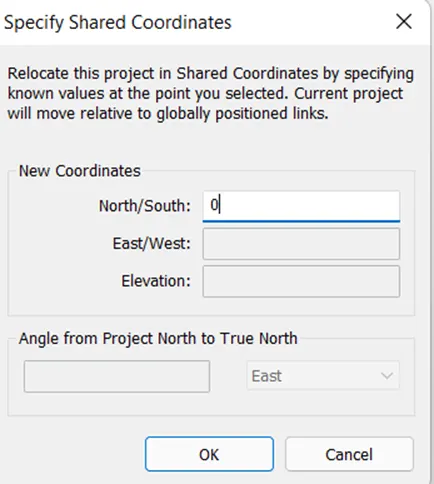
Step 4
- To set the project basepoint, type VG command to open the visibility graphics setting, it will display visibility dialog box, scroll down and expand the site option.
- Select the click mark on project basepoint, select apply and ok from dialog box.
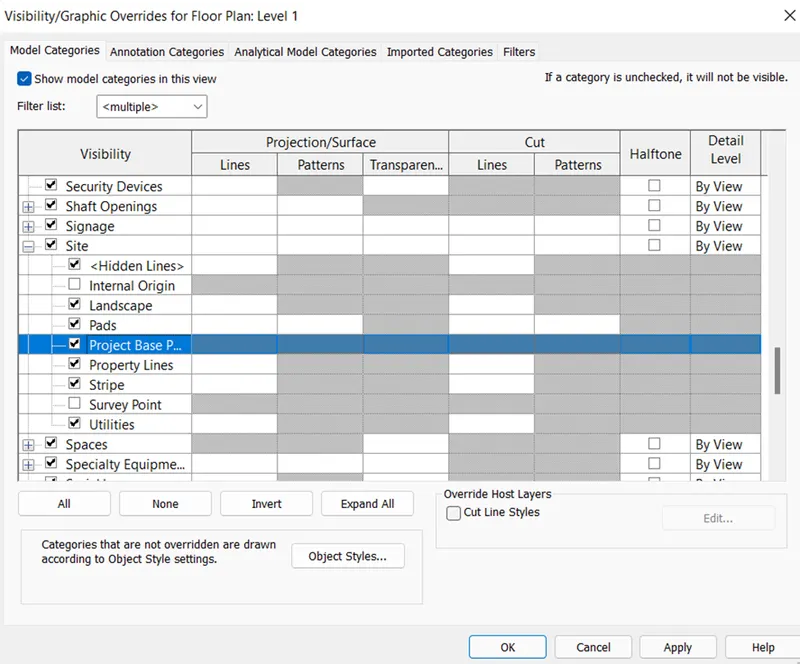
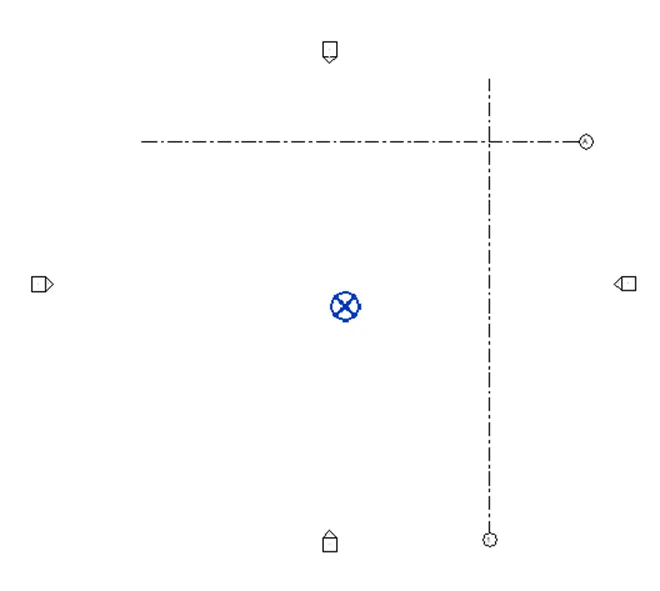
Step 5
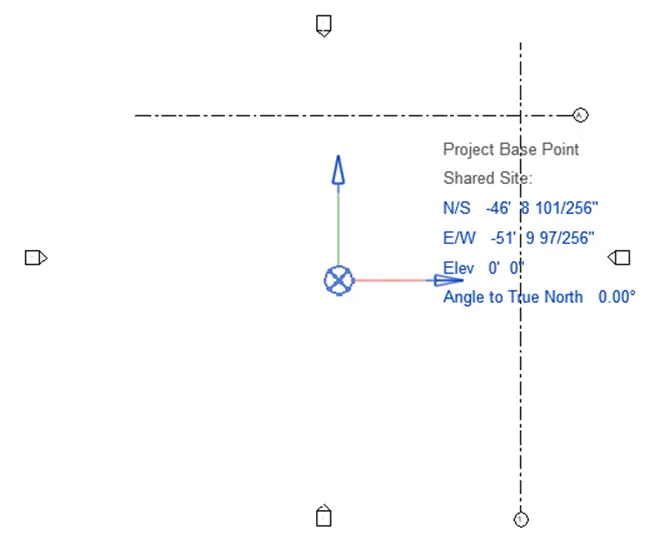
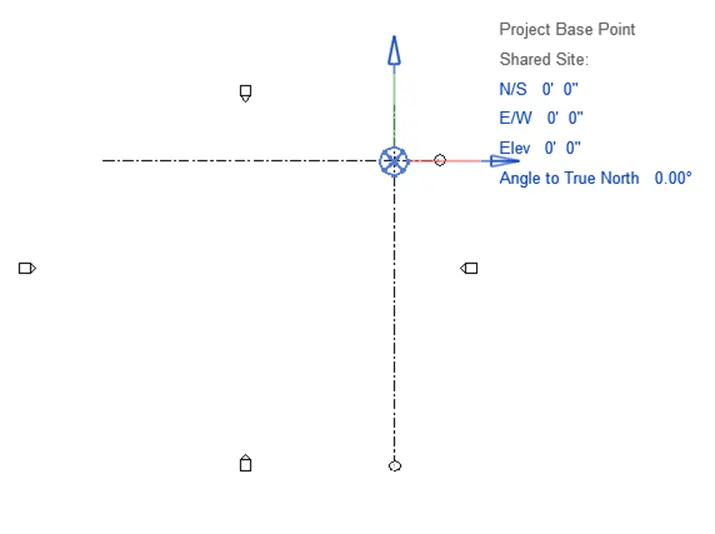
- Click on project base point, click on it and change the coordinate to 0’0” to place the project base point at the intersection of the two grid lines as shown below.
Step 6
- To hide the project base point, type VG, expand the site option and remove the tick mark of project base point, select apply and ok to hide project base point.
Step 7
- Go to file tab, select save as option from file tab, select project and name the file as architectural by selecting the destination folder and select save from save as dialog box.

Result :
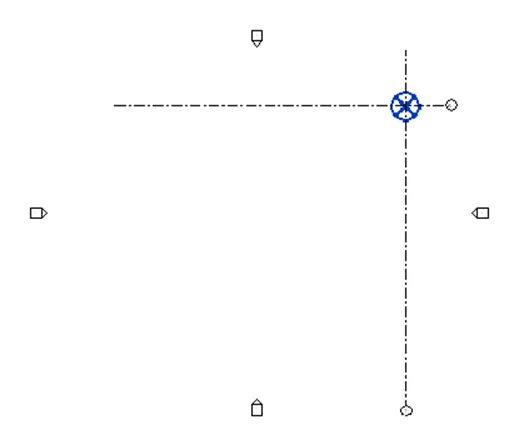
Therefore, using manage tab, project base point and project shared coordinate for the project are set in architectural template as shown below.
2) Open another new file but with a structural template. Using the manage tab set project parameters the same as the architectural model. Copy the parameters from the architectural model to the structural template or enter the parameters manually into the structural model.
Aim : To open fie with structural template and manage the project parameters same as that of architectural model in Revit software.
Introduction:
- In Structural template view properties and ranges have been modified to work with structural components.
- We can set the project base point and project shared coordinate same as that of architectural model using coordinate tool of manage tab.
Procedure :
Step 1
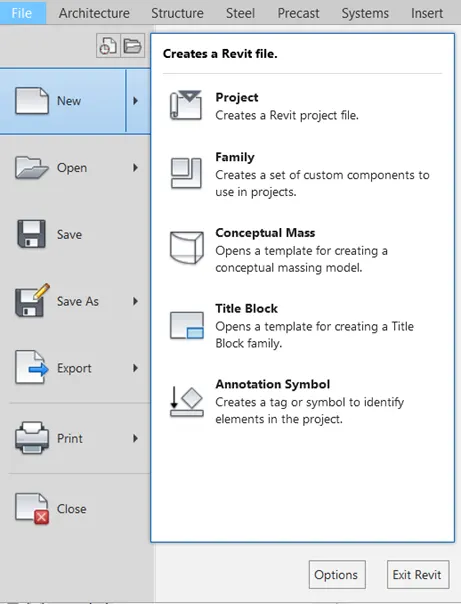
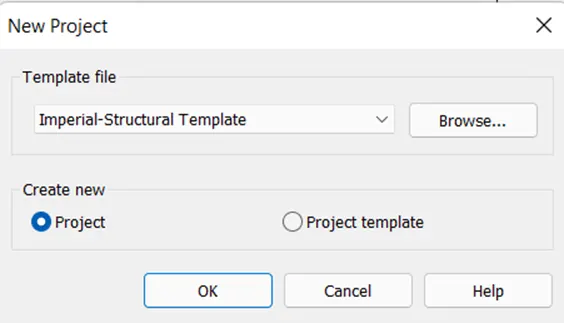
- Open Revit software, select new option from file tab, select the template file as imperial -structural template and select ok.
Step 2
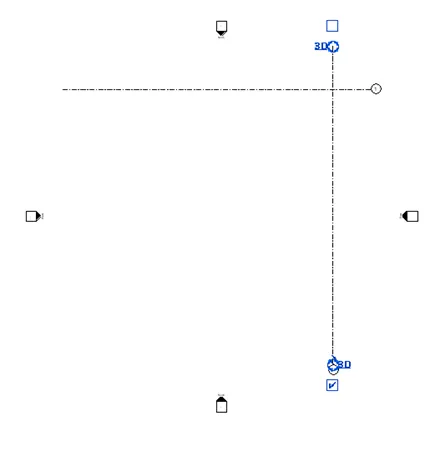
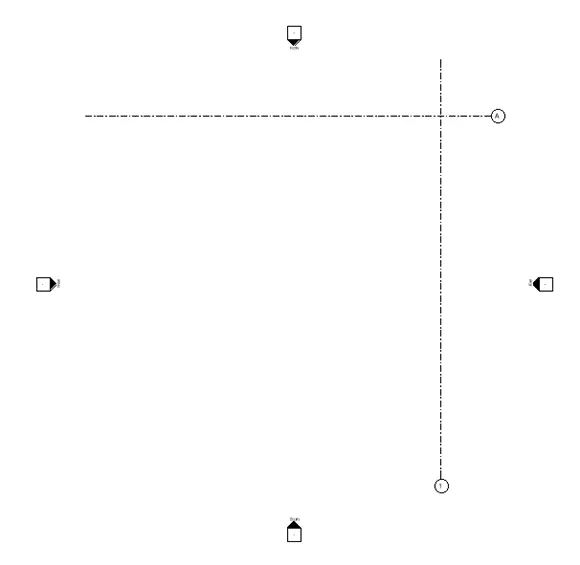
- Go to structure tab, select the grid tool from datum panel, and draw the transverse and longitudinal grids as and rename it with alphabets and numerical and press escape as shown below.
Step 3
- Go to manage tab, select the coordinate tool from project location panel, select the specify coordinate at point option, select the grid line, it will display the specify shared coordinate dialog box.
- Specify new coordinate as 0’0” and select ok.
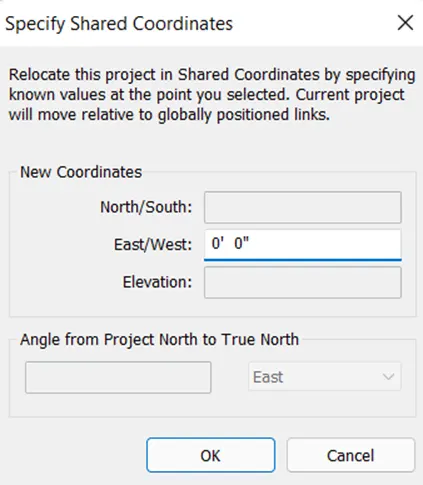
- Similarly select go to manage tab, select coordinate tool from project location panel, select specify shared coordinate, select another grid line and specify new coordinate as 0’0” ad select ok.
Step 4
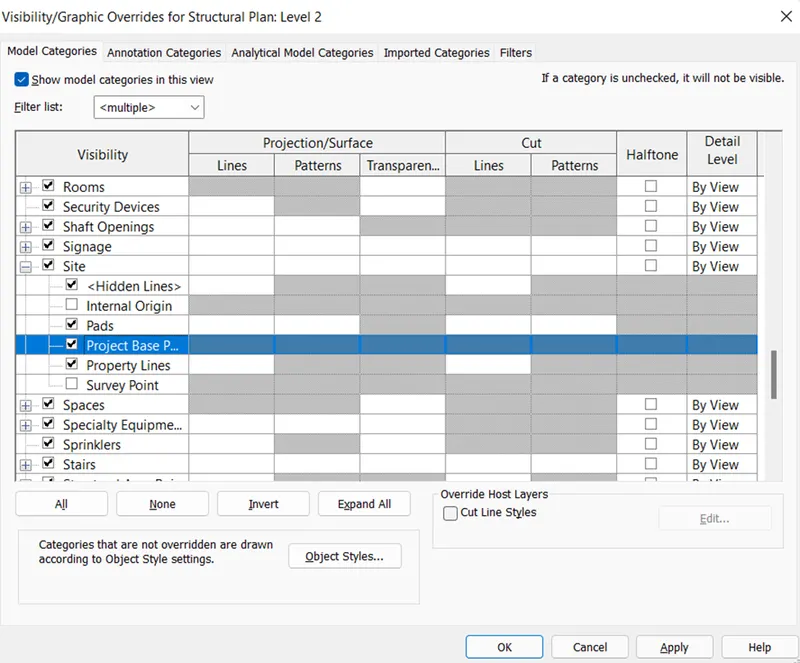
- To set the project basepoint, type VG command to open the visibility graphics setting, it will display visibility dialog box, scroll down and expand the site option.
- Select the click mark on project basepoint, select apply and ok from dialog box.
Step 5
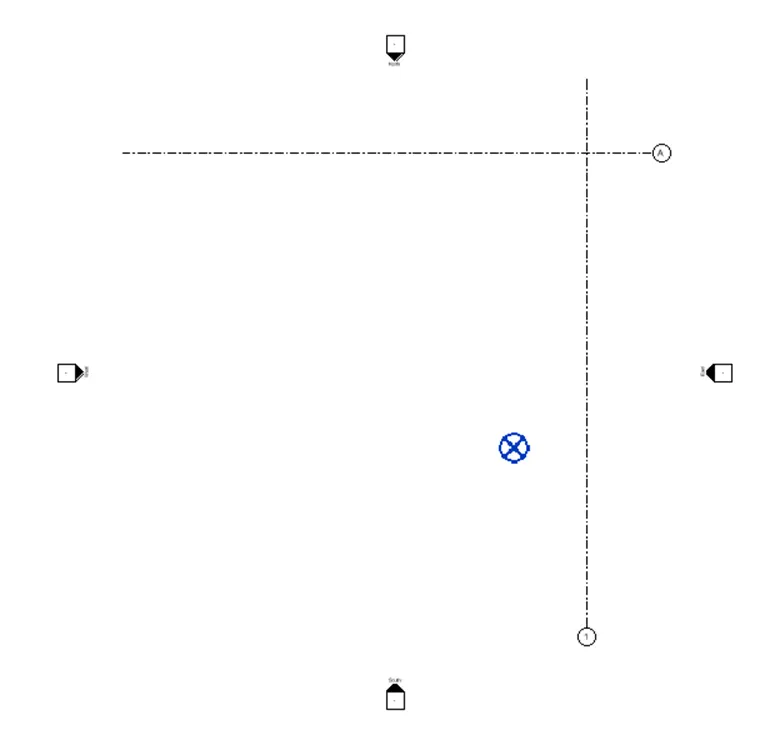
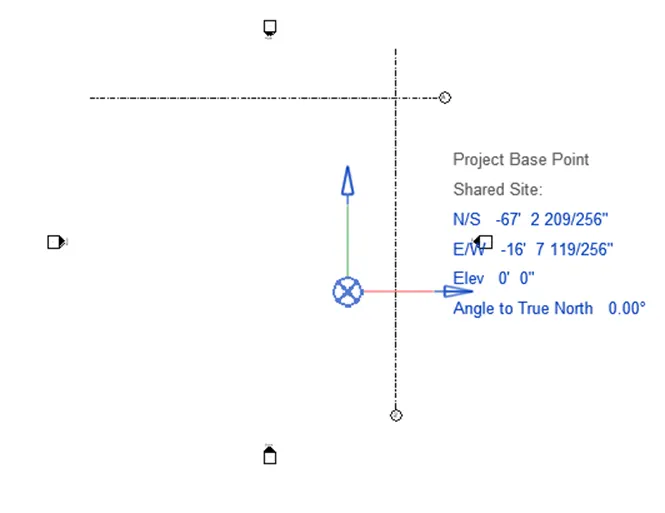
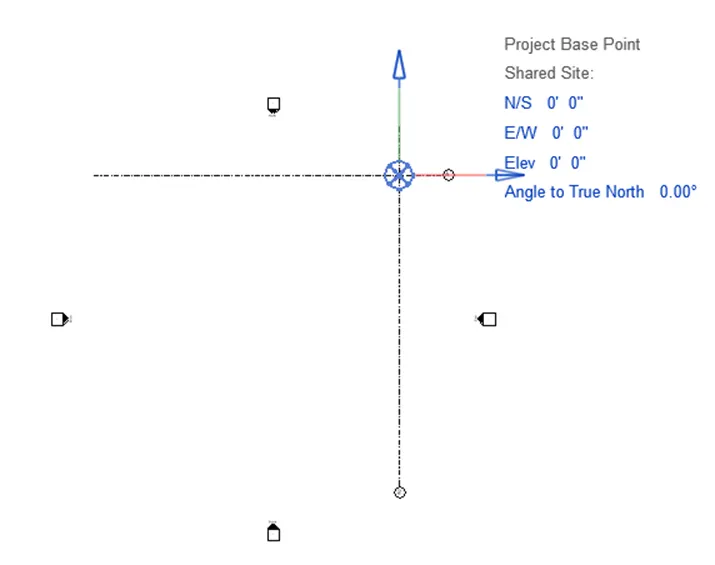
- Click on project base point and change the project base coordinate to 0’0” as shown below.
Step 6
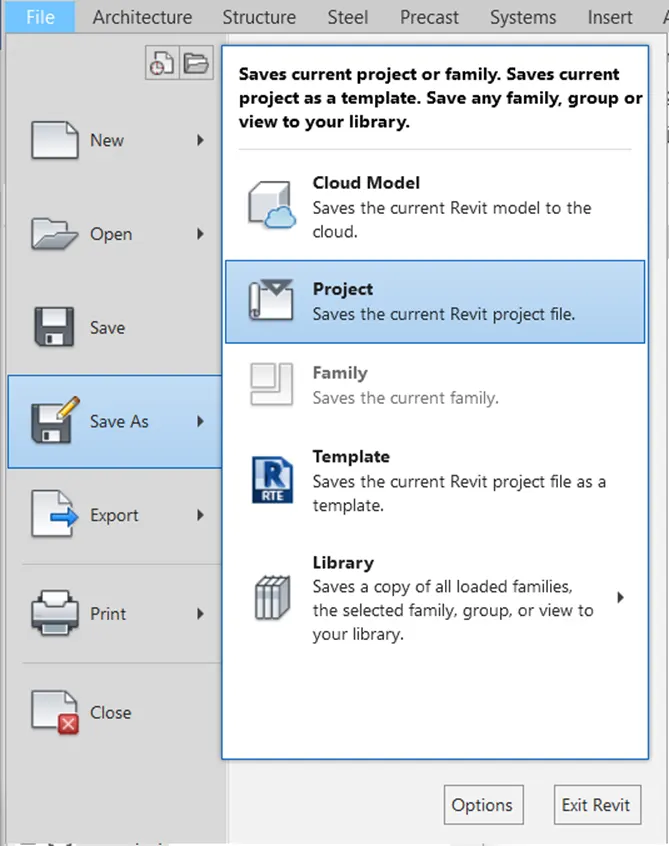
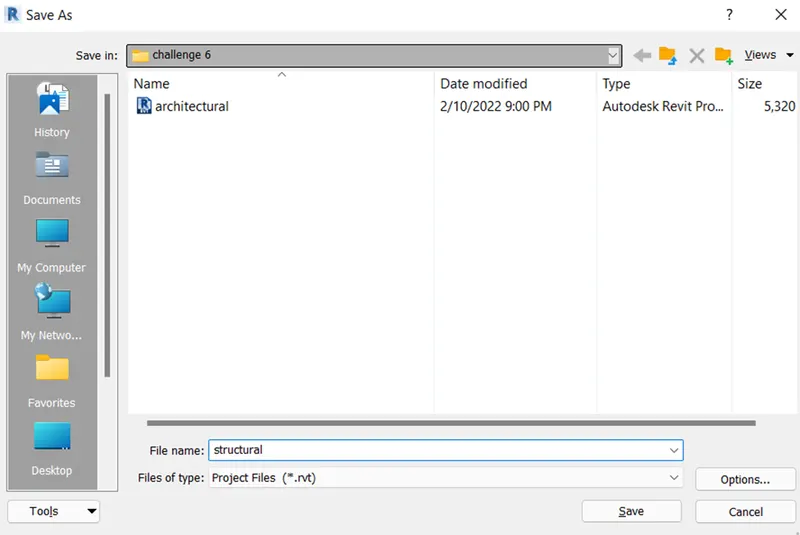
- Go to file tab, select save as option from file tab, select project and name the file as structural by selecting the destination folder and select save from save as dialog box.
Result :
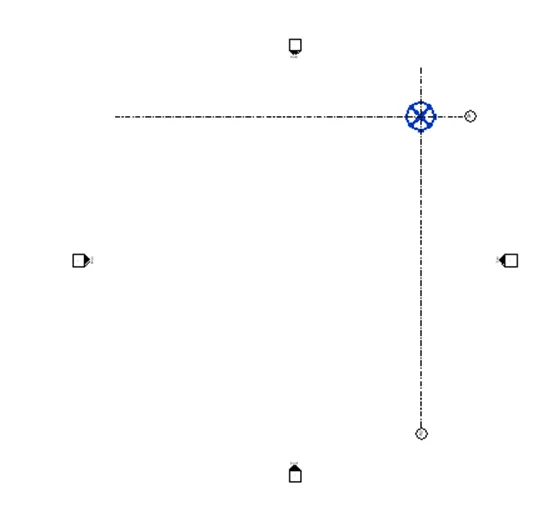
Therefore, the project parameters same as that of architectural parameters are set in the structural template as shown below.
3) Re-open the architectural model. Using the tools under the Collaborate tab make the architectural model a central model (enabling simultaneous working on the model).
Aim : To make the architectural model as a central file using collaborate tool in the Revit software.
Introduction :
- In Revit software, collaborate tab offers the platform for multiple disciplines to work simultaneously on the same project from different geographical locations.
- This can be achieved by making the file as central file.
Procedure :
Step 1
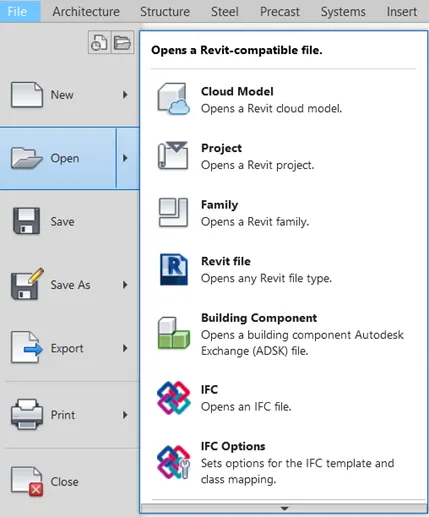
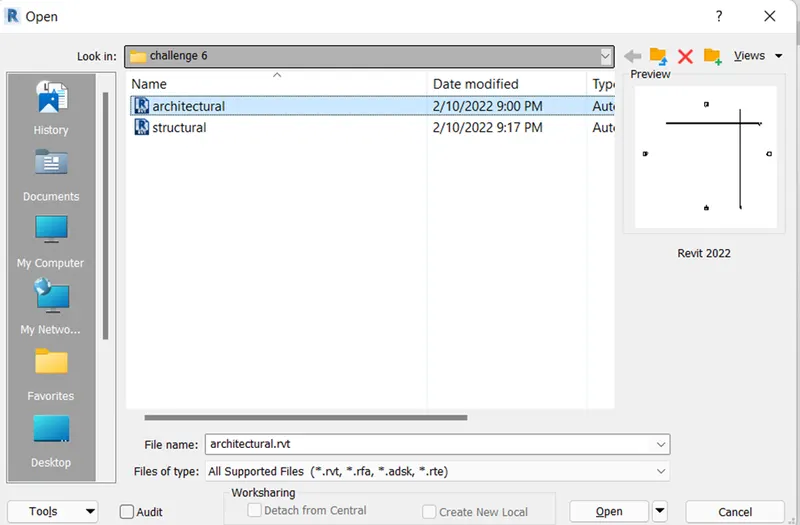
- Go to Revit software, select file tab, select open option, select the architectural file and select open. It will open the architectural file.
Step 2
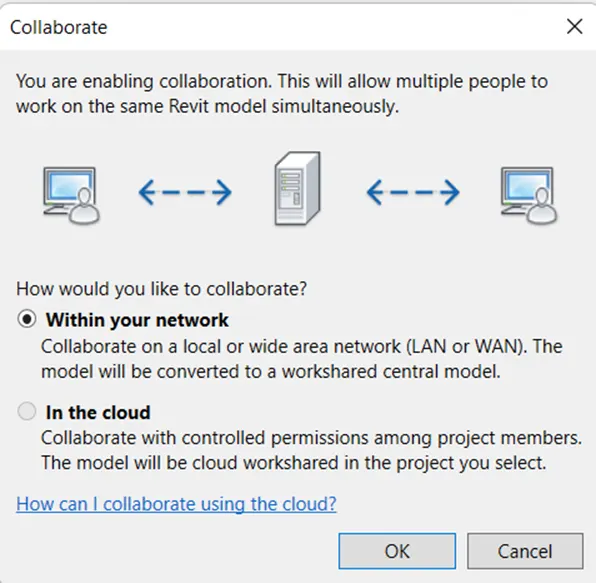
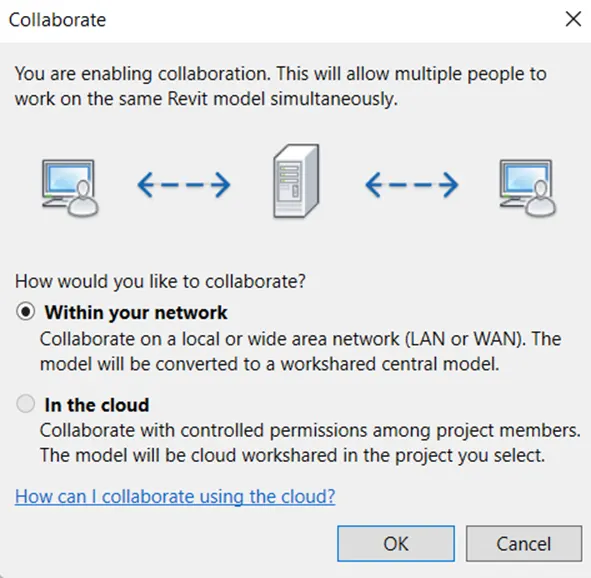
- Go to collaborate tab, select collaborate tool from manage collaboration panel, select within your network and select ok.

Step 3
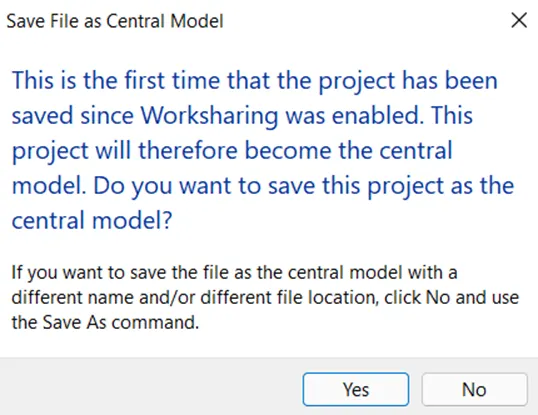
- Click on the save icon from top toolbar and select yes to save the file as central model from dialog box as shown below.

Result :
Therefore, the architectural model is made as a central model file using the collaborate tab in Revit software.
4) Create the Grids Longitudinal and Transverse pattern for the project similar to the task done in Week 2.
Aim : To create longitudinal and transverse grid patterns for project in architectural template in Revit software.
Introduction :
- Grids acts as reference lines for locating the object or measuring the distances of the components in the model.
- Grids can be created at required location by using grids tool of datum panel.
Procedure :
Step 1
- Open Revit software, open the architectural template file.
Step 2
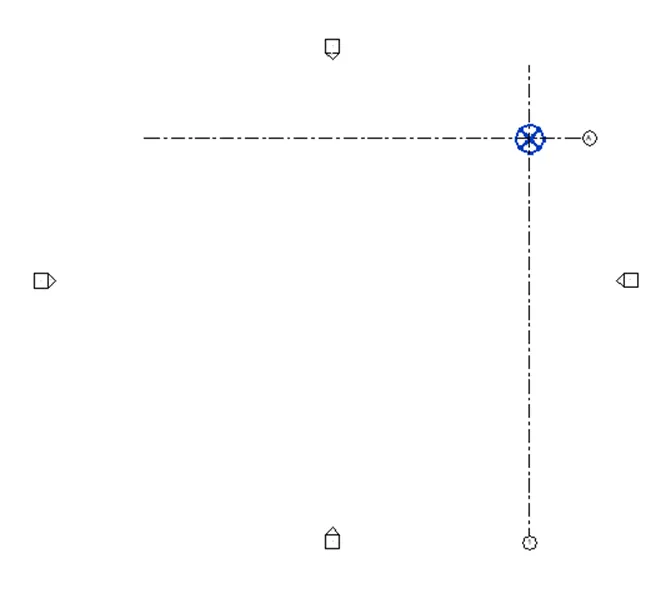
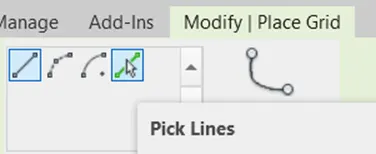
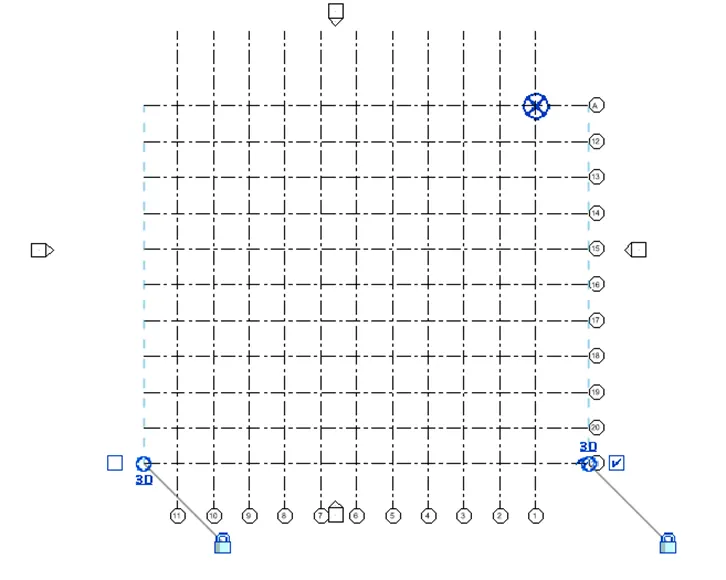
- Go to architectural tab, select the grid tool from datum panel, select the pick line tool from draw panel, of modify place grid tab, specify offset distance as 10’ and press enter.

Step 3
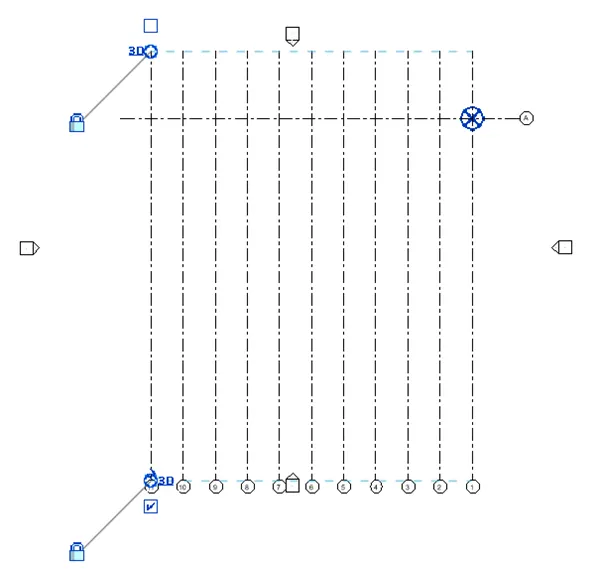
- After selecting pick line, select the longitudinal grid line to draw the longitudinal grid lines as shown below.
Step 4
- Similarly create transverse grid lines by selecting the transverse grid line as shown below.
Step 5
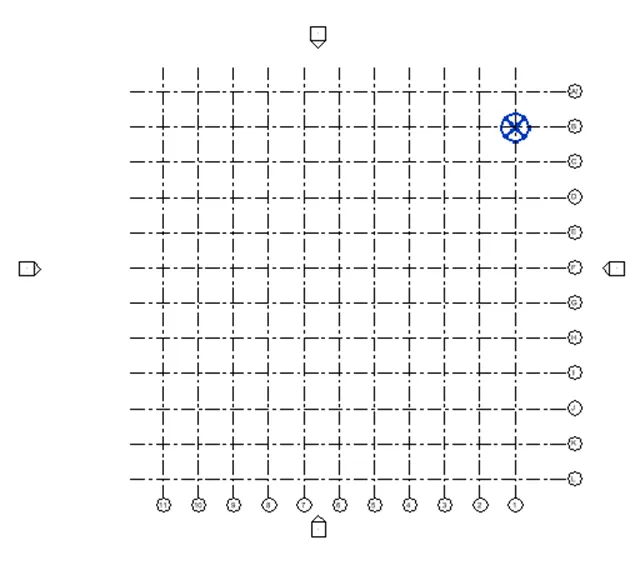
- Select the grid line and rename transverse grid lines with alphabets and vertical grid lines with numerical as shown below.
Step 6
Go to save icon from top toolbar and save the changes in the file.
Result :
Therefore, longitudinal and transverse grid patterns for project are created similar to task in week 2 as shown below.
5) Synchronize the changes from the local copy to the central file of the architectural model.
Aim : To synchronize changes from local copy to central file of architectural model in Revit software.
Introduction :
- In Revit software, the changes are not made directly in the central file, instead the file is opened as a local file, changes are made in local file and then changes are updated in central file.
- Synchronize tool in the Revit software is used to synchronize or update the changes in central file in the Revit software.
Procedure :
Step 1
- Open the Revit software and open the architectural model created in last question.
Step 2
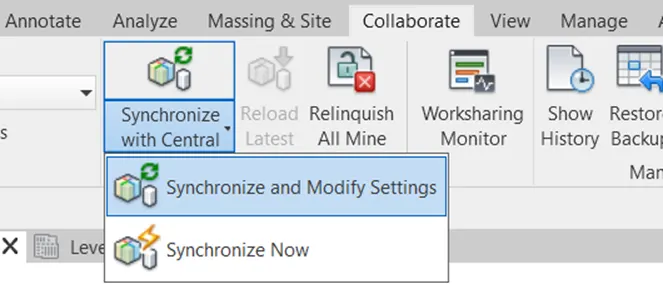
- Go to collaborate tab, select synchronize with central tool drop down from synchronize panel, and select synchronize and modify setting option.
Step 3
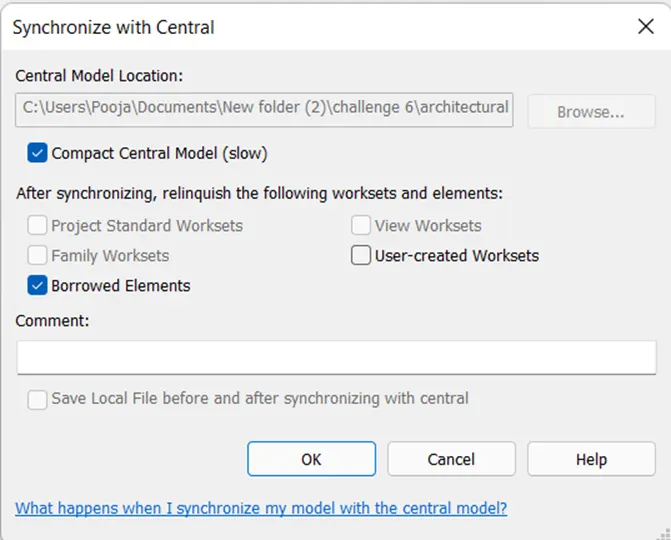
- Select compact central model from synchronize with central dialog box and select ok, local copy is synchronized with central.
Step 4
Go to save icon from top toolbar and save the changes made in the model.
Result :
Therefore, changes from local copy file of the architectural model is synchronized to the central file in Revit software using collaborate tab.
6) Open the structural model and use the collaborate tools to save the model as a central file.
Aim : To save the structural model as a central file using the collaborate tool in the Revit software.
Introduction:
- Benefit of making the file as central file is that multiple disciplines can work on the same project simultaneously.
- The file can be converted into central file using the collaborate tool of the collaborate tab.
Procedure :
Step 1
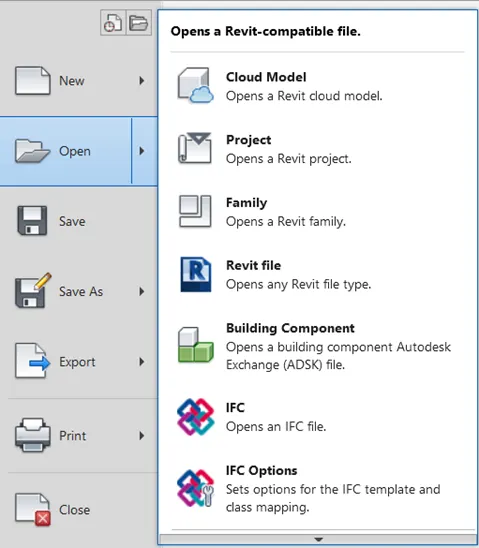
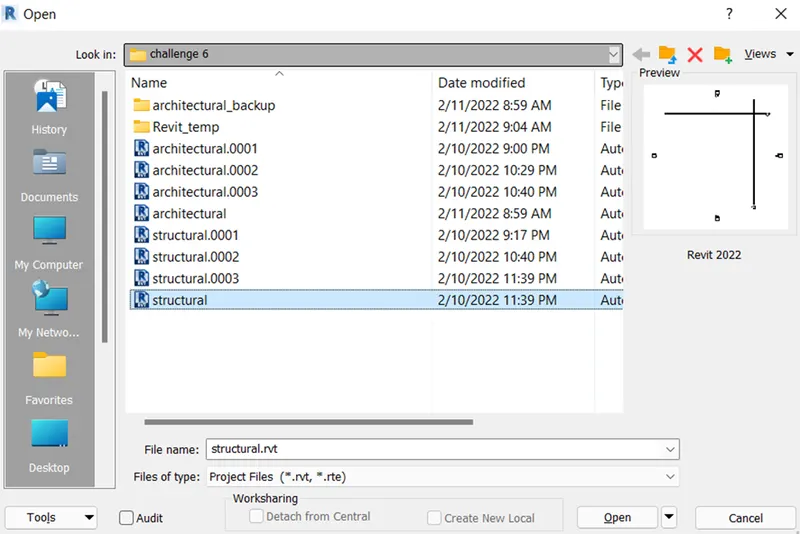
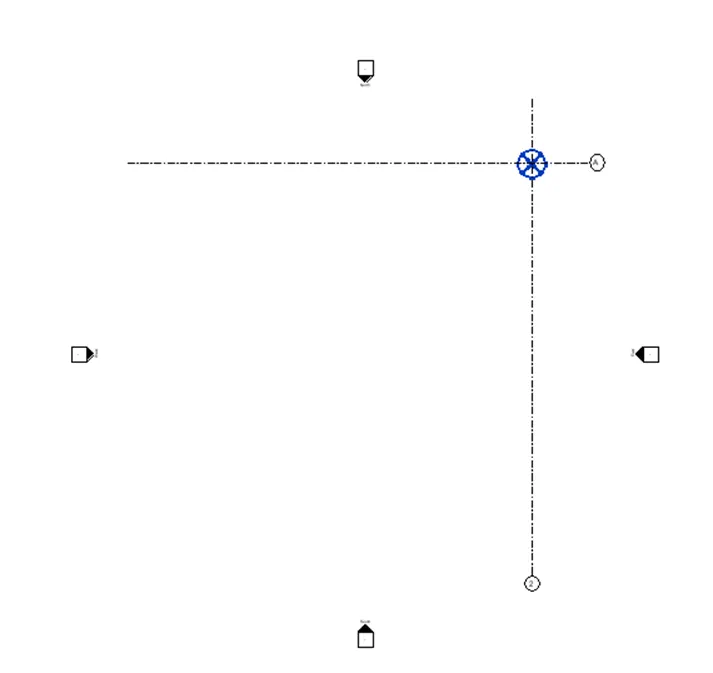
- Go to file tab, select open option, select the structural file and select open.
Step 2
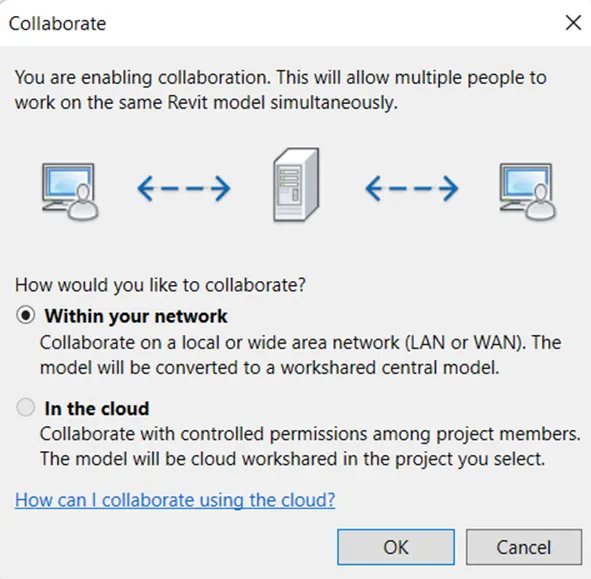
- Go to collaborate tab, select collaborate tool from manage collaboration panel, select within your network and select ok.

Step 3
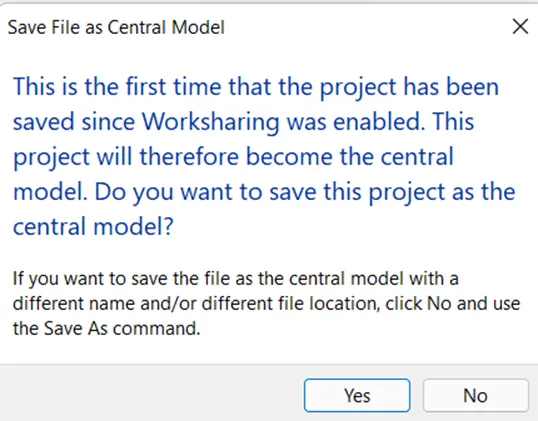
- Click on the save icon from top toolbar and select yes to save the file as central model from dialog box as shown below.
Result :
Therefore, structural model is saved as a central file using the collaborate tool in the Revit software.
7) Under the Collaborate tab, select the grids and levels from the architectural model, and using Copy Monitor try to copy the grids to the structural model. See what happens when the copy monitored grid is moved around in the structural model
Aim : To select the grids and levels from architectural model and copy it to structural model using copy monitor tool in Revit software.
Introduction :
- We can copy elements from a linked model to the current model, and monitor the elements for changes.
- To copy the elements from linked model to current model, copy / monitor tool from coordinate panel of collaborate tab is used.
Procedure :
Step 1
- Open created structural model from Revit software.
Step 2
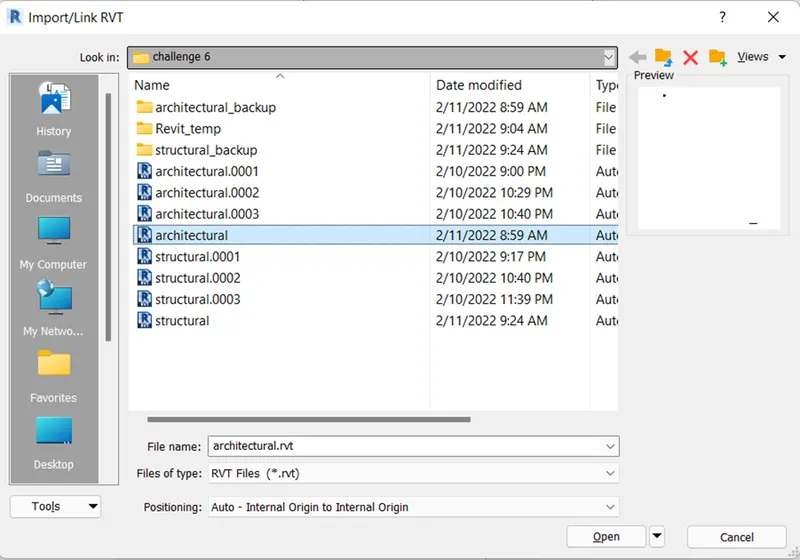
- Go to insert tab, select the Revit link from link panel, select architectural file and select open.

Step 3
- To cross check whether model is copied of linked type VG command it will open visibility graphics dialog box.
- Go to rivet link tab, from dialog box and uncheck the architectural option from dialog box as shown below, select apply and ok.
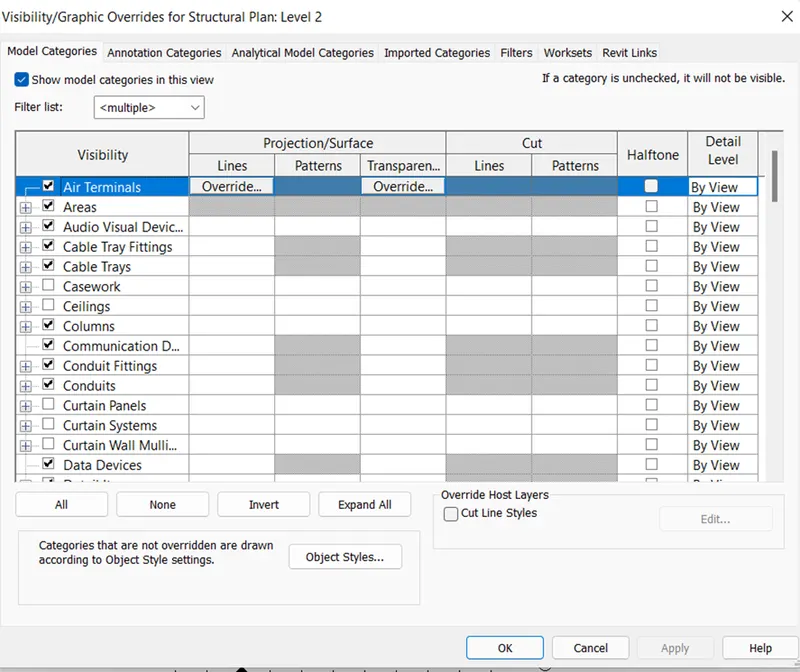
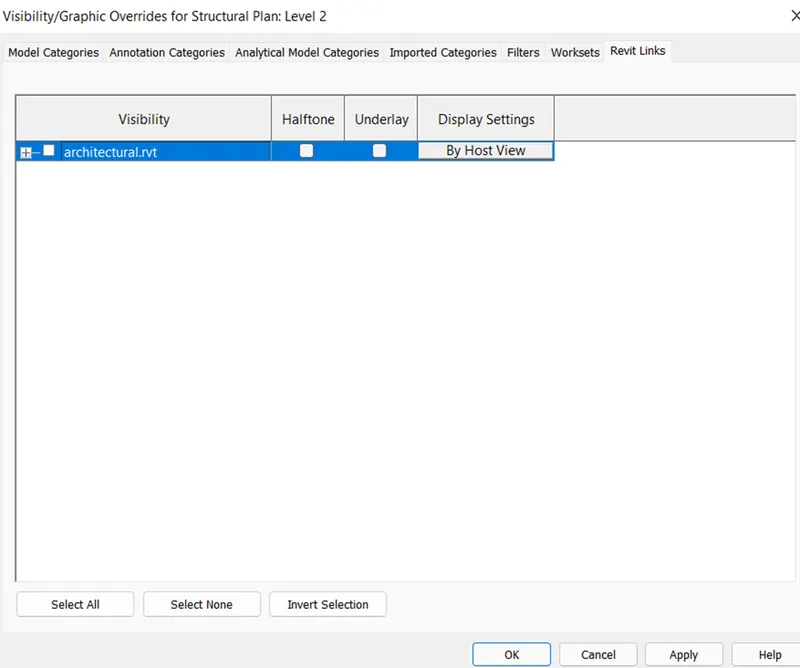
- That means the architectural model is just linked but not copied.
Step 4
- To display architectural model, again type VG command, go to Revit link tab, select the architectural option to make it visible, select apply and ok.
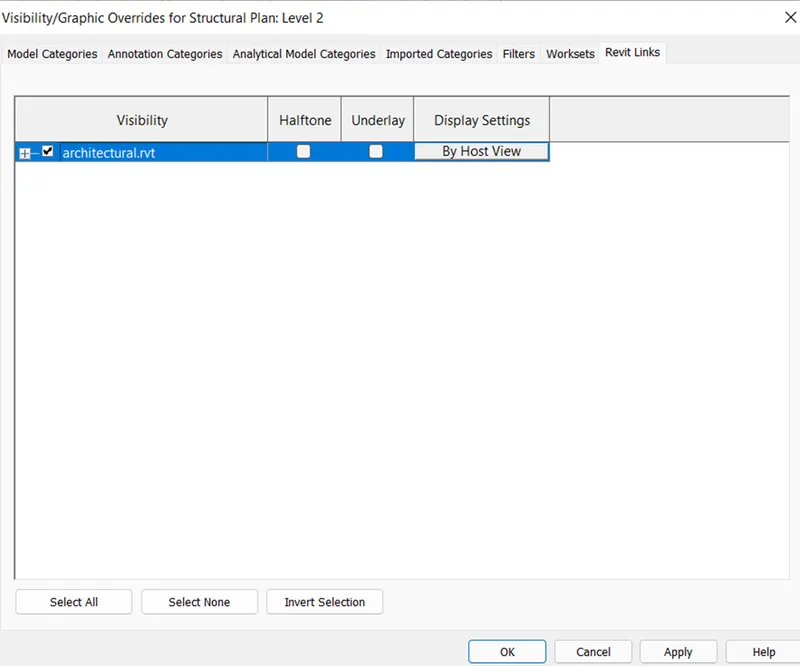
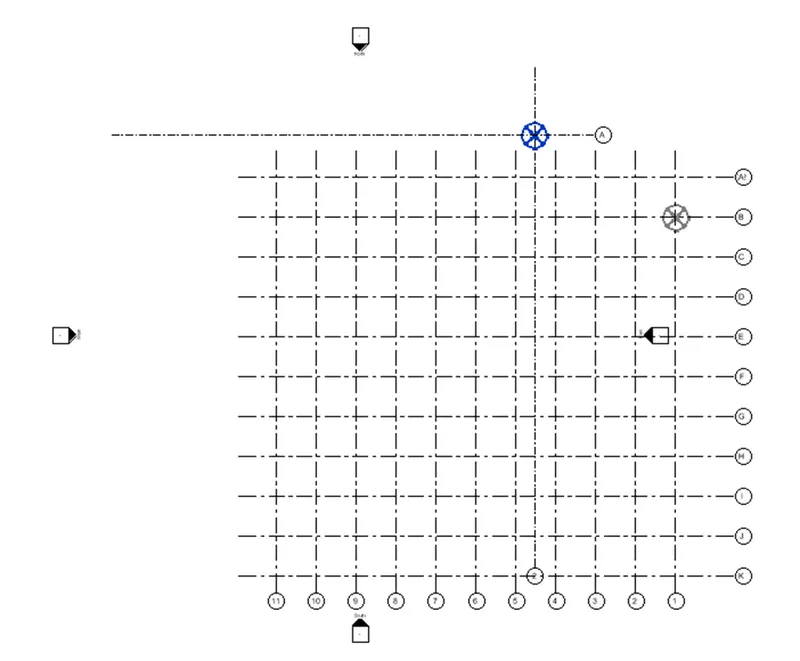
Step 5
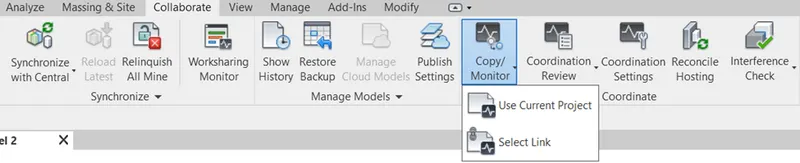
- To copy grids in structural template, go to collaborate tab, select drop down of the copy/ monitor tool, select link and select the architectural link.
Step 6
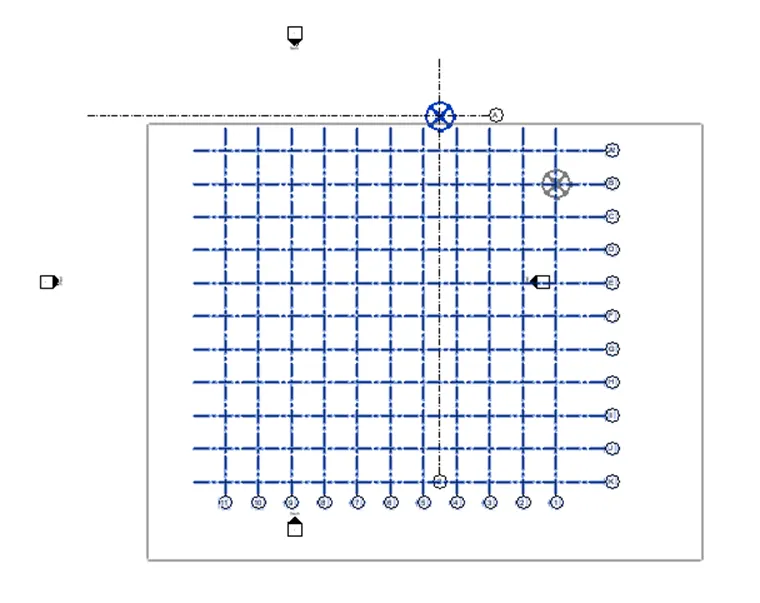
- Select the copy option from copy / monitor tab, select multiple , select architectural grids using mouse, click finish.

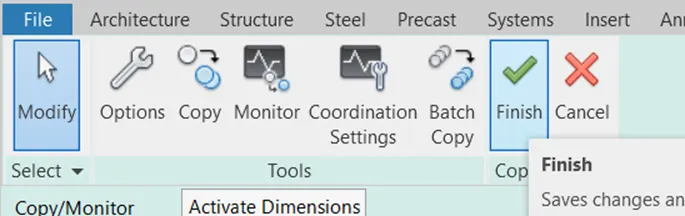
- Again, go to copy/ monitor tab, select the finish tool from copy/ monitor panel.
Step 7
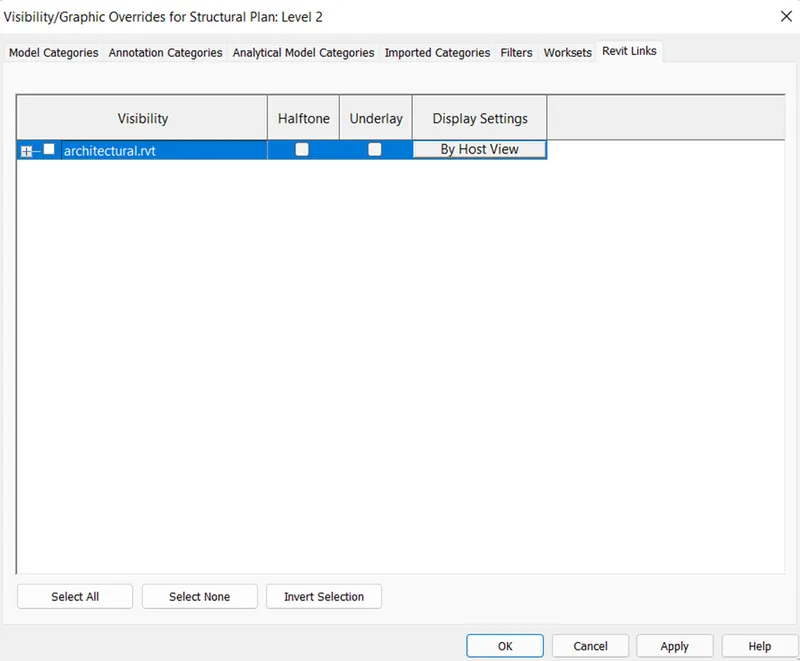
- To cross check whether model is copied or not, type VG command it will open visibility graphics dialog box.
- Go to rivet link tab, from dialog box and uncheck the architectural option from dialog box as shown below, select apply and ok it shows that grids are visible even if the architectural template is made invisible.
Result :
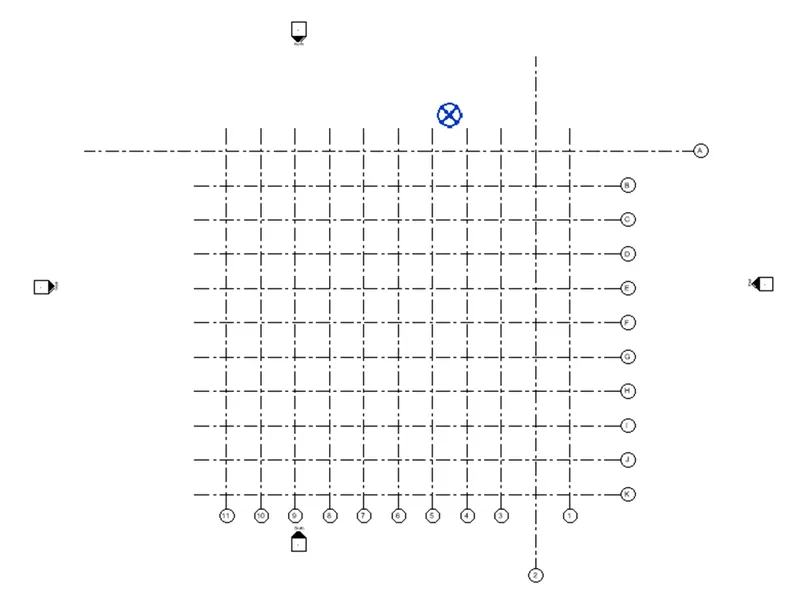
- Therefore, grids from architectural template are copied in the structural template using copy monitor tool of collaborate tab as shown below.
- Also from above observation it is seen that grids are moved from project base point in structural template after copying from architectural template and aligned with each other.
8) Create another new file with a construction template. Save the new file as a central model. This file will include both architectural and structural model. Under the manage tab, Click manage links to link both architectural and structural files. Save the file and close all the files.
Aim :
- To create construction template save it as central file.
- To link architectural and structural template with construction template in Revit software.
Introduction
- Construction template as its name used to construct building, means inside parts such as beam, column, footing, etc.
- Structural and architectural templates are linked in construction template using the Revit link tool of insert tab.
Procedure
Step 1
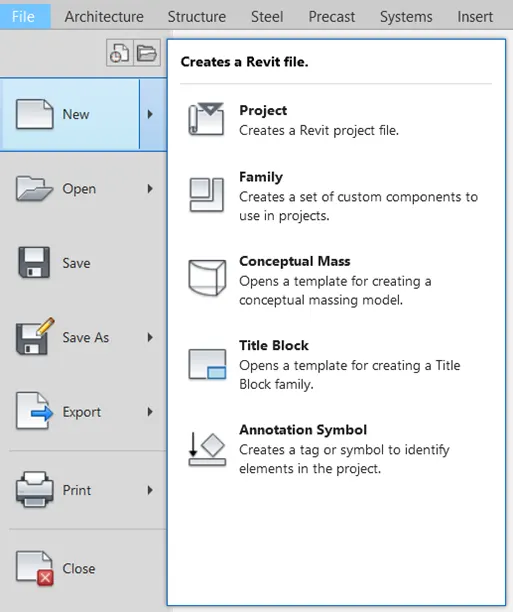
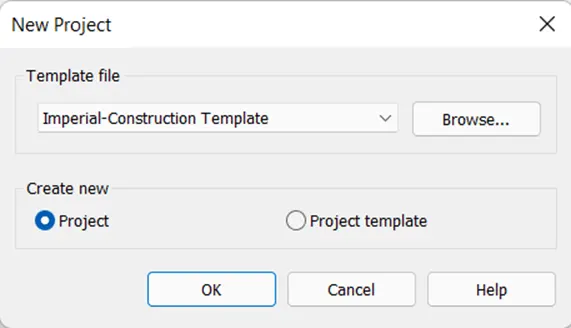
- Open Revit software, select file tab, select new option, select the imperial construction template ans select ok from new project dialog box.
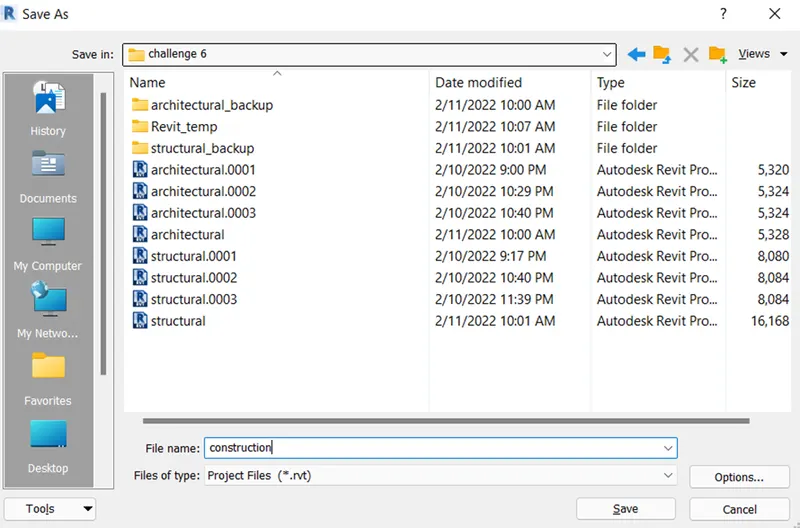
Step 2
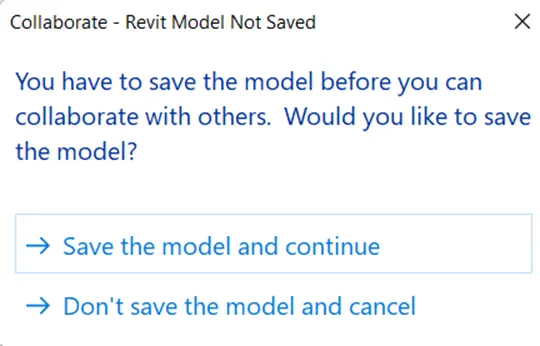
- Go to collaborate tab, select the collaborate tool from manage collaboration, and save the model with appropriate name in desired destination folder as shown below.
Step 3
- Select within your network option from collaborate dialog box and select ok.
Step 4
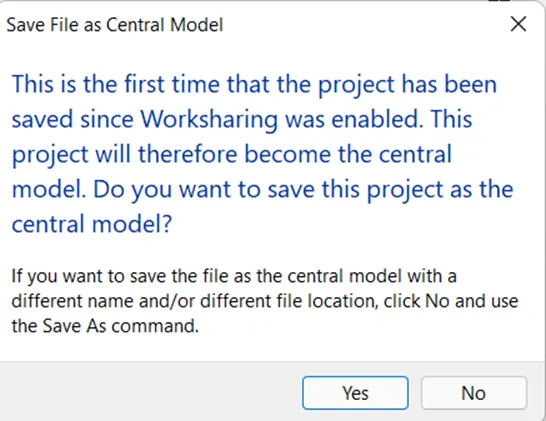
- Again, go to save icon of top toolbar and save the file after making it as central file by selecting yes in save file as central model dialog box.
Step 5
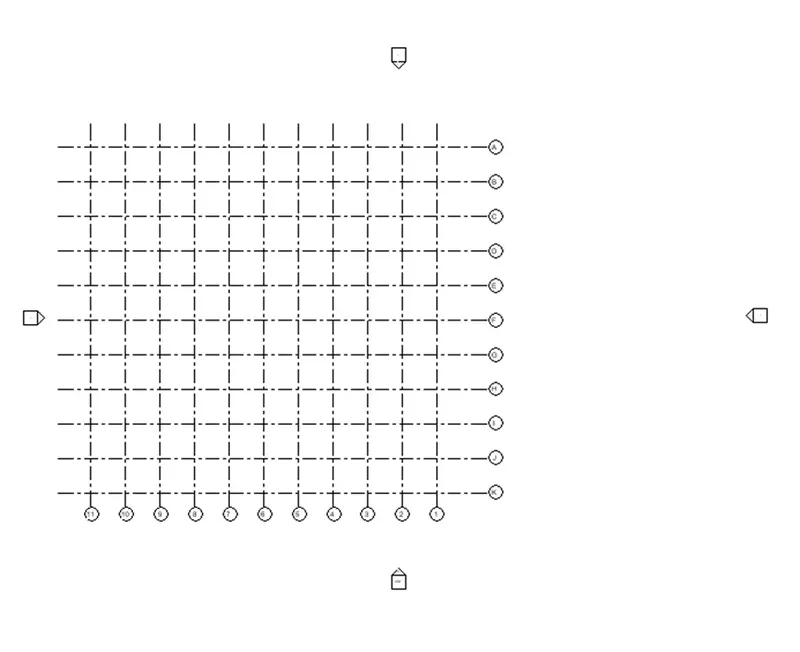
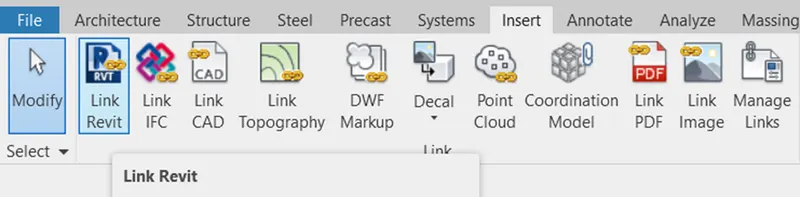
- For linking structural and architectural template, go to insert tab, select link Revit tool from link panel, select the architectural file and select open from import/link RVT dialog box.
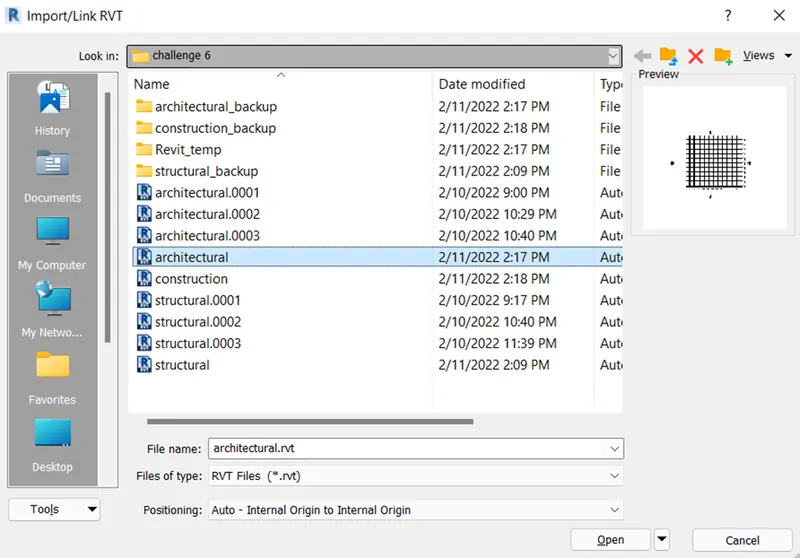
- The architectural template is linked as shown below.
Step 6
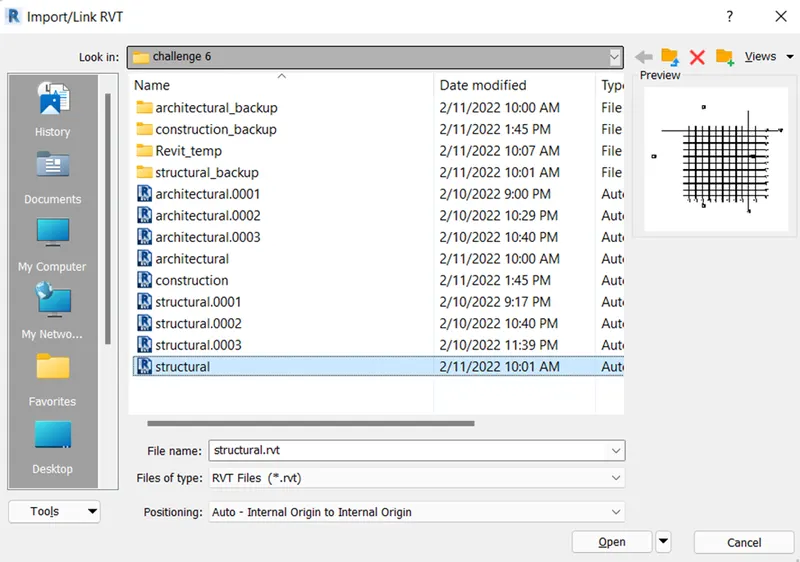
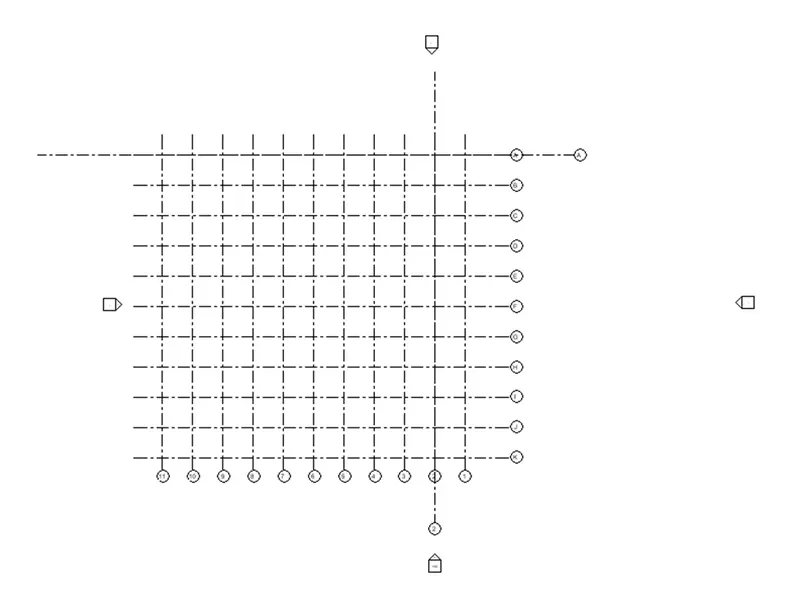
- To link structural template, again go to Revit link tool from insert tab, select the structural file and select open to link structural template with construction template as shown below.
Step 7
- Select the save icon from top toolbar, select synchronize with central option and select save to save the changes into the model.
Result :
- Construction template is created and saved as a central file using collaborate tool of collaborate tab.
- Also, the structural and architectural templates are linked in construction template using the Revit link as shown below.
9) Are the grids from structural and architectural model matching in the construction template created? If yes the model is set up for project 2. If not work on the shared parameters and linking options under Manage links
( Hint: origin to origin, by shared coordinates or by project base point to base point ) to link the models in an appropriate manner
Aim : To check whether grids from structural and architectural model matching in the construction template or not, if matching then set up the model for project 2.
Introduction
- In Revit software grids from structural and architectural model must match with each other in construction template to create a common worksharing for both linked model so that file can be saved for the next project as a setup file.
- If the grids are not matching then we can make it match by acquiring the coordinate and relocating the project using project location panel of manage tab,
Procedure
Step 1
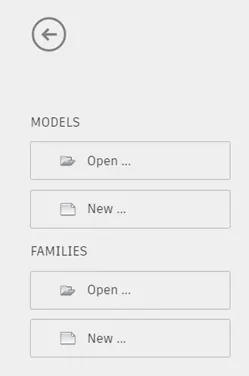
- Open Revit software, select the open from model menu of home page of Revit software, select the construction file and select open.
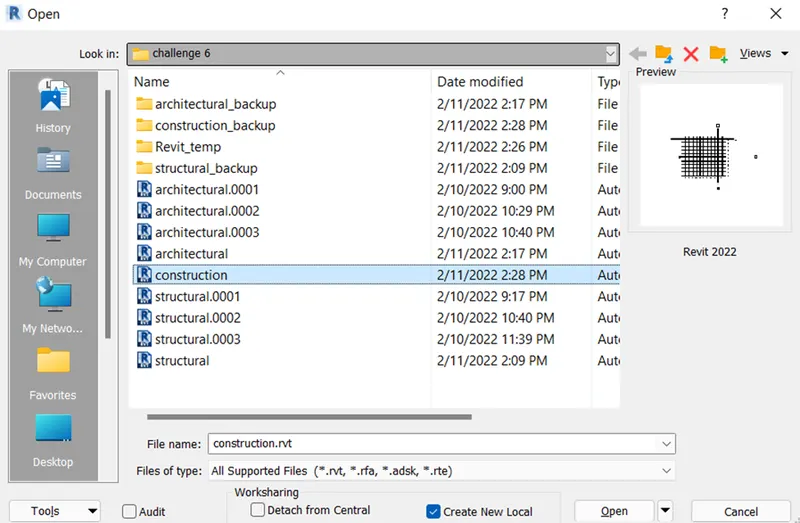
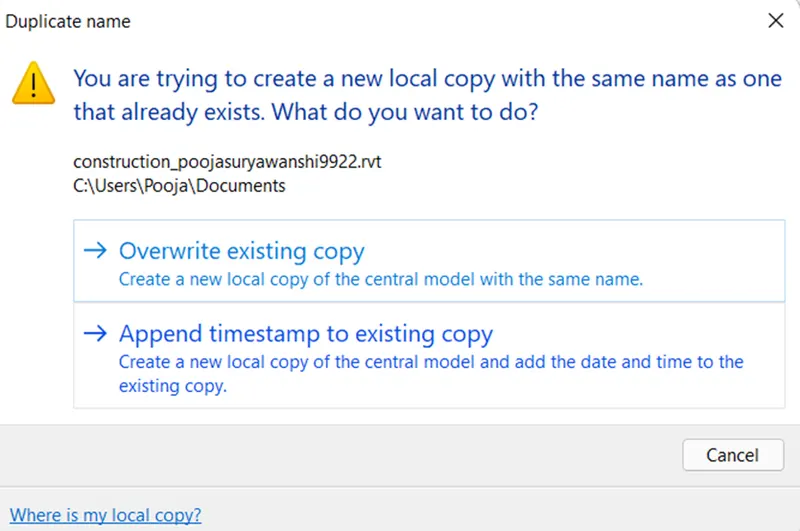
- Select overwrite existing copy option to open it.
Step 2
- Check whether, the grids from structural and architectural model matching in construction template created.
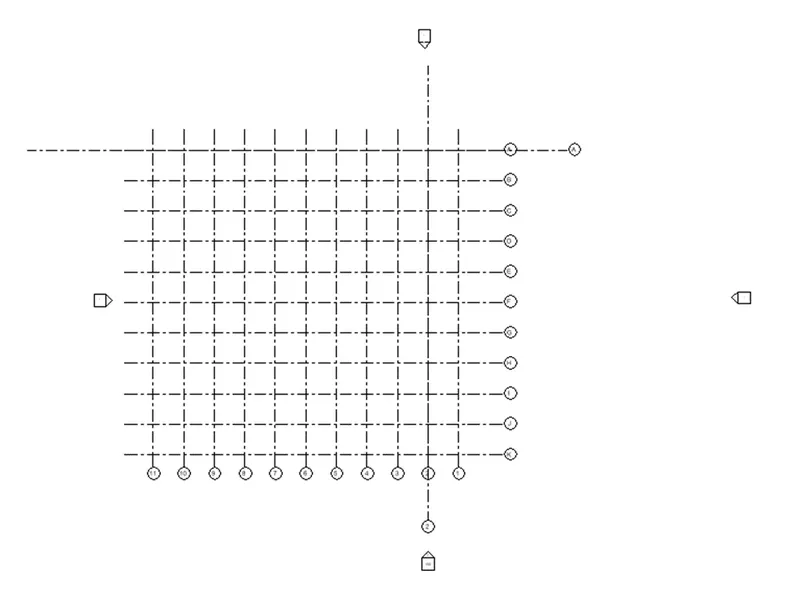
- From the above, it is shown that grids from architectural template are matching with grids of the structural template.
- Therefore, the model is ready to set up for project 2.
Step 3
- Go to save icon from top toolbar and save the file.
Step 4
- If grids from architectural and structural template are not matching then go to manage tab, select the coordinate dropdown, select the acquire coordinate option, select the architectural link, then again, go to manage tab, select relocate project, select the structural grid and position it to architectural grids.
Result :
- Therefore, grids from structural and architectural model matching in the construction template created as shown below.
- So the project can be set to project 2 and there is no need to work on shared parameters.
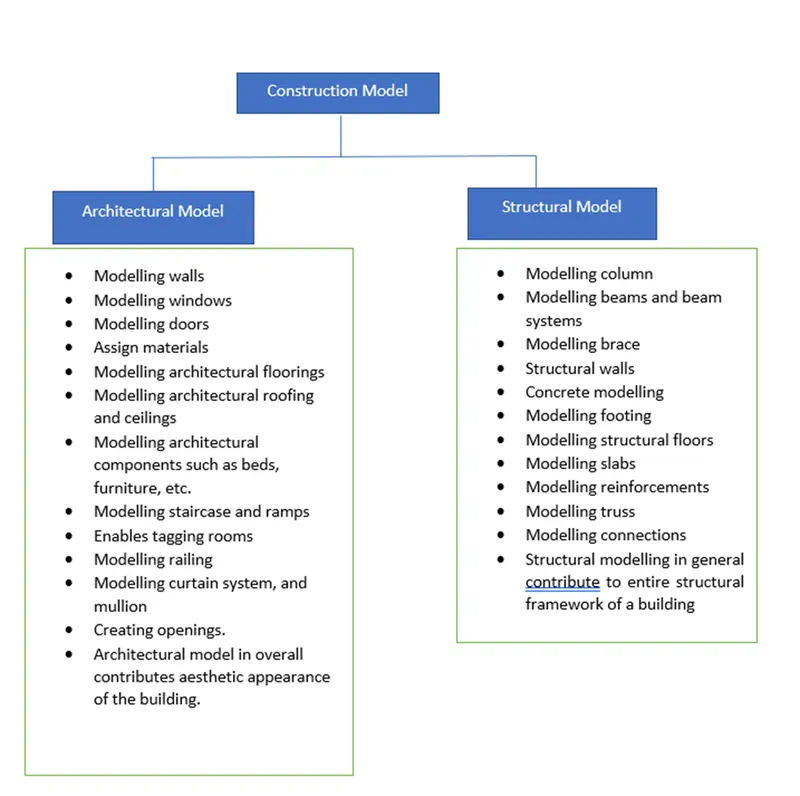
10) List a flow chart of a project tree set up in terms of Construction model, Architecture & Structure model, in this exercise and understand how many people can work on the same project using Revit simultaneously
Aim : To list a flow chart of a project tree set up in terms of construction model, architecture and structural model and understand how many people can work on same project in Revit software.
Introduction :
- In Revit software multiple people of different disciplines work together using collaborate tool by making file as central model.
- The terms of architectural model contains the components that contributes to the aesthetic appearance of the model like doors, windows, furniture etc.,whereas structural model terms contributes to the structural framework such as beams, columns, footing etc.
Procedure :
flow chart of a project tree set up in terms of construction model, architecture and structural model is created as shown below.
- Revit allows multiple users to work simultaneously on the same model or Revit project, this can be achieved through Worksharing.
- Worksharing is a design method that allows multiple team members to work on the same project
- Using linked elements project elements are separated into individually managed models that can be linked together.
- Members from various disciplines such as architect, structural engineer, MEP engineers etc., can work together in Revit projects.
- Number of people working simultaneously depends upon type of project and extent and size of project being done.
Result :
Flow chart of a project tree set up in terms of construction model, architecture and structural model is created as shown below.