Project 2-Highway Assistant-Lane Changing Assistant
PROJECT - 2
Highway Assistant-Lane Changing Assistant
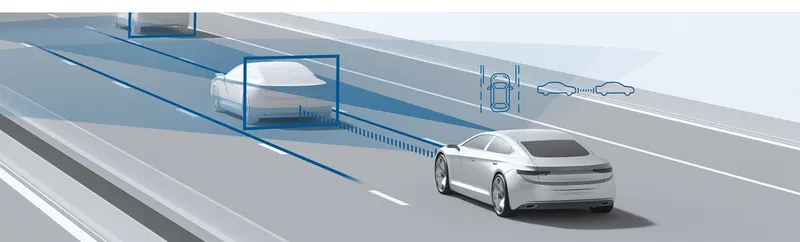
- The Highway Assistant supports the driver and takes over the longitudinal and lateral guidance of the vehicle in monotonous driving situations on highways.
- The partially automated function can automatically start, accelerate, brake as well as steer the vehicle to a certain extent. The driver has to permanently supervise the system and be ready to take over the complete control of the vehicle at any time.
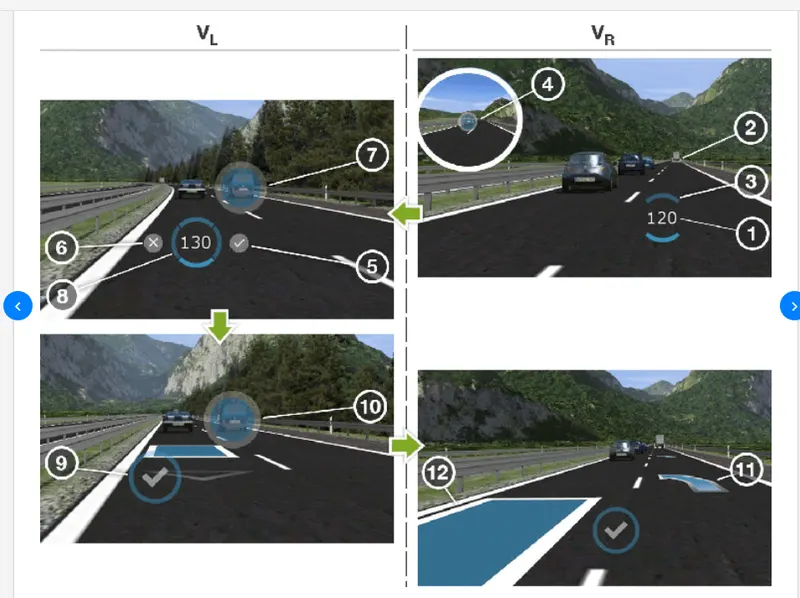
- To understand this project better , i have simplified it in the forms of steps
- Take a look at it .
1) MODEL DEVELOPEMENT :
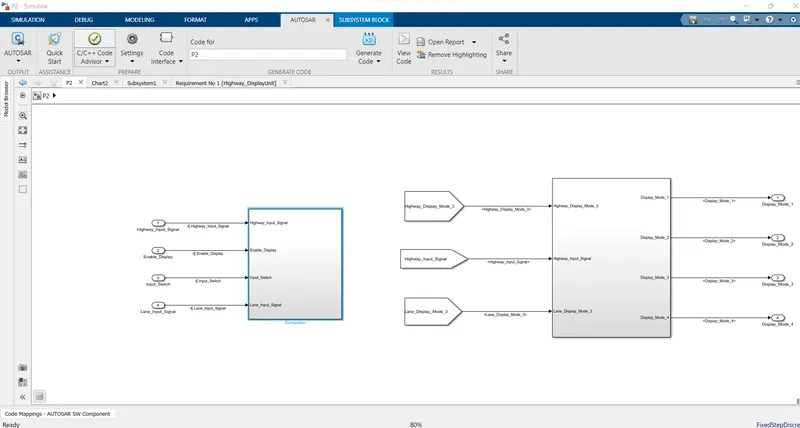
- This is upper phase of the model .
- In order to simplify the model , i have sub systems for it .
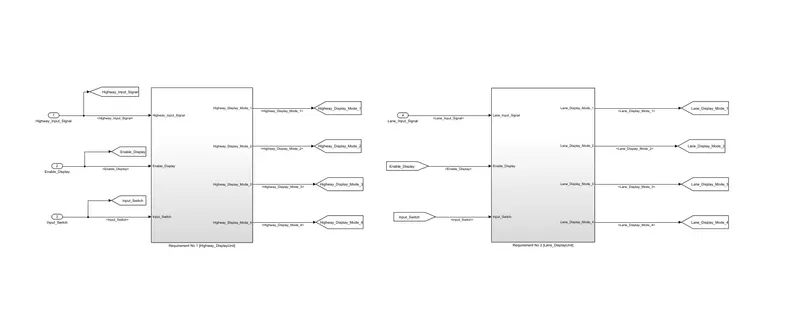
- So these are 2 sub systems for 2 different requirement .
- Lets see each of them in detail
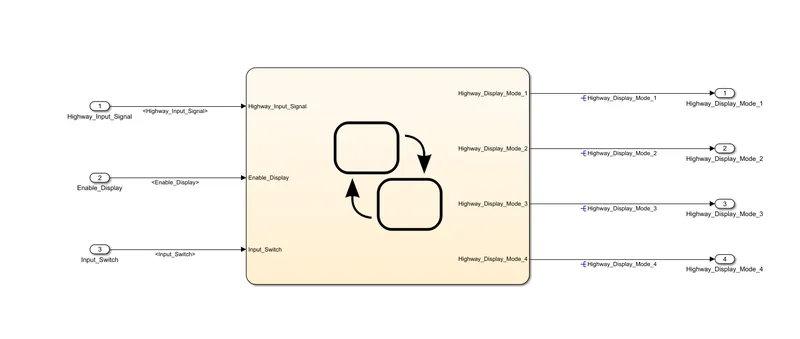
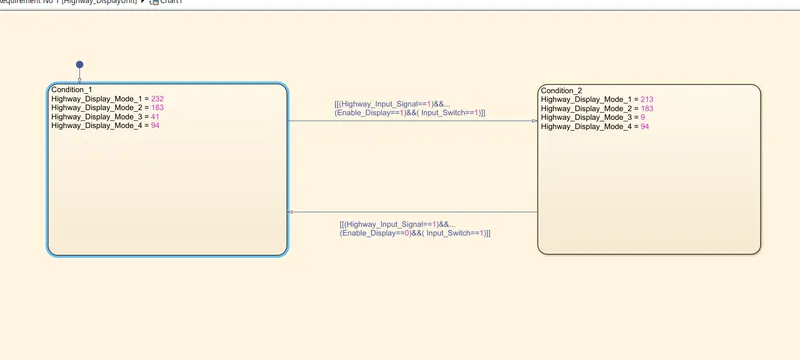
- So this is req 1 model blocks
- Also same as it is there is a model 2 req
- The difference between them is variable name
- The conditions involved in the stateflow
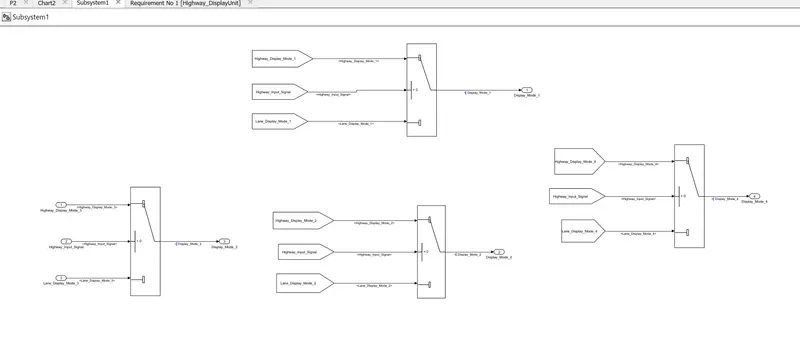
- This is req 3
- The involvement of switch blocks are there into it .
2 ) Now SLDD creation :
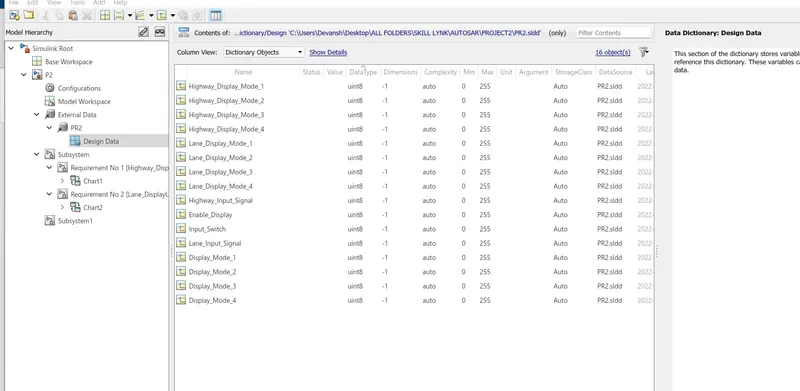
- After making of the logic , craete a SLDD file in which all the variables and the signals names are mentioend in detail . Not doing this will not run the simulation .
3) ENABLE SIGNALS :
- This is done to ensure that the signal information mentioned in SLDD file is complied with the actual signal in the model for the perfect information flow .
4) REQUIRMENT TAGGING :
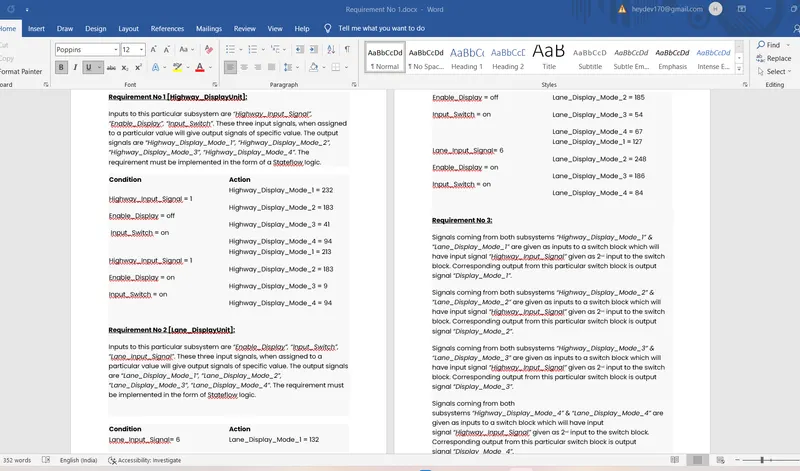
- This is done to understand the logic in words which is mentioned for the particular sub sytem .
- For this we need to create the requiements in the word file and then we have to tag it with the model .
6 ) MODEL SETTINGS
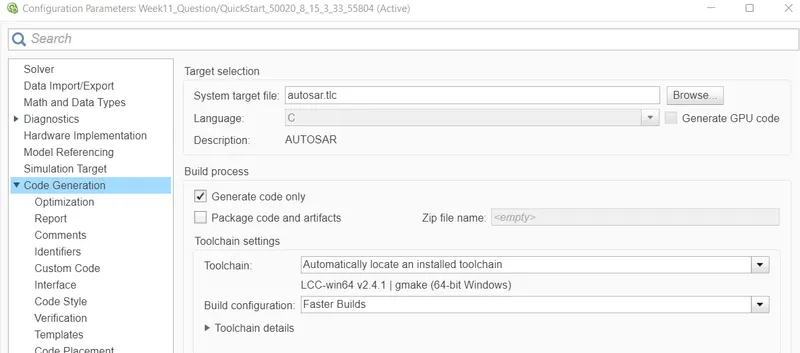
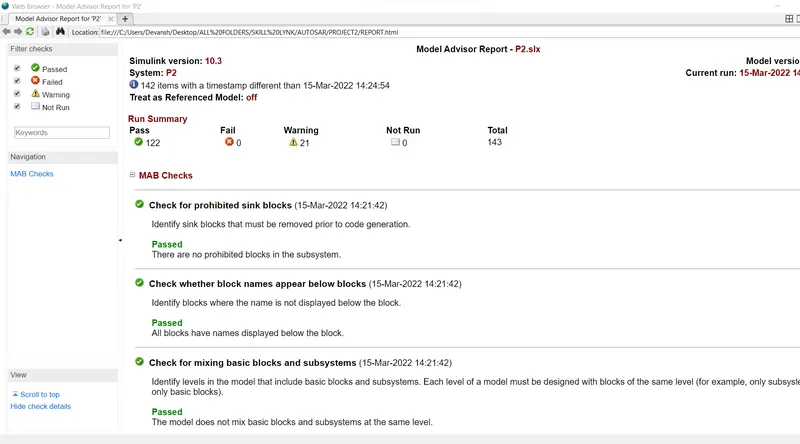
- Do the model setting for the proper run of the advisory report and the code generation so that thre there are minimum warnings .
- First of all , change the target file to AUTOSAR.tlc . in the code generation settings of confifuration settinngs .
- This is done to ensure that the envinment of the model will change to the autosar format .
7 ) AUTOSAR SETTINGS
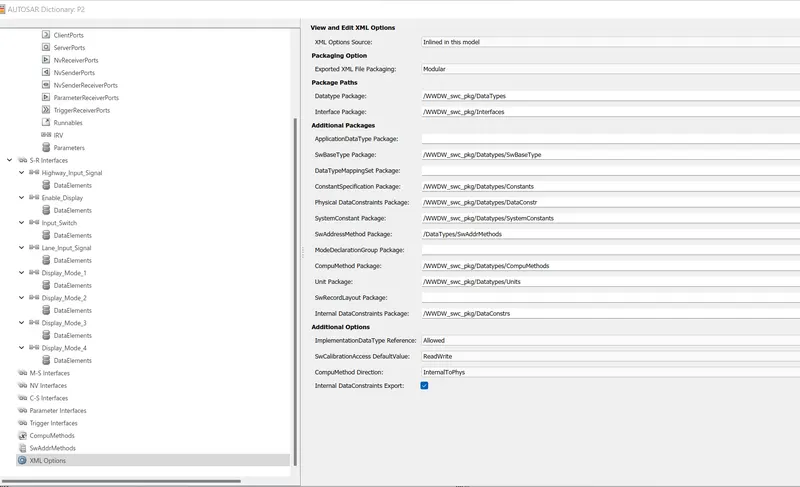
- The first option that has to be configured is the XML option
- All the the input settings are done as per the figure .
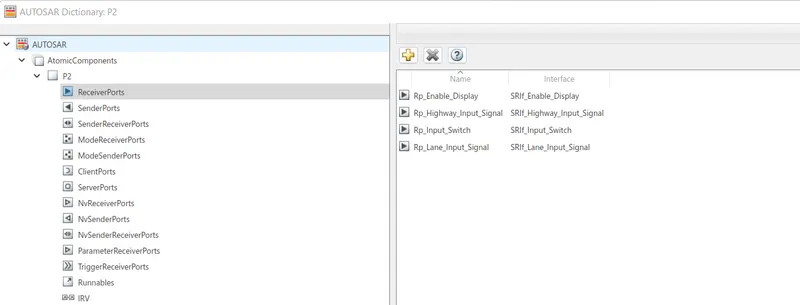
- Now after doing this , we have to Edit the reciever ports names with the prefiX Rp_
- This is done for each and every input
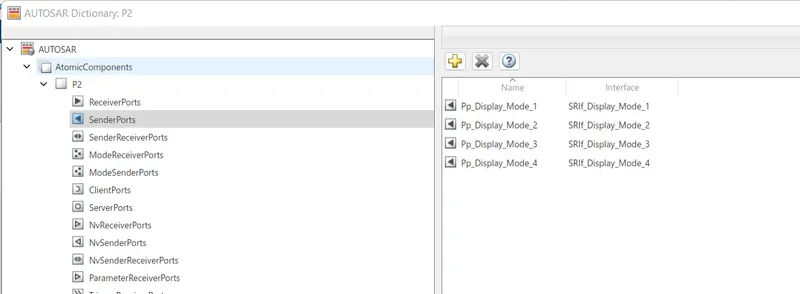
- Now after doing this , we have to Edit the sender ports names with the prefiX Pp_
- This is done for each and every output
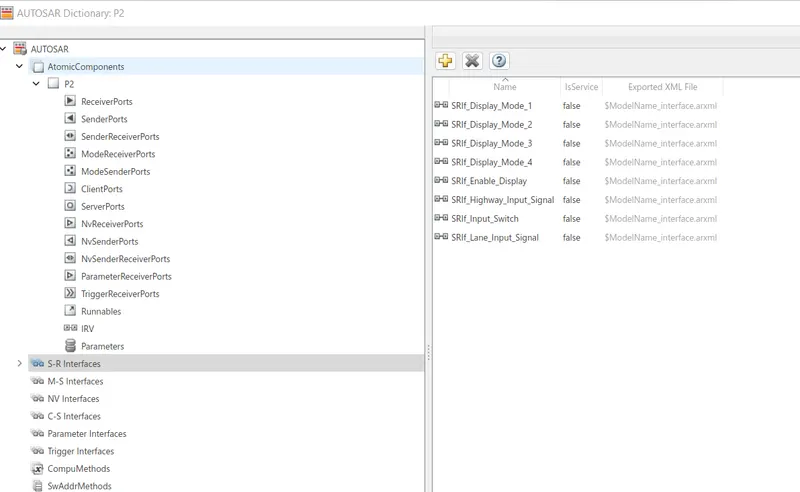
- Now after XML , we have to edit this by adding a prefix called SRIf with each name
- After doing it save them .
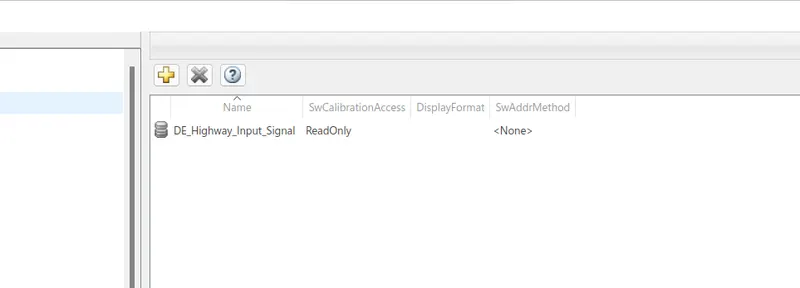
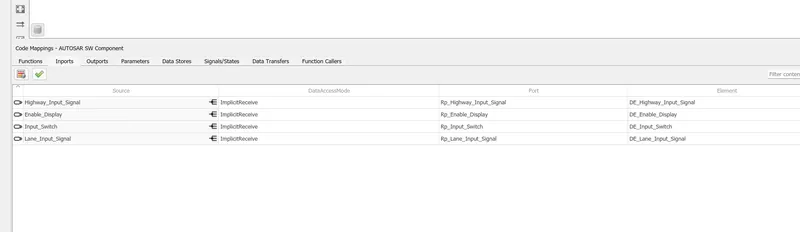
- Now after doing this , we have to check on the code mapping option .
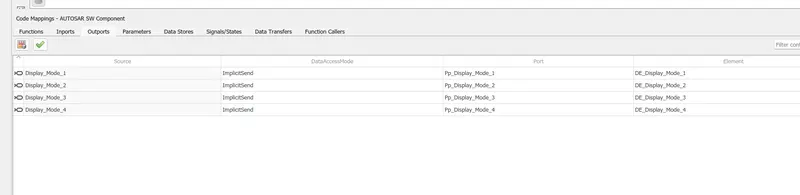
- This is done For checking weather the updated value untill now are being properly mapped or not
- This is done for both input and outputs.
8) ADVISORY CHECK :
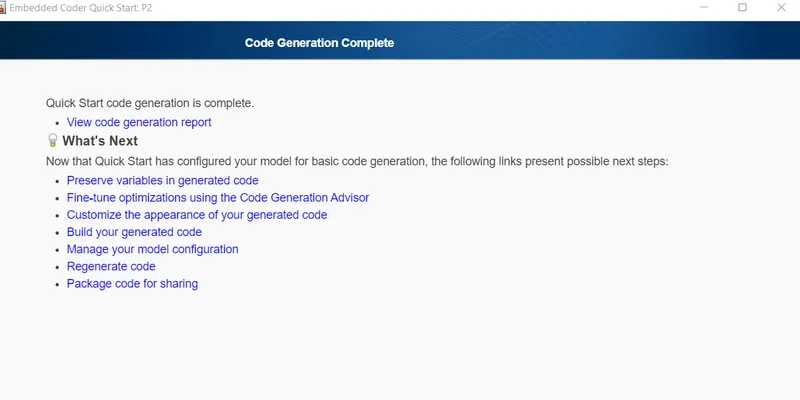
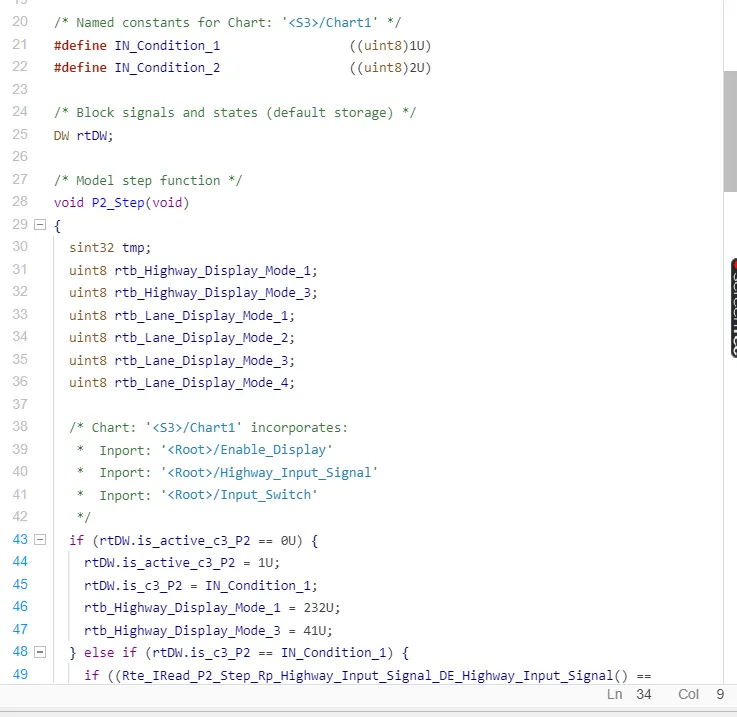
9) Final CODE GENERATION :