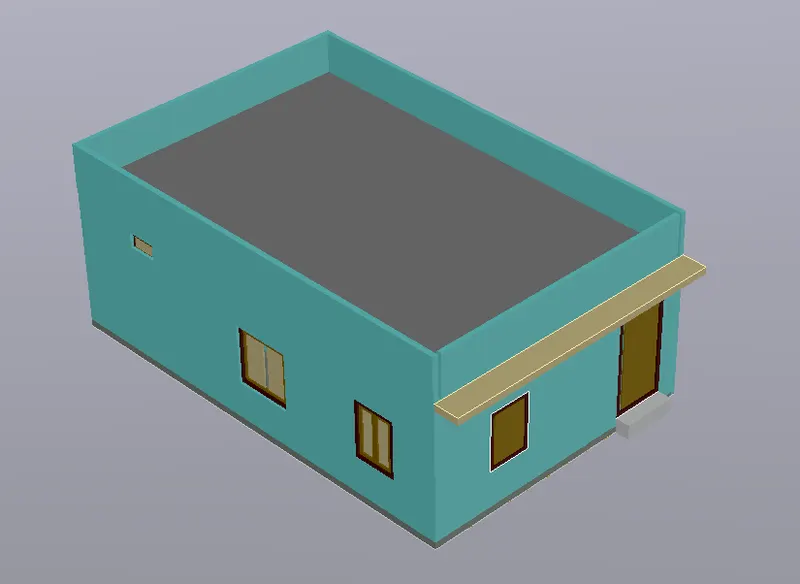
Project 2_Creating a 3D rendered model for a Residential Building in AutoCad
AIM:- To create a 3d view of a residential building
command used
- line
- polyline
- rectangle
- trim
- erase
- move
- copy
- offset
- extrude
- 3drotate
- 3dorbit etc
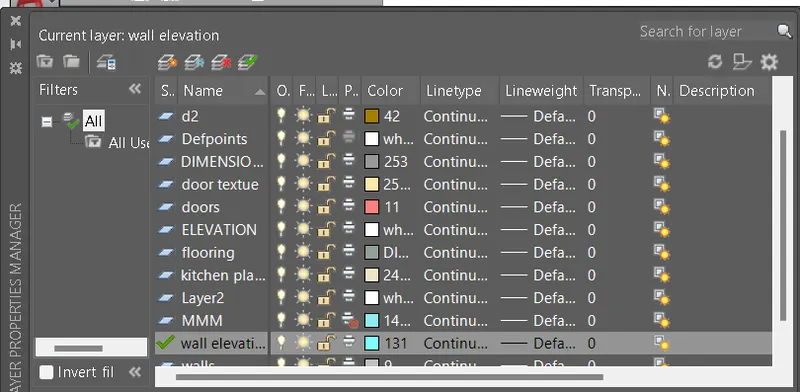
creation of layers
- take a layer command
- Click on create a new layer option
- change the properties of the layer as per the requirement
- similarly other such type of layers can be created
- layers can be switched on and off based on the use
- list of layers created is shown below
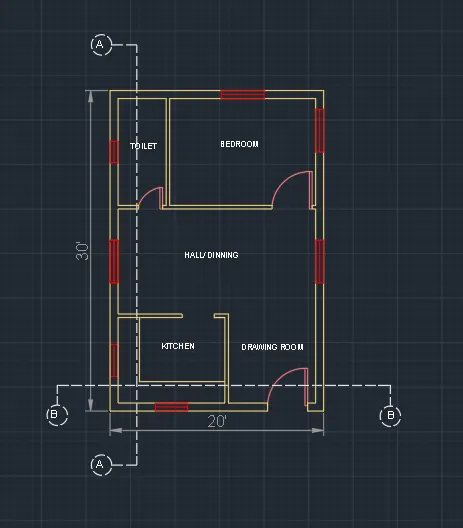
step 1:- to create a plan of a residential building to the assumed dimensions
- take a line command
- specify the first point
- specify the next point as @20'<0
- specify the next point as @30'<90
- specify the next point as @20<180
- specify the next point as @30'<270
- then take an offset command
- specify the offset distance as 9"
- create an offset of all the lines to represent the outer walls
- then take a line command
- draw the lines to divide the plan into rooms
- width of internal walls is taken as 4"
- then draw the doors and windows as per the standards
- then give the label to the rooms by taking mtext command
- given the dimensions to the plan
- then the required plan of the residential building is drawn
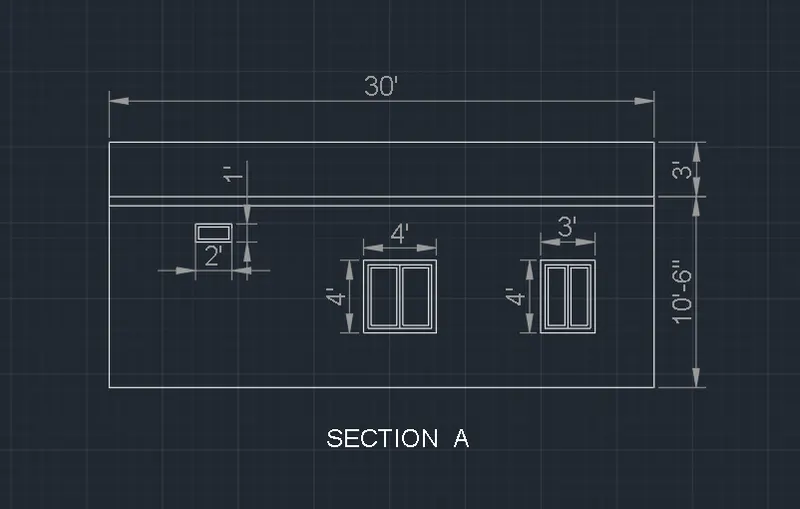
step 2:- To create a sectional view of the elevation of the above residential building
SECTION A
- take Xline command
- draw the lines from the edges of the section
- then draw the horizontal line
- now take an offset command
- specify the offset distance as 10'6" to represent the height of the floor
- then again take offset command
- specify the offset distance as 3' to represent the height of the parapet wall
- now take a line command
- draw the elevation of the windows and ventilator
- size of the window is taken as 3' x 4' and 4'x 4'
- the window is placed at the sill level of 3'
- size of the window is taken as 2' x 1'
- ventilator is placed at the height of 8' from the plinth level
- then show the details of the plan (dimensions)
- then the required elevation of the section view is created
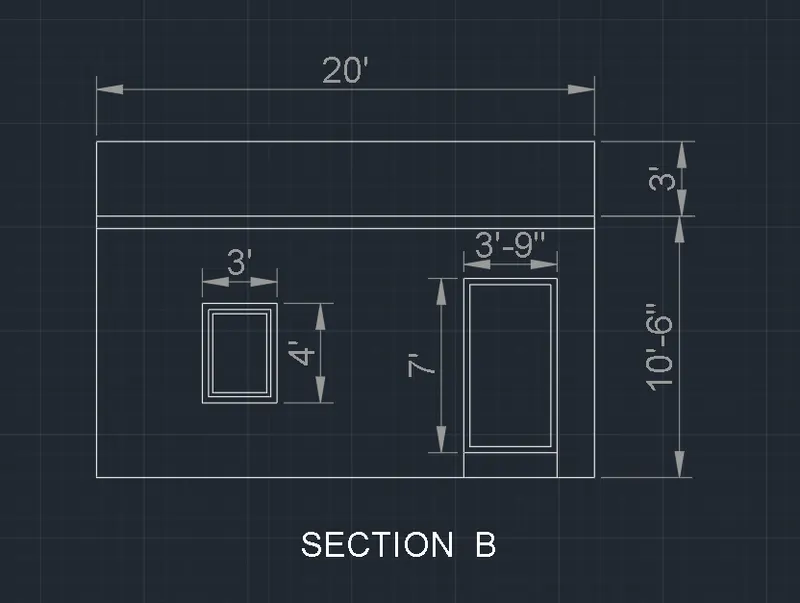
SECTION B
- take Xline command
- draw the lines from the edges of the section
- then draw the horizontal line
- now take an offset command
- specify the offset distance as 10'6" to represent the height of the floor
- then again take offset command
- specify the offset distance as 3' to represent the height of the parapet wall
- now take a line command
- draw the elevation of the door and window
- height of the door is taken as 7' and width as 3'6"
- size of the window is taken as 3' x 4'
- the window is placed at the sill level of 3'
- then show the dimensions of the lines
STEP 3:- To create a 3d view of the plan showing the elevation
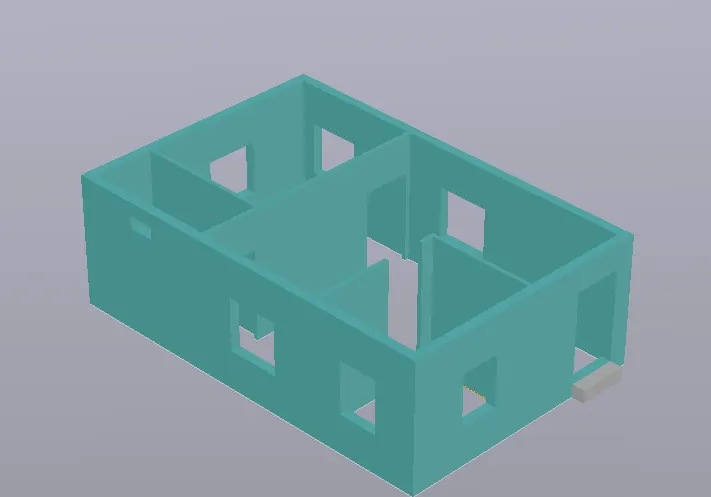
- firstly change the view of the drawing to isometric
- then draw the polyline of the wall boundary
- take an extrude command
- select the objects
- then extrude the objects up to a height of 10'6" (up to the height of the floor)
- then take a union command
- merge the region of the walls on all sides
- then extrude the openings
- windows placed at the sill level of 3'
- ventilator placed at the height of 8' from the plinth
- then to create an opening subtract the object of doors and windows from the solid object of walls
- then the wall with the required width and openings as per the plan is created
step 4:- to draw the elevation
- copy the section view of the elevation
- then take a 3drotate command
- select the object
- specify the basepoint of the object
- then select the rotation axis
- then click on OK
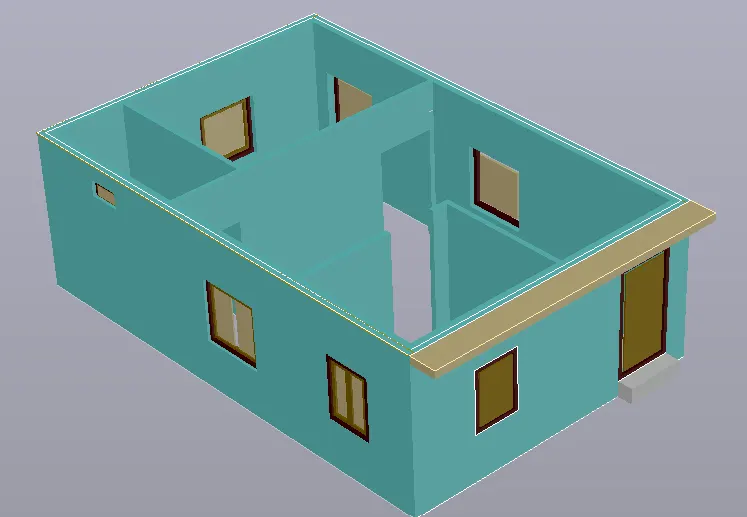
- then select the elevation
- then take an extrude command
- and extrude the boundaries of the doors and windows to differentiate the levels of the wall and openings
- and also provide a sunshade at the lintel level with the projection of 2'
then add flooring to the plan
select the type of flooring from the material browser
add the type of flooring
and click on assign
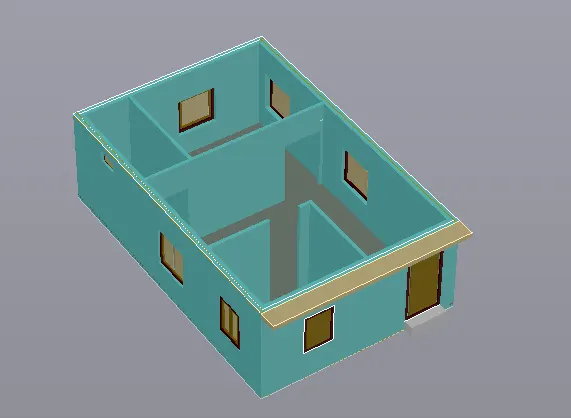
then create a slab floor
and add the parapet walls to the slab
parapet wall of 4" is provided with the height of 3'