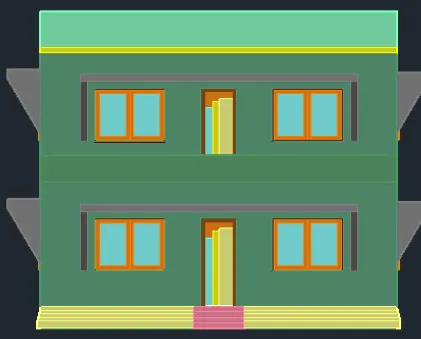
Project 2_Creating a 3D rendered model for a Residential Building in AutoCad
Q.1 Create a 3 dimensional model of the residential building with a rendered view.
AIM:-
To create a 3Dimensional modal of the residential building and create a render view.
Procedure:-
To create a 3d modal of the residential building i have drawn a random plan of size10500x8000 sq. mm which have a required rooms the plan and elevation details are below:
- Open the autocad
- Type UN and specify engineering and select precision as 100,100mm
- Draw a plan of 10500x8000mm
- type offset and specify 230mm and do the offset
- Trim the extra line using trim command
- Type offset 150mm and do the offset for room
- Draw the toilet
- Draw the window and door using line command
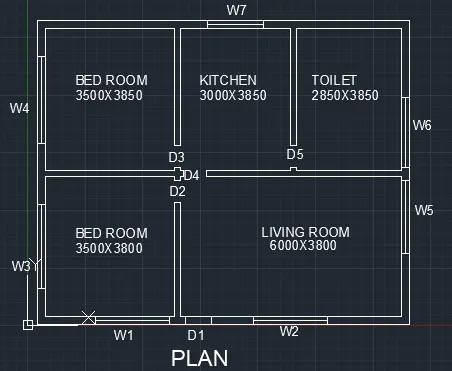
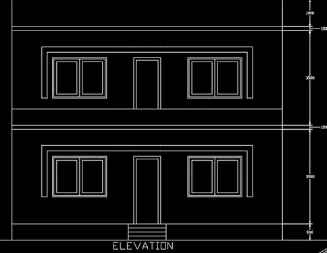
Procedure:
1. Extrude- To give height to a surface or giving distance or height in z axis of an object in x y plane so that i become 3d.
2. Offset- To Draw the offset line. command "o"
3. UCS- command "USC" To change the usc so as to draw in that face ie. x and y plane will be made in the selected face so that it is easy to draw in that plane. Default is UCS world.
4. BOx- To create a box. it is found in the ome toolbar.
5. UNION- Command "union" To make different 3rd object into a single enitity.
6. Move- command "m"- To move an object in a particular axis . coordinate also can be given for moving an object after the command.
7. 3dorbit - command "3do" to rotate the object so that we can view around 360 degree.
8. Loft- Command " loft' is available in home toolbar. it is used to connect two section of an object.
9. Sweep - command-"sweep' or in home toolbar. it is used to created a 3d along a path created from the cross section.
11. Cone- it is an primitive object.
12. Region- command "region". it is used to create a region in a particular face so that it can be created to a solid while extruding.
13. Boundry - Command - "BO" from this command also region can be created.if the encircled region is created by different lines.
14. Layer- Layer is used to assign the different layers created to the different components with different colours to distinguish.
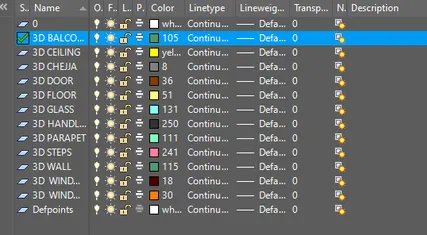
step 1: Create a plinth level and wall by using region and boundary.
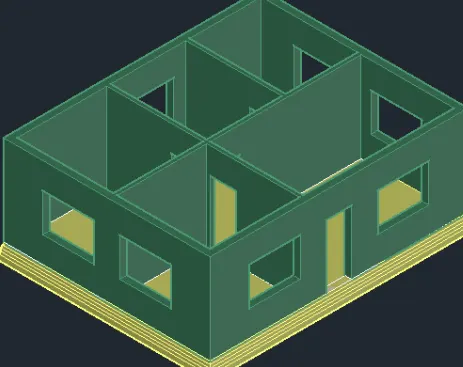
step 2: Creating window and door and placing it in a place and placing ceiling over the ground floor.
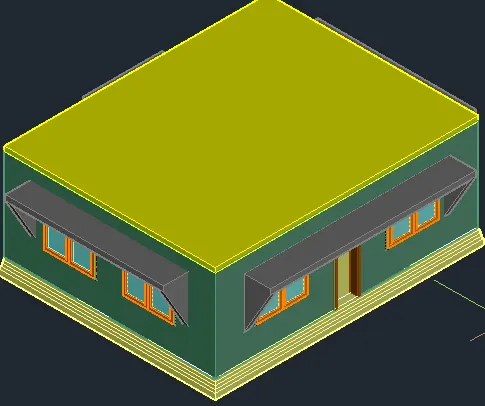
step 3: creating the ceiling of the first floor and creating the parapet wall.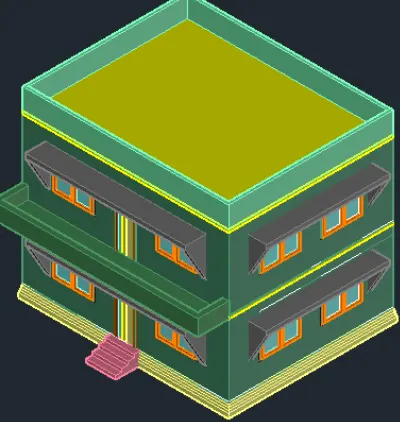
Result: