Project 2
Aim: Route the Wiring harness on Given car body and Prepare flatten view drawing in CATIA V5. Application of all Packaging rules, Industry best practices studied in this course shall be demonstrated in design. Apply Protection coverings as required.
Objective: The objective of this project is to route the wiring harness and prepare flatten view drawing for the tailgate of the car. All types of packaging rules have to be considered while routing the harness and industry based practices shall be demonstrated in harness design. All necessary details like clearance, clipping/clamping selection, harness fixing requirements, harness continuity should be provided in order to design the wiring harness.
INTRODUCTION:
WIRING HARNESS OR CABLE HARNESS:
A cable harness, also known as a wire harness, wiring harness, cable assembly, wiring assembly, or wiring loom, is an assembly of electrical cables or wires which transmit signals or electrical power. The cables are bound together by a durable material such as rubber, vinyl, electrical tape, conduit, a weave of extruded string, or a combination thereof.
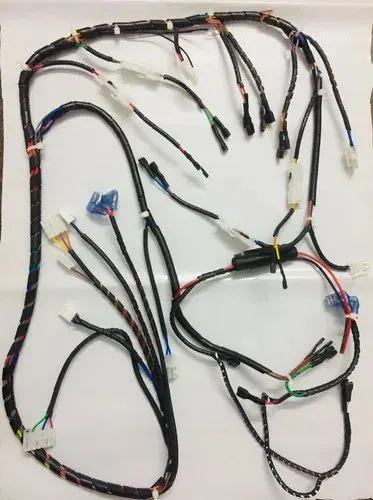
Cable harnesses are usually designed according to geometric and electrical requirements. A diagram is then provided (either on paper or on a monitor) for the assembly preparation and assembly.
The wires are first cut to the desired length, usually using a special wire-cutting machine. The wires may also be printed on by a special machine during the cutting process or on a separate machine. After this, the ends of the wires are stripped to expose the metal (or core) of the wires, which are fitted with any required terminals or connector housings. The cables are assembled and clamped together on a special workbench, or onto a pinboard (assembly board), according to design specification, to form the cable harness. After fitting any protective sleeves, conduit, or extruded yarn, the harness is either fitted directly in the vehicle or shipped.
COMPONENTS:
(a).Connectors:
1.
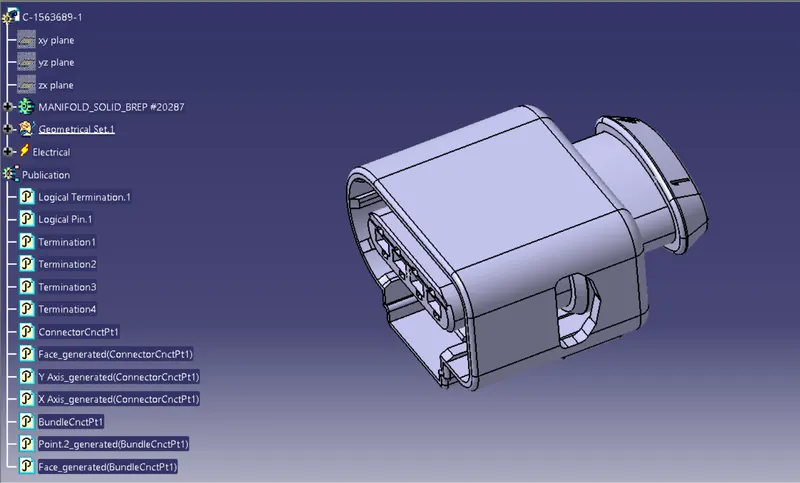
Part No: C-1563689-1
No of terminals: 4
No of Quantity : 4
2.
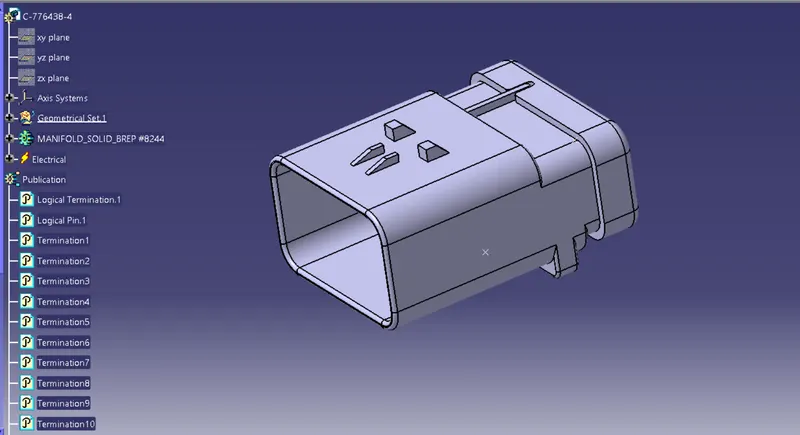
Part No : C-776438-4
No of terminals: 12
No of Quantity : 1
(b).Mounting Equipment:
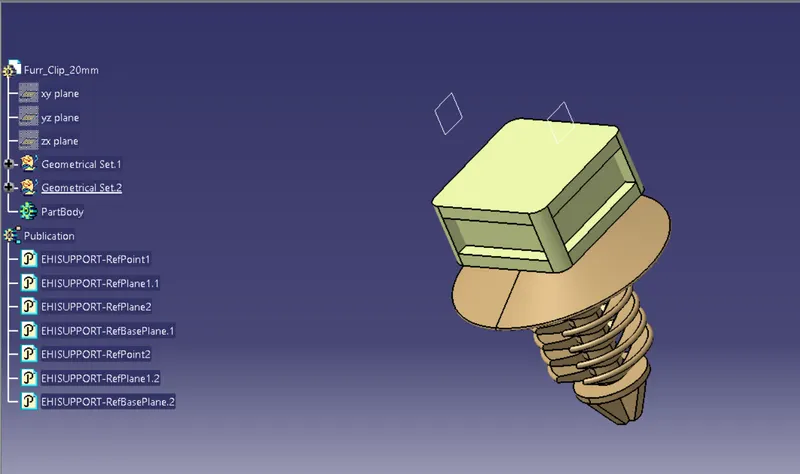
1. Furr Tree Clip
No of Quantity : 7
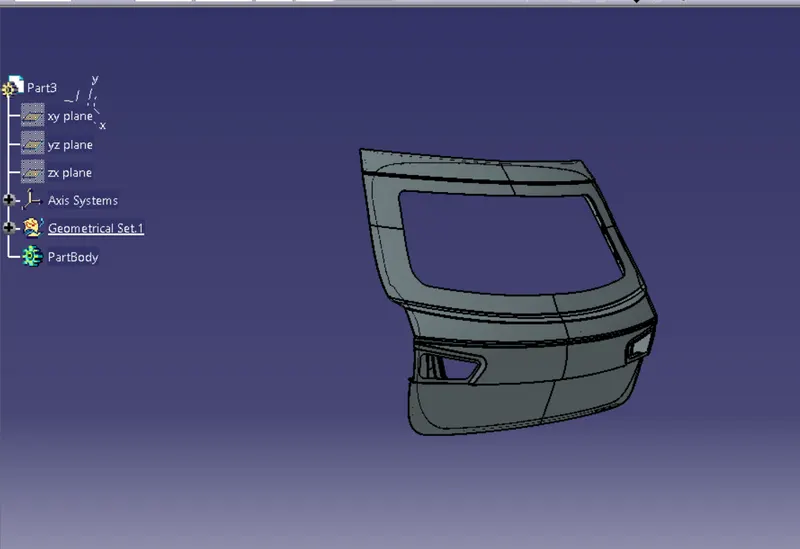
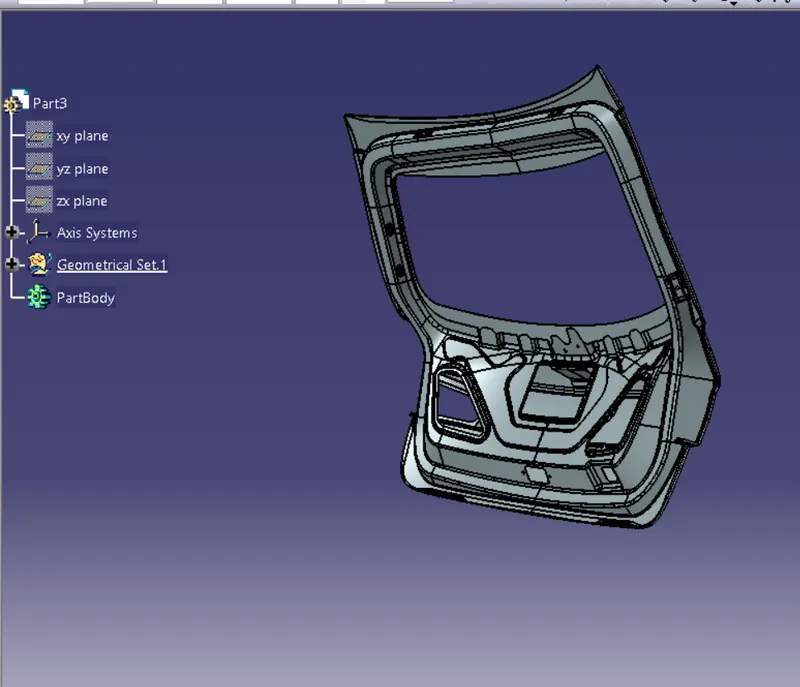
Given Tailgate:
Assumptions:
- Wiring harness should be routed in such way that it is easy to assemble and access.
- Easy manufacturing, installation, removal and maintenance have to be considered while designing the wire harness.
- Wiring Harness should be kept away from sharp environment like edges, corners etc.
- Avoid harness routing and clipping in the blind zones or hard to reach areas during harness assembly or service.
- Provide additional slack if needed according to the surrounding and harness bending requirement. If harness is passing through the closures/doors or tail gates then envelope dimensions during opening and closing of doors shall be considered to provide the slack. Check the harness slack requirements with open and close conditions to avoid excess slack.
- Routing through small structural holes and openings shall be avoided. To minimize chaffing and handling of the wiring harness during installation.
- It should be make sure that there is no case of fouling while designing the wiring harness in the CAD environment. Additional mounting equipments like clips/clamps may be used to avoid fouling.
- Use of rubber grommet is recommanded if harness is passing through sheet metal panels. Example- firewall, passing to door, tail gate etc.
- The branch length should be greater than 50mm.
- The minimum distance between the clip and branch point should be at least 25mm.
- The minimum distance between the two branch points should be at least 50mm.
- Clips/clamps used for the wiring harness should be easily available in the market to avoid extra cost for custom mounting solutions.
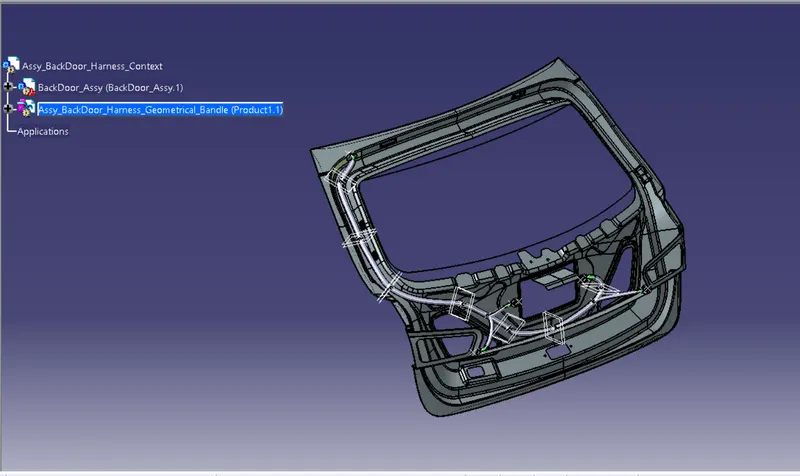
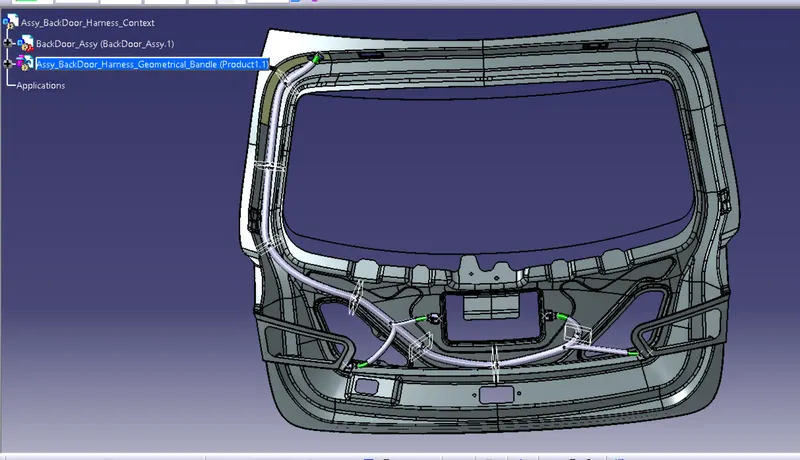
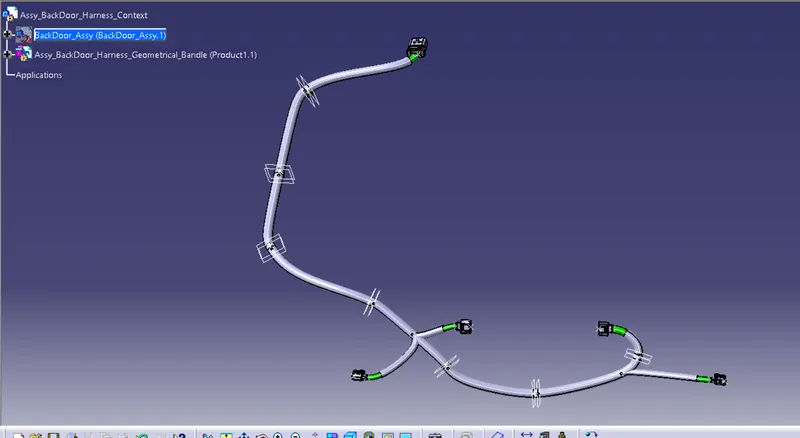
HARNESS ROUTING:
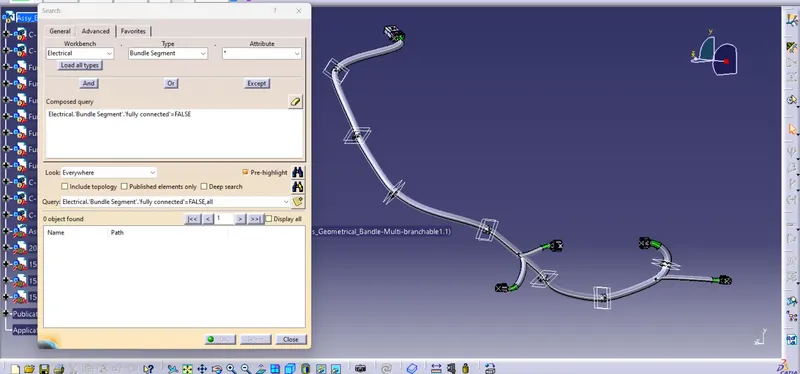
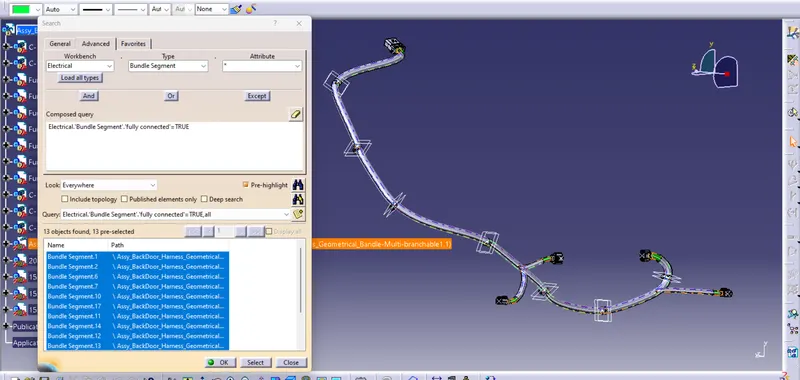
BUNDLE CONTINUITY CHECK:
Creating flatten product and Flatten drawing view of harness assembly:
Flattened product is 2D representation of harness bundles along with all the electrically defined equipments to present it on piece of drawing paper.
To create flattening product of the assembly working bench should be Electrical harness flattening, name the new product as car body hatch flattening assy and define flattening parameters as shown in the figure, and make sure to use single line foe bundle and double line for PVC tapes for better differentiation.
Once the parametrs are defined , the geometrical bundle assembly should be extarcted in to the flattening product by using the extract option in the work bench. Once the assembly is extracted use the flatten option to flatten the entire assembly.
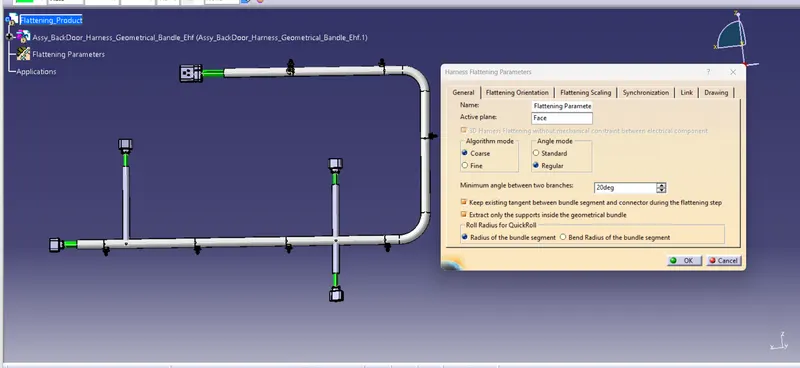
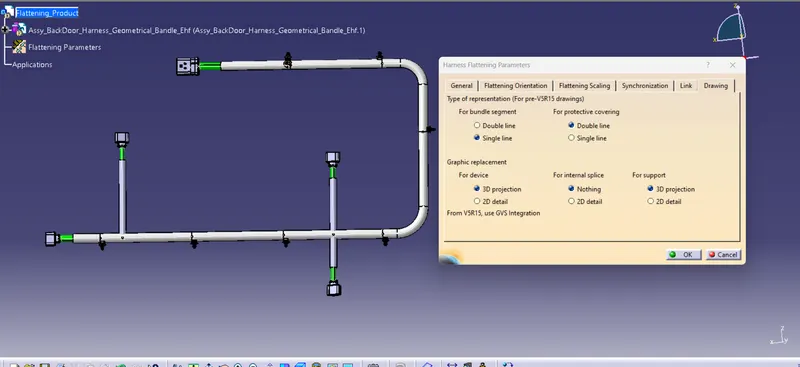
Once the flattened product is obtained make all the necessary changes like scaling, rolling, rotating, straightening etc. Now transfer the flattened assembly on to the 2D drawing sheet by creating new drawing sheet and save the drawing sheet in the same location as all the files saved before.
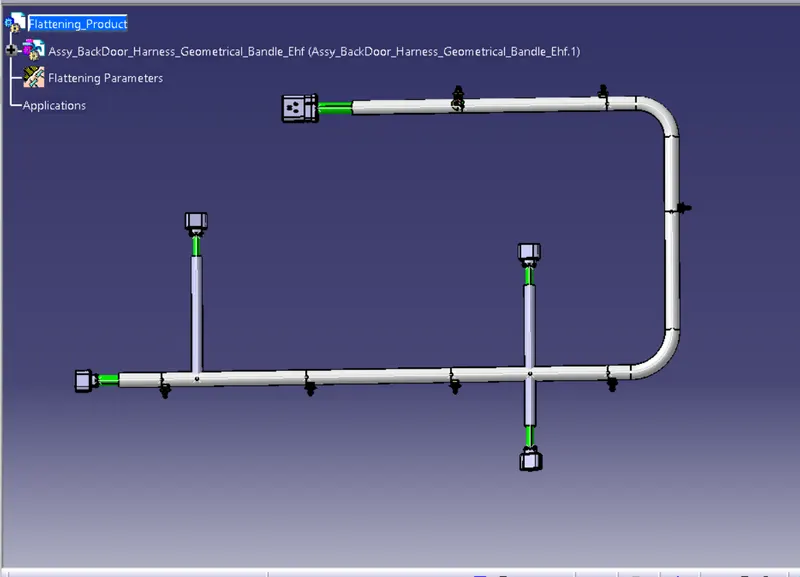
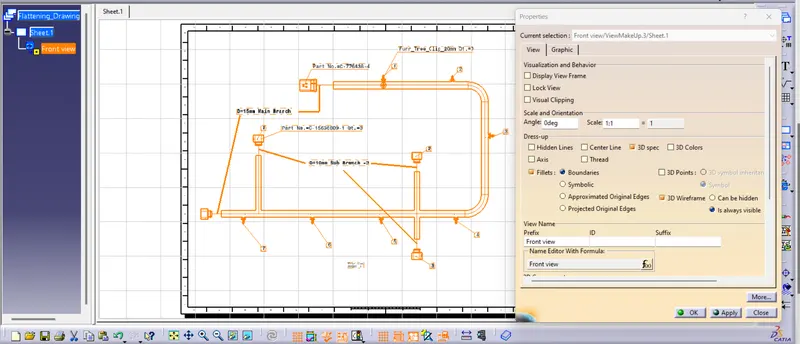
Now select the front view option and select the plane of the flattened which was selected earlier in the flattening properties.
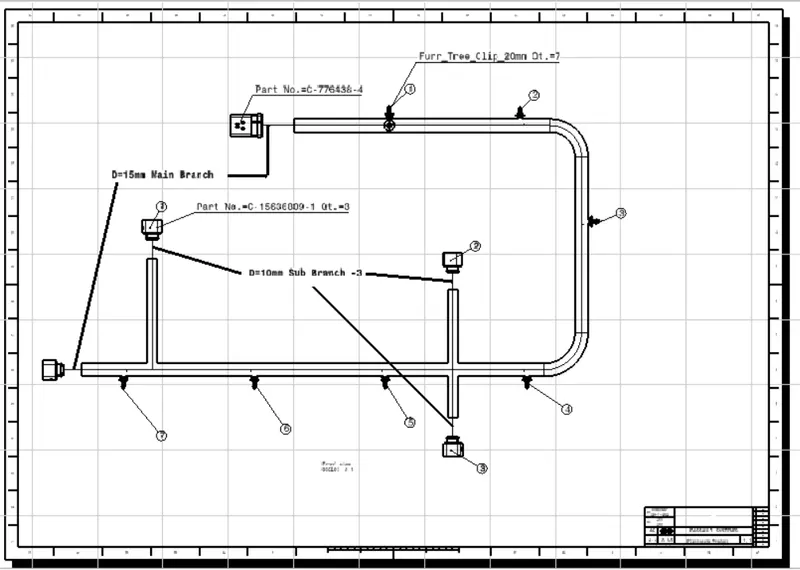
Now the 2D diagram of flattened model is displayed on the drawing sheet, now to go the that drawing properties and in the view section make sure 3D wire frame is always ON which represents the bundles and make sure the graphic for device is 3D projection for better identification and understanding and single line for bundle and double line for protective coverings, and 3D colors can be added for better look as per the image shown below.
The connectors namings can also be given by selecting the text option, and drawing frame and title block, BOM table can also be added for better understanding.
Drawing:
Conclusion:
Routing of wiring harness for car body hatch is done and flatten view for harness assembly is created in CATIA V5. In the process of this project various packaging rules and constraints are considered for routing the wiring harness. Industry best practices are considerd while designing wiring harness. Every minute details and major details like clipping and clamping section, Clearences, harness fixing requirements, bundle continuity are all considered in this design process.