Project 2
A 100 m WBM road needs to be constructed inside the Skill Lync Education center premises to allow access to the centre for students and faculties.
Create the following Project (under same EPS/OBS as project-1) and Resource :
Project Name - Education Centre Road
Assume - Calendar as 6 x 24 and start date on 22nd feb 2021
Please do the following:
1. Develop the project schedule as per the criteria above
2. Use 3-Tier timescale with Year / Month / Weeks
3. Define and Add resources
4. Add a budget to your project - INR 6 cr.
5. Assign a baseline to the project
6. Add following expense:
Task - 1 - Rs 20,000/- (Item - Fuel)
Task - 2 - Rs 30,000 /- (Item - Maintenance)
7. Generate material resource costs curve
8. Generate an activity wise cost report
9. Create a reflection
10. In the reflection, auto update the project at 15 days from start
11. Open a TSLD view of the project in Visualizer
12. Add curtains up-to first 15 days of the project.
13. Find out the actual cost for labour, non-labour and material cost of the updated schedule
Ans:
Project: Education Centre Road
Introduction:
This report outlines the creation and analysis of a project schedule for constructing a 100m WBM road within the Skill Lync Education Center premises. The project will be created under the same EPS/OBS as project-1 in Primavera P6 with specific assumptions and functionalities implemented.
Step-by-Step Guide:
1. Create the Project:
- Open Primavera P6.
- Go to the "Projects" tab and click "New Project."
- Select the EPS as Skill Lync Education
- Enter "Education Centre Road" as the project name.
- Select the start date as 22nd February 2021.
- Select the responsible manager as Project Manager
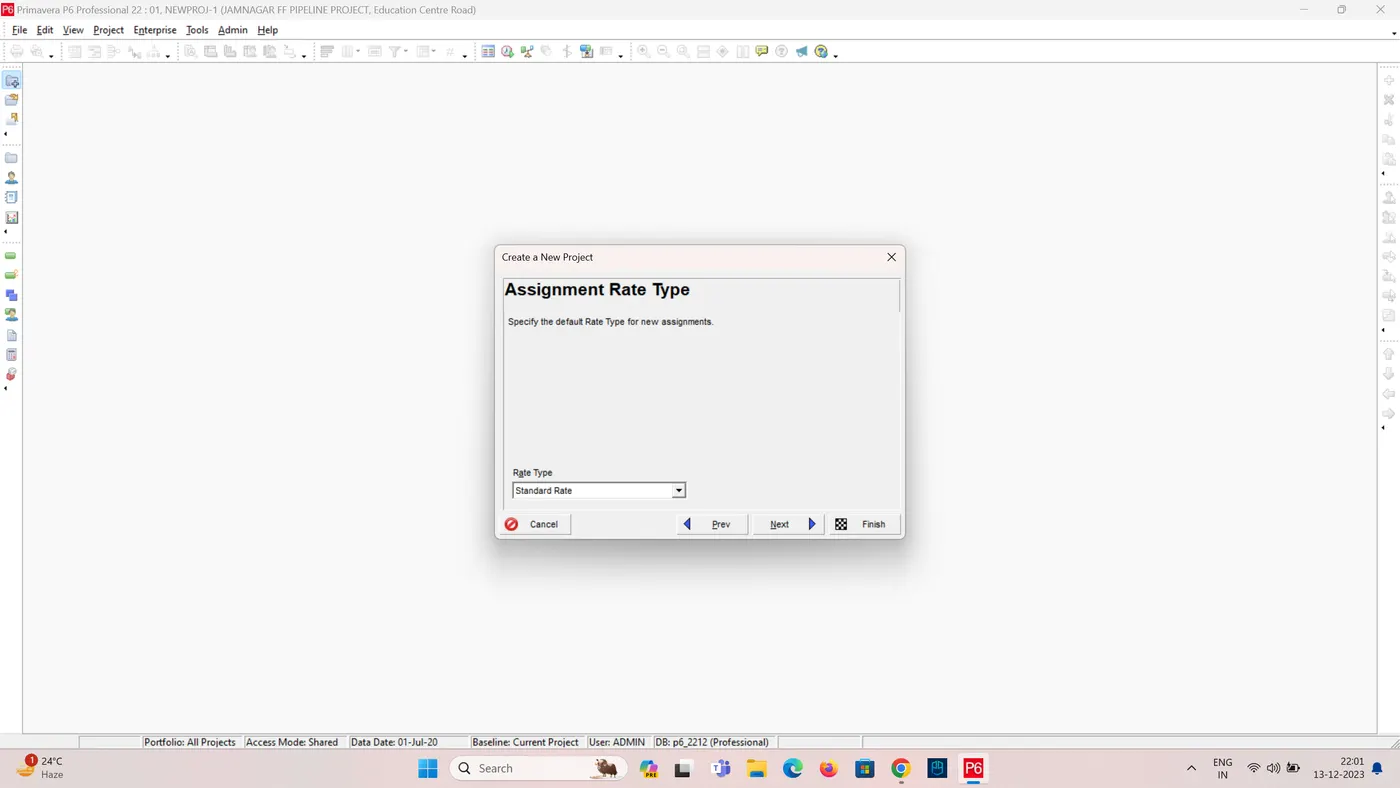
- Select the Standard Rate type.
- Click Finish to create a project.
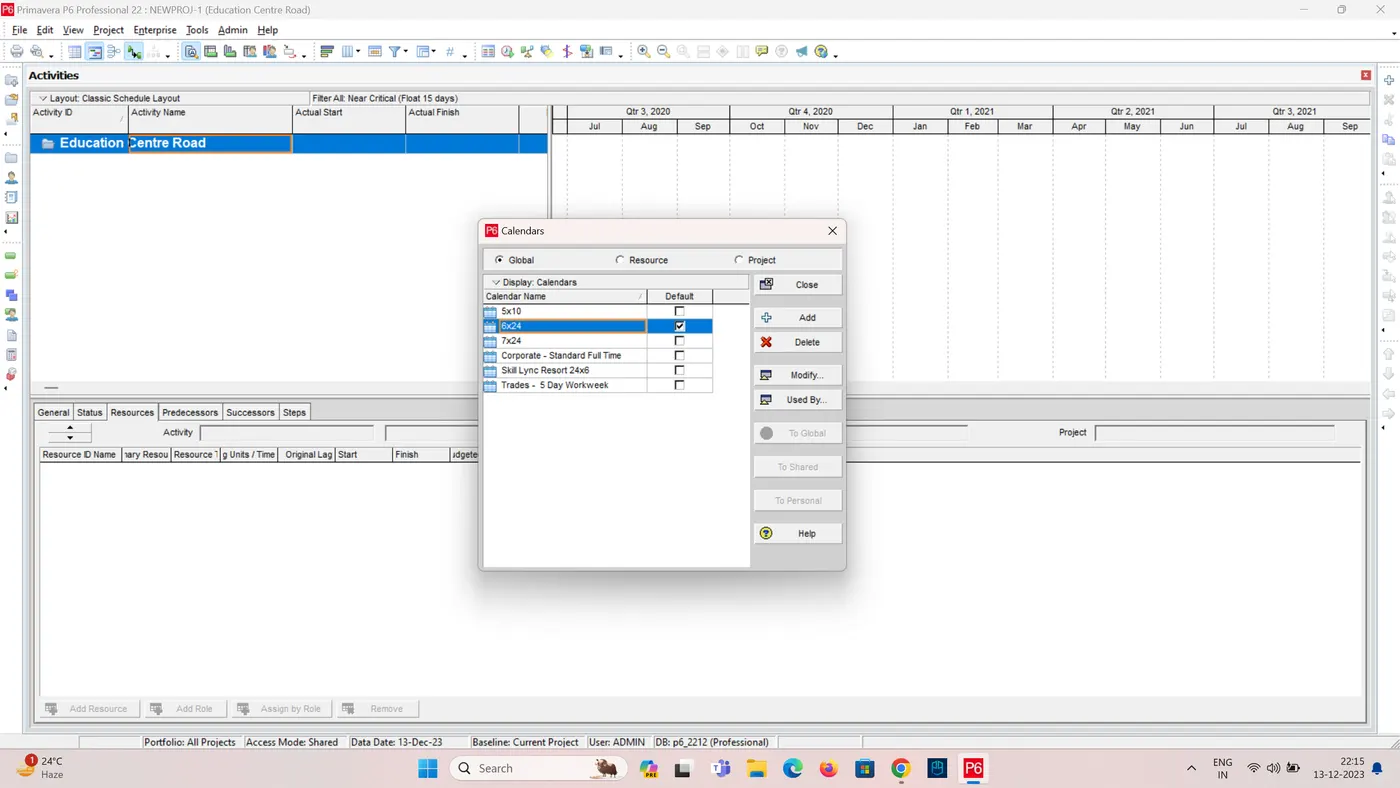
- Define your base calendar as "6 x 24" to represent a 6-day work week with 24-hour workdays.
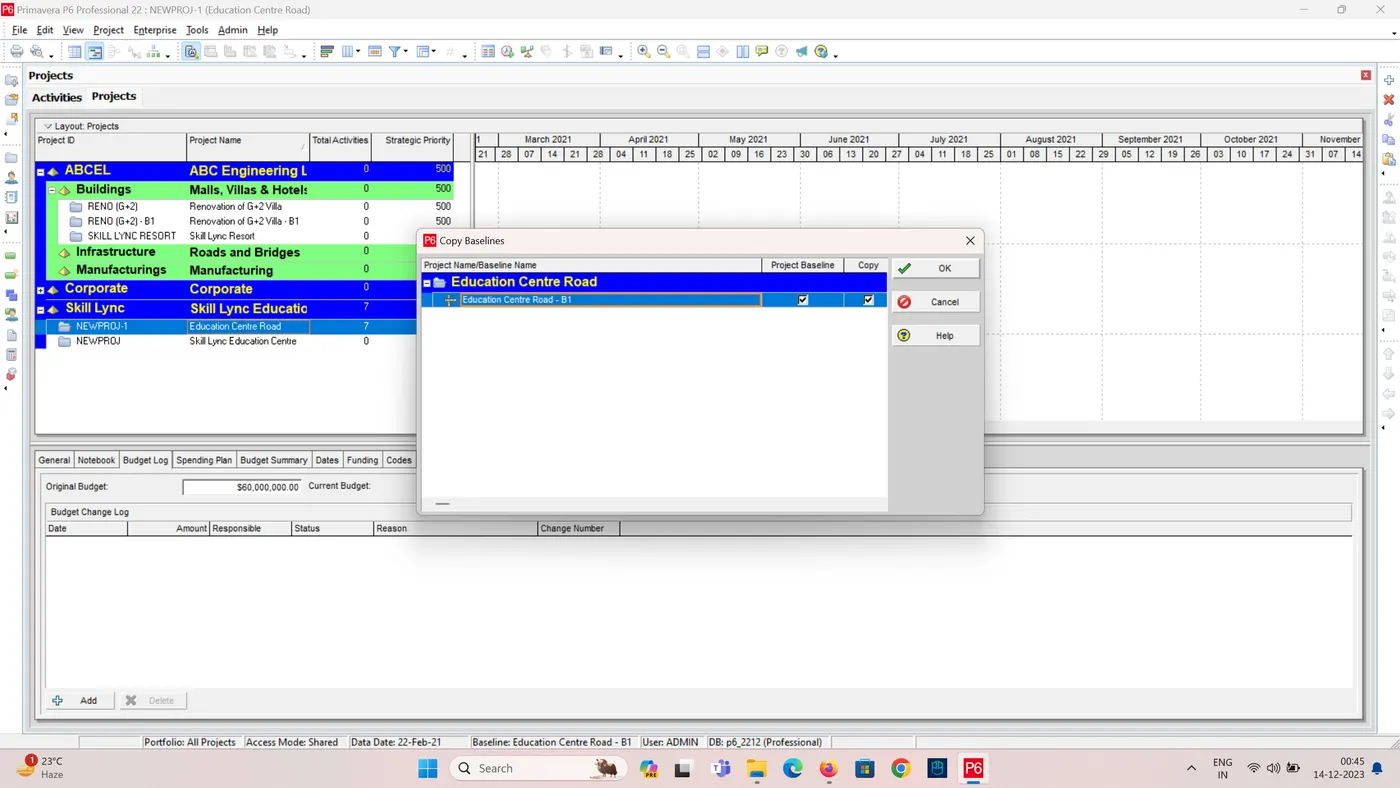
- Now open the created project by Clicking the "Open" button on the EPS toolbar. This will open the Open Projects dialog box.
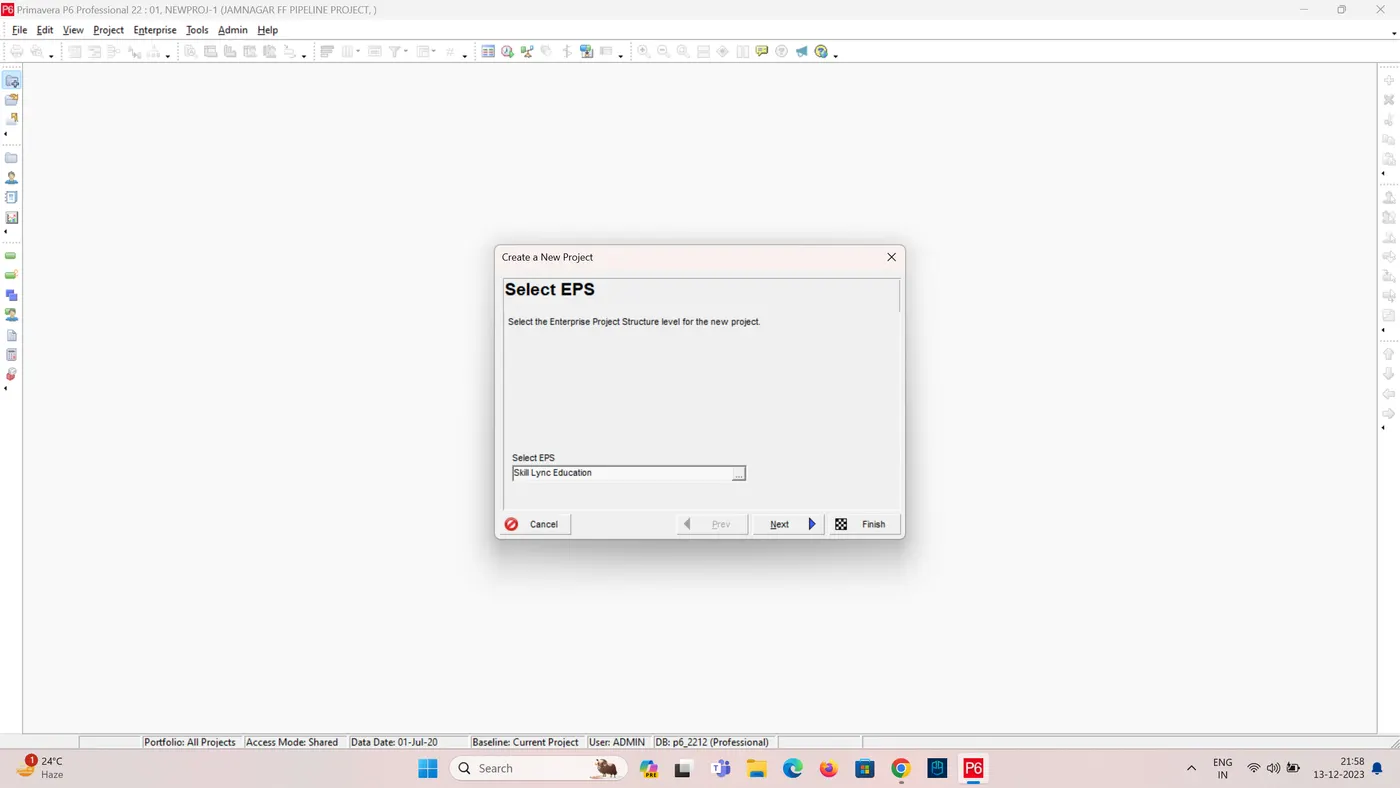
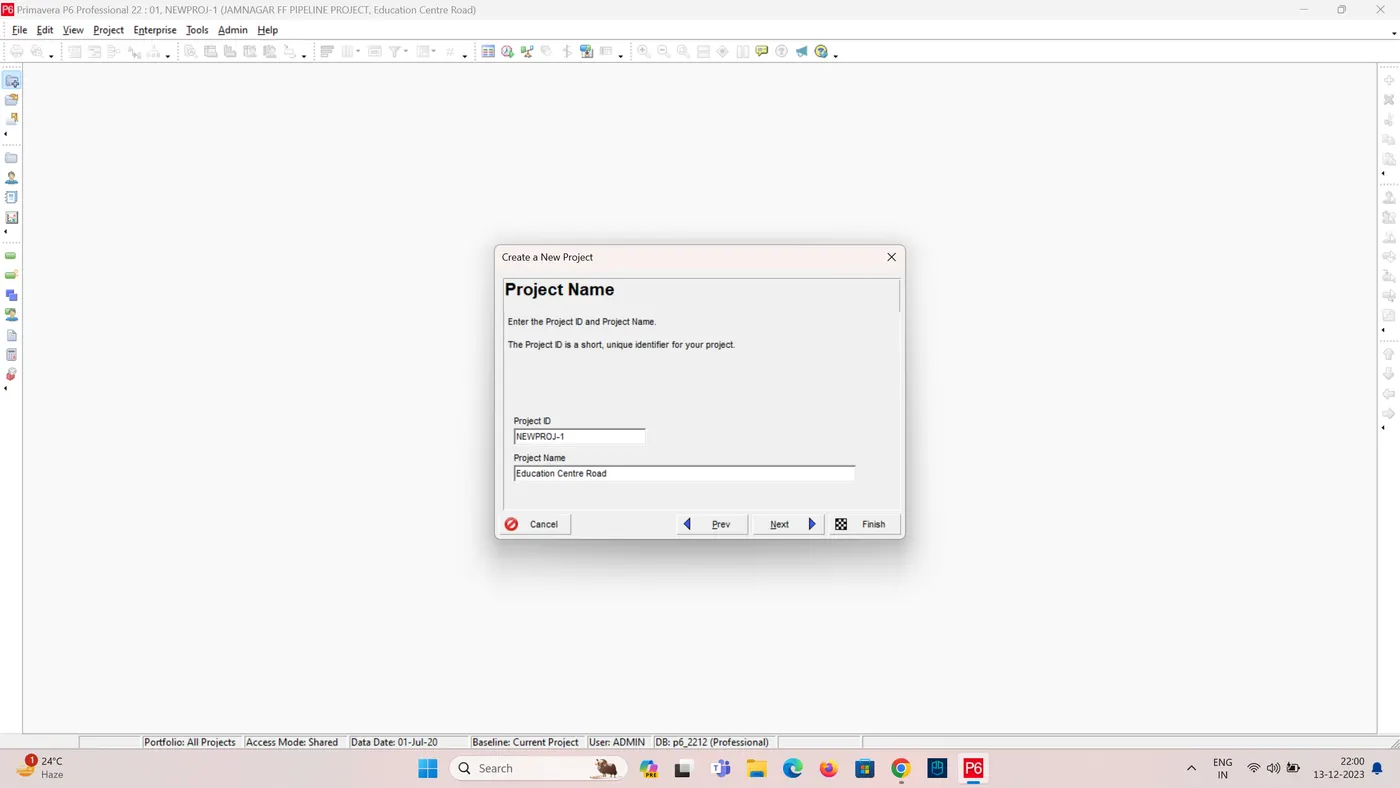
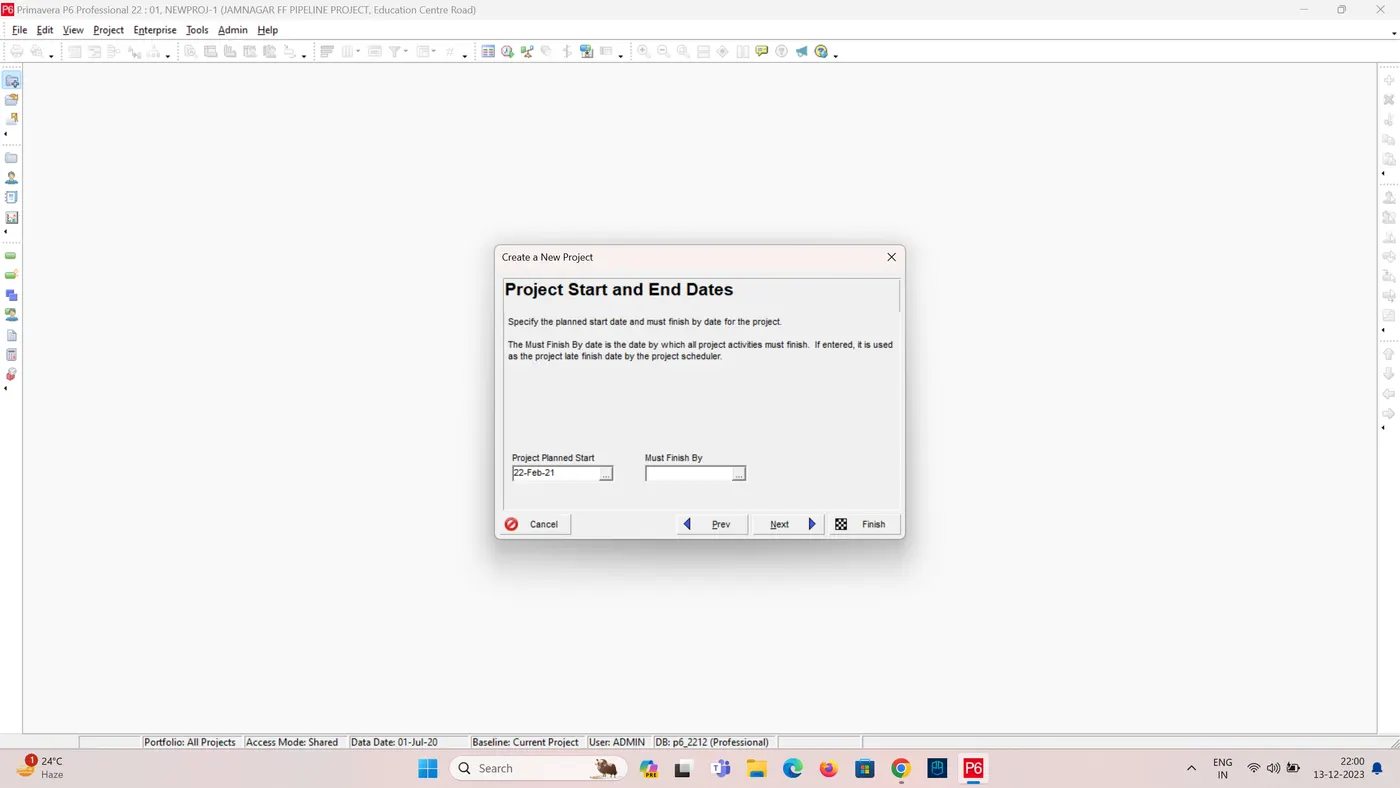
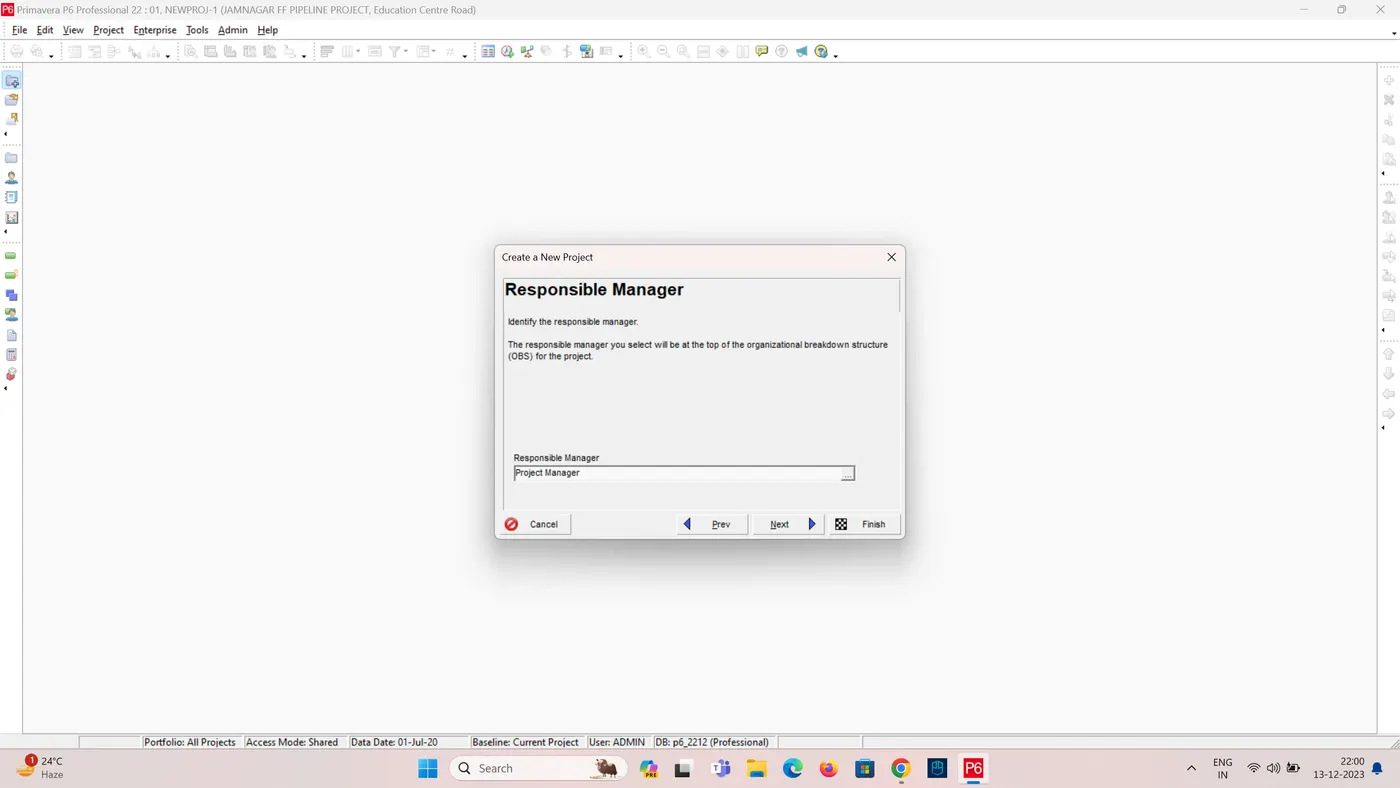
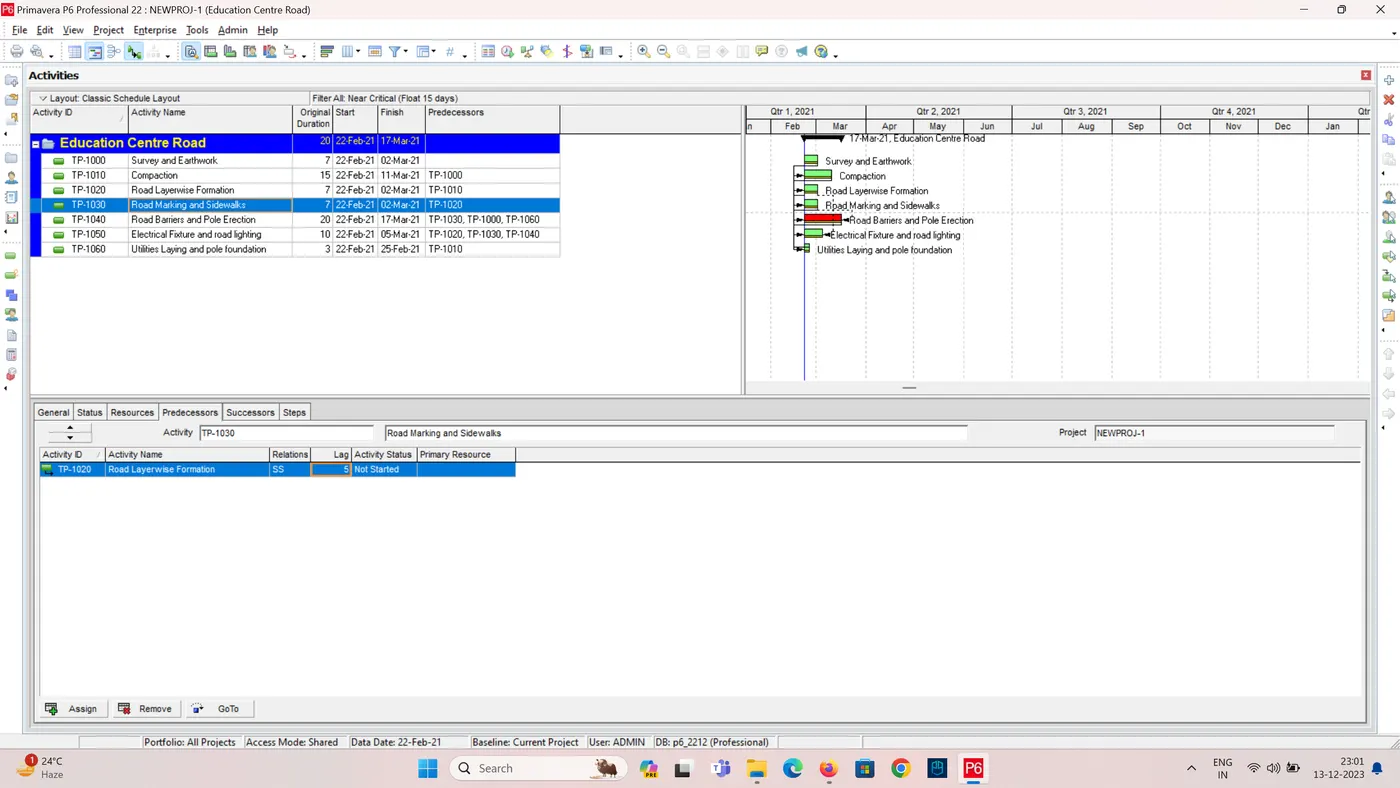
2. Create the Activities:
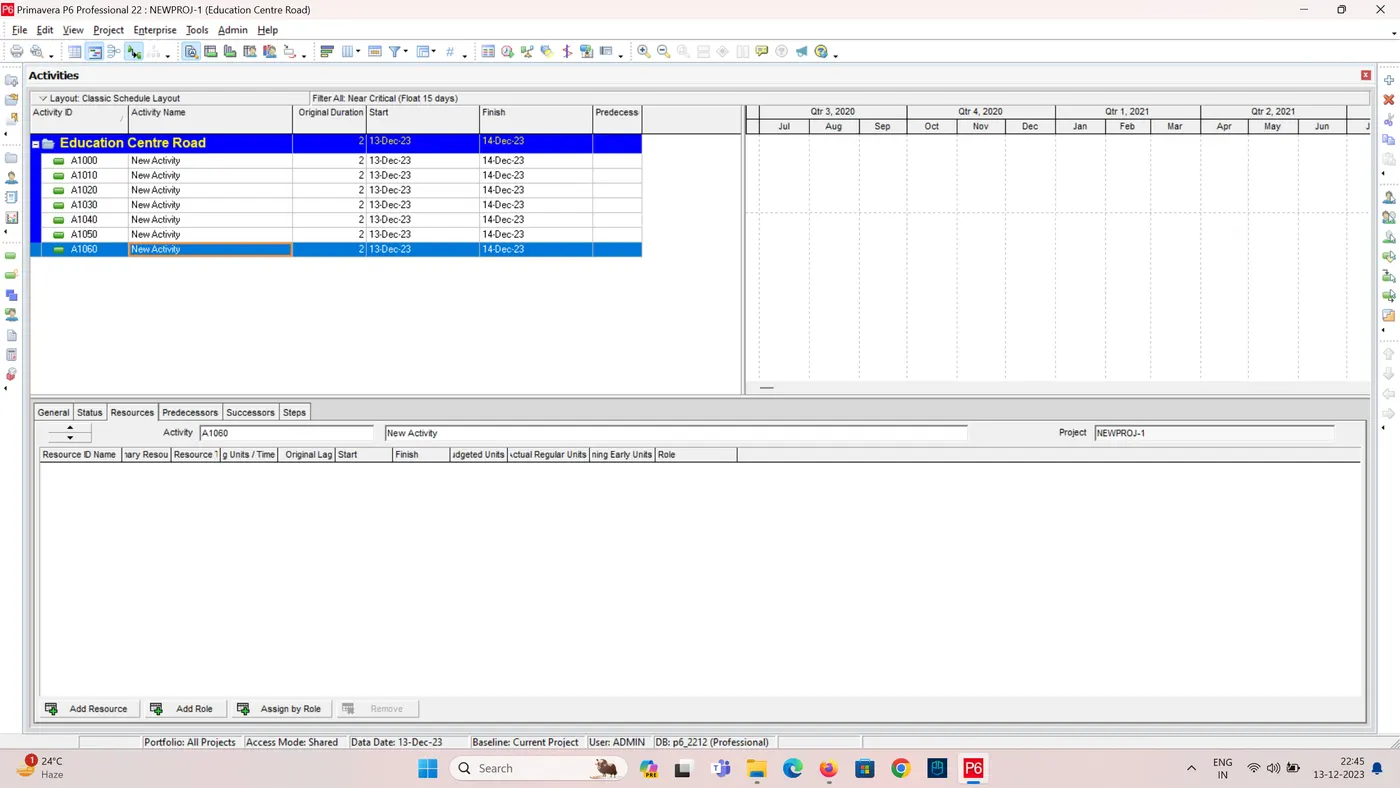
- Click on the New Activity button.
- In the Activity ID field, enter a unique identifier for the activity.
- In the Activity Name field, enter a descriptive name for the activity.
- In the Duration field, enter the estimated time it will take to complete the activity. You can choose from various units like days, hours, weeks, etc.
- You can also use the Start and Finish date fields to specify the planned dates for the activity.
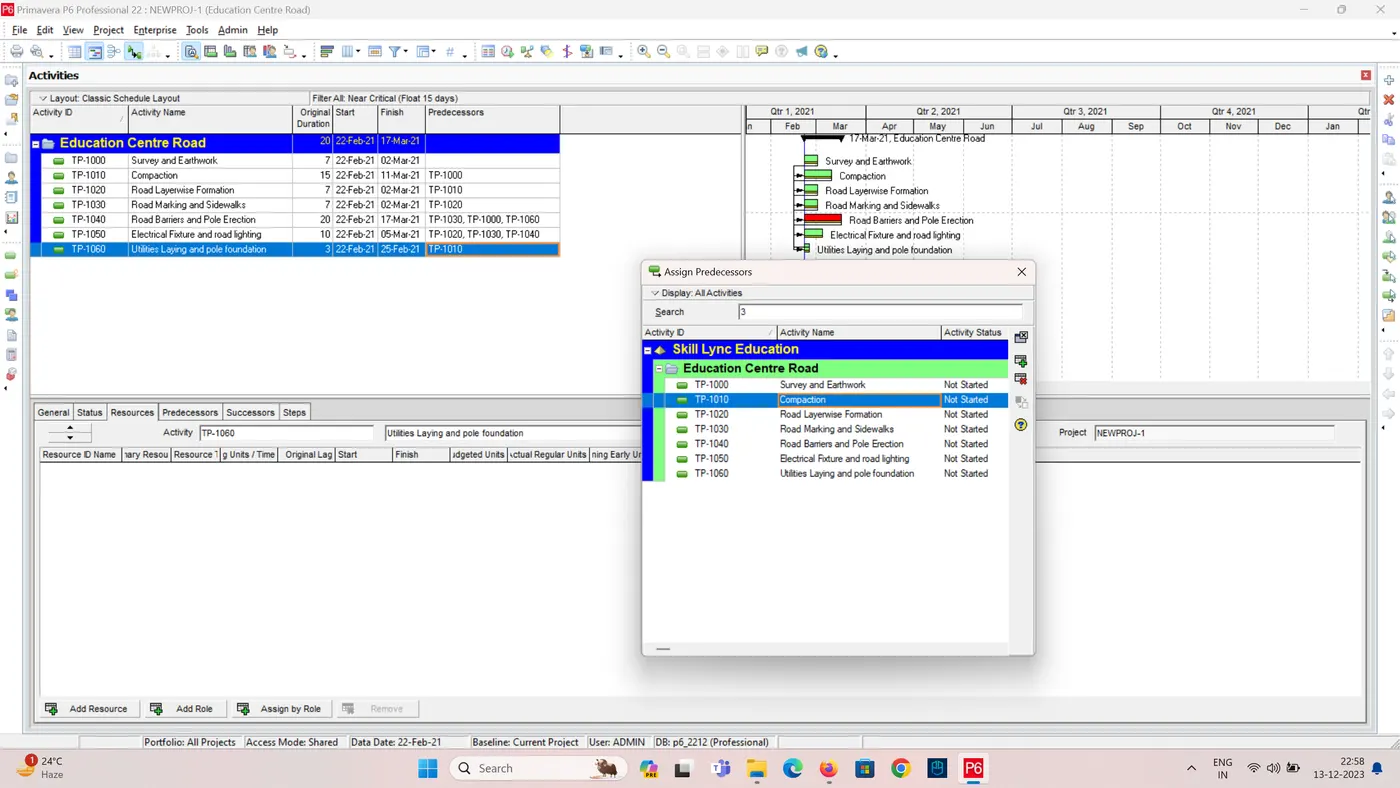
- Click on the Predecessors tab.
- Click on the Add button.
- In the Activity field, select the activity that must be completed before this activity can start.
- Choose the type of relationship between the activities. Common relationships include:
- Finish-to-Start (FS): This means the successor activity can start once the predecessor is finished.
- Start-to-Start (SS): This means both activities start at the same time.
- Finish-to-Finish (FF): This means both activities finish at the same time.
- add a lag or lead time to the relationship which is given in the question. A lag delays the start of the successor activity, while a lead allows it to start before the predecessor finishes.
- Follow steps to create and link all activities in your project.
- You can use the drag-and-drop functionality to rearrange activities in the list.
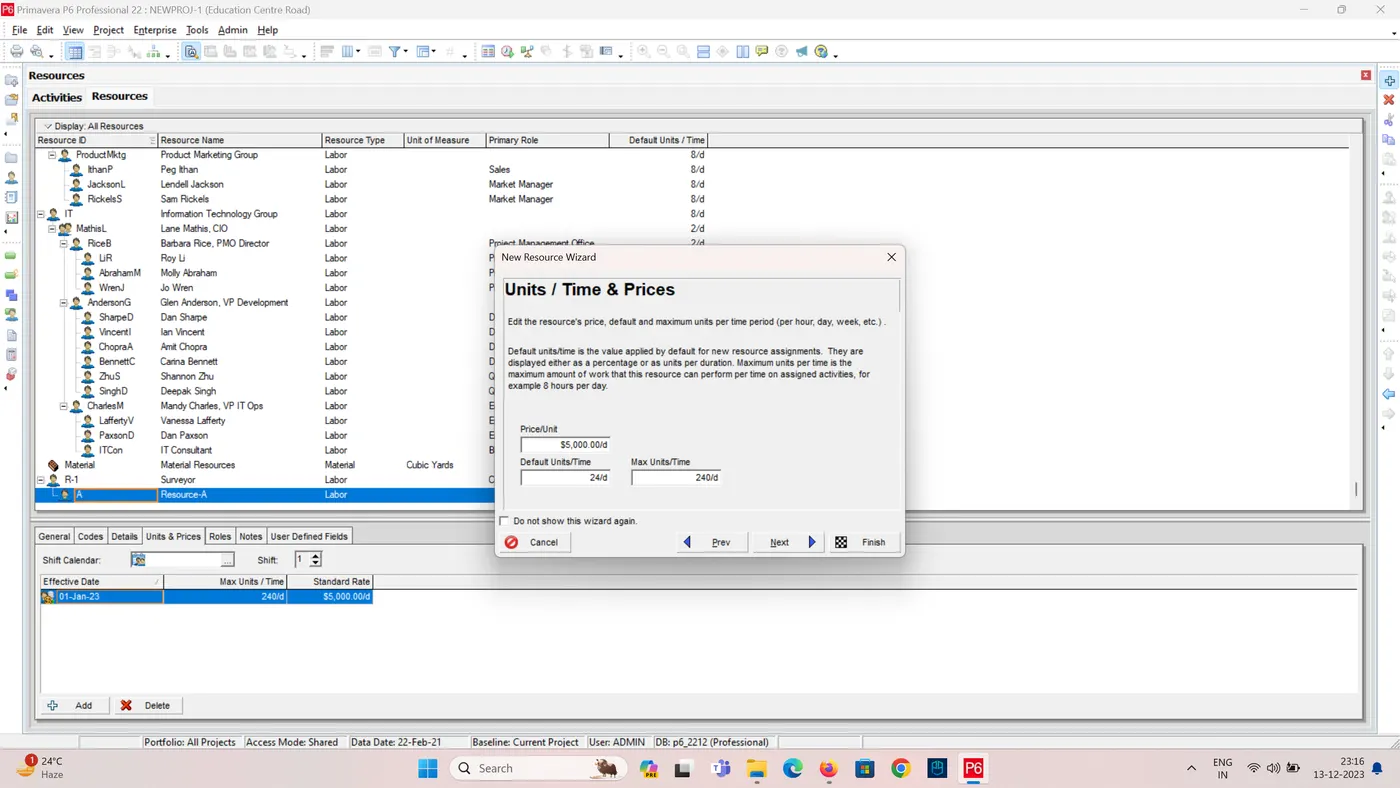
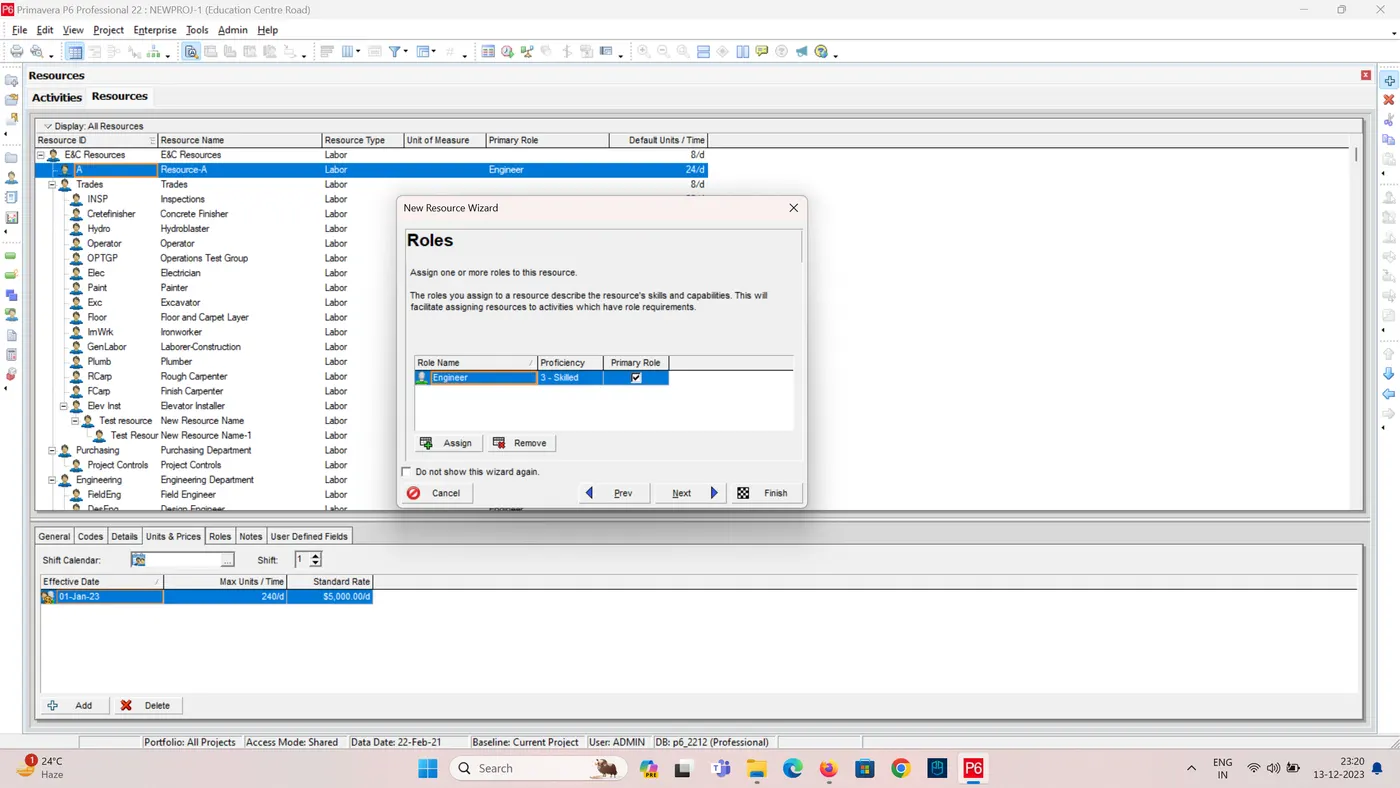
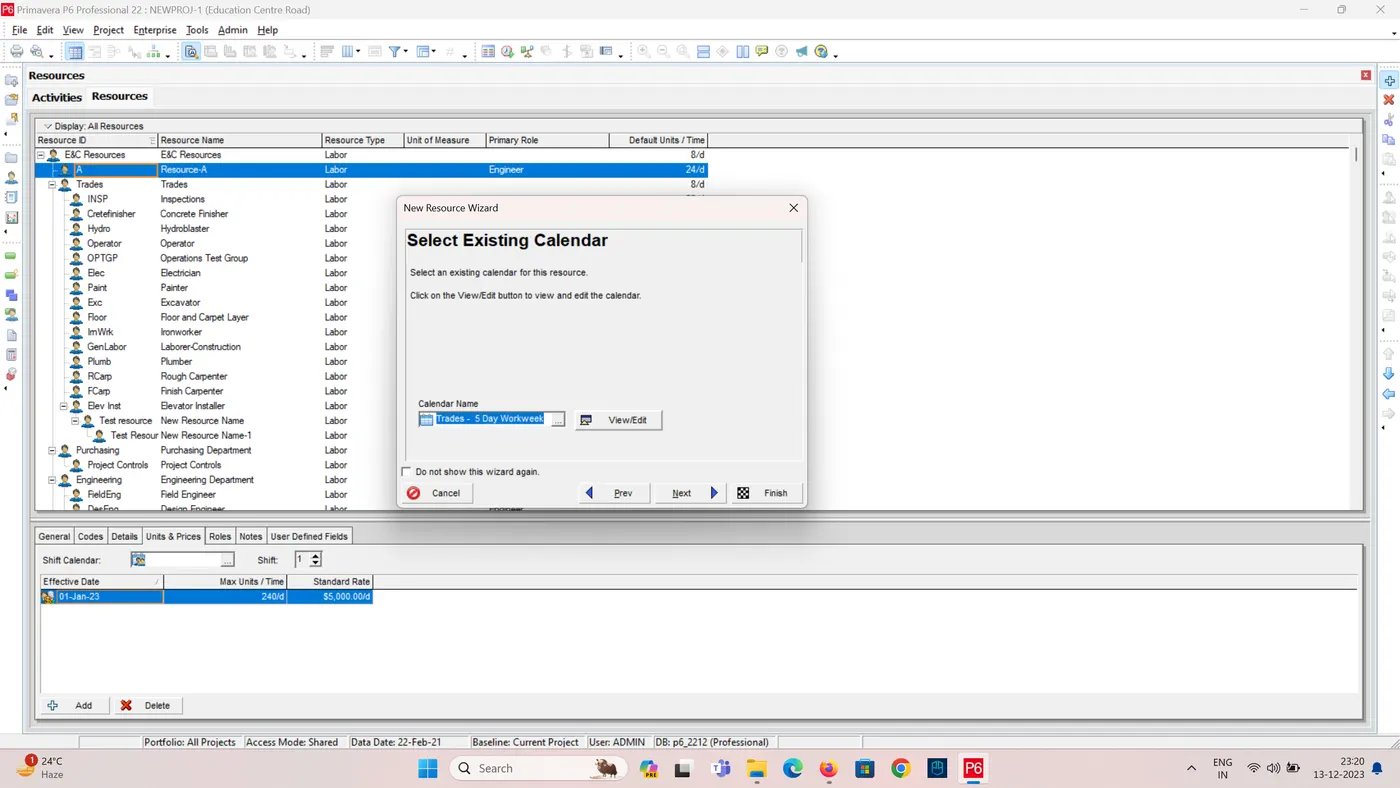
3. Create Resource and assign the suitable resource to the activity:
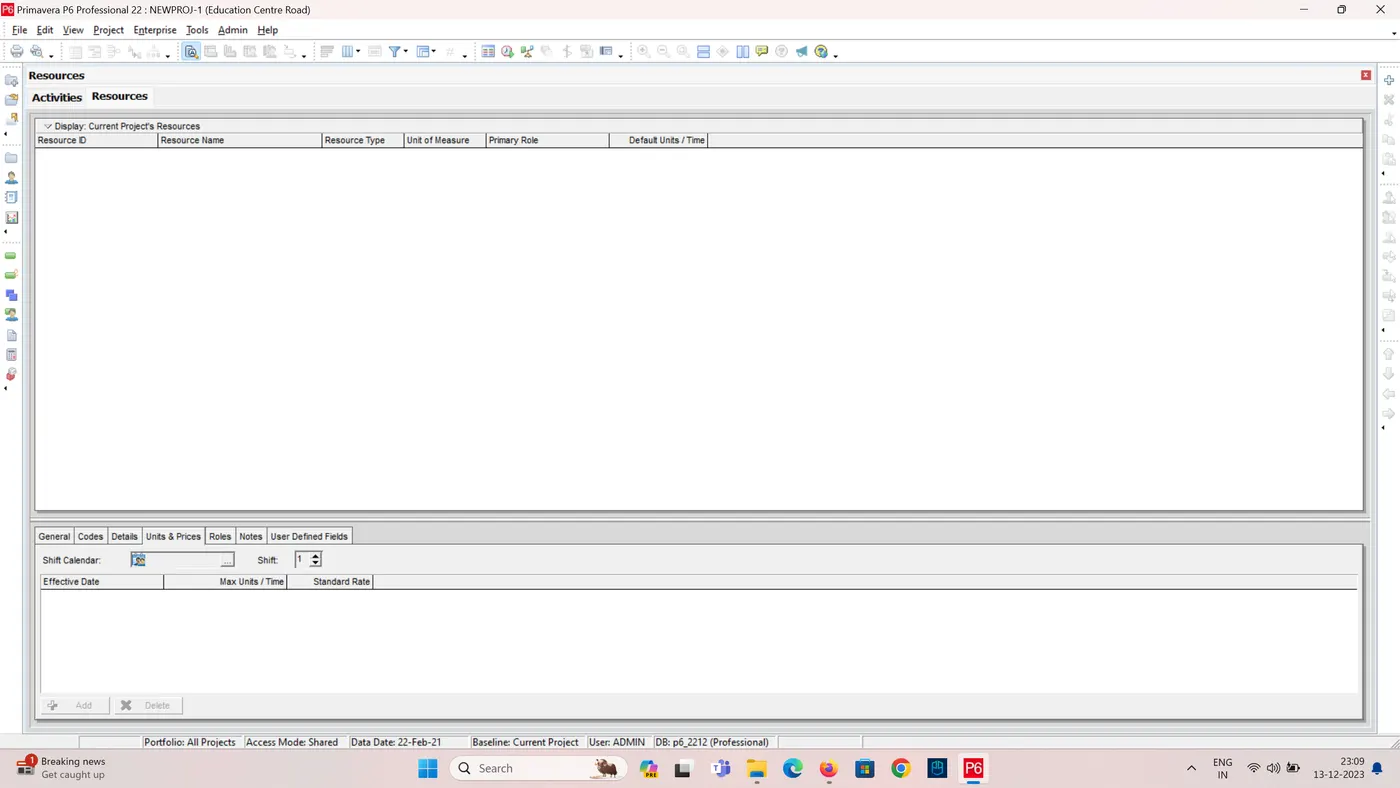
- Go to the Projects tab.
- Click on Resources.
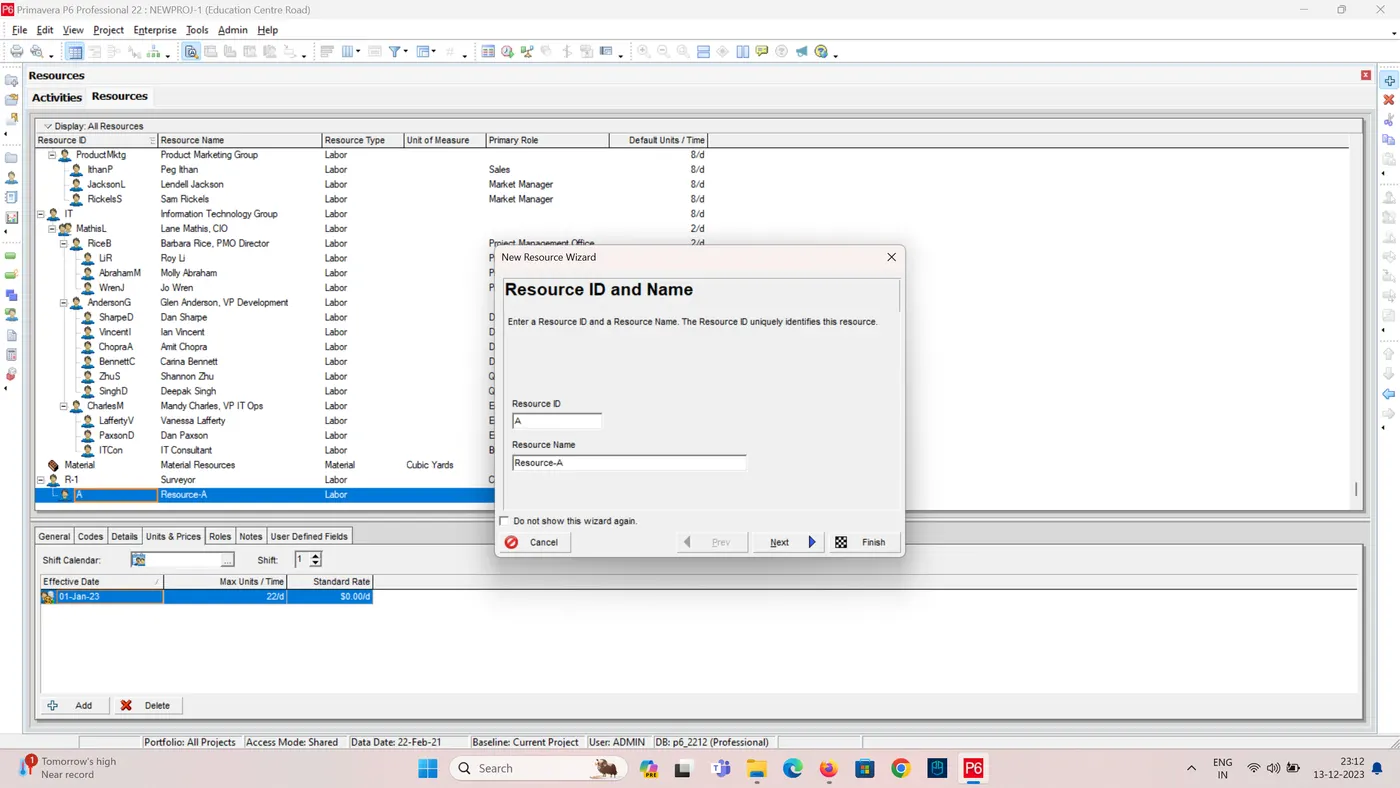
- Click on the New Resource button.
- Enter a unique Resource Code and a descriptive Resource Name.
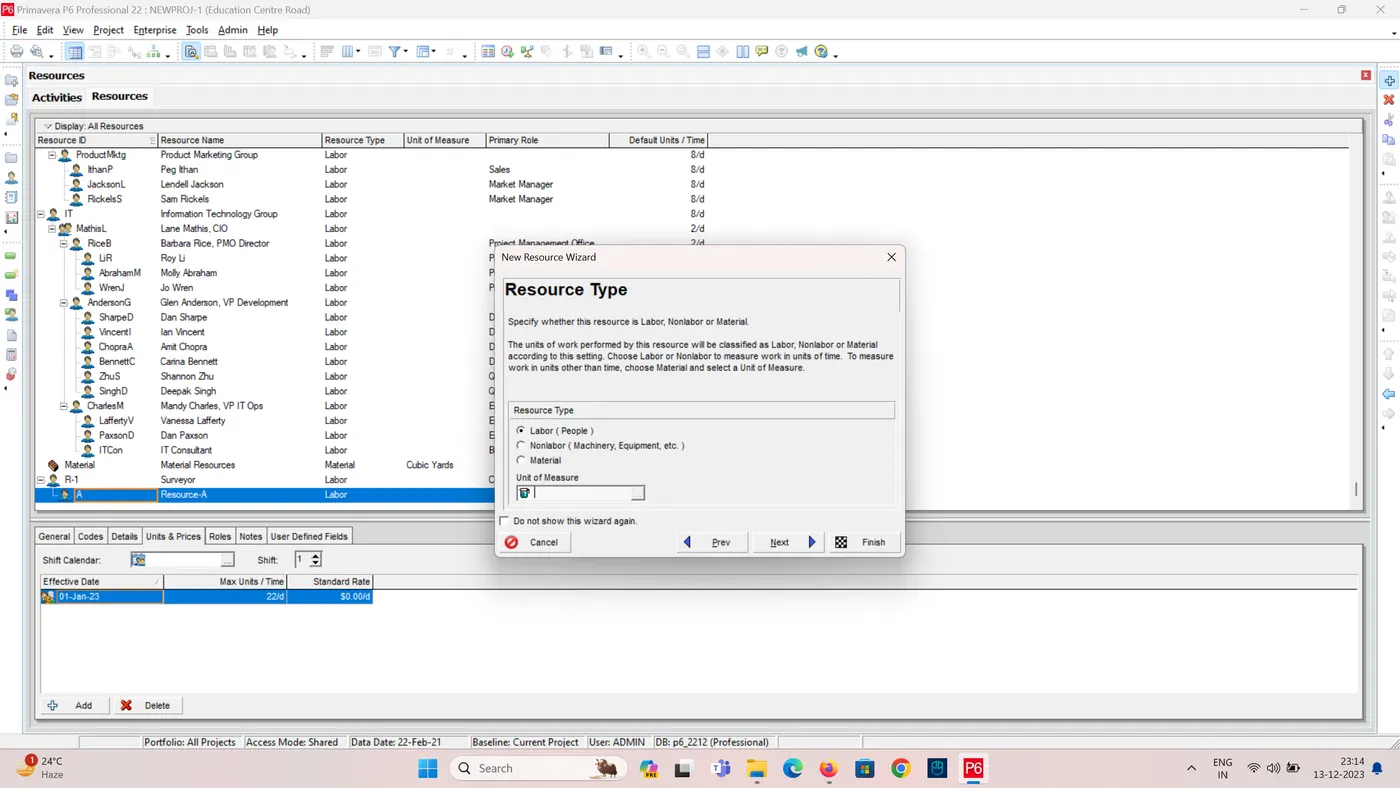
- Define the Resource Type (e.g., Labor, Equipment, Material).
- Specify additional details like Units, Cost, Role, Availability Calendar, etc. (optional).
- Click OK to save the new resource.
- Now repeat the same process for Resource-B and Resource-C
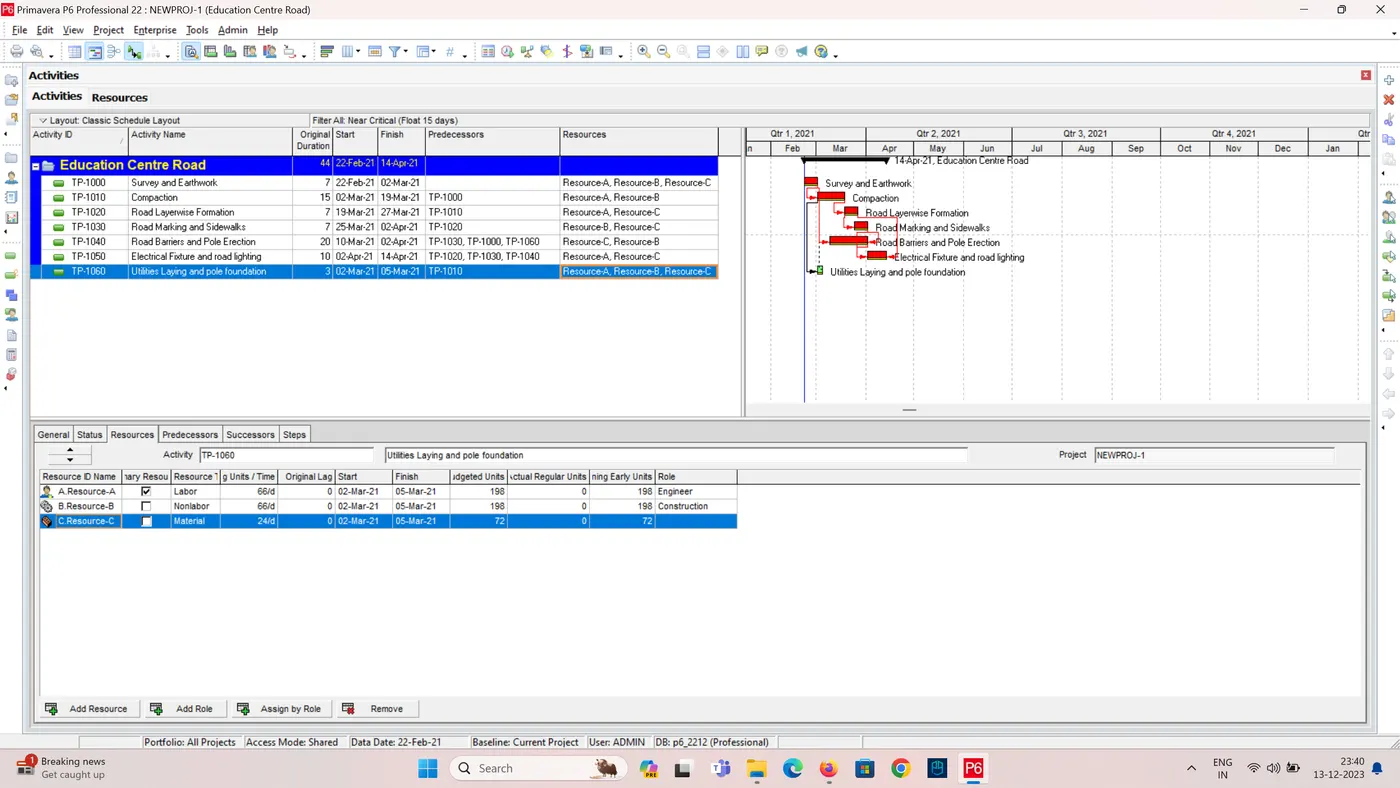
- Add Resources to Activities:
- Go to the Schedule tab.
- Click on Activities.
- Right-click on the activity you want to assign a resource to.
- Select Assign Resources.
- In the Assign Resources window, click the Add Resource button.
- Select the desired resource from the list.
- Enter the Units of the resource required for the activity (e.g., hours, number of workers).
- Optionally, set the Start and Finish dates for the resource assignment.
- You can assign multiple resources to an activity by repeating steps 6-8.
- Click OK to save the resource assignment.
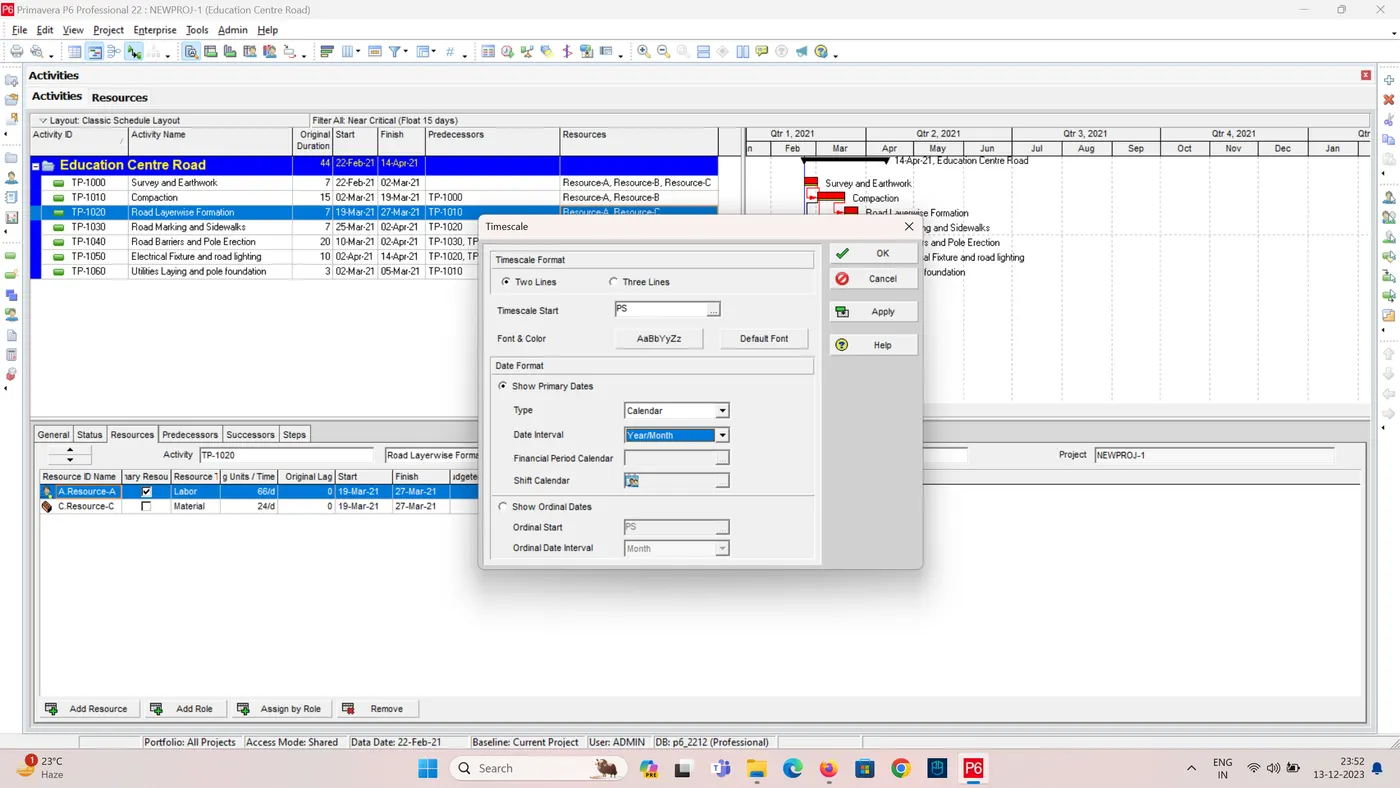
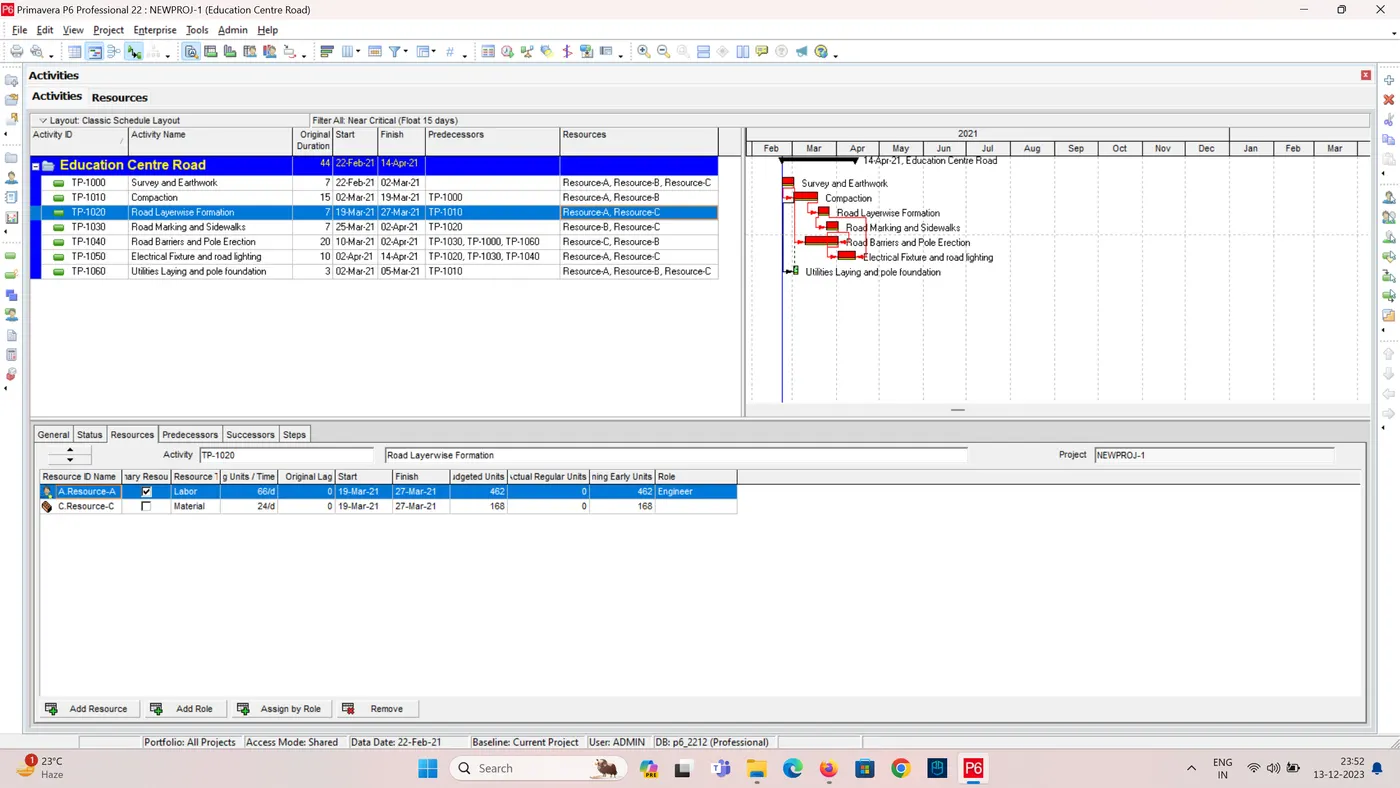
4. To Change Timescale in Gantt Chart:
- Right click anywhere on Gantt Chart.
- select Three Lines, and select Year/Month and Week
- Now, the Timescale has changed.
5. Maintain and Assign a baseline to the project:
- Ensure you have completed your project schedule in Primavera P6, including activities, durations, relationships, and resources.
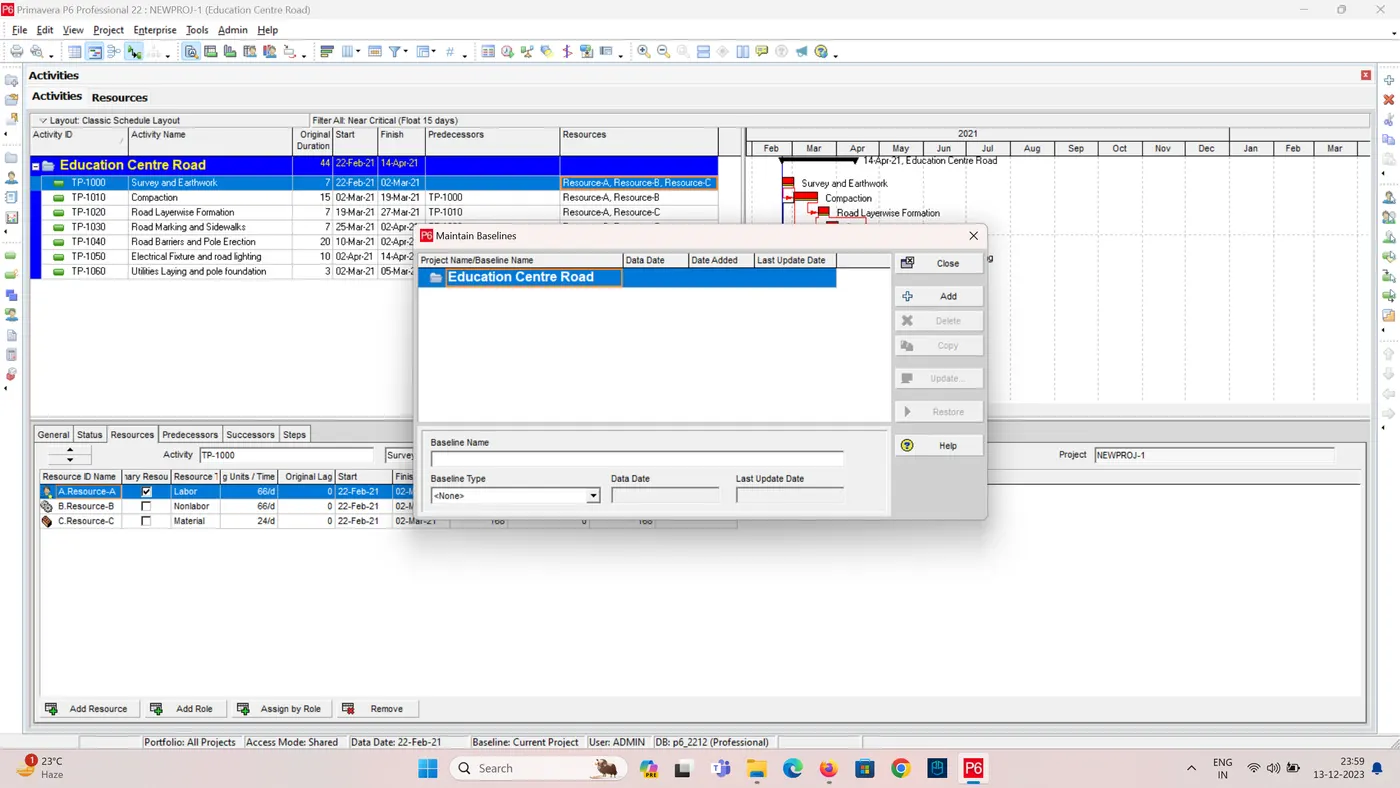
- Go to the Project tab and click on Maintain Baselines.
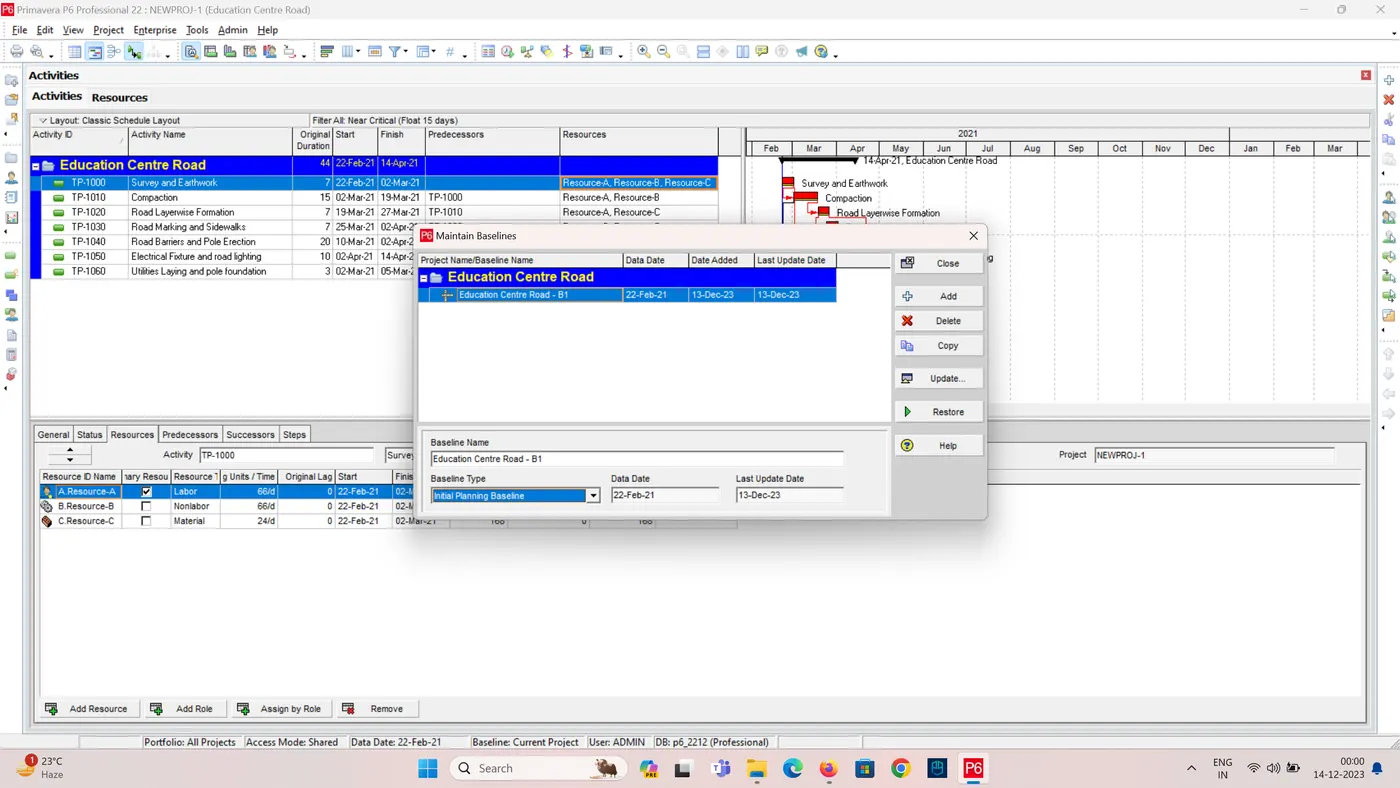
- Click on Add. Choose Save a Copy of the Current Project as a New Baseline. This creates a complete copy of your current schedule as a baseline.
- Give your baseline a descriptive name
- Click OK to save the baseline assignment
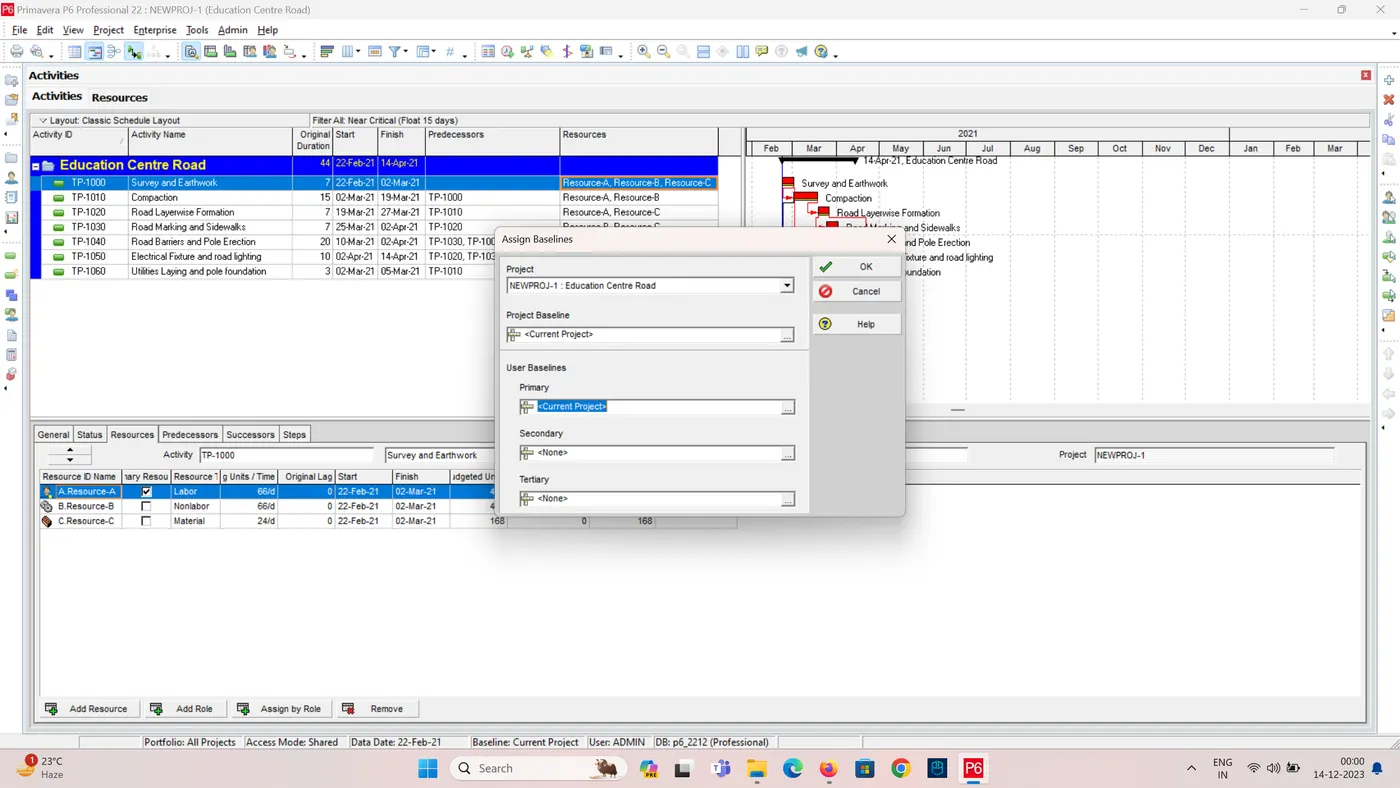
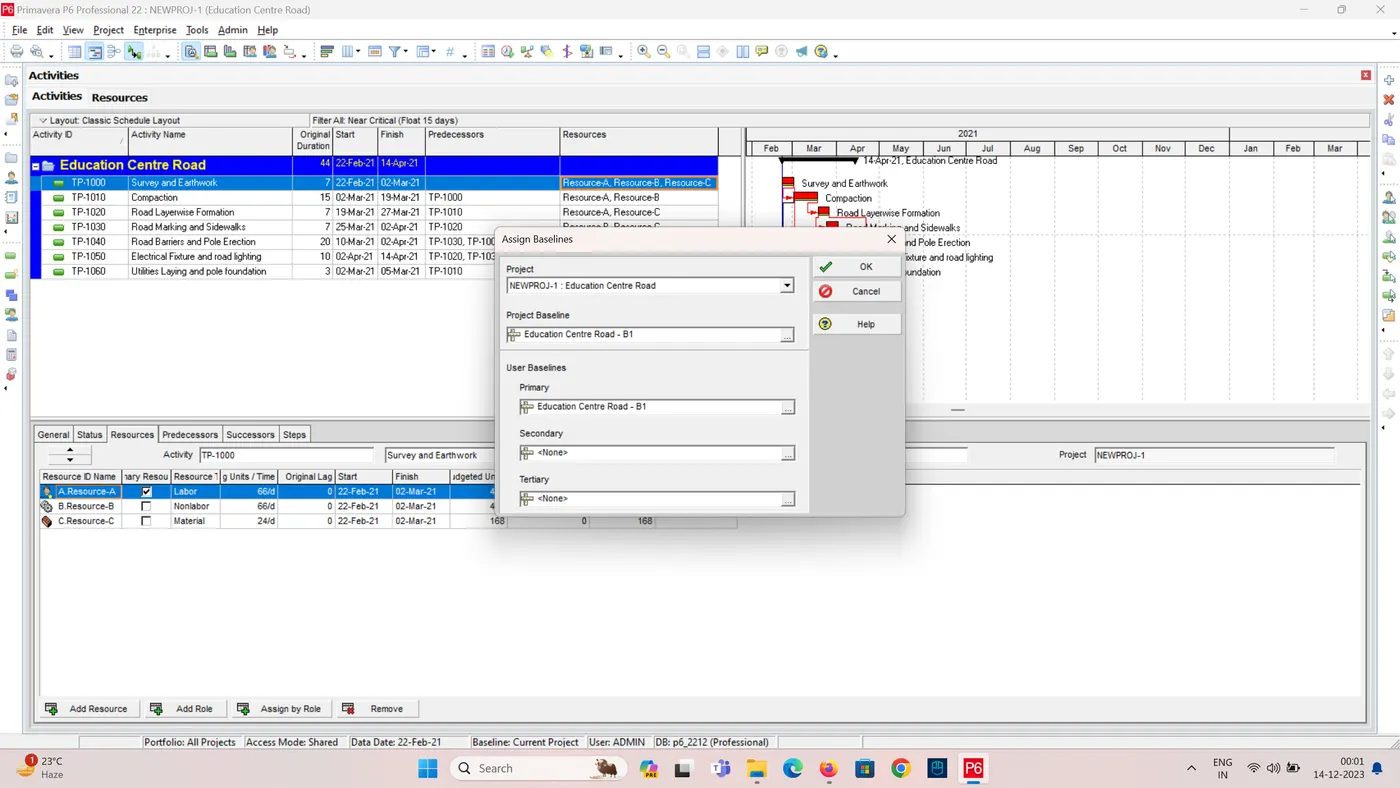
- Assigning a Baseline:
- go to Project Tab, and select Assign Baseline to assign.
- Assign created Baseline as Primary and Project Baseline.
- go to Project Tab, and select Assign Baseline to assign.
6. Add a budget to your project
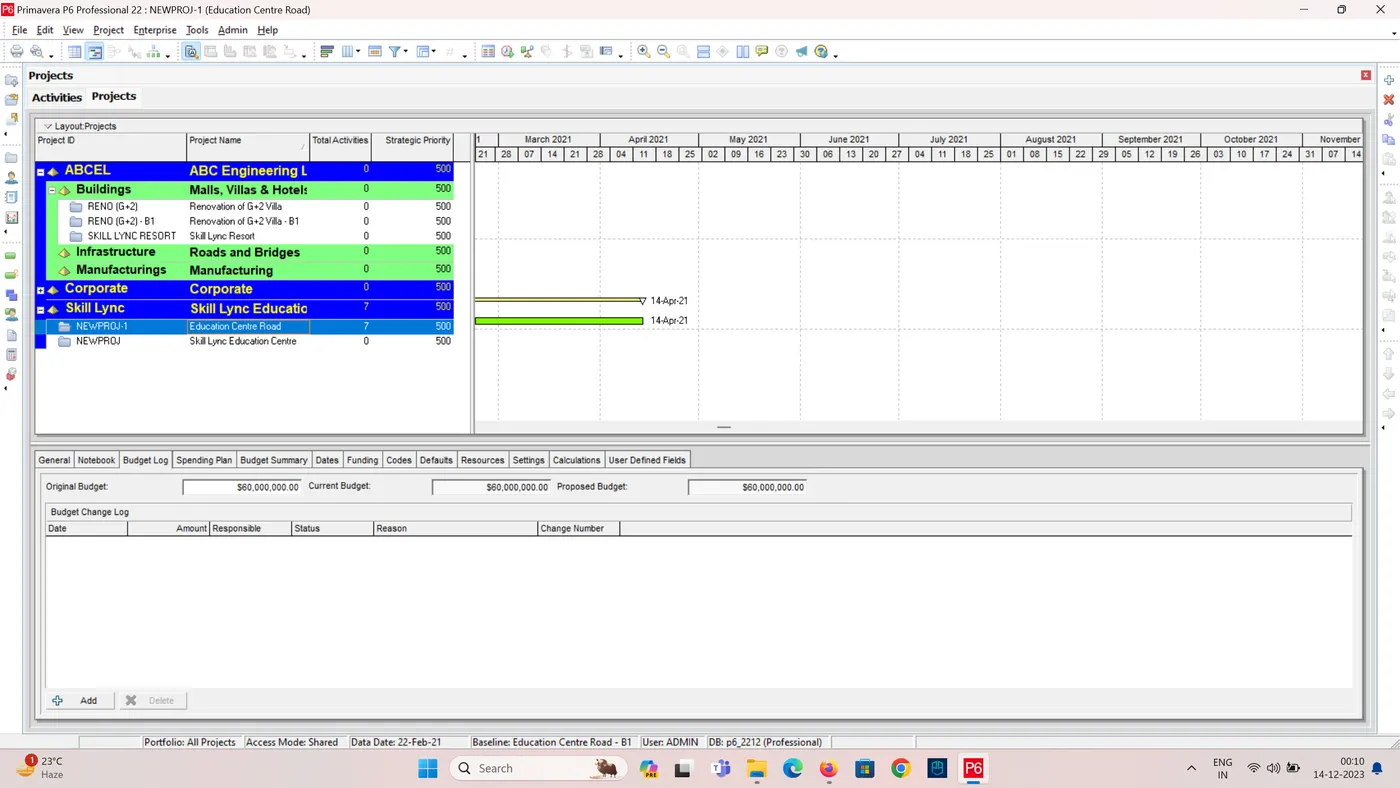
- Go to the Projects tab.
- Click on Budget Log.
- Enter the Original Budget amount as 6Crs.
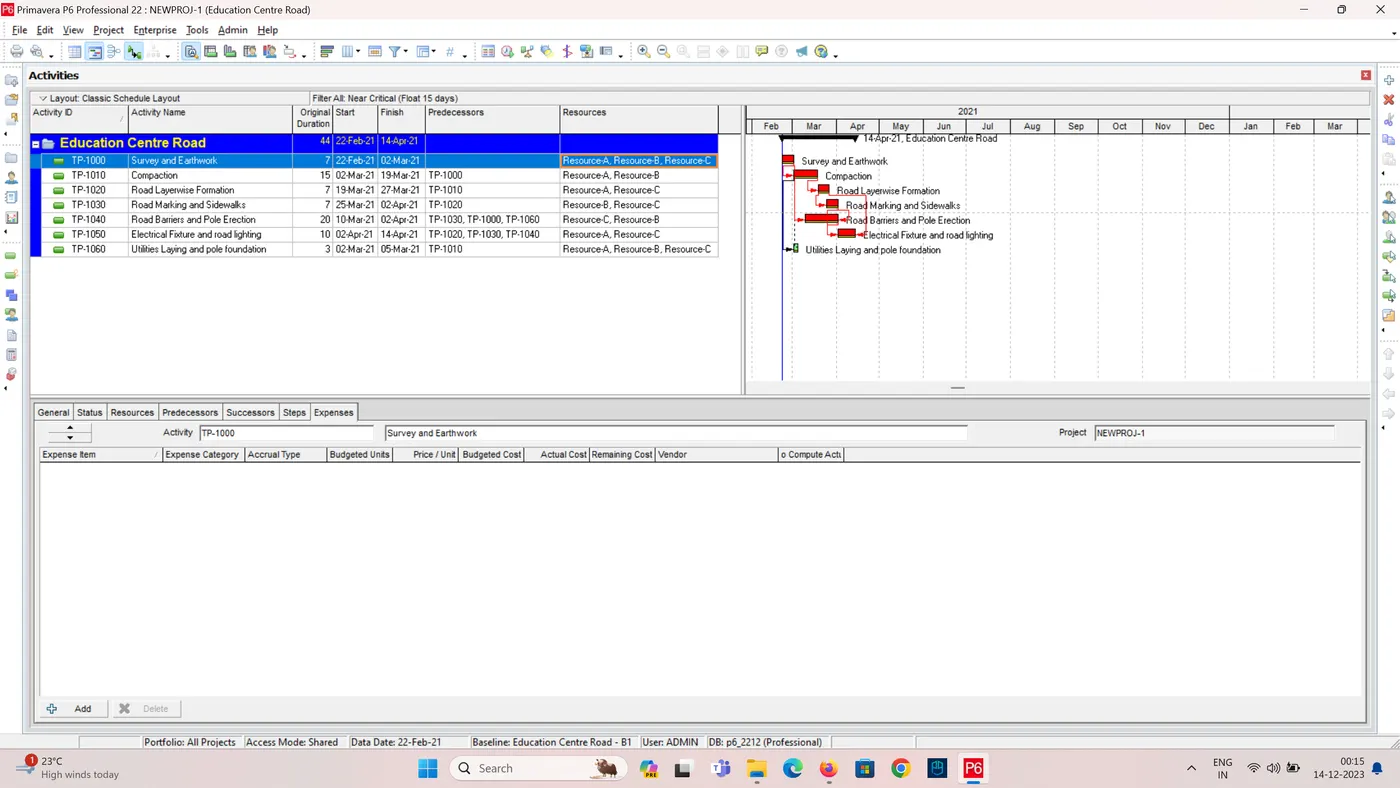
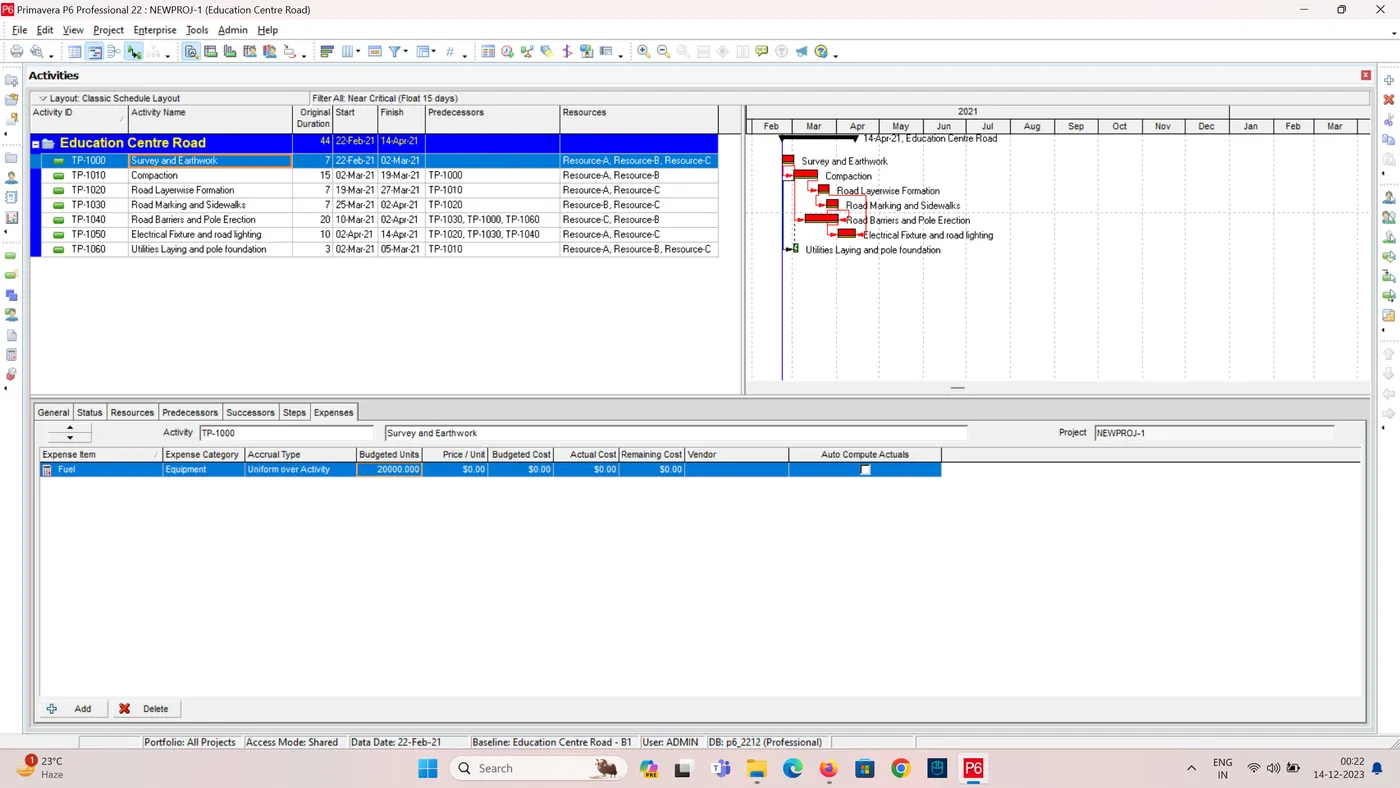
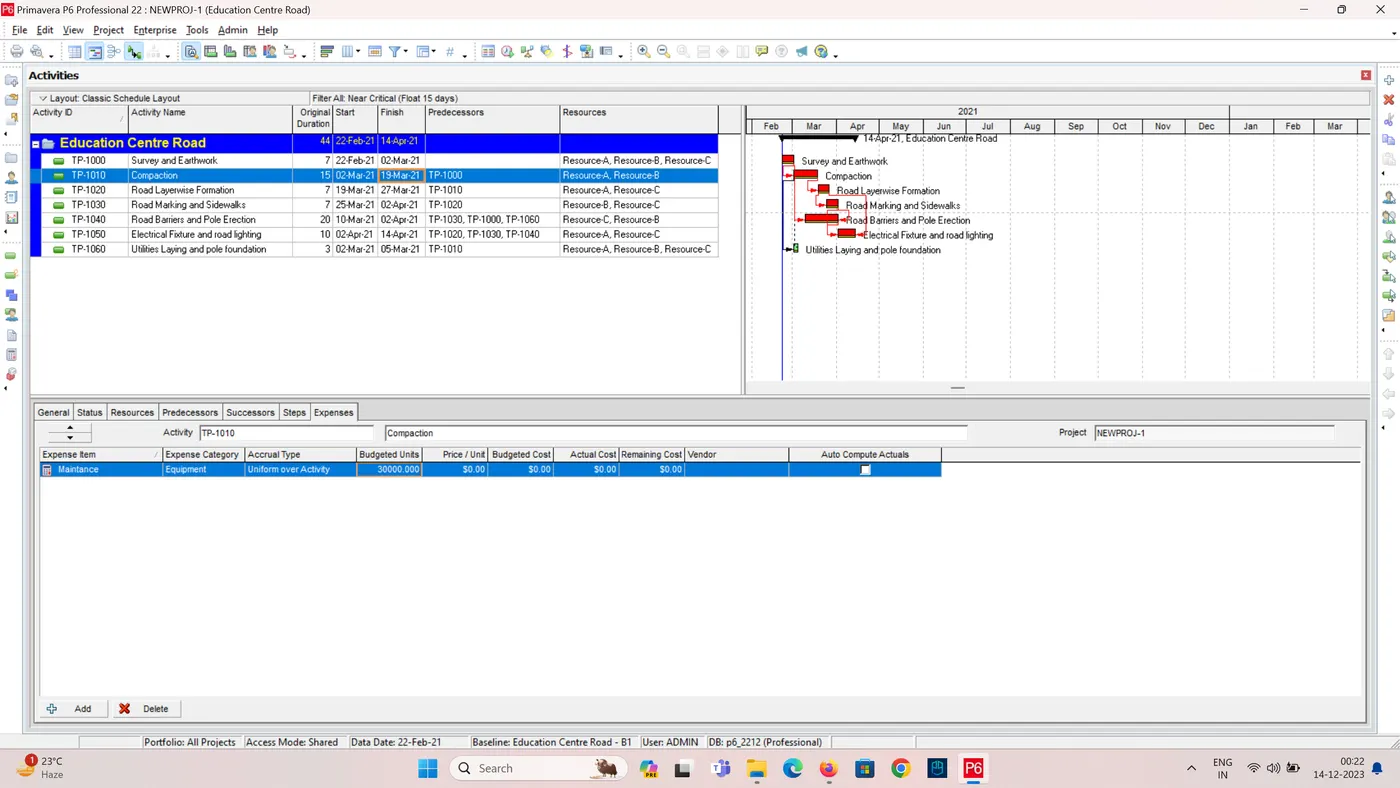
- Open Expenses Log by adding expenses column.
- Then select the Activity and add expense as given.
- Now add all expense to the respected activities.
7. Generate material resource costs curve
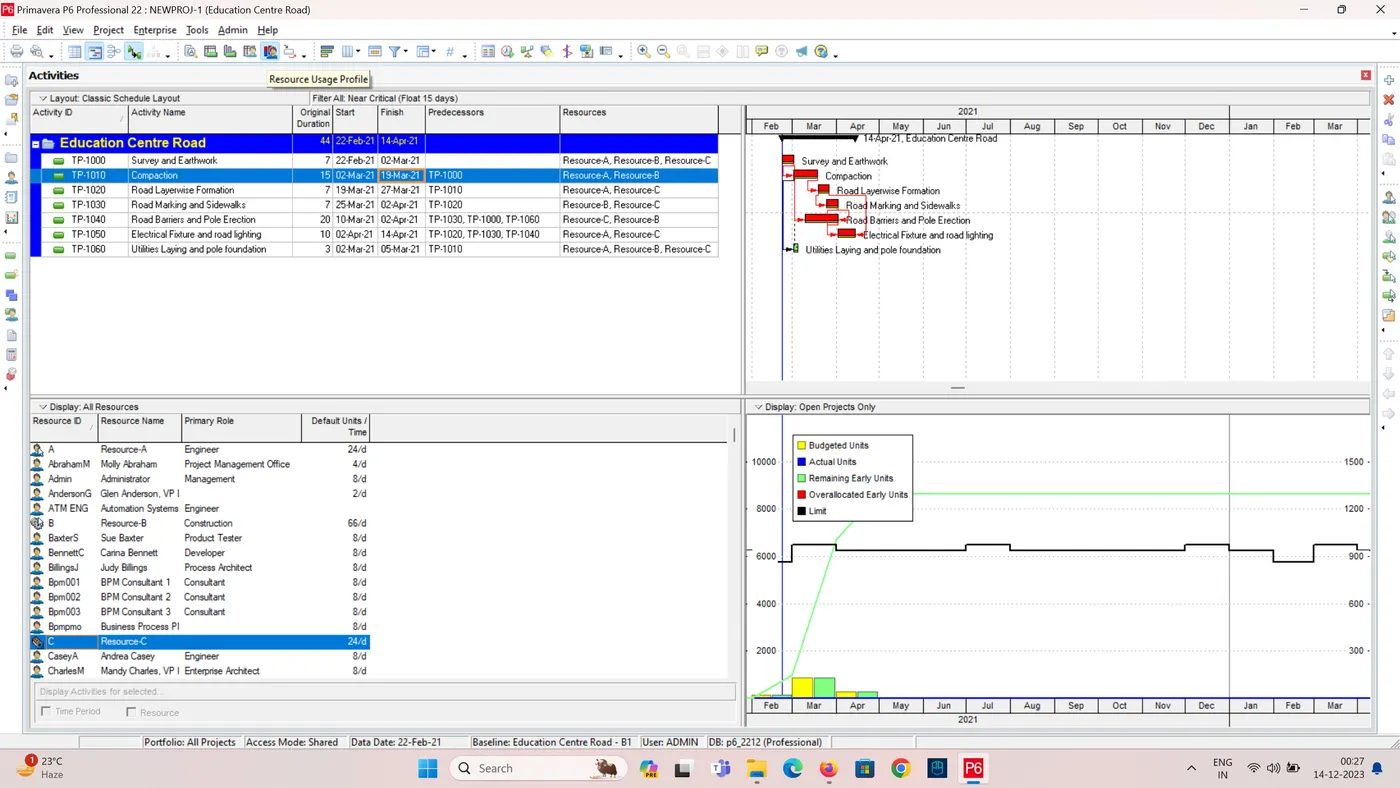
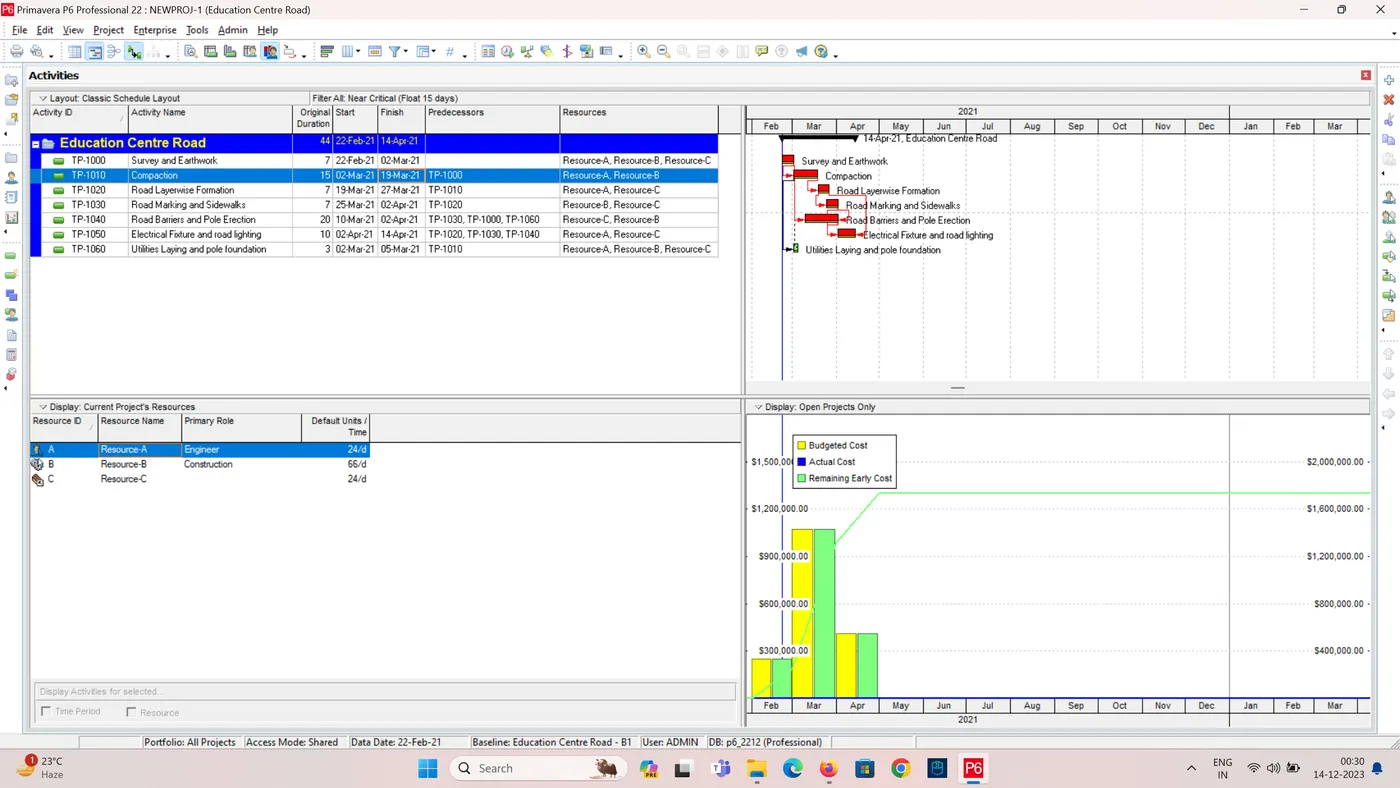
- To show material resources cost curve, we have select Resource Usage Profile.
- Right click on Curve window and select Resource Usage Profile Option.
- Choose Cost curve. Now, it shows Material Resource cost Curve
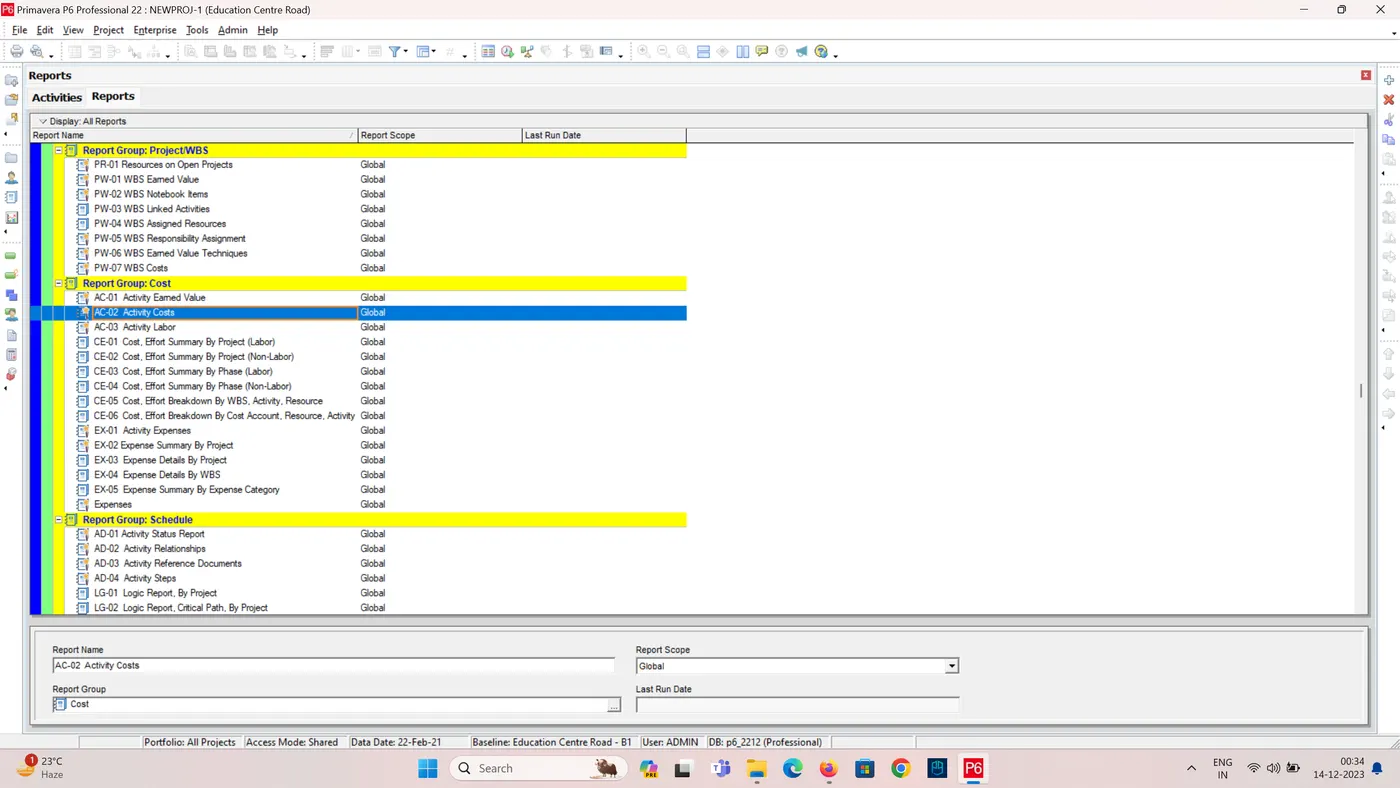
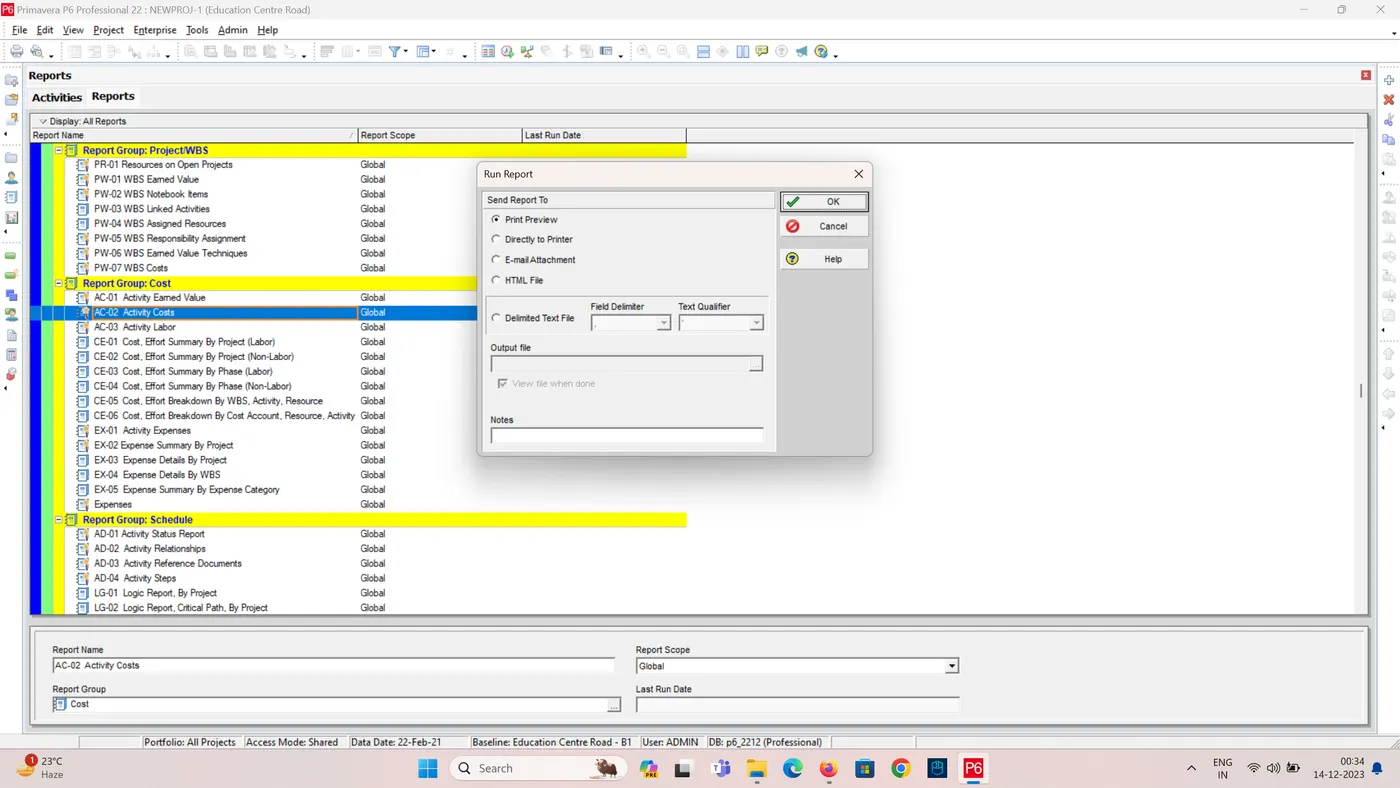
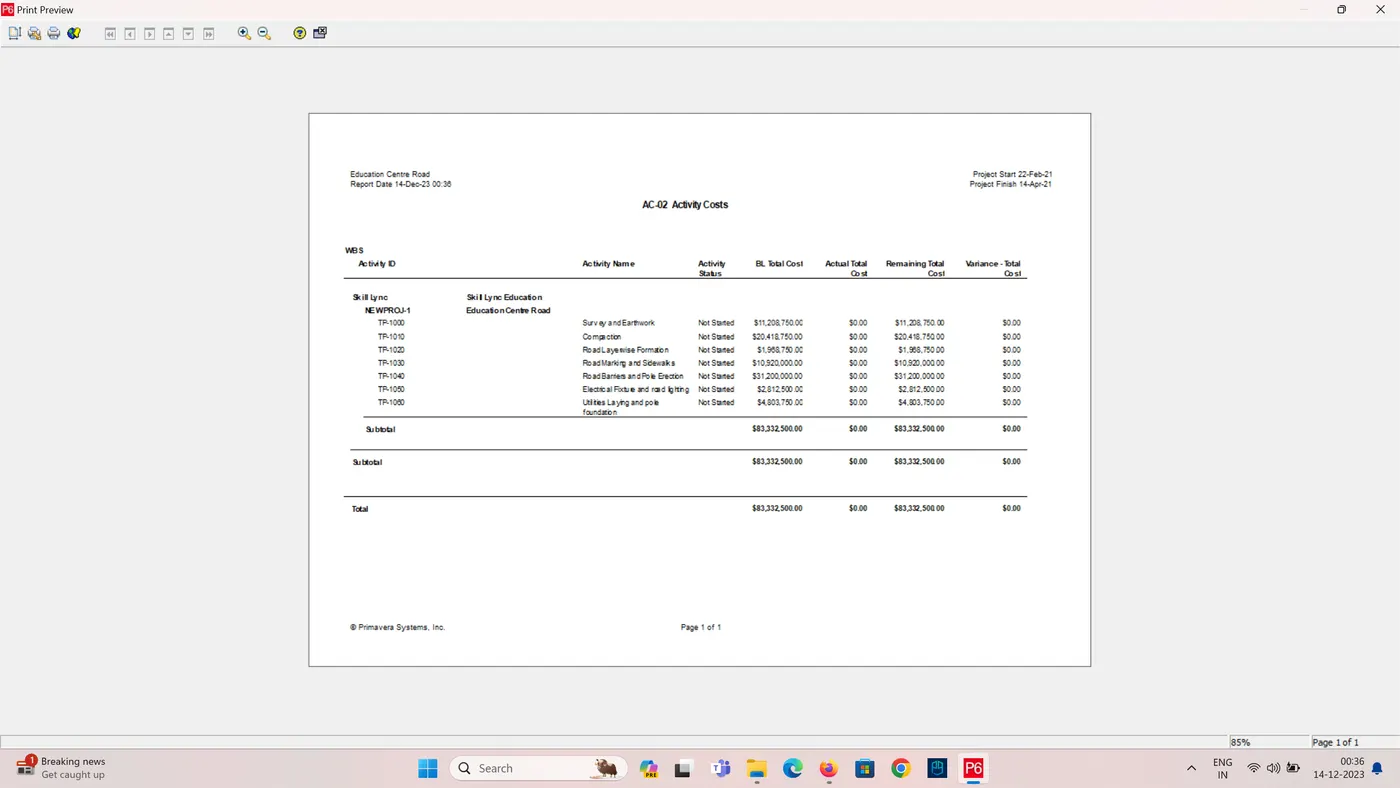
8. Generate an activity wise cost report:
- Go to Tools Tab, select Report then click Reports.
- Then Activity Costs, and click Run then click Report.
- set the page margin carefully to fit the report in sheet.
- Click Print to get hardcopy of the activity cost of your project.
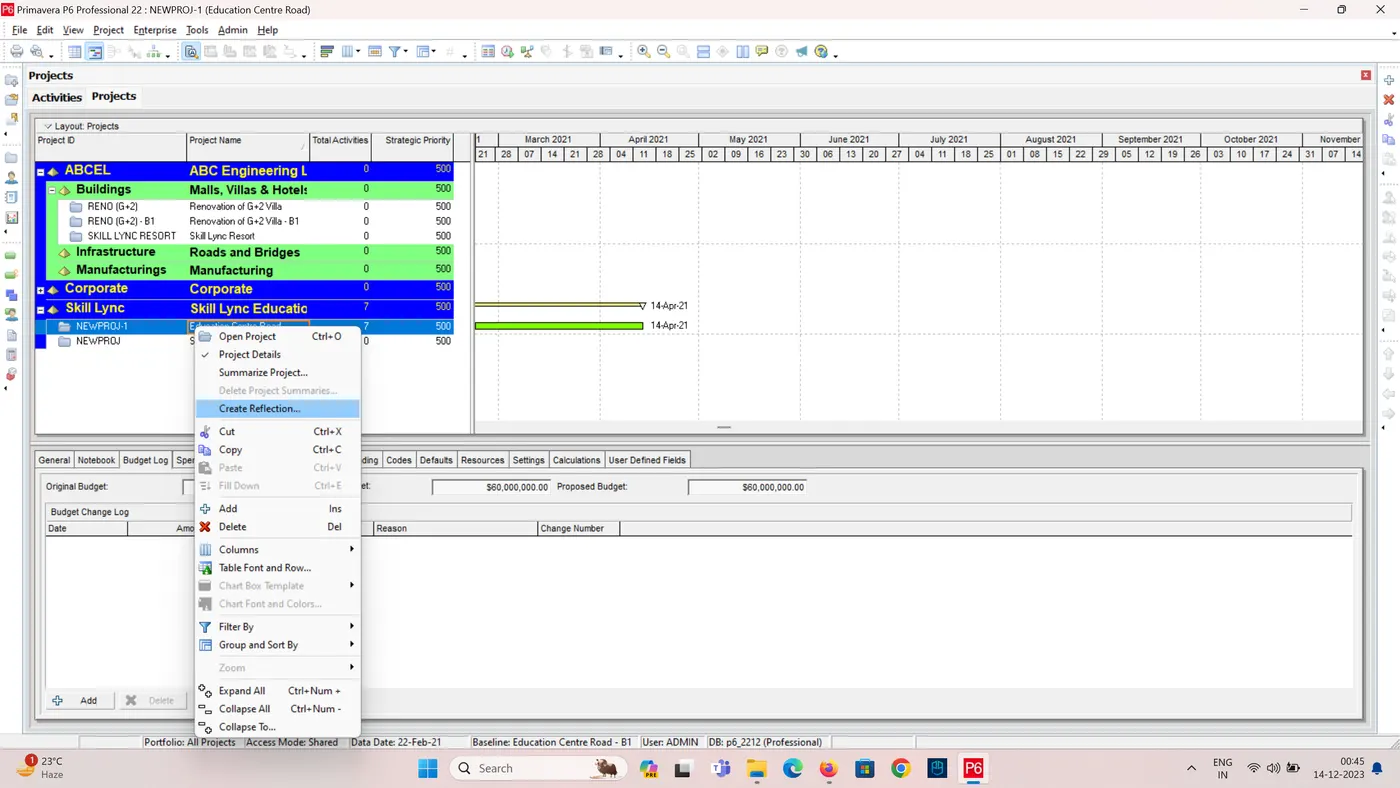
10. Create a reflection and In the reflection, auto update the project at 15 days from start:
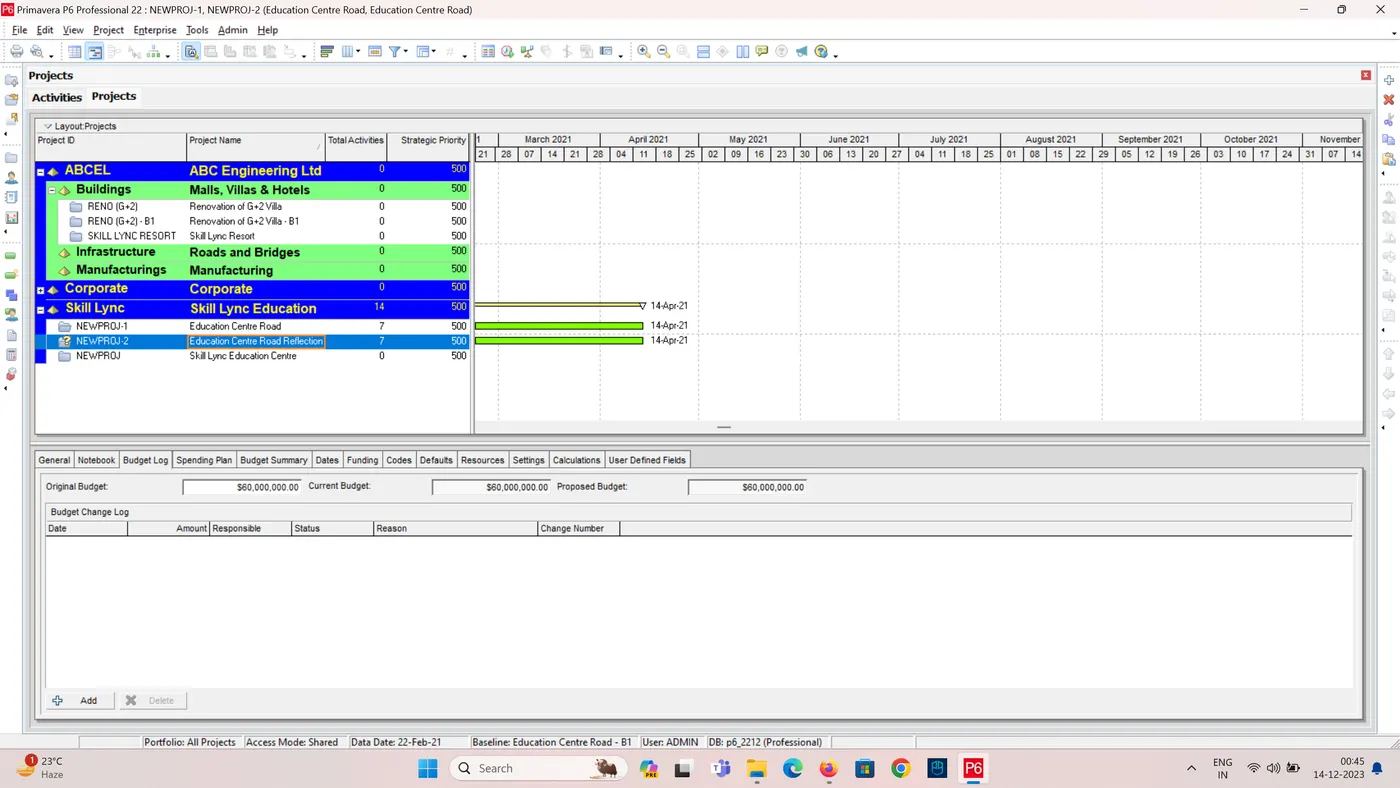
- Right-click on the project in the Projects tab.
- Select Create Reflection.
- A new project file will be created within the same EPS node containing a copy of your original schedule.
- The reflection project will have a unique name appended with "(Reflection)".
- Then Open the Reflected Project.
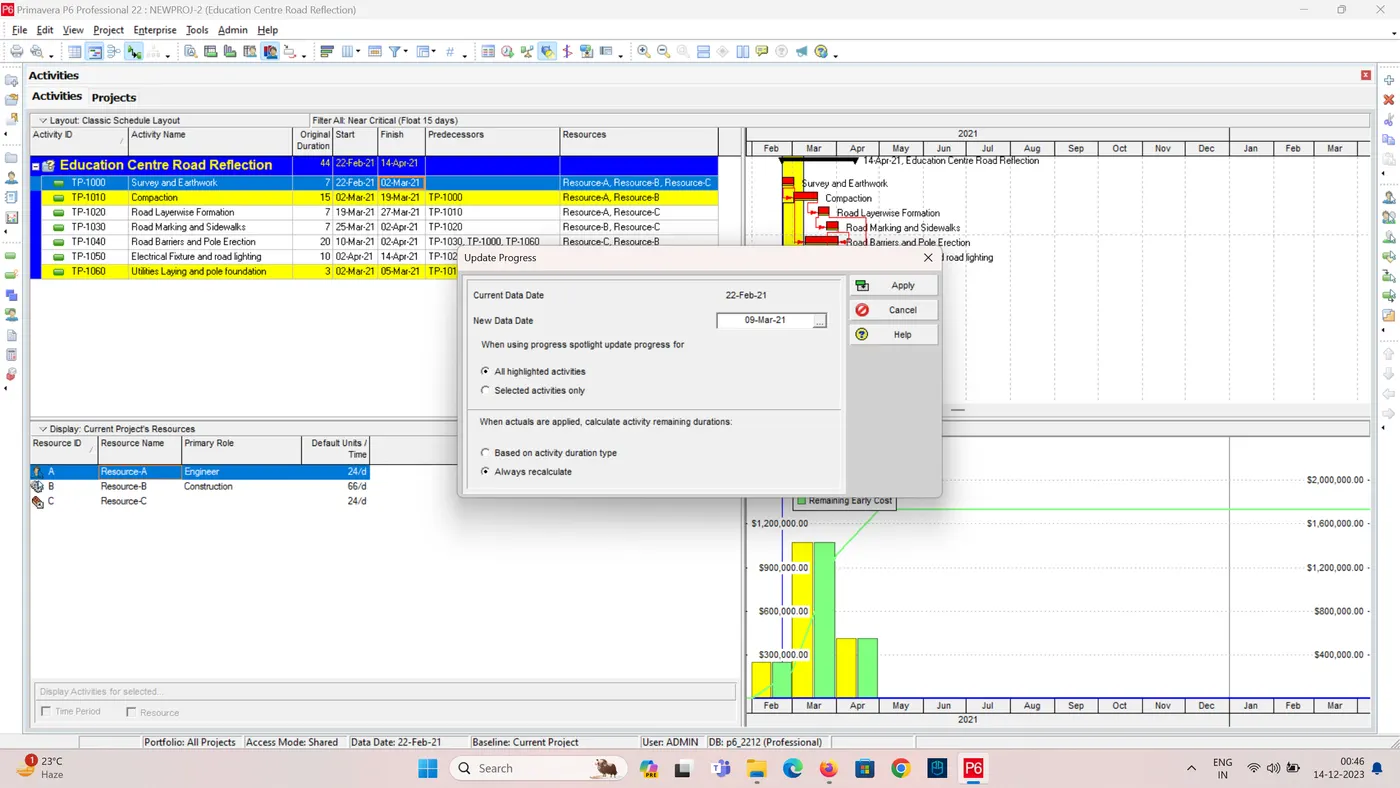
- Now Click Update Progress from Tools Tab.
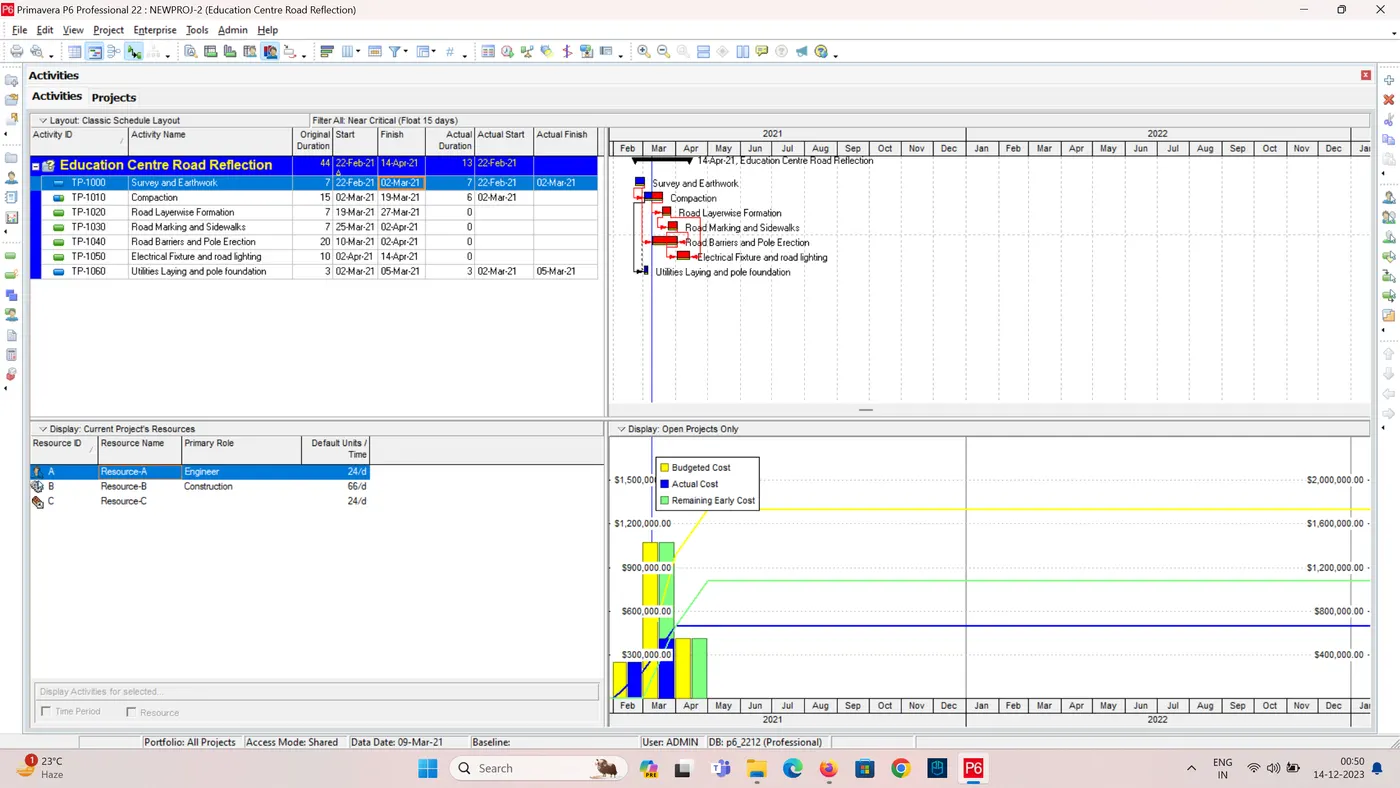
- Choose 15 days from Start Date (09-Mar-21).
- Now add column to see the Actual Start and Finish date
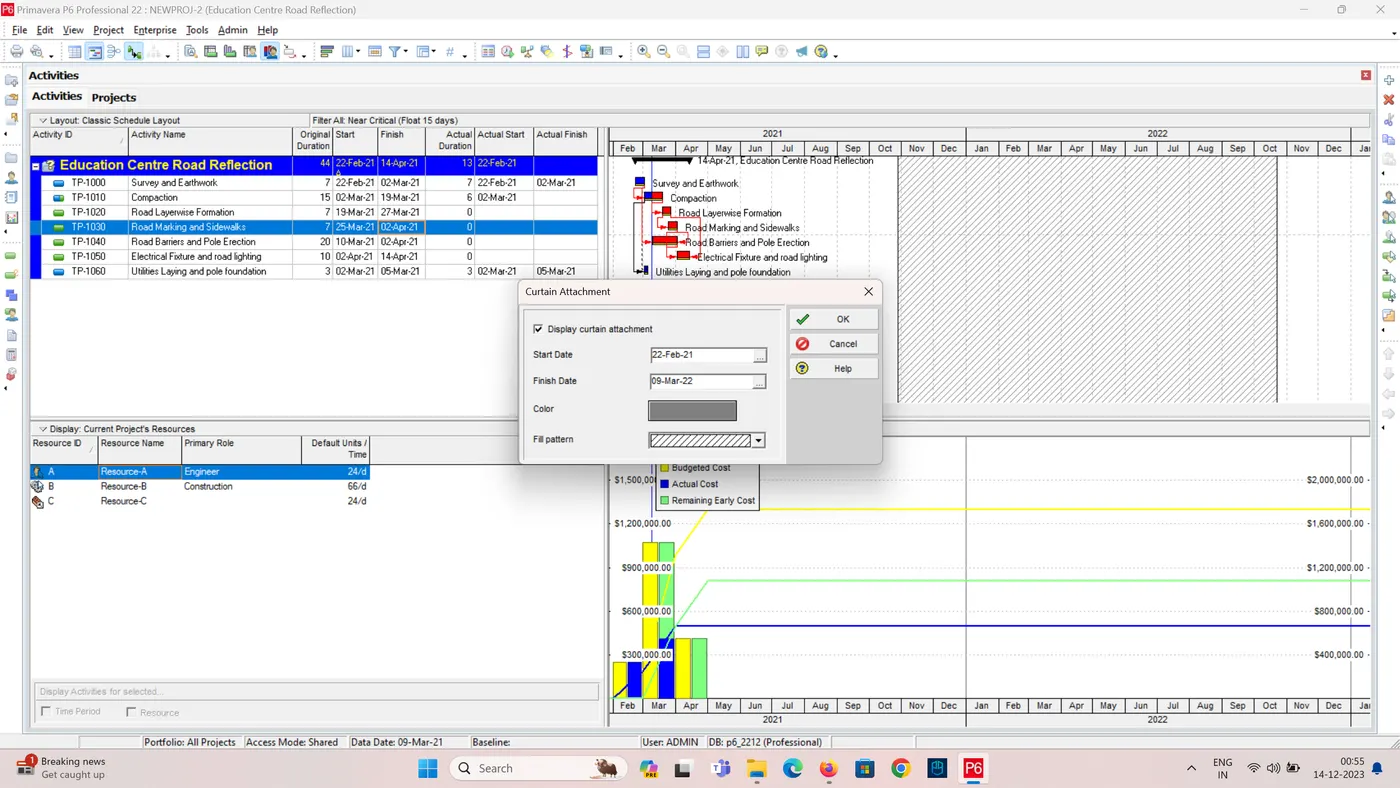
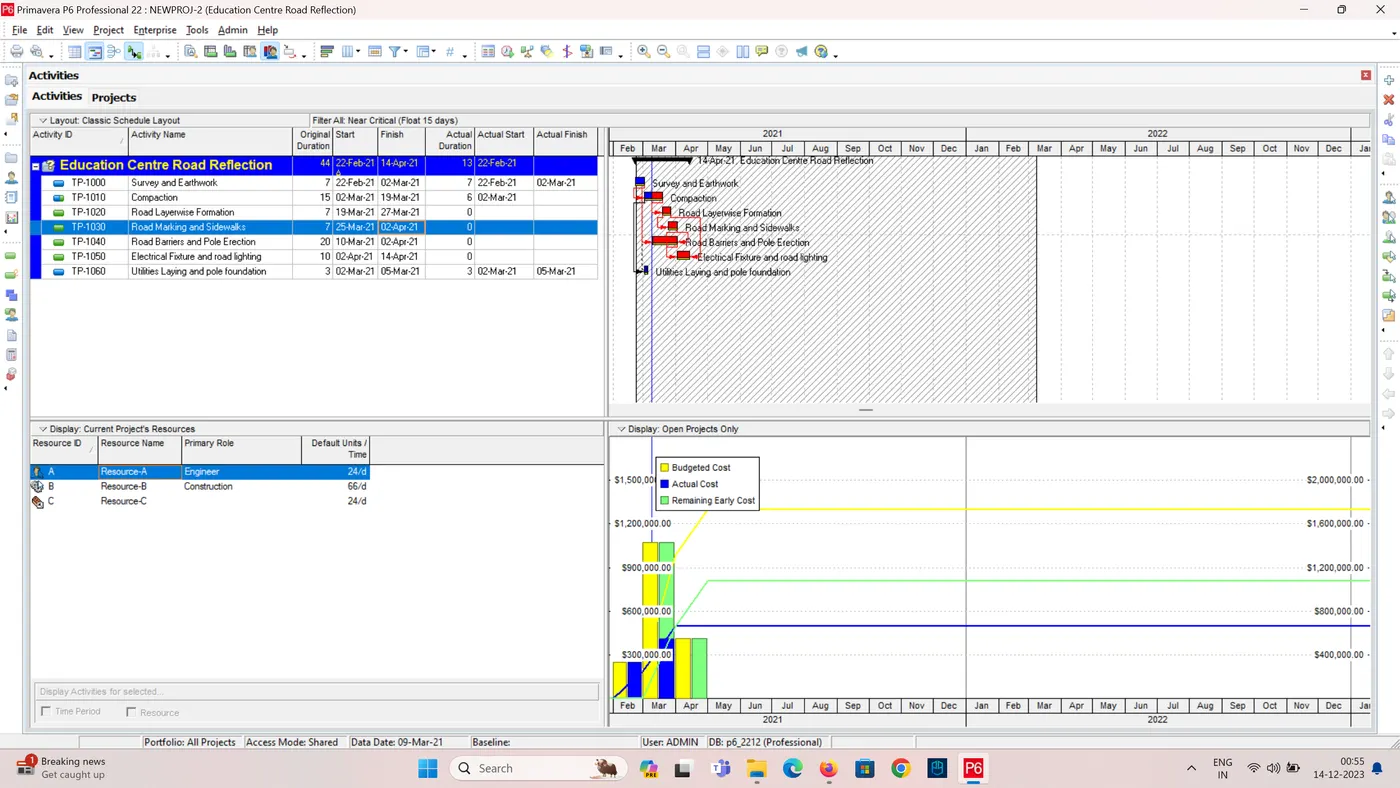
11. Add curtains up-to first 15 days of the project:
- Right on the gantt chart click attachment then click curtain then add curtain
- Add the days of the project
12. TSLD view of the project in Visualizer:
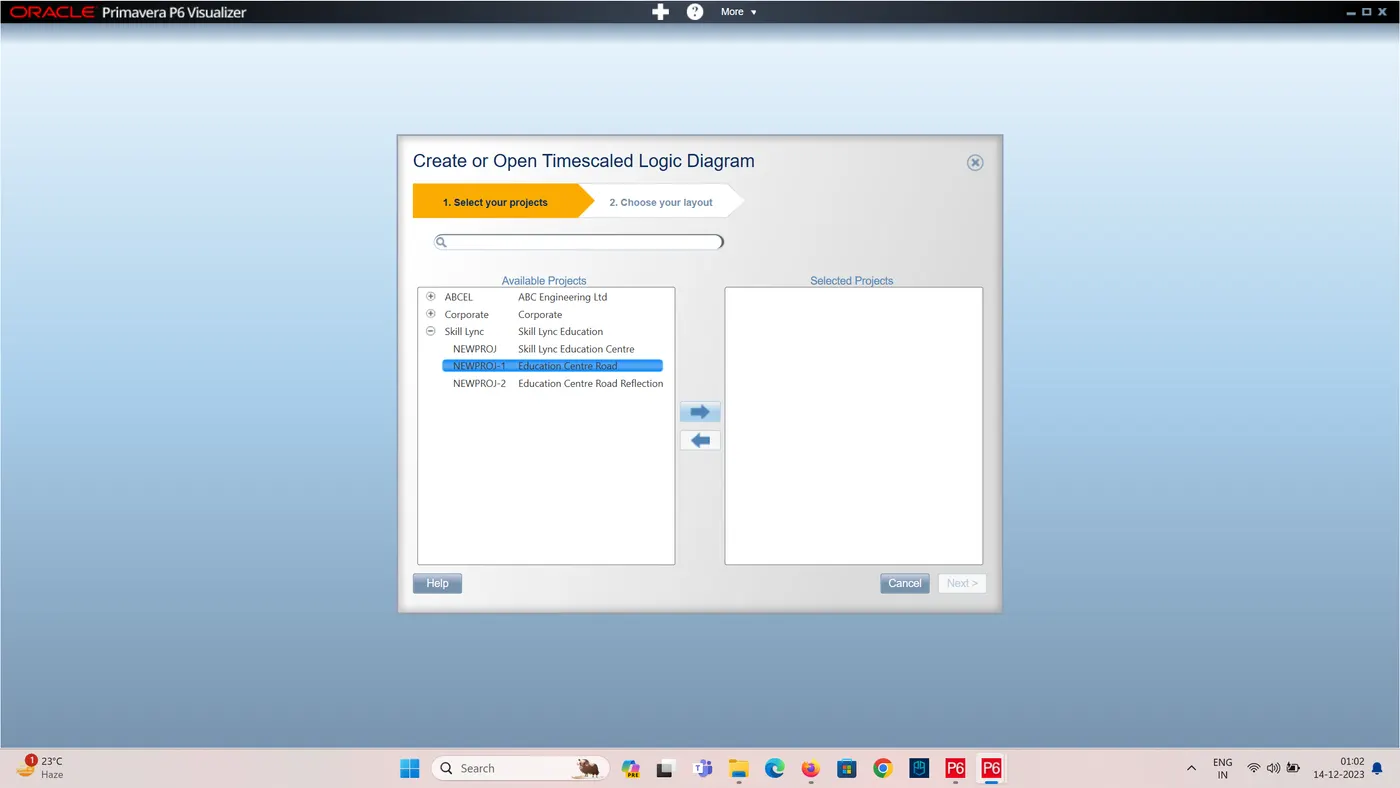
1. Activate the Visualizer Module:
- Go to the Tools tab in your Primavera P6 interface.
- Click on Visualizer. This will launch the dedicated Visualizer module within Primavera P6.
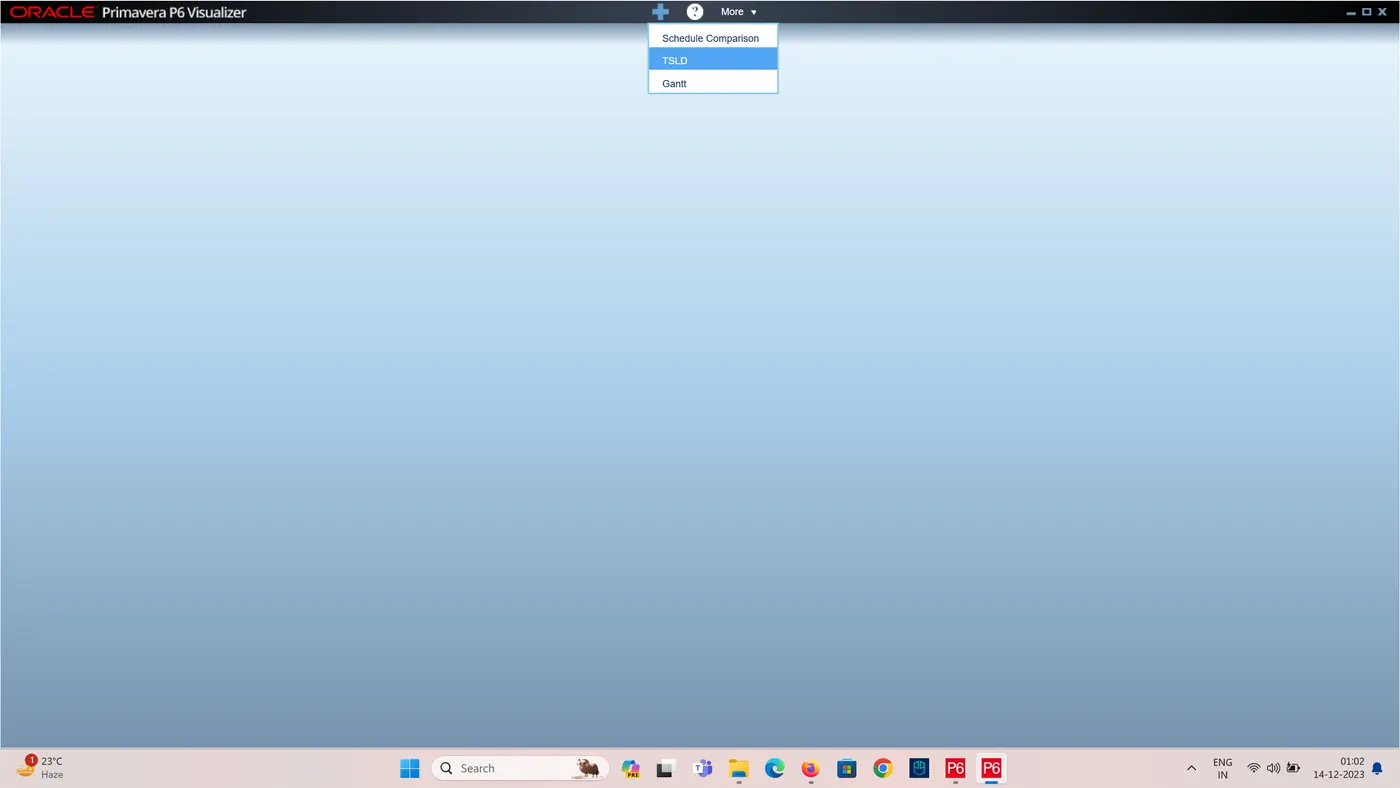
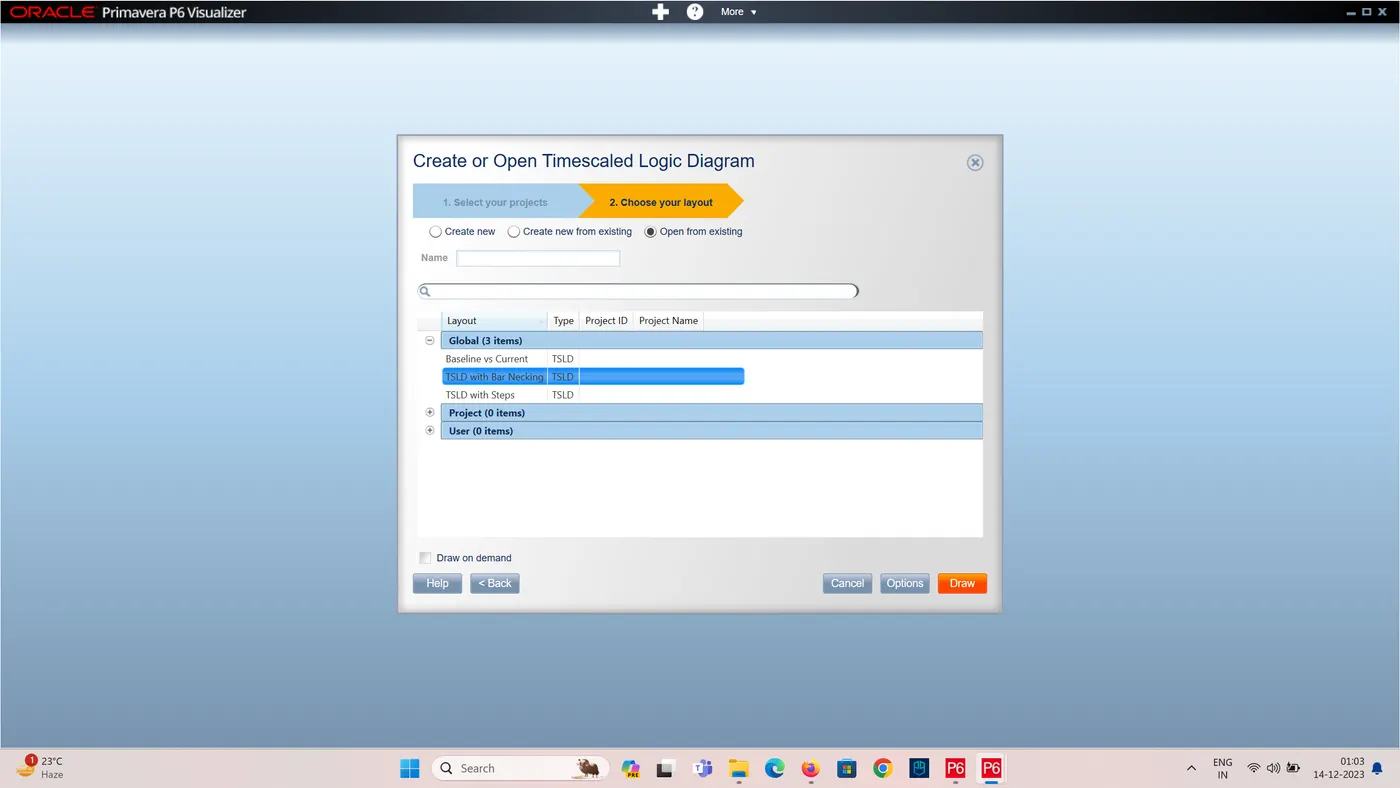
2. Choose the TSLD View:
- In the Visualizer workspace, you'll see different layout options.
- Locate the TSLD button or icon. It might be located in the main menu bar, a dedicated layout category, or a context menu depending on your Primavera P6 version.
- Click on the TSLD button.
3. Customize your TSLD:
- Primavera P6 Visualizer will present you with a blank TSLD canvas.
- You can now add activities and relationships to build your project's logic diagram.
- Use the available tools and options to customize the TSLD view:
- Activity List: Drag and drop activities from the list to the canvas.
- Relationships: Connect activities with arrows to represent dependencies.
- Formatting: Adjust colors, line styles, labels, and other visual elements of your TSLD.
- Timescales: Define and display relevant timescales at the top or bottom of the diagram.
- Filters: Apply filters to focus on specific activities or aspects of your project.
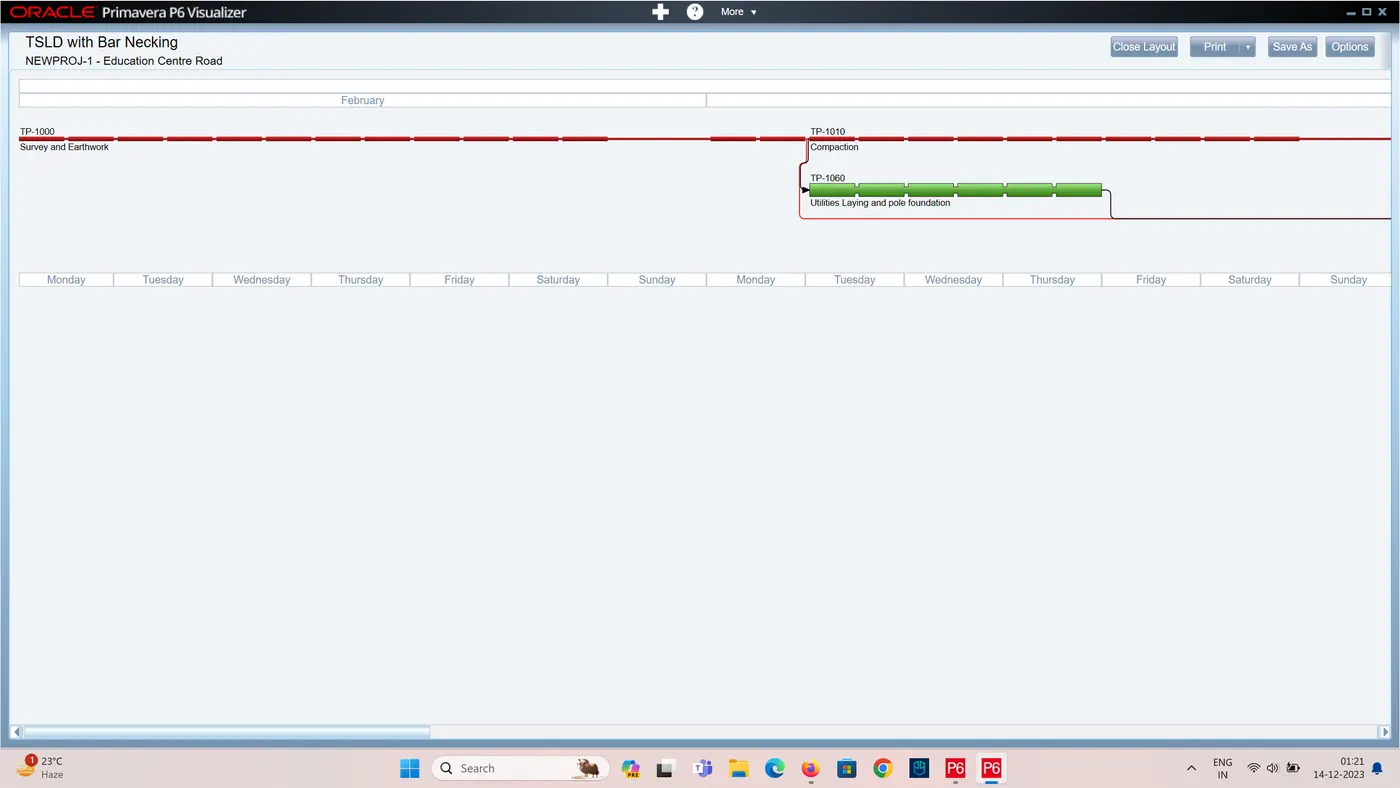
4. Save and Share your TSLD:
- Once you've built and customized your TSLD, you can save it for future use or share it with others.
- Use the Save or Export options within Visualizer.
- You can save your TSLD as a VLF file (specific to Primavera P6) or export it to other formats like PDF or image files.
Conclusion:
Hence , the project schedule for the given work is completed.