Project 2
[PROJECT - 02] ELECTRICAL WIRING HARNESS DESIGN OF SUV CAR TAIL GATE USING CATIA V5
IN THIS REPORT:
- DEFINITION OF AUTOMOTIVE WIRING HARNESS
- GIVEN DATA
- PACKAGING RULES OF WIRING HARNESS ROUTING
- COMPONENTS SELECTION FOR TAIL GATE WIRING HARNESS
- ELECTRICAL DEFINTION AND CATALOGUE CREATION
- ASSEMBLY OF ALL COMPONENTS AT EXACT LOCATION
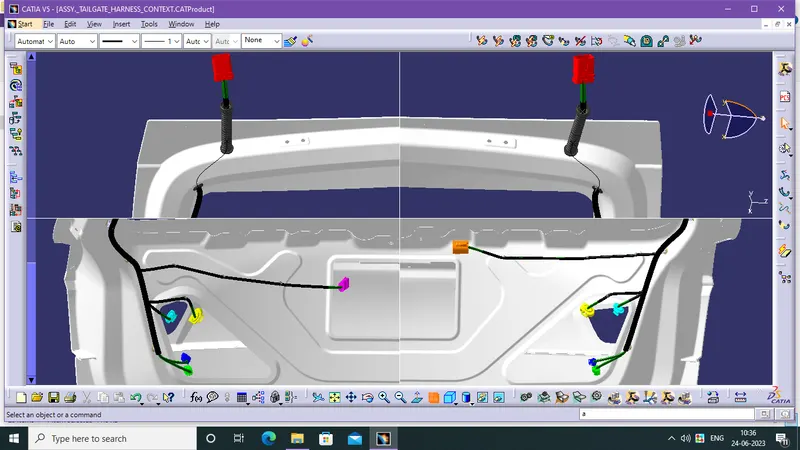
- PROPER ROUTING OF BUNDLES VIA GROMMETS AND SUPPORT PARTS
- BUNDLE SEGMENT CONNECTIVITY CHECK
- FLATTENING - WIRING HARNESS OF SUV CAR TAIL GATE
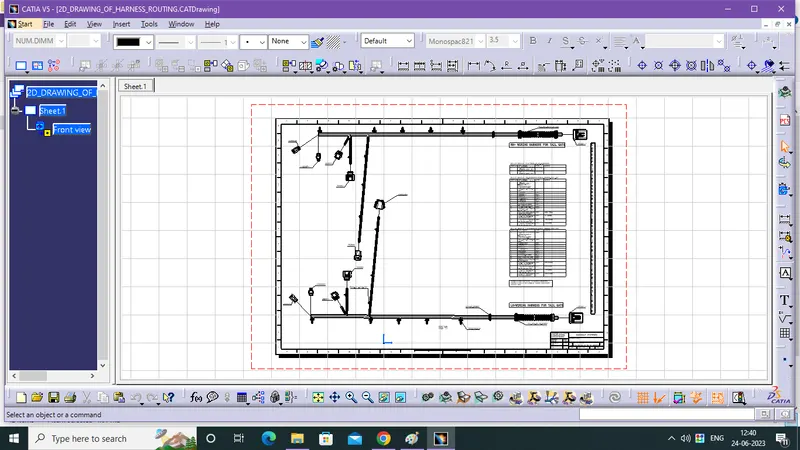
- DRAWING - WIRING HARNESS OF SUV CAR TAIL GATE
DEFINITION OF AUTOMOTIVE WIRING HARNESS:
- Automotive electrical wiring harness design involves creating a plan for the routing and connection of the various electrical components in a vehicle. A wiring harness is a collection of wires, connectors, and other components that are used to transmit electrical power and signals between various components in a vehicle, such as the engine, transmission, and dashboard. The design and routing of the wiring harness is a critical part of vehicle design, as it affects the reliability, safety, and performance of the vehicle.
PACKAGING RULES OF WIRING HARNESS ROUTING:
- Avoid harness routing and clipping in blind zone
- Provide additional slack to the harness according to the surrounding. 5-10% of slack is enough.In this project we use 1-5%
- Provide enough clearance to the wiring harness with respect to the surrounding.
- Use available holes for clamp and clip mounting, If need of holes and cutouts demand that to sheet metal design engineer.
- Enough clamps to be provided to ensure positive clearance with surrounding and safety of the wiring harness.
- Distance between two clamps on a straight branch should be a maximum of 200mm.
- Use rubber grommets which provide proper sealing, protect harness from sharp edges, provide protection against vibration, and even act as a clamp.
- Branch length should be minimum of 50 mm
- Minimum distance between clip and nearest branching point should be 25mm
- Minimum distance between two breakouts should be 50mm
- Provide bracket for interconnection connector parking.
COMPONENTS CHOOSING FOR TAIL GATE WIRING HARNESS:
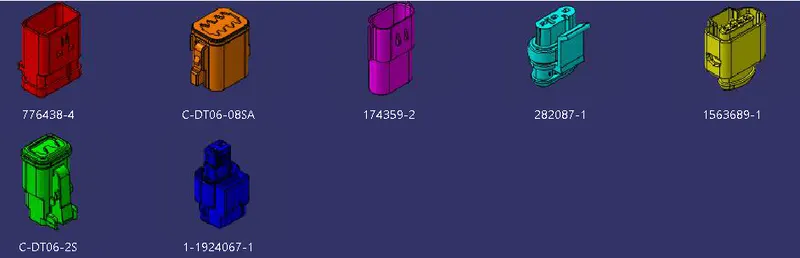
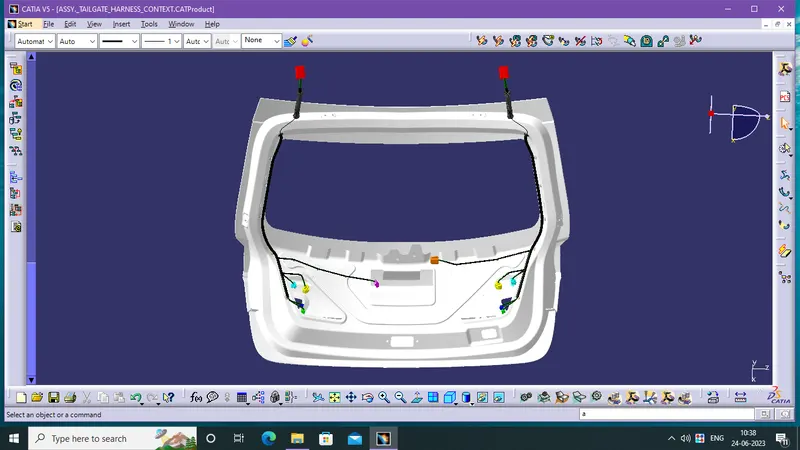
- Red - 776438-4 - Inter Connection Connector
- Orange - c-DT06-08SA - Wiper Motor Connector
- Purple - 174359-2 - No. Plate Light Connector
- Cyan - 282087-1 - Integrated Turn Signal and Hazard Light Connector
- Yellow - 156389-1 - Intergrated Running and Brake Light Connector
- Green - C-DT06-2S - Reverse Light Connector
- Blue - 1-1924066-1 - Parking Light Connector
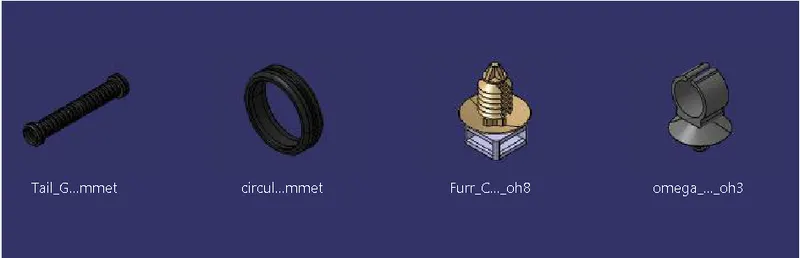
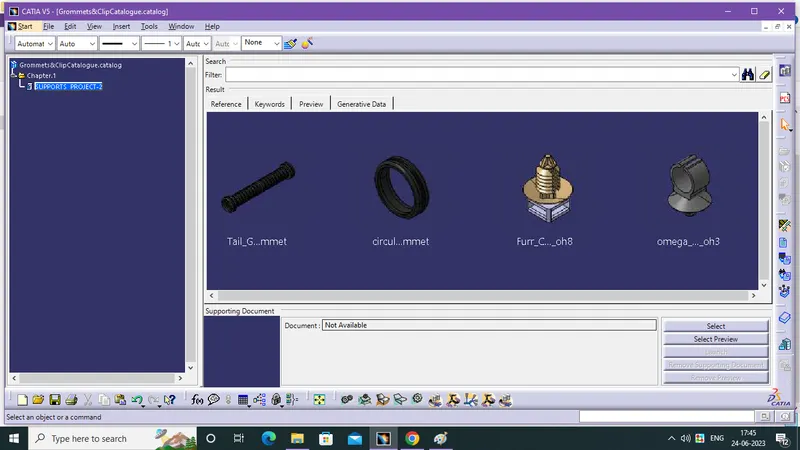
- Tail Gate Bellow Grommet
- Circular Grommet
- Furr Tree Clip
- Omega Furr Tree Clip
GIVEN DATA:
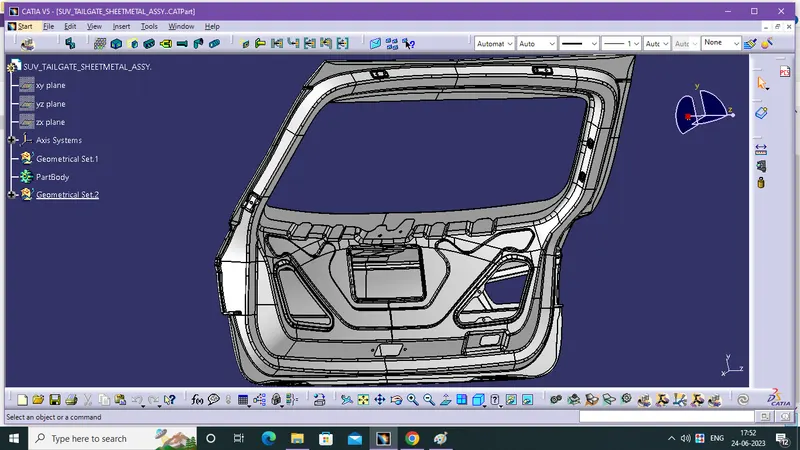
- Given SUV tail Gate CAD Data.
- Available connector and clips,clamps 3D data can be used, or download the connectors from Hellermann Tayton.com and www.te.com
ELECTRICAL DEFINTION AND CATALOGUE CREATION:
- Create a points and a axis system based on that requirement and rules in Part Design WB.
- Go to Electrical Part Design WB and define the products, now mechanical part convert into electrical part.
- use define connector and connector connection pt., bundle connection pt. for connectors, save the components in the specific catalogues.
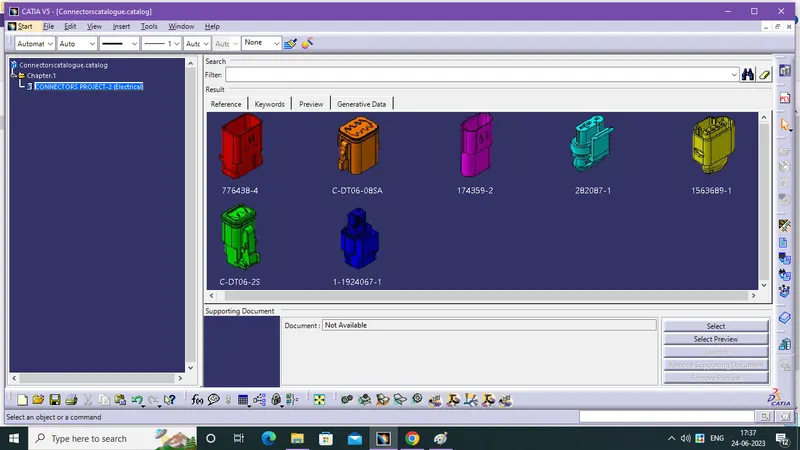
- use define support part twice for dual entry and exit of bundle for Clamps and Clips, circullar Grommets.
- use define equipment and bundle connection point for long Grommets and Channels. create line for routing via Grommet and Channel. After all, save the components in the specific catalogues.
ASSEMBLY OF ALL COMPONENTS AT EXACT LOCATION:
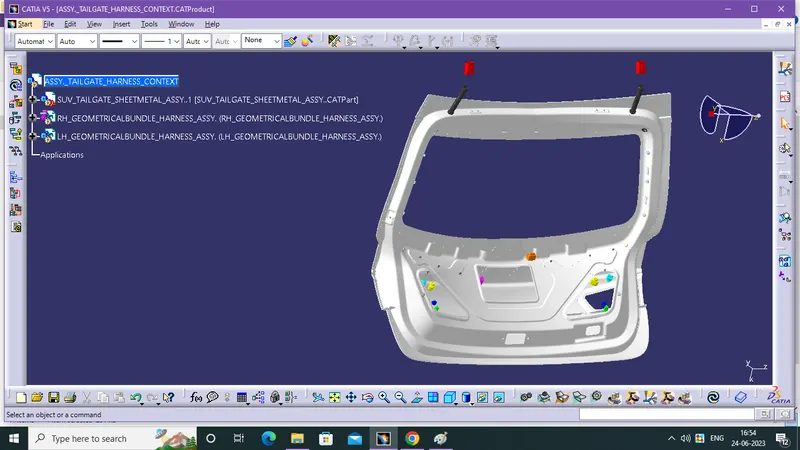
- Using mechanical assembly work bench, move toolbar commands and compass for fixation of All components at exact location of planned design.
PROPER ROUTING OF BUNDLES VIA GROMMETS AND SUPPORT PARTS:
Step - 1:
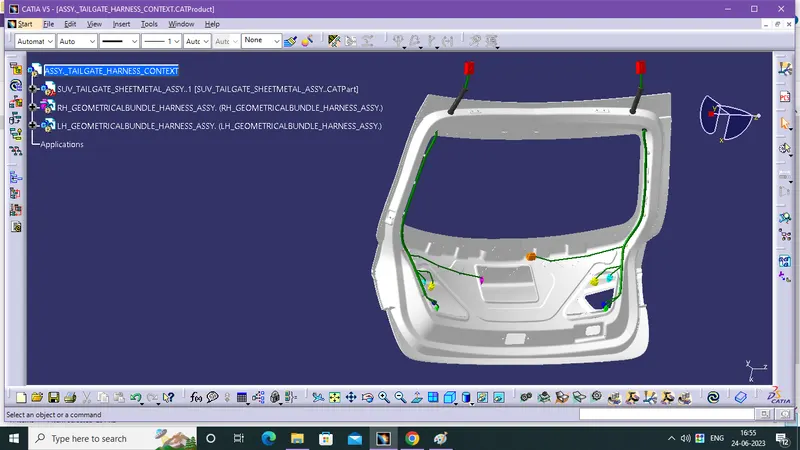
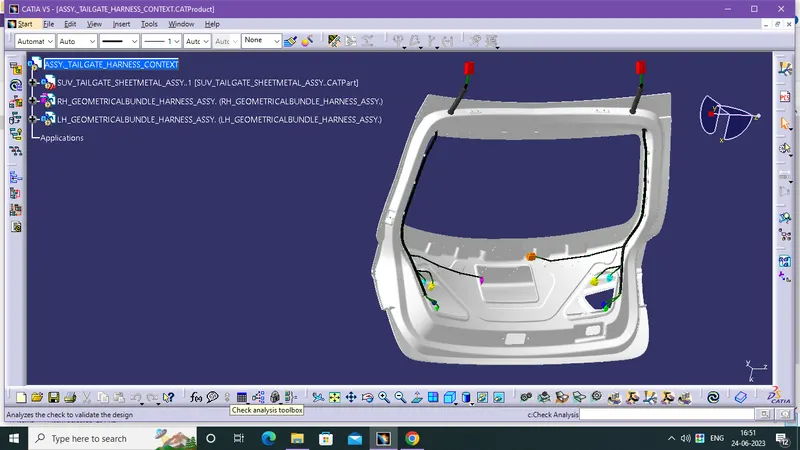
- Define the Harness Geometrical Bundle Assy.Product into Electrical Product, using the Geometrical Bundle command in Electrical Harness Assembly workbench.
- now, use Electrical Harness Assembly WB, Multi Branchable Document command in product and create a main Branch using Branch Definition
- Click Route Definition then, select the comomponent and component or bundle segment and component for all route dedfinition for fully connected bundle segment to achive the Flatten.
Step - 2:
- split the branch for adding sub branch, using Add Branch Point then use Branch Definition for Sub Branch creation in Electrical Harness Installation WB.
Step - 3:
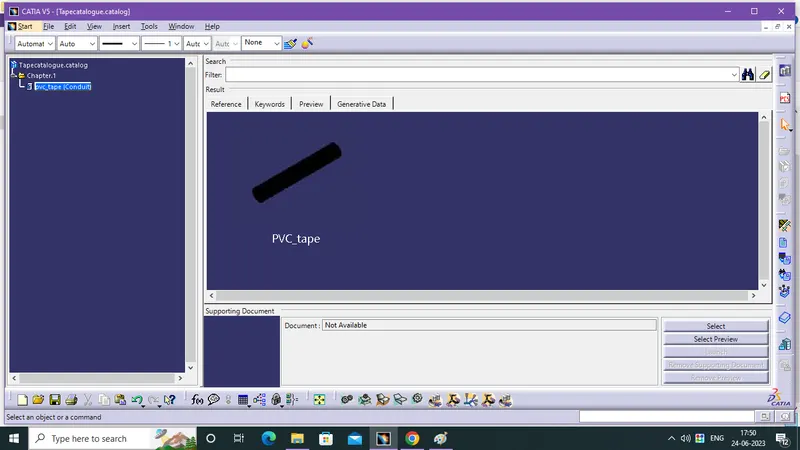
- In Electrical Part Design workbench, Create a corrugated tubes and tapes as required dimensions and save them into specific catalog. tapes are don"t have a specific Radius.
- Electrical Harness Assembly, now add covering, using Protective Covering command in Electrical Harness Assembly WB and select the branches then pick the PVC Tape from catalog.
BUNDLE SEGMENT CONNECTIVITY CHECK:
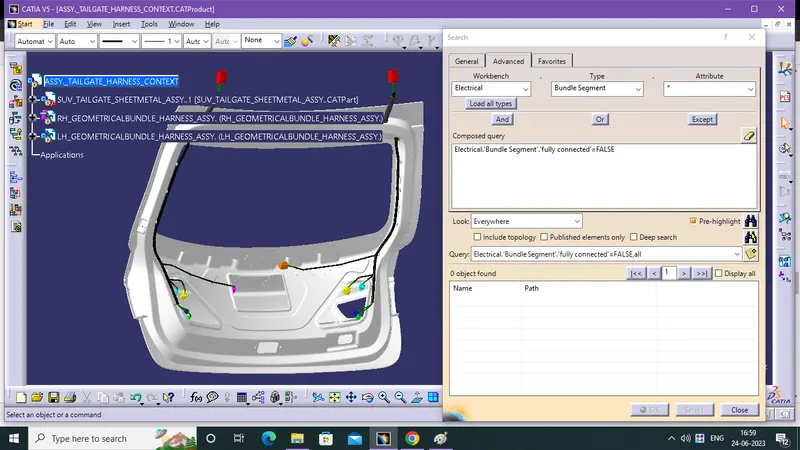
- After the complition of routing, Bundle segment connectvity is mandatory for Flattening. so, check the connectivity using Edit-->Search.
- Now there is No False segment connectivity, segment is fully connected so, it is ready to Flattening.
FLATTENING - WIRING HARNESS OF SUV CAR TAIL GATE:
Step - 1:
- Create a product file and save it in the same location where the wire harness or routing assembly Product File is stored.
In Electrical Harness Flattening WB:
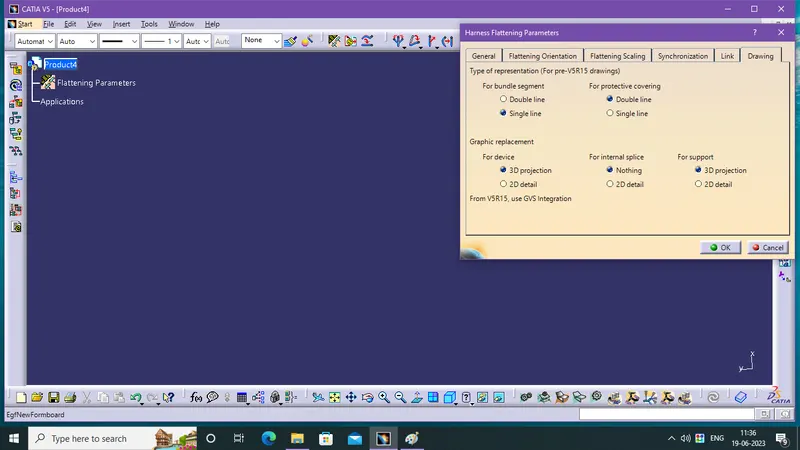
- Open the Electrical Harness Flattening WB then Define the Harness flattening parameters. like shown in following fig.,and rest of the parameters are don't need a edit, so default settings are enough for those.
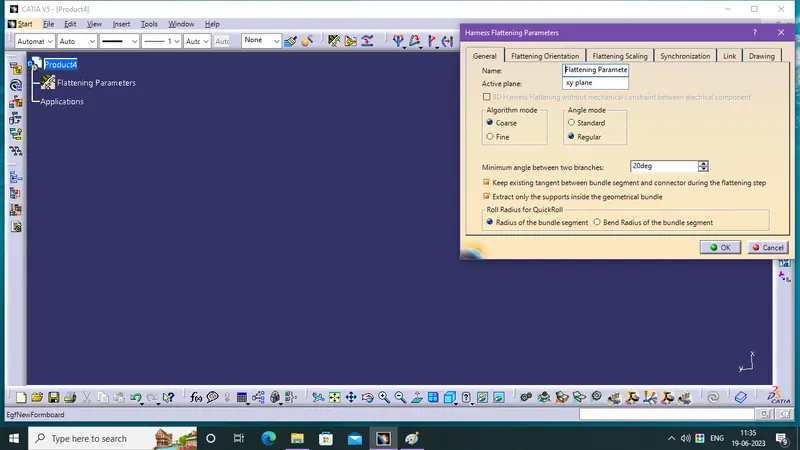
- Active Plane selection, you can select a another plane, face or continue with default xy plane.
Step - 2:
- Select the Extract command for importing the product file into the Flattening WB.
- Then, the geometric bundle assembly product is modified into geometric bundle assembly Ehf product now save it as a Ehf product.
Step - 3:
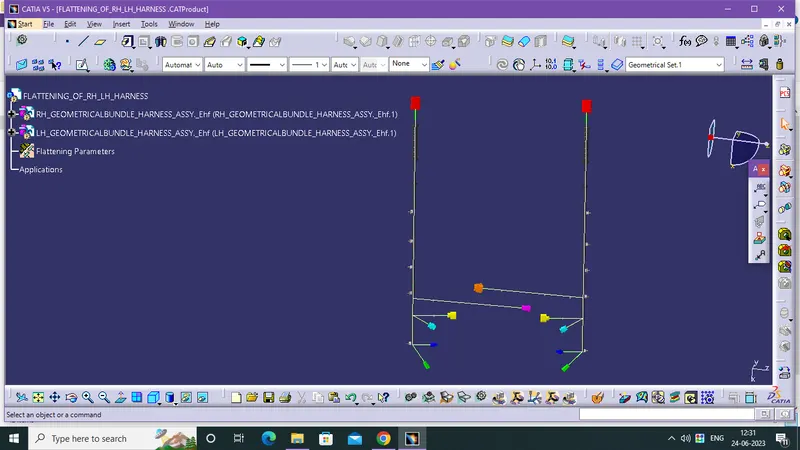
- Select the Flatten option to flatten the wire harness assembly.
- Then select the active plane, then select any one branch or First Branch Bundle segment and then select the 'select all branches'.
- If there is no discontinuity in the bundle segment then all the branches will be selected and by pressing 'ok' the wire harness assembly will be flattened.
Step - 4:
- Use Manipulator Toolbar commands, like Rotate and other commands to move the branches and bring them in proper orientation as per the given layout.
- If any need of modification in bundle segments and cot tubes do it in normal assembly product then save it, and now use the Synchronize command and update the modification in Ehf product.
DRAWING - WIRING HARNESS OF SUV CAR TAIL GATE:
In Drafting WB:
- Import the 3D Flattening assembly into 2D drawing sheet using front view command, Add the front view of the harness assembly by selecting any one of the flat faces of the connector and orient the view as per the requirement.
- Go to the properties of the view and select the '3D Wireframe' on and ' Is always visible' option in order to see properly the Wire bundle, connectors and the protection coverings.
- Enable the TItle Block template from Edit and fill up the required details.
- Enabe the BOM Table from Insert.