Project 2
A 100 m WBM road needs to be constructed inside the Skill Lync Education center premises to allow access to the centre for students and faculties.
Create the following Project (under same EPS/OBS as project-1) and Resource :
Project Name - Education Centre Road
Assume - Calendar as 6 x 24 and start date on 22nd feb 2021
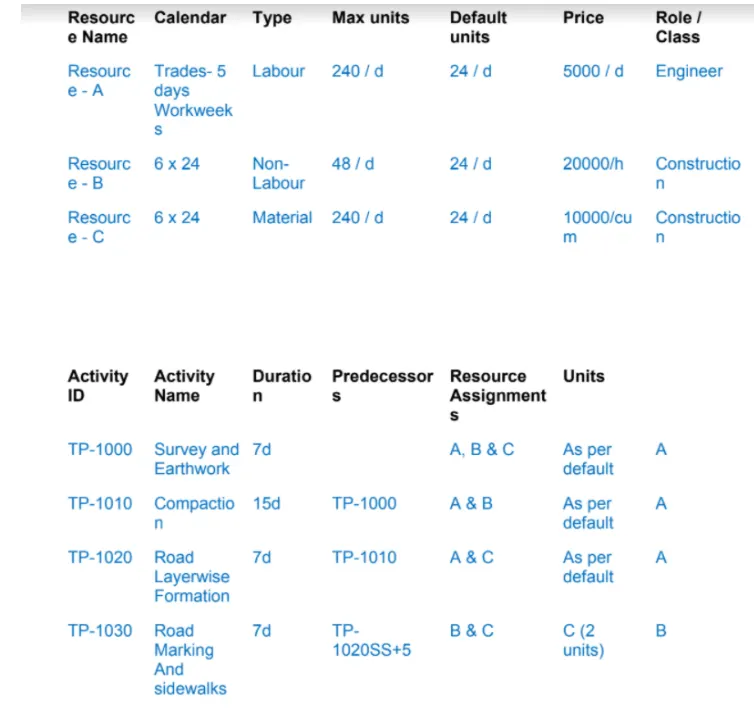
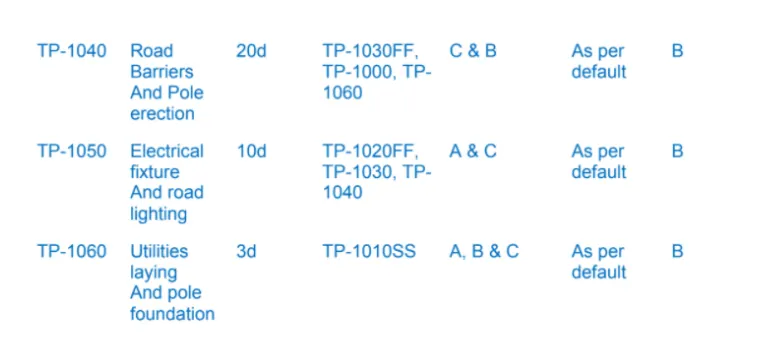
Please do the following:
1. Develop the project schedule as per the criteria above
2. Use 3-Tier timescale with Year / Month / Weeks
3. Define and Add resources
4. Add a budget to your project - INR 6 cr.
5. Assign a baseline to the project
6. Add following expense:
Task - 1 - Rs 20,000/- (Item - Fuel)
Task - 2 - Rs 30,000 /- (Item - Maintenance)
7. Generate material resource costs curve
8. Generate an activity wise cost report
9. Create a reflection
10. In the reflection, auto update the project at 15 days from start
11. Open a TSLD view of the project in Visualizer
12. Add curtains up-to first 15 days of the project.
13. Find out the actual cost for labour, non-labour and material cost of the updated schedule
- Open Primavera P6 Software.
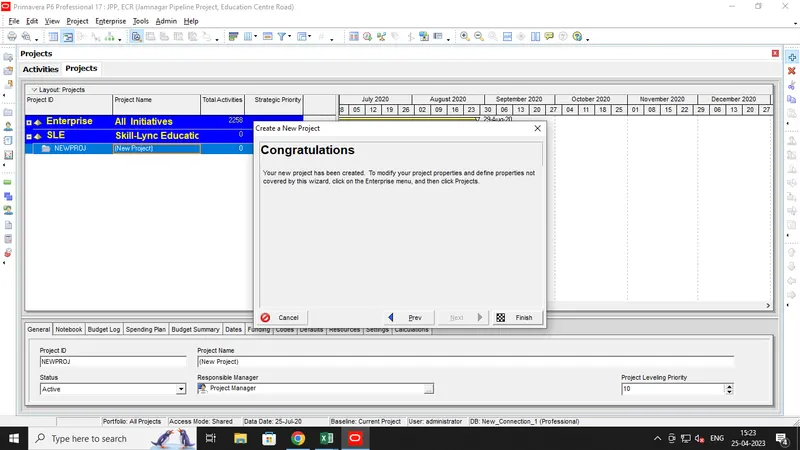
- Go to Enterprise and click Project.
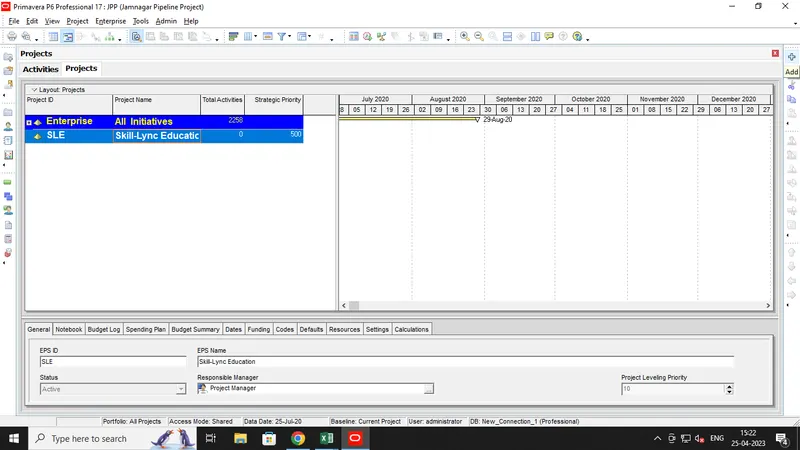
- Then Click Add, a New window opens.
- Then Select EPS as Skill-Lync Education.
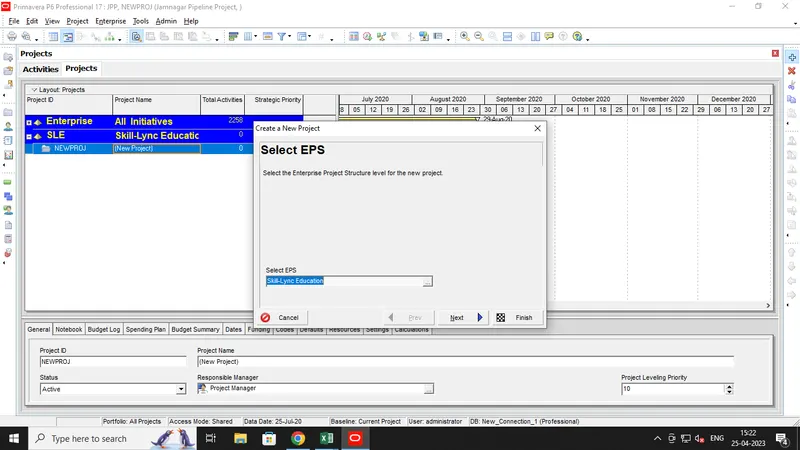
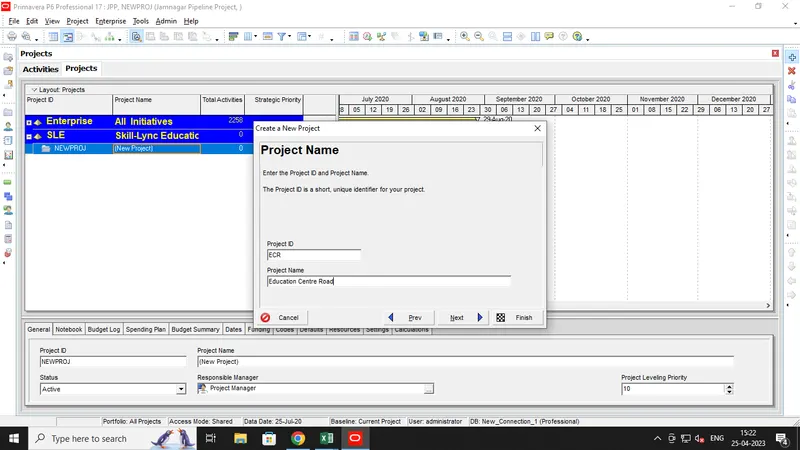
- Then Enter Project ID and Project Name as Education Centre Road.
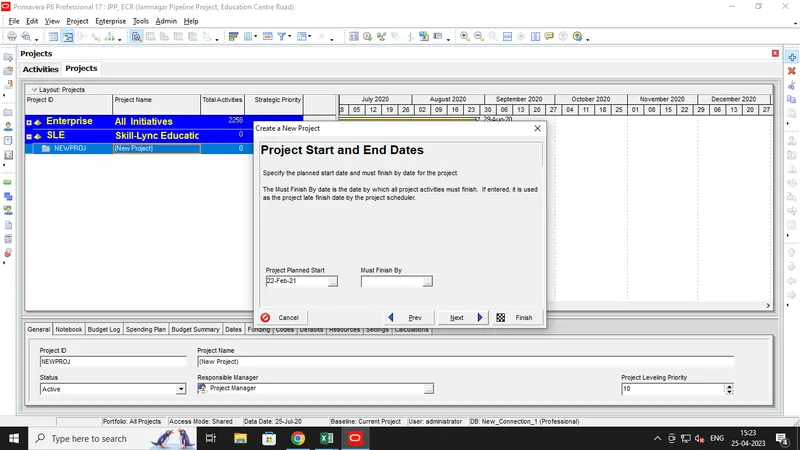
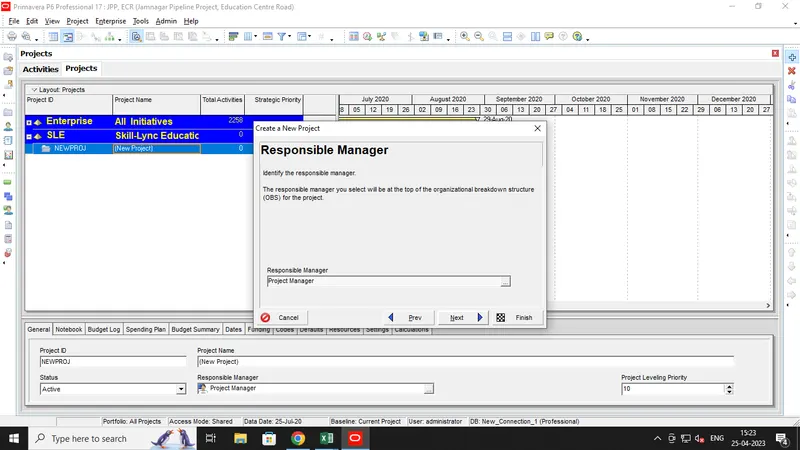
- Define Project Start Date and Assign Responsible Manager as Project Manager.
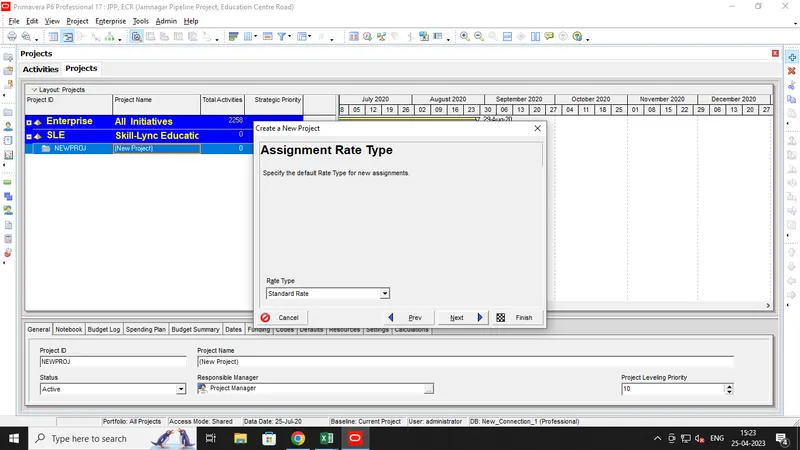
- Then Select Standard Rate for Rate Type.
- And Click Finish to Create a Project.
Step 2:-
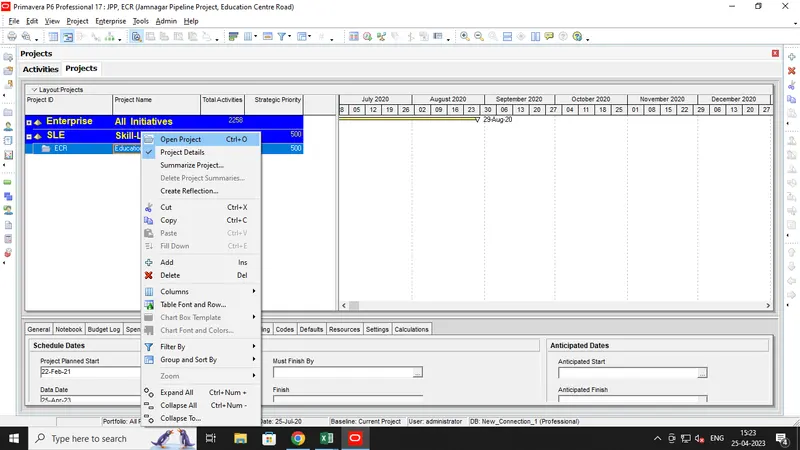
- Now Select and Open the Project "Education Centre Road".
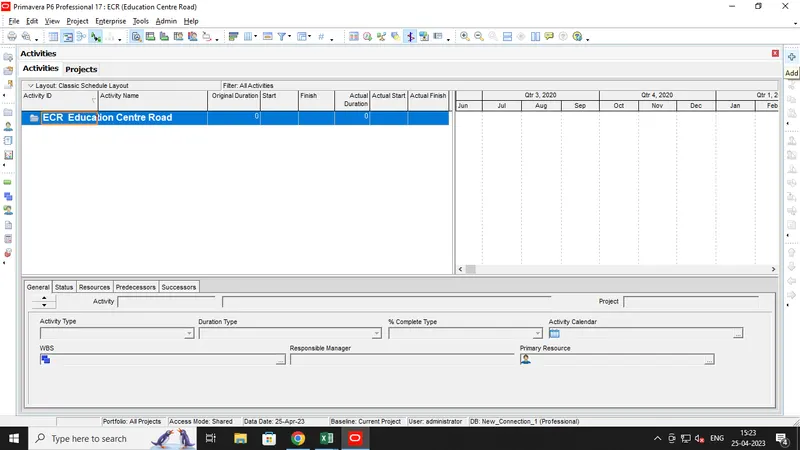
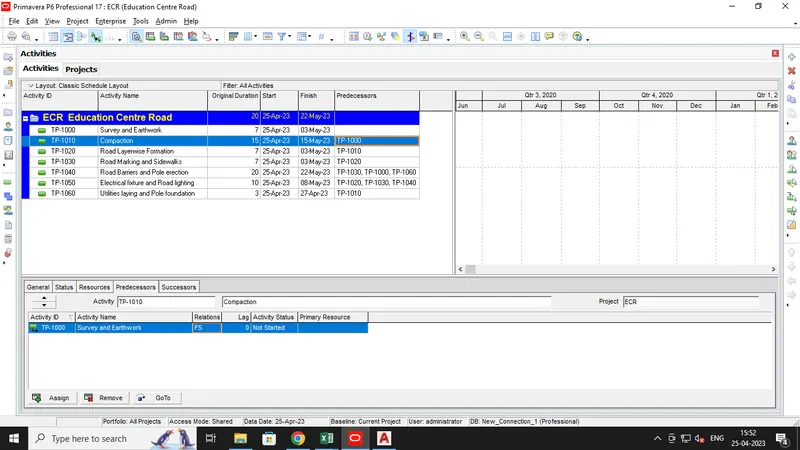
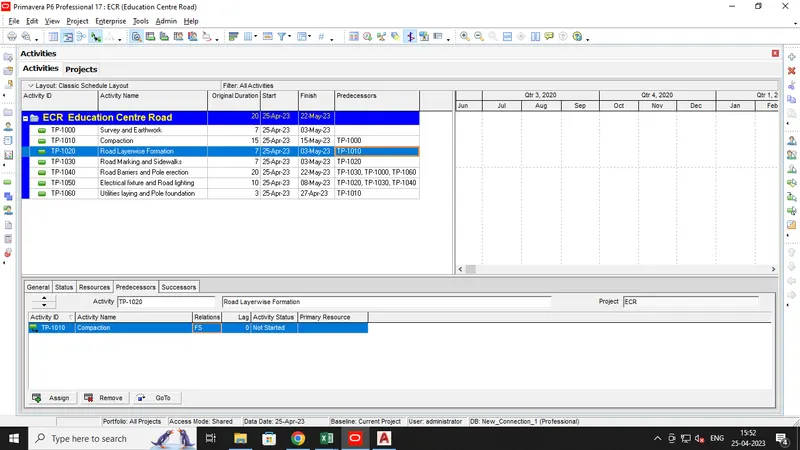
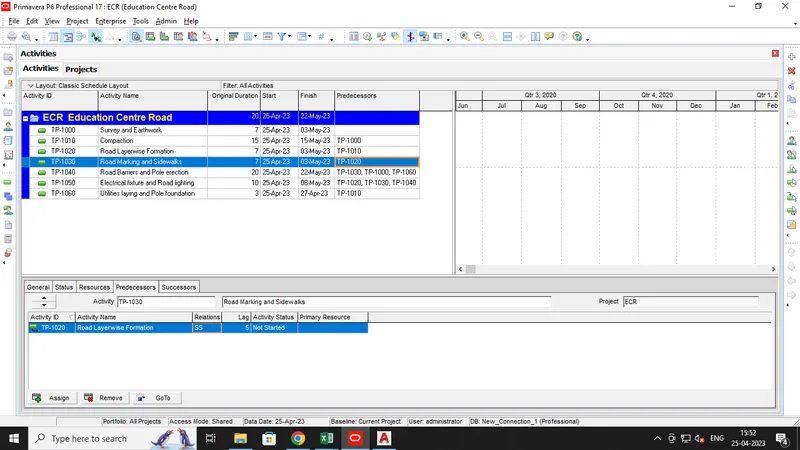
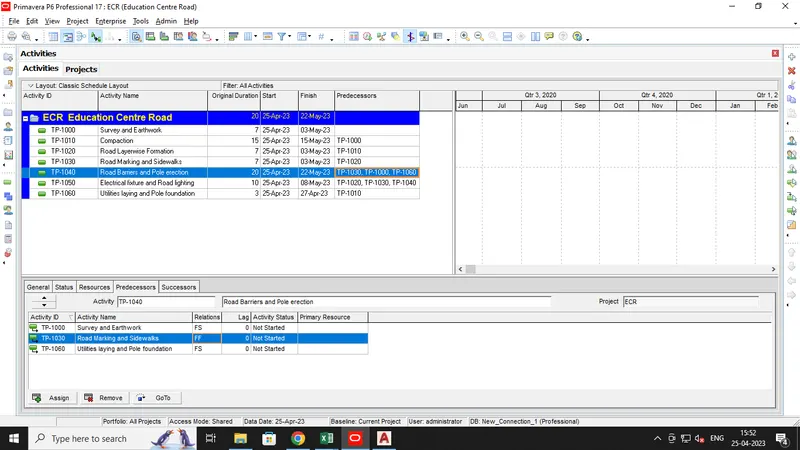
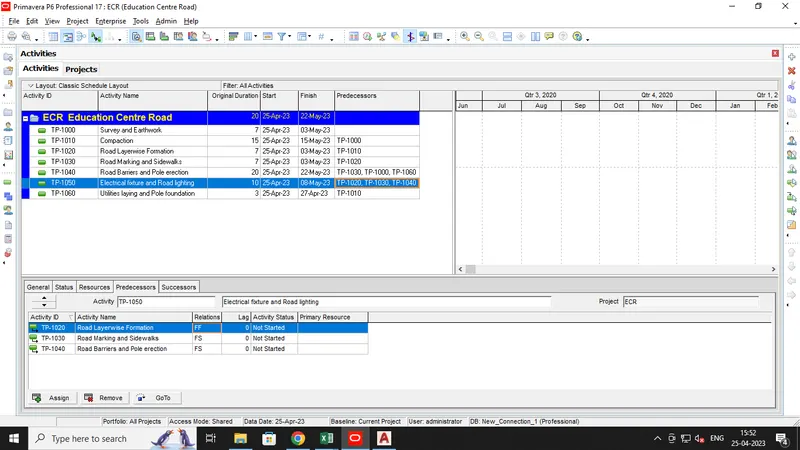
- Now Project opened and then Add Activities as given above.
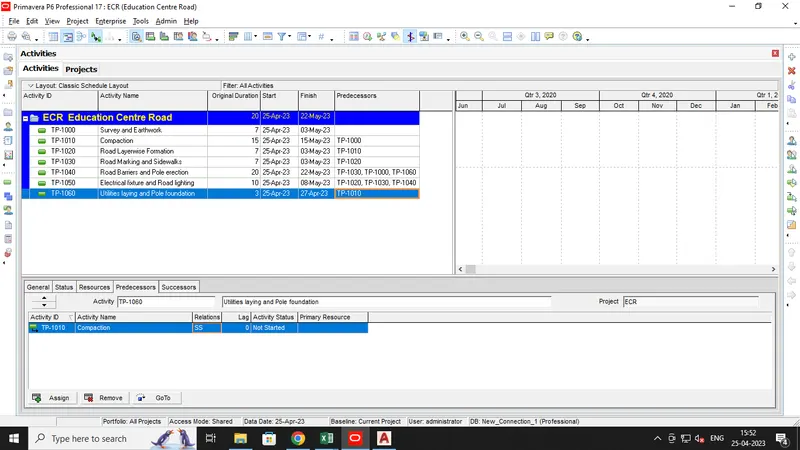
- After Activity addition give Durations as shown below.
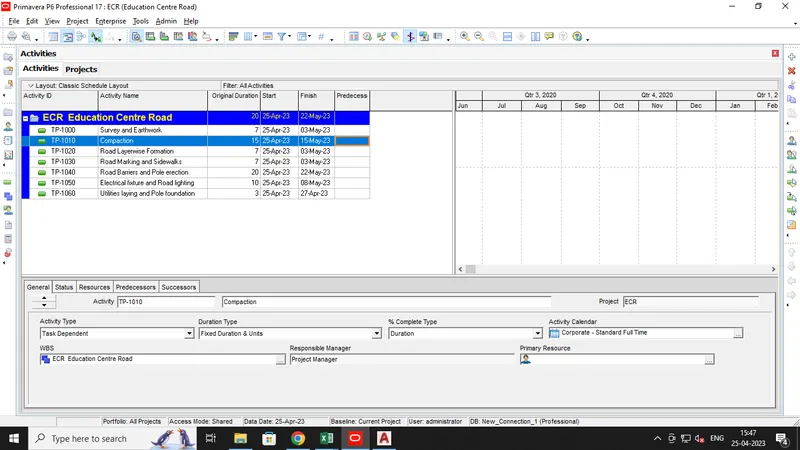
- Then Assign relationships as shown below.
Step 3:-
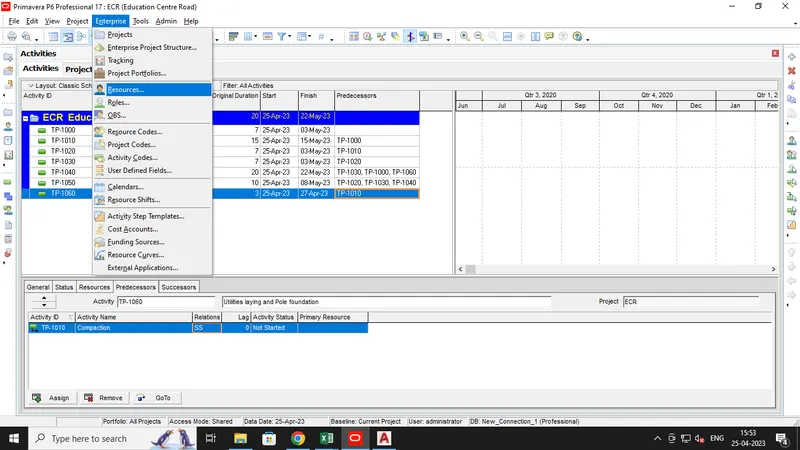
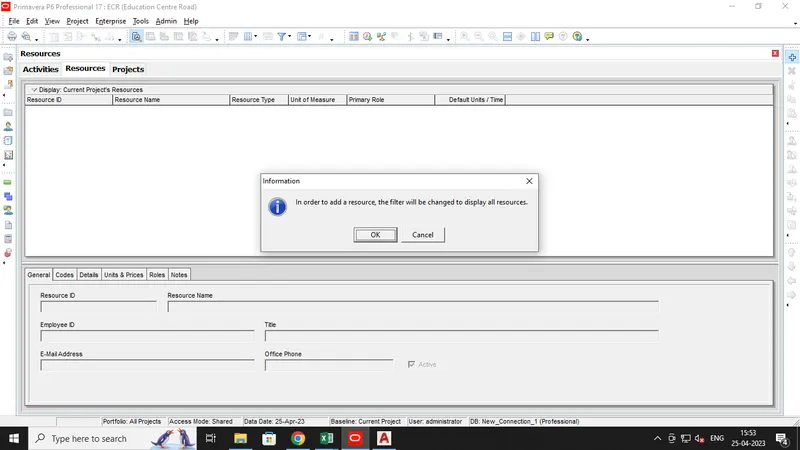
- Go to Enterprise Tab, then select Resources to define Resources.
- Now new window pops up, then click Add icon.
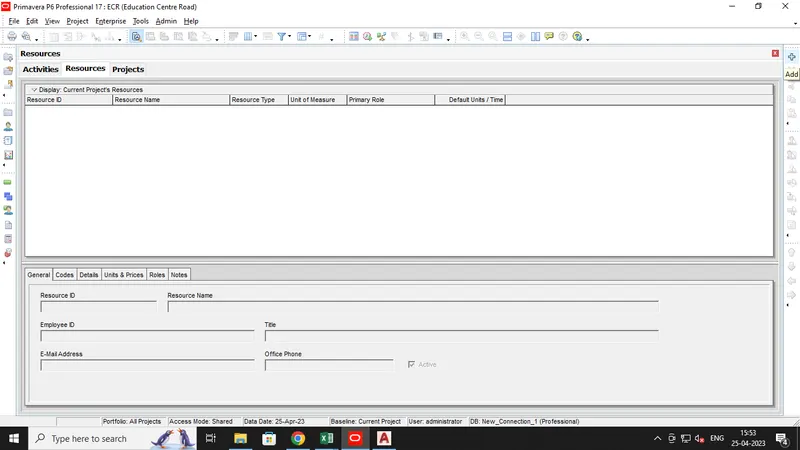
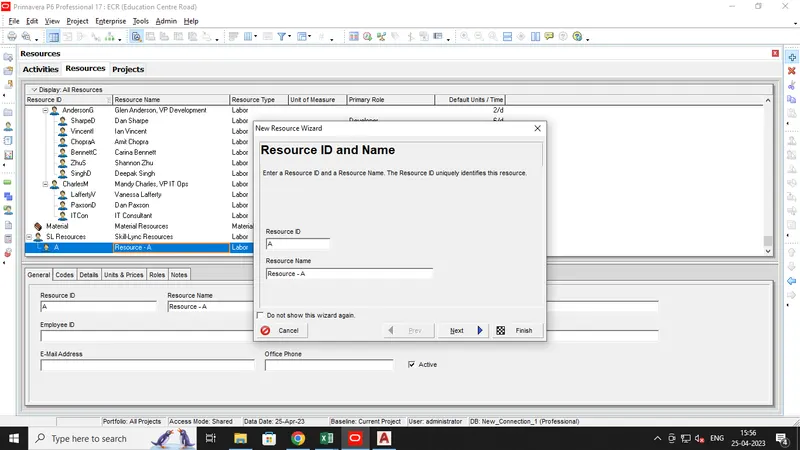
- Now define Resource ID and Resoure Name. as shown below.
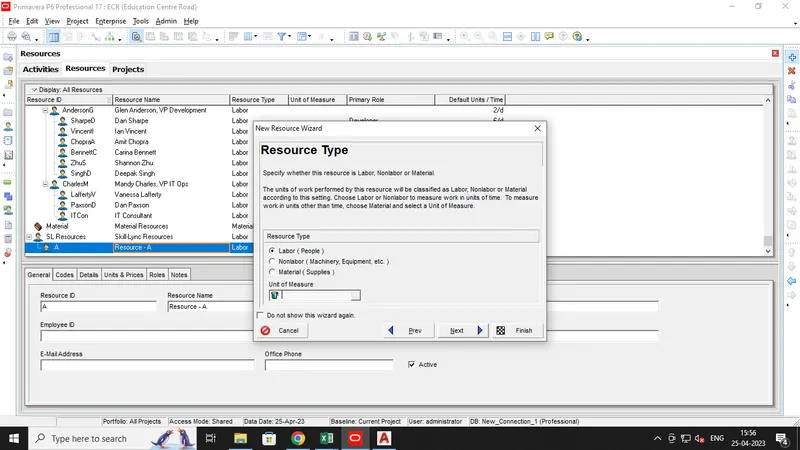
- Then Select Resource Type, Unit/Time & Prices and Roles of Resources.
- Then Select Calender, and click Finish.
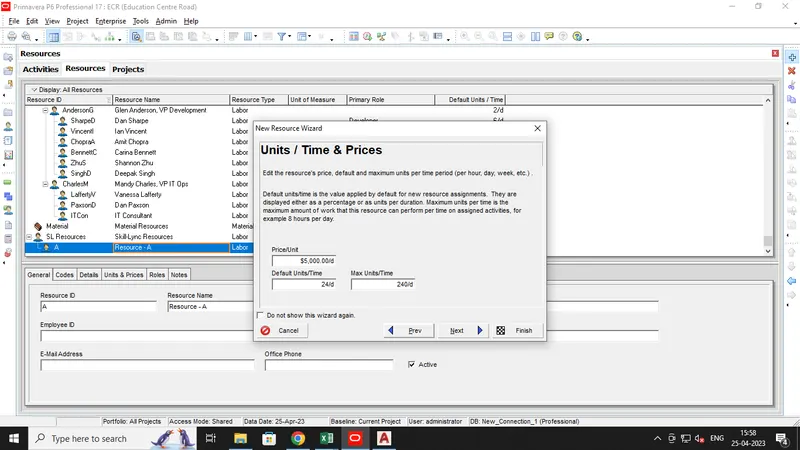
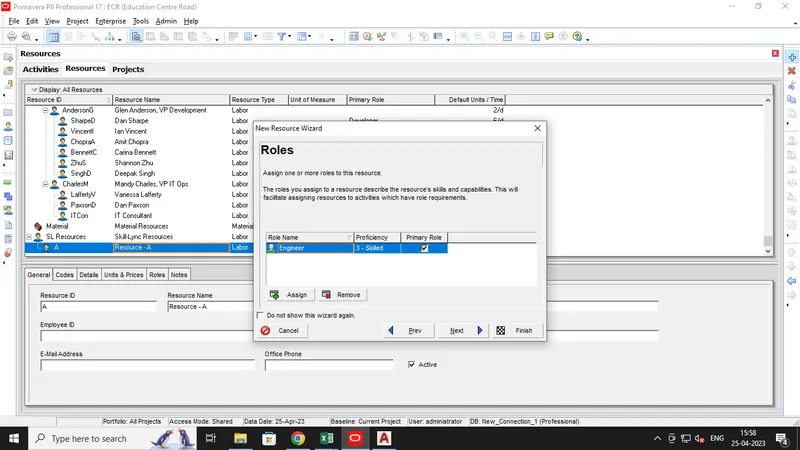
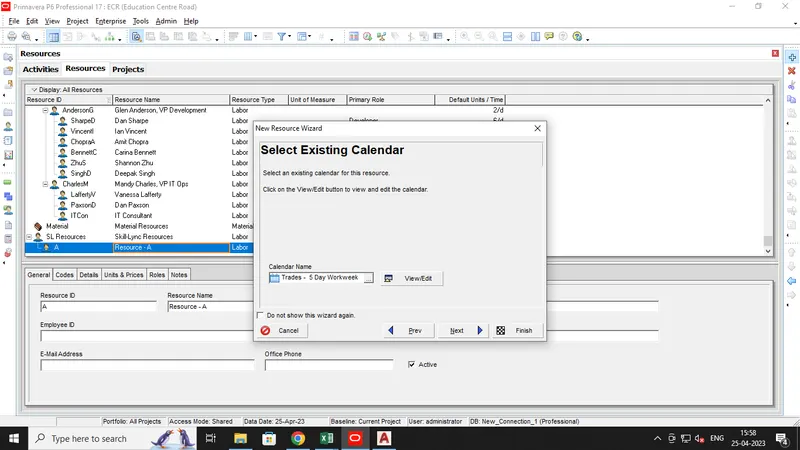
- Similarly Add other resources.
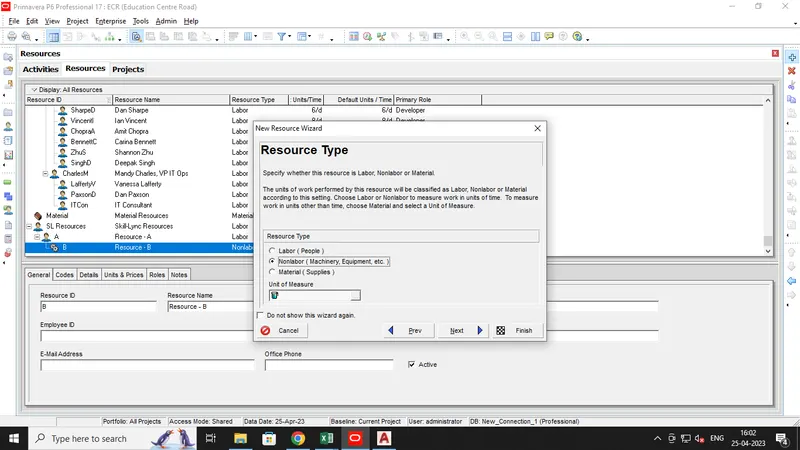
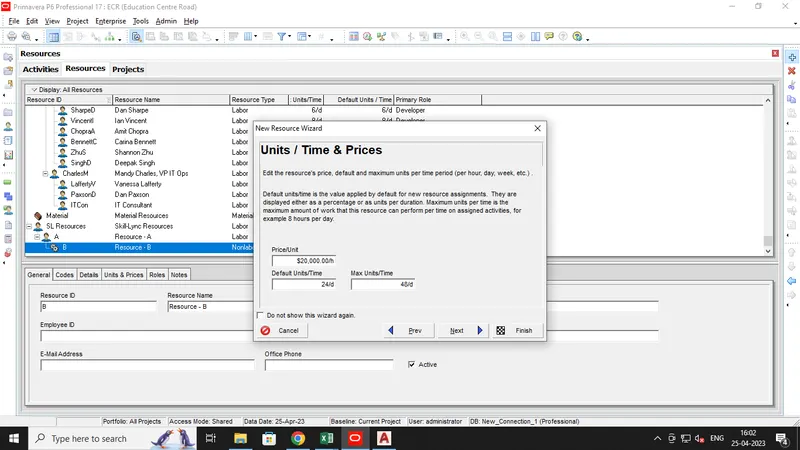
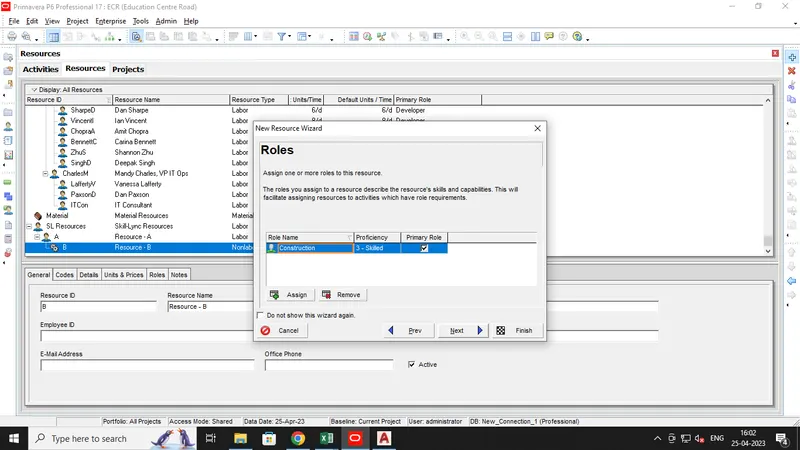
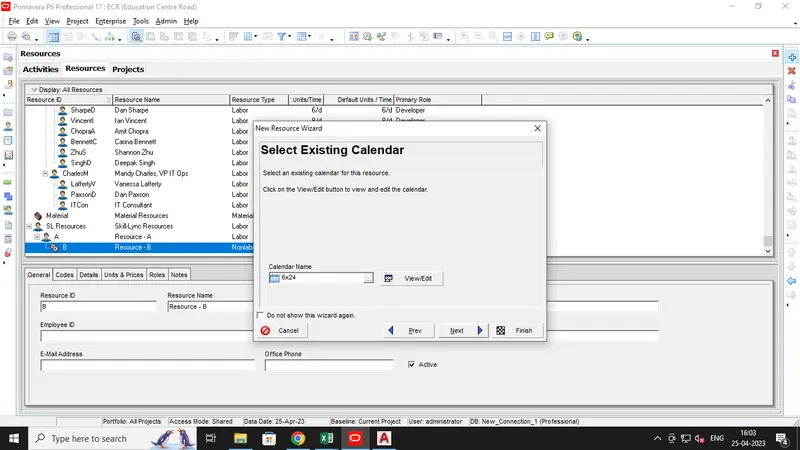
- Resources add successfully.
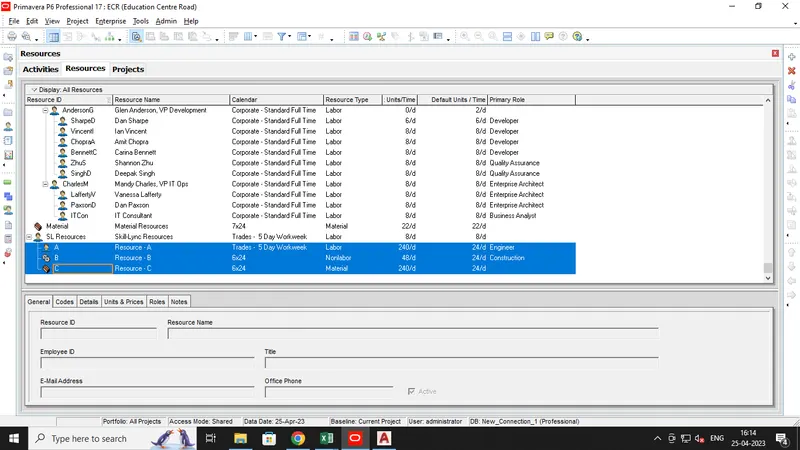
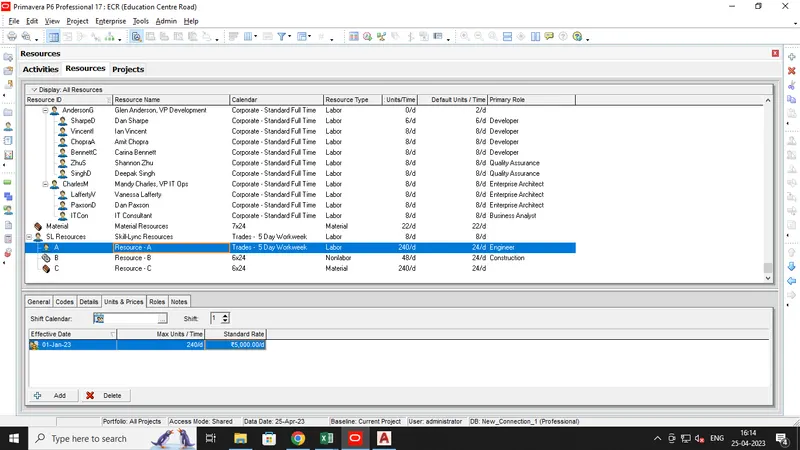
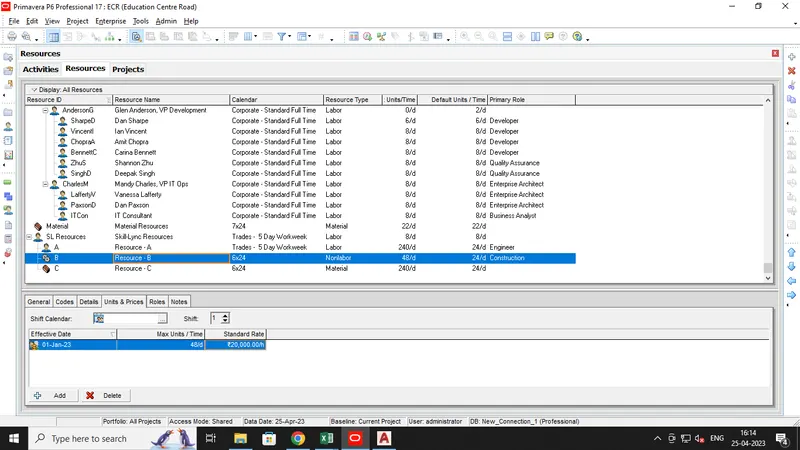
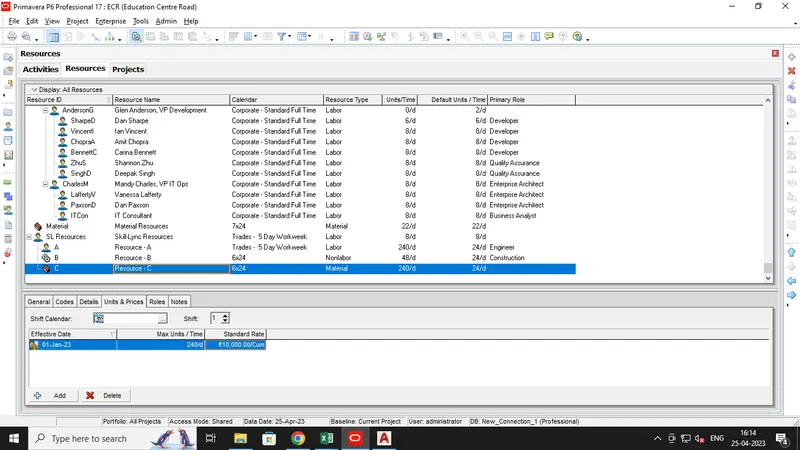
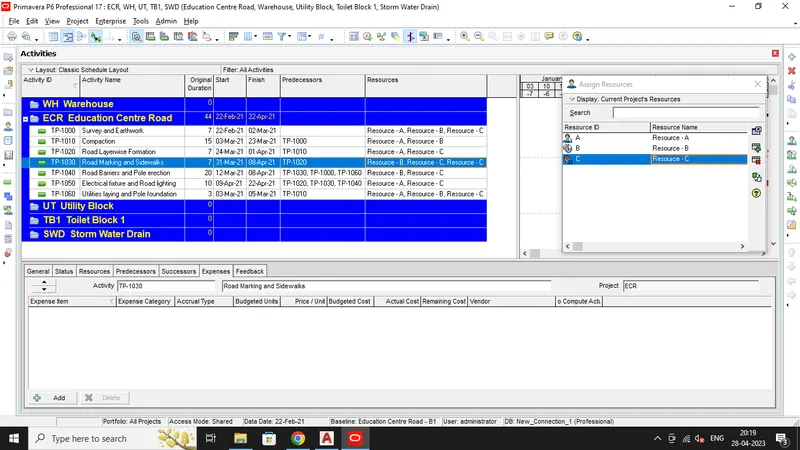
- Now assign resources to the particular activities as shown below.
Step 4:-
- To Change Timescale in Gantt Chart, first we need to Right click anywhere on Gantt Chart.
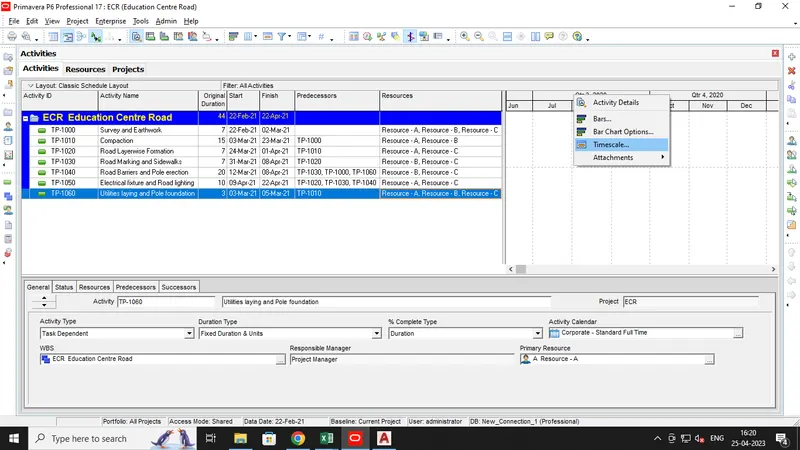
- Then select Three Lines, and select Year/Month and Week as shown below.
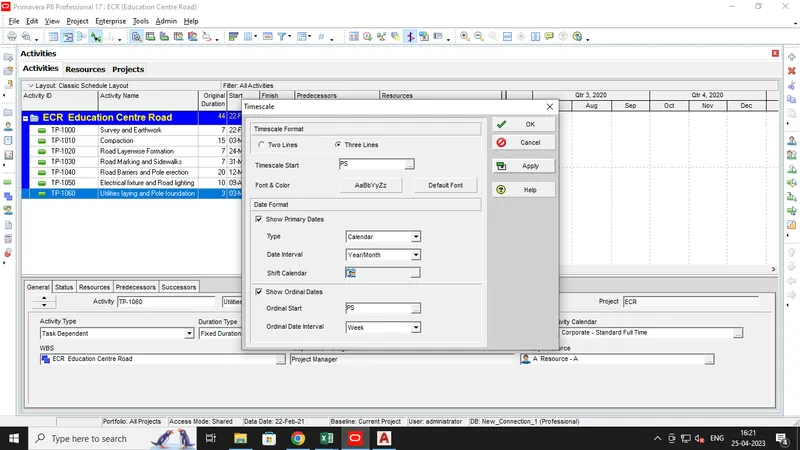
- WQe can see the Timescale changed.
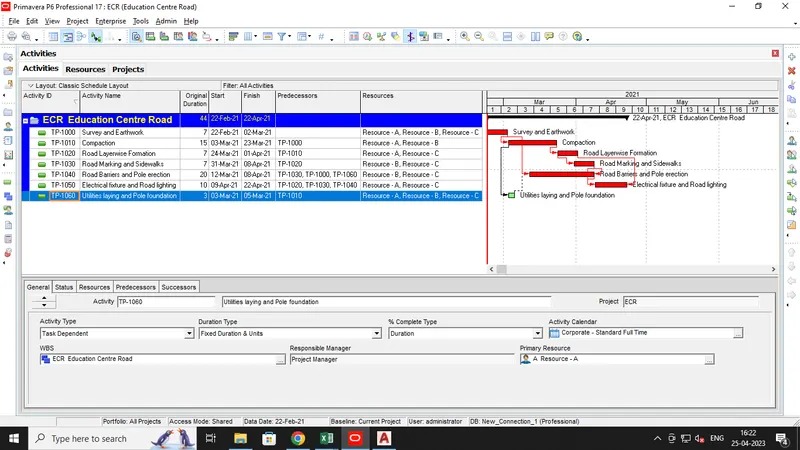
Step 5:-
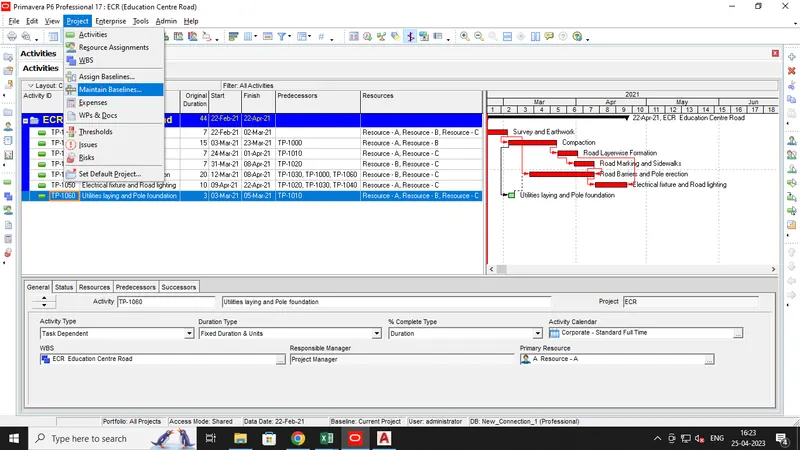
- Now add Baseline by selecting Maintain Baseline from Project Tab.
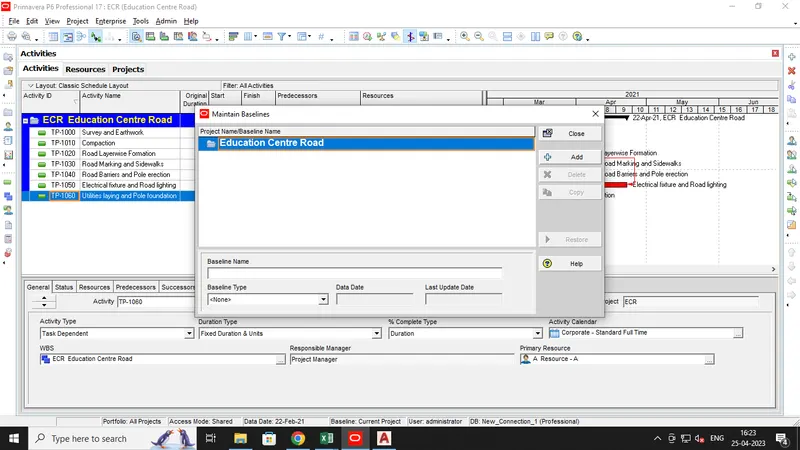
- Then Click Add and change type Initial Planning.
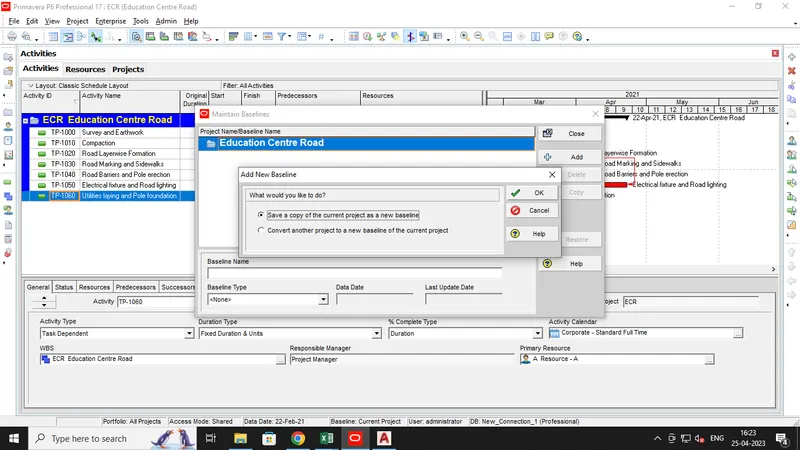
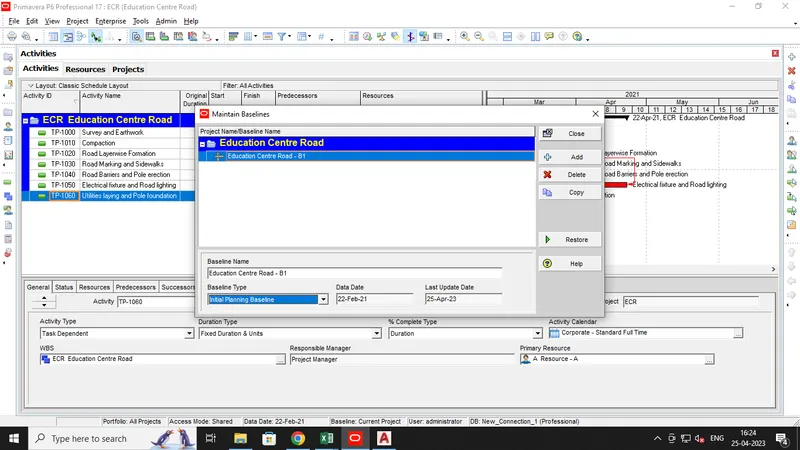
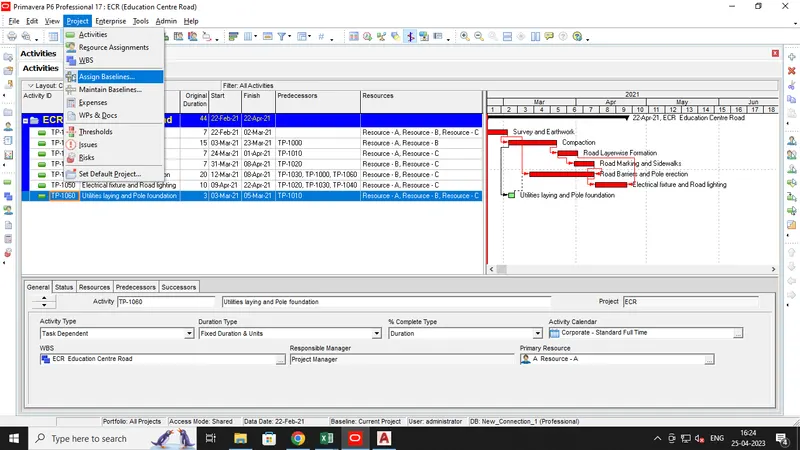
- Again go to Project Tab, and select Assign Baseline to assign.
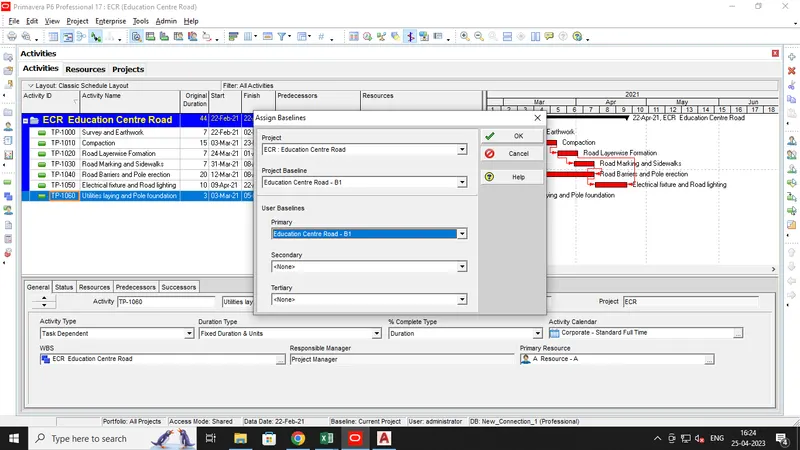
- Assign created Baseline as Primary and Project Baseline.
Step 6:-
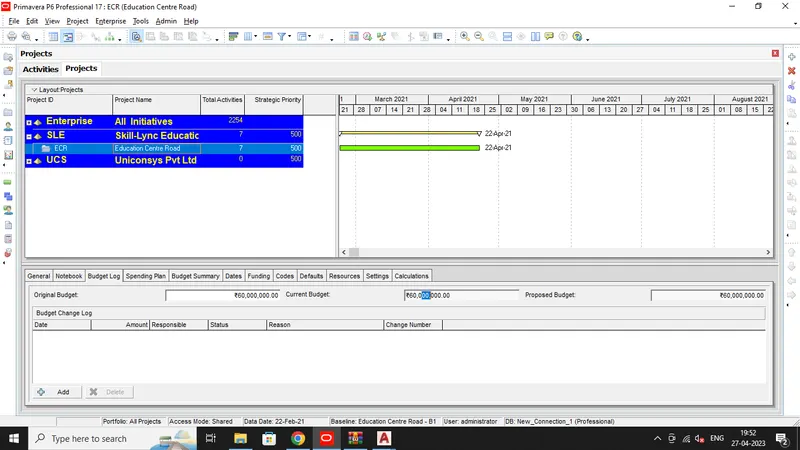
- Go to Project window and add Project Budget 6 cr. into the Original Budget as shoen below.
- Now add expense, adding Expenses column.
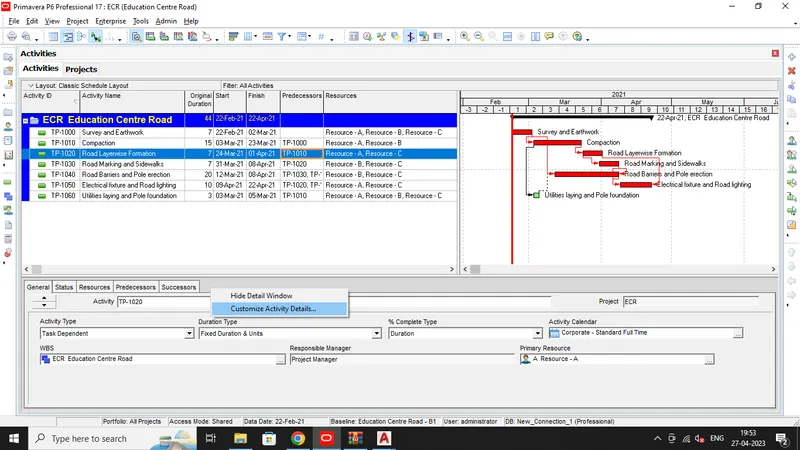
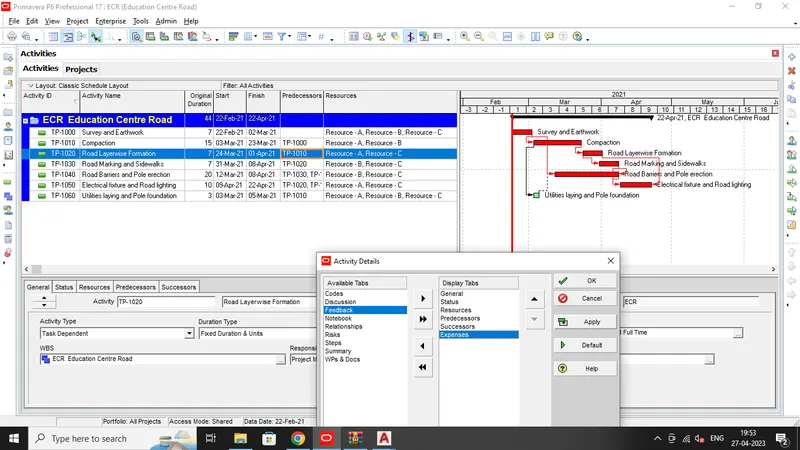
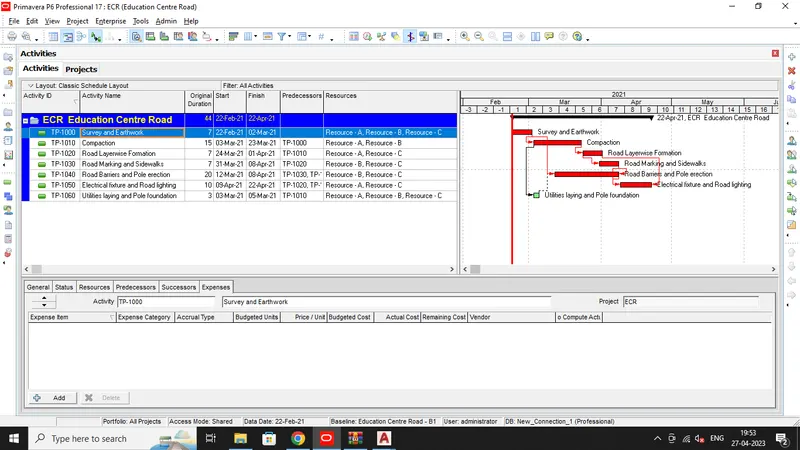
- Then select the Activity and add expense as shoen below.
- It includes Expense item, category and budgeted Units.
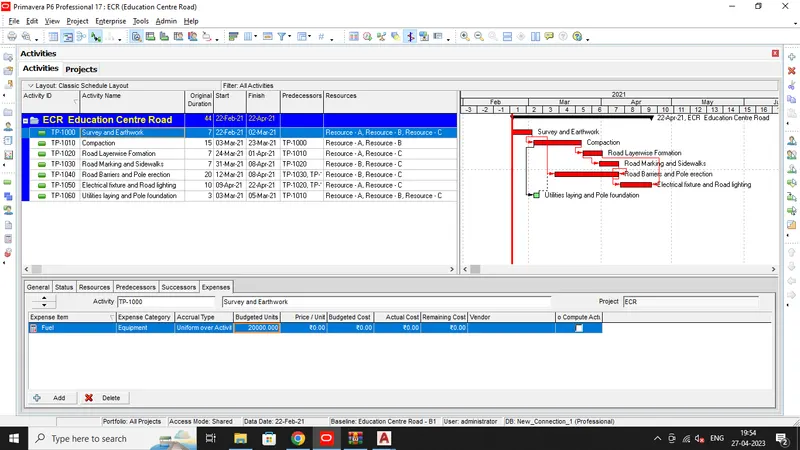
- Similary add all expense to the activities.
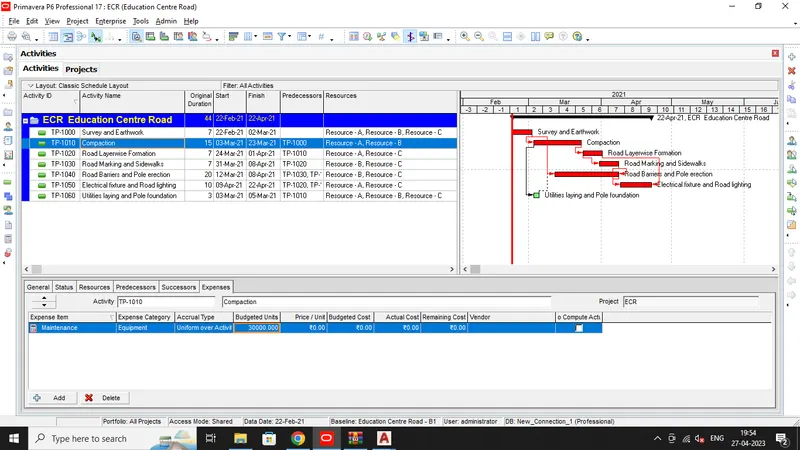
Step 7:-
- To show material resources cost curve, we have open Resource Usage Profile a shoen below.
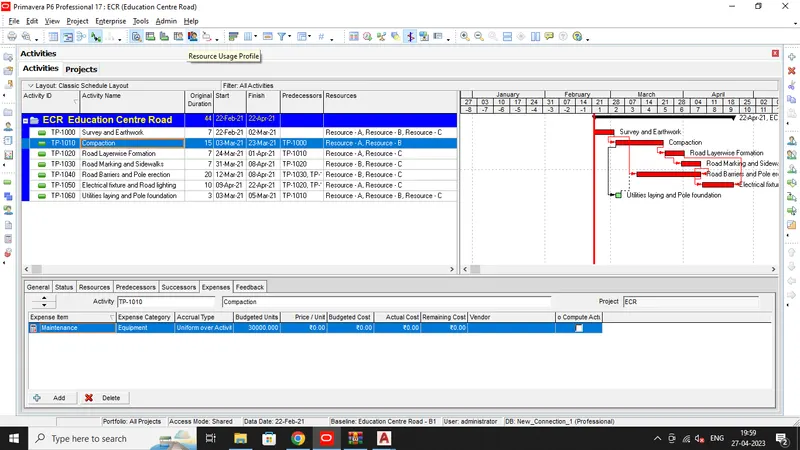
- Right click on Curve window and select Resource Usage Profile Option.
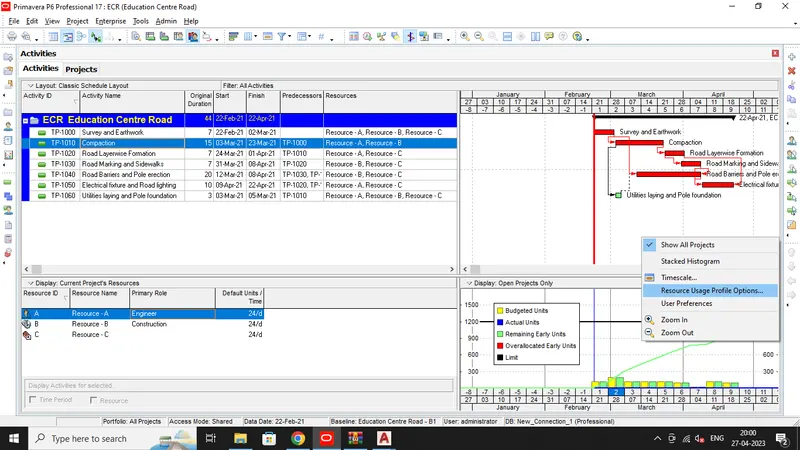
- Choose Cost curve.
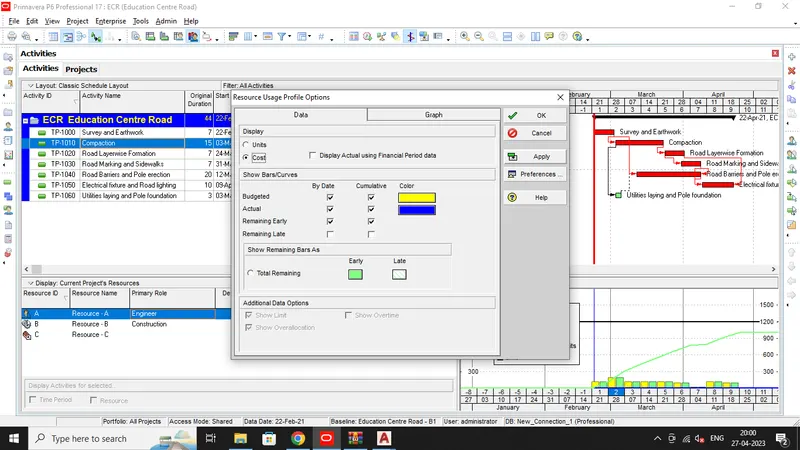
- Now it shows Material Resource cost Curve.
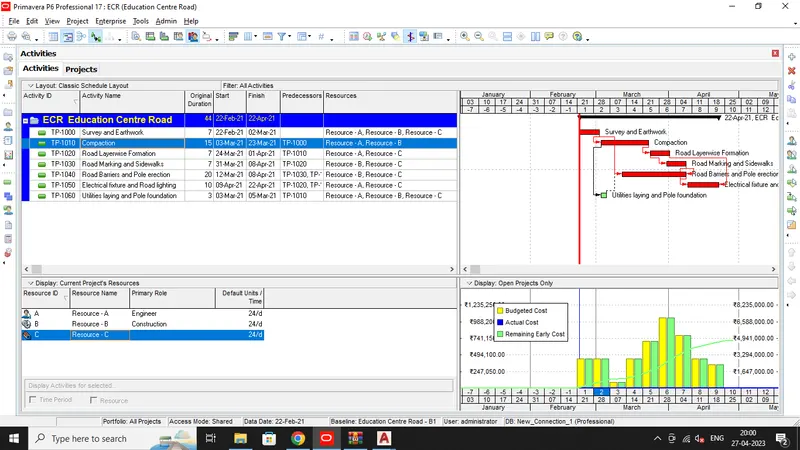
Step 8:-
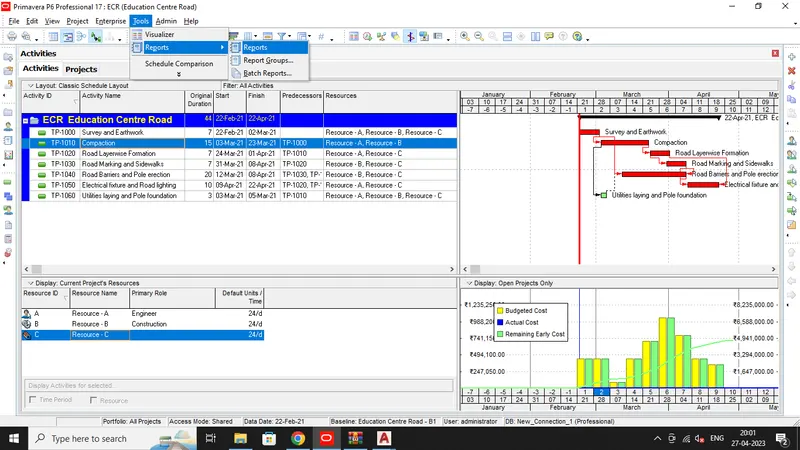
- Go to Tools Tab, select Report > Reports.
- Then Actual Costs, and click Run > Report.
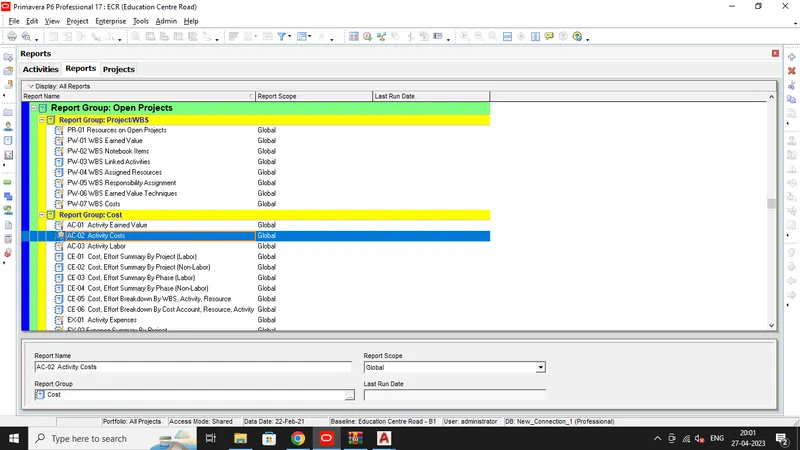
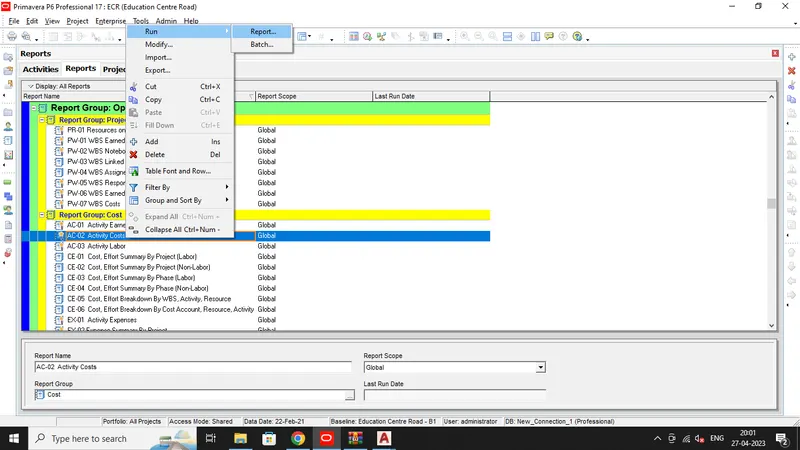
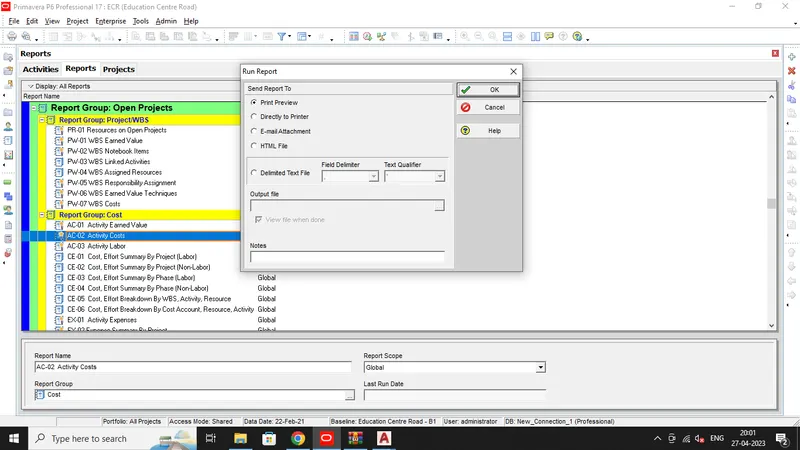
- Report Generated successfully.
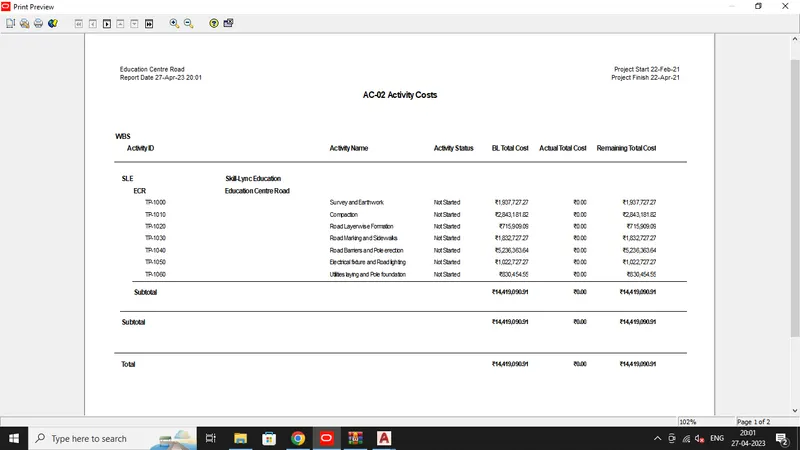
Step 9:-
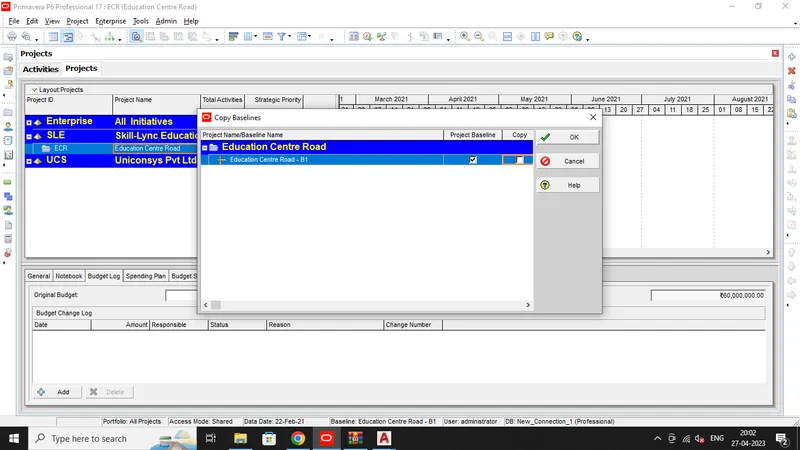
- To create Reflection of the project, Right click the Project on Projects Window.
- Click Create Reflection option.
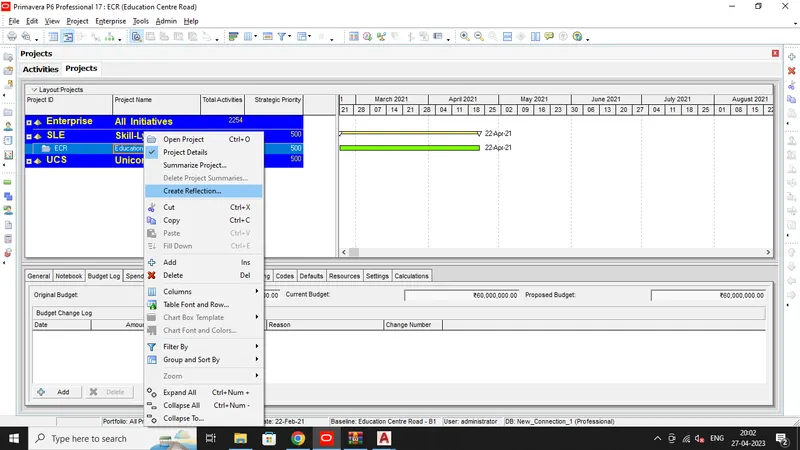
- Choose Baseline and click Ok.
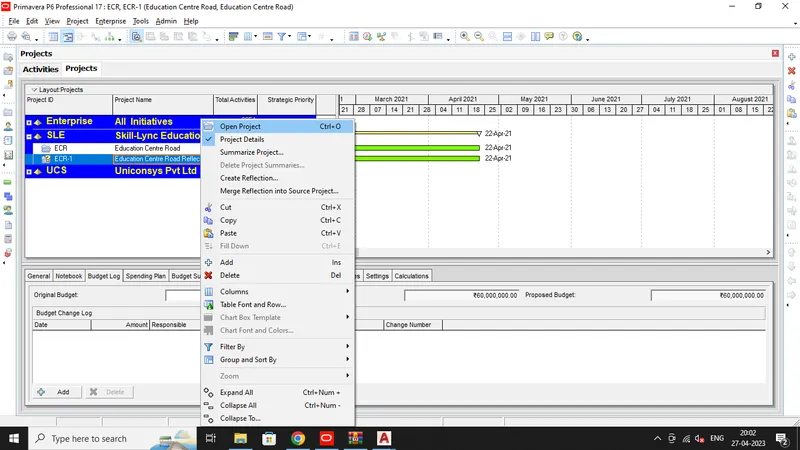
- Then Open the Reflected Project.
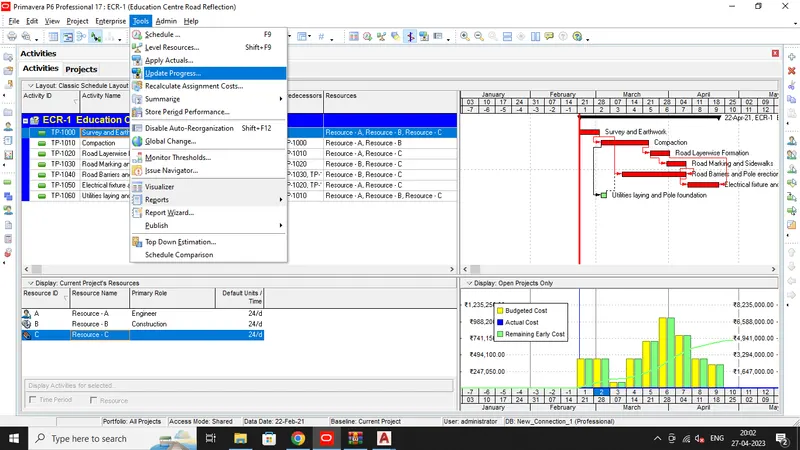
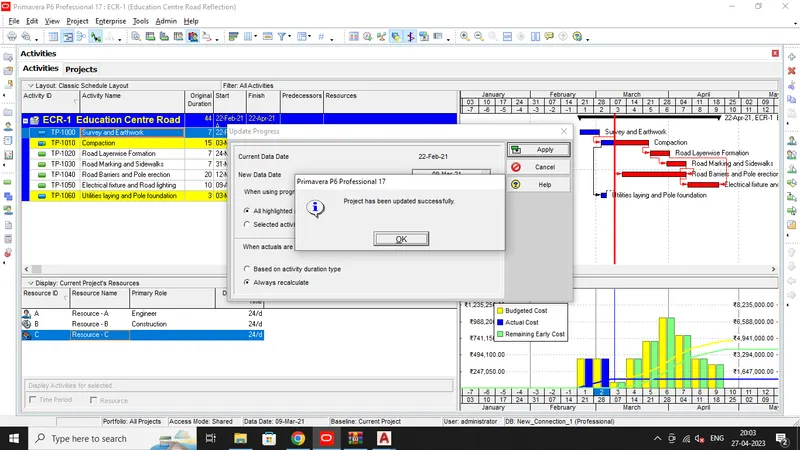
- Now Click Update Progress from Tools Tab.
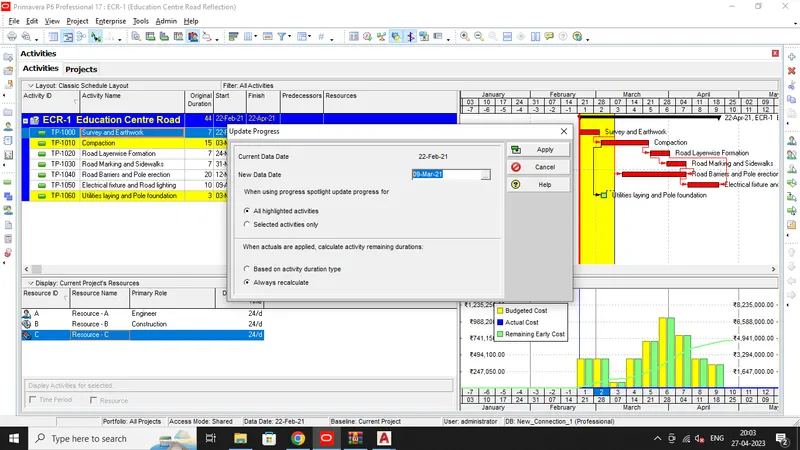
- Choose 15 days from Start Date (09-Mar-21).
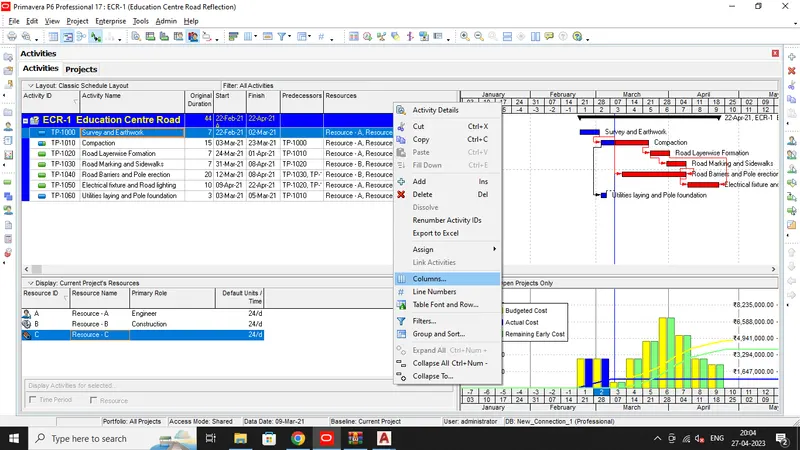
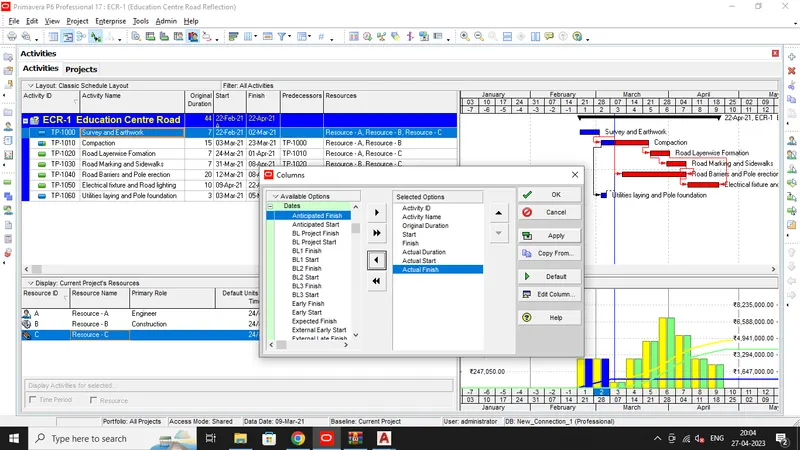
- Now add column to see the Actual Start and Finish date.
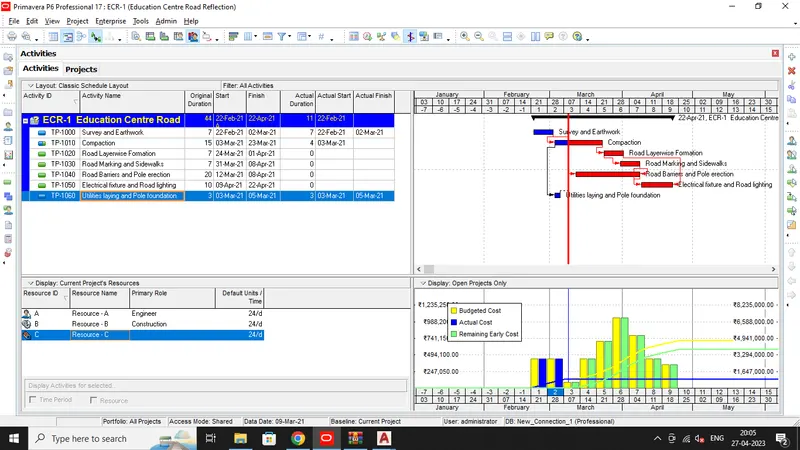
- Now Curtain for first 15 Days from Attachments as shown below.
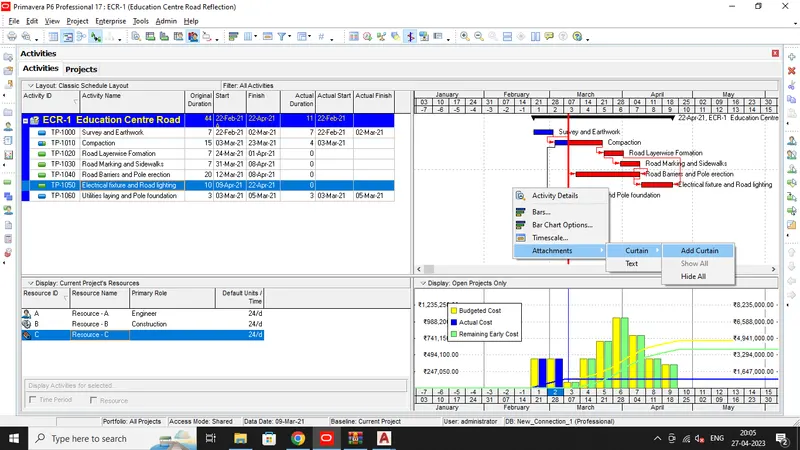
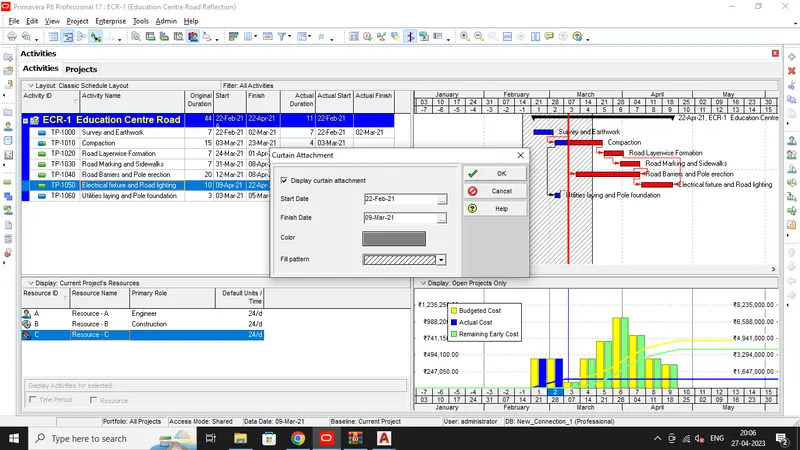
- Curtain added successfully.
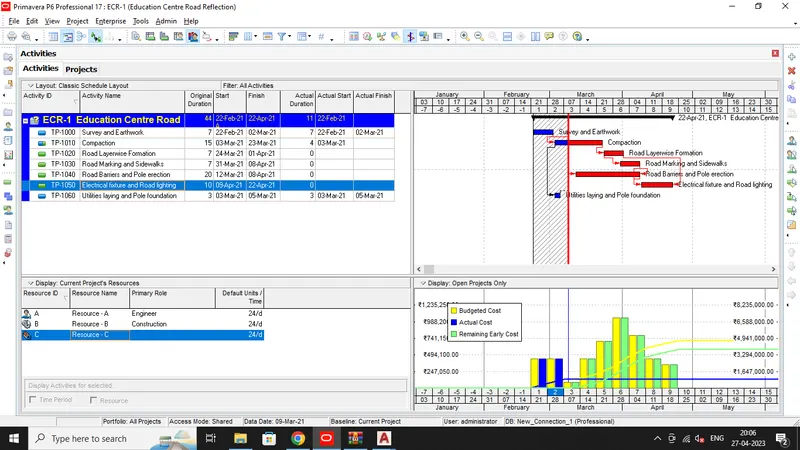
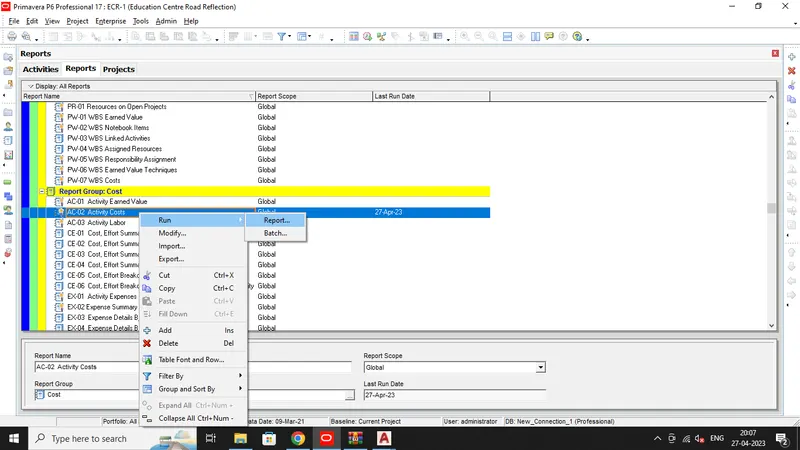
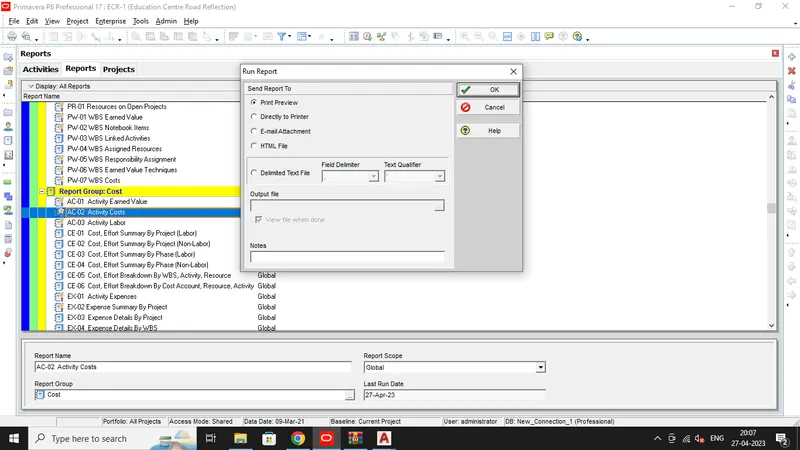
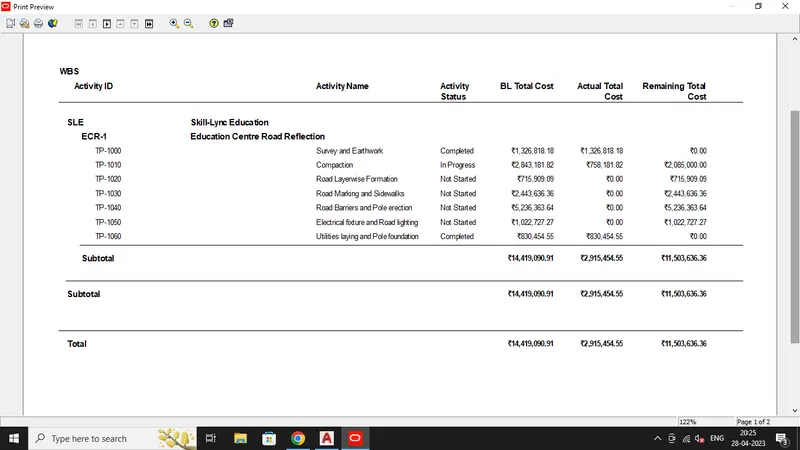
- To see Actual Cost report for Updated schedule, again go to Tools tab and Reports > Reports.
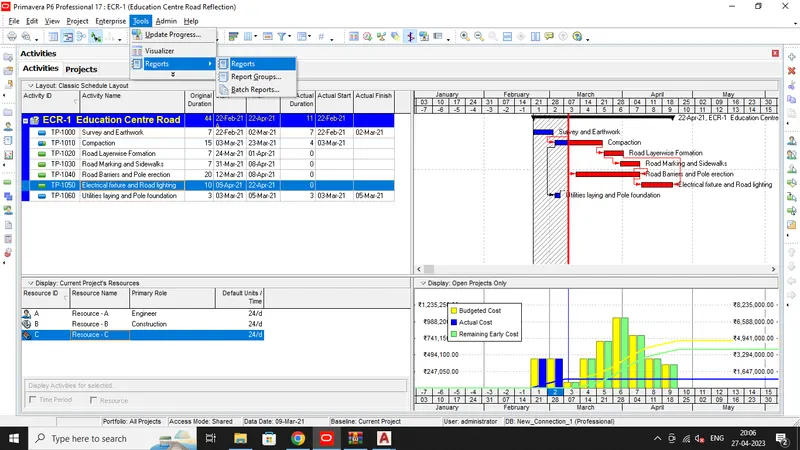
- Then Actual Cost and Click Run > Report.
Step 10:-
- Go to Tools Menu and select Visualizer.
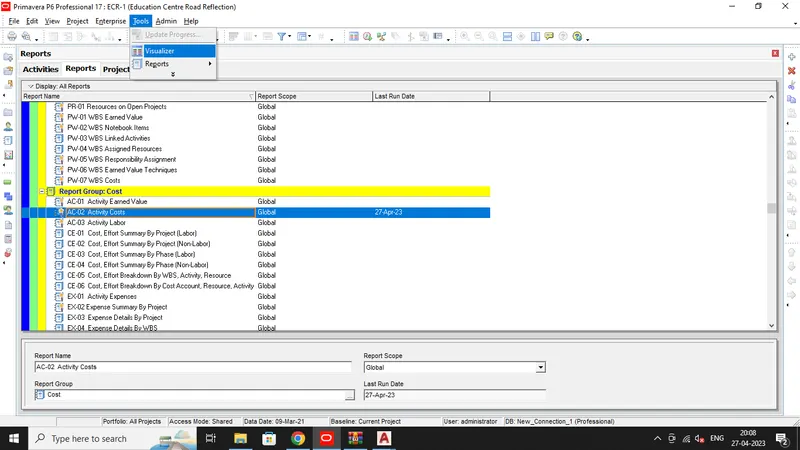
- P6 Visualizer opens, in that select TSLD layout.
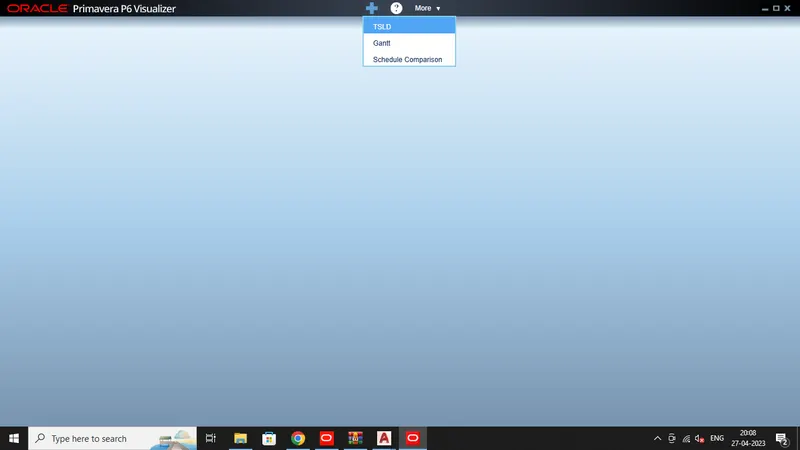
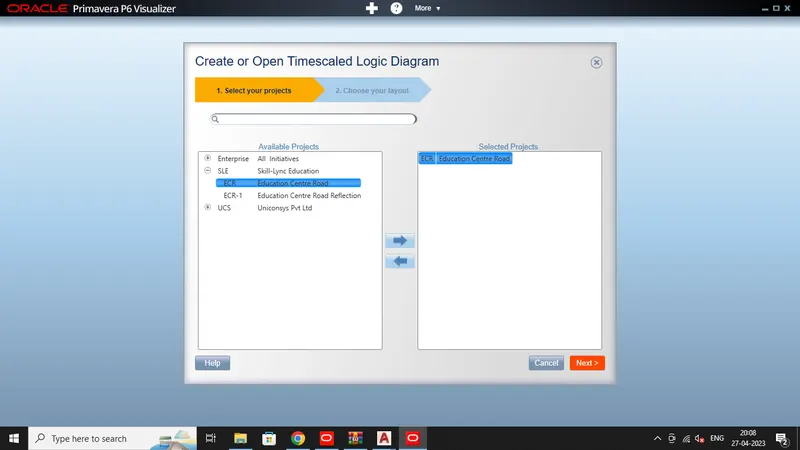
- Select the Project, choose TSLD Bar Necking and draw the Layout.
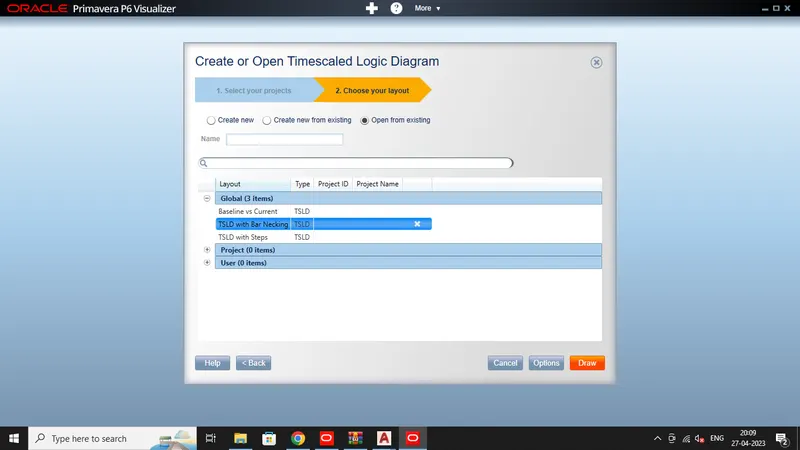
- Layout generated successfully.
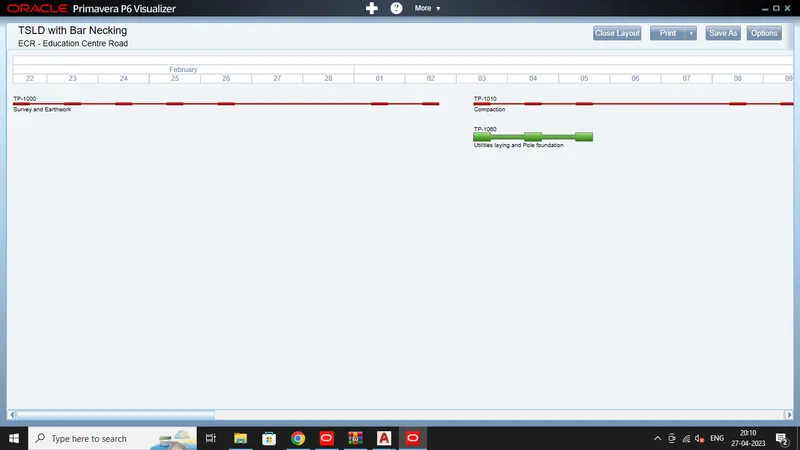
Result:-
- The Project Schedule was developed for the Skill-Lync Education Centre Road as per the all given inputs.