Project 2
PROJECT 2
INTRODUCTION
A wire harness, also commonly referred to as a wiring harness, is an exterior sheath used to cover some types of electronic wires. Generally, wiring harnesses are made of thermoplastic or thermoset materials that can help protect the cables from the environment.
Introduction-
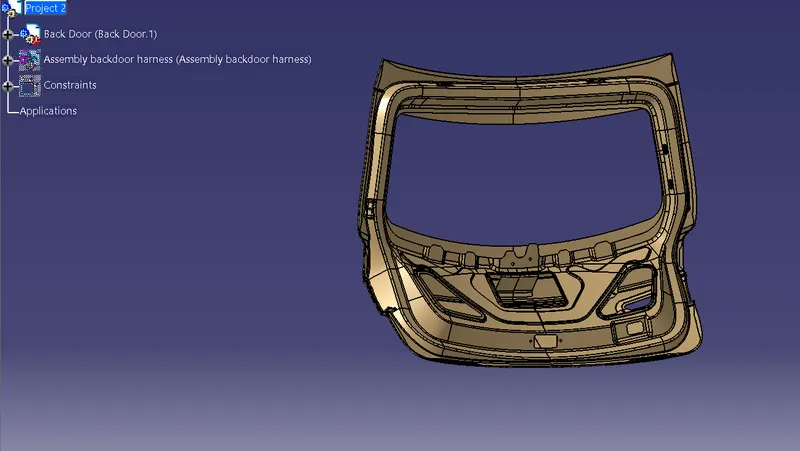
The trunk or boot of a car is the vehicle's main storage or cargo compartment it also have a hatch at the rear of the vehicle. It is also called a tailgate.These doors can be operated manually or electric powered. here we design the trunk or back door wire harness using the Catia.The Backdoor is an assembly of many parts such as inner panel, outer panel upper, outer panel lower and Reinforcement.Inner panel is attached to the outer panel using mastic sealant.
Types of doors based on working position
- Top Mounted Door
- Side mounted Door
- Bottom Door
OBJECTIVE:
- To Route the following harness layout in the Electrical workbench.
- Add protective covering on all branches.
- create them under electrical flattening harness.
- Flattening view on drawing sheet.
PROCEDURE:
Step 1- download the engine CAD data and required connectors CAD data from the given source.
Step 2- Download the required Connectors from the source and convert the mechanical connectors electrically by using the electrical part design work bench by following below steps.
- First download the connectors and mounting clip from the given link source.
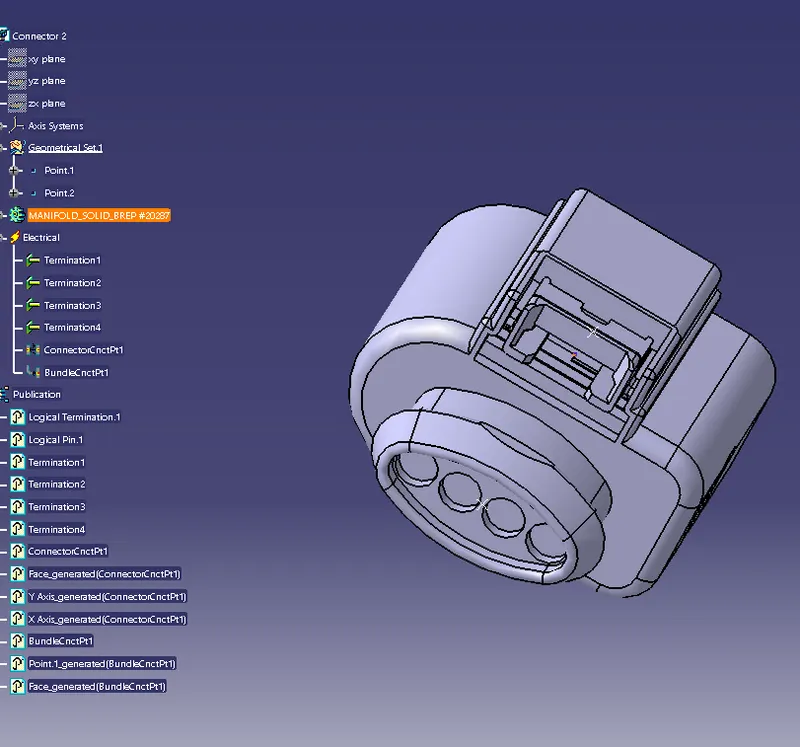
- Get into the mechanical part workbench to create required geometrical parameters. Create connector connection point and bundle connection point on the required sides of the CAD part.
- Create axis system on the connector connection point such a way that the Y coordinate facing normal to the connector face, X coordinate facing towards the locking mechanism and Z coordinate facing to the top.
- Create cavity connection point for connectors having the cavity for mounting clips
Using the geometrical parameters created,
- Define part as electrical connector.
- Define bundle connection point.
- Define connector connection point.
- Define cavity connection point.
4 pole connector
STEP 3- Download and Define the plastic channel electrically
- Procedure for electrically defining the Channel.
- Create bundle entry point and exit point.
- Create a line curve between the main entry and exit points for creating the multi-branchable using external curve inside the channel
- Create 8 bundle entry points on the openings for connecting the injector connectors.
- Using the geometrical parameters, define the channel electrical using the define mounting equipment option.
- Create define bundle entry points using the “define bundle connection point option.
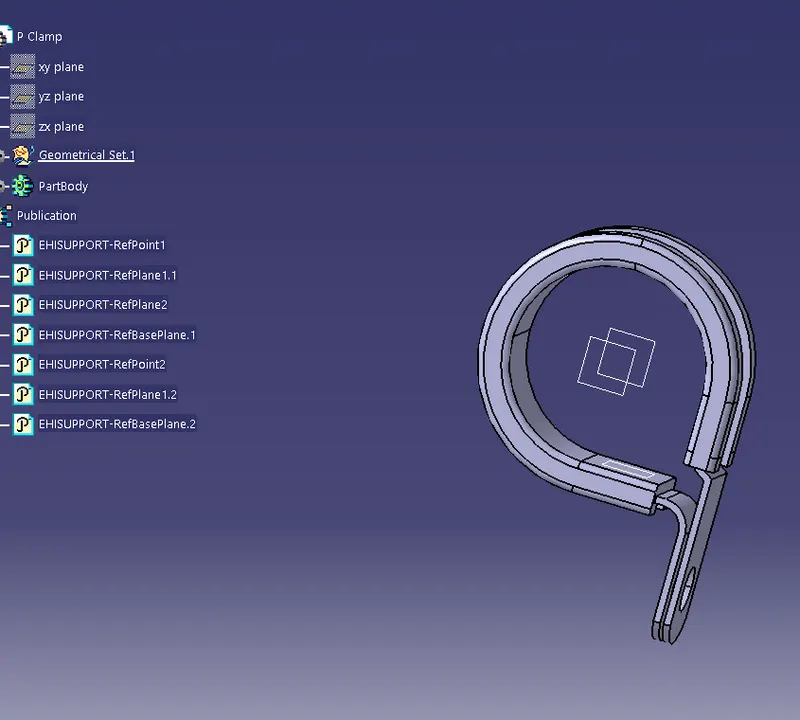
STEP 4- download and define P-clamp .
STEP 5 – Creating the context assembly
Context assembly is nothing but the product file which contains the engine 3D-CAD data and the engine harness geometrical bundle. Here the geometrical bundle product contains all the connectors and other mounting equipments, clips and clamps which are electrically defined for the assembly. Sheet metal L-clamp are added in the main context assembly.
Some important packaging rules and best practices to be considered during wire harness routing and placing of the clips and clamps are as follows –
- Distance between two clamps on a straight branch should be minimum of 200mm.
- The minimum branch length should be 50mm.
- Minimum distance between clip and nearest branching point should be 25mm.
- The minimum distance between two straight connection points should be 200mm.
- The minimum distance between two breakout points should be 50mm.
- To limit the number of branches from a single branch point to 4.
- Avoid routing wiring harness near the exhaust manifold and its components and also from other unshielded heat sources. If re routing is not possible then maintain a minimum distance of 200mm.
- Try to avoid use of too many metal brackets on engine. Try to use the available threaded bosses on engine or demand for it.
- Enough clamps shall be provided to ensure positive clearance with surroundings and safety of wiring harness.
- P - Clamps, Fir tree clips and other clips can be added to the Geometric bundle as they are electrically defined and are part of the Wire harness routing and should be provided with the Wire bundle package.
- Enough slack should be provided to the wiring harness which help not to get damaged during the Engine rocking or starting condition.
- The wire harness routing should be done in such a way that it is easy in manufacturing and serviceability.
- The wire routing should be done keeping in mind the cost effectiveness of the bundle package.
- To avoid the harness routing and clipping in blind zones of the operator during the assembly and the service.
- To provide proper slack at end connectors so that there will be no tension on the wire bundle.
- To avoid sharp edges on the sheet metal parts and if it is not possible then provide protection parts to prevent damage of the wire bundle.
- To provide separate branch points for separate connectors to ensure Poka-Yoke.
STEP 6 - HARNESS CONNECTION
After completing the routing, we need to check that if any of the bundles is interacting with the Engine part.
There must be proper clearance between the wire bundle and the engine part.
Additional slack or Fir tree can be placed to ensure proper routing.
STEP 7 - ELECTRICAL CONTINUITY CHECK
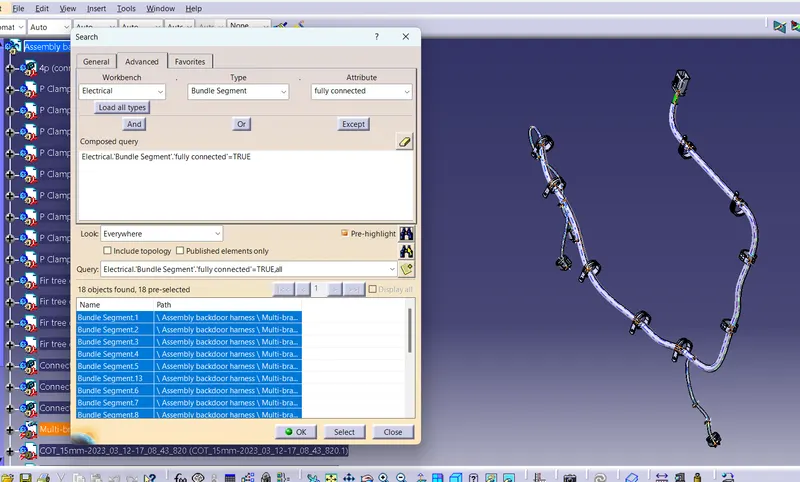
We need to ensure that the entire bundle is fully connected.
Go to edit and then click on search command.
Go to advanced
Select workbench as electrical, type as bundle segment and attribute as Fully connected
The select result should be as TRUE or FALSE and the click search to see the connectivity analysis result.
Selecting the "TRUE" option will show all the connected bundle segments while the selecting "FALSE" will show all the non-connected bundle segments.
For now, we will select "TRUE" and search for results. All the bundle segments are highlighted and found showing that all the bundle segments are electrically connected.
when it's given False.
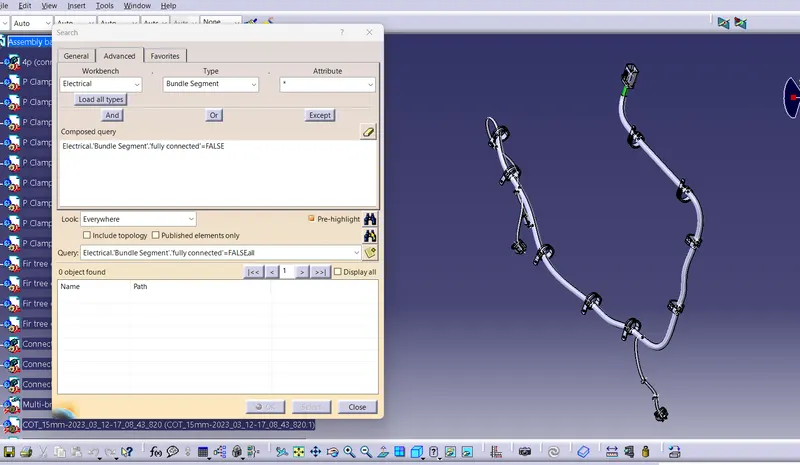
when it's given True.
Slit- COT tubes, cotton tapes are added on the wiring harness bundle as shown below. The top part of the plastic guiding channel will also be added at this stage.
Following means can be used to protect the wiring harness in high temperature zones
Use of Corrugated tubes
- They are of two types Slit and Non-slit Cot tubes
- Corrugated flexible tubes also known as COT tubes / convoluted conduits have a wide range of applications in automotive industries.
- Corrugated tubes are made from plastic and they are flexible.
Plastic materials used and its temperature resistance are as follows,
- Polypropylene (PP) for (-) 20 to 100 degree Celsius
- Heat Resistant (HR) for (-) 20 to 135 degree Celsius
- Flame Retardant (FR) for (-) 20 to 135 degree Celsius (flame retardant)
- Polyamide/nylon (PA) for (-) 20 to 180 degree Celsius
Use of breaded tubes (Nylon woven loom) and Silica sleeves –
In case of corrugated tube is not suitable for the very high temperature zones (specially in exhaust area), use of breathed tubes and silica sleeves can be done.
Beaded Tube- is an expandable sleeving braided from 8 mil(0.2mm) flame resistant polyphenylene sulfide (PPS) monofilament fiber, extremely lightweight, resistant to high temperature (up to 285 degree Celsius) and virtually impervious to solvents.
Silica Sleeve – it is braided into a strong and flexible sleeve from silica yarns. The thick 560mil (1.5mm) walls of this sleeving provide enhanced thermal protection up to 1800-degree Fahrenheit (982 degree Celsius).
STEP 7 - Applying protection part to the required Harness Bundles
STEP 8 – FLATTENED HARNESS VIEW IN THE DRAWING SHEET
- First, we need to make sure that in the flatten parameter settings bundles and protective coverings have different graphical representation which are,
Bundle Segments – Double line representation.
Protective coverings – Double line representation.
- Create a new drawing file in the drafting workbench.
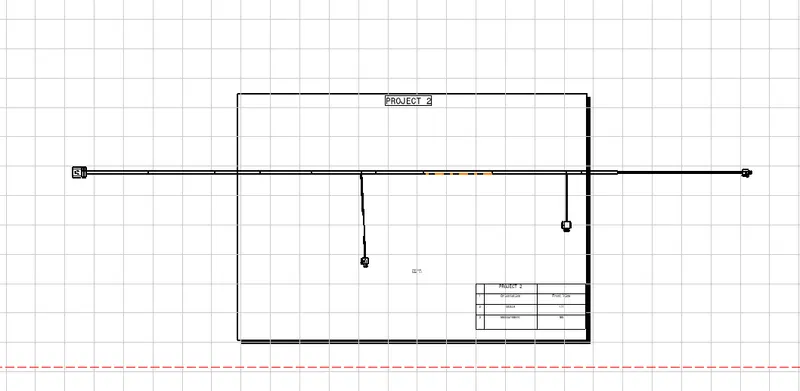
So the flattening the experimental harness had difficulty of not fitting on either xy plane or any nor the flat surface of the electrical component of the clamps or connectors, it has been tried every possible way but chose one orientation and the other wire harness parts might be visible in another orientation view and it didn't fit A0 size potrait sheet. Thus the asthetic view work was failed to set on the drawing file due to the incorrect positions on connectors after flattening.
CONCLUSION
- To Route the following harness layout in the Electrical workbench.
- Add protective covering on all branches.
- create them under electrical flattening harness.
- Flattening view on drawing sheet are done using CATIA V5.