Project 1 (Mini Project on Vehicle Direction Detection
Mini Project - Vehicle Direction Determination
General Overview:
Identifying the direction of the vehicle is one of the important & diverse features in Autonomous driving & Advanced Driver Assistance Features. This particular sub-feature of identifying the direction of vehicle is basically identifying the direction the vehicle is taking based on the camera input.
Camera reads the road signs & stores into its memory with unique values for left turn, right turn & straight drive. Depending on the direction it is taking, final indication is given to the driver – as an indication if he is driving in the recommended direction or not.
Vehicle Direction Determination can also be coupled along - side features like GPS systems to identify whether the vehicle is reaching its destination in an optimized manner. This sub feature can also be used along with Lane Detection, Highway Warning, Ramp Entry / Exit in Wrong Way Detection etc.
Objective of Mini Project:
- Development of MATLAB Simulink model as per requirement.
- Tag the requirements to the simulink model; tagging requirement 1 & requirement 2 to their corresponding subsystems is fine.
- MBD compliant changes, Data Dictionary creation & code generation is added advantage, and that is not scope of this project.
- If choosing code generation, Storage class for Input signals: ImportedExtern; Storage class for Output signal: Export to File; Storage class for local signals: localizable; Storage class for calibration signals: Const.
- Choose sample time for all signals as 0.01s
Signals & Calibration Data List:
|
Signal / Calibration Name |
Signal Type |
Data Type |
Dimension |
Min |
Max |
Initial Value |
Units |
|
SteeringWheel_YawDegreeInput |
Input |
Int16 |
1 |
-180 |
180 |
- |
Deg |
|
CameraInput_RoadSign |
Input |
Boolean |
1 |
0 |
1 |
- |
- |
|
Vehicle_Turn_Status |
Local |
Int16 |
1 |
-180 |
180 |
- |
Deg |
|
Right_Turn_AngularLimit |
Calibration |
Int16 |
[1 1] |
-180 |
180 |
30 |
Deg |
|
Left_Turn_AngularLimit |
Calibration |
Int16 |
[1 1] |
-180 |
180 |
-120 |
Deg |
|
Straight_Drive_Steering_Angle |
Calibration |
Int16 |
[1 1] |
-180 |
180 |
0 |
Deg |
|
RightTurn_RoadSign |
Calibration |
Int16 |
[1 1] |
-180 |
180 |
30 |
|
|
LeftTurn_RoadSign |
Calibration |
Int16 |
[1 1] |
-180 |
180 |
-120 |
|
|
Straight_RoadSign |
Calibration |
Int16 |
[1 1] |
-180 |
180 |
0 |
|
|
Vehicle_Direction_Indicator |
Output |
Boolean |
1 |
0 |
1 |
- |
- |
To create .SLDD File go to model setting and as per the requirement we have to feed the values
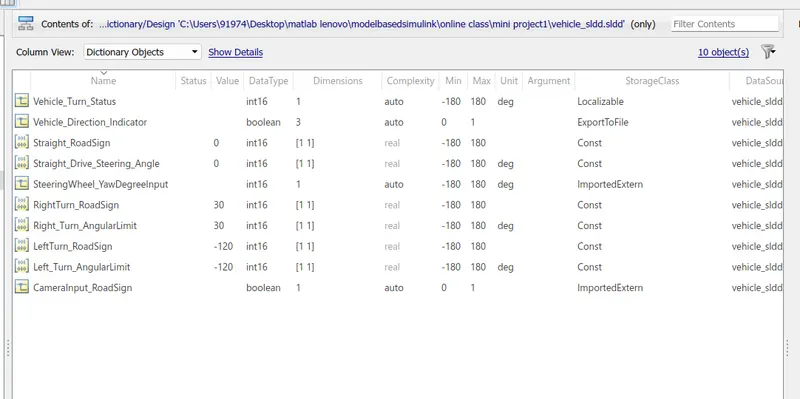
Fig1: .SLDD File
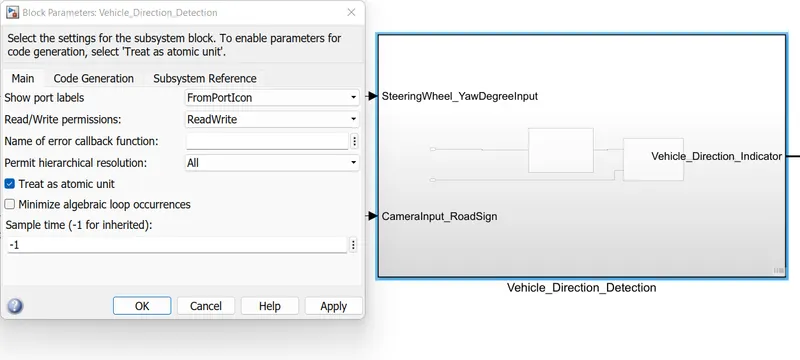
DEVELOPMENT OF THE SIMULINK MODEL : The main subsystem Vehicle Direction Detection Along with the input SteeringWheel_YawDegreeInput and CameraInput_RoadSign and output signal Vehicle_Direction_Indicator is shown below,
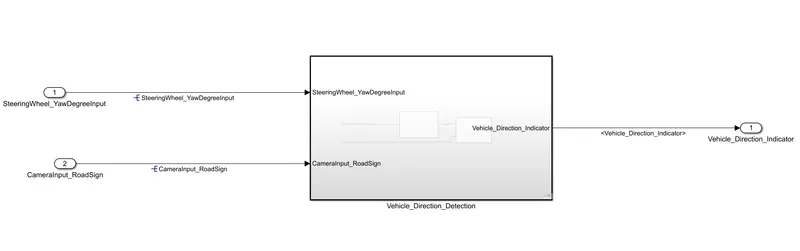
Fig2: Vehicle Direction Detection subsystem
The main subsystem is devided in to two subsystem, If we go inside the subsystem it will look as per the below model
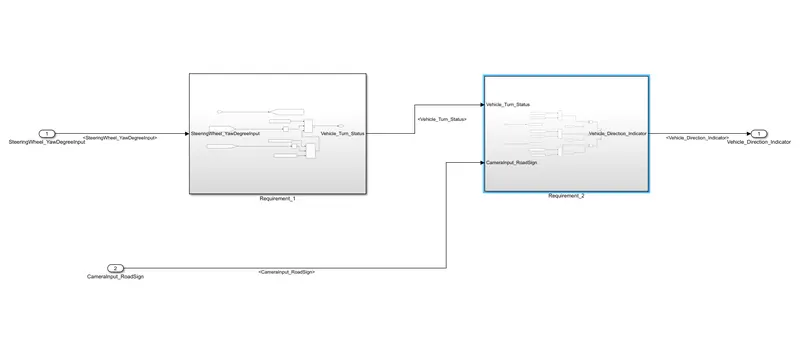
Fig3: Requirement - 1 & Requirement - 2
Requirement - 1:
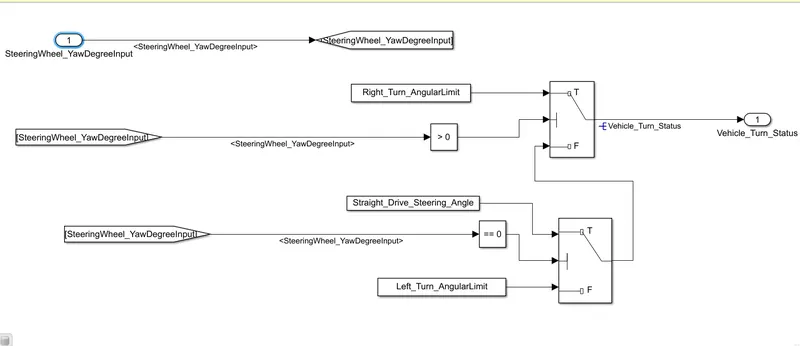
- Steering wheel input as yaw rate (Signal name: SteeringWheel_YawDegreeInput) is the input for this system.
- This is compared against 3 angular values, one each for left turn, right turn & straight drive (Calibration Values: Right_Turn_AngularLimit, Left_Turn_AngularLimit, Straight_Drive_Steering_Angle) to say which specific direction the steering wheel is turning towards.
- Use switch blocks to compare & develop this requirement. Keep this requirement in a subsystem & output of this requirement is a local signal (Signal Name: Vehicle_Turn_Status).
Requirement – 2:
- Keep this requirement as a separate subsystem. Inputs to this requirement are local signal from requirement 1 (Signal Name: Vehicle_Turn_Status) & an input signal from camera (Signal Name: CameraInput_RoadSign), which confirms the occurrence of a road sign.
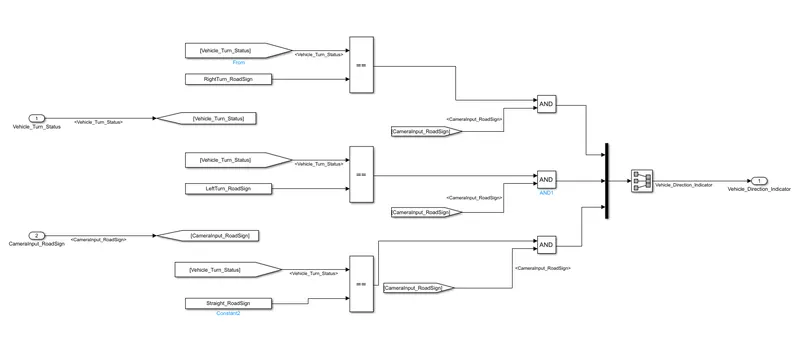
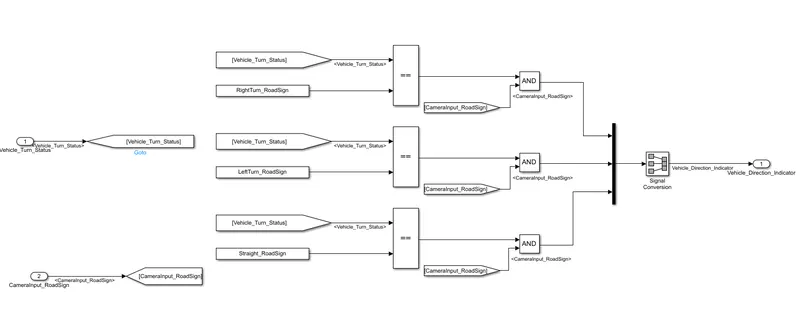
- Signal Vehicle_Turn_Status is compared against calibration values (Calibration Values: RightTurn_RoadSign, LeftTurn_RoadSign, Straight_RoadSign), if each of them is found equal, then each of the three corresponding output is compared against the camera input signal,
- Using a logical operator block, only one among them is finally given as output signal (Signal Name: Vehicle_Direction_Indicator).
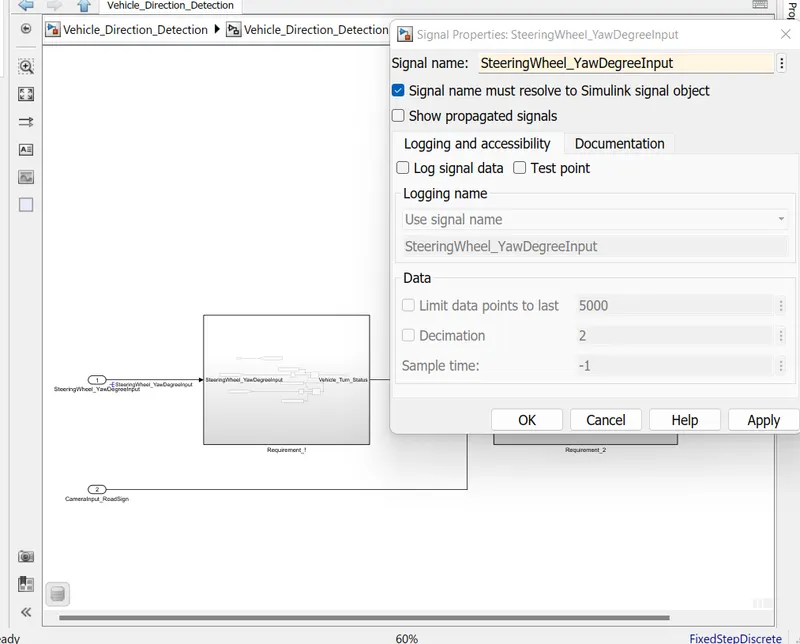
To resolve the signal,
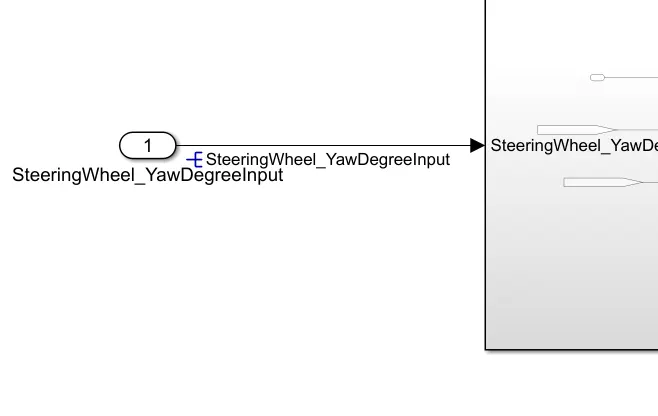
After resloving the signal it will show in Blue indication,
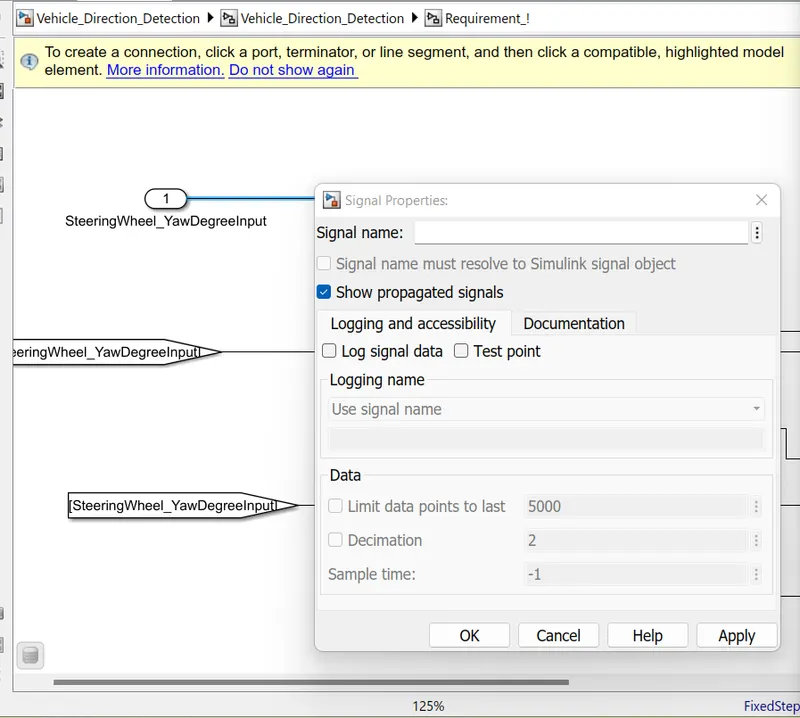
To propogate the signal
WORKING OF THE MODEL
In Requirement - 1:
- Steering wheel input as given yaw rate (Signal name: SteeringWheel_YawDegreeInput) is the input for this system.
- This is compared against 3 angular values, one each for left turn, right turn & straight drive (Calibration Values: Right_Turn_AngularLimit, Left_Turn_AngularLimit, Straight_Drive_Steering_Angle) to say which specific direction the steering wheel is turning towards.
- condition 1: SteeringWheel_YawDegreeInput >0, Right_Turn_AngularLimit
- condition 2: SteeringWheel_YawDegreeInput =0, Straight_Drive_Steering_Angle
- condition 3: SteeringWheel_YawDegreeInput <0, Left_Turn_AngularLimit
- Here we used switch blocks to compare & develop this requirement. Keep this requirement in a subsystem & output of this requirement is a local signal (Signal Name: Vehicle_Turn_Status).
In Requirement - 2:
- By keeping this requirement as a separate subsystem. Inputs to this requirement are local signal from requirement 1 (Signal Name: Vehicle_Turn_Status) & an input signal from camera (Signal Name: CameraInput_RoadSign), which confirms the occurrence of a road sign.
- Signal Vehicle_Turn_Status is compared against calibration values (Calibration Values: RightTurn_RoadSign, LeftTurn_RoadSign, Straight_RoadSign), if each of them is found equal, then each of the three corresponding output is compared against the camera input signal,
condition 1:Vehicle_Turn_Status==RightTurn_RoadSign,Output to the vehicle indication=1,and CameraInput_RoadSign input=1 given to logical operate AND Gate and if both the input same, Vehicle detection indicator shows RightTurn_RoadSign
condition 2:Vehicle_Turn_Status==LeftTurn_RoadSign,Output to the vehicle indication=1 and CameraInput_RoadSign input=1 given to logical operate AND Gate and if both the input same, Vehicle detection indicator shows LeftTurn_RoadSign
condition 3 :Vehicle_Turn_Status==Straight_RoadSign,Output to the vehicle indication=1 and CameraInput_RoadSign input=1 given to logical operate AND Gate and if both the input same , Vehicle detection indicator shows StraightTurn_RoadSign
- By using a logical operator AND block, only one among them is finally given as output signal (Signal Name: Vehicle_Direction_Indicator).
Requirement Tagging: To do the requirement tagging select the heading of the particular word file in MS Word and go to the subsytem , where we need to tag the requirement and do the below procedure as shown in the figure,
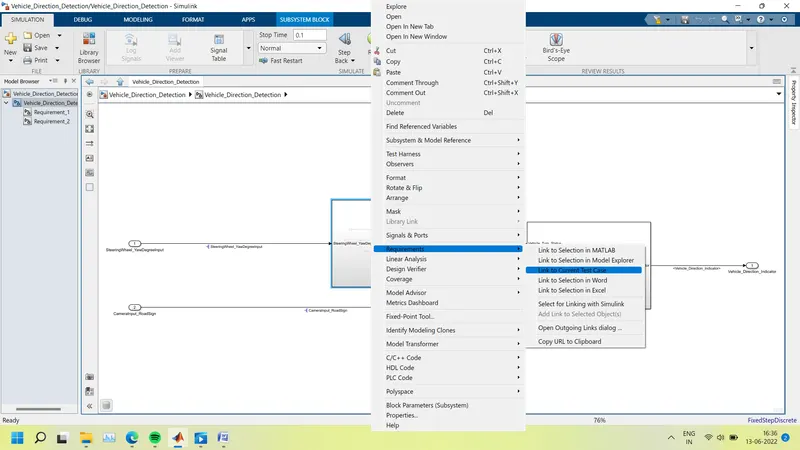
So whenever user using the subsytem by right clicking to the subsytem we can read the required tagging given, For this we have to save the word file in same folder
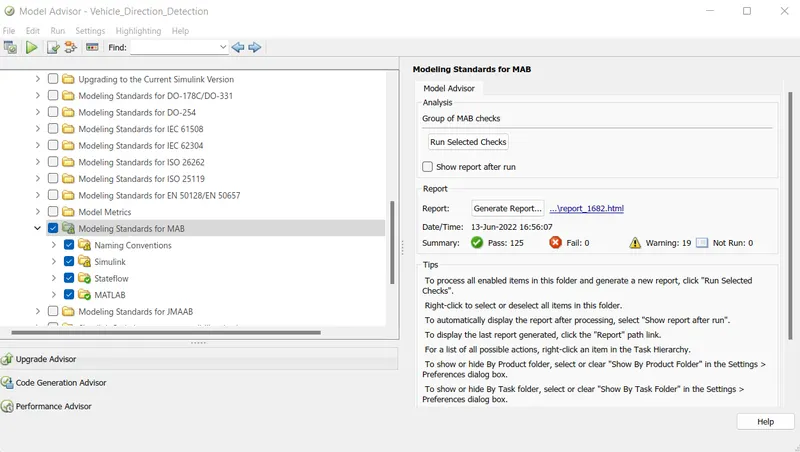
MODEL ADVISER CHECK: To check the MAAB guidelines
Model setting need to be done before as shown in below,
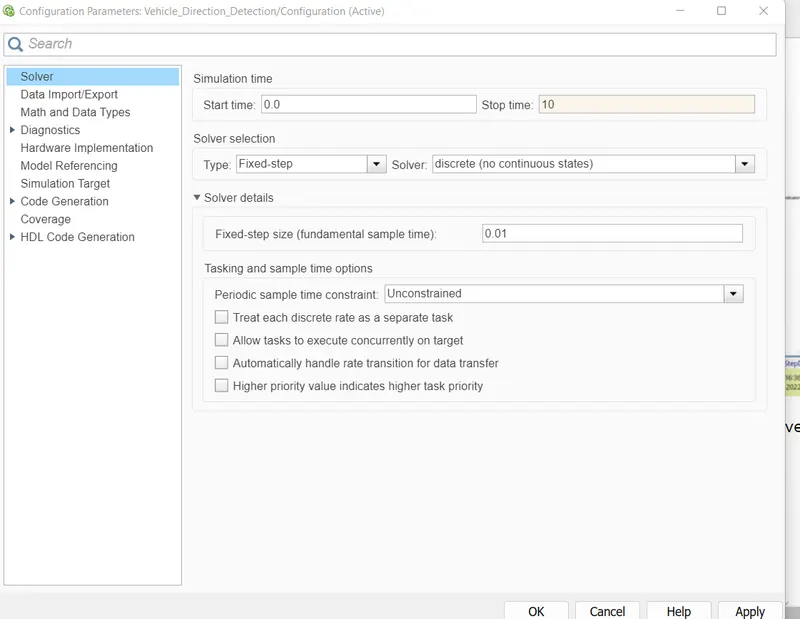
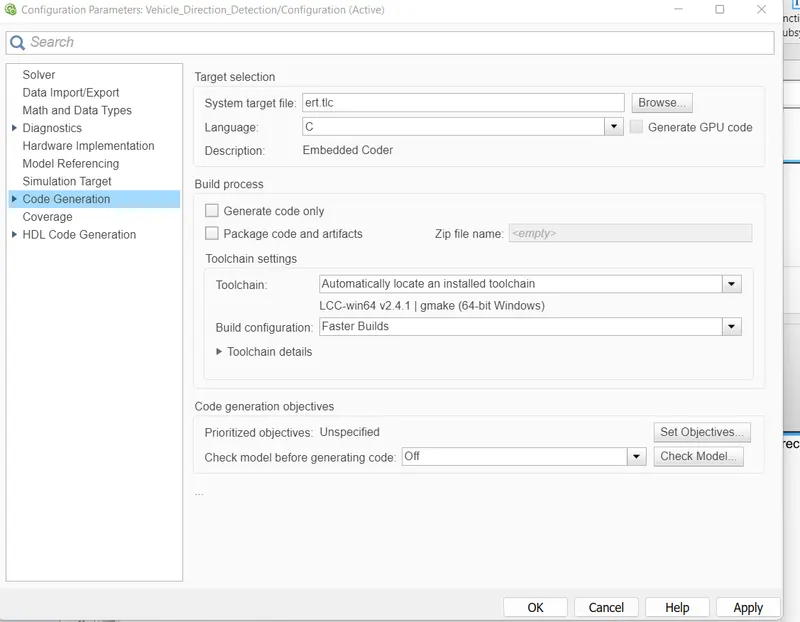
Select Modelling Standards for MAAB,
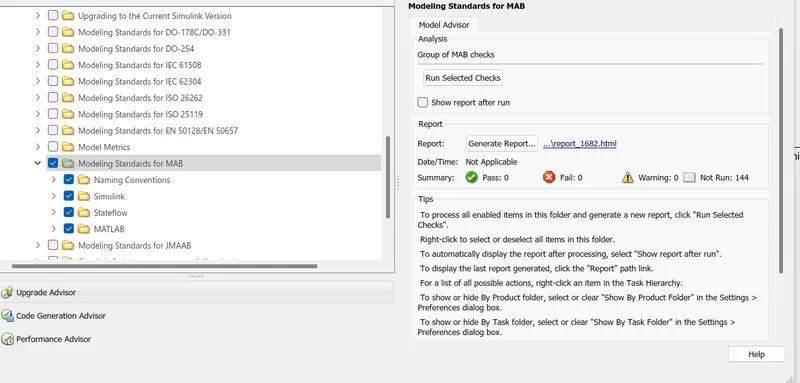
To resolve the error,
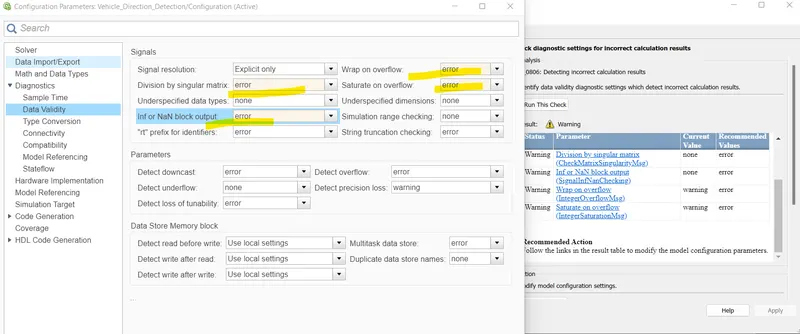
After changing in to current value to recommonded value we get
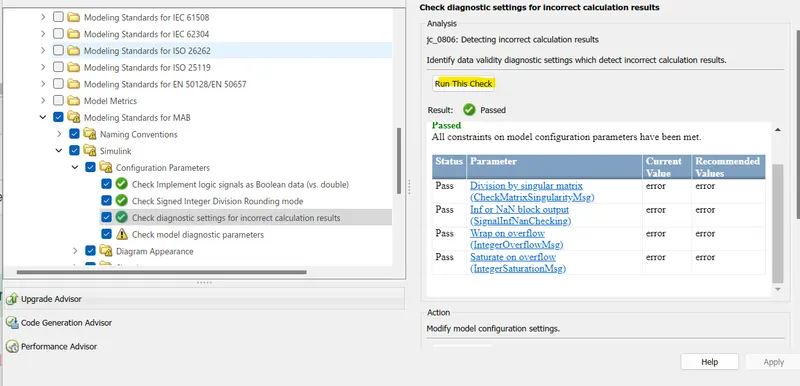
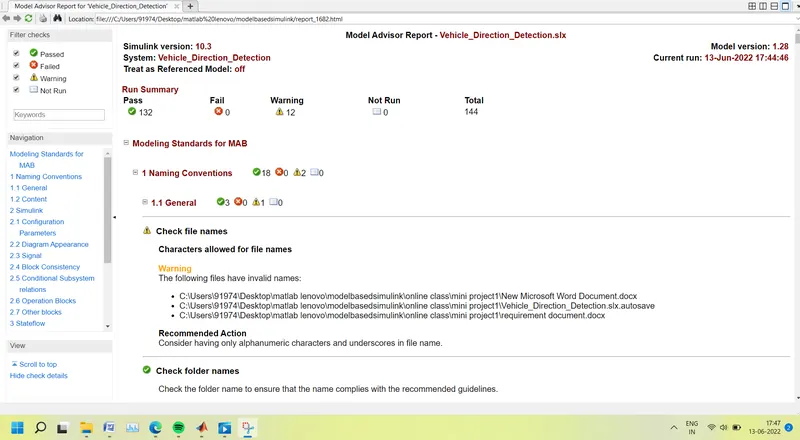
As we keep on rectifying the warning it will reducing to some warning
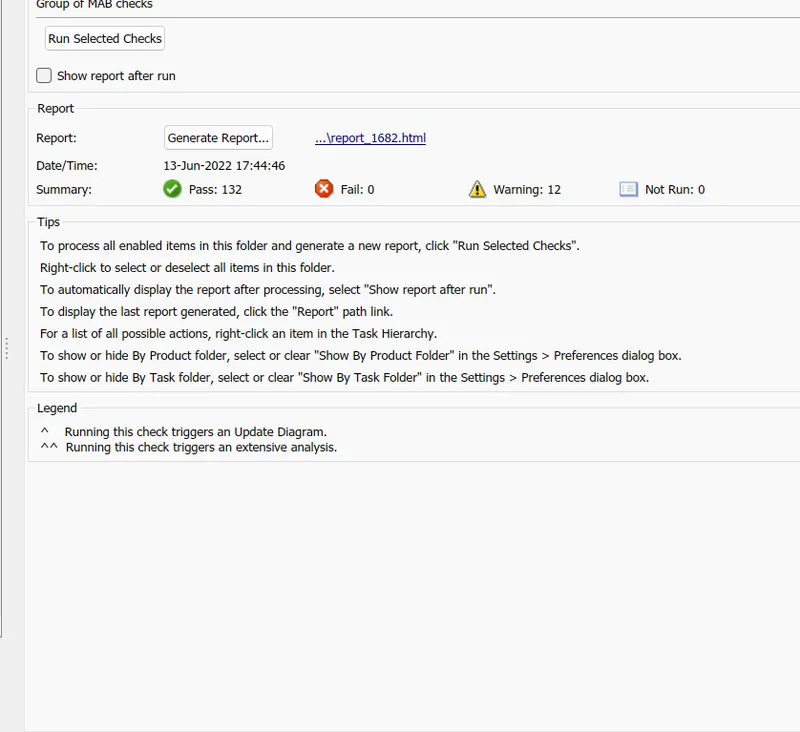
Generating a report: It will be saved in current working directory
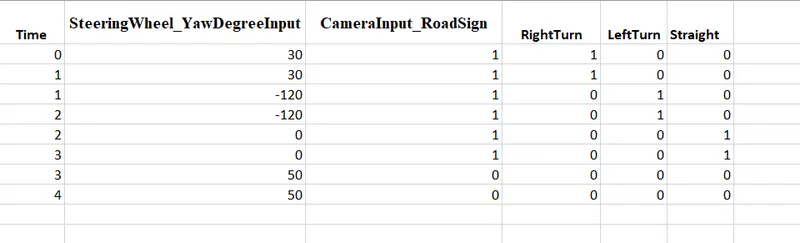
Totaly 4 test cases we have taken as shown below
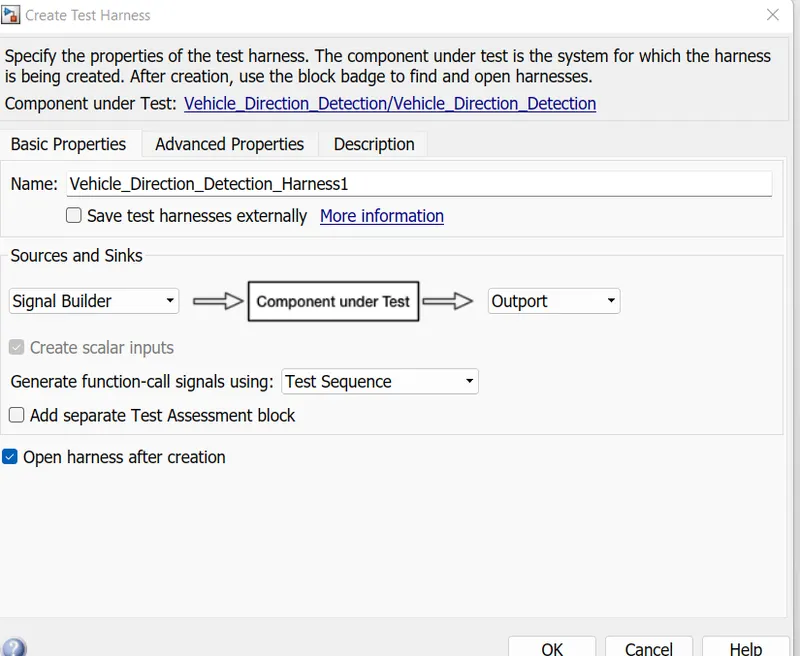
TEST HARNESS
MIL TEST:
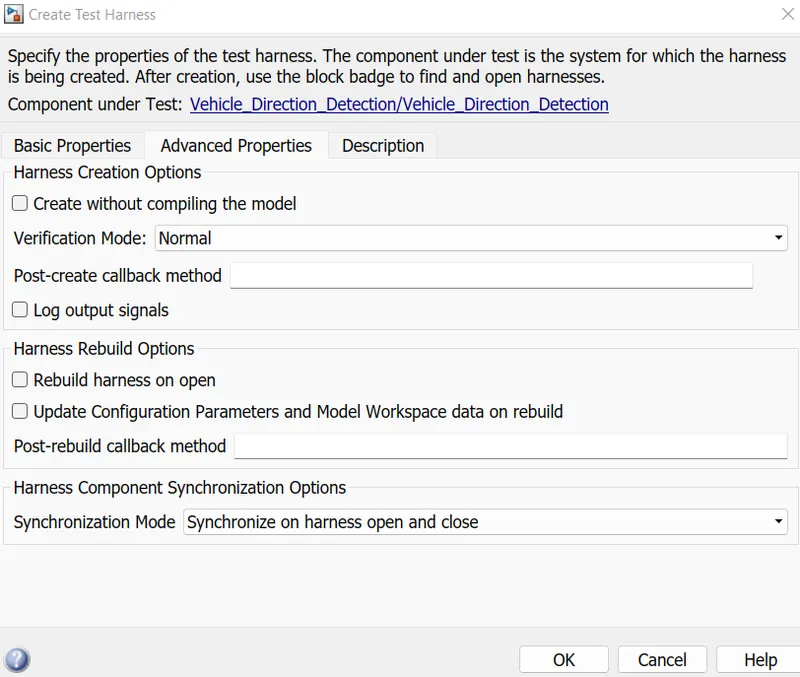
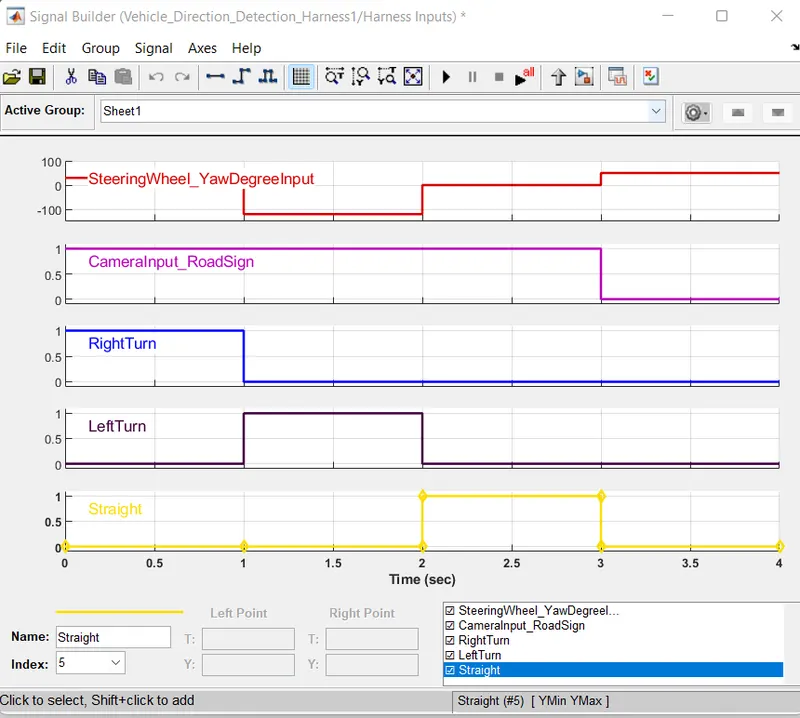
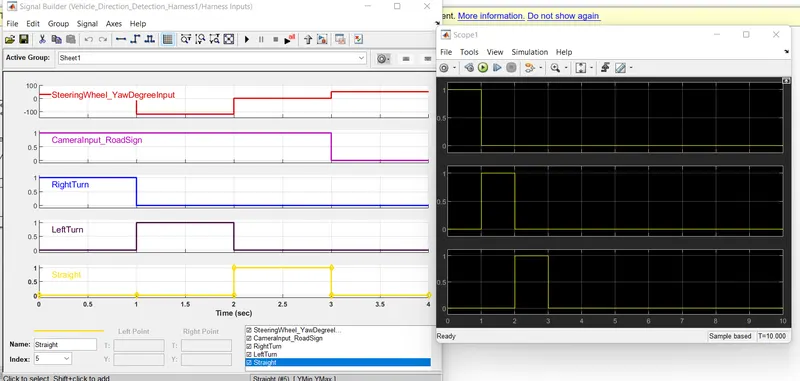
Importing the data of test cases from excel file to signal builder
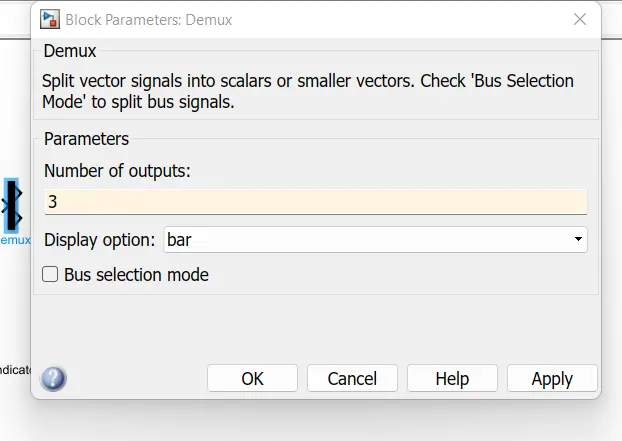
Here we connected Mux to combine the 3 input in the requirement 2 subsystem to taken out that we need to use DMUX
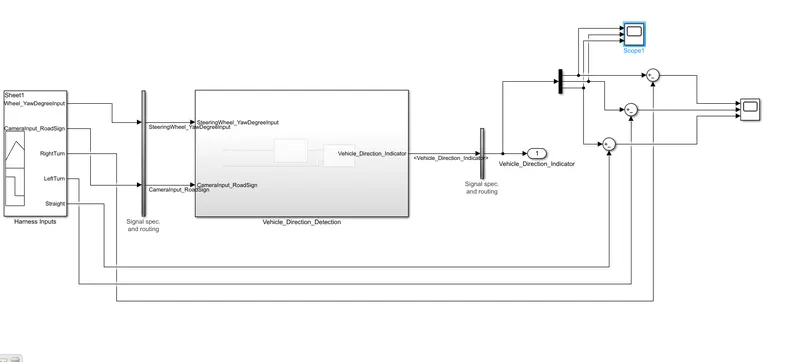
Here we are giving the vehicle detection indication input as
From 0 to 1 sec RightTurn
1 to 2 sec LeftTurn
2 to 3 sec Straight
if we compare side by side we can see te same waveform from signal builder and input before Dmux
Output:
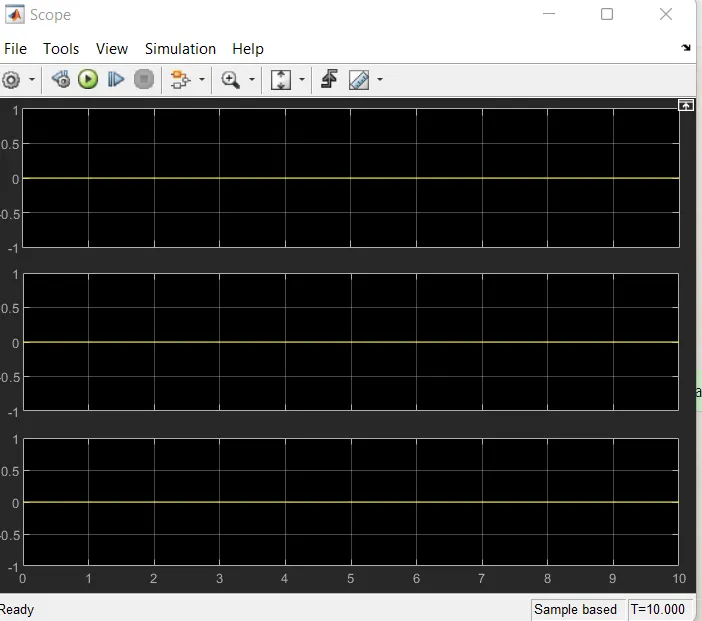
After taking the difference between input and output we are getting Zero , Hence the MIL TEST verified
2.SIL TEST
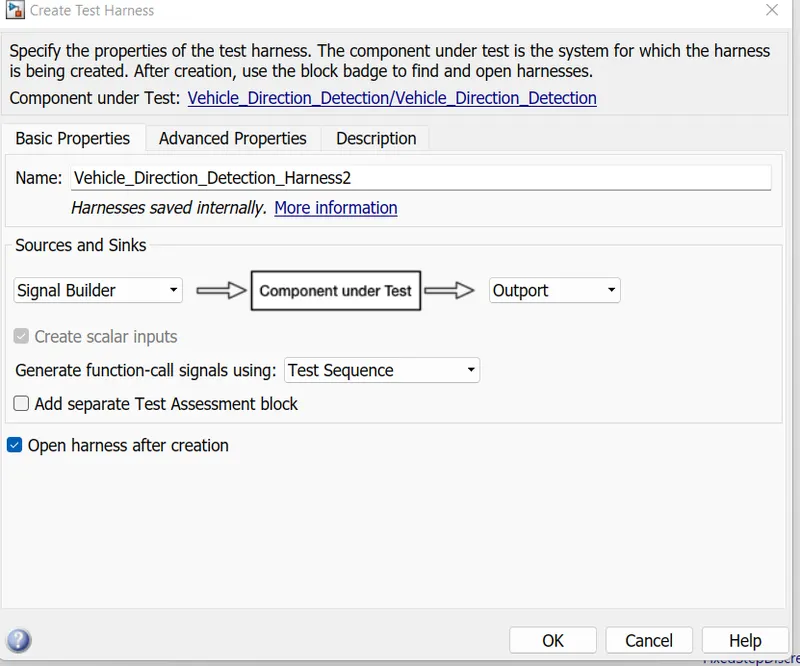
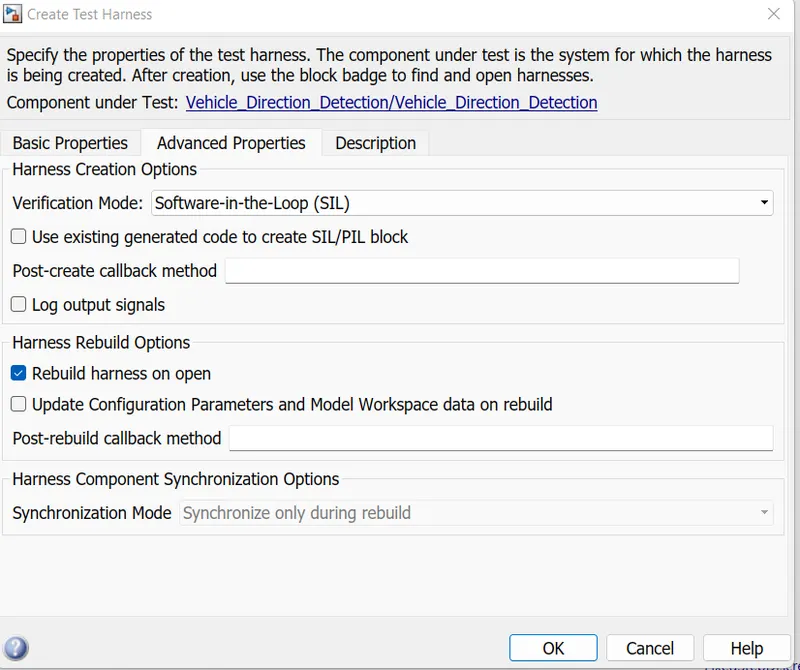
We have to import the data of test cases from excel file to signal builder
We have connected Mux to combine the 3 input in the requirement 2 subsystem to taken out that we need to use DMUX
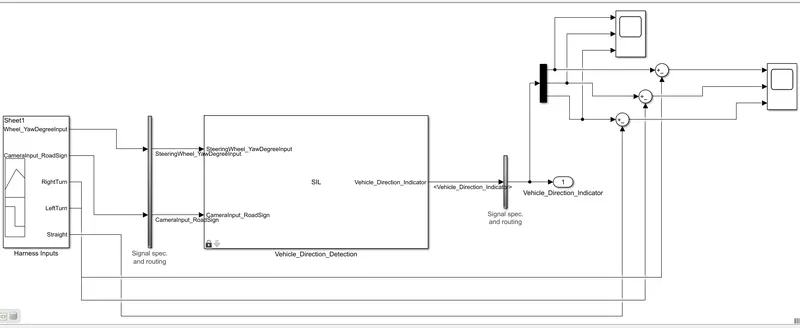
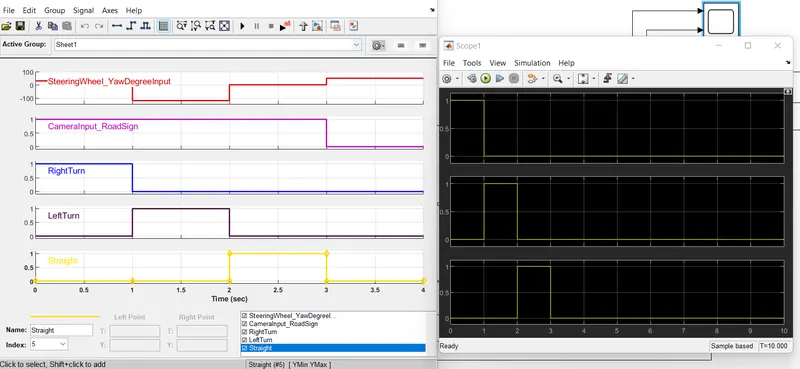
Output:
After taking the difference between input and output we are getting Zero , Hence the SIL TEST verified
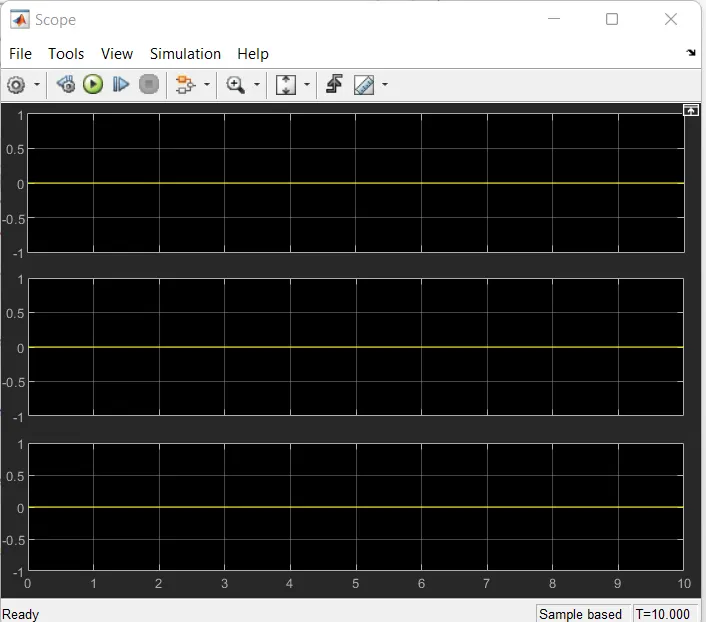
Tested for both MIL and SIL test harness and after testing we can see the right bottom corner Internal test harnesses
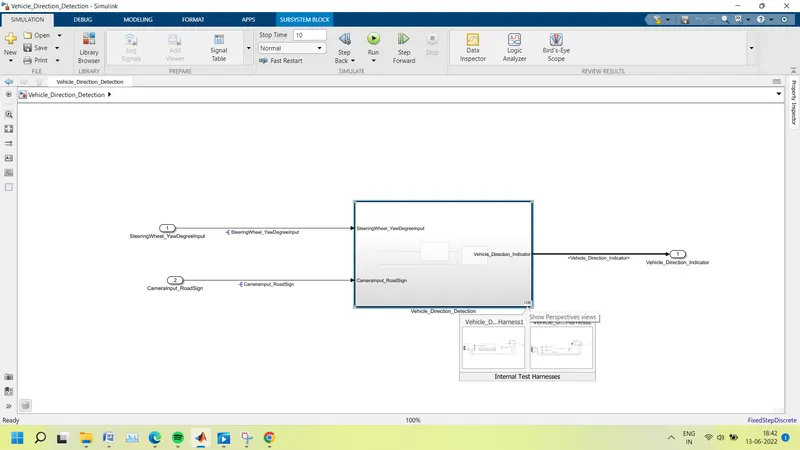
COVERTING THE MODEL TO C CODE
APPS OPTION ---> Embedded coder-->Build Option--->View Code
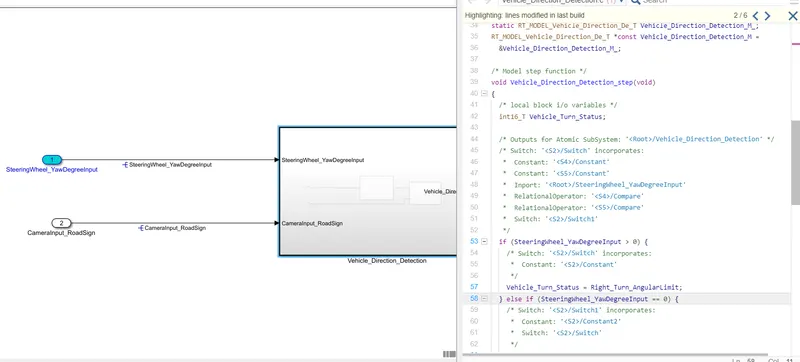
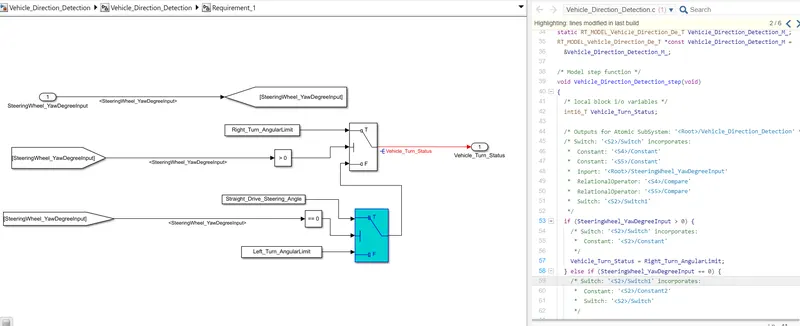
Also, the data containing code is stored in the file where the model is located as _ert_rtw file.
CONCLUSION:
- MATLAB model has been developed as per the requirement
- .SLDD file is created as per the given signal and constant inputs
- Model Adviser check is done and the report is obtained as per the MAAB guidelinees
- Model In Loop Testing(MIL) and Software In Loop Testing(SIL) is done
- The output waveform generated is compared with input for both the test and hence it is verified