Project 1 _Creating an Architectural plan for the provided plot size and develop relevant basic structural drawings
Creating an Architectural plan for the provided plot size and develop relevant basic structural drawings
Design and Draft a layout of a residential building with the following details:
a. Plot Size: 60’x20’(18.3m x6m)
b. Orientation- Facing East
c. Develop the following: 1. Architectural Drawing (Floor Plan, Elevations, and Sections) 2. Structural Drawing (Column, Bean, Footing Plan)
Aim: To design and draft a layout of a residential building facing east with a plot size 20’x60’ (18.3 m x 6m) with the following details
- Architectural Drawing (Floor Plan, Elevations, and Sections)
- Structural Drawings (Column, beam, and footing plan)
Introduction:
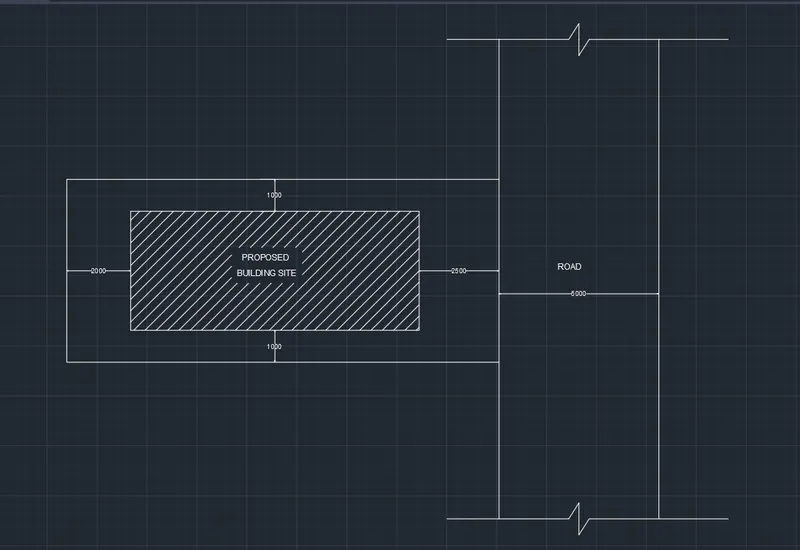
By rectangle, draw the plot giving dimensions as 6 and 18.3 m.
Give setback from the plot, 4.3m and 3m for the sides. The proposed building should come inside the setback drawn.
Various commands used:
- Offset command
- Line command
- Trim command
- Fillet command
- Circle command
- Hatch command
- Extend command
- Copy command
- Move command
- MTEXT command
Ground floor:
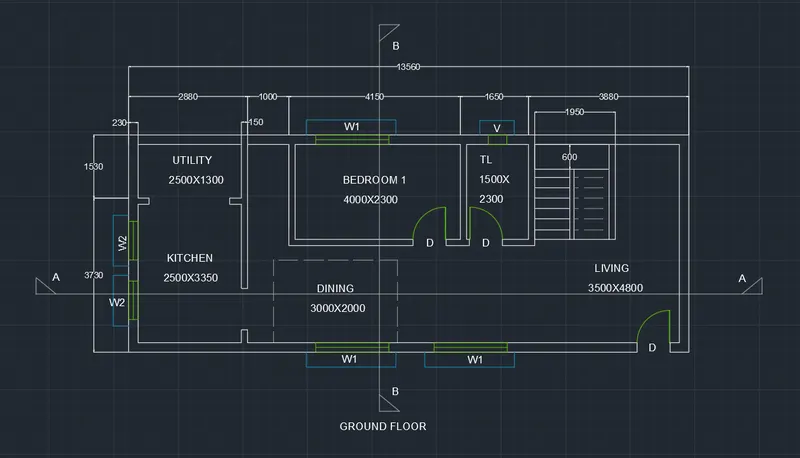
Draw the interior walls for the building with the required dimensions.
All the dimensions in the drawing are in mm
Draw 2500 x 1300 mm for the utility room
Then offset the interior walls with a dimension of 150 mm and the outer wall offset is 230 mm
Draw bedroom 1 with 4000 x 2300 mm
Draw the Toilet with 1500 x 2300 mm
Living 3500 x 4800 mm and the rest are empty space
Using dotted lines draw the Dining area with a dimension of 3000 x 2000 mm
Then Draw stairs, Doors, Windows, and Ventilation.
For drawing doors, windows and ventilation change the color of the line using the line property.
Then add in the dimensions and use DIMSTYLE to modify the dimension style.
Then draw in the section lines were needed
Ground floor:
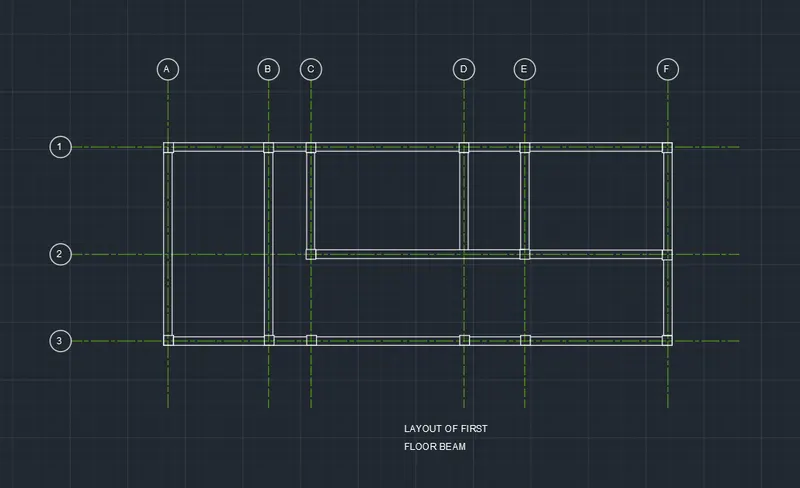
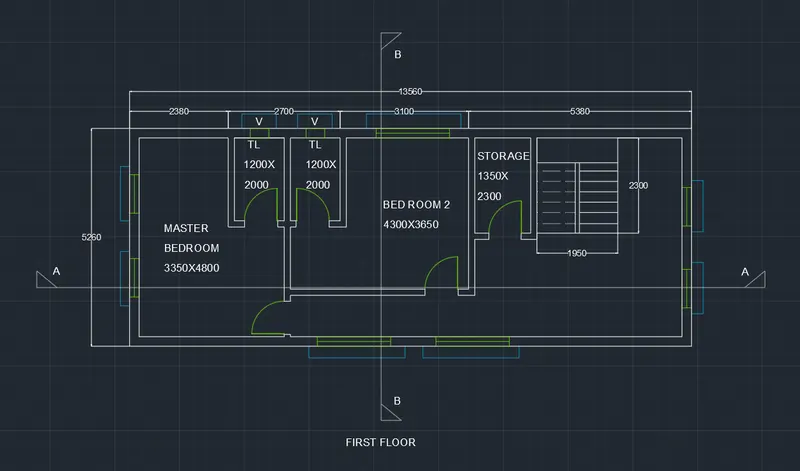
Once the Ground floor is finished draw the First floor
By extending grid lines we can sketch the first floor
Sketch the first floor as needed
Master bedroom of dimension 3350 x 4800 mm
Bedroom 2 4300 x 3650 mm
Storage 4300 x 3650 mm
And add in the dimensions, doors, windows, ventilation, etc...
Type CO in the command box, press enter, select the base point and copy the text from the ground floor plan, and copy it to the required position.
Type ED in the command box, press enter, select the text required to edit and edit it as per the required content.
Type DIMLIN in the command box and give dimensions to the lines by specifying the origin of the first extension line and second extension lines.
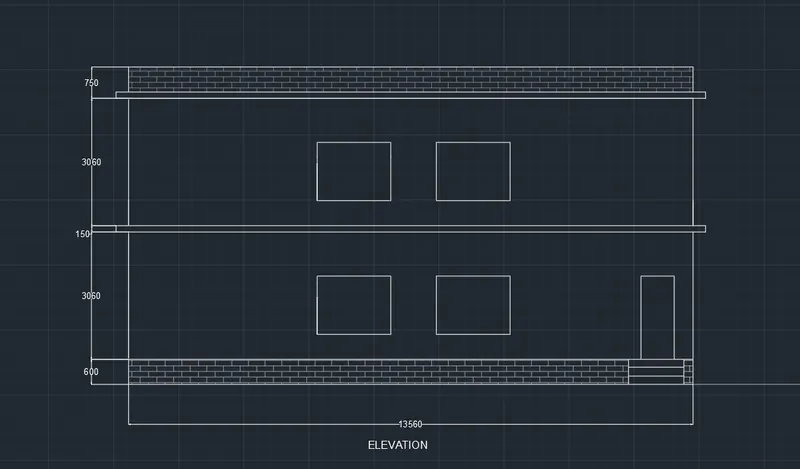
Elevation:
Extend the grid lines from the floor plan and draw the sections
Draw the vertical projections from the walls and columns of the plan at the section line.
Add in the floor slabs with a thickness of 150mm
Draw the doors and windows
Type ED in the command box, press enter, select the text required to edit and edit it as per the required content.
Type DIMLIN in the command box and give dimensions to the lines by specifying the origin of the first extension line and second extension lines.
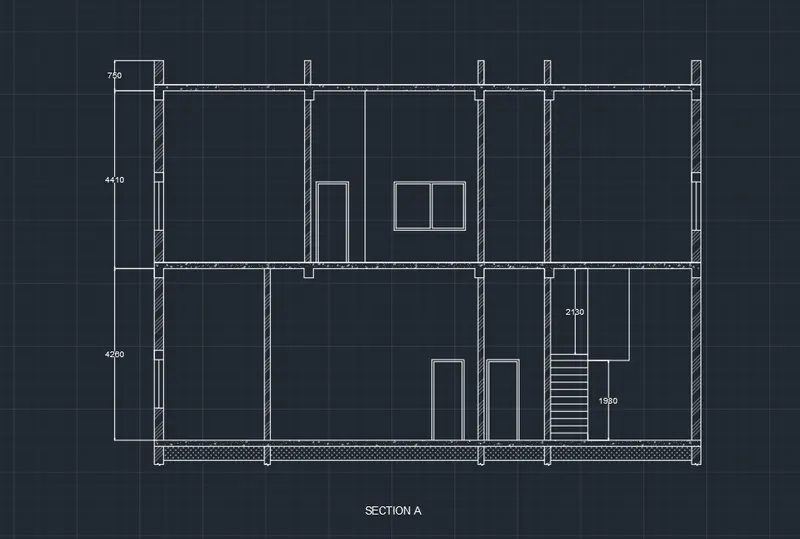
SECTION A:
Project the lines from the elevation for the height and from the section line of the plan for the horizontal members.
Drawing windows, doors, and stairs in section. Draw the window and door which we see after cutting the section line.
For Hatching and layering:
Using the hatch command the walls with the bricks hatch and the foundation with the concrete hatch.
Place the windows and foundations in the respective layers.
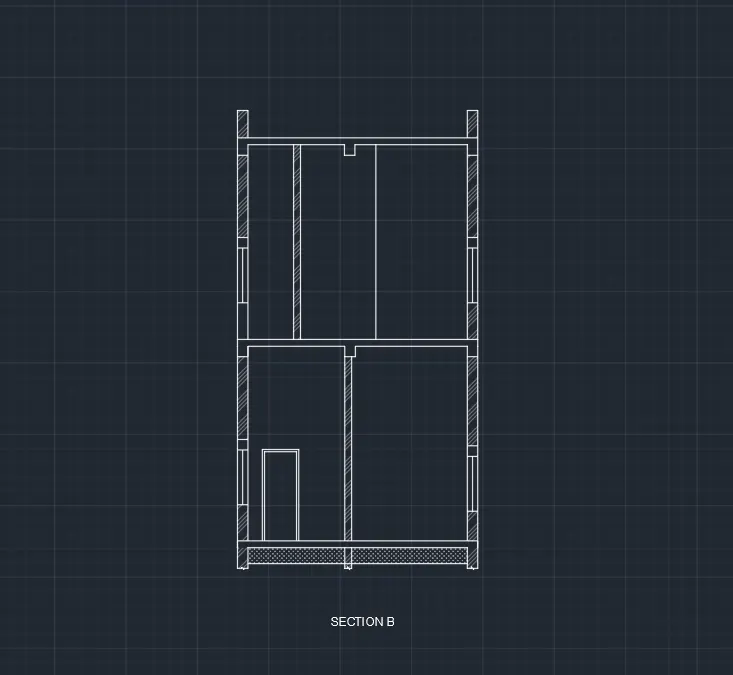
Using the same steps from section A draw section B.
1. Column layout:
Step 17:
Placing of columns:
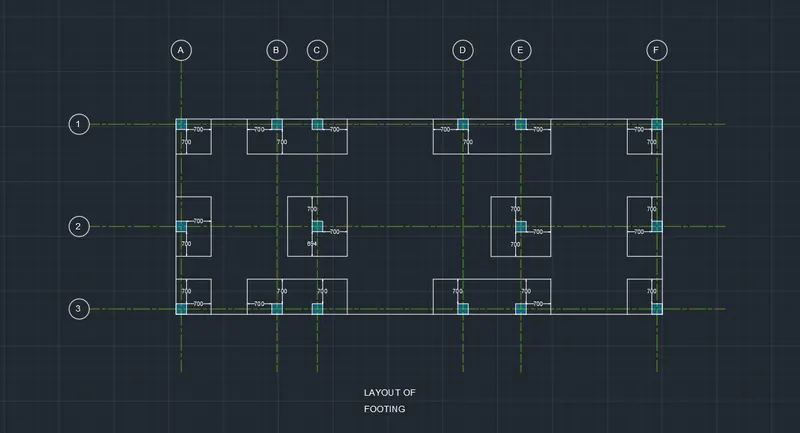
Column of size 0.25m x0.25m is considered.Columns are placed in all corners of the wall and intersection of walls wherever required.
Now draw the center line for the column from the annotated tab -center line.
Now mark the grid line as 1,2 in the x direction and A, B, C, D, and E in the y direction.
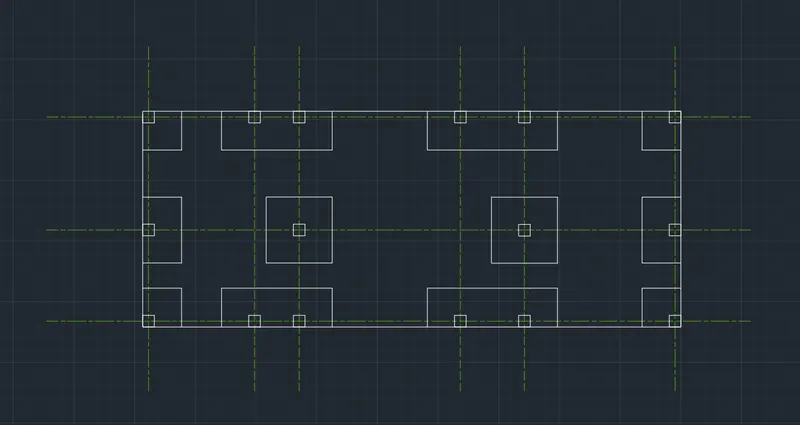
Footing Layout:
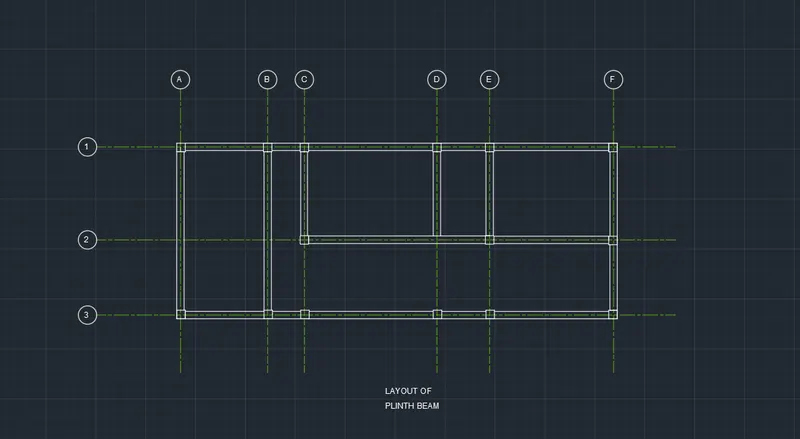
Plinth beam layout:
Drawing of plinth beam:
First connect the columns by a beam of width 0.25m, as the wall thickness is 0.25. A plinth beam is provided below all the walls