Project 1 _Creating an Architectural plan for the provided plot size and develop relevant basic structural drawings
Design and Draft a layout of a residential building with the following details:
a. Plot Size: 60’x20’(18.3m x6m)
b. Orientation- Facing East
c. Develop the following: 1. Architectural Drawing (Floor Plan, Elevations, and Sections) 2. Structural Drawing (Column, Beam, Footing Plan)
Aim:
To design and draft a layout of a residential buildings with the given details using AutoCAD software
Introduction:
Design and Draft a layout of a residential building with the following details and assume the dimensions of all rooms
a. Plot Size: 60’x20’(18.3m x6m)
b. Orientation- Facing East
c. Develop the following: 1. Architectural Drawing (Floor Plan, Elevations, and Sections) 2. Structural Drawing (Column, Beam, Footing Plan)
Procedure:
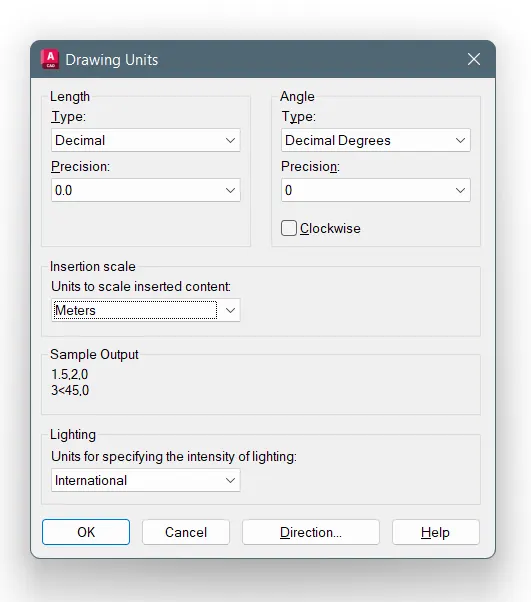
Step-1: To set up the Units
- Open the AutoCAD software to create the model
- Then, type Units shortcut is UN
- And give the values of units as shown in below figure
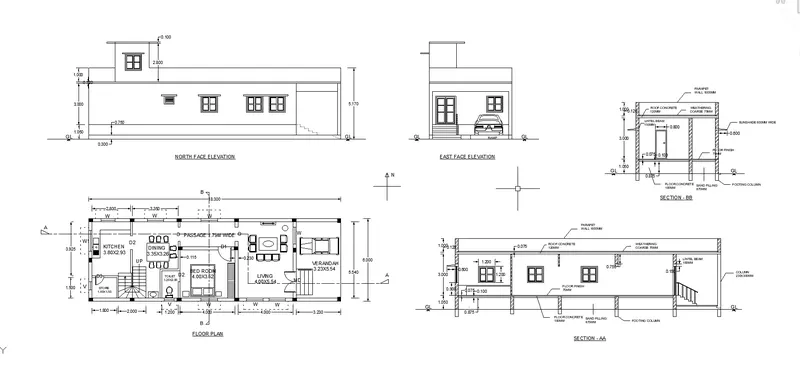
Step-2: To draw the Architectural drawing
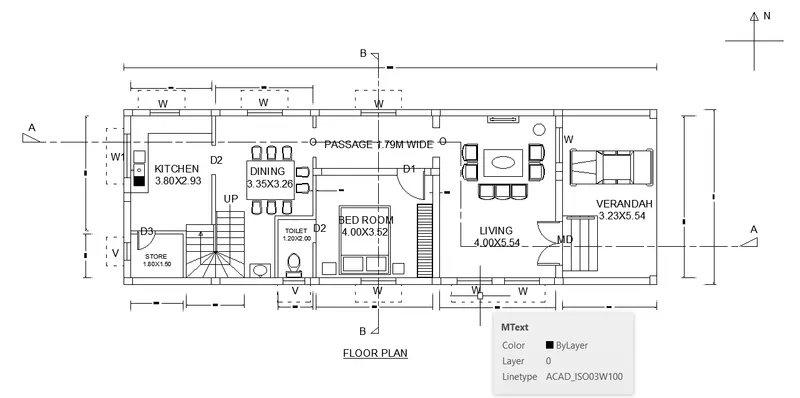
- Using the Line command to draw the plan, section drawings and elevation drawings
- First draw the line sketch to creating floor plan
- And draw the interior fixtures (Sofa, Dinning table and Bed) of the building using the Line and Arc drawing
- Then, draw the window, door and staircase using Line command
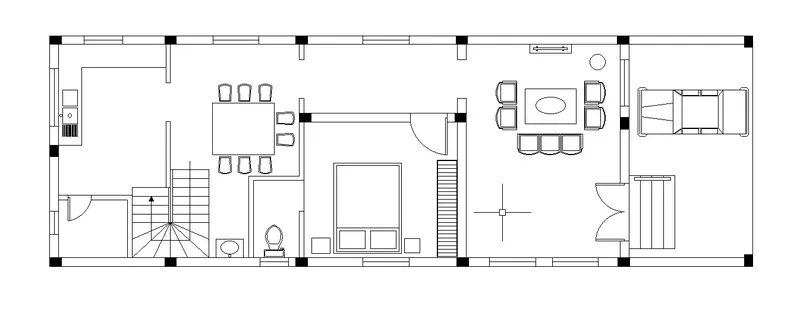
- Insert the car in this building using the Toolpallete
- Here, the column size is 230x300mm and the thickness of wall is 230mm
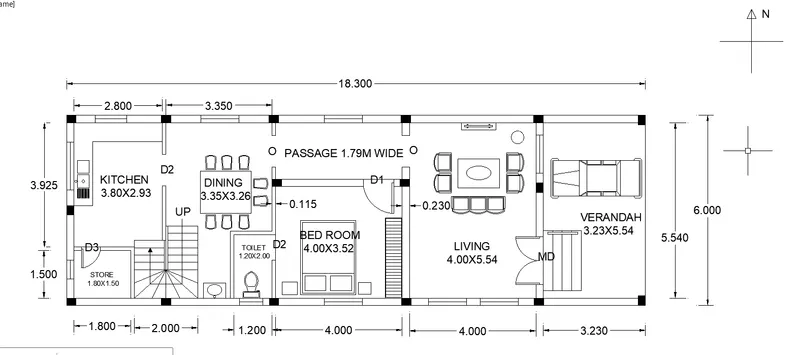
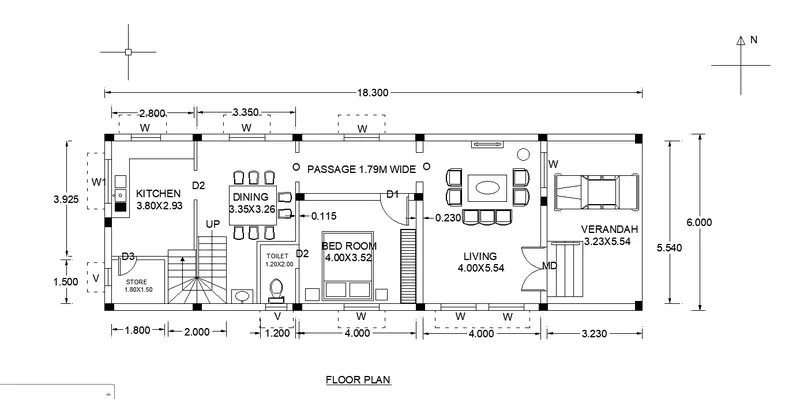
- Here, using the Bylayer command and load the dot lines for draw the lintel cum sunshade wide is 600mm
- Using, the Dimlinear to measure the dimensions where i want
- Finally draw the section line using Bylayer command and load the long line and short line from the layer box
Step-3: To set up the Dimstyle
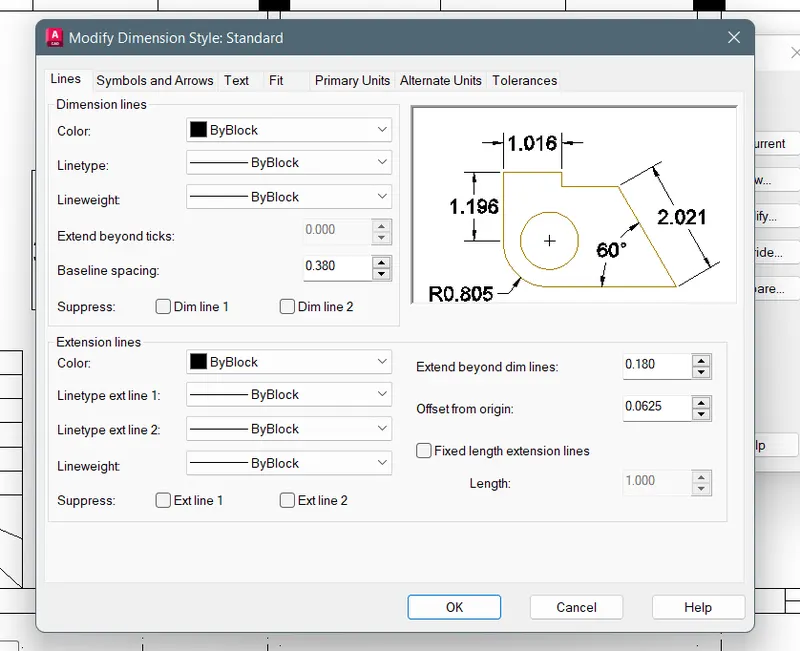
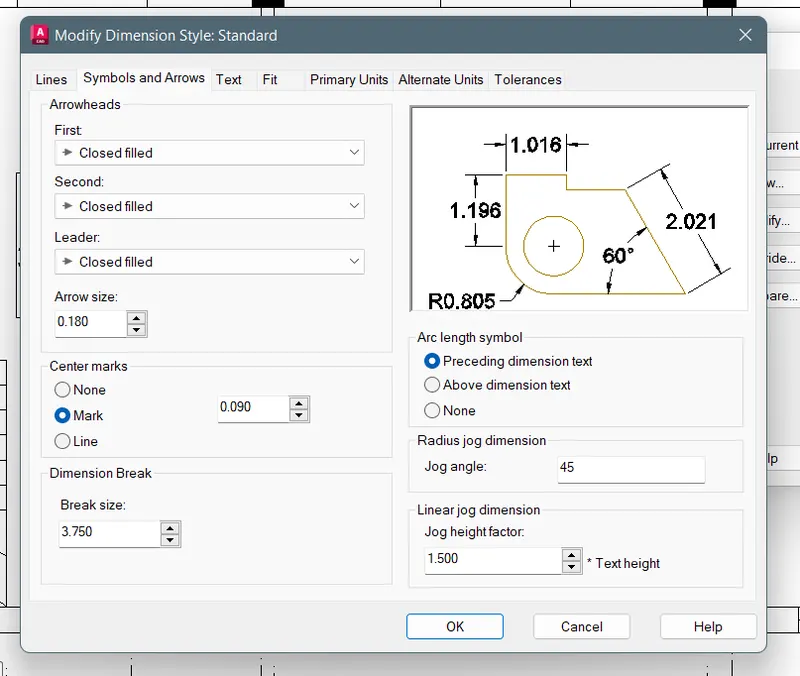
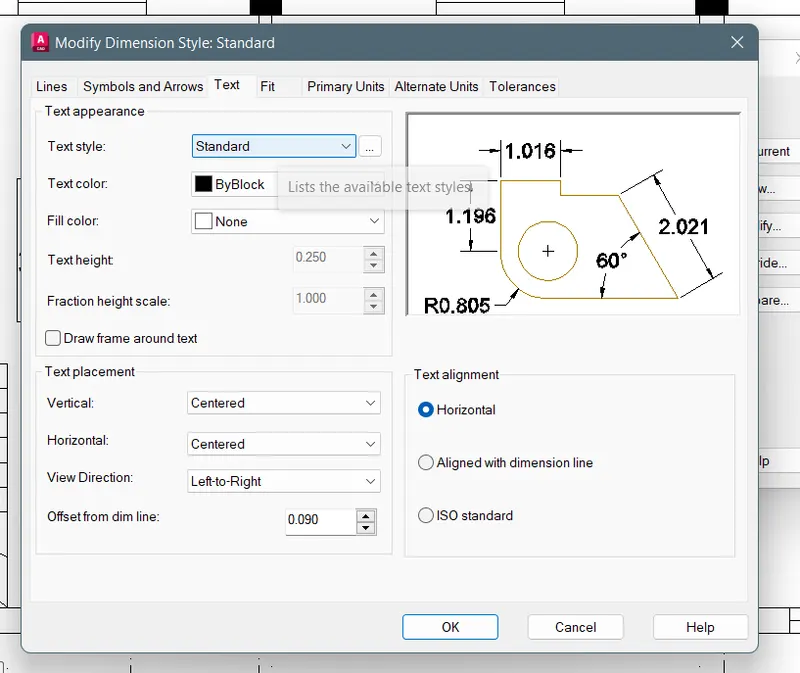
- First type in command box like DIMSTYLE for edit the dimension line, symbol and arrow, text and primary units
- Then, click modify to edit
- The values of the dimstyle is as given in below figures
- Finally click the OK then Setcurrent and then click Close
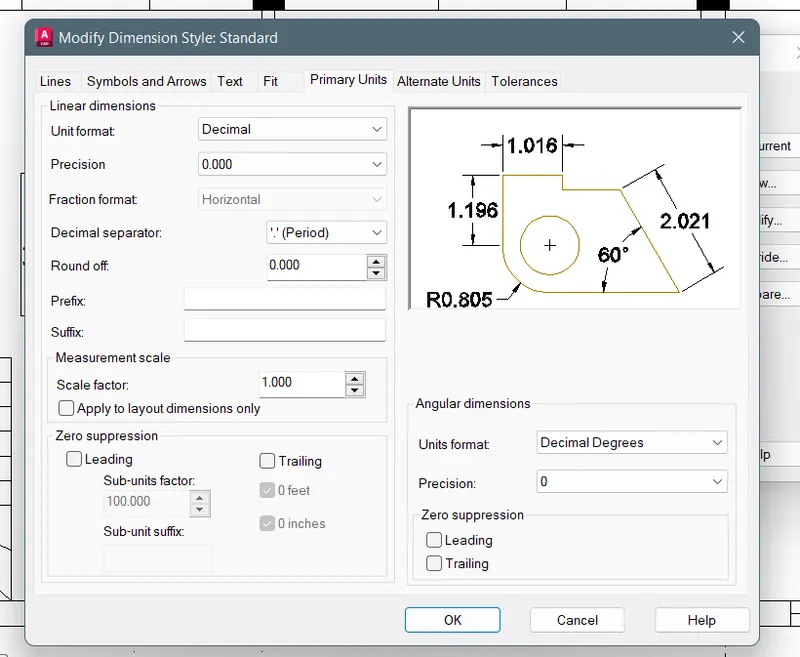
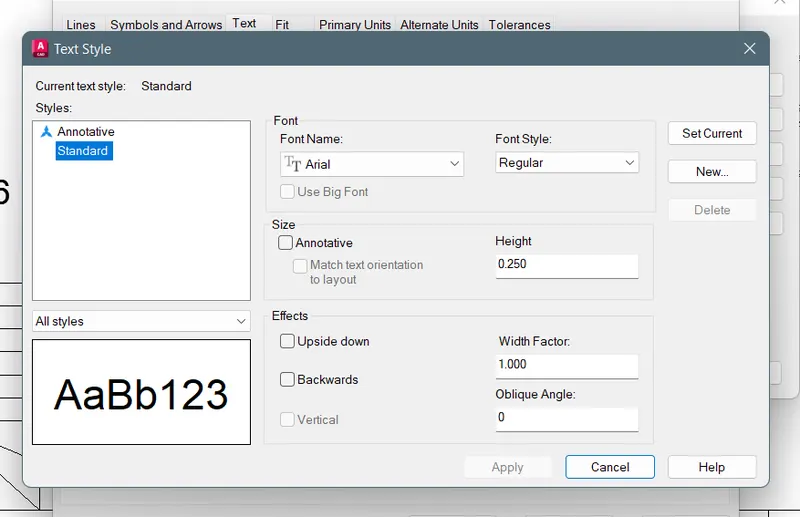
Step-4: To set the text
- Here i have using the Arial type of font name and the height is 0.25, 0.10 have been used
- Then, click Apply - Setcurrent and then, click Close
Step-5: To draw the elevations
- Here, the elevation of the building is draw using the Line command and take the dimension using the Dimlinear command
- The facing of the elevation is North and East orientaton
- The lintel cum sunshade is drawn from the edge point of the window and take the offset distance is 0.2m and the thickness of the sunshade is 0.1m
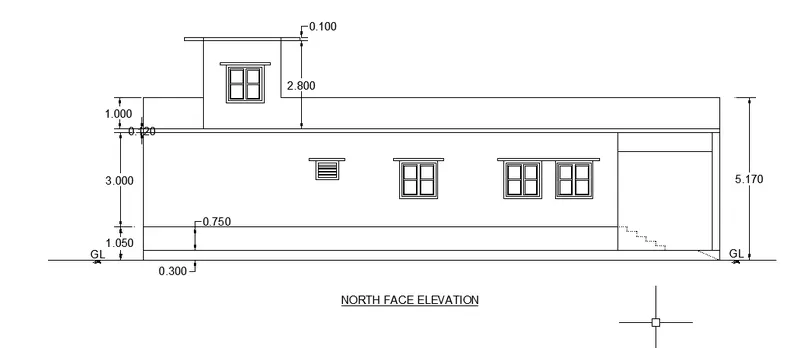
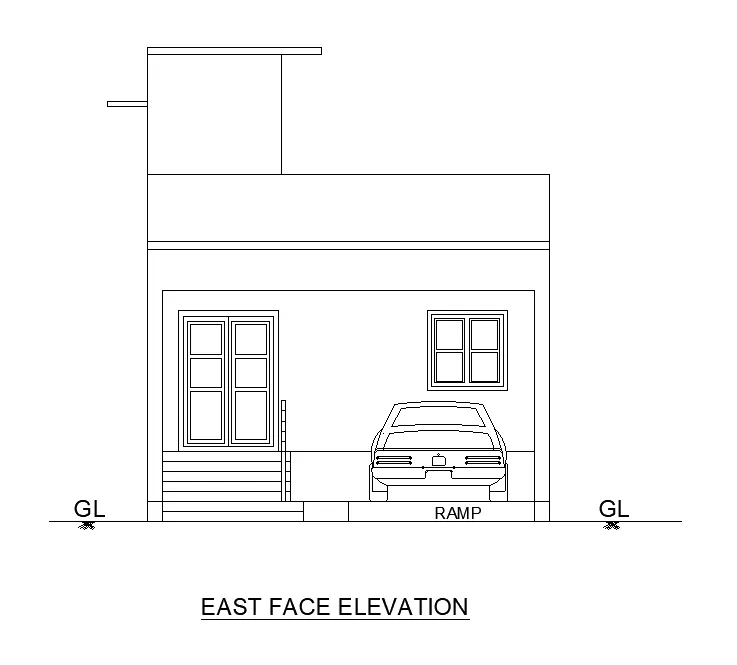
Step-6: To draw the section drawing
- First draw the section-AA drawing
- And assume the all dimensions of the building component is drawn
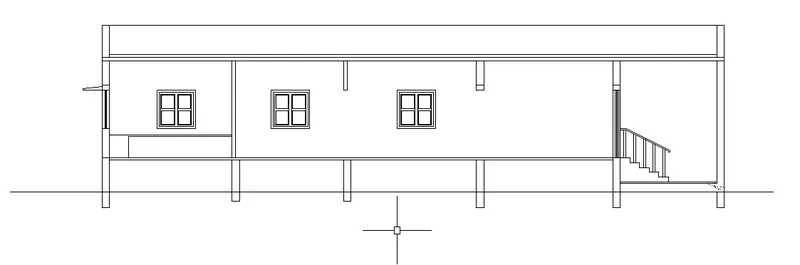
- Give the all components name and sizes as shown in figure
- Using the Hatch command to identify the wall
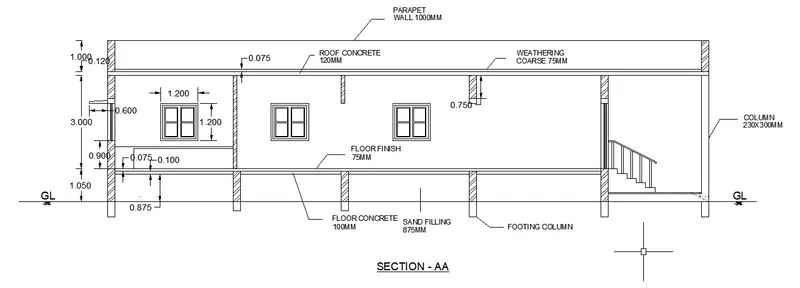
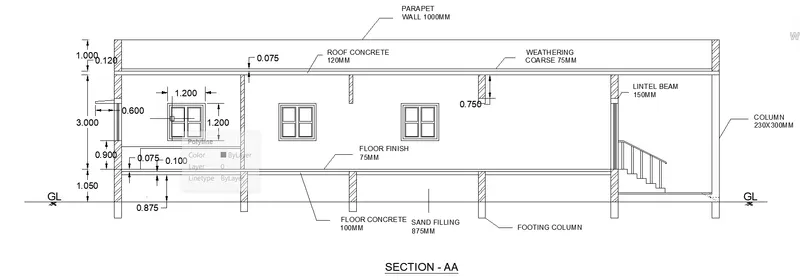
- Here, draw the section-BB drawing
- Same as AA drawing of componenets of the building and dimensions
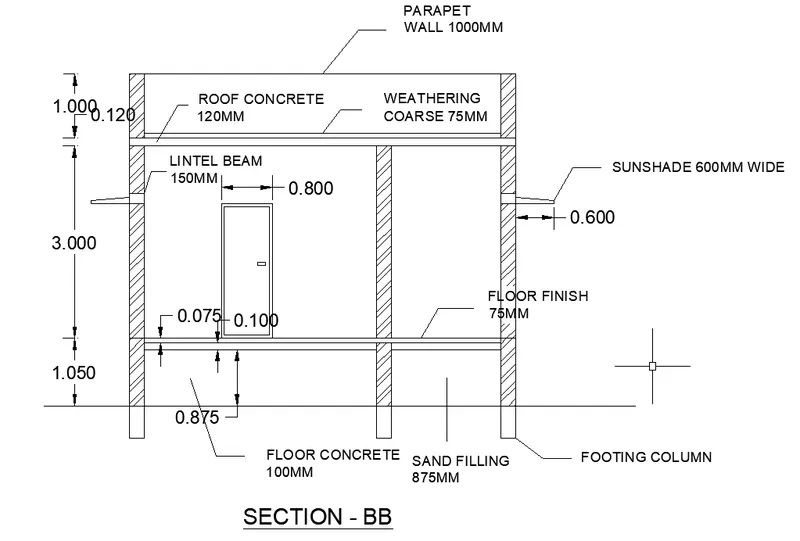
- Finally finish the Architectural drawing is drawn using the all commands as we saw above steps
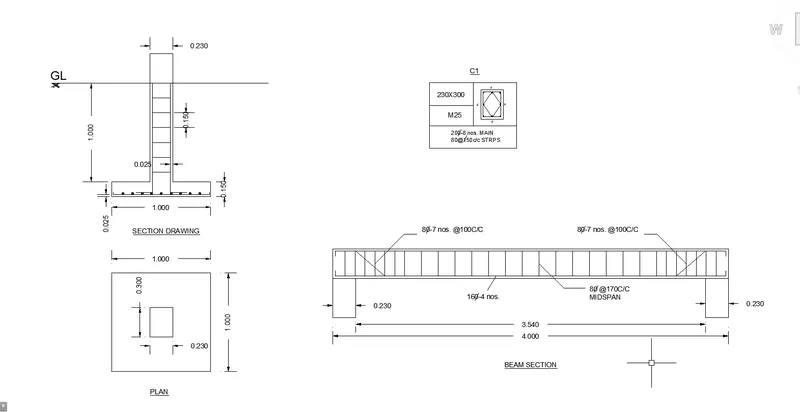
Step-7: To draw the structural drawing
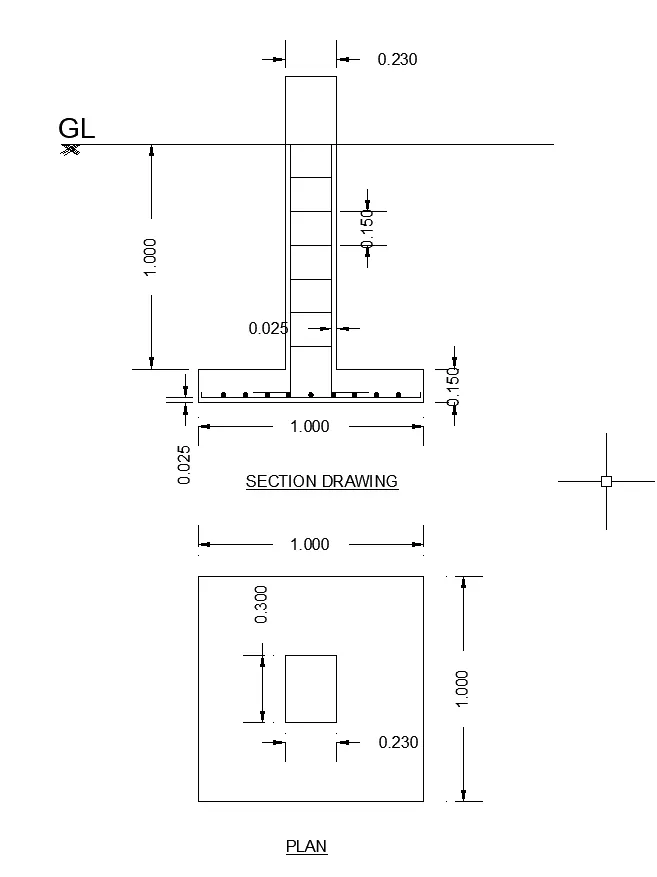
- Here using the Lines and Circle command for draw this footing drawing
- And using the Dimlinear command for take the dimensions
- The drawings are drawn assumed dimensions
- This is a column footing drawing
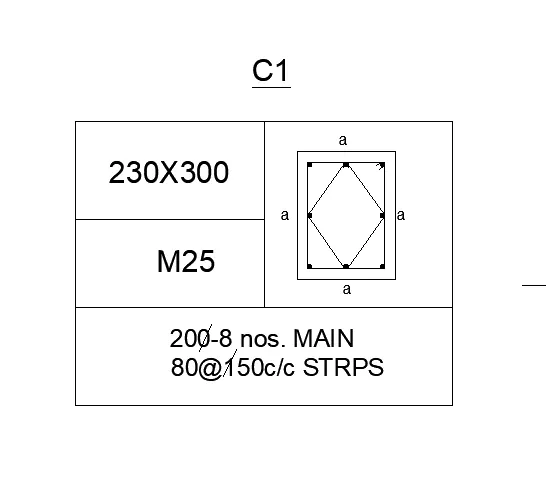
- This is a column drawing for using this building
- And assume the No. of rods, covering of the column and the size of the rod
- Here, using the commands of Line, circle and MText
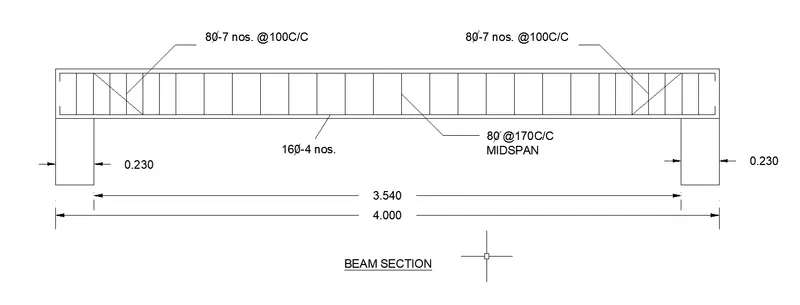
- This is a beam section drawing
- Take the size and details are assumpsion only
- Here, the used commands are Line, MText and Dimlinear
- The details of the beam is as shown in below drawing
- Finally finish the structural drawing of given details as in question
- Using the shortcut of snipping tool to took the screen shot for reference of the drawing is Windows key+Shift+S
- Next take the screenshot using this shortcut
- And, then upload te drawings
Result:
The Architectural and Structural drawing is drawn using all commands as we saw above steps and details and finish the model using the AutoCAD 2023 software