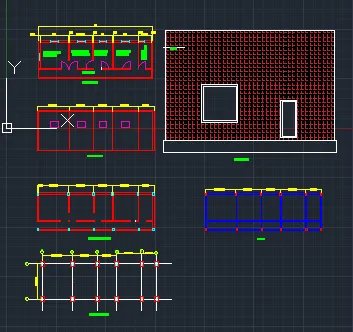
Project 1 _Creating an Architectural plan for the provided plot size and develop relevant basic structural drawings
Aim:-
To create residential building plan,plot size(60'x20') east facing plan.
To develop the following
1. Architectural drawing ( floor plan,elevation,abd section)
2. structural drawing( column, beam and footing)
elevation and section use proper dimension and text style
Introduction:-
Limits:-
Limit command sets an invisible rectangular boundary in the drawing area that can limit the grid dispaly and limit clicking the entire point locations.
Command- Limits press enter
shortcut - limi press enter
set the limits:-
Z enter
All enter
2. Trim command-
Trim command is used to delect th
e unwanted part of an object.
Command - Trim press enter
shortcut- tr and press enter
3. Offset command-
Offset command is used to create concentric circles,
Parrallel lines and parallel curves from the existing curve the geometry
Command - offset
shortcut- o nad press enter
4. Hatch command-
hatch command is used to fill an enclosed area or selected object with a selected hatch pattern, solid fill or a gradient fill .
Command - hatch and press enter
short cut - h and enter
Hatchedit- hatch edit is used to modilfy the ecisting hatch properties such as pattern scale and.
Command - Hatchedit and press enter
shortcut- he end press enter
5. Dimension-
Linear dimension is used to measure and display the linear distance value of a line or between two points.
Linear dimension can be horizontal , vertical or aligned
Command - Dimli and press enter
shortcut - Dli and press enter
6. layer command:-
layer command is used access the layer properties manager, which is used to manage the layer and their properties. in layer properties manager you can add delect and rename layers, change their properties.
Coomad - Layer and press enter
shortcut - LA and press enter
7. multileader:-
To mark and write specification about the particular marked section multileader is used . more than one leader can be used at a time.
we can create oue won style of multileader , from annotate toolbar , manage multileader style is selected, then multileader style manager dialogue box appears.
Procedure:
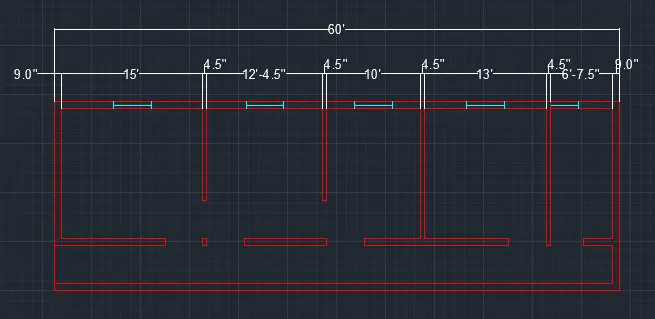
1. Plan:
- Given outer wall thickness as 9" and innear wall thickness as 4.5".
- Draw Xl-H and Xl-v give the thickness of wall.
- Give the dimension of room bedroom 13'x13'9" by offset command.
- give innear wall thickness as 4.5" by offset method.
- offset horizontally 15' , 12'4.5" , 10' , 13' nad 6'7.5" bedroom and 9" external wall.
- Offset vertically 13'9" drawing room,from bedroom c and give wall thickness of 4.5'
- Divide the room horizontally by offseting 15'. 12'4.5", 10' 13' , 6'7.5.
Creating doors and window:
D- 4'x6'6"
window- 4'x4'
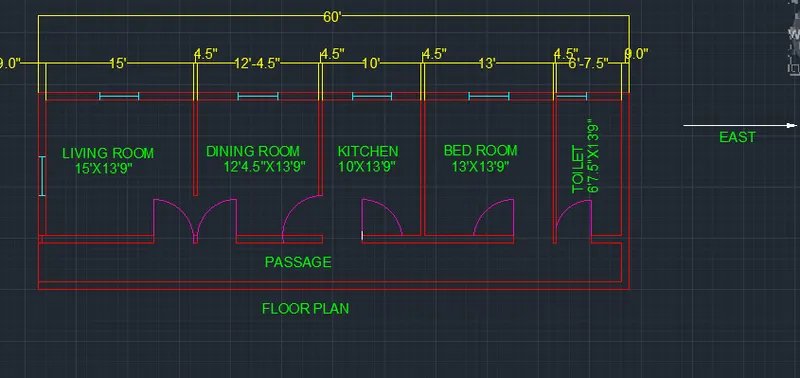
Text:-
With multiline text coomand "t" create text box , select standard as text style ans text height as 250mm type the require text.
Names of rooms with sizes and marking of window and doors.
Each component are placed in layer 9 layer are created.
Layer for external wall, winddow , doors text, dimension , stairs, column slab and beam.
And, final result:
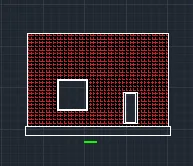
2. Elevation :-
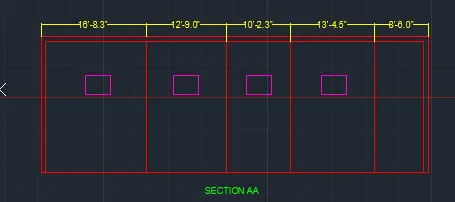
3. secrion AA:-
- Project the wall and column from the plan using line command
- Mark a vertical line showing ground level, offset of 9"for p.c.c and 4.5" from the ground level to show the floooring level.
- project the window and ventilators and give the height 4'.
- offset slab of 30'thickness and draw the beams
- Show the selection of window wherever the section line cuts the window
- With multileader , text size-1'and leader point as 2, write the text
Dimensioning:-
command "dimlinear" the linear dimension
- to edit dimesion style ,text command "d"
- to move a dimension line select the grip point and move
- if we place mouse on grip points of extension lines, we can we options such as strech , continue , baseline dimension , flip arrow.
- command "dimbreak" is used to break the overlapping dimension
- commnad dimcontineous to continue dimensioning.
Dimension style : command "D"
- we can creat our own dimension style from new menu.
- In symbols and arrow , we can change shape of arrow head,arrow head sizes, centre marks, break size etc.
- in text , we can set height of text , colour , style.
Text:
With multiline text coomand "t" create text box , select standard as text style ans text height as 250mm type the require text.
Names of rooms with sizes and marking of window and doors.
Layer:-
Each component are placed in layer 9 layer are created.
Layer for external wall, winddow , doors text, dimension , stairs, column slab and beam.
And, final result:-
2. Structural Drawing:-
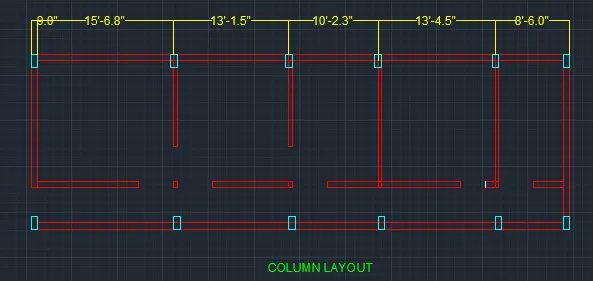
A. Column layout:-
- Create the rectangle angle of 9"x18" , explode it.
- Divide the column and again divide one 18' using offset command
- Create raw at top and bottom of 2' and 4' respectively by offset command.
- Command offset select the top line and give distance as 2' again command o select the bottom line and give offset distance as 4'.
- Trim off the unecessary lines.
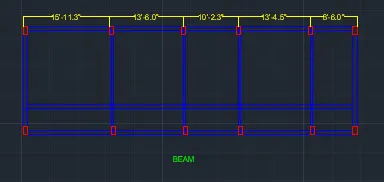
b. Beam:-
C. Footing Layout:-
Procedure:-
line command: type the line command
Trim command :- trim command is used to delete the unwanted part of an object.
command : trim and press enter
shortcut key : tr and press enter
offset command: offset command is used to create concentric circles,parraller lines and parallel curve from the existing curve the geomentry.
command: offset
shortcut key : o and press enter
ribbon menu: home>modify panel>offset
Hatch command:
Hatch commnd is used to fill an enclosed area or selected object eith a selected hatch pattern ,solid fill or a gradient fill.
command - hatch command
shortcut- h and press enter
dimension command:
linear dimension is used to measure and display the linear disrtance value of a line or between two points.
Linear dimension can be horizontal,vertical or alingned
Command: dimli and press enter
shortcut : dli and press enter
ribbon menu: annotate >dimension>linear
Access from: menu bar>dimension>linear
After the specifying the start and end points, the software prompts as below for more options.
Layer management:-
creates a layer with a default name . the new layer inherits the properties of the currently
selected layer in the layer list
set current - set current layer as the current layer.new object automatically created on the layer.
Drawing the grid lines:-
Draw an verical line with construction line xl-v
offset the vertical by offset command with offset command 16'3",13'1.5",10'2.3",13'4.5",7'9.5"
Draw an verical line with construction line xl-h
offset the vertical by offset command with offset command 18'5"
mark the horizontal line from A to F
mark the vertical from "1 to 2"
draw the bottom thickness 9" and upper grid line 4.5"
drawing column and rectangle box.
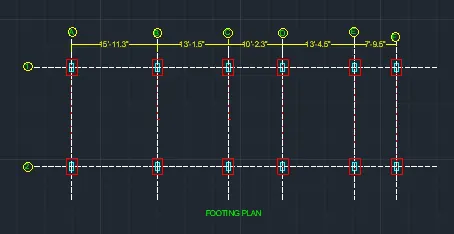
And Final plot :-