Project 1 : CFD Meshing for Tesla Cyber Truck
PROJECT
CFD Meshing for Tesla Cyber Truck
Aim:
To solve and rectify the error of tesla cybertruck and to perform surface meshing with tunnel design for the cybertruck tesla and to maintain mesh quality criteria
Objective:
To solve the intersection as well as geometrical error on tesla cybertruck after that maintain a suitable mesh quality of it. then design the tunnel and maintain the suitable mesh of tunnel as well.
Body of content:
In this detail report we will discussing about the cybertruck tesla, the initiative taken to perform the CFD mesh and the method used to rectify the geometrical as well as intersection error on cybertruck tesla.
Geometry cleans up:
Before that we set our units in millimeter and set the resolution to 1, then we go for the geometry check, as shown in below figure we face geometry warning which is red cons and in intersection error it shows the lots of error as shown in below figure. We will be going to rectify each error one by one.
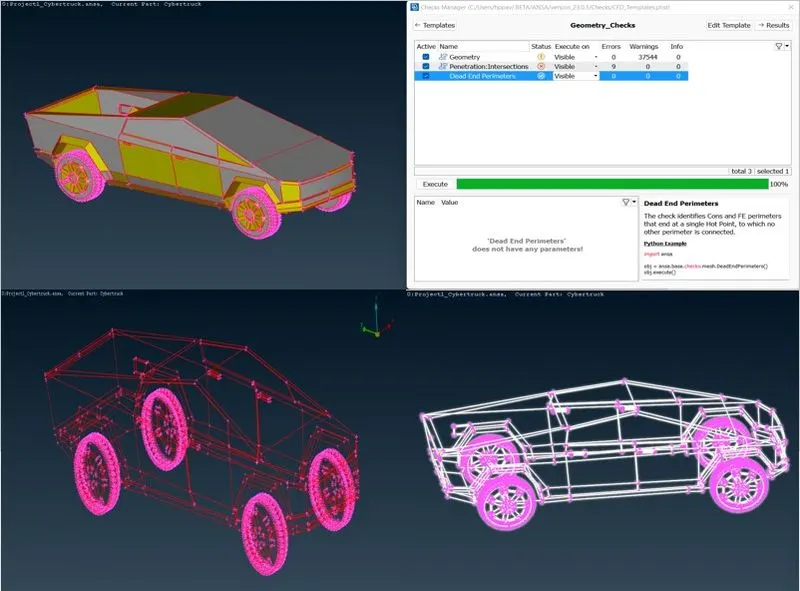
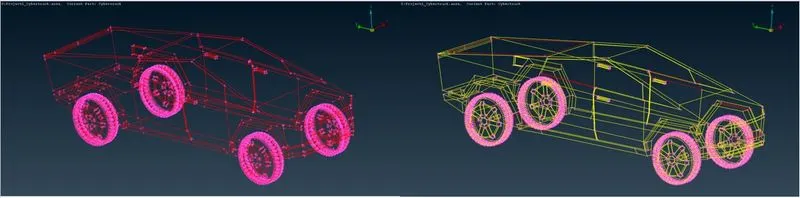
First, we going with a topo command in faces and rectify all the unjointed faces as shown in below figure.
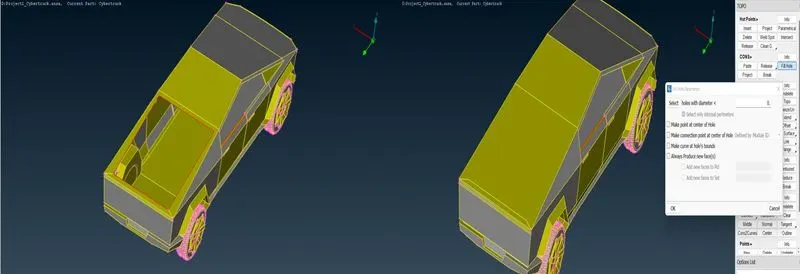
Now going for another error that is the back face of cyber truck tesla is missing, we created a face there with the help of fill hole options in cons command as shown in below figure.
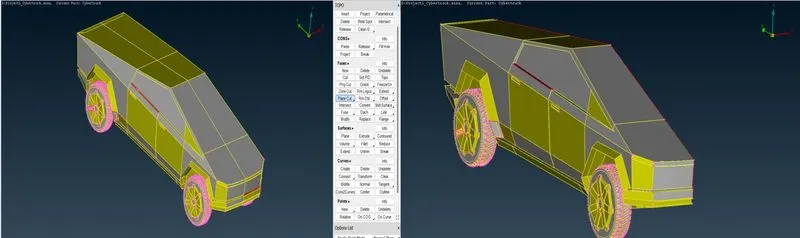
Before moving to next error, we have deleted the half part of car so that we are able to rectify maximum error in minimum time. In these we have used plane cut method in faces, for first we assign the hot points on the center of car and then select plane cut option to cut the car in half and delete the half part as shown in below figure.
Now coming back to error as shown in below figure there is missing face also because of it sharp edges we can get skewed elements so to avoid that we are going to rectify the error and create the new face as shown below.
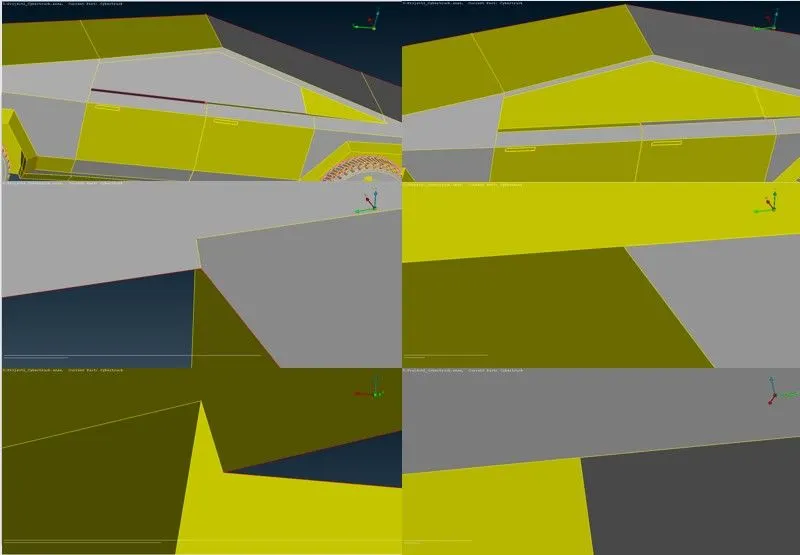
Now rectifying the next error as shown in below figure,
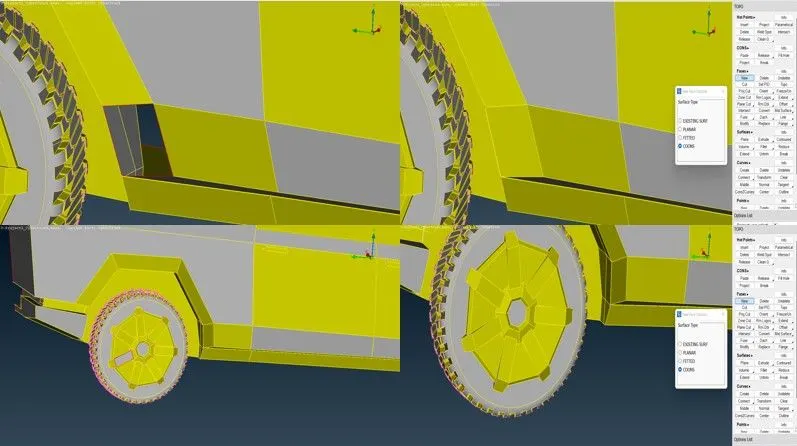
Now moving to intersection error, we can see that there is an intersection error in front on cyber truck tesla car as shown in below figure, to rectify that we deleted and recreated a new face there.
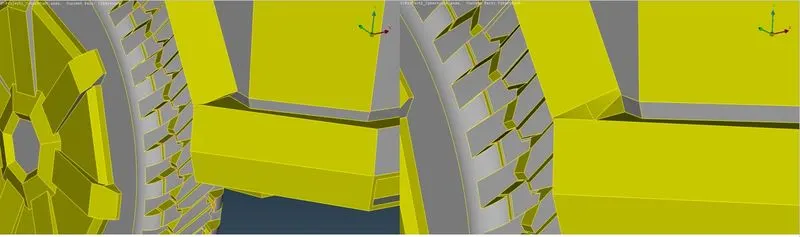
Moving to next intersection error is on tyres as shown where is two overlapping faces are there so we delete the one faces to solve the intersection error in tyres.
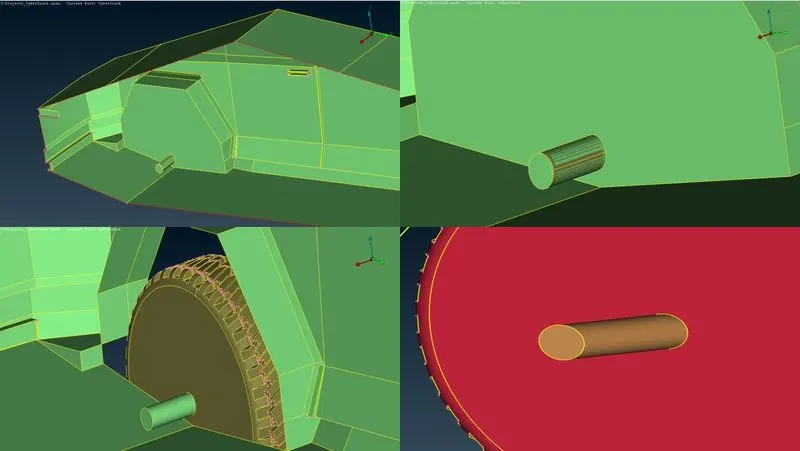
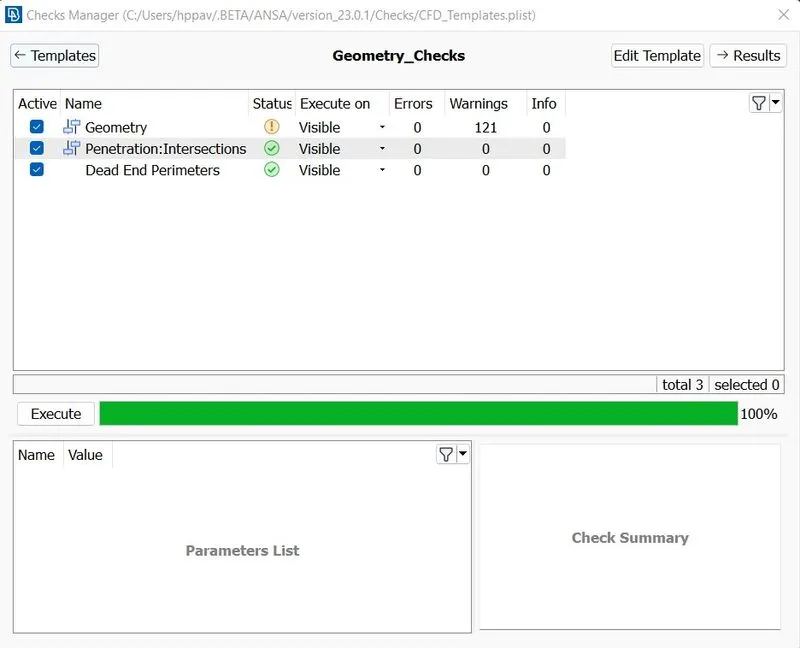
As shown in below figure we can see that now there is no intersection error as well as geometrical error only warning.
Property identities assignment:
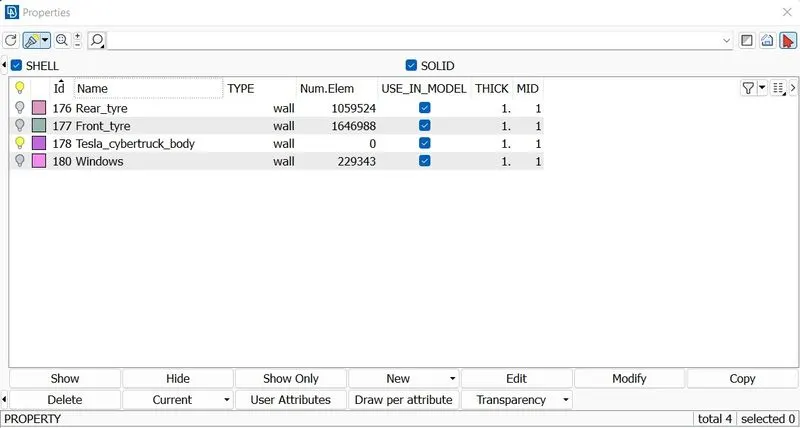
Now as we rectify all the error what we done next is assign the property identities to our tesla cyber truck, as shown in below figure the name assigns to the cyber truck tesla.
Meshing of cybertruck tesla:
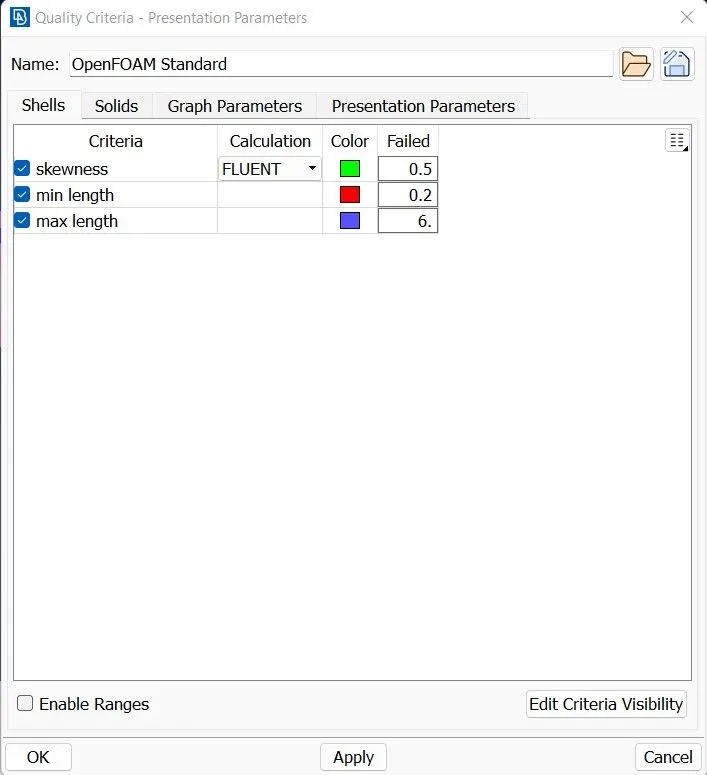
Now as we assign PIDs its time to perform the surface meshing on assigns PIDs, but before that we set the quality criteria of meshing in tesla cyber truck case as it is as it involves very large components, we set our skewness to 0.5 minimum length to 0.2 and maximum up to 5mm, As shown in below figure.
1. Meshing of windows part
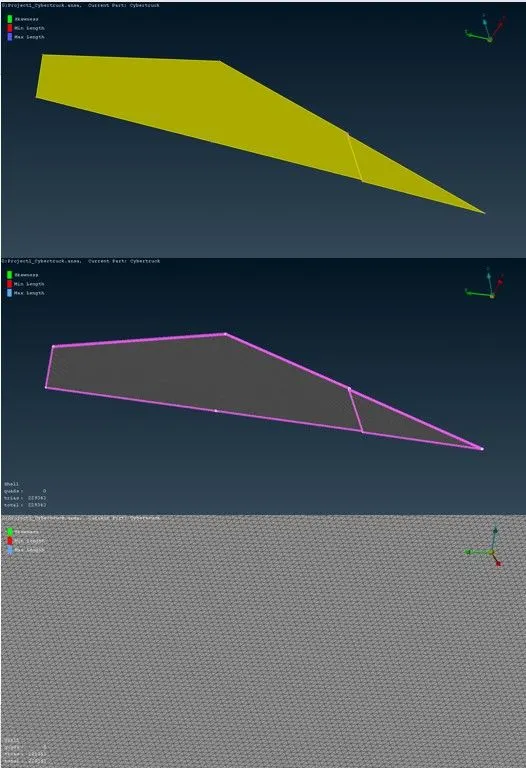
Now first we start our mesh with windows as shown in below figure, we have performed auto CFD on the windows where we give the minimum length upto 1mm and maximum length upto 3mm, as shown in below figure the mesh part of windows which satisfy the quality criteria.
2. Meshing on front tyres
Now moving on to next components i.e., front tyres of tesla cybertruck as shown in below figure we perform the same meshing with minimum length upto 1mm and maximum length upto 2.5mm, as shown in below figure the mesh components of front tyres of cybertruck tesla.
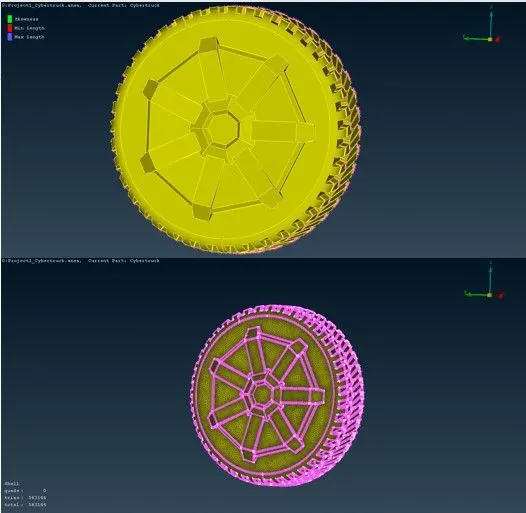
3. Meshing on rear tyres of cybertruck tesla:
As shown in below figure we perform the meshing on rear tyres of tesla cyber truck, the minimum length taken as 1 and maximum length taken as 2.5 so that we can capture the whole component.
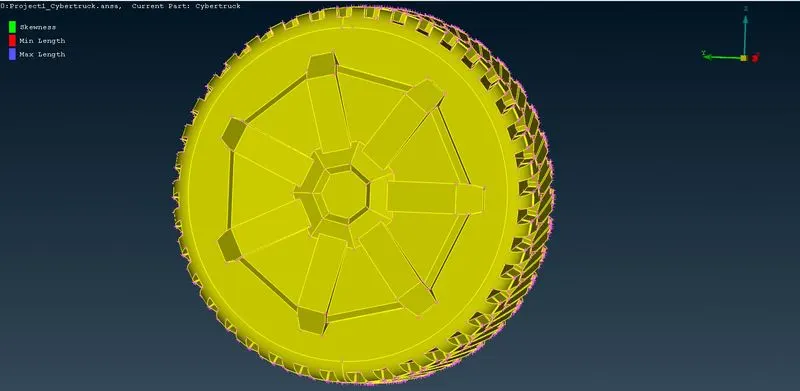
Performing the given mesh criteria, we see that there is element which is failing the quality criteria as shown in below figure.
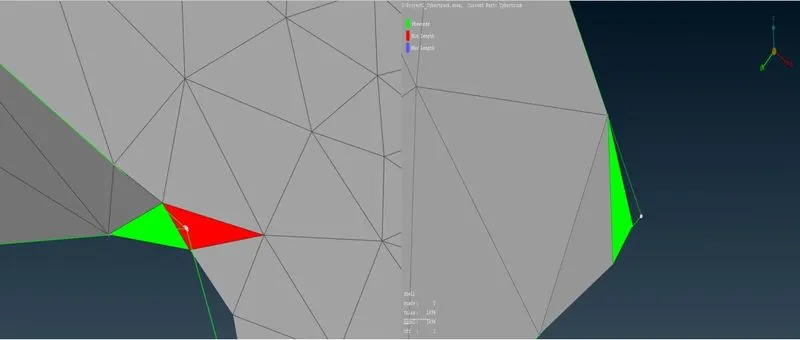
As we can see that the element quality which is failed here is skewness and minimum length criteria so for that we applied move gids option in grid command where we rectify the skewness as well as minimum length mesh quality criteria as shown in below figure.
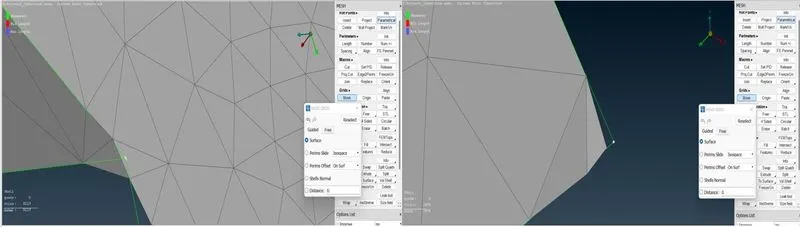
The final figure of mesh rear tyres of tesla cybertruck as shown in below.
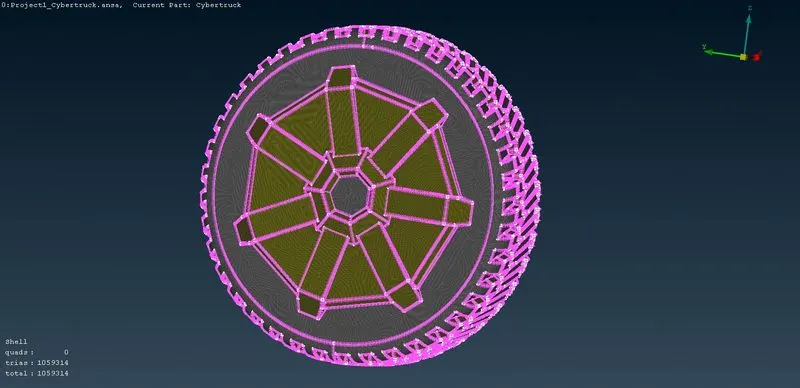
3. Meshing on Tesla cybertruck body
Now moving the next components of tesla cybertruck which is nothing but tesla cybertruck body as shown in below figure.
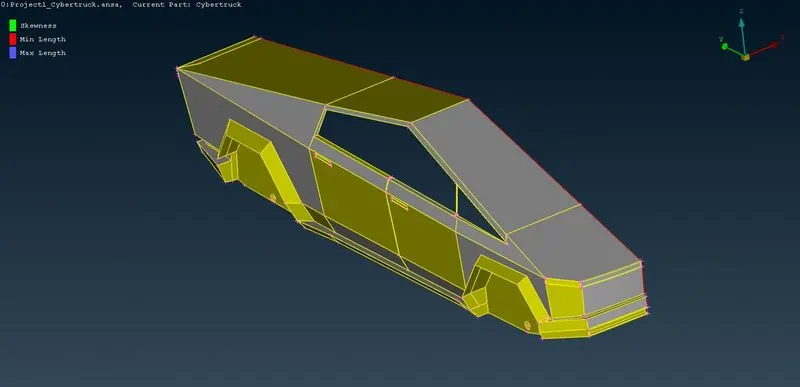
We have given the minimum mesh length 3mm and maximum mesh length upto 4mm. the below figure shows the mesh quality of cybertruck body.
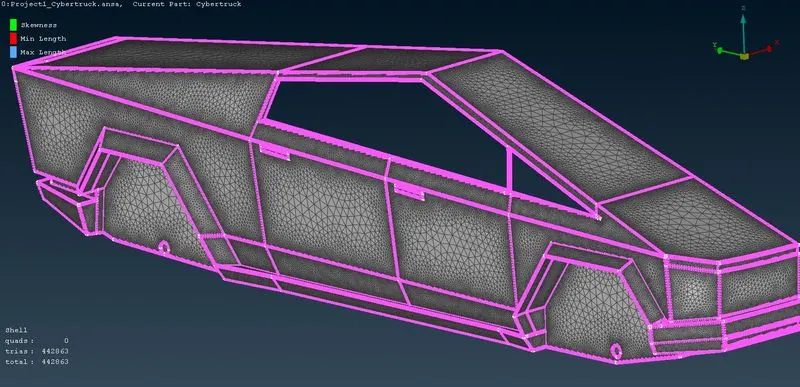
The fully meshed tesla cybertruck is shown in below figure, without any off elements and satisfying the quality criteria.
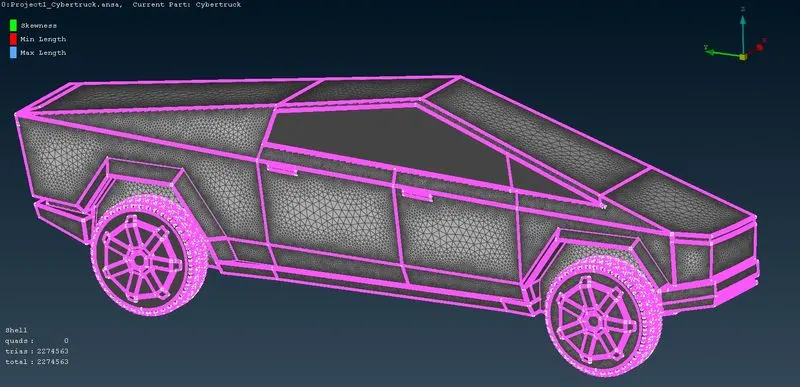
Mirroring of tesla cybertruck:
As we mirror the tesla cybertruck with help of transform command we found another error in it as shown in below figure.
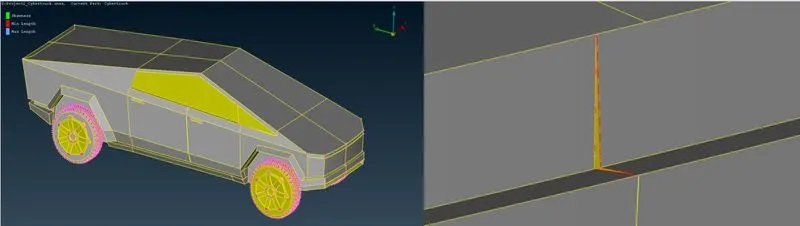
As one can see in above figure there is a gap between faces so to fill that gap, we simple go with new option in face and create a new face as shown in below figure.
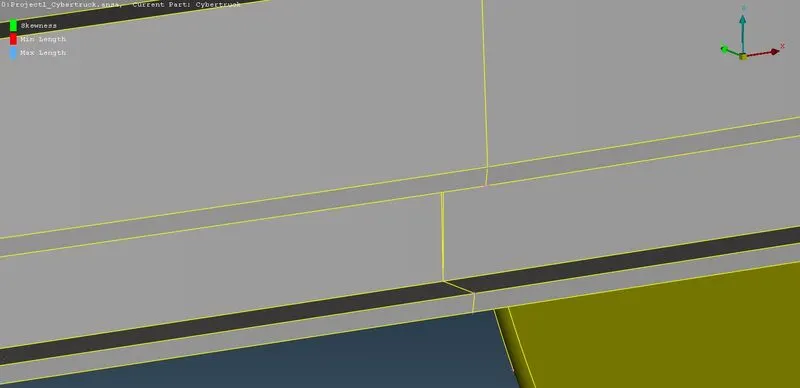
So, creating new face effect our meshing on tesla cybertruck body as shown in below figure. As the new faces we created is unmeshed.
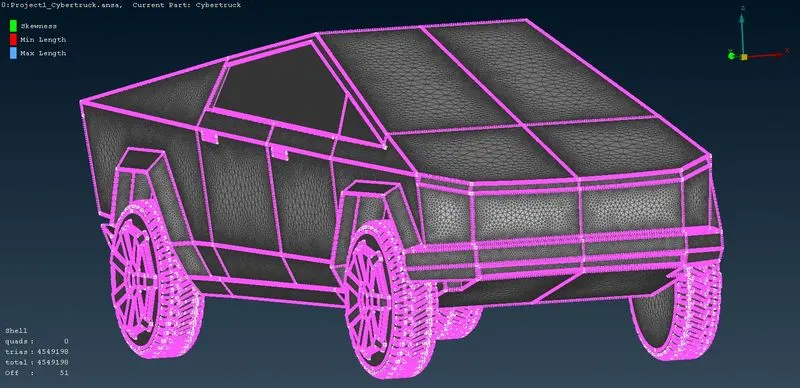
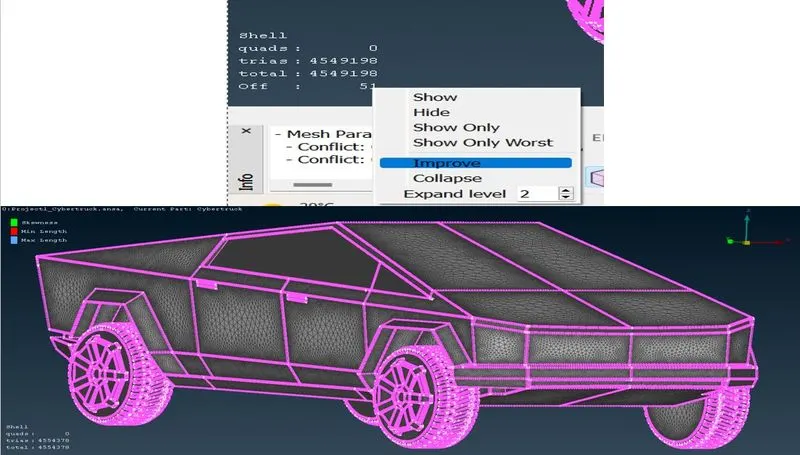
To mesh that face just simple use, free command and to maintain quality criteria go improve tools in off as shown in below figure, and reshape the element then we can have our whole tesla cybertruck meshed, as shown in below figure.
Designing of wind tunnel:
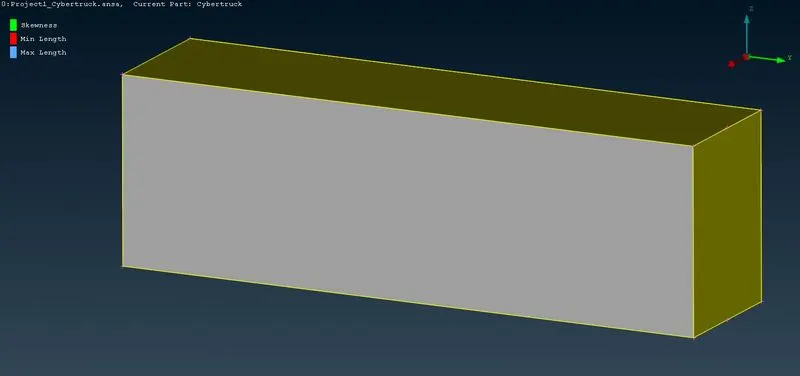
We have designed the bottom face of tunnel which is 1000mm away from the bottom face of cybertruck as shown in below figure.
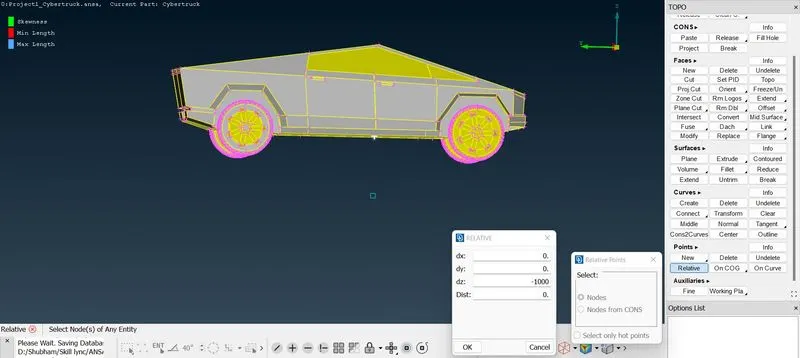
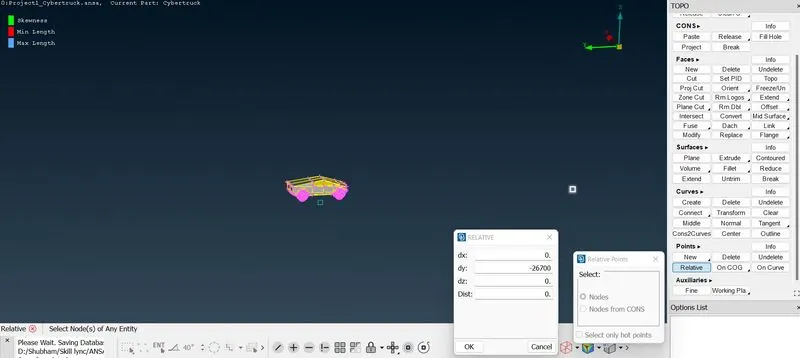
Now, next we created a bottom face, to construct that points we calculate the distance, which is the distance of centroid plus six times the length of cyber, which is nothing but 26700mm. as shown in below figure.
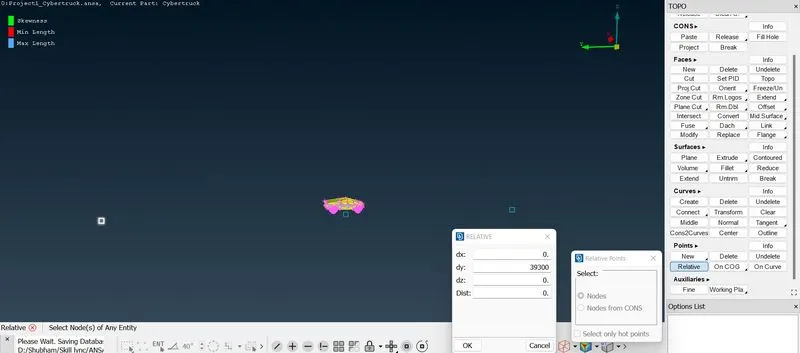
Now, the rear face which distance is six times length of the cybertruck plus the centroid of the cybertruck. The value of the centroid to the rear face is 39300mm. As shown in figure.
Now creating the side faces which is at distance from centroid to the length of cybertruck, the vale of side faces is 8000mm on each side. As shown in figure.
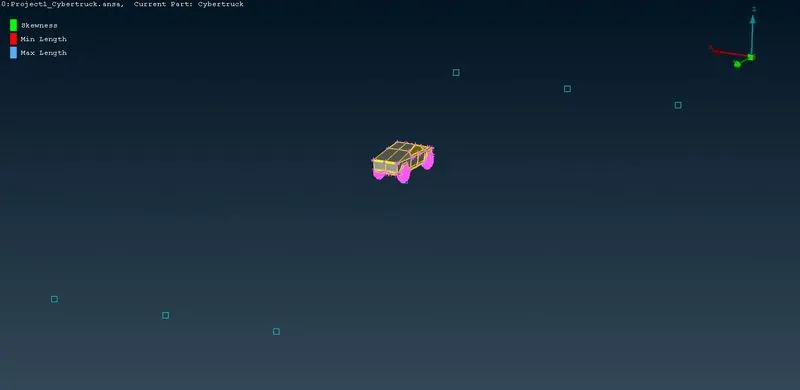
So, for the top face which is at a distance of 1000 plus the three times the length of cybertruck which is 20600 away from the reference point, as shown in figure.
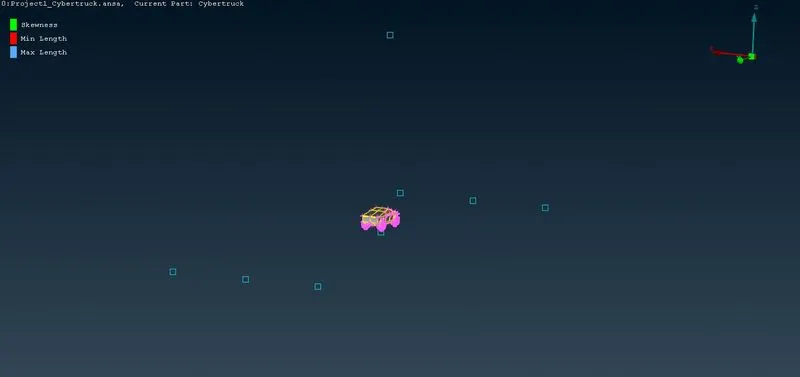
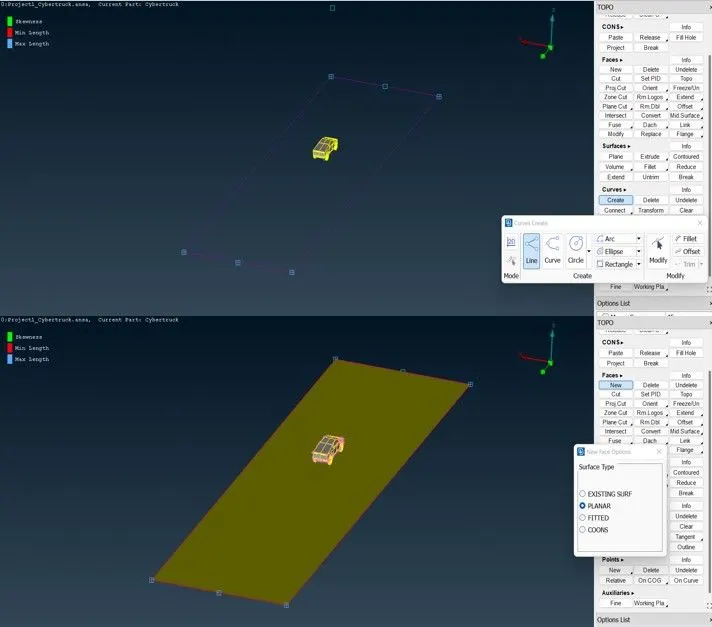
Now as allocated the point the next thing is to create the bottom face, so for that we created a curve and from that curve we have created the ace as shown in below figure.
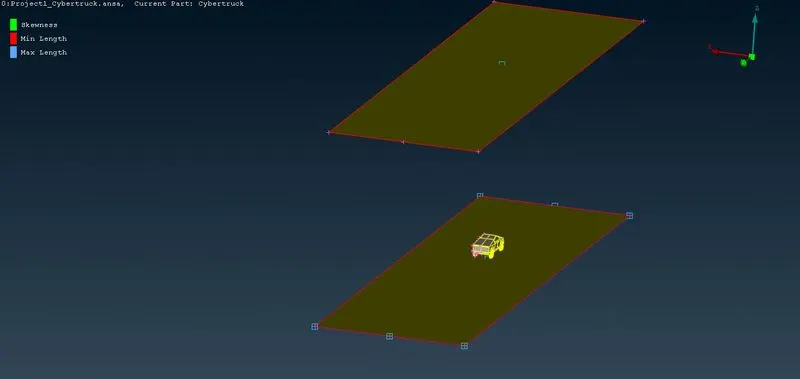
Now, to create the top face we are going to take the offset of bottom face which is 20600mm away. As shown in figure.
Now next thing is to create a side face, which is created by the help of face command, as shown in below figure.
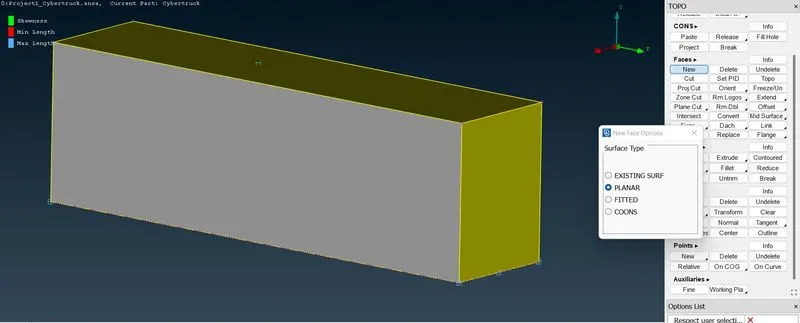
Delete unnecessary relative points and curve, as shown in below figure.
Meshing of wind tunnel:
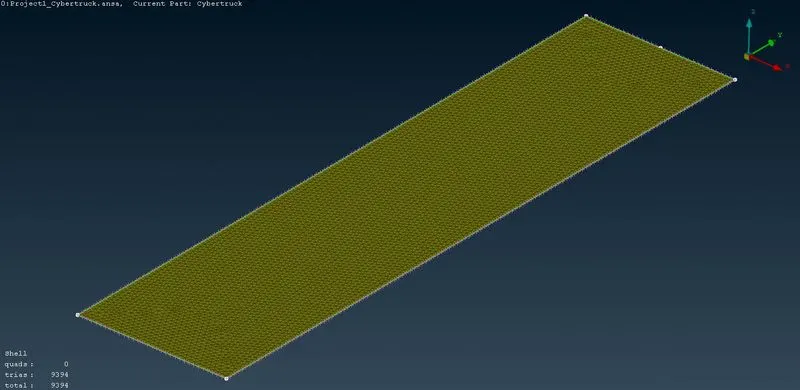
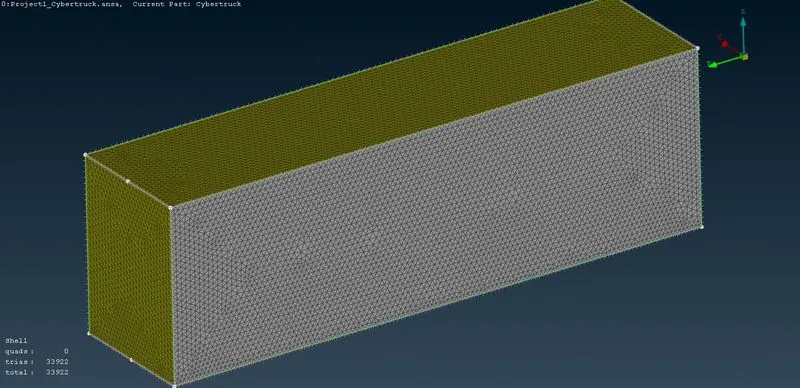
Starting from the bottom face of tunnel we are going to create surface meshing on tunnel, as shown in below figure which is the meshing of bottom face of tunnel with mesh length of 500mm. So, here we take minimum target length as 100 and maximum target length as 510. The CFD mesh is shown in below figure.
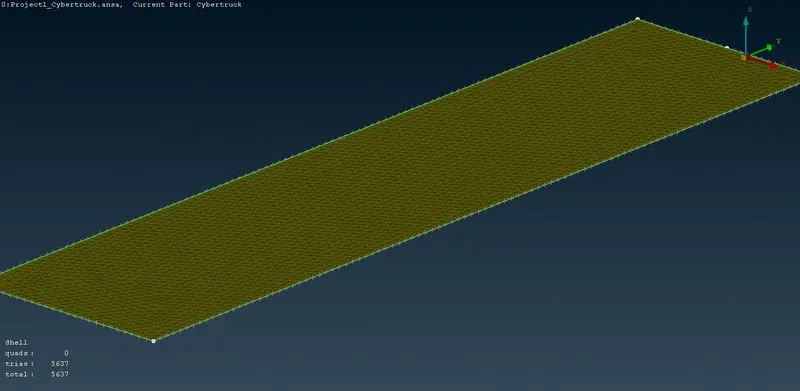
Now for the top face of tunnel we go with mesh size of 650, in which minimum target length taken as 100 and maximum target length taken as 660. Below is the image generated by the CFD mesh of target length 650.
Now for the side faces we are going with manual spacing in order to create grown mesh in which the Dstart is given as 500mm and Dlimit is given as 650 as shown in below figure.
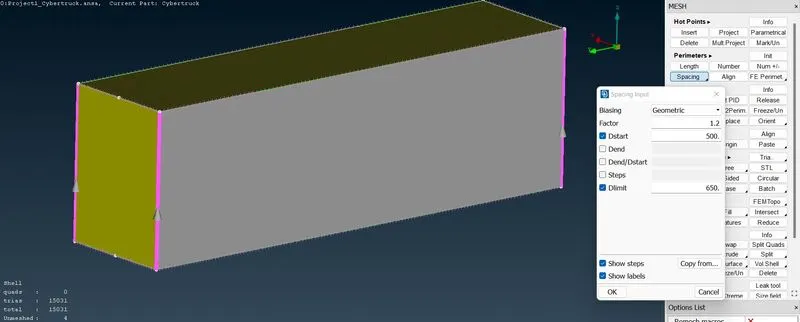
Now for the side faces we are going with manual spacing in order to create grown mesh in which the Dstart is given as 500mm and Dlimit is given as 650, the CFD mesh generated by manual is shown in below figure.
Conclusion:
In this report we have clean and rectify all the necessary error in tesla cybertruck.
Maintain required mesh quality like skewness, maximum length and minimum length by giving required mesh traget length.
Design and mesh tunnel with respected dimension which is required to perform aerodynamic analysis is furthers process.
The google link of meshed cybertruck of tesla is shown below:-
https://drive.google.com/file/d/1VORcx0S6VNTHHcL6QktRTCbJEWaofM8g/view?usp=share_link