Preparing Schedule & Cost Estimation for a building using REVIT
Preparing Schedule & Cost Estimation for a building using REVIT
1) Use the shortcut keys in Revit discussed in class to complete the following tasks and list them below
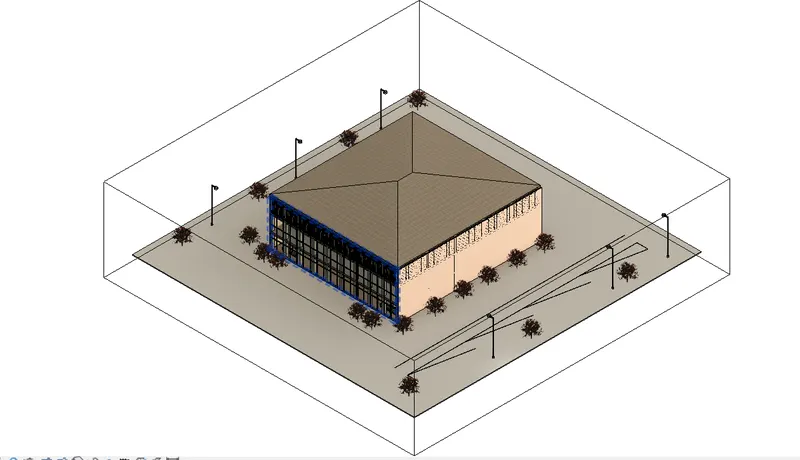
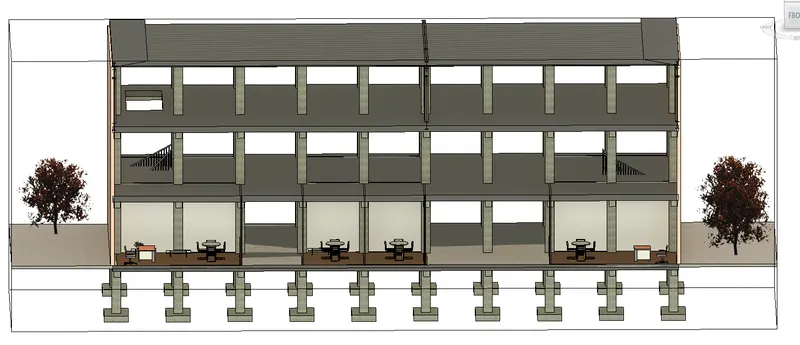
a. Using 3D model create a section box
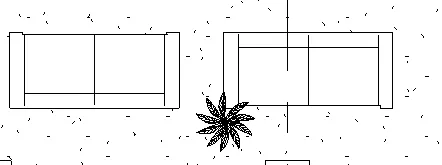
b. To create similar doors and windows in a floor plan layout
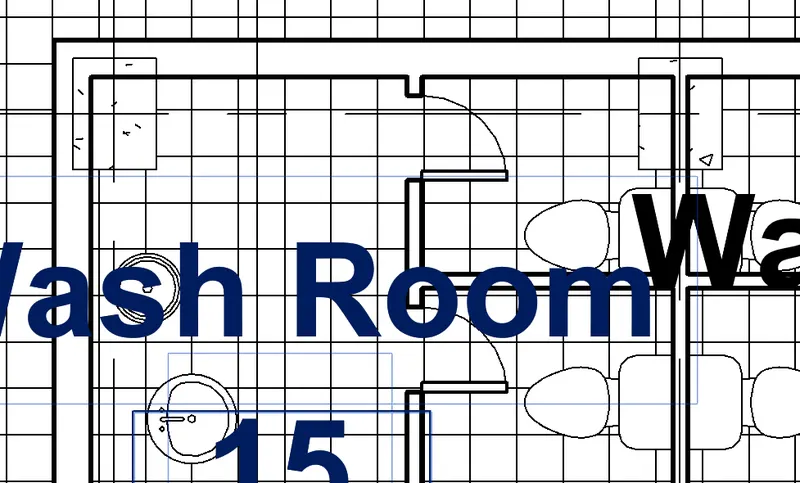
c. To reduce the thickness of lines visible in plan views
d. To apply override settings to a floor in the model section view
e. To increase the range of visibility in a plan view
f. To select the previously selected items
g. To add annotations to the model views
h. To bring the model elements in line
i. To rotate the model elements
j. To move an object to another location
k. To copy a model element
l. To mirror an element about an axis
m. To create an array of model elements.
Answer: Some of Common Short Cut keys used in Revit as Discussed below.
a)Section Box-BX
- Go to Properties>Section Box.
- Check the Section Box Option>Apply.
- A Section Box will appear around the model.
- Again,go to Properties and Uncheck the Section Box option, Click Apply.
- Select an Element of the model,around which the Section Box is created.
- Enter BX.
- A Section Box Will be Generated around the Selected Element and Only that element will be in View.
- Adjust the Section Box to get the Required View.
b) Create Similar-CS
- Select the element that has to be Recreated.
- Enter CS.
- A Similar Element will be Generated.
- Place the Element at the desired location.
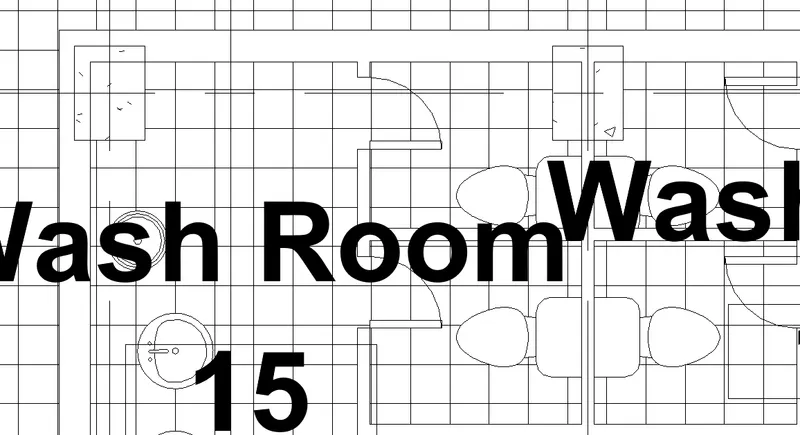
c) Thin Lines-TL
- Zoom in to View the wall lines.
- Enter TL.
- The thickness of the lines will Visibly reduce.
- We Can Toggle Between thin and Thick lines using the TL Command.
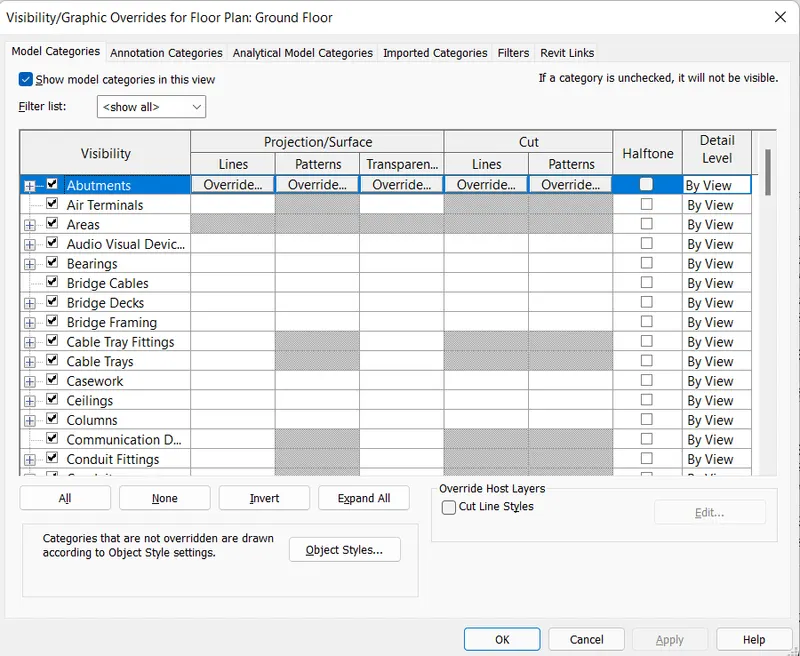
d) Visibility Graphics-VG
- Enter VG.
- Scroll down,Go to Floors>patterns>Override.
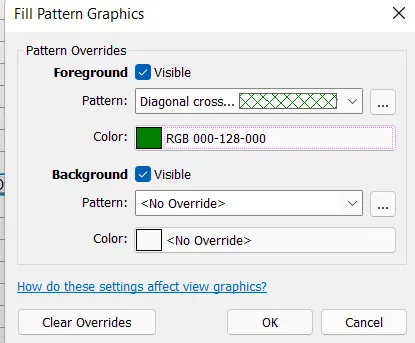
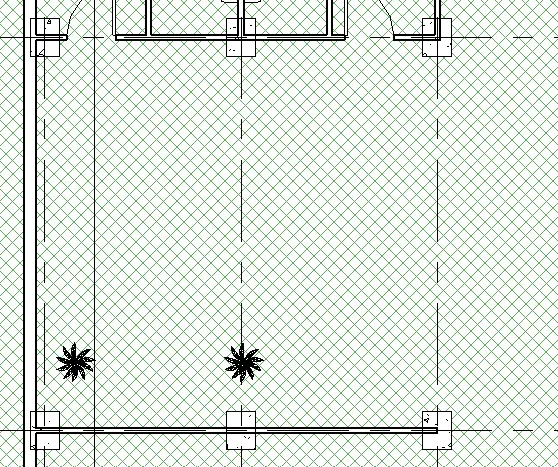
- In the Fill pattern Graphics dialog box,Select the pattern and Color as required>Ok>Apply.
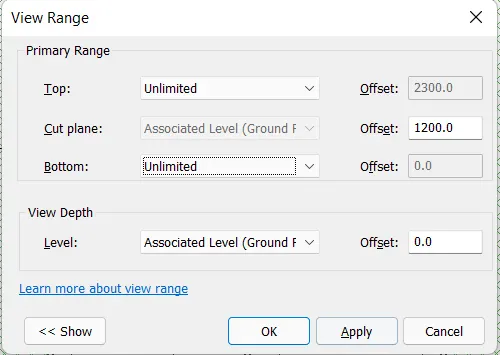
e) View Range-VR
- Enter VR.
- Change the Top and Bottom range to unlimited.
- Click Apply>OK.
- The View range will Visibly Increase.
f) Reselect- Ctrl +<
- Press the Control key and Select items(eg, Chair).
- In case we forget to keep pressing the Ctrl key and the previously Selected items get deselected.
- Press Ctrl +< (the Left arrow key) to reselect the deselected items.
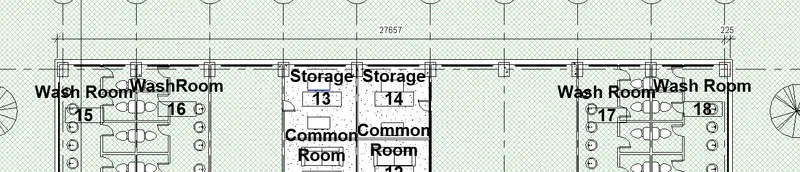
g) Dimensions/Annotations -DI
- Enter DI.
- Choose the Suitable type of the Dimension.
- Add Annotations to the Model Views.
h) Align-AL
- Draw a Small Floor outside the Main Entrance.
- Select the recently Created Floor.
- Enter AL.
- Select the edge of the Floor along which we want to align.
- Next Select the Edge of the Element that needs to be aligned.
i) Rotate-RO
- Select the object to be Moved.
- Enter Ro Command.
- Specify the rotation angle/direction.
- The Element will be Rotated.
j) Move-MV
- Select the item to be moved.
- Enter MV Command.
- Move the Object to the Desired Location.
- The Object is Moved.
k) Copy-CO
- Select the item to be Copied.
- Enter CO Command.
- Copy the Object to the Desired Location.
l) Mirror-MM or DM
- Select the Object to be mirrored.
- Enter MM Command.
- Select the axis of the mirror.
- The Object is Mirrored.
m) Array-AR
- Select the item to be Arrayed.
- Enter AR Command.
- A tab appears at the top of the workspace.
- Enter the number of objects/item required.
- Specify the Distace Between the Arrayed items.
- The Object has been Arrayed.
Result:
The Use of various Shortcut Keys in Revit has been illustrted.
-------------------------------------------------------------------------------------------------------------------------------------------
2) Using Revit and the project used from week 6 to 8 prepare a schedule for the following
a. Walls
b. Doors
c. Windows
d. Material – Concrete/Wood.
Aim: To prepare a Schedule for the elements listed in the question with reference to the project created.
Introduction: The procedure to prepare a Schedule for the various elements used in project is Explained in detail and the final result is given.
Procedure:
- Select and open the model of the office building created.
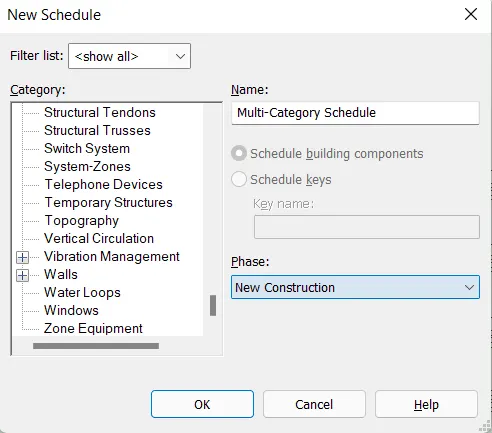
- Go to View>Schedules>Schedules/Quantites.
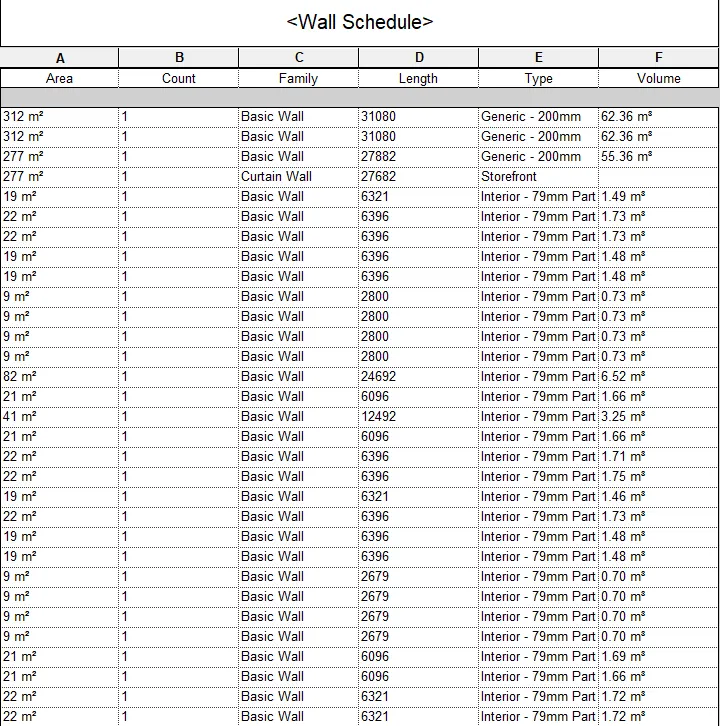
a) Wall Schedule
- In the New Schedule dialog box,Select walls>Ok.
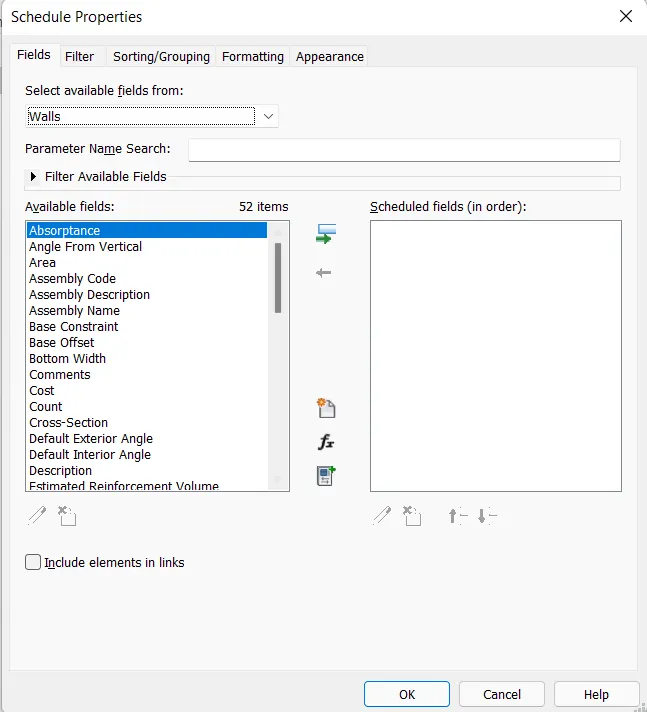
- Select and add parameters to be listed on the Schedule>Ok.
- The Wall Schedule will be Displayed.
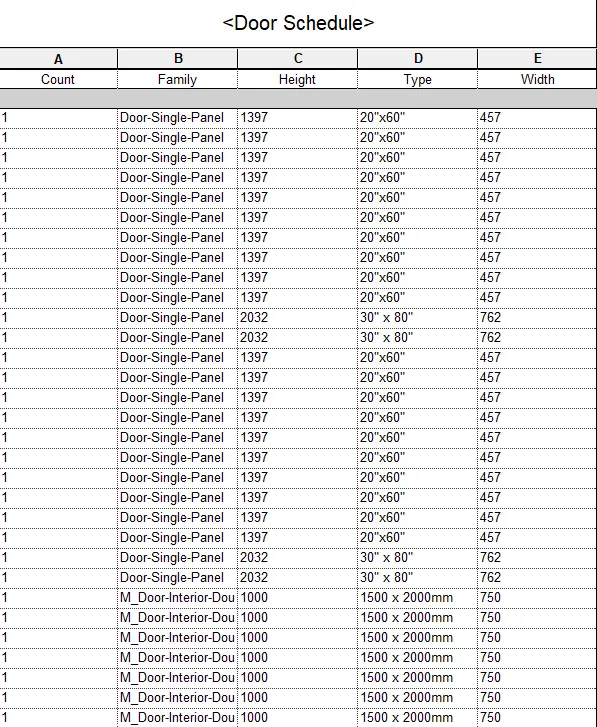
b) Door Schedule
- Go to View>Schedules>Schedules/Quantities.
- In the New Schedule dialog box,Select Doors and Click Ok.
- Select and add parameters to be listed on the Schedule>Ok.
- The Door Schedule will be displayed.
c) Window Schedule
- Go to View>Schedules>Schedules/Quantities.
- In the New Schedule dialog box,Select Window and Click Ok.
- Select and add parameters to be listed on the Schedule>Ok.
- The Door Schedule will be displayed.
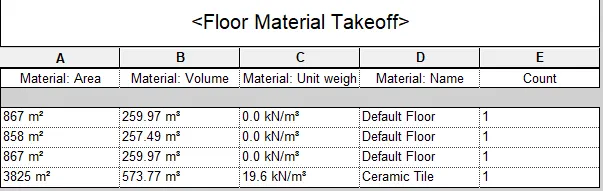
d) Material Schedule
- Go to View>Schedules>Material Takeoff.
- In the New Material take off dialog box,Select Floor>Ok.
- Select and add parameters to be listed on the Schedule>Ok.
- The Window Schedule Will be displayed.
Result:
It hs been Successfully illustrated how to prepare Schedules for walls, doors, windows and Floor material.
-------------------------------------------------------------------------------------------------------------------------------------------
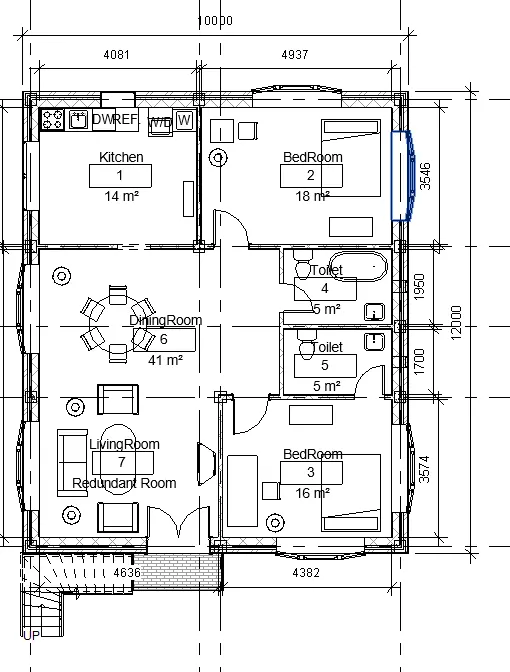
3) Using Revit Calculate area and volume of each room in the model with appropriate room tags applied to each room. Prepare a schedule report for area and volume of each room.
Aim: To Calculate area and volume of each room in the model and prepare a Schedule report for area and volume of each room.
Introduction: The procedure to Calculate area and Volume of each room and to prepare a Schedule report for the Calculated area and volume is Explained in detail and the final result is given.
Procedure:
- Select and open the model of residential building created previously.
- Go to architecture>Room.
- Add room tag to the different rooms.
- Rename the different rooms accordingly.
- Go to View>Schedules/Quantites.
- In the New Schedule dialog box, Select Room and Click Ok.
- Select and add parameters to be listed on the Schedule>OK.
- The Room Schedule will be Displayed.
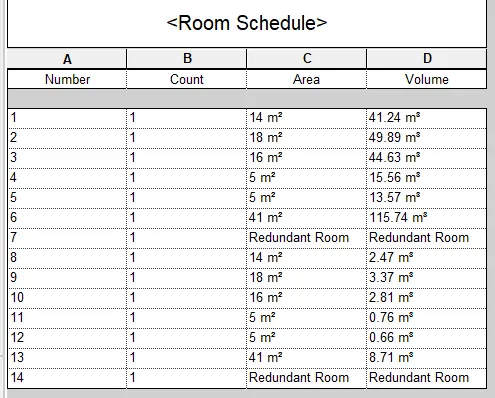
Result:
It hs been Successfully illustrated how to apply appropriate room tags to each room and how to present room Schedule,reporting the area and volume of each room.
-------------------------------------------------------------------------------------------------------------------------------------------
4) Using the same schedule using the unit cost rate for materials available in the internet, prepare total cost of materials used in the project
a. Total Cost of Materials
b. Individual Material Take off.
Aim: To prepare total cost of materials and carry out individual material takeoff.
Introduction: The procedure to prepare the total cost of material and individual material takeoff is Explained in detail and the final result is given.
Procedure:
- Select a wall element.
- Go to Properties>Edit type.
- Enter appropriate cost for the element>Apply>Ok.
- Similarly,add cost parameter for all other elements such as doors,windows etc.
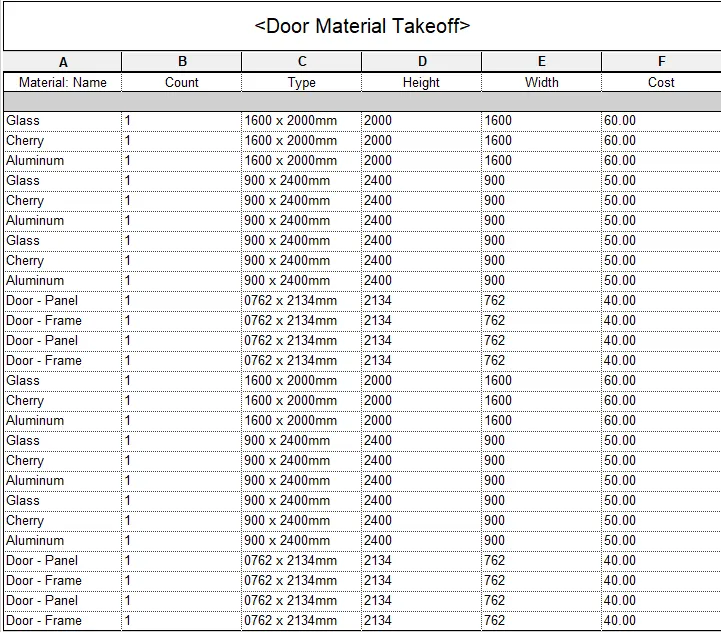
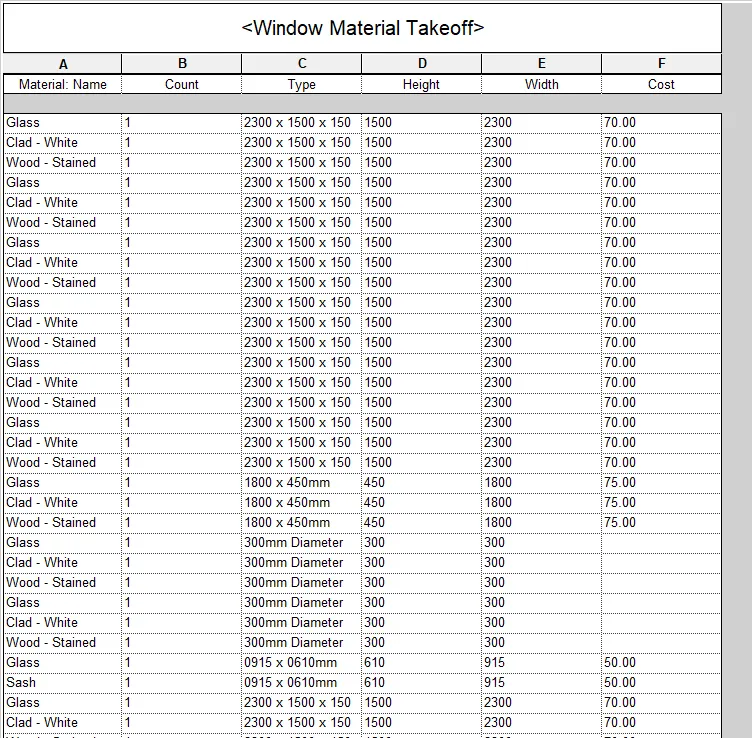
- Go to view>Schedules>Material take off.
- In the new material take off dialog box, Select wall and click Ok.
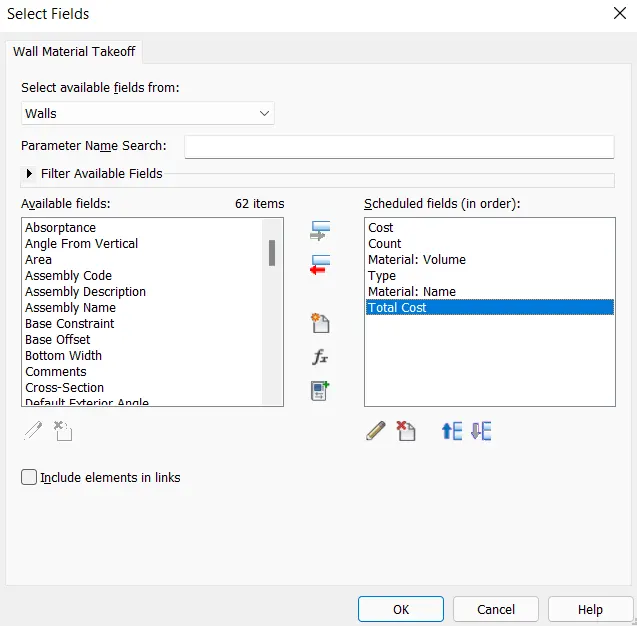
- Select and add parameters to be listed on the schedule as required>Ok.
- Select and insert a new column to the schedule.
- Select the newly created column.
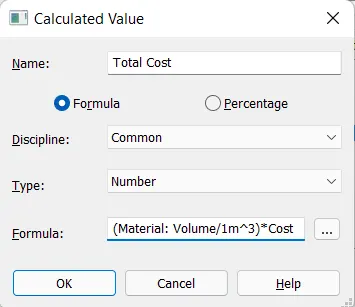
- Click on the Calculated tool.
- Enter the name as total cost.
- Enter the Formula>Ok.
- The Wall material takeoff is ready.
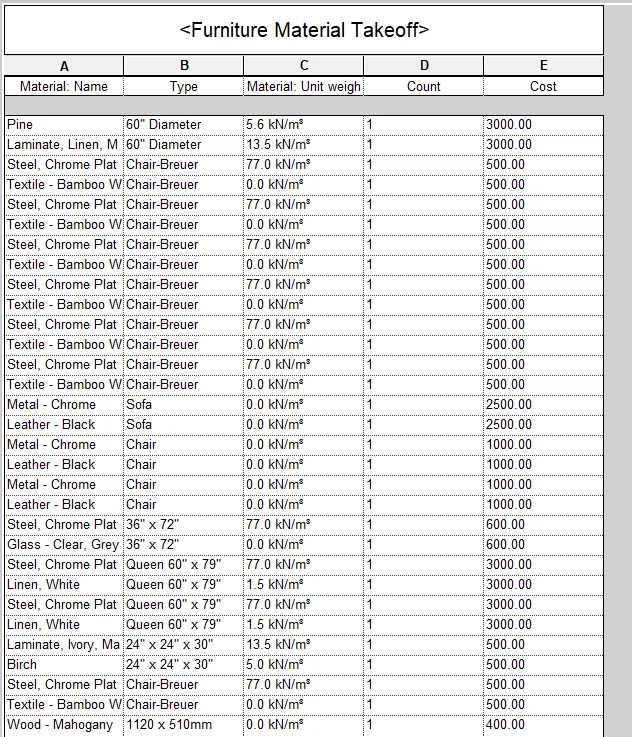
- Similarly material takeoff for other model elements including doors and furnitures can be prepared.
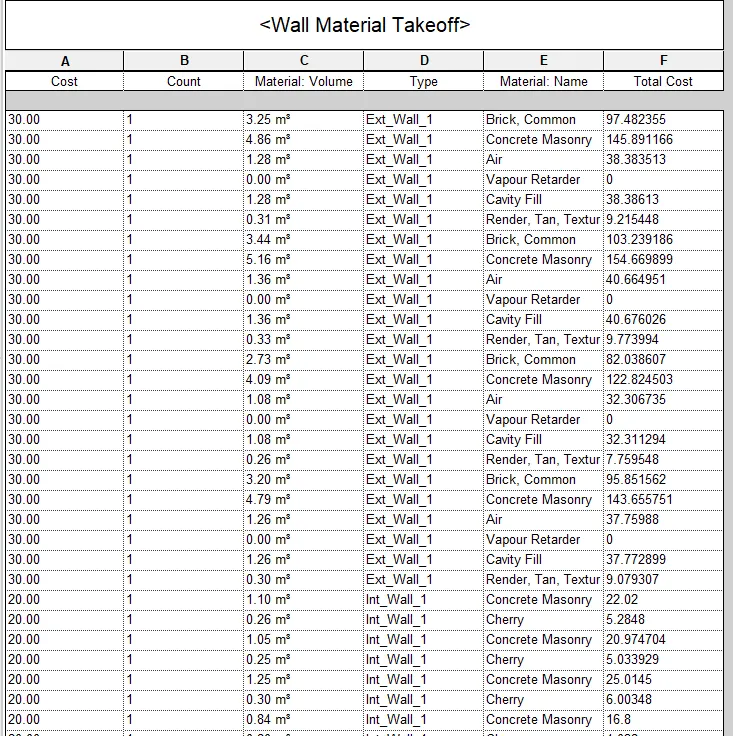
Door Material Takeoff
Window Material Takeoff
Furniture Material Takeoff
Result:
It hs been Successfully illustrated how to perform material takeoff for various elements used in the project model.It has also been explained how to calculate and report total cost and individual cost of materials.
-------------------------------------------------------------------------------------------------------------------------------------------
5) Using the concept of Visual Programming discussed in class, list a flowchart for the following scenario
a. How to decide framings for a structure using Dynamo ?
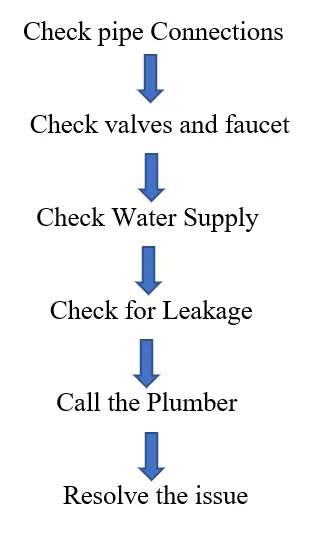
b. If there is no water coming from the pipes
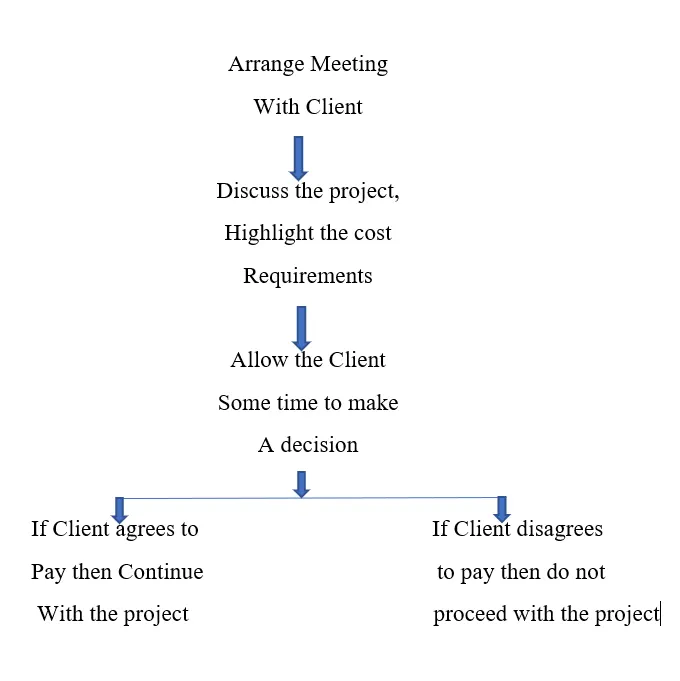
c. If request for money from client has been declined for the project.
Aim: To draw flow charts for the given scenerios.
Introduction: The Flow diagrams for the different scenerios given in questions are drawn, highlighting the major steps involved in solving each of the given problem.
Solutions:
a. How to decide framings for a structure using dynamo?
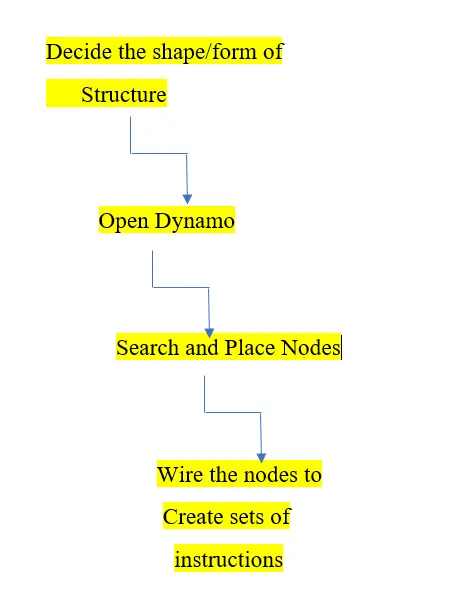
Finding and Placing Nodes
The Dynamo Library is located on left side of the Screen.
[1] Search:use the library search to find nodes.
[2] Browse: discover nodes in the library categories.
[3] Add Nodes: after you find a node in the library, just hit enter or click on it to place it on the canvas.
Writing Nodes to Build a Set of instructions
[1] Click on the output port of one node, then [2] drag the wire to the input port of another, and click again to connect.
[3] Click on empty spot in the canvas to delete a dashed, unconnected wire.
[4] Deleting Wires: Click on the port at the right end of the wire.Then,drag it away and click on an empty spot in canvas.
b. If there is no water coming from the pipes
c. If request for money from client has been declined for the project
-------------------------------------------------------------------------------------------------------------------------------------------
6) List the parameters associated with each model element
a. Wall
b. Floor
c. Door
d. Window
e. Table
f. Building.
Answer:
Parameters associated with each model element are as follows:
1) Wall
- Wall type
- Wall Description
- Wall material
- Wall position
- Wall Length
- Wall Width
- Wall Height
- Wall Area
- Wall Volume
- Wall Cost
2) Floor
- Floor Type
- Floor Material
- Floor Description
- Floor Length
- Floor Width
- Floor thickness
- Floor Area
- Floor Volume
- Floor Cost
3) Door
- Door Type
- Door Material
- Door Description
- Door Length
- Door Width
- Door Height
- Door Area
- Door Volume
- Door Cost
4) Window
- Window type Wiindow material
- Window Description
- Window Length
- Window Width
- Window Height
- Window Area
- Window Volume
- Window Cost
5) Table
- Table type
- Table material
- Table Description
- Table Length
- Table Width
- Table Height
- Table Area
- Table Volume
- Table Cost
6) Building
- Building Type
- Building Location
- Building perimeter
- Building height
- Building Area
- Possible Loads on a Building
- Building materials