Preparing Schedule & Cost Estimation for a building using REVIT
Name: Allan Bryan Jayson Cruz
Course: Master’s Certification Program in High-Rise Building Design & Analysis
Date: February 17, 2022
Challenge 9_Preparing Schedule & Cost Estimation for a building using REVIT
********************************************************
1. Aim & Introduction
***************
Aim
This challenge aims to familiarize the student with the different shortcuts offered by revit to increase their efficiency with using the software. The challenge also aims to give the student an experience in estimation and scheduling of materials using the innate application in the Revit software.
It also aims to introduce the Dynamo application which is installed as part of revit to give the student an idea of how to manipulate workflow information and to provide background with the different aspects that the Revit software can provide.
Introduction
Revit is a building information modelling software that allows the user to create and design a 3D model building structure. It is an architectural, structural, and mechanical software where the user can provide 3D illustration of the building as well as its design.
********************************************************
2. Detail Procedure
***************
1) Use the shortcut keys in Revit discussed in class to complete the following tasks and list them below
******
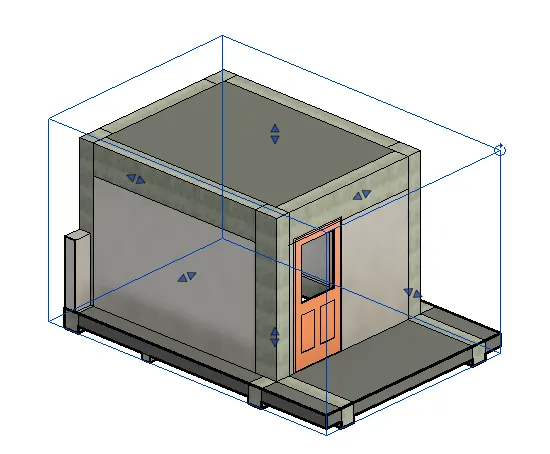
a. Using 3D model create a section box
******PROCEDURE:
- Shortcut for this action is "BX".
- First select the desired element for the command.
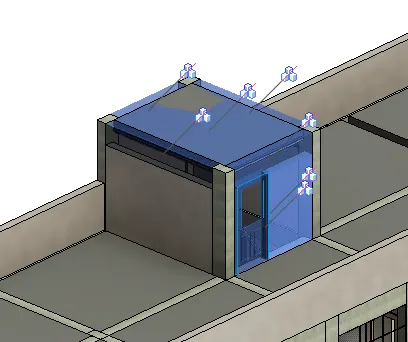
- Then press the appropriate shortcut.
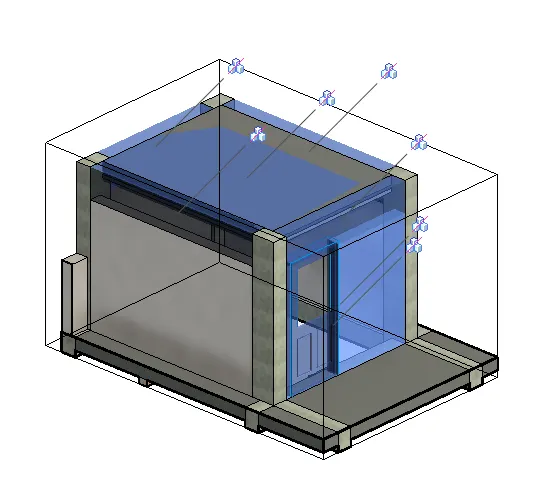
- A box view of the selected object will be created.
- You can adjust the box by dragging the arrows shown at its sides.
******
b. To create similar doors and windows in a floor plan layout
******PROCEDURE:
- Shortcut for this action is "CS".
- First select the desired element for the command.
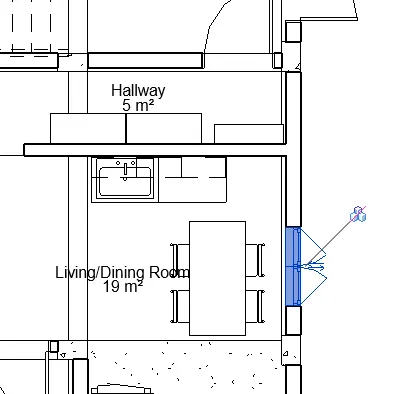
- Then press the appropriate shortcut.
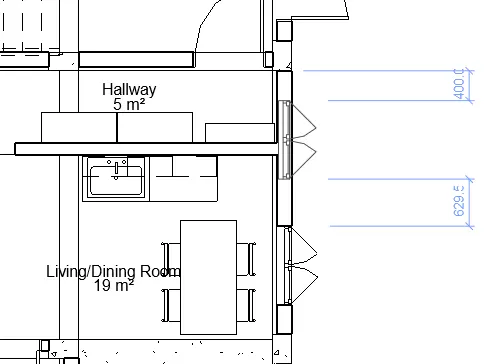
- A similar object will be created which can be placed at a desired location. This can be used for faster modeling of similar elements.
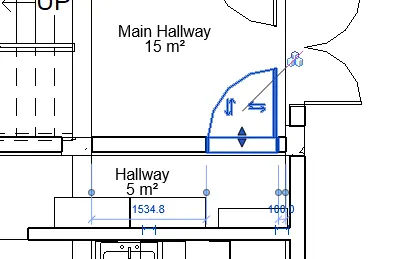
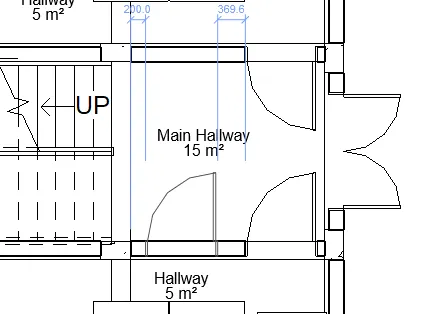
- As shown, any selected singular element can be created using the command.
******
c. To reduce the thickness of lines visible in plan views
******PROCEDURE:
- Shortcut for this action is "TL".
- Click on the software interface or the workspace itself.
- Notice that the lines are thick.
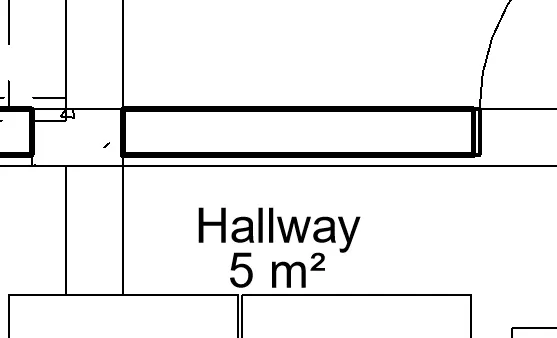
- Click the shortcut key and the lines will be thinner.
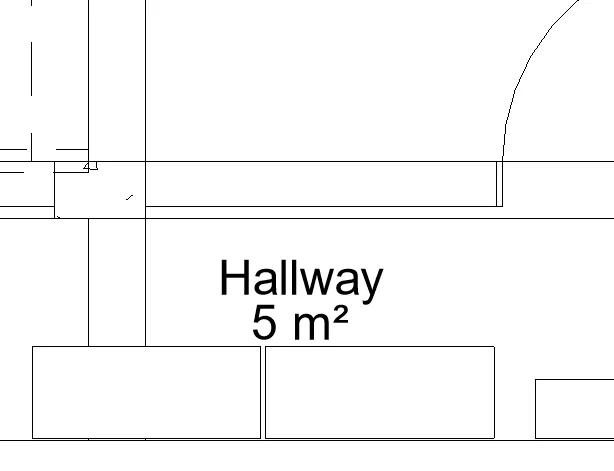
- Do the same to bring the lines back to the original settings.
******
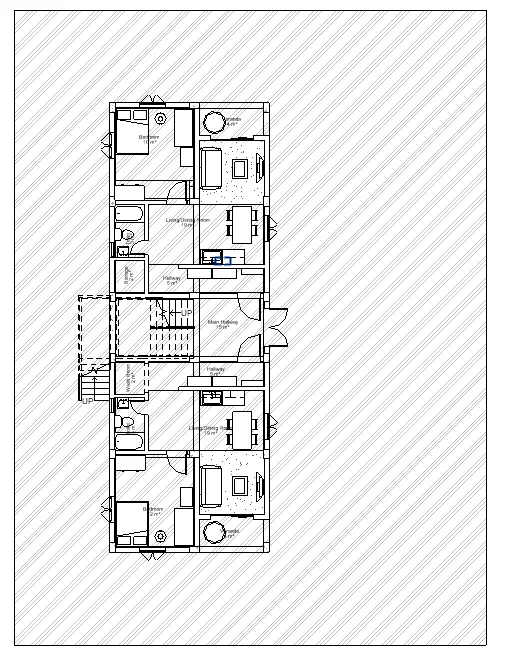
d. To apply override settings to a floor in the model section view
******PROCEDURE:
- Shortcut for this action is "VG".
- To override settings for the floor, use VG and open the Visibility/Graphic Overrides.
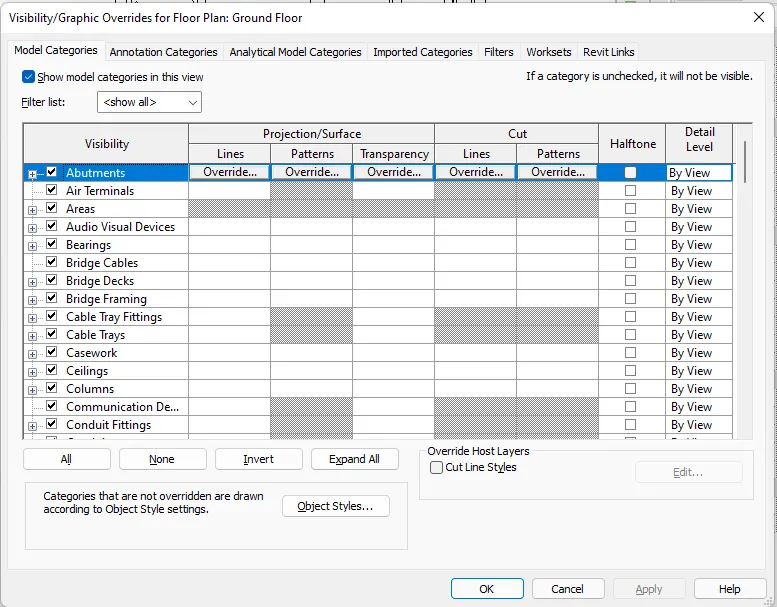
- Find the floor under the Visibility Tab.
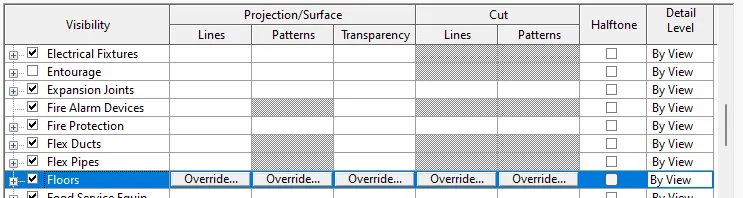
- Select the parameter you wish to override and change the floor settings as desired.
- An example is when the Patterns is overrided.
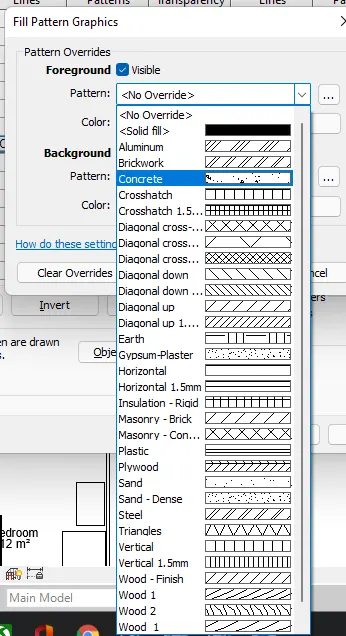
- When the selected pattern is chosen, it will be reflected for all the floor elements.
******
e. To increase the range of visibility in a plan view
******PROCEDURE:
- Shortcut for this action is "VR".
- First click on the plan workspace.
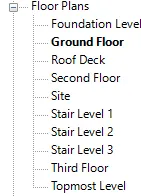
- Then press the appropriate shortcut.
- The View Range Window will appear.
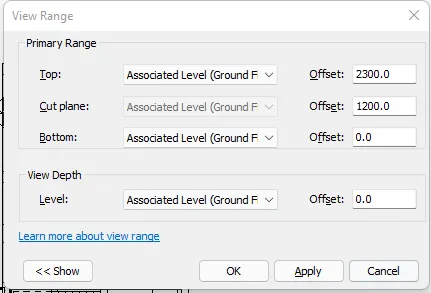
- Use this to change the range allocation of your plan view.
******
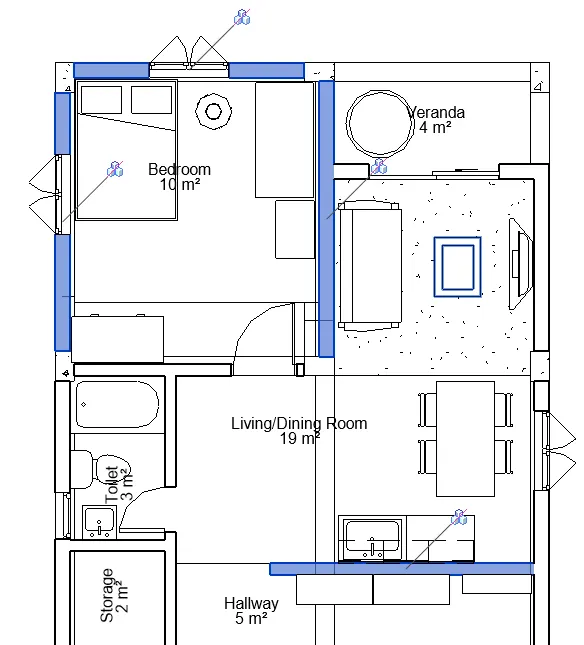
f. To select the previously selected items
******PROCEDURE:
- Shortcut for this action is "Ctrl+Left Arrow Key".
- It is used to reselect selected members when a mistake during this action is made.
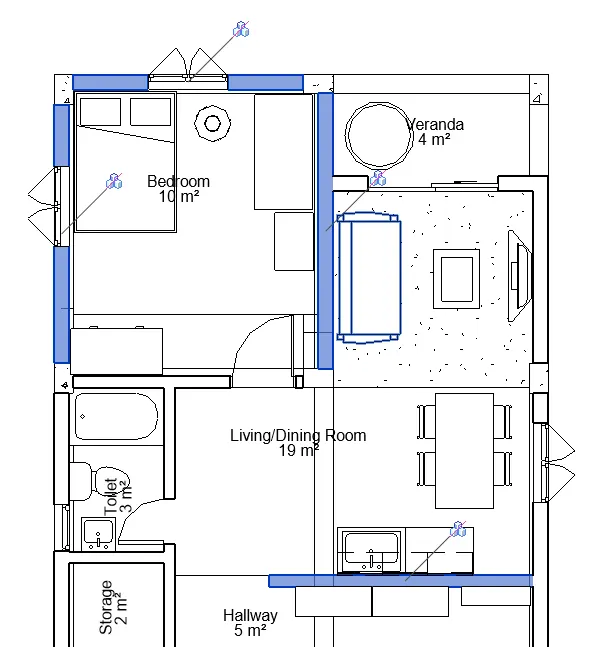
- Example is when the selected members are selected and you select another element without pressing the Ctrl key.
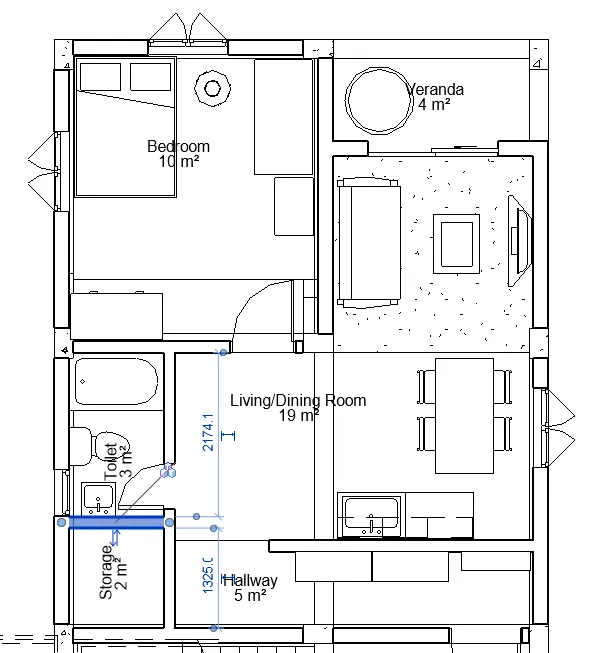
- Press the shortcut key to reselect the previous members removing the current selected member.
******
g. To add annotations to the model views
******PROCEDURE:
- Shortcut for this action is "DI".
- Use this to add dimension to your model.
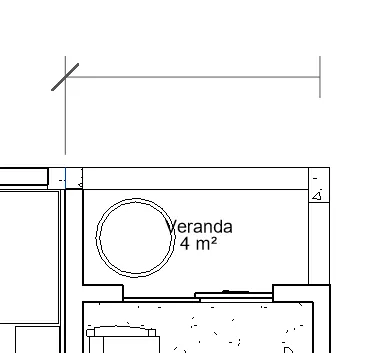
- Select desired edges or locations.
******
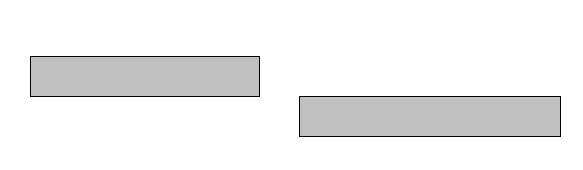
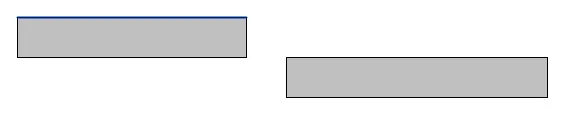
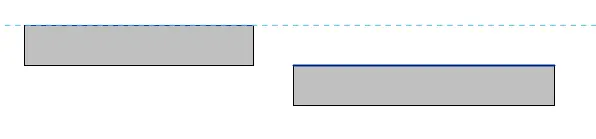
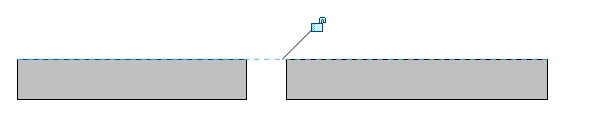
h. To bring the model elements in line
******PROCEDURE:
- Shortcut for this action is "AL".
- First select the desired location of alignment.

- Then press element you want to align.

- Example.
******
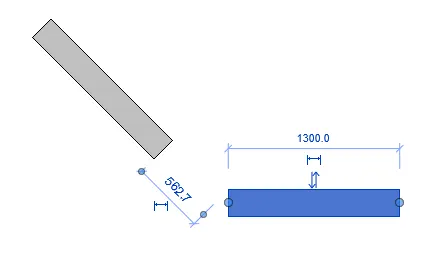
i. To rotate the model elements
******PROCEDURE:
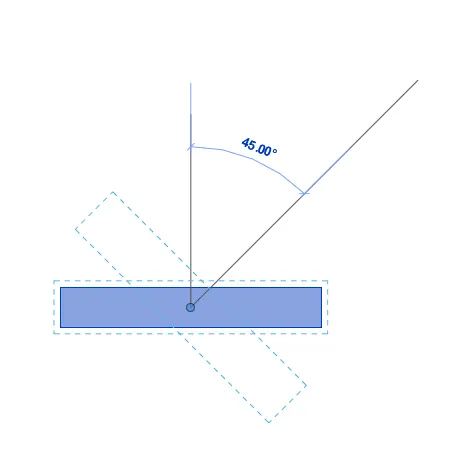
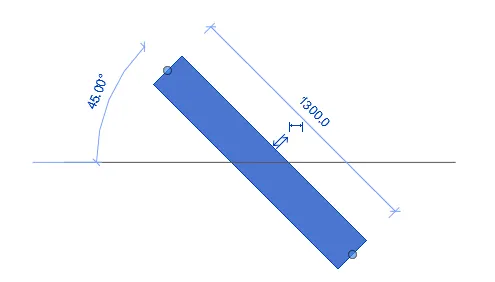
- Shortcut for this action is "RO".
- First select the desired element for the command.
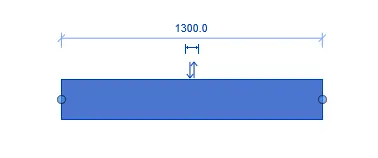
- Then press the appropriate shortcut.
- The rotation baseline will appear.
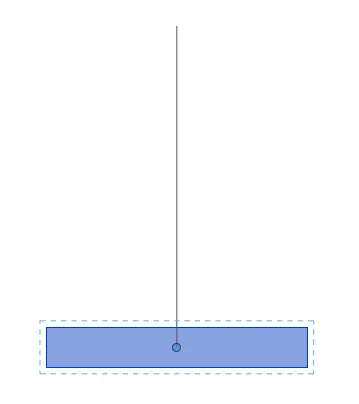
- Click on the desired base point and select the desired angle of rotation.
******
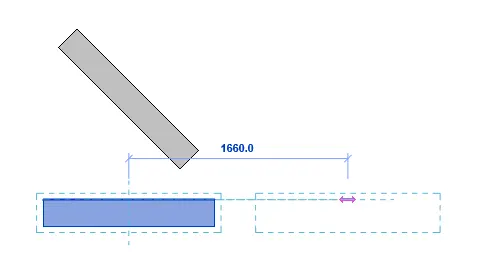
j. To move an object to another location
******PROCEDURE:
- Shortcut for this action is "MV".
- First select the desired element for the command.
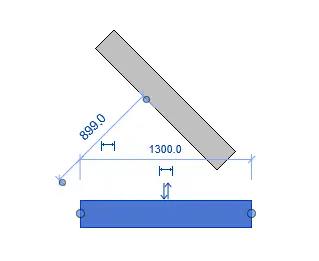
- Then press the appropriate shortcut.
- Select base point and move to desired location.
******
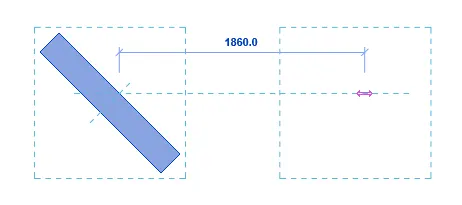
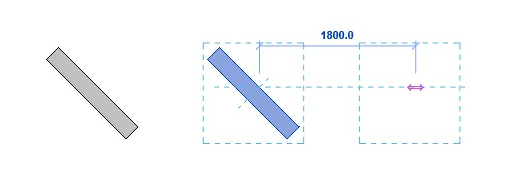
k. To copy a model element
******PROCEDURE:
- Shortcut for this action is "CO".
- First select the desired element for the command.
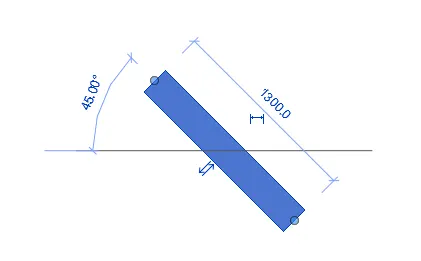
- Then press the appropriate shortcut.
- Select base point and copy to desired location.
******
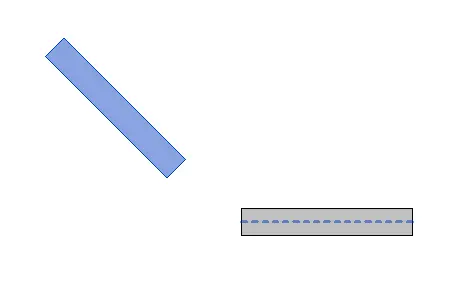
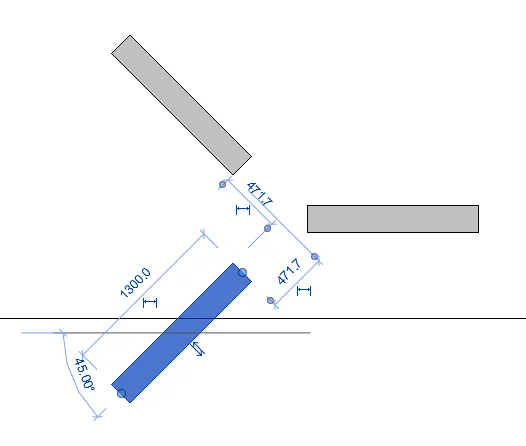
l. To mirror an element about an axis
******PROCEDURE:
- Shortcut for this action is "MM".
- First select the desired element for the command.
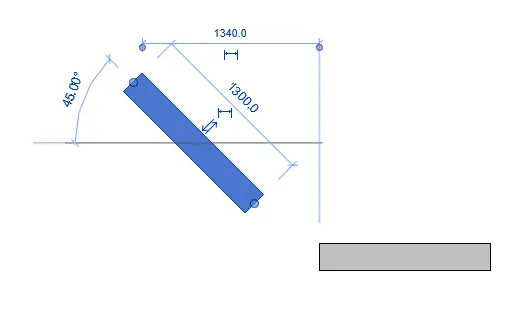
- Then press the appropriate shortcut.
- Select reference axis and the object will be mirrored.
******
m. To create an array of model elements
******PROCEDURE:
- Shortcut for this action is "AR".
- First select the desired element for the command.
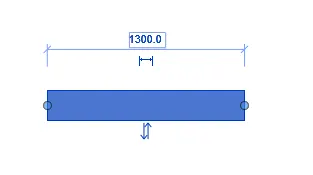
- Then press the appropriate shortcut.
- Select base point then pick the direction and distance.
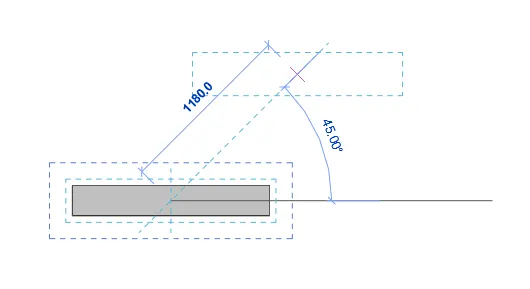
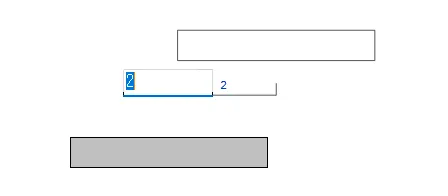
- Then decide the number of arrays. Say 5.
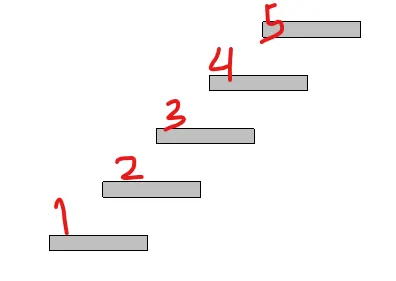
- 5 copies of the selected object will be made.
***************
2) Using Revit and the project used from week 6 to 8 prepare a schedule for the following
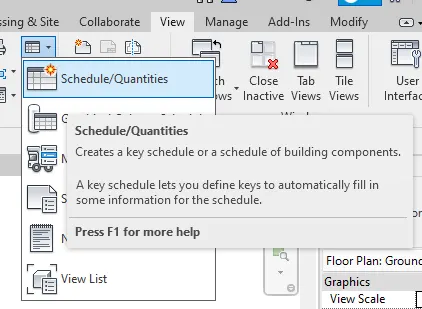
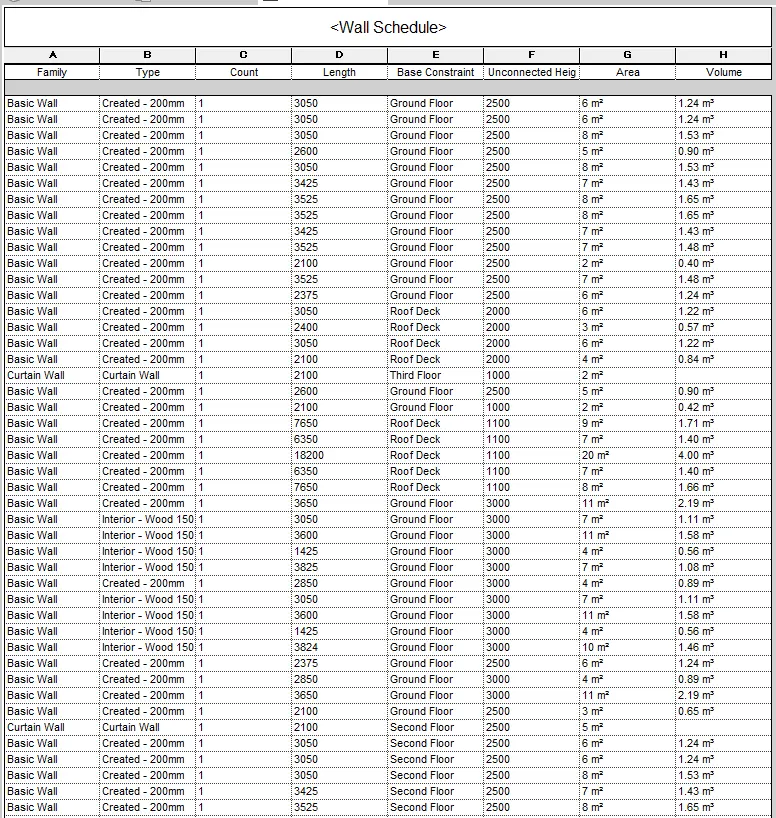
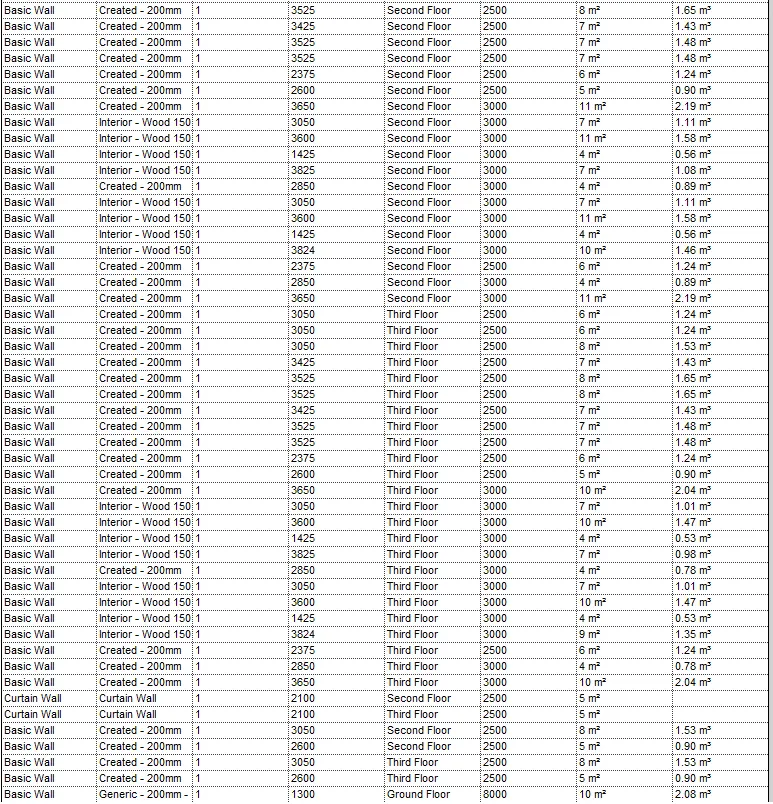
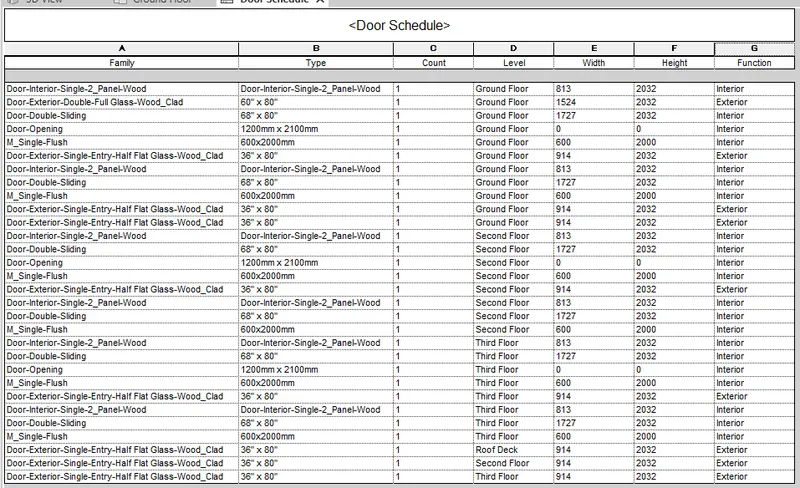
General: To create a schedule, use the Schedule/Quantities tool under the View tab.
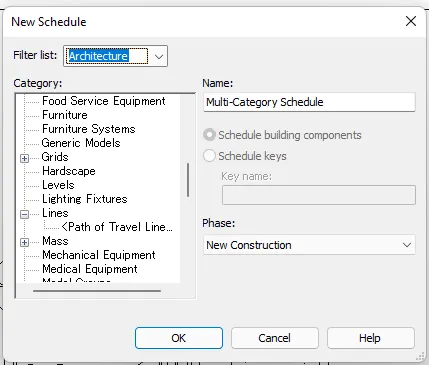
- Select the element on the New Schedule Window.
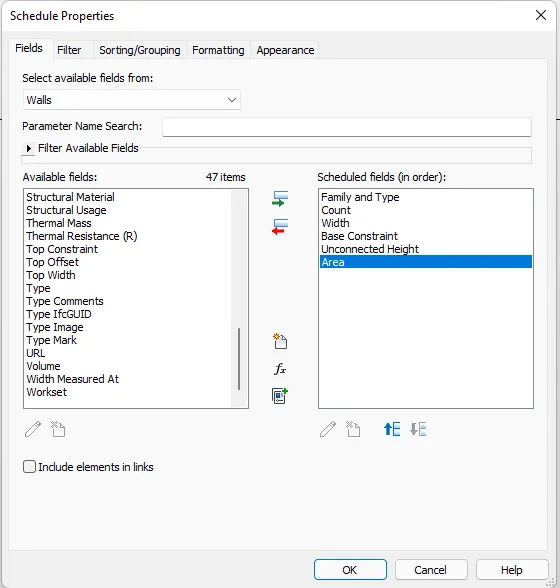
- Then select the parameters that will be included in the schedule under the Schedule Properties tab.
- Click Ok then the schedule will be created.
- The schedule created can be seen under the Project Browser tab.

******
a. Walls
******PROCEDURE:
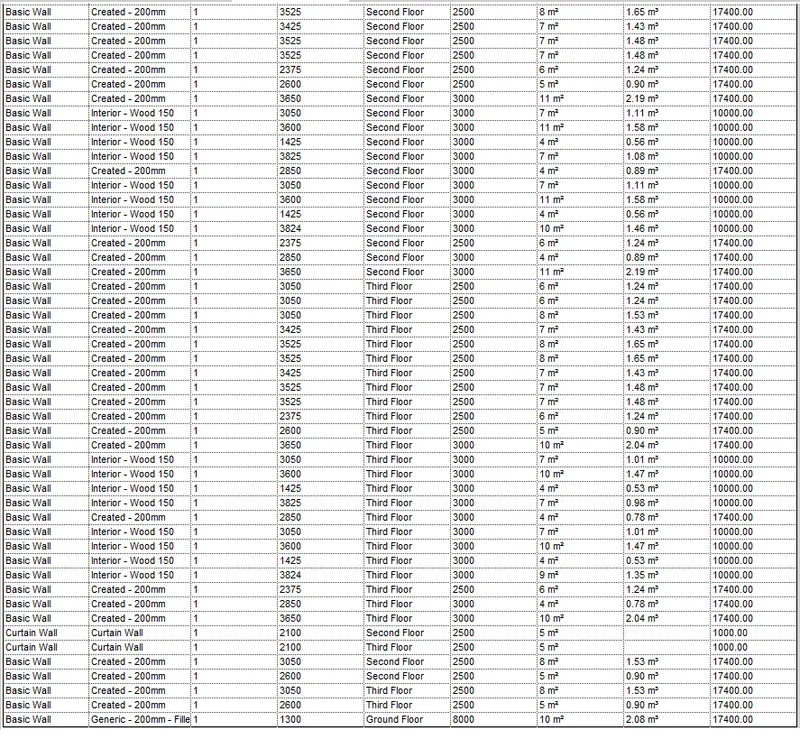
- The following Parameters are used for the this schedlue.
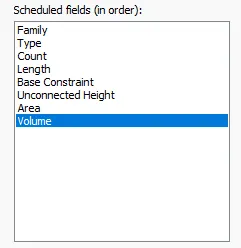
--> WALL SCHEDULE
******
b. Doors
******PROCEDURE:
- The following Parameters are used for the this schedlue.
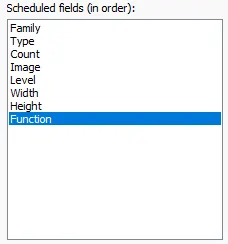
--> DOOR SCHEDULE
******
c. Windows
******PROCEDURE:
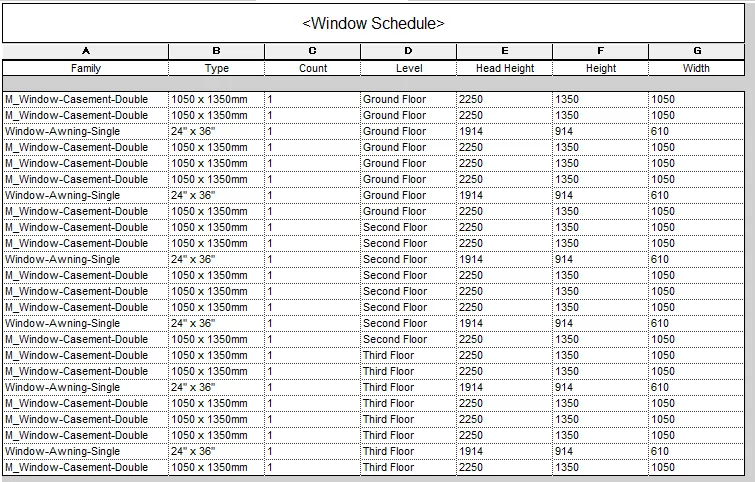
- The following Parameters are used for the this schedlue.
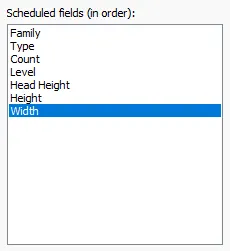
--> WINDOW SCHEDULE
******
d. Material – Concrete/Wood
******PROCEDURE:
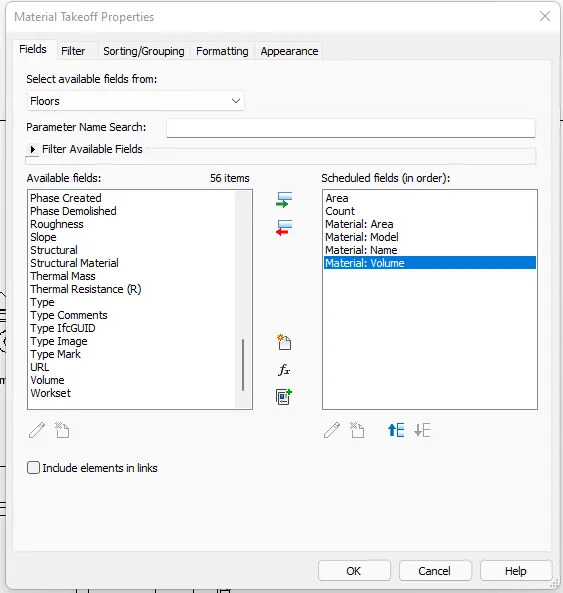
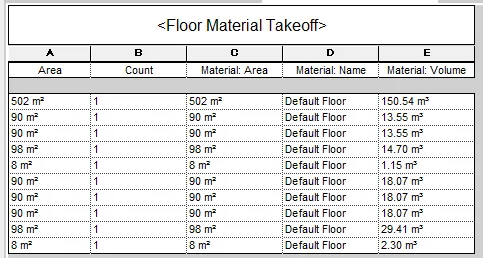
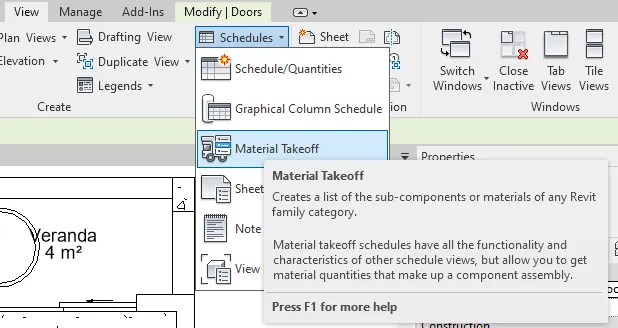
- For this one, the Material take off tool is chosen.
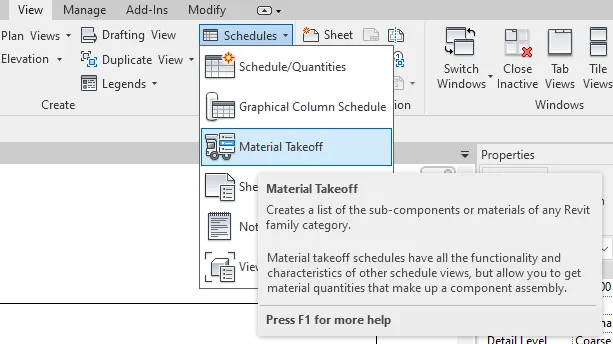
- Then select the desired element.
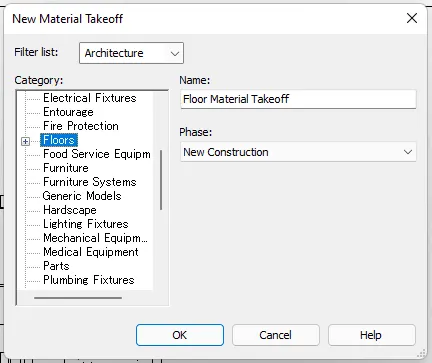
- Now Select the properties required under the Material Takeoff Properties.
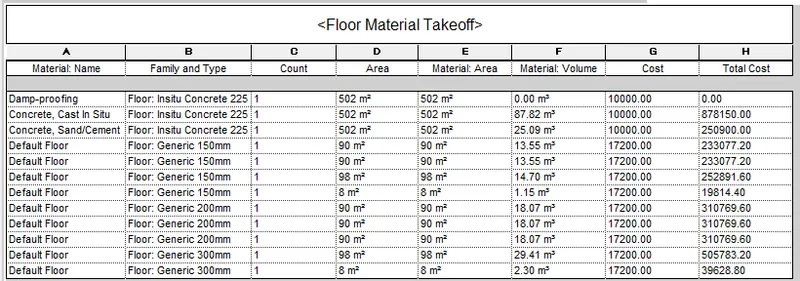
--> FLOOR MATERIAL SCHEDULE
***************
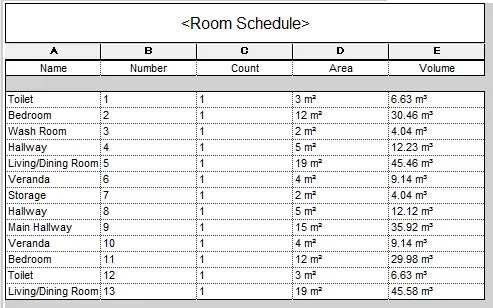
3) Using Revit Calculate area and volume of each room in the model with appropriate room tags applied to each room. Prepare a schedule report for area and volume of each room.
******PROCEDURE:
-
To create a schedule, use the Schedule/Quantities tool under the View tab.
- Select Room as the element for a New Schedule.
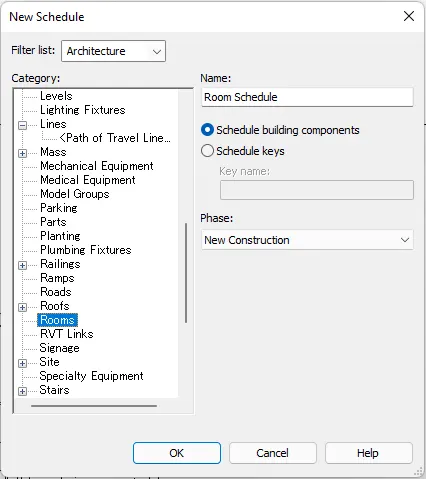
- Provide the required paramters for the schedule.
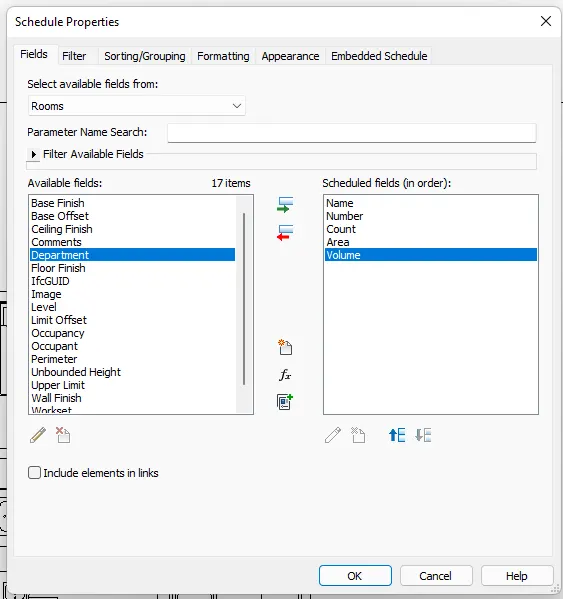
- Click OK to create the schedule.
***************
4) Using the same schedule using the unit cost rate for materials available in the internet, prepare total cost of materials used in the project
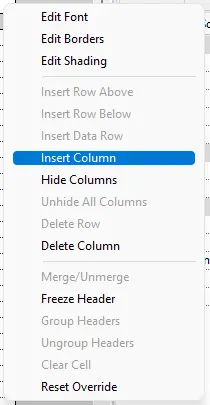
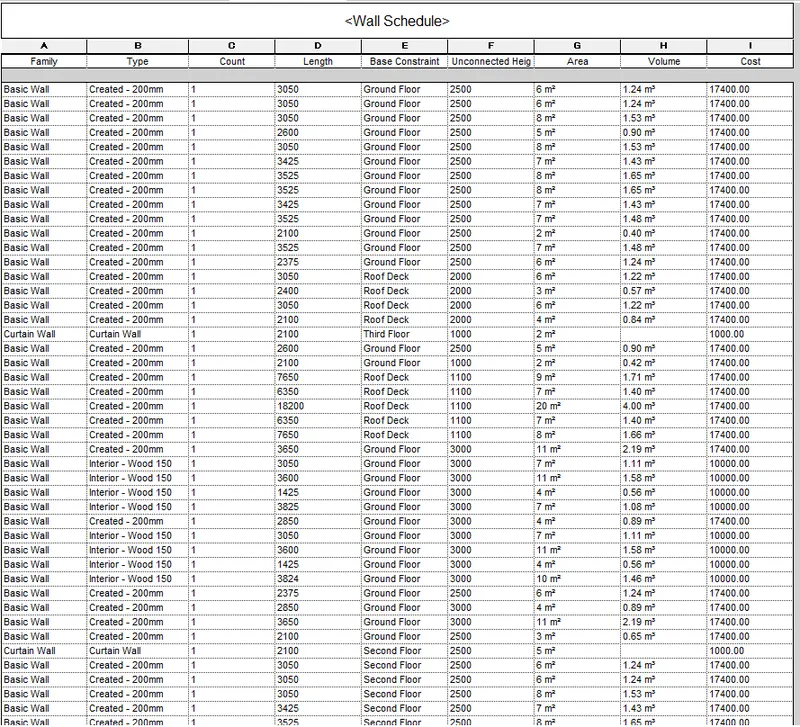
- General: Columns can be inserted on the created Schedules.
- Use the steps above to create Material Takeoffs.
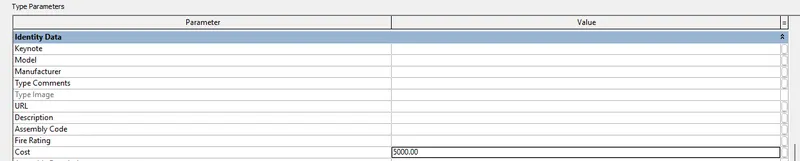
- To add cost to the selected element, go to Edit type and add in the cost of the material depending on the currency you are using.
- Cost can also be added to the schedule by manipulating the table.
- To create formulas, in the paramater window, choose calculated parameter designated by the Fx symbol.
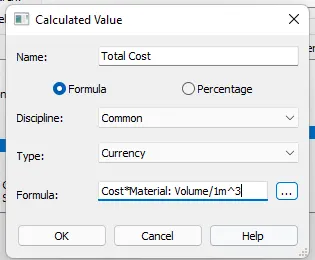
- Create the desired formula.
******
a. Total Cost of Materials
b. Individual Material Take off
******
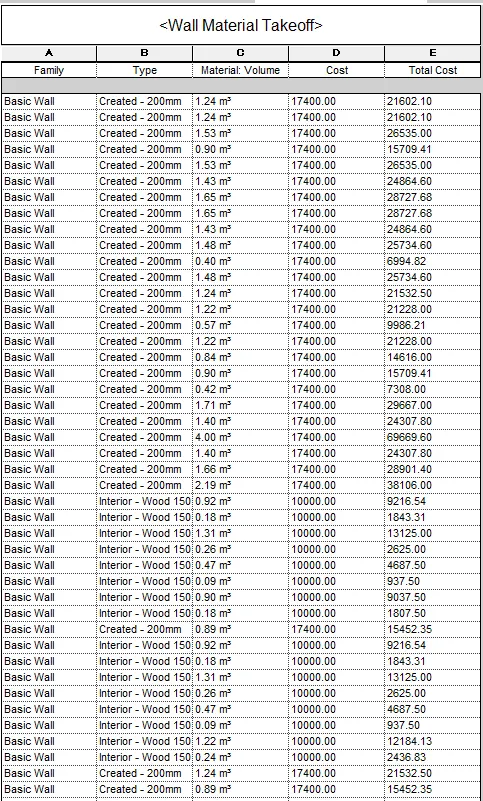
--> WALL
- Add cost of materials to the schedule.
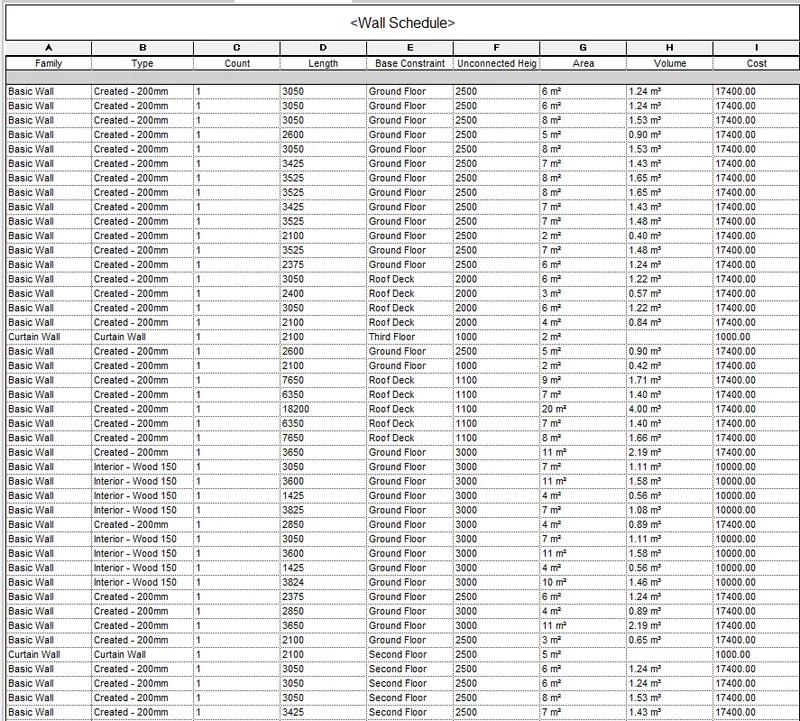
- Create material takeoff list and add total cost of materials using a created formula.
--> DOORS
- Add cost of materials to the schedule.
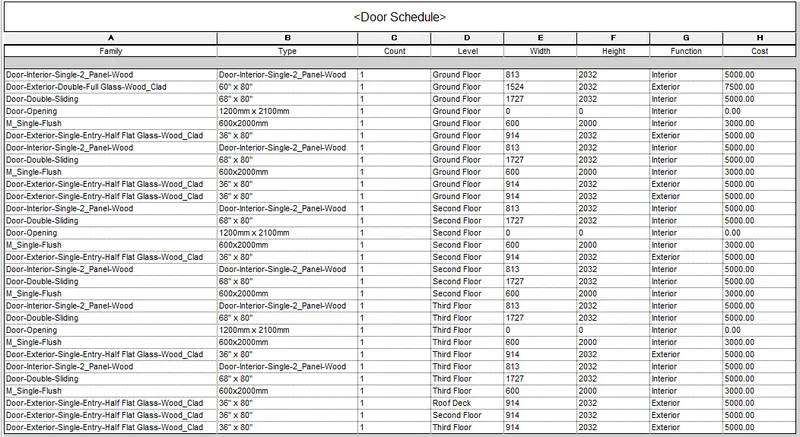
- Since doors are built in per piece, material take off will not be needed. Cost per piece will be provided in the schedule.
--> WINDOWS
- Add cost of materials to the schedule.
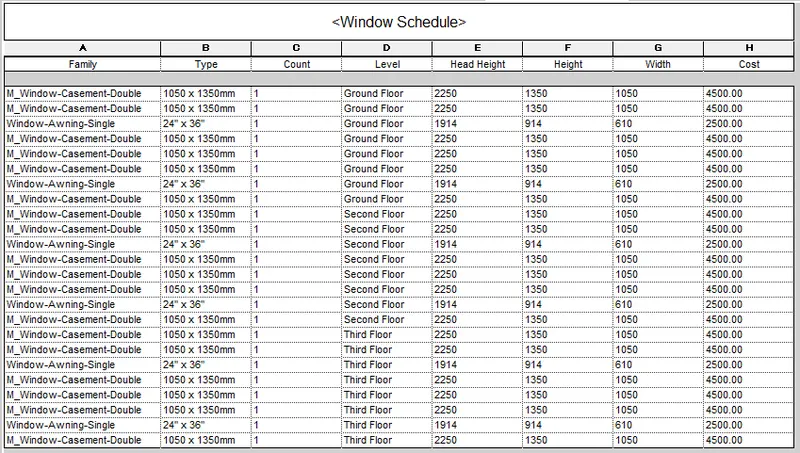
- Since doors are built in per piece, material take off will not be needed. Cost per piece will be provided in the schedule.
--> FLOOR
- Add cost of materials to the schedule.
- Create material takeoff list and add total cost of materials using a created formula.
***************
5) Using the concept of Visual Programming discussed in class, list a flowchart for the following scenario
******
a. How to decide framings for a structure using Dynamo ?
******PROCEDURE:
To understand how to decide framing using Dynamo, the following flowchart can be used.
| Purpose |
| ==> |
| Project Boundaries |
| ==> |
| Initial Framing |
| ==> |
| Space Requirements |
| ==> |
| Preparation of Formworks |
| ==> |
| Assembling of Formworks |
| ==> |
| Placement of Reinforcements |
| ==> |
| Concrete Pouring |
| ==> |
| Compaction of Concrete |
| ==> |
| Curing of Concrete |
| ==> |
| Completion |
******
b. If there is no water coming from the pipes
******PROCEDURE:
To determine solutions for pipe problems, the following flowchart can be used.
| Identify Problem | ||
| ==> | ||
| Check Nearby Piping Connection | ==> If NOT ok; | Fix Connection |
| ==> If ok; | ||
| Check Supply of Water | ==> If NOT ok; | Fix Supply |
| ==> If ok; | ||
| Check for Leaks | ==> If NOT ok; | Find Source and Fix |
| ==> If ok; | ||
| Discuss with Partners and Check Again until Problem is Fixed |
******
c. If request for money from client has been declined for the project
******PROCEDURE:
| Create Report / Advertising Strategy | ||
| ==> | ||
| Present Project Idea to Client | ||
| ==> | ||
| Set Time allocation for Decision Making | ==> If NOT ok; | Revise Idea/Strategy and present the revised idea to the client. |
| ==> If ok; | ==> If NOT ok; | Stop and find other opportunities. |
| Proceed with Project |
***************
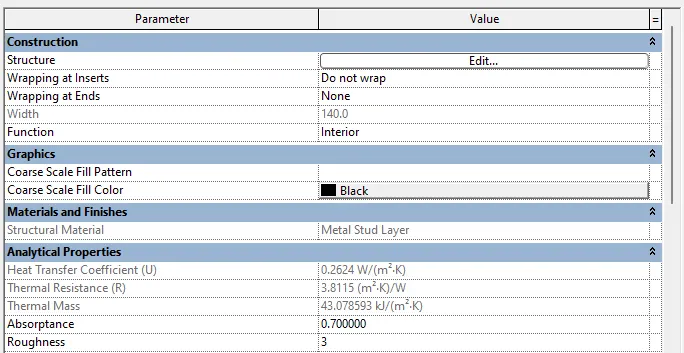
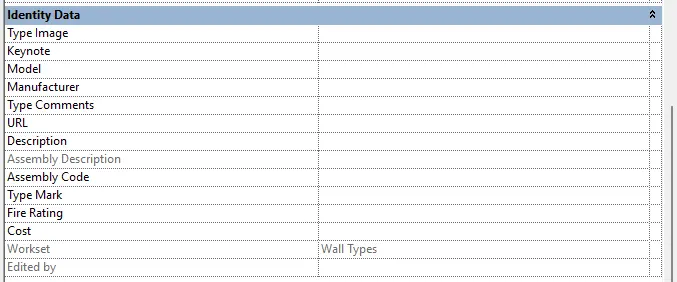
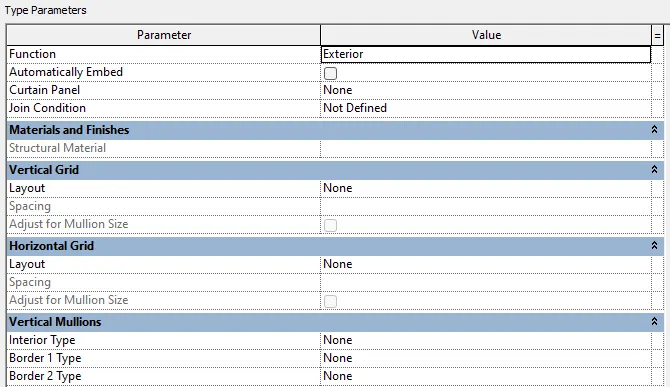
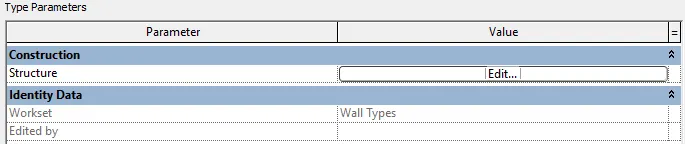
6) List the parameters associated with each model element
These parameters are seen when the Edit Type button is clicked when an element is selected.
Sometimes, different Parameters will be listed per Family of a single element.
******
a. Wall
The Parameters associeted with this element are:
--> System Family: Basic Wall
--> System Family: Curtain Wall
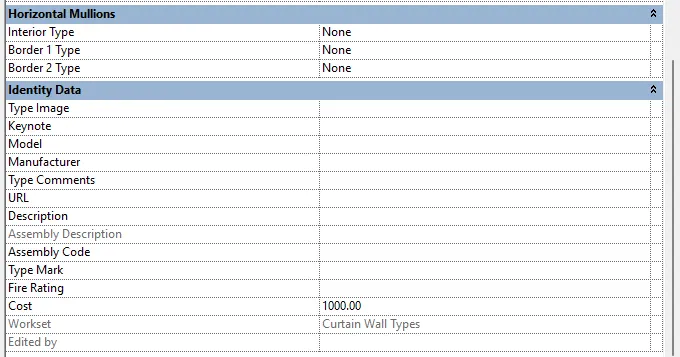
--> System Family: Stacked Wall
******
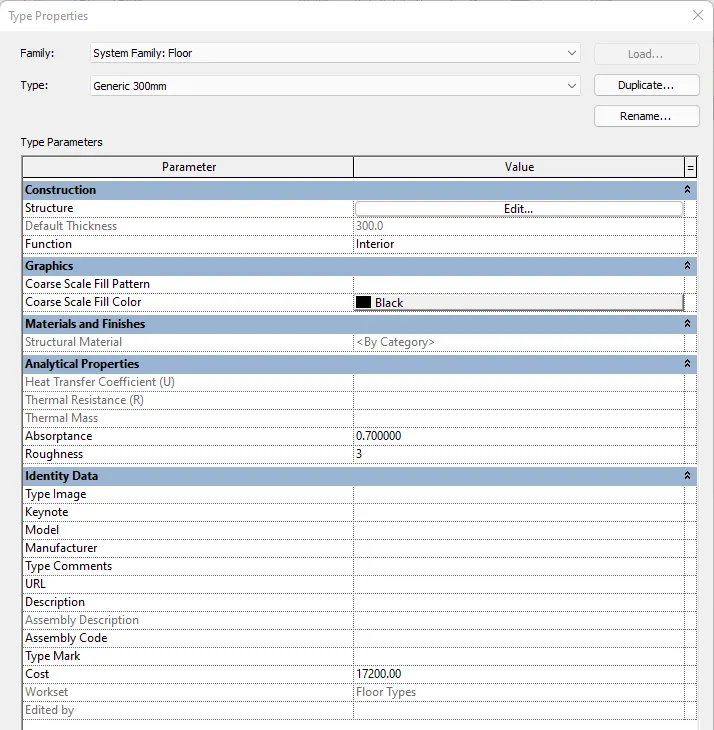
b. Floor
The Parameters associeted with this element are:
- Construction
- Graphics
- Materials and Finishes
- Analytical Properties
- Identity Data
******
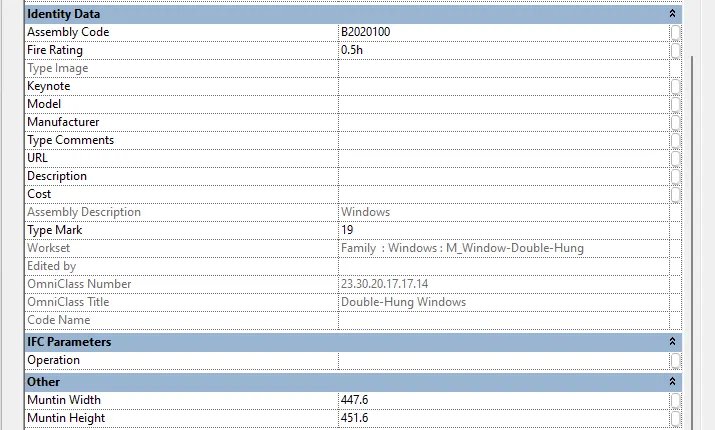
c. Door
The Parameters associeted with this element are:
- Construction
- Graphics
- Materials and Finishes
- Dimensions
- Analytical Properties
- Identity Data
- IFC Parameters
- Other
******
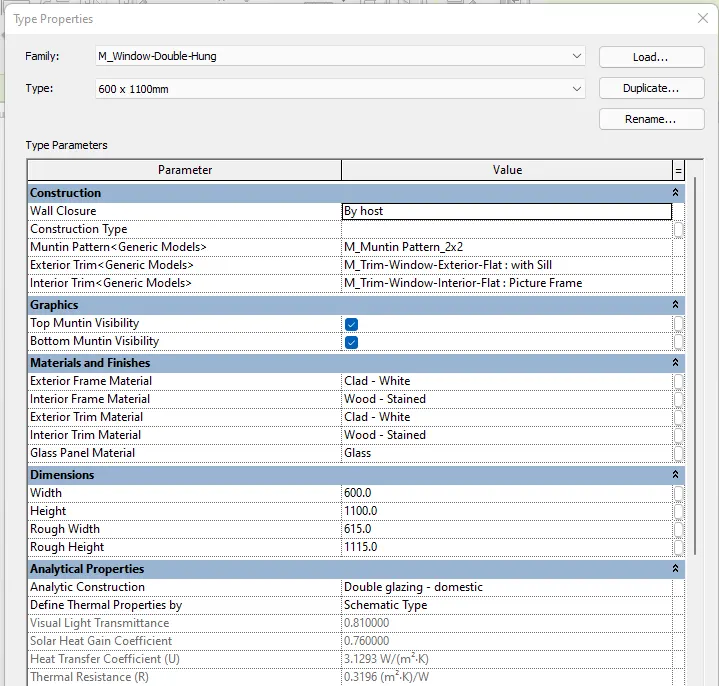
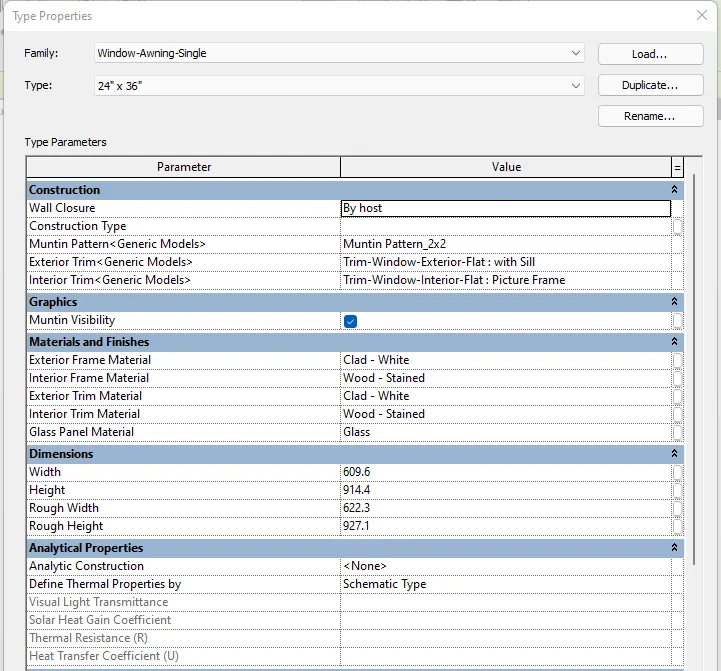
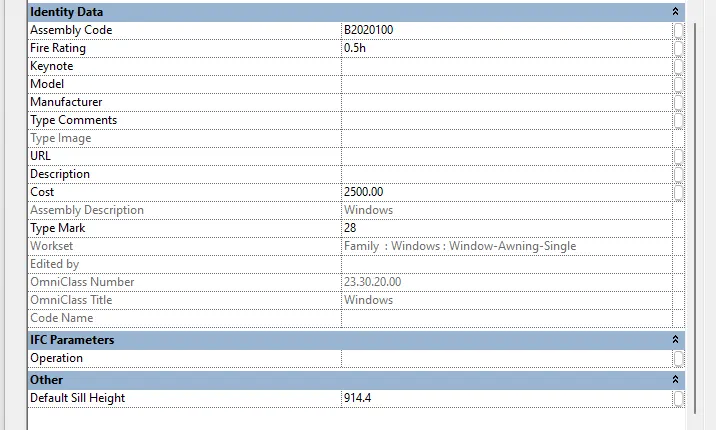
d. Window
The Parameters associeted with this element are:
- Construction
- Graphics
- Materials and Finishes
- Dimensions
- Analytical Properties
- Identity Data
- IFC Parameters
- Other
******
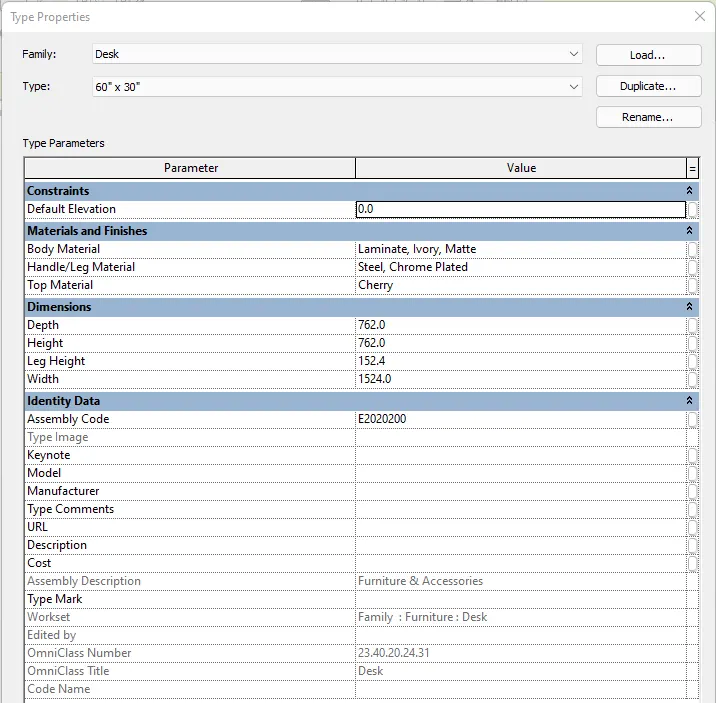
e. Table
The Parameters associeted with this element are:
- Constraints
- Materials and Finishes
- Dimensions
- Identity Data
******
f. Building
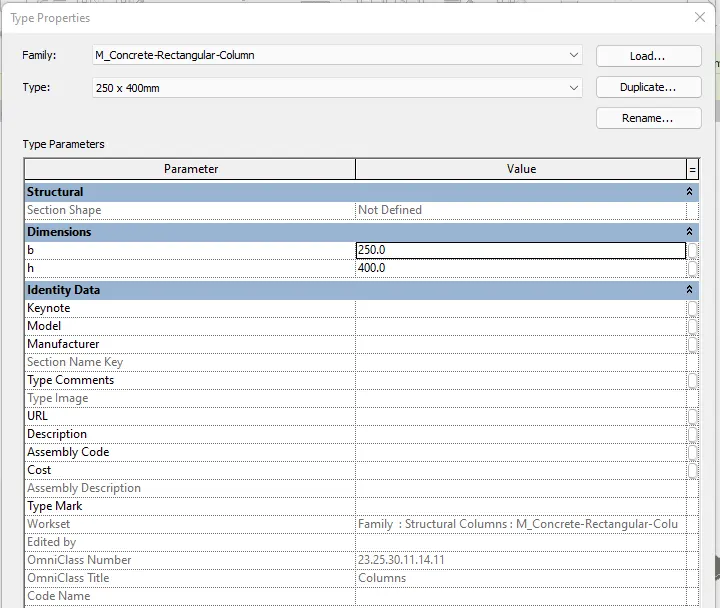
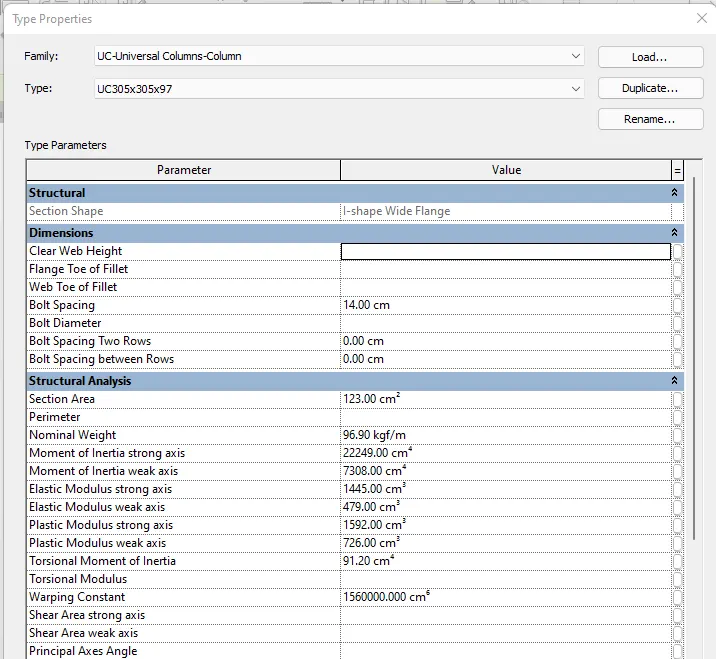
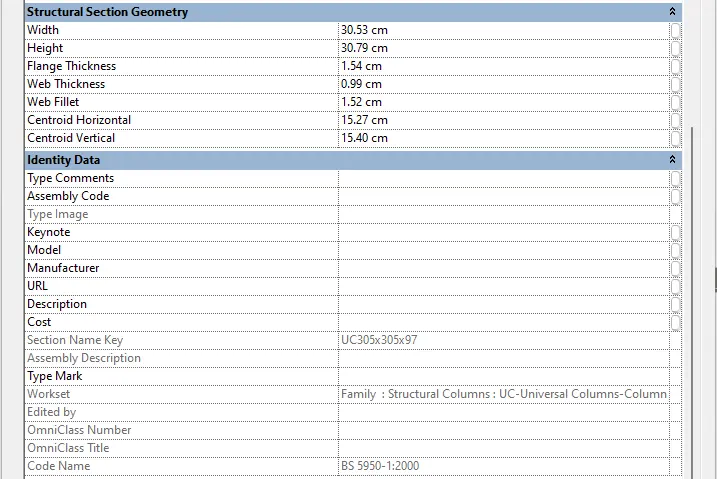
The Parameters associeted with the structural columns are:
----> Concrete Columns/Beams
- Structural
- Dimensions
- Identity Data
----> Steel Columns/Beams
- Structural
- Dimensions
- Structural Analysis
- Structural Section Geometry
- Identity Data
********************************************************
3. Conclusion
***************
The Revit software provides a convenient way to model each elements through the use of Shortcut Keys. These keys allows faster modeling that saves time and energy during the project.
The Revit software also allows the scheduling and takeoff of different building materials or elements. This application of Revit enables it to provide total estimation of the structural building in terms of quantities and cost. It is a useful tool in the construction industry as it saves time and allows comparison of costs in a Real Time basis.
The software also provides the Dynamo application that helps in planning and organization of the whole structure. It is a graphical programming interface that lets you customize your building information workflow. It is an open source visual programming platform that allows the use of codal informations that helps in structure modeling once the codes are sets.