Preparing Schedule & Cost Estimation for a building using REVIT
1) Use the shortcut keys in Revit discussed in class to complete the following tasks and list them below
a. Using a 3D model create a section box
b. To create similar doors and windows in a floor plan layout
c. To reduce the thickness of lines visible in plan views
d. To apply override settings to a floor in the model section view
e. To increase the range of visibility in a plan view
f. To select the previously selected items
g. To add annotations to the model views
h. To bring the model elements inline
i. To rotate the model elements
j. To move an object to another location
k. To copy a model element
l. To mirror an element about an axis
m. To create an array of model elements
ANSWER:
A. BX (Section box):
- Open model from week 7 project
- Click on any element
- Type BX in keyboard the section box will appear and then we can adjust the box as per requirement
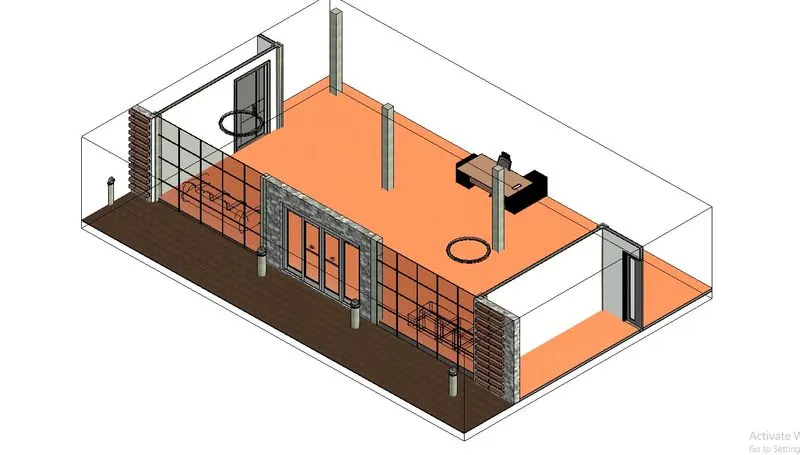
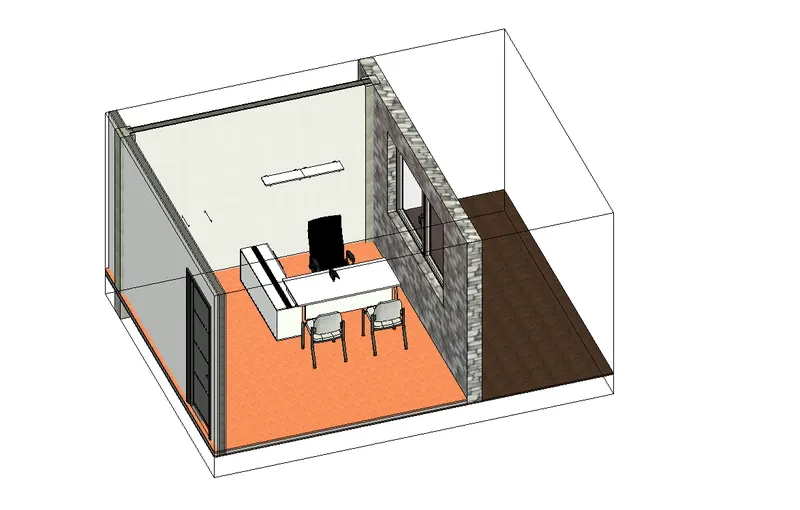
B. CS (Creative similar):
- Select an element as desired
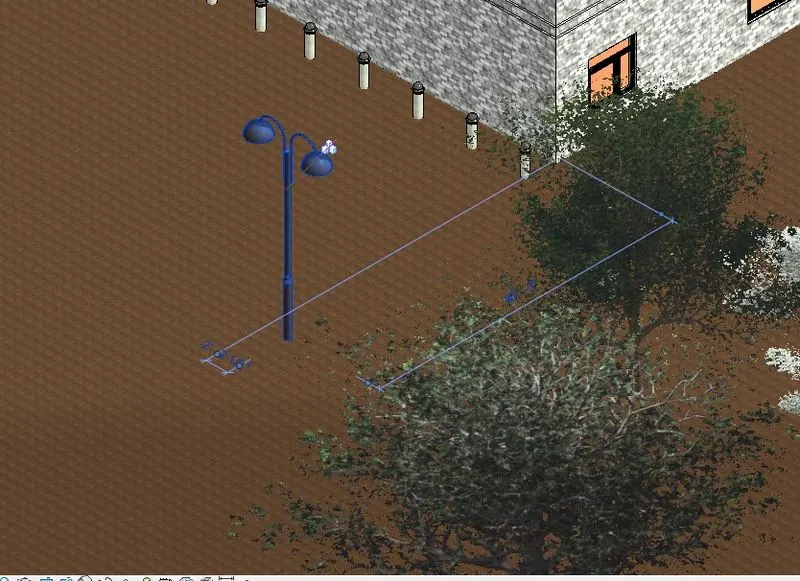
- Type CS in the keyboard so that similar to the selected element is created and placed where ever required
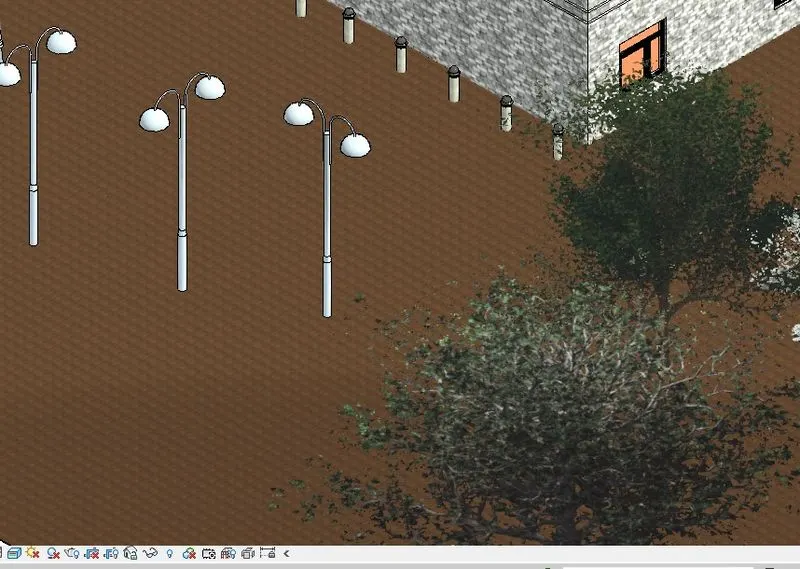
C. TL (Thin/ Thick lines):
- In the floor plan the boundary of the model like walls appearing in thick lines i.e., line weight is more we can reduce or if line weight is less, in that case, we can increase.
- Type TL in keyboard the lines will get Thin in case if it is Thick or Thick in case of line Thin
THICK THIN
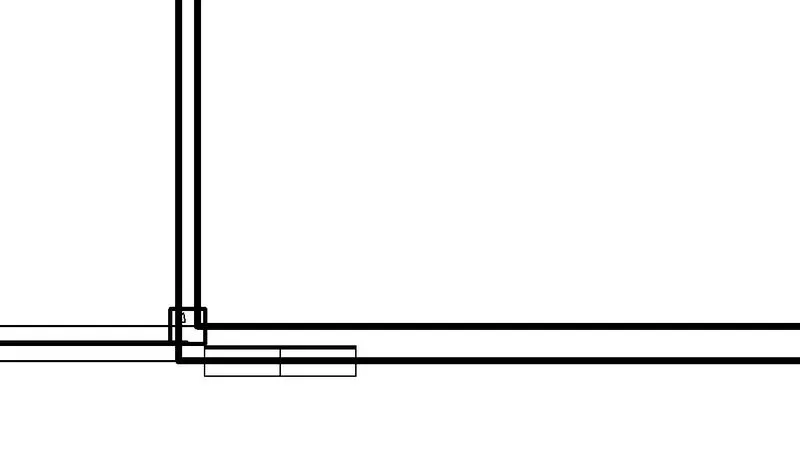
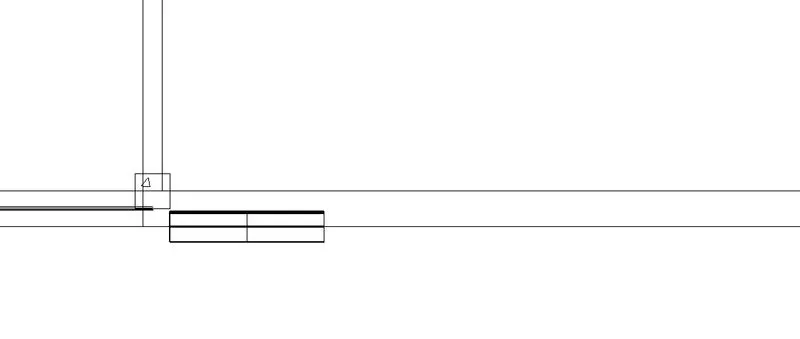
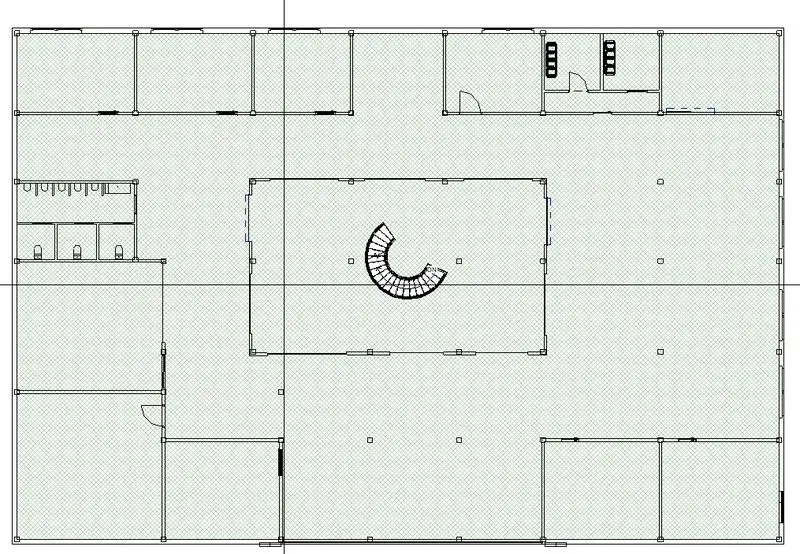
D. VG (Visibility graphics):
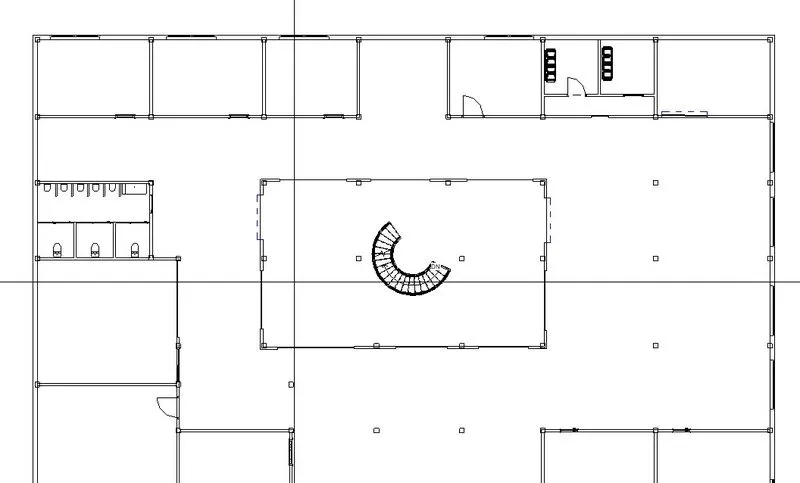
- For example in the floor plan we want to highlight the floor to know the carpet area then
- Type VG in keyboard the visibility graphics window pop-ups
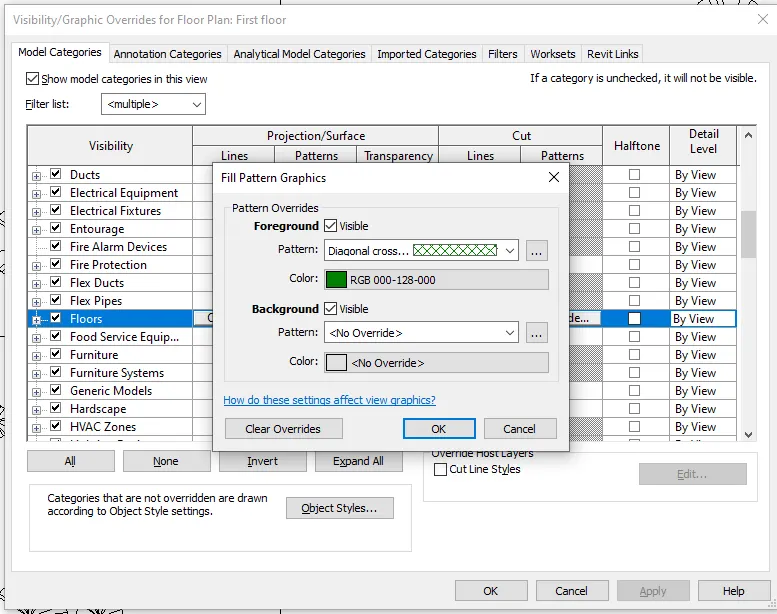
- In the window select, the floor in model components and in that select override option in pattern select the desired pattern style and colour to apply and click ok
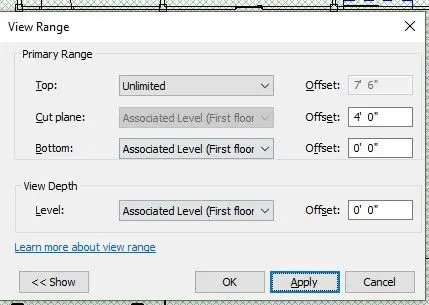
E. VR (View range):
- Type VR in keyboard the view range widow will pop-ups
- set the parameters of the visibility
F. Ctrl + <- (Reselect):
- If previously selected instances got unselected
- Type Ctrl+<- to reselect the previous instance
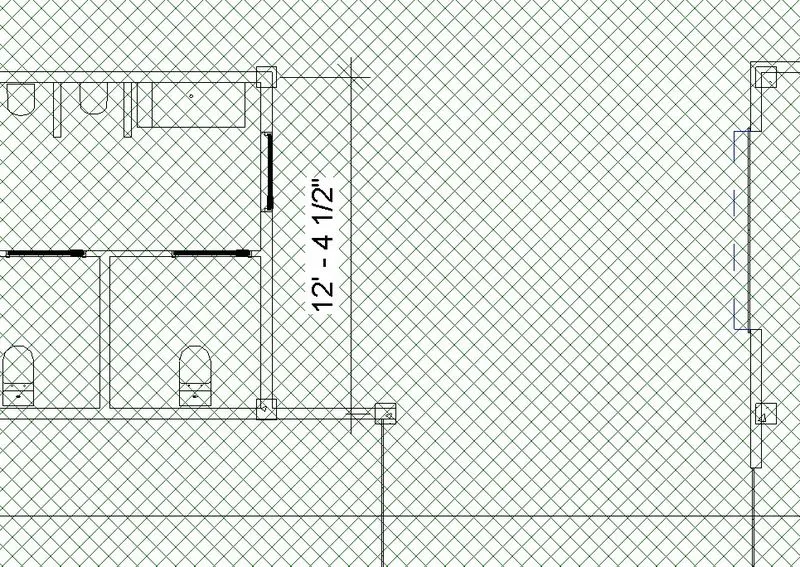
G. DI (Dimensions):
- Type DI in keyboard the dimension ribbon will appear in modify ribbon itself without going to annotation toolbar
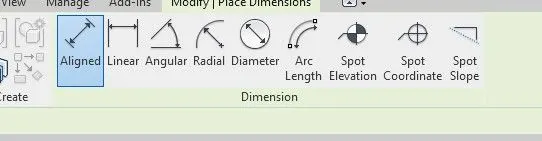
- Select the desired dimension tool and assign
H. AL (Align):
- To align any element
- Type AL in keyboard and select the line/ element to be aligned with
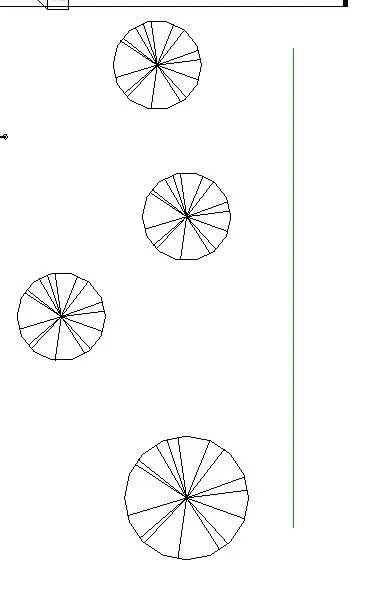
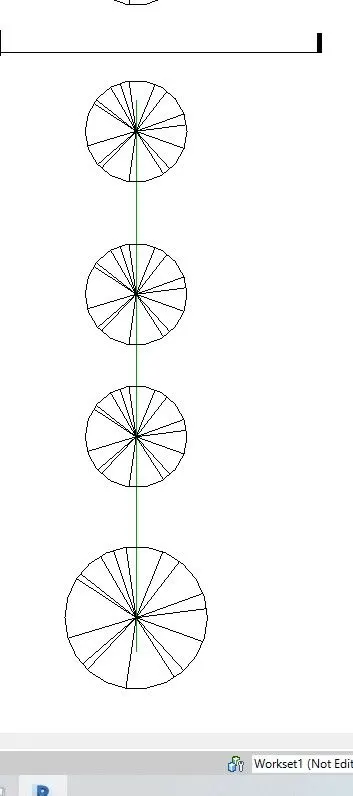
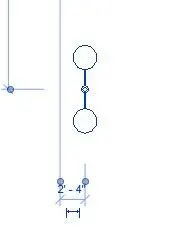
I. RO (Rotate):
- If we want to rotate any element in the model
- Type RO in keyboard and select the element which we want to rotate and click enter and rotate to the angle

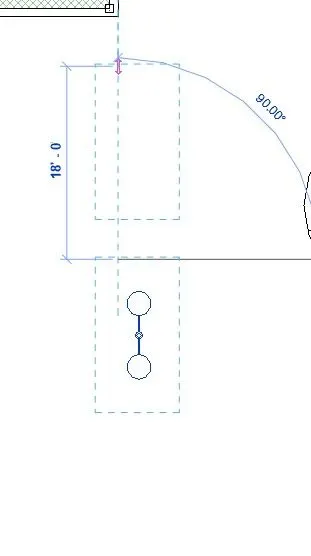
J. MV (Move):
- By using the MV command we can move an element by the offset of choice in the model
K. CO (Copy):
- By using the command CO we can copy the element and paste at the desired place in the model
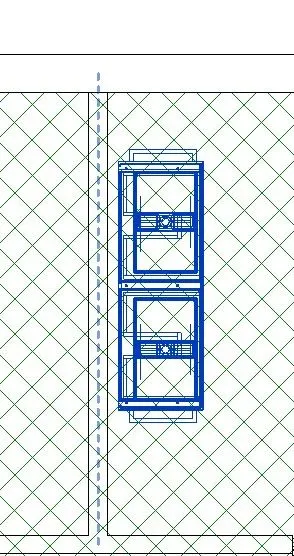
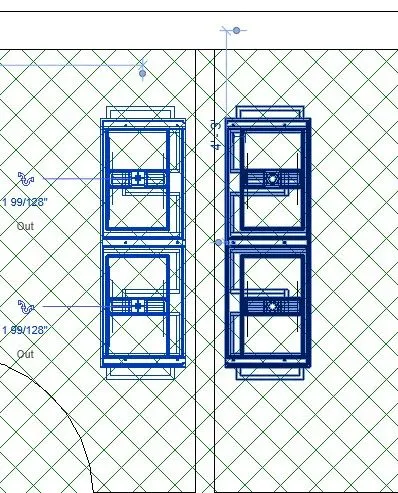
L. MM (Mirror):
- Select the element which we want to mirror
- Type MM command and assign the reference line and click enter so that we can mirror an element by using command
M. AR( Array):
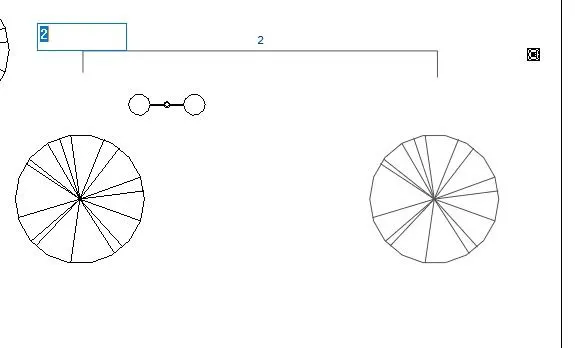
- Select the element which has to do multiple copies
- Type AR on the keyboard and array n times with an offset distance of the element
2) Using Revit and the project used from week 6 to 8 prepare a schedule for the following
a. Walls
b. Doors
c. Windows
d. Material – Concrete/Wood
AIM: To prepare a schedule for Walls, Doors, Windows and Material - concrete/ wood
PROCEDURE:
A. WALLS:
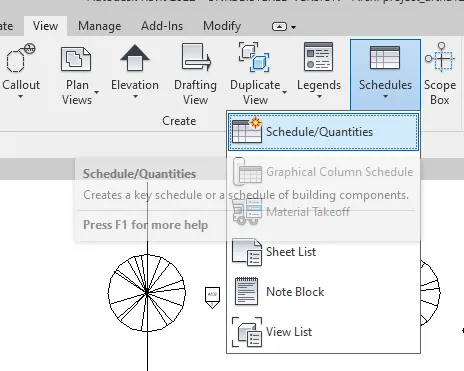
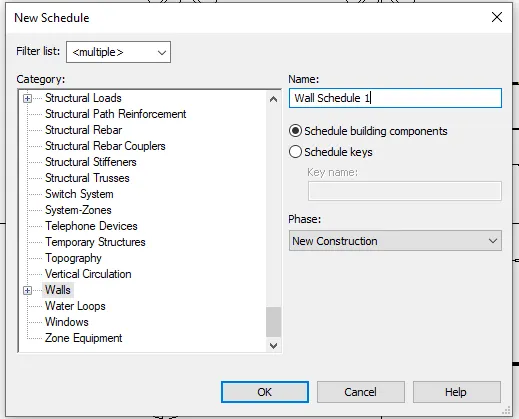
- To create a schedule for any material go to the View toolbar and select schedules in the dropdown select the schedule/ quantities
- Select walls in the popup window
- Set the name as wall Schedule 1 and click ok
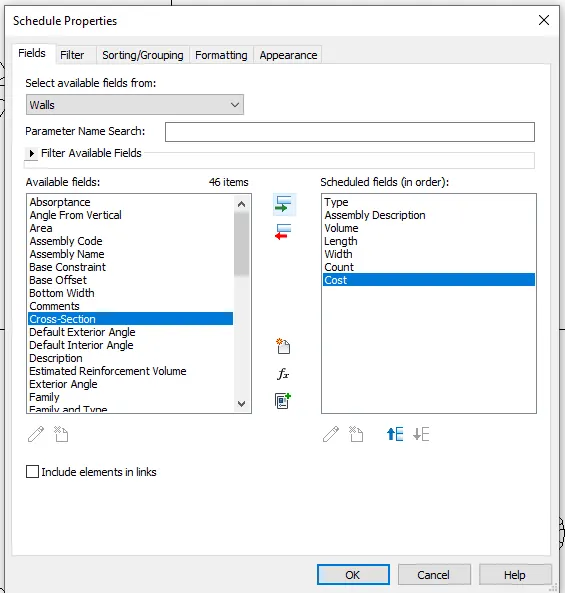
- After clicking ok Schedule properties window will pop up in that add properties like Assembly description, cost, count, length, width, type, volume to the list
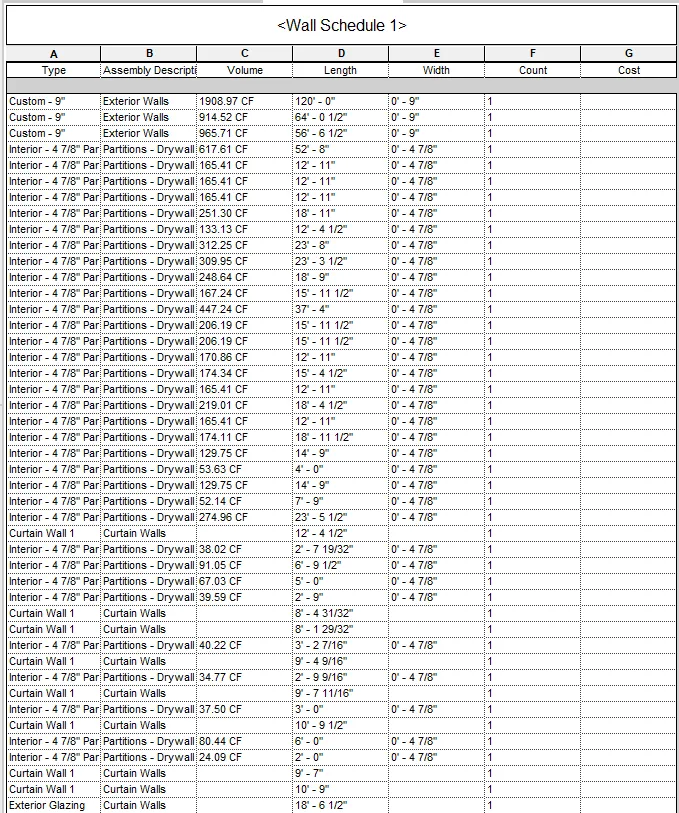
- Click ok to generate a schedule of quantities
- In properties, tab click on sorting/ grouping
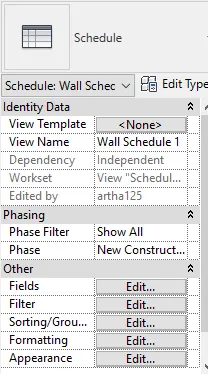
- Change sort by type
- Select grand totals and uncheck the Itemize every instance
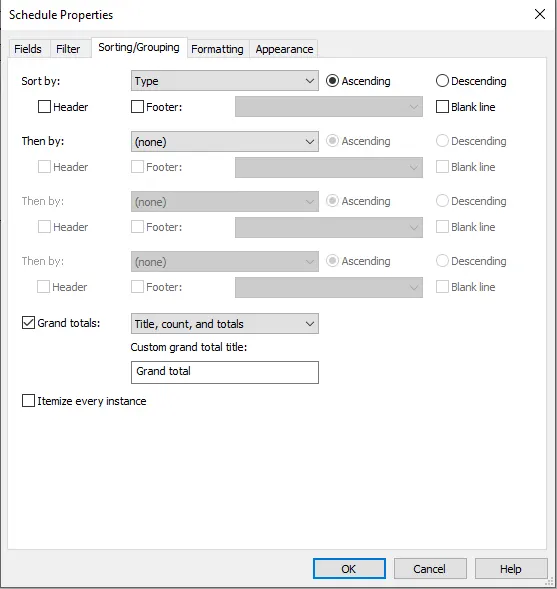
- Click ok to sort by type
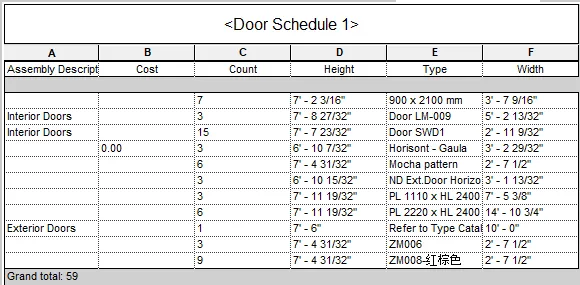
B. DOORS:
- To create a schedule for any material go to the View toolbar and select schedules in the dropdown select the schedule/ quantities
- Select doors in the pop-up window
- Assign the name as Door schedule 1
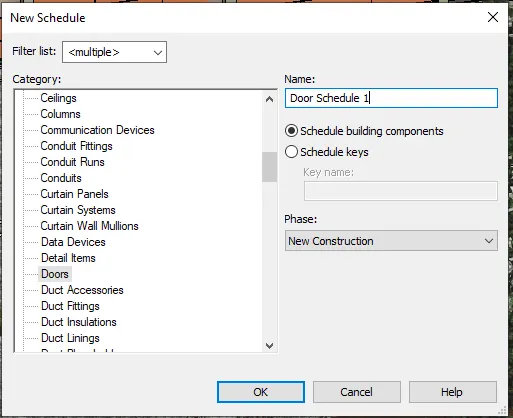
- Click ok and in the schedule properties window add properties like Assembly description, count, cost, type, height to the list
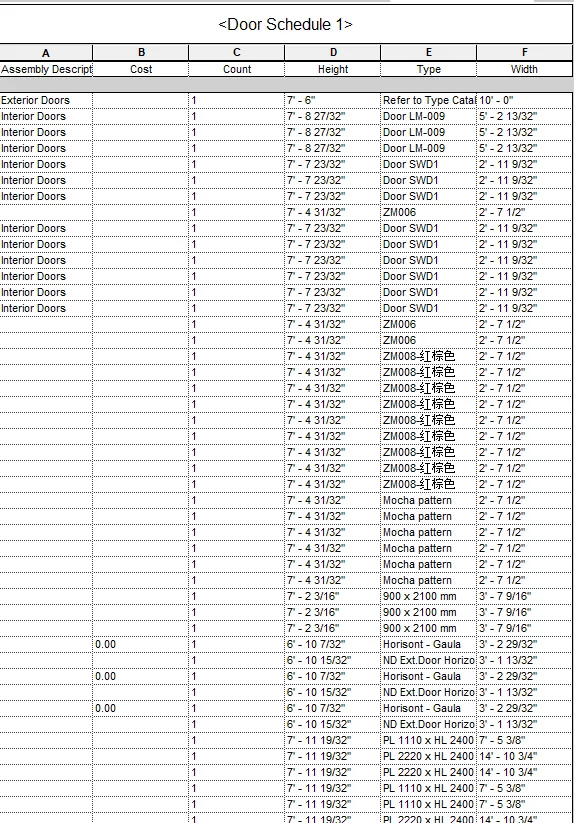
- In properties, tab click on sorting/ grouping
-
- Change sort by type
- Select grand totals and uncheck the Itemize every instance
-
- Click ok to sort by type
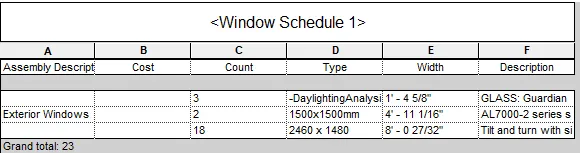
C. WINDOWS:
- Select Windows in the pop-up window
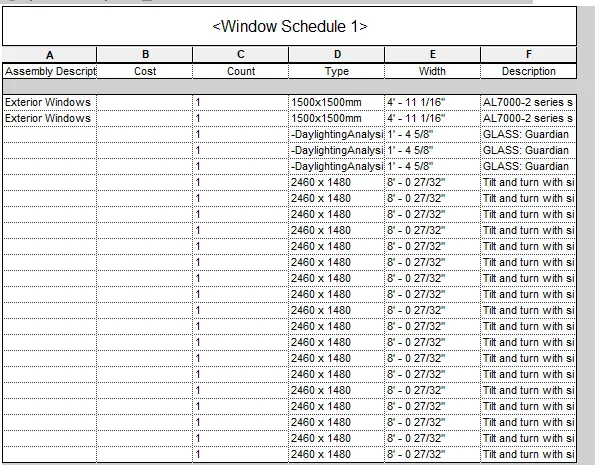
- Assign the name as Window schedule 1
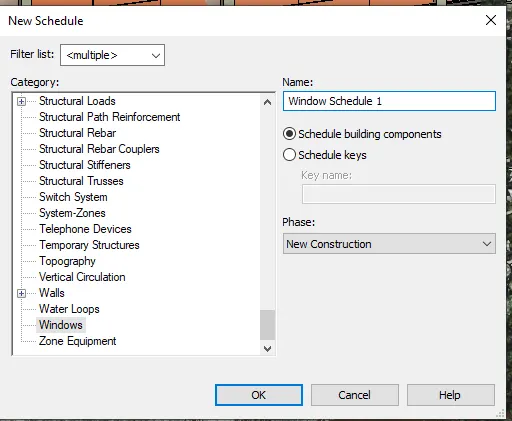
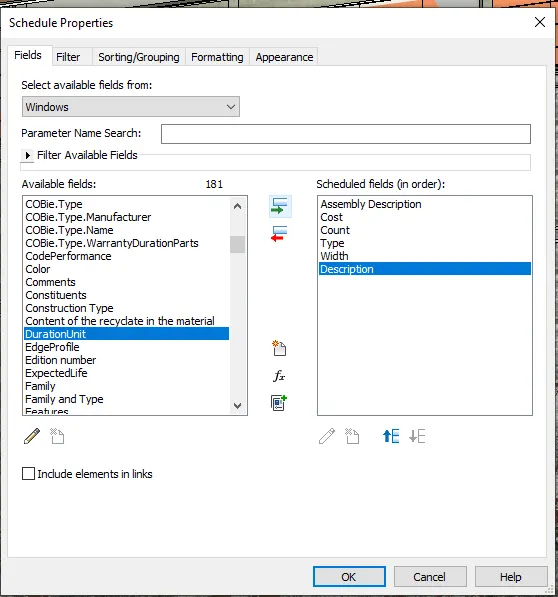
- Click ok and in the schedule properties window add properties like Assembly description, count, cost, type, height to the list
- In properties, tab click on sorting/ grouping
-
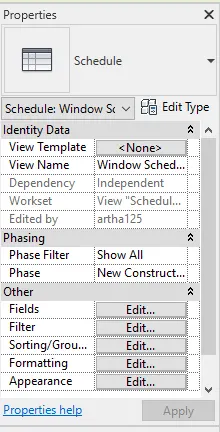
- Change sort by type
- Select grand totals and uncheck the Itemize every instance
-
- Click ok to sort by type
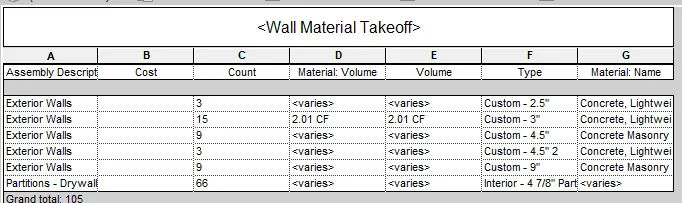
D. Material takeoff- walls:
- In the view tab select schedule and in the drop-down select material take-off
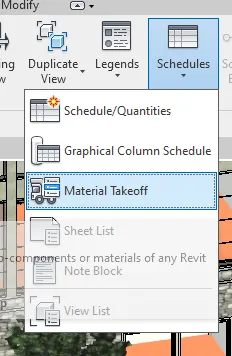
- Select walls in the pop-up window
- Assign the name as wall MATERIAL TAKEOFF
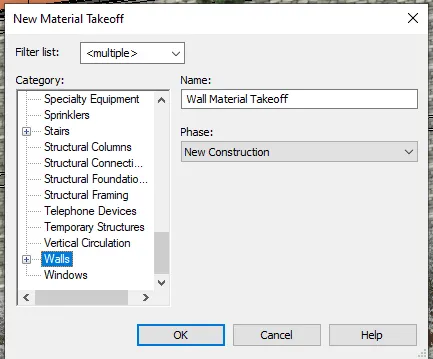
- Click ok and in the schedule properties window select the properties from the list as Assembly description, count, volume, material volume, material name, cost
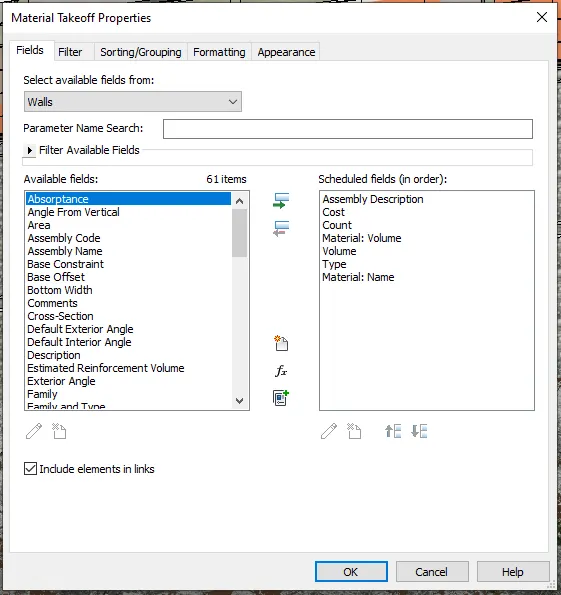
- Click on include elements in links
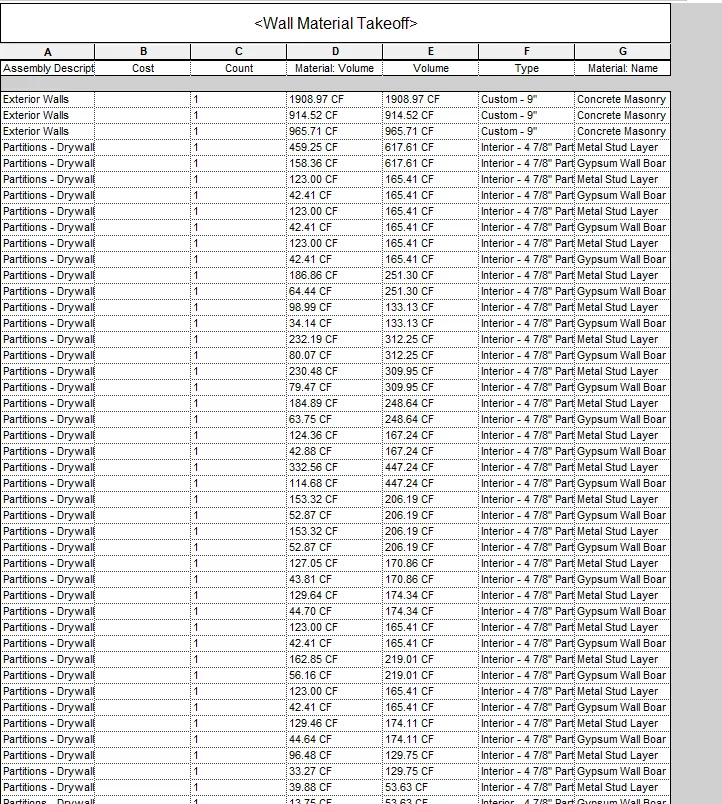
- sort the data accordingly
RESULT:
The schedules after sorting are as follows
A. Wall
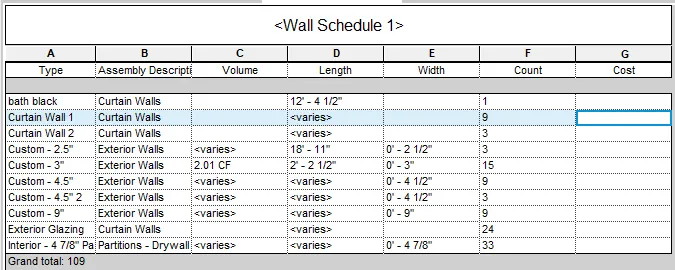
B. DOOR:
C. WINDOW:
D. MATERIAL TAKEOFF:
3) Using Revit Calculate the area and volume of each room in the model with appropriate room tags applied to each room. Prepare a schedule report for the area and volume of each room.
AIM: To create schedules and calculate the area and volume of all the rooms
PROCEDURE:
- Set all the room tags appropriately
- In view toolbar select schedule and in the dropdown select the Schedules/ quantities
- In the pop-up window select the rooms and assign name as room schedule 1
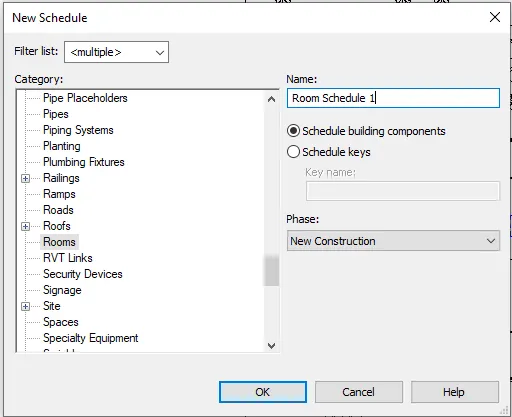
- Click ok and in the schedule p[properties window select the fields are Area, Volume, Name, unbounded height
- Click on include elements in links
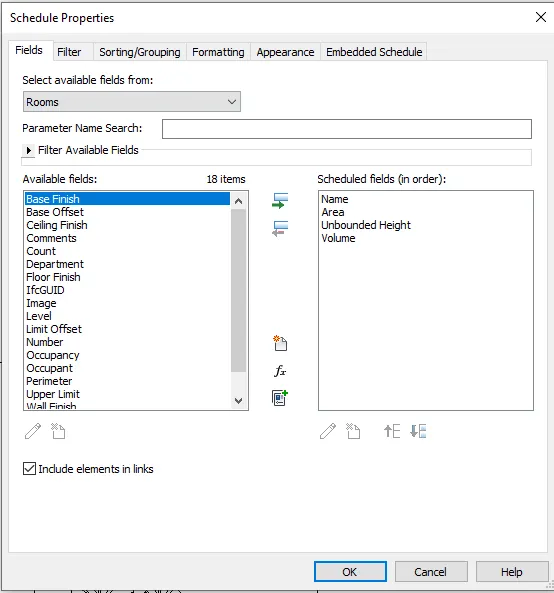
- Click ok to generate the schedule of quantities
- Select one of the cells under the 'volume' column
- In modify tab click on calculate

- Set name as the 'volume of the room'
- Set formula as " Area*unbounded height' by clicking on the dots on the side
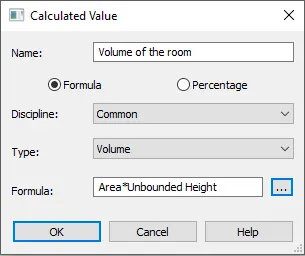
- click ok to show the calculated volumes
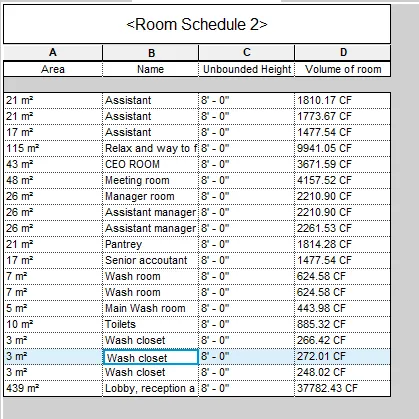
RESULT:
The Schedule for rooms
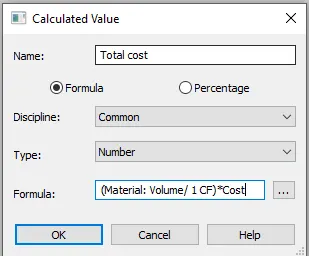
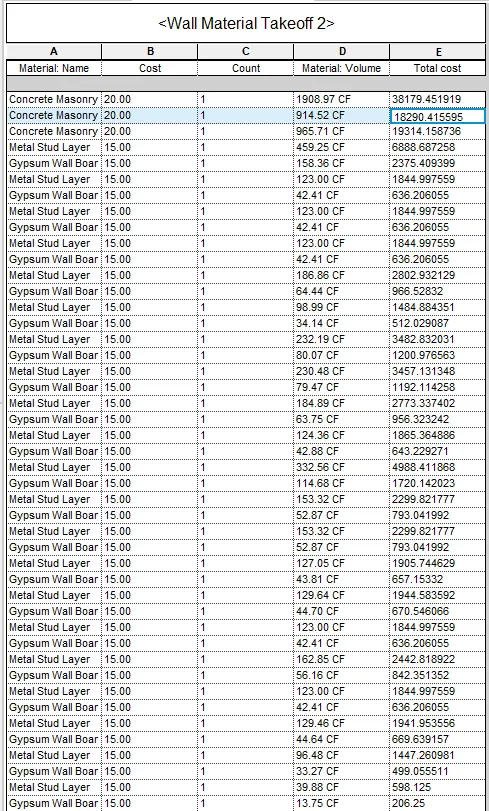
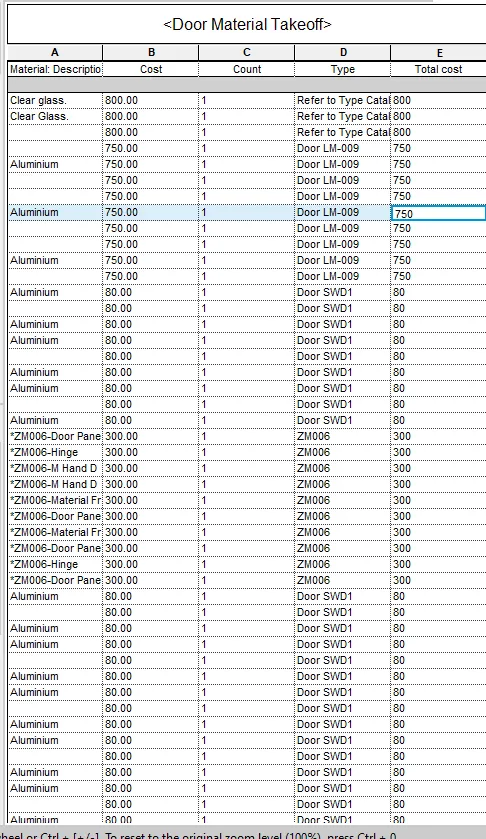
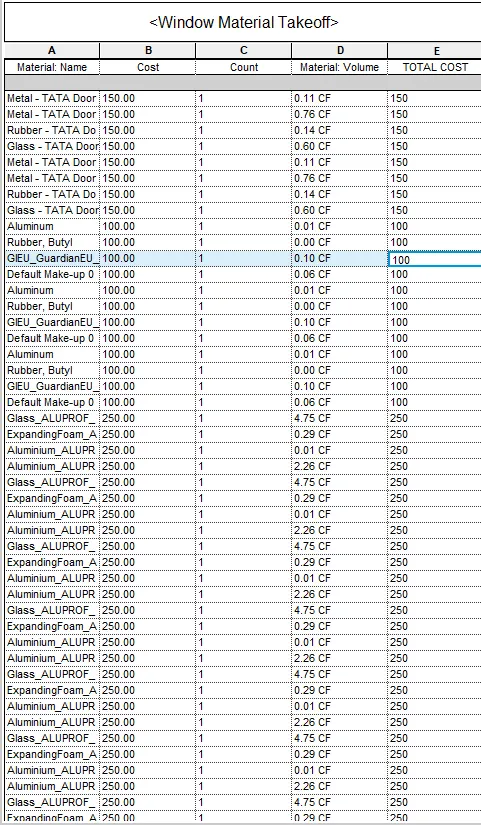
4) Using the same schedule using the unit cost rate for materials available on the internet, prepare the total cost of materials used in the project
a. Total Cost of Materials
b. Individual Material Takeoff
AIM: To do schedule for the total cost of materials and individual material takeoff
PROCEDURE:
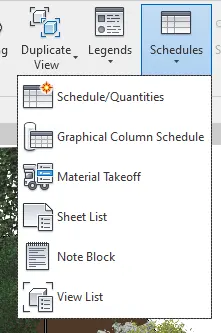
- In view, toolbar click on schedules and in the drop-down select the Material takeoff
RESULT:
5) Using the concept of Visual Programming discussed in class, list a flowchart for the following scenario
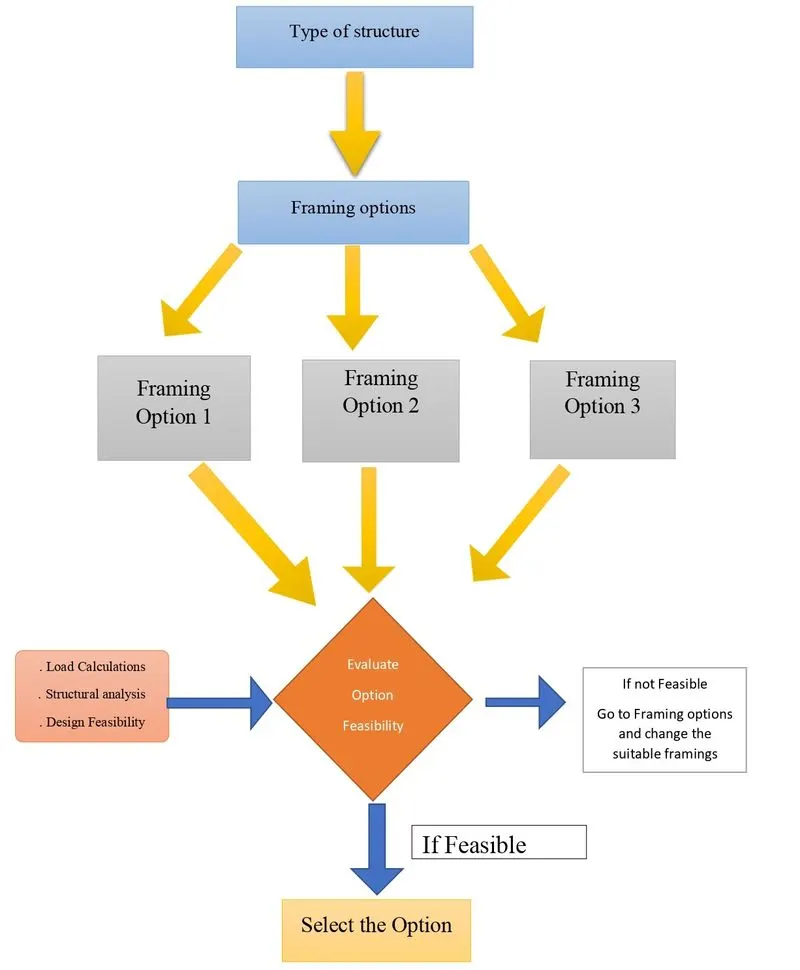
a. How to decide framings for a structure using Dynamo?
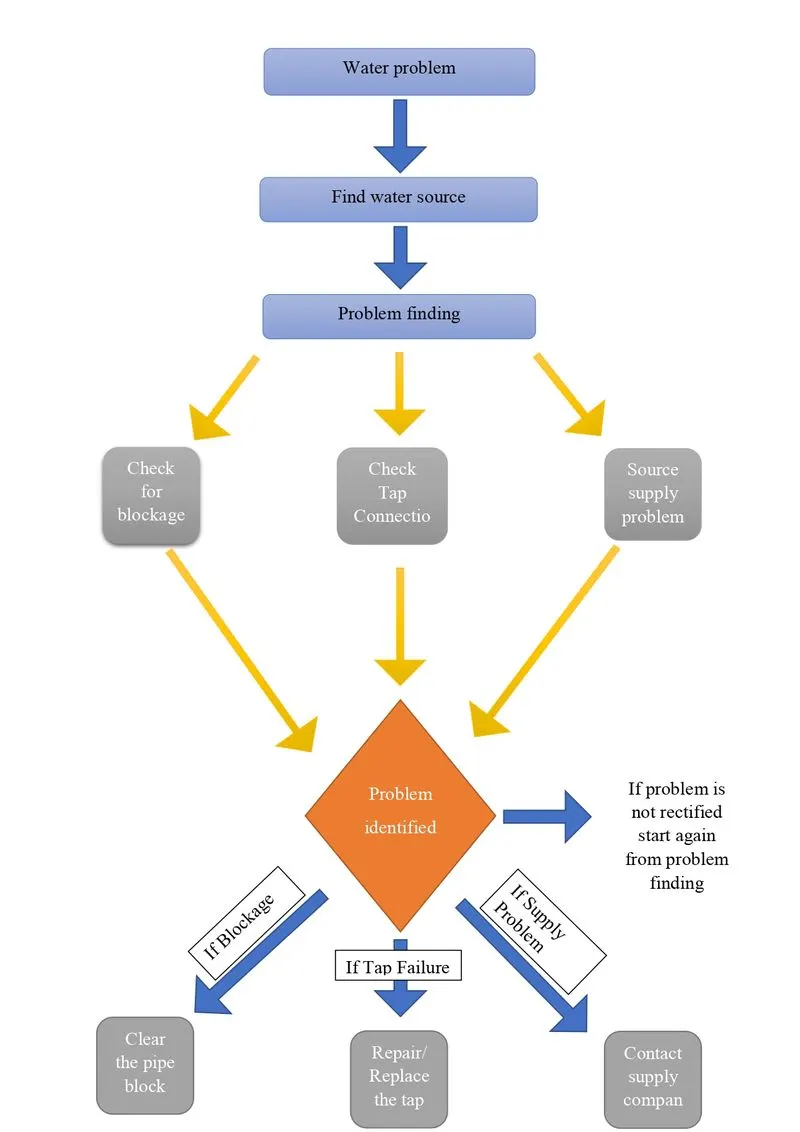
b. If there is no water coming from the pipes
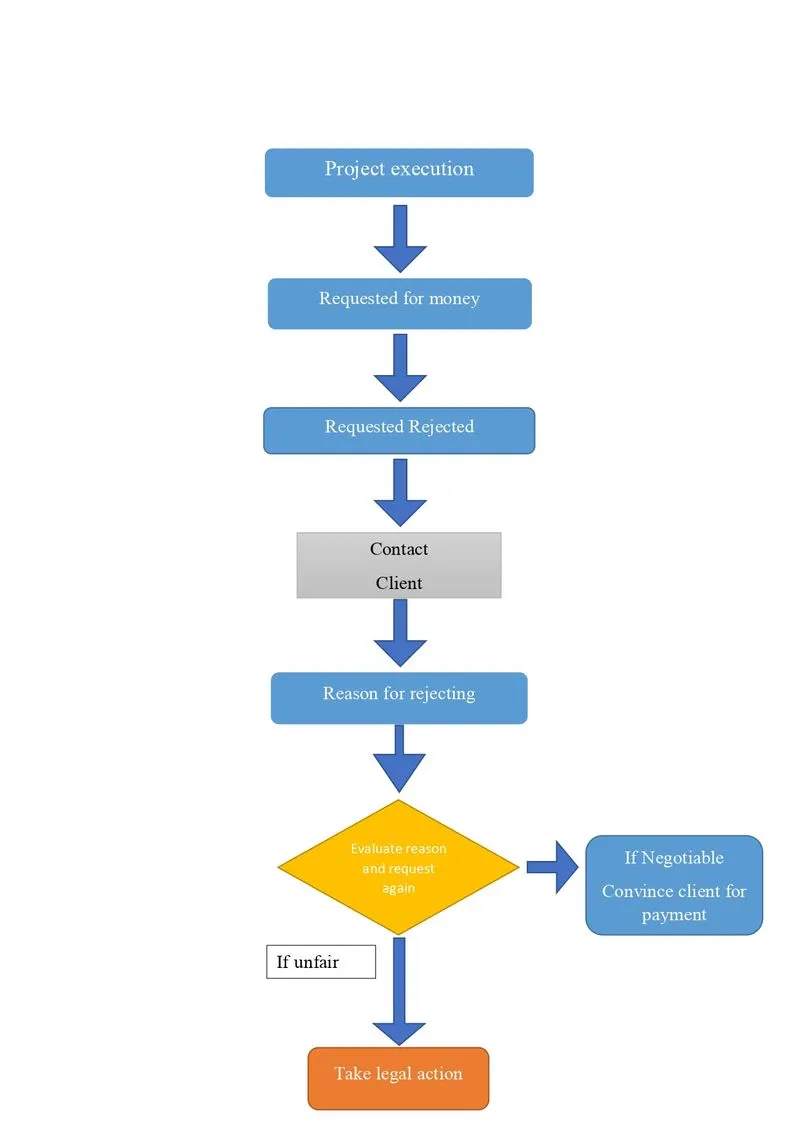
c. If the request for money from the client has been declined for the project
ANSWER:
A. How to decide framing for structure using dynamo?
B. If there is no water coming from the pipes
c. If the request for money from the client has been declined for the project
6) List the parameters associated with each model element
a. Wall
b. Floor
c. Door
d. Window
e. Table
f. Building
ANSWER:-
A. WALL:
- Type of wall
- Length
- Width
- Thickness
- Height
- Material
- Cost
B. Floor:
- Type of floor
- Length
- Width
- Thickness
- Height
- Material
- Cost
C. Door:
- Type of door
- Length
- Width
- Area
- Height
- Lintel height
- Height of sill material
D. Windows:
- Length
- Width
- Windows
- Area
- Height
- Lintel height
- Height of sill
- Material
E. Table:
- Type of table
- Purpose
- Height
- Length
- Width
F. Building:
- Type of building
- Number of floors
- Foundation types
- Length
- Width
- Height
- Material used
- Location of building
- Loads on building