Preparing Schedule & Cost Estimation for a building using REVIT
1. Use the shortcut keys in Revit discussed in class to complete the following tasks and list them below
a. using 3D model create a section box
b. To create similar doors and windows in a floor plan layout
c. To reduce the thickness of lines visible in plan views
d. To apply override settings to a floor in the model section view
e. To increase the range of visibility in a plan view
f. To select the previously selected items
g. To add annotations to the model views
h. To bring the model elements in line
i. To rotate the model elements
j. To move an object to another location
k. To copy a model element
l. To mirror an element about an axis
m. To create an array of model elements.
a. using 3D model create a section box
Section box is used to get desired view which can be manually adjusted in revit software. Section box is selected in three ways.
- By selecting "Sectional box" in modify tab
- Enter shortcut key "BX"
- Section box option in properties browser.
- Open last week model in revit software
- Open 3D view
- Select an elemnt
- Enter shortcut key "BX"
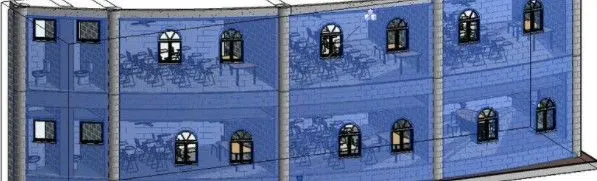
- Adjust the arrows to crop 3D view for viewing other parts of the building
- Untick the section box in properties browser to get the original view.
RESULT:-
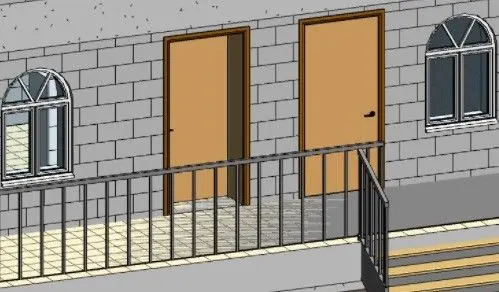
b. To create similar doors and windows in a floor plan layout.
Create similar is used for copying elements. Elements can be copied by entering shortcut key "CS" or select copy in modify tab
- Open last week model in revit software
- Open 3D View.
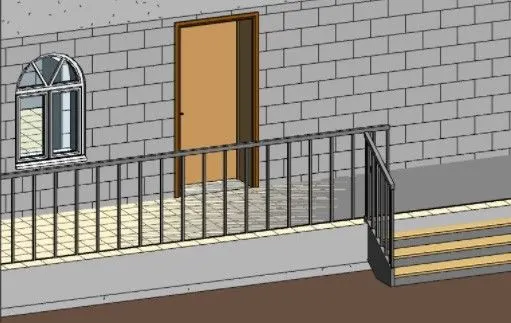
- Select door
- Enter shortcut key "c "
- Multiple doors can be created and placed
- Similarly select window
- Enter shortcut key "CS"
- Multiple doors can be created and placed.
c. To reduce the thickness of lines visible in plan views.
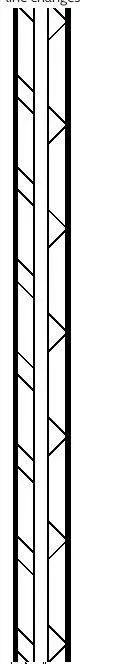
Thin line tool is used to turn on or off line weights in revit This tool is enabled by selecting on quick access tool bar or by using shortcut key "TL"
- Open last week model in revit software
- Open Floor plan
- Select a wall
- Enter shortcut key "TL"
- Thickness of line changes.
RESULT:-

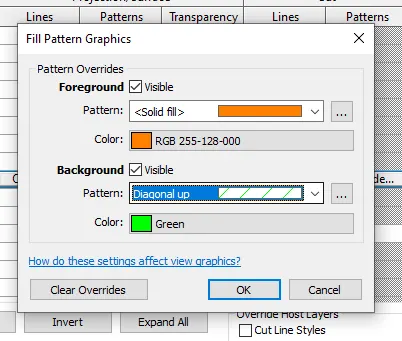
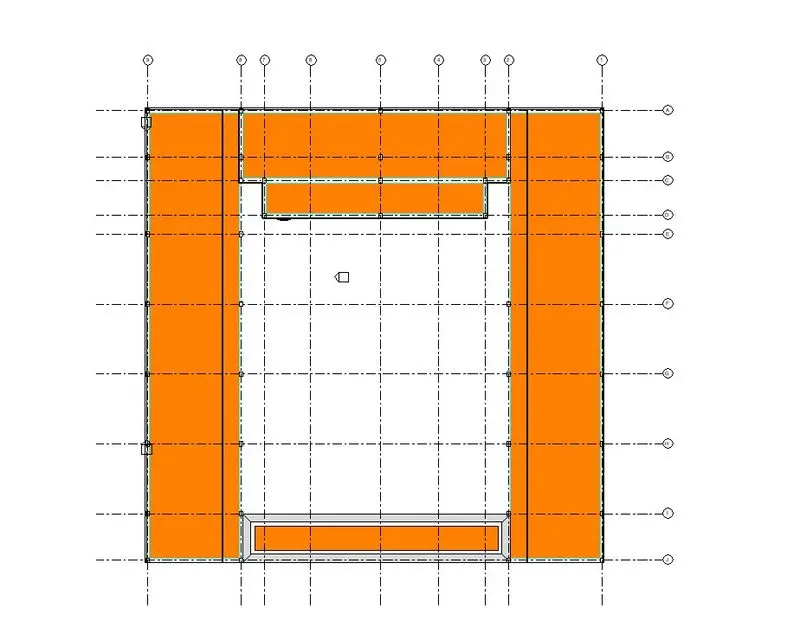
d. To apply override settings to a floor in the model section view.
Visibility or graphic display setting is used to change the graphics of an element.
- Open Revit software
- Create walls and floor
- Enter shortcut key "VG"
- Go to model categories
- Go to floor and click on override
- Change line settings.
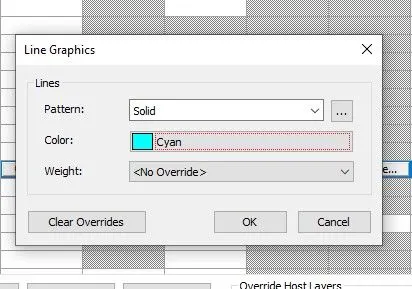
- Changc Pattern setting
RESULT:-
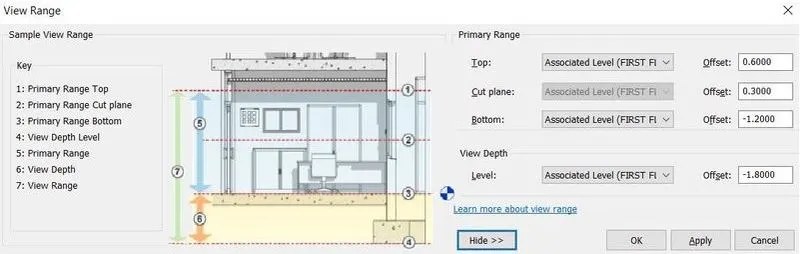
e. To increase the range of visibility in a plan view
View range is the set of horizontal planes that control the visibility and display of objects in a plan view. The horizontal planes that define the view range are top, cut plane and bottom.
- Open last week model in revit software
- Open Floor plan
- Enter shortcut key "VR".
f. To select the previously selected items.
To reselect the same object press Ctrl +< (left arrow on keyboard)
g. To add annotations to the model views.
To add annotations that is
- Dimensions to the model enter shortcut key "Dl"
- Text shortcut key is "TX"
- Room tag shortcut key is "RT"
- Spot elevation shortcut key is "EL"
- Detail line shortcut key is "DL".
h. To bring the model elements in line.
Align is used to align model elements such as walls, beams etc. This tool is found is modify tab or enter shortcut key "AL"
- Select any element such as wall
- Enter shortcut key "AL"
- Wall is automatically drawn which is aligned to previous wall element.
i. To rotate the model elements
Rotate tool is used to rotate element about an axis. This tool is found is modify tab or enter shortcut key "RO"
- Select any element
- Enter shorcut key " RO"
- Enter angle to rotate.
j. To move an object to another location.
To move object from one location to another.
- Select that object
- Enter shortcut key "MV"
- Drag the object
- This tool is also found in modify tab or simplay select object and drag it.
k. To copy a model element
- To copy a model element
- Select any element
- Enter shortcut key "CO"
- Element is copied and multiple copies can be placed
- This tool is also found in modify tab
l. To mirror an element about an axis.
Mirror tool reverses the position of selected model element, using line as mirror axis.
- Select any element
- Enter shortcut key "MM"
- Select the axis
- Element in mirrored
- Instead of "MM" shortcut key, Enter shortcut key "DM" to draw mirror axis and elements are automatically mirrored.
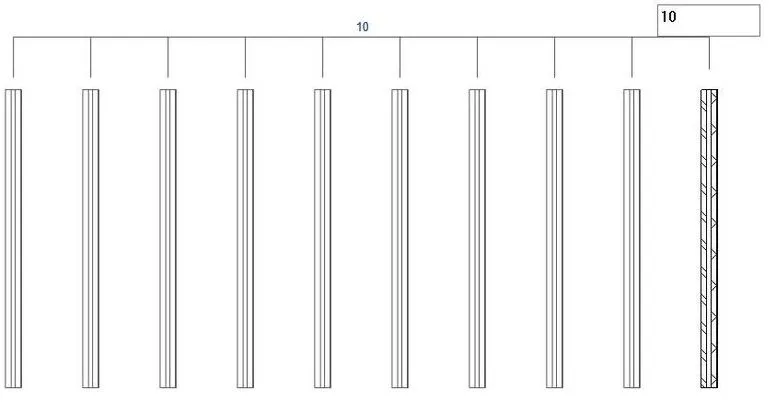
m. To create an array of model elements.
Elements are copied under specified distance and specified number of elements
- Select any element
- Enter shortcut key "AR"
- Enter number of elements
- Drag to a given distance.
2.Using Revit and the project used from week 6 to 8 prepare a schedule for the following
a. Walls
b. Doors
c. Windows
d. Material — Concrete/Wood.
AIM :-To create schedule for the project.
INTRODUCTION :- Schedule displays information, extracted from properties of an element in a project in tabulat form.
PROCEDURE :-
STEP 1:-
Open week 7 project
Click on schedule in view tab
Select door and click 0k
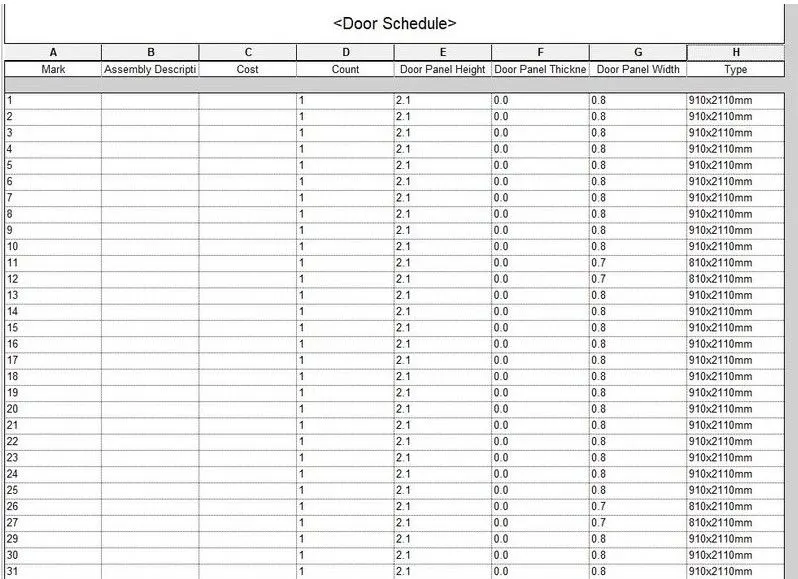
Add assembly description, cost, count, door depth, width, thickness, type and mark.
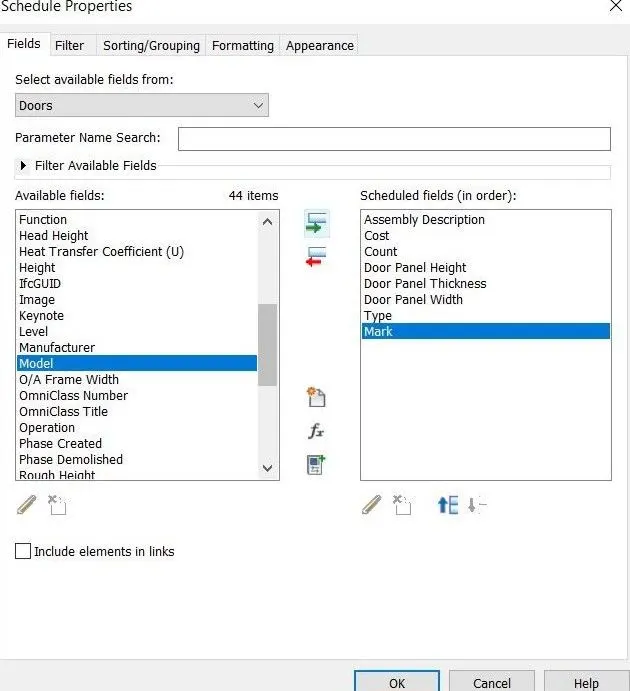
- Tick mark "Include elements in links
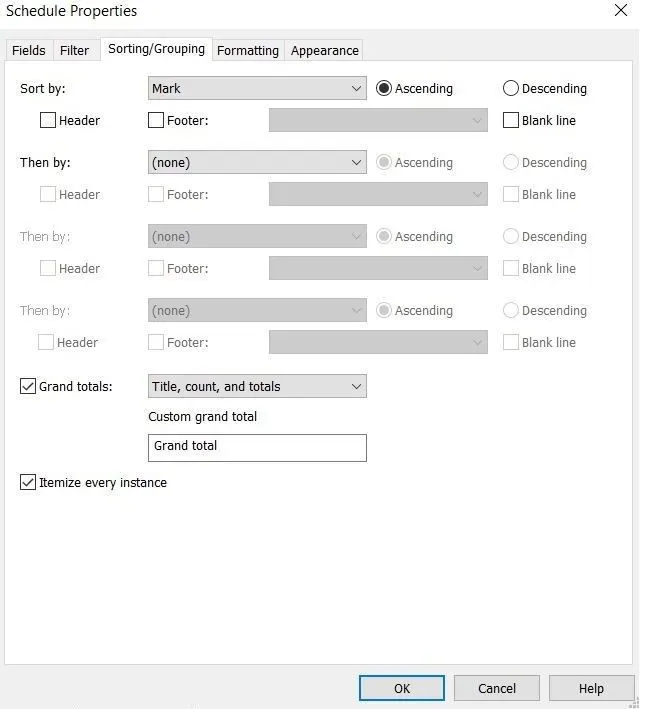
- Now go to sorting/ grouping
- Sort by : Mark
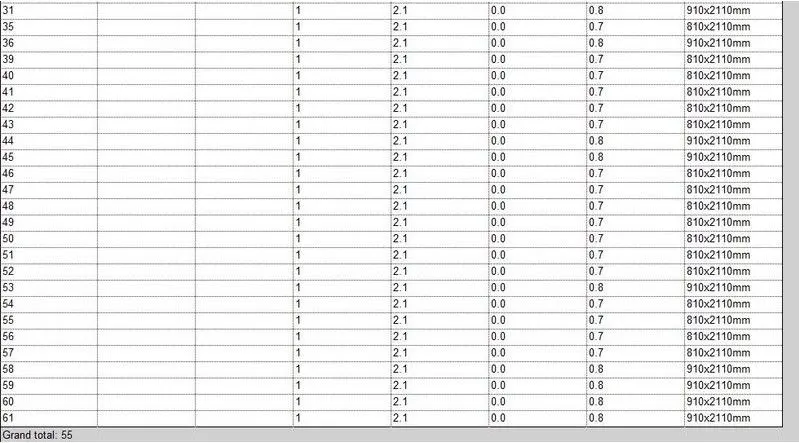
- Tick mark "Grand totals".
STEP 2:-
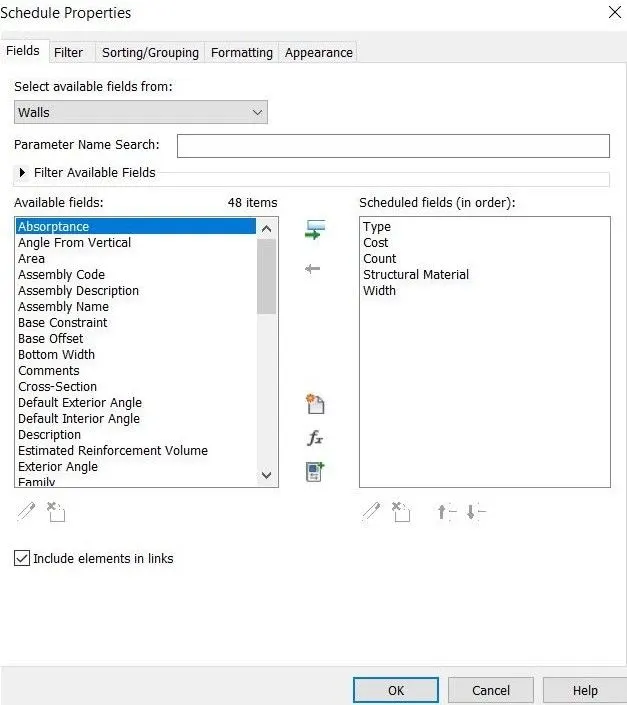
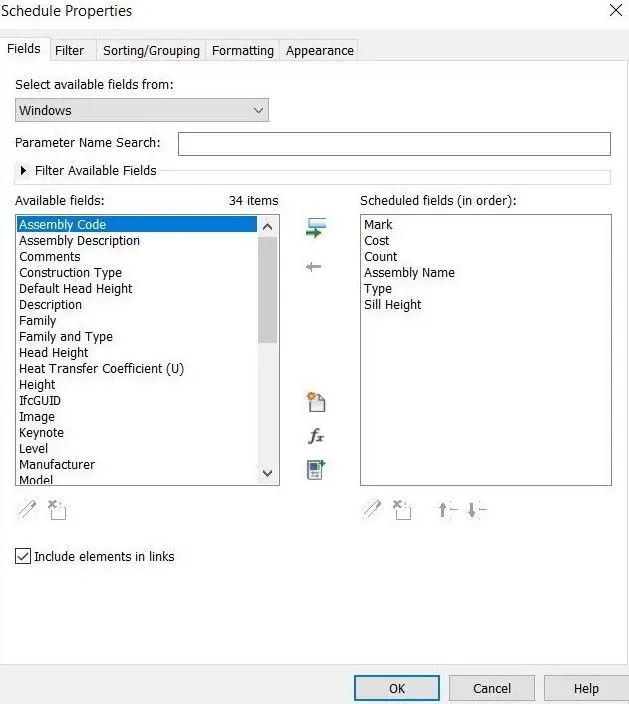
- Similary create schedule for walls and windows
- WALLS.
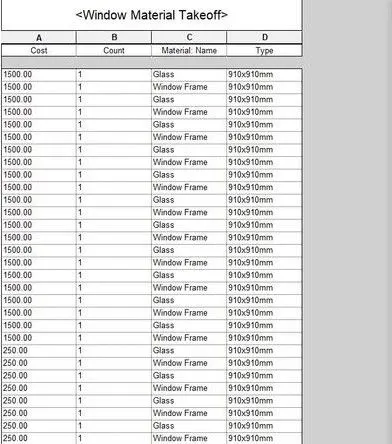
- WINDOWS.
- Cost can bc edited in "edit type" of each element
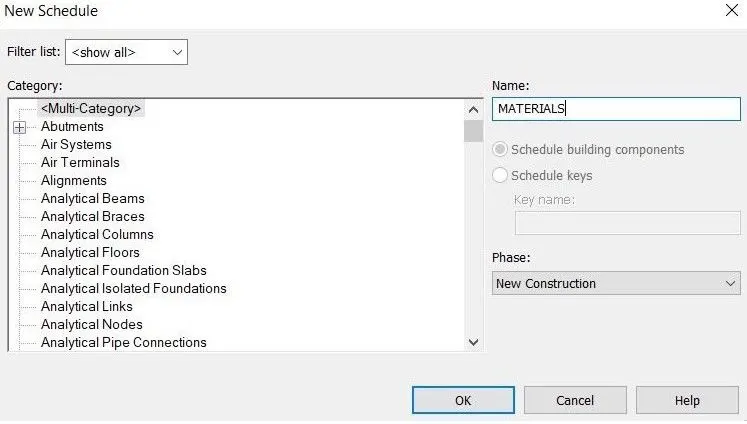
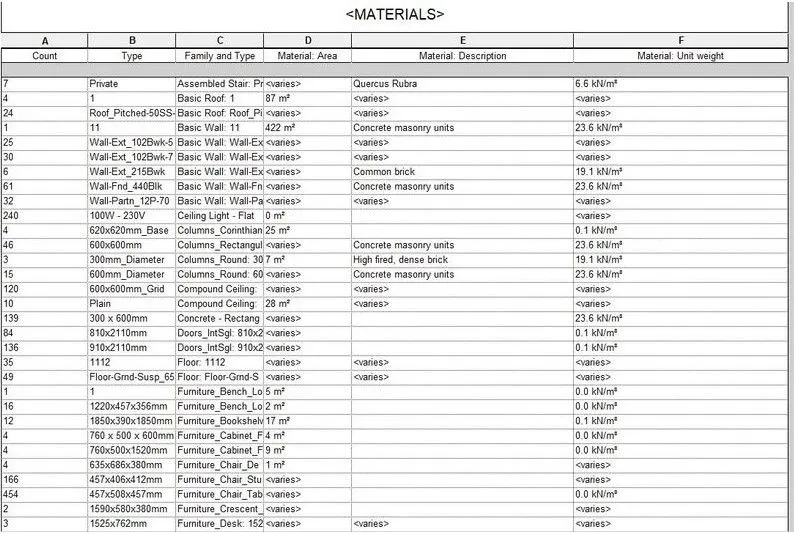
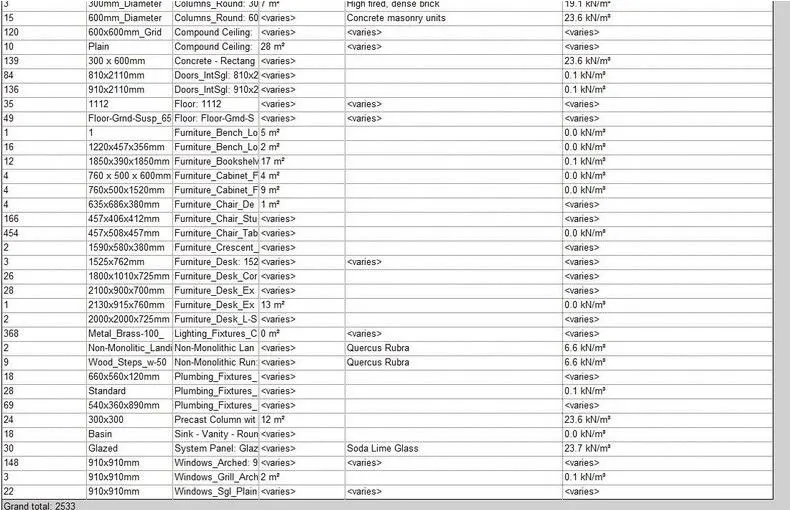
- Now select material takeoff in schedule
- Select multi category and enter name as materials.
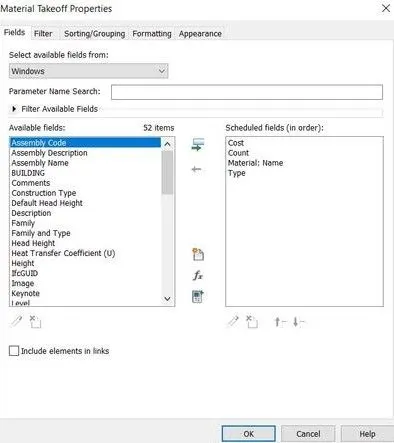
- Enter fields as given below.
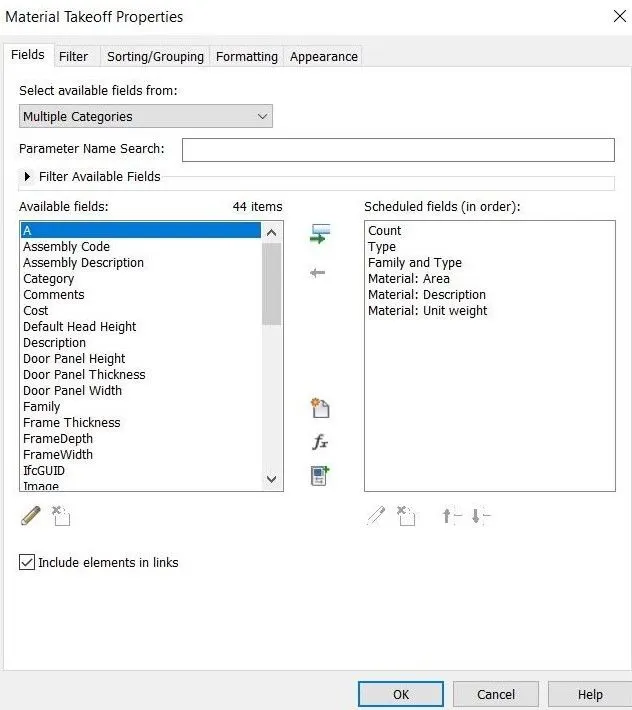
- Untick itemize every instance in sorting and grouping and click ok.
RESULTS:-
SCHEDULE IS CREATED FOR
1.DOORS
2.WALLS
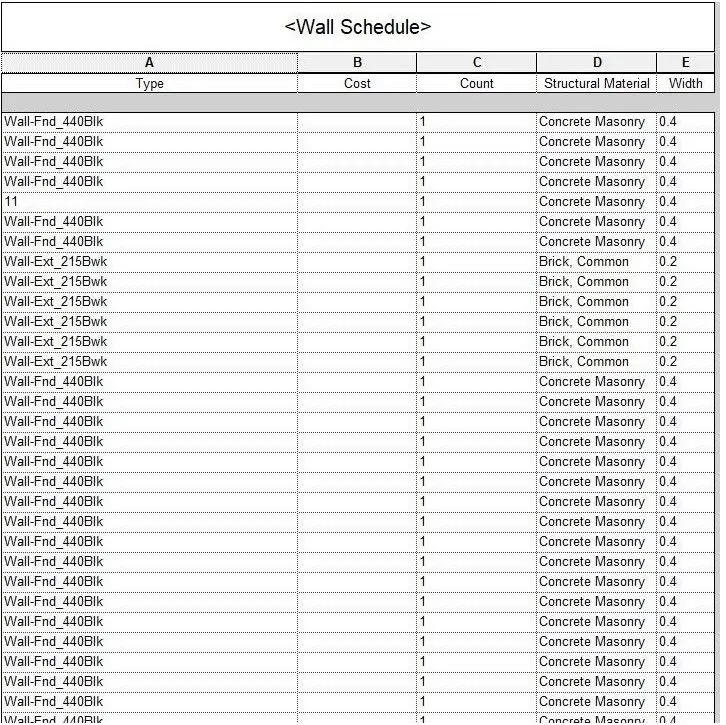
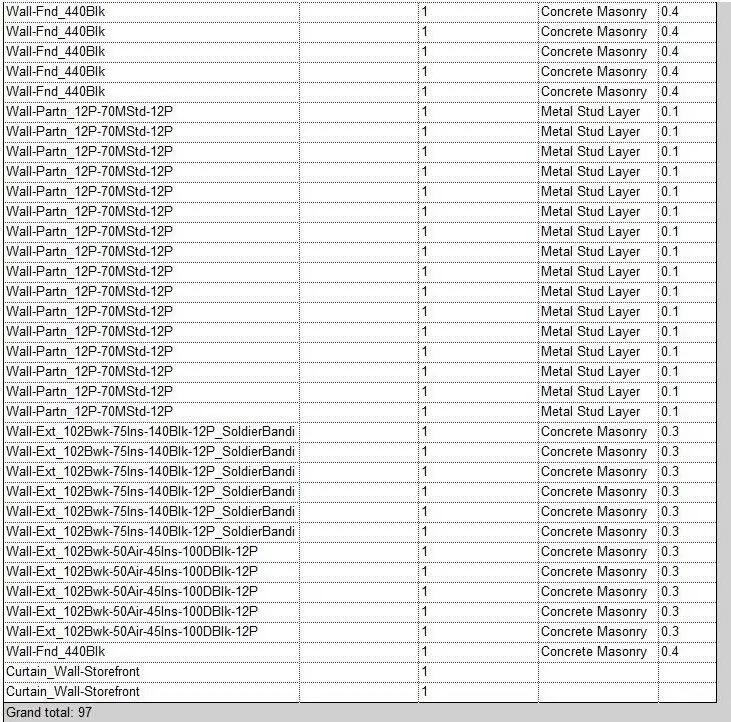
3.WINDOWS
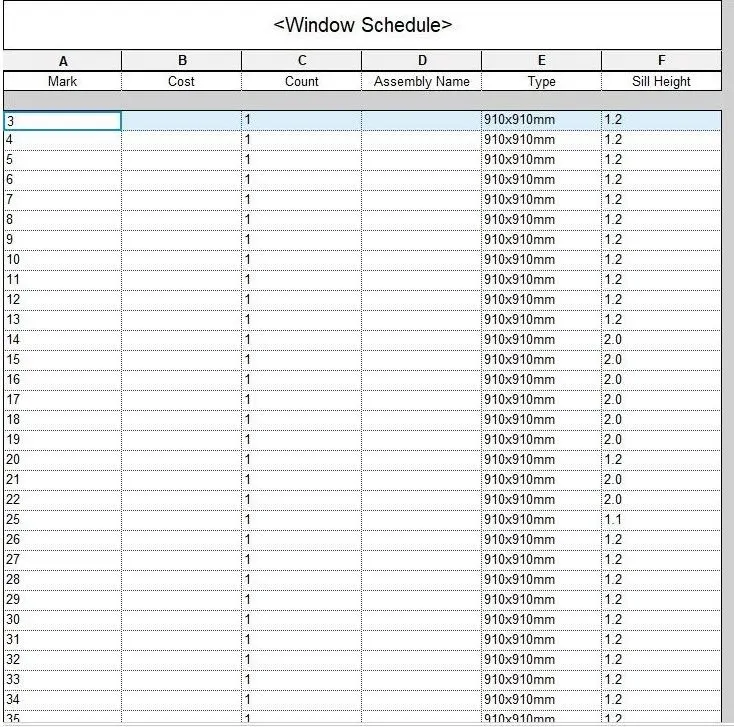
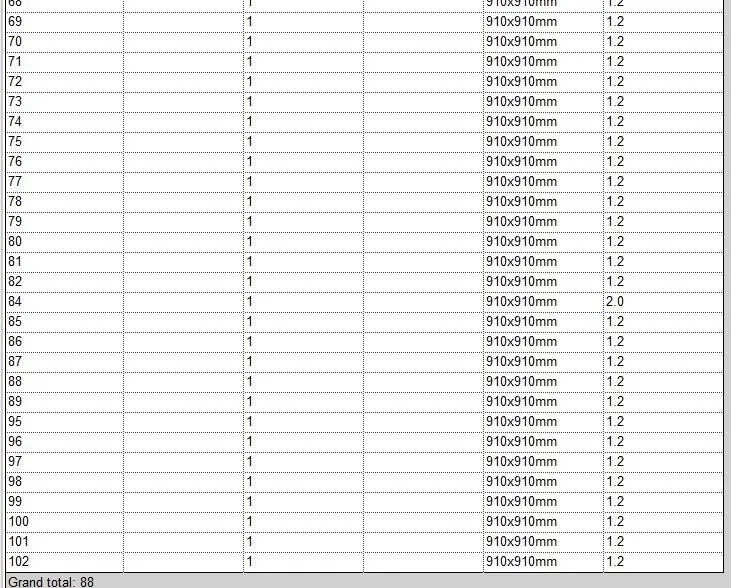
4.MATERIALS
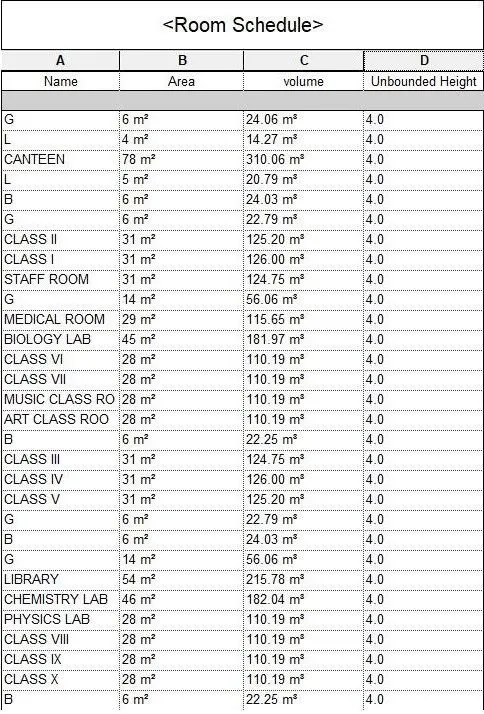
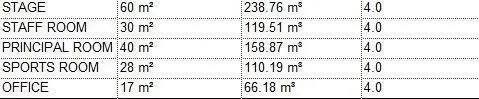
3.using Revit Calculate area and volume of each room in the model with appropriate room tags applied to each room. Prepare a schedule report for area and volume of each room.
AIM : To create schedule for area and volume of each room.
INTRODUCTION : Schedule displays information, extracted from properties of an element in a project in tabulat form.
PROCEDURE :-
- Open 7th week project
- Go to view tab and click on schedule
- Select rooms.
- Enter the fields as given below.
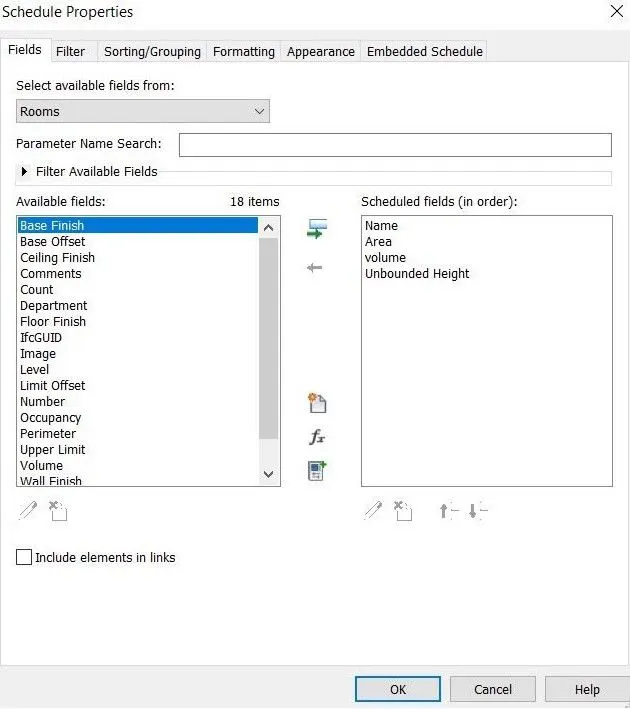
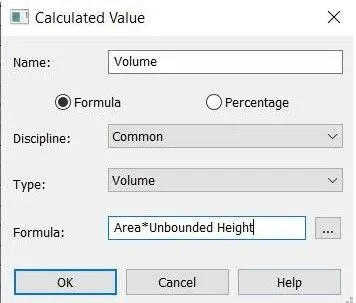
- Now click on "calculated" to enter formula for volume
RESULTS:
- Schedule report for area and volume of each room with room tag.
4) Using the same schedule using the unit cost rate for materials available in the internet, prepare total cost of materials used in the project.
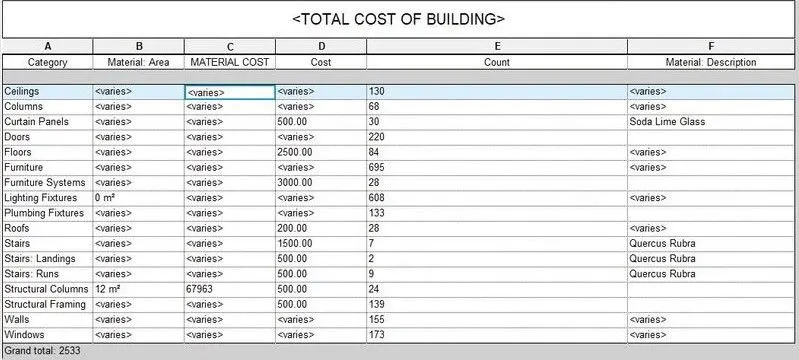
a. Total Cost of Materials.
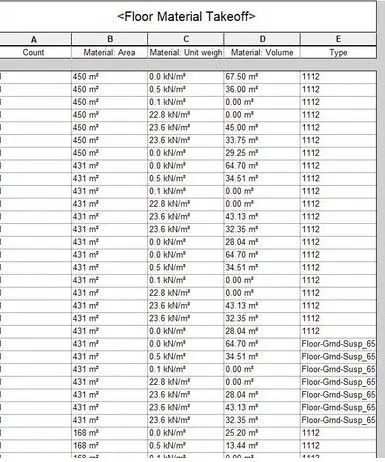
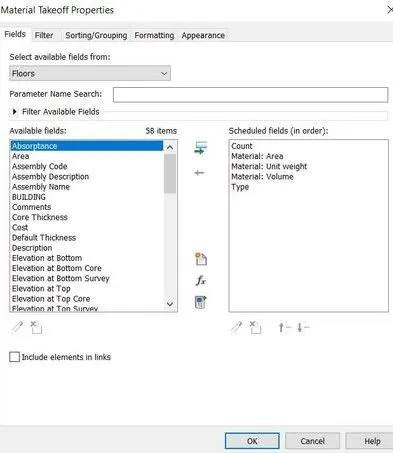
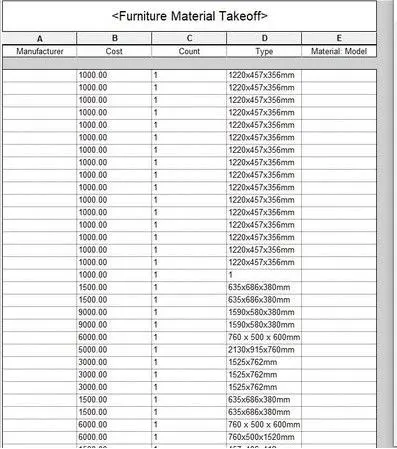
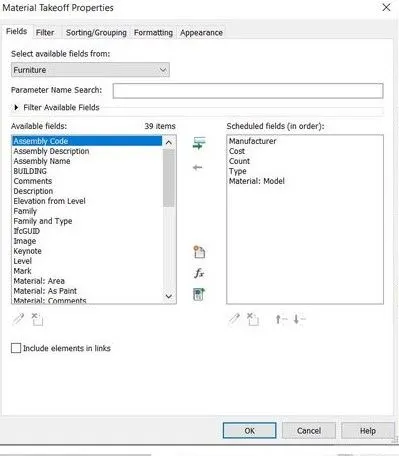
b. Individual Material Take off.
AIM: To prepare schedule for total cost of the materials and individual material takeoff.
INTRODUCTION: Schedule displays information, extracted from properties of an element in a project in tabulat form.
a. Total Cost of Materials
PROCEDURE:-
- Enter each material cost using properties browser
- Go to view
- Select materials takeoff
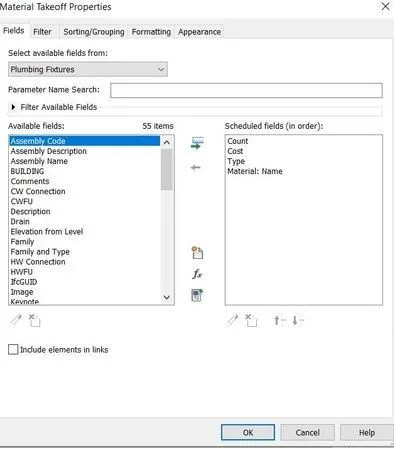
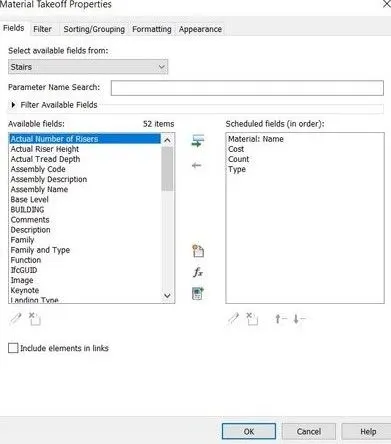
- Select multicategory
- Select fields as shown below.
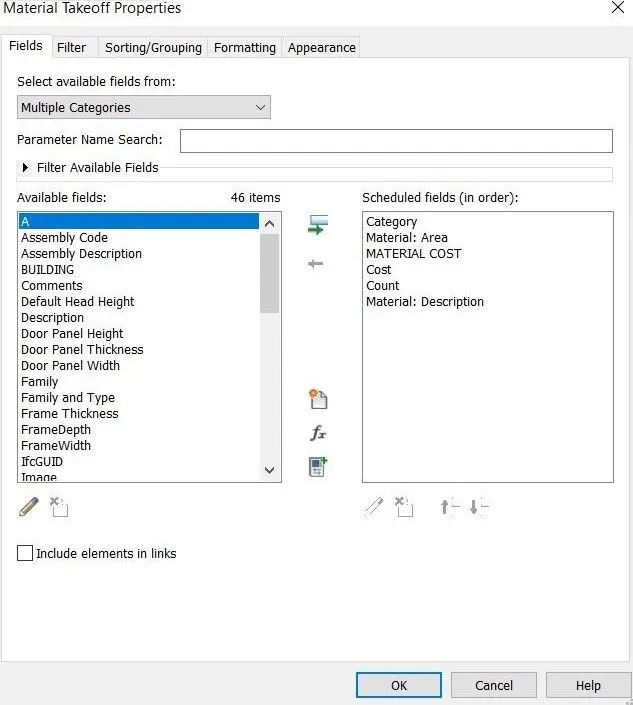
- Enter material cost formula :- Material area * (Cost*0.092) as cost was in sq ft coverted to sqm.
RESULT:-
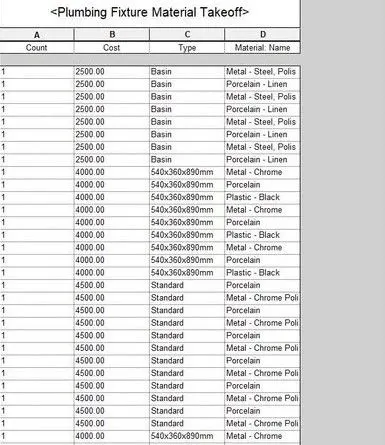
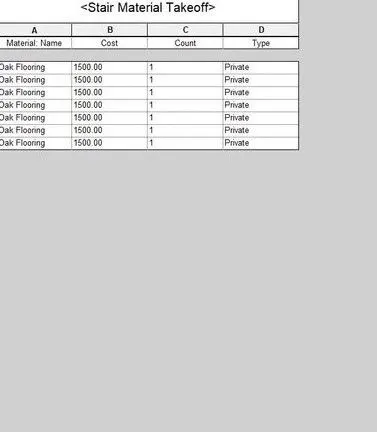
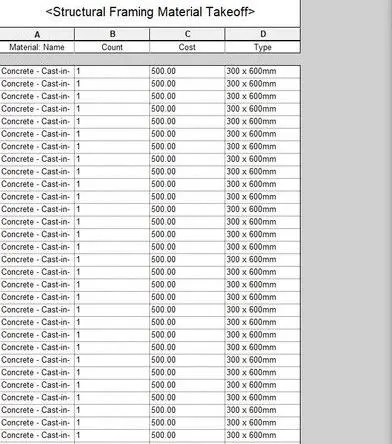
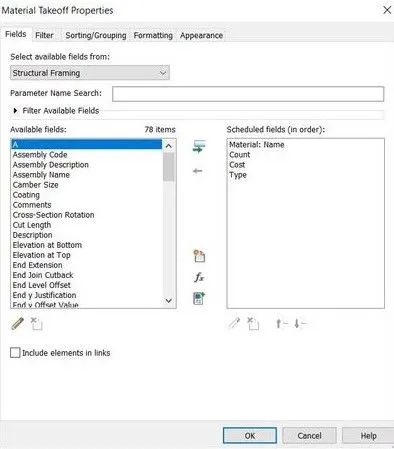
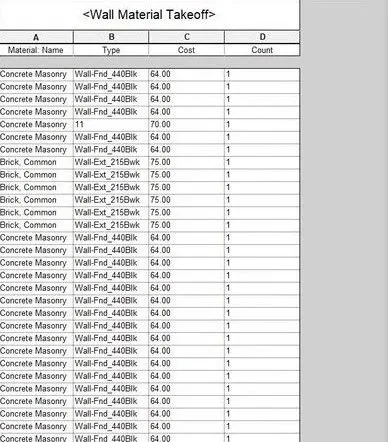
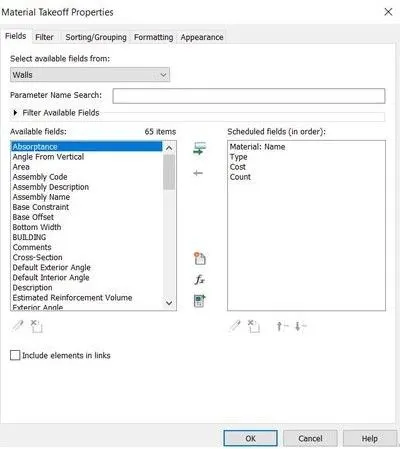
b. Individual Material Take off.
PROCEDURE:-
- Go to view
- Select materials takeoff
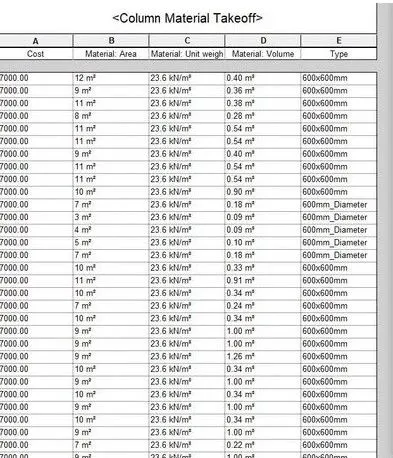
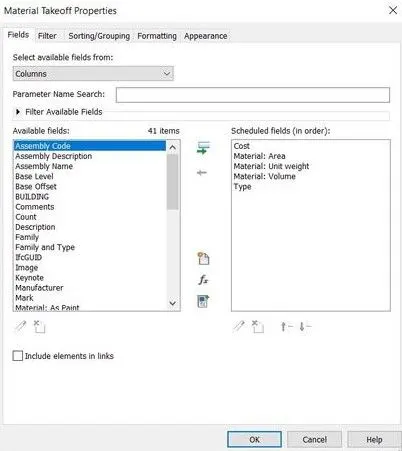
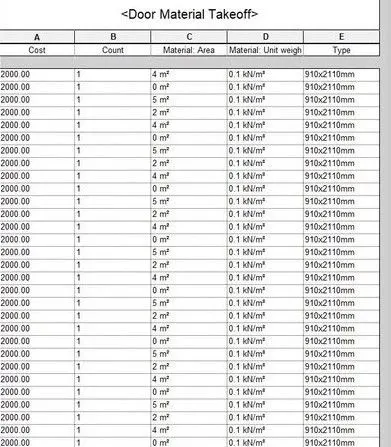
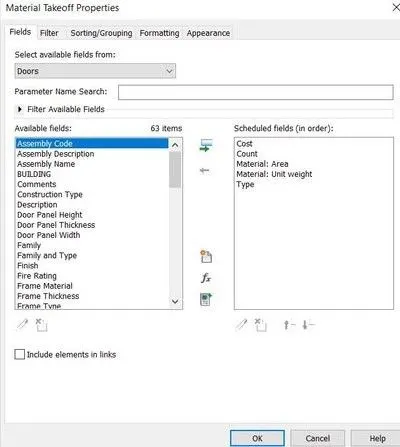
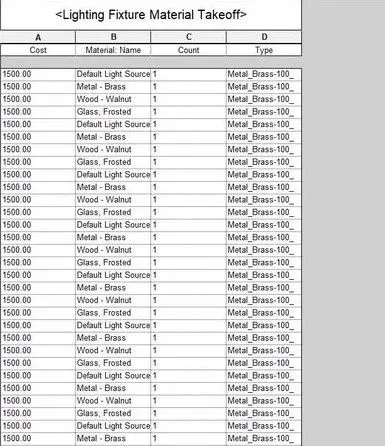
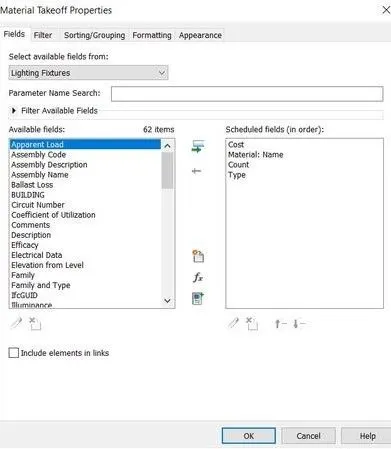
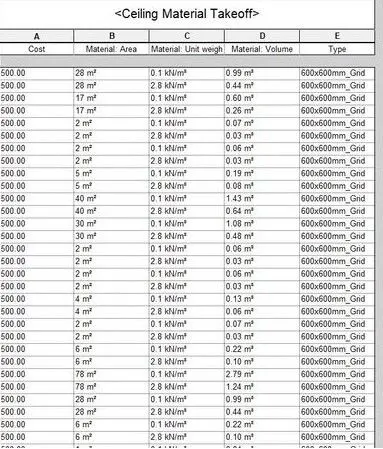
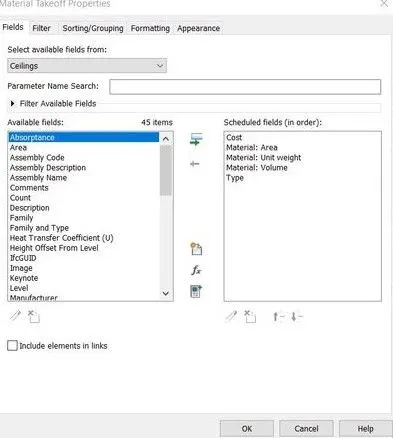
- Select each material separately such as coulmn, ceiling etc
- Create individual takeoff.
RESULTS:-
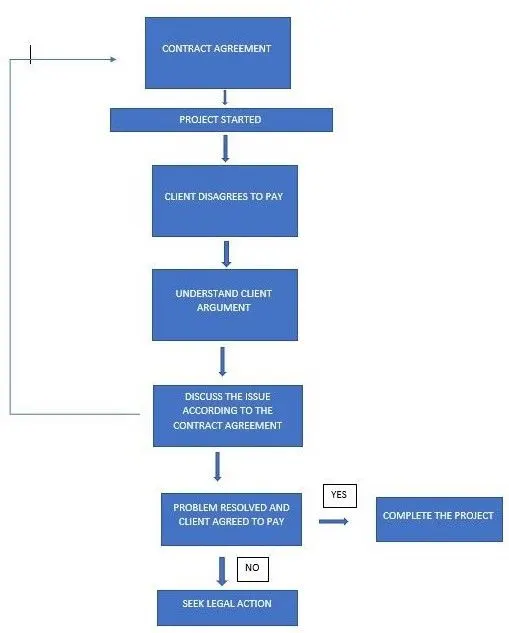
5) Using the concept of Visual Programming discussed in class, list a flowchart for the following scenario
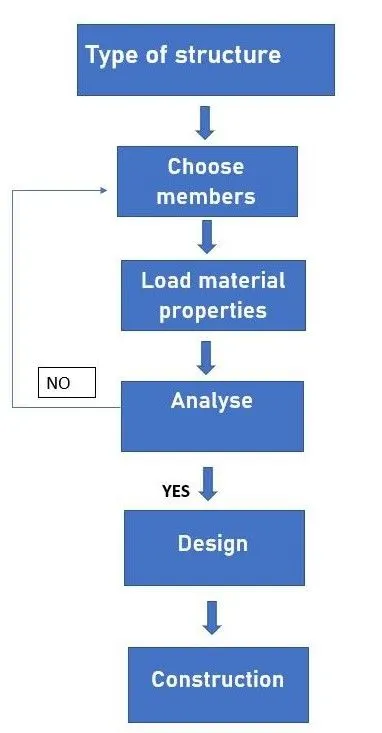
a. How to decide framings for a structure using Dynamo ?
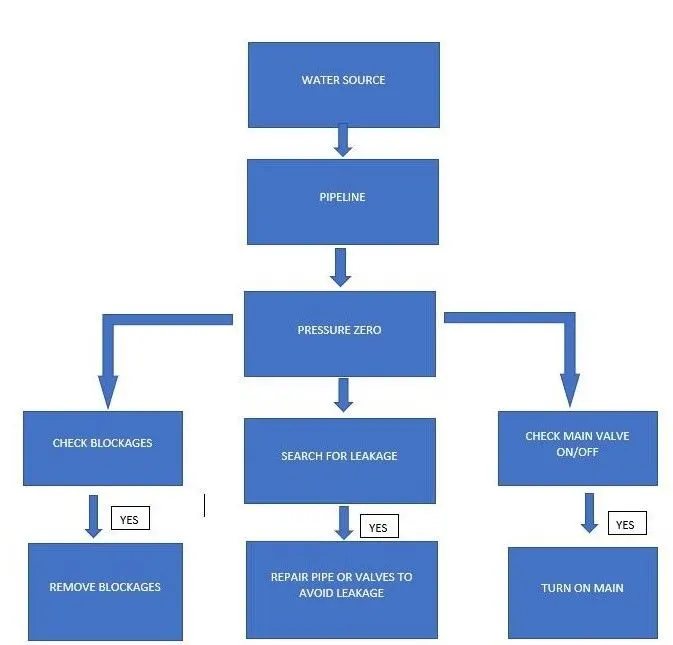
b. If there is no water coming from the pipes
c. If request for money from client has been declined for the project.
Visual programming allows to design a project with formalizing algorithms. Dynamo is an open source visual programming language for revit. Dynamo is envisioned as a visual programming tool for designers which allows to make tools that make use of external libraries or autodesk product that has API.
a. How to decide framings for a structure using Dynamo ?
b. If there is no water coming from the pipes
c. If request for money from client has been declined for the project.
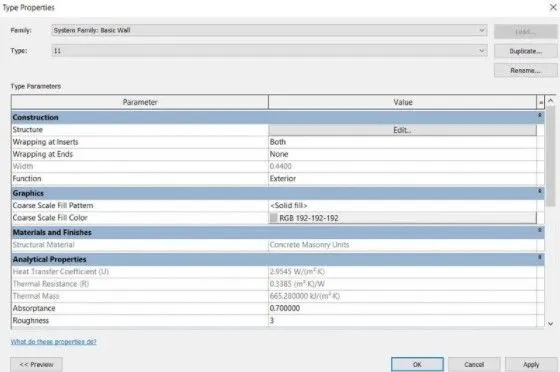
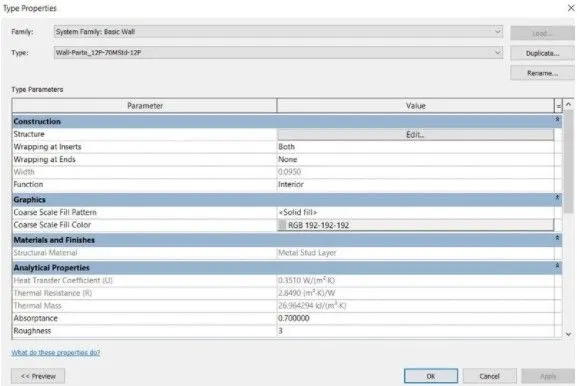
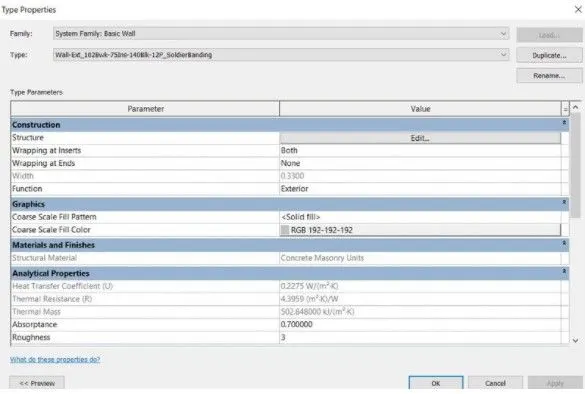
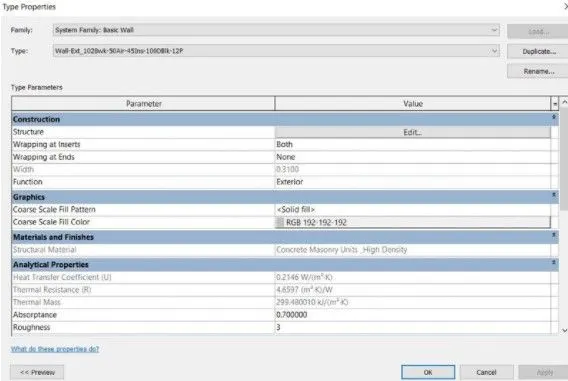
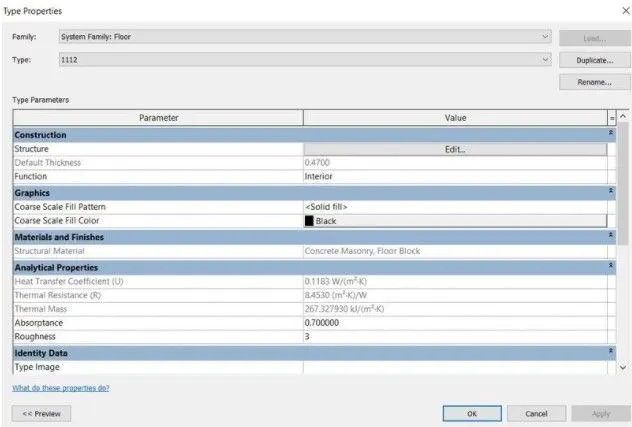
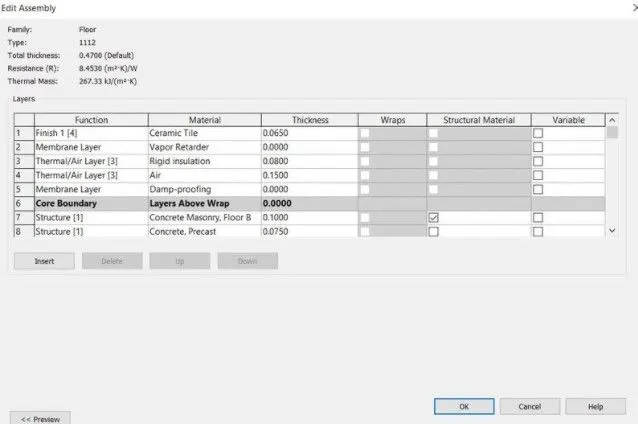
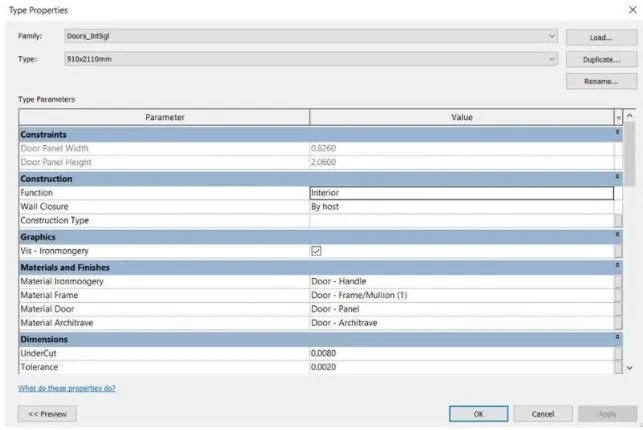
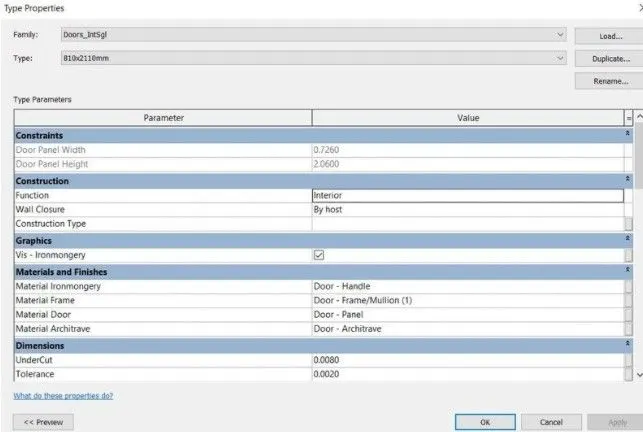
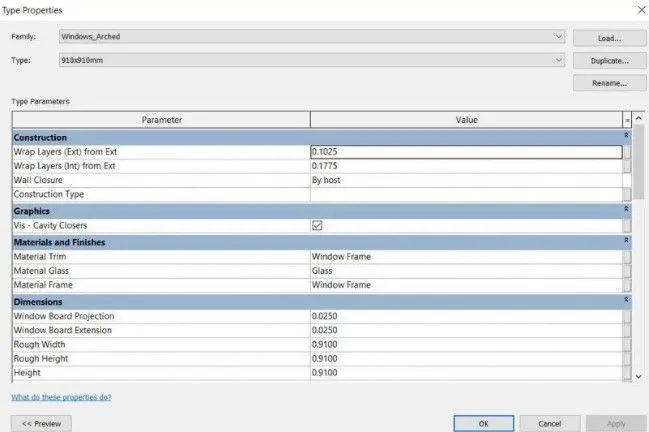
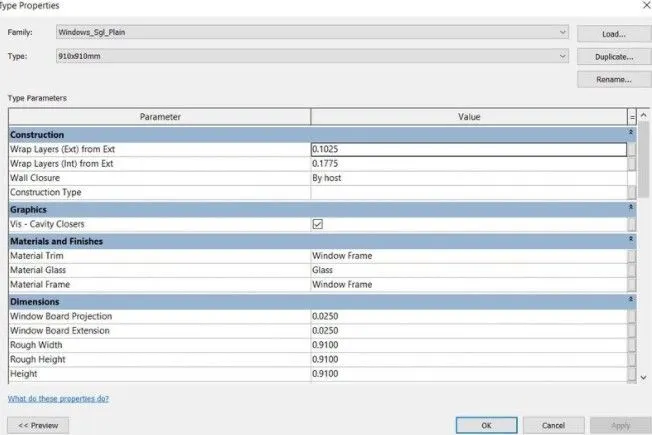
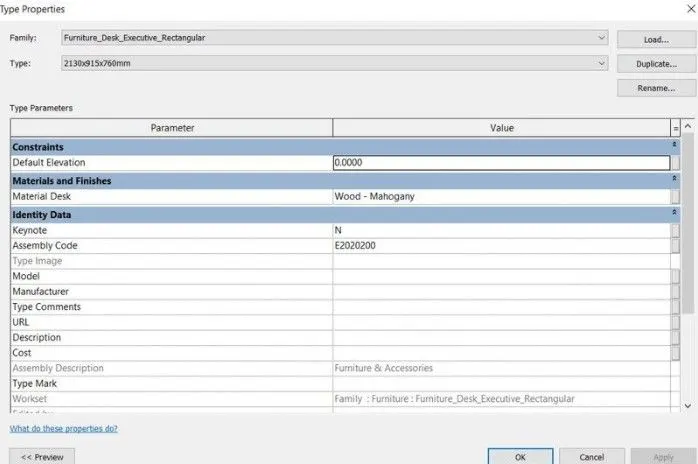
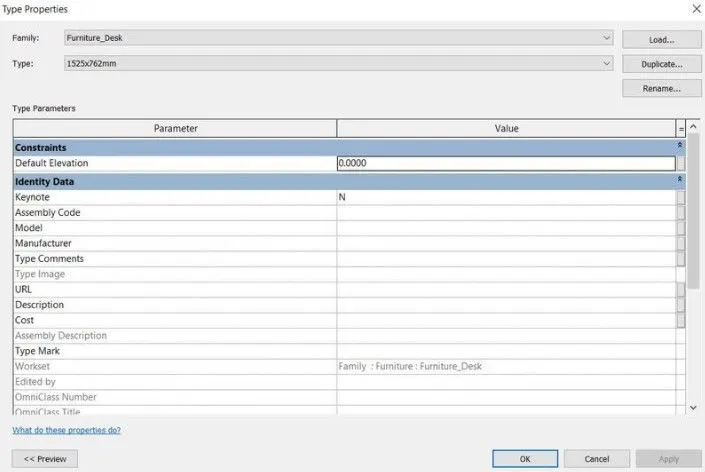
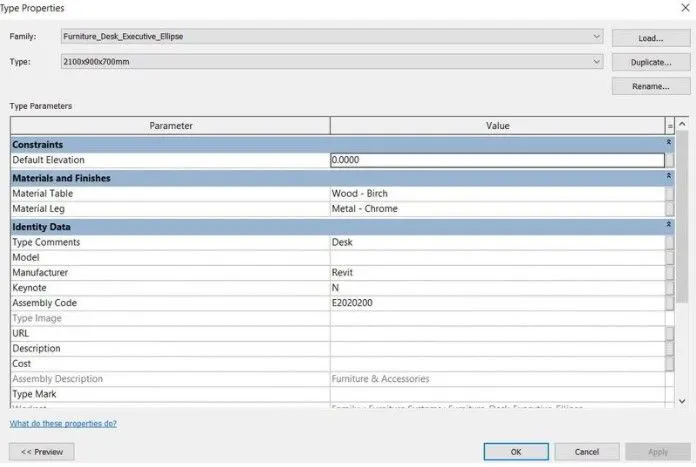
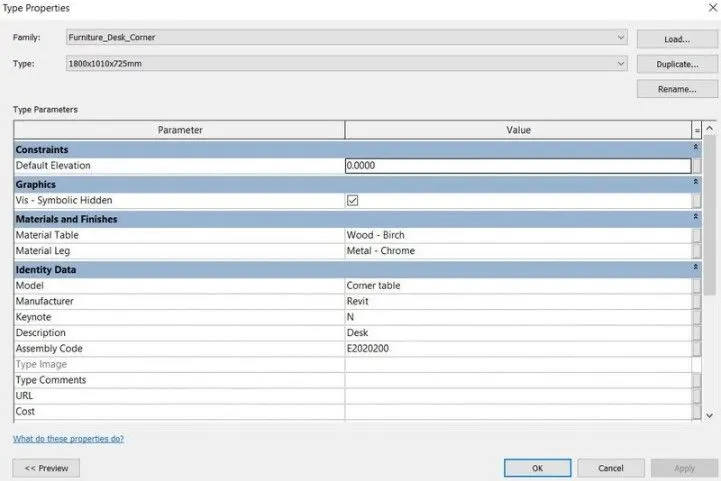
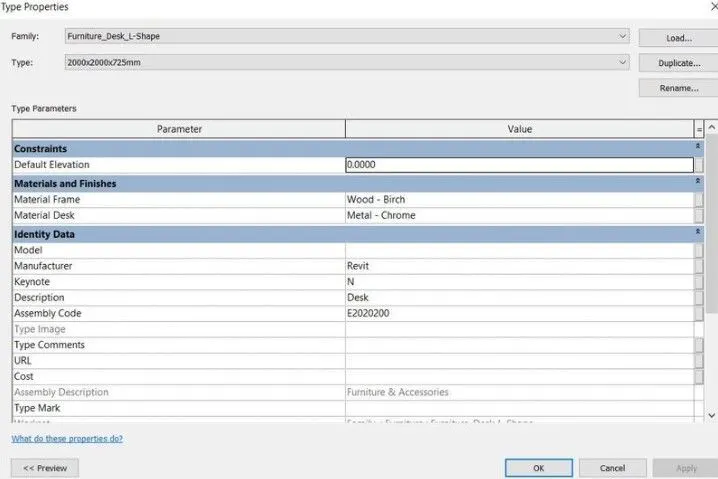
6) List the parameters associated with each model element.
a. Wall
b. Floor
c. Door
d. Window
e. Table
f. Building
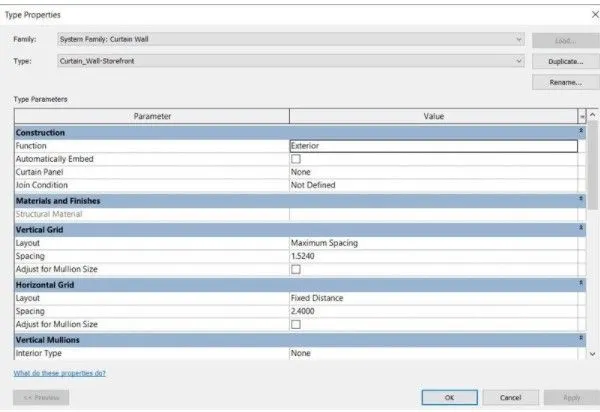
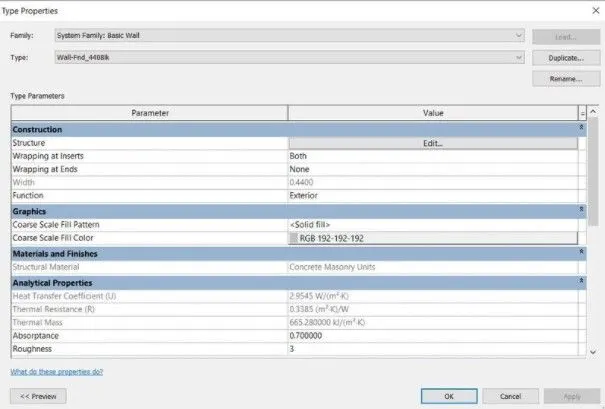
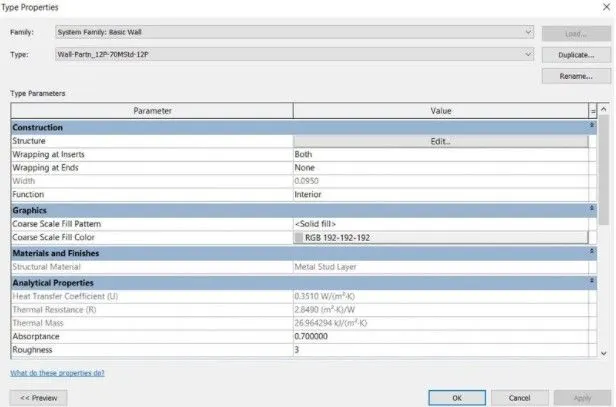
- Select each element
- Click on "edit type"
- Note down the parameters of each element.
a.WALL
b.FLOOR
c.DOOR
d.WINDOW
e.TABLE:-
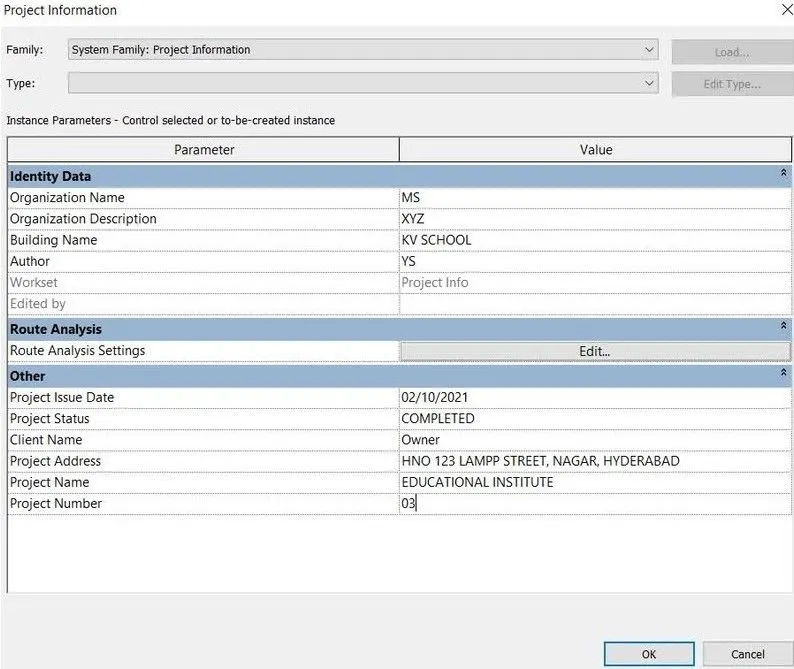
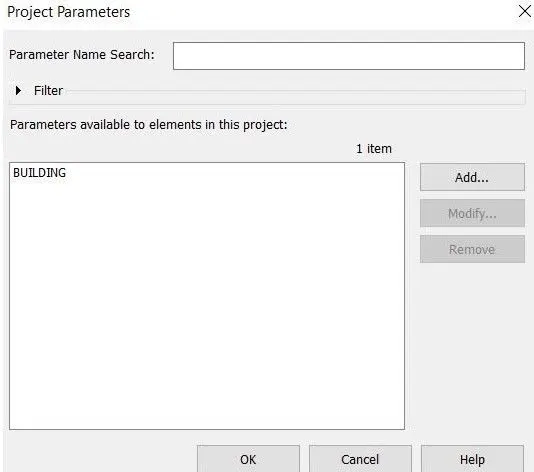
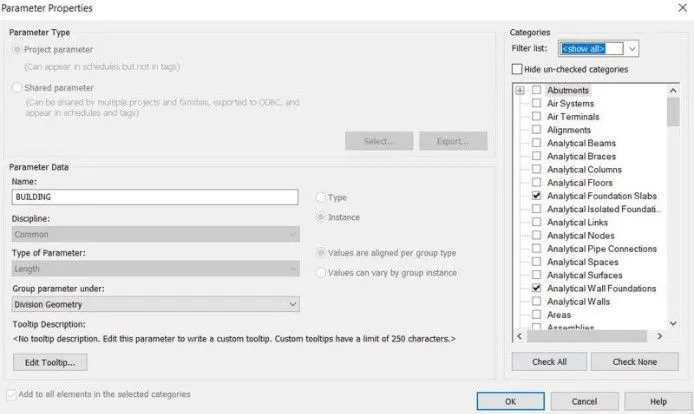
f.Building