Preparing Schedule & Cost Estimation for a building using REVIT
1. AIM:
Using the shortcut key to complete the given task
INTRODUCTION:
In this question we have modify the existing project by using shortcut key. One by one shown the step
PROCEDURE:
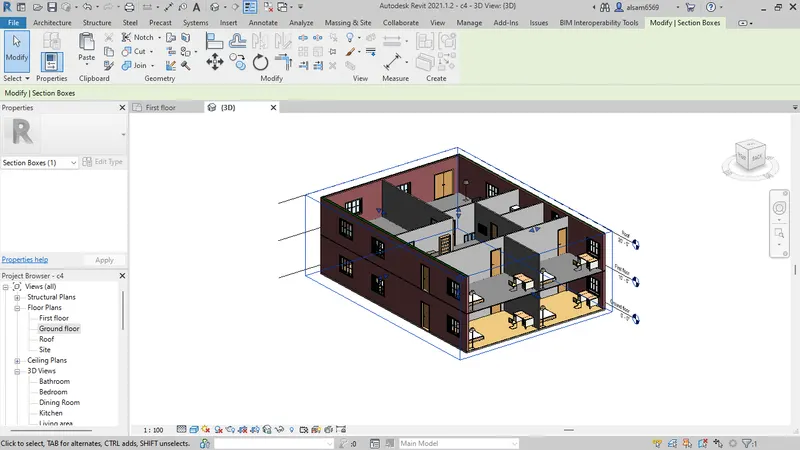
A) SECTION BOX (BX)
- Open Revit software
- Click on open and select previously created model
- Go to 3D view
- Select any part of the building to create a section box
- Type shortcut BX, the section box visible for the particular view
- We can adjust the section box by stretching the arrow, for more visibility near that particular part
B) CREATE SIMILAR (CS)
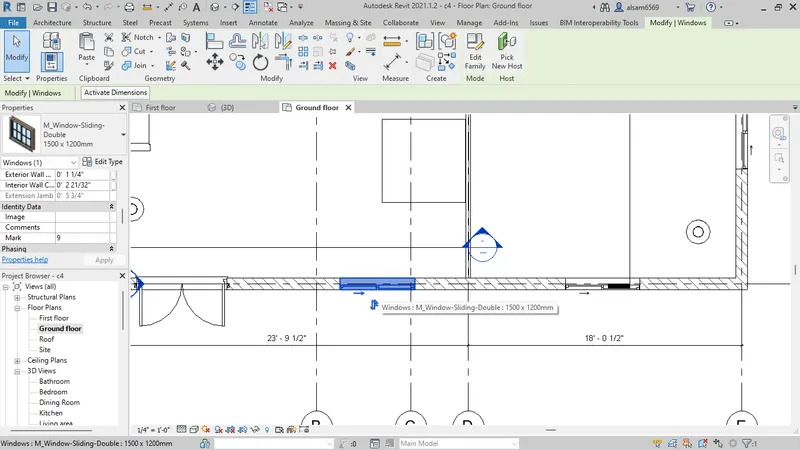
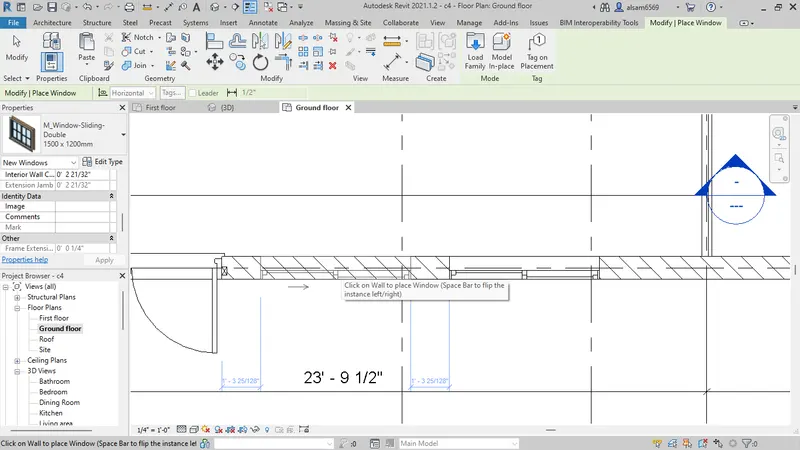
- In the floor plan layout
- Select door or window whicch you want create similar
- Type command CS
- Automatic selected object will appear for placing
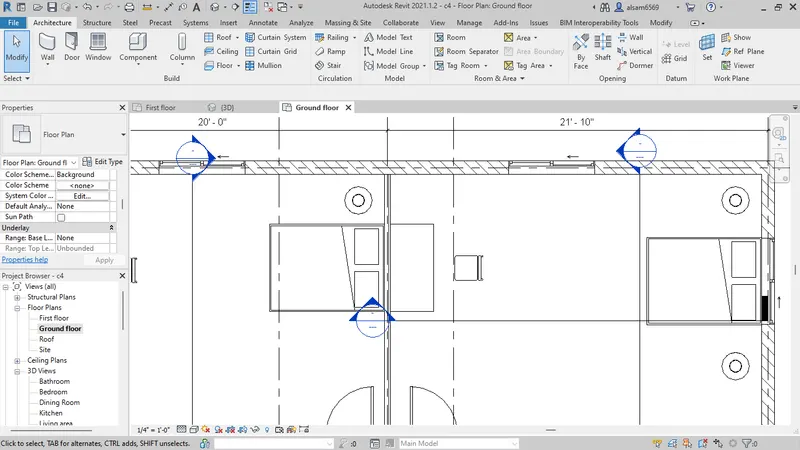
C) THIN LINES (TL)
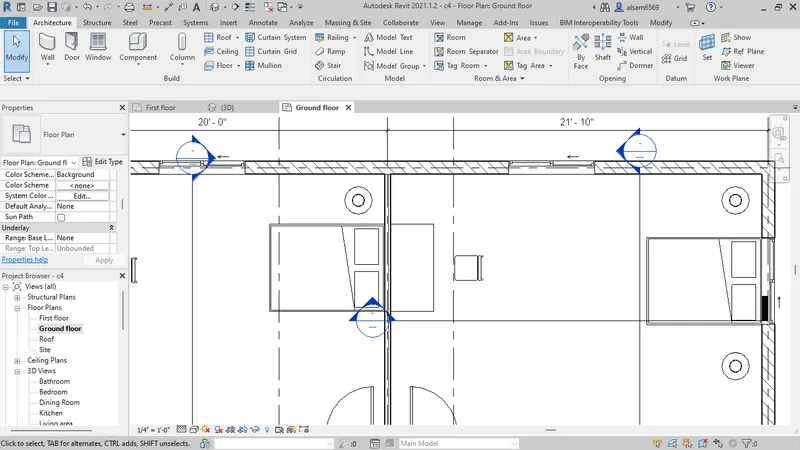
- In the floor plan layout
- Type command TL
- The line will be thin in the floor plan
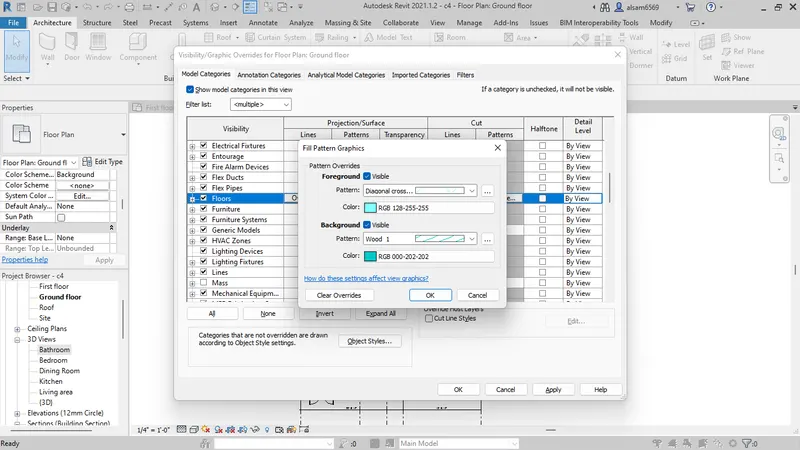
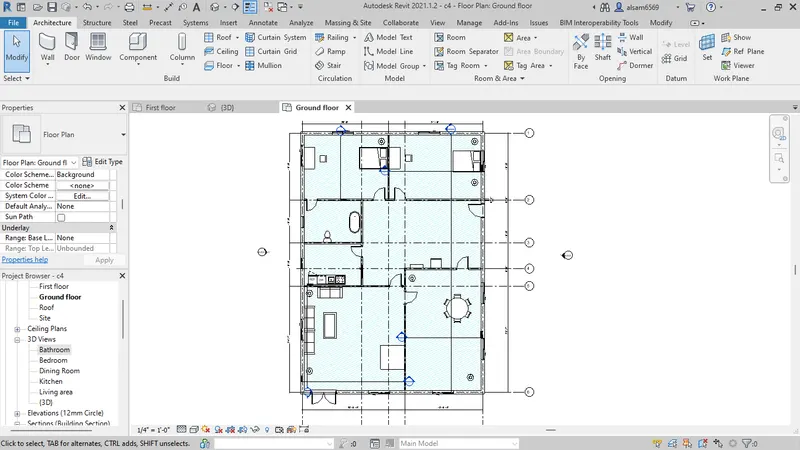
D) VISIBILITY GRAPHICS (VG)
- In the floor plan
- Type VG command
- Go to floor > pattern> override
- Change pattern and colour>ok
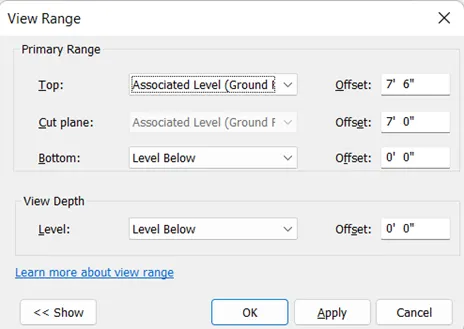
E) VIEW RANGE (VR)
- In the floor plan
- Type VR command
- In appeared dialog box we can changed the levels or offset for increase or decrease the view range
F) RESELECT (CTRL<)
- In the floor plan
- Type ctrl and left arrow key (<) command
- Reselected all the previously selected item
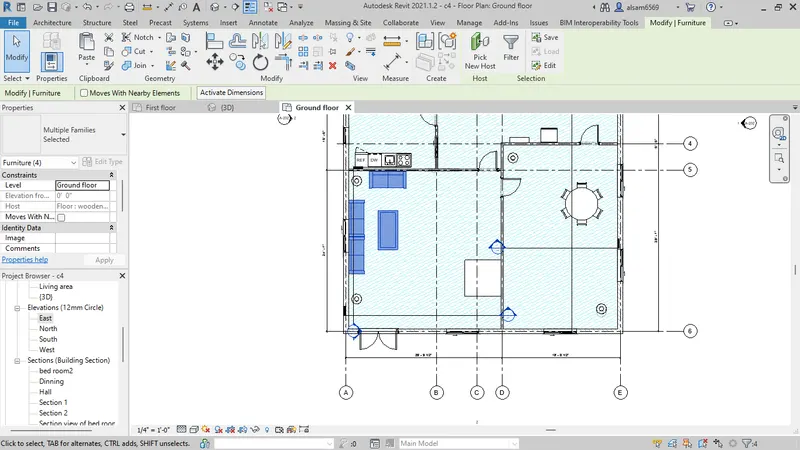
G) ANNOTATION (DI)
- In the floor plan
- Type DI command
- Annotation tab will open and active aligned dimension
- We can choose any dimension after activating the annotation tool
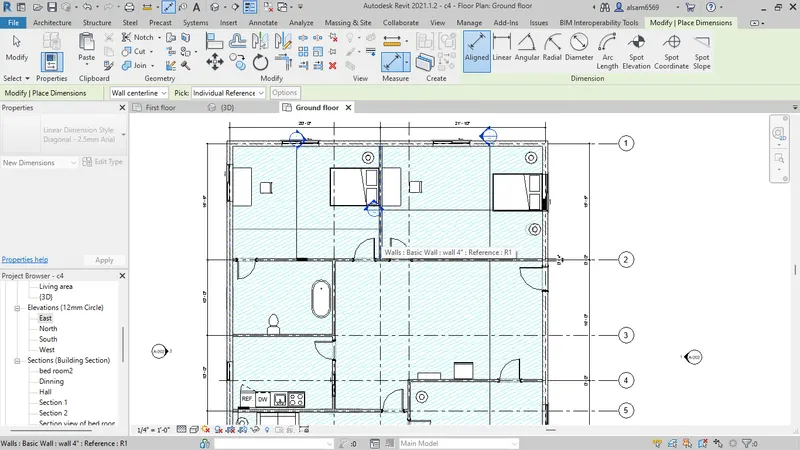
H) ALIGN (AL)
- In the floor plan
- Type AL command
- First select base line then select element to align
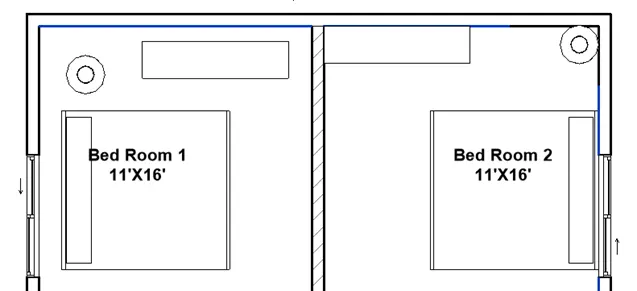
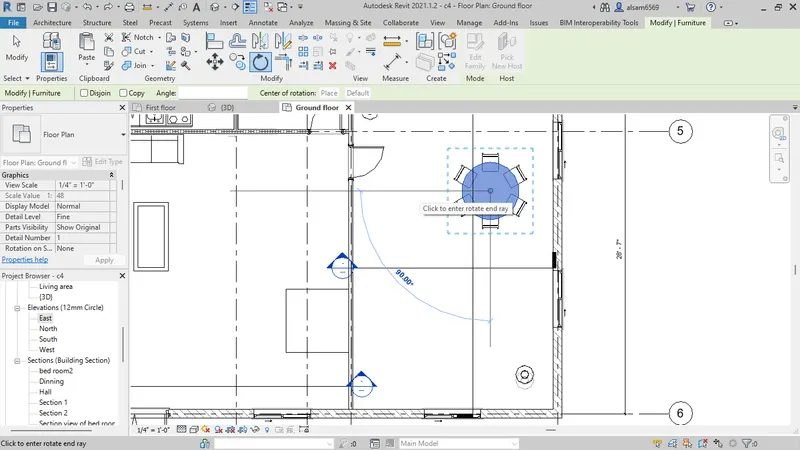
I) ROTATE(RO)
- In the floor plan
- Select item to be rotate
- Type RO command
- then select the pick point to rotate
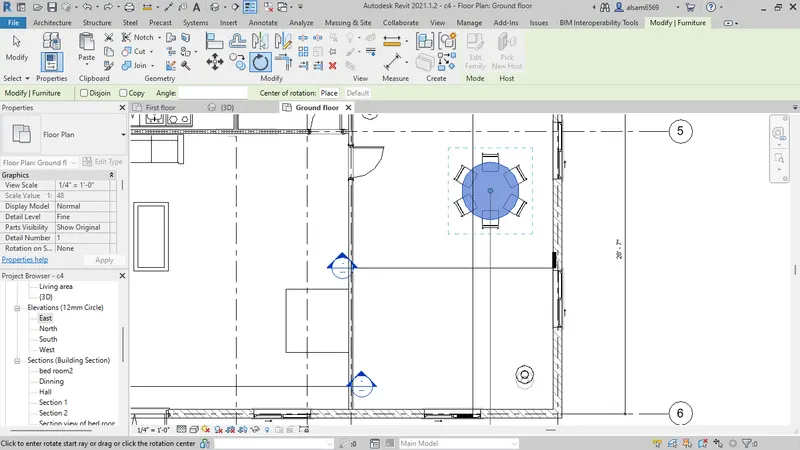
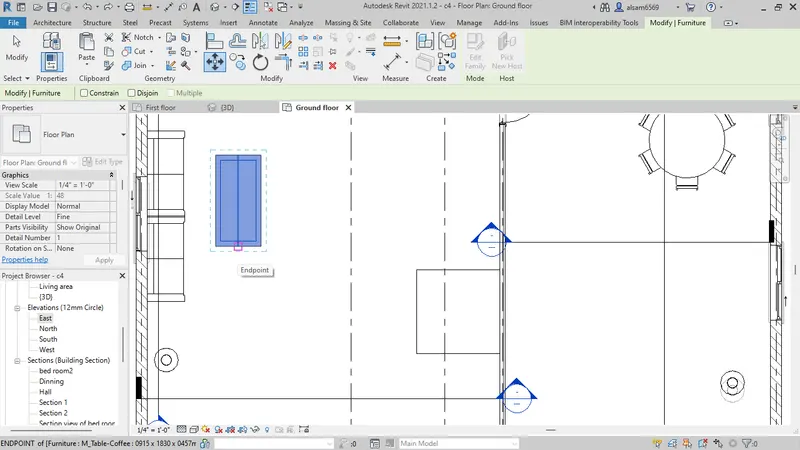
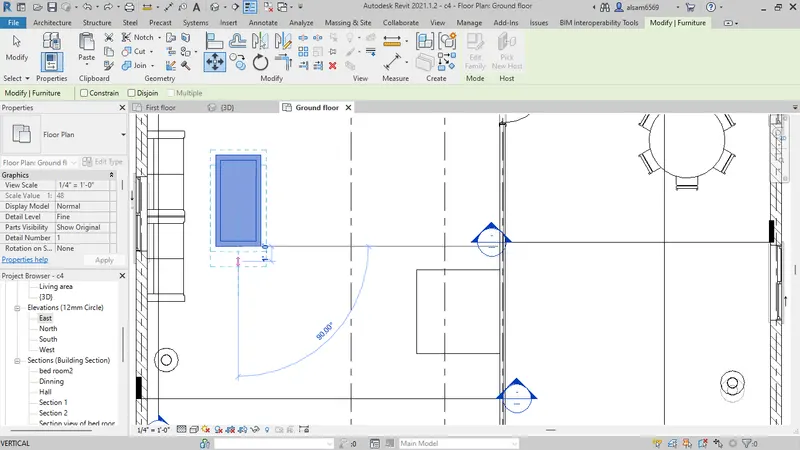
J) MOVE(MV)
- In the floor plan
- Type MV command
- Select the element to be move
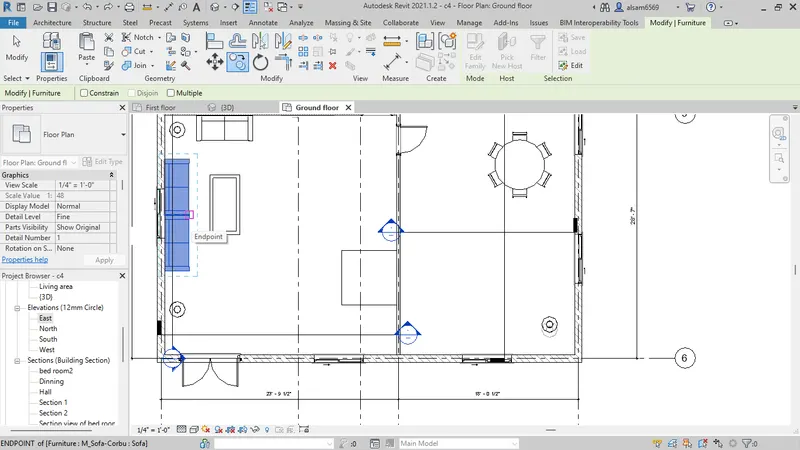
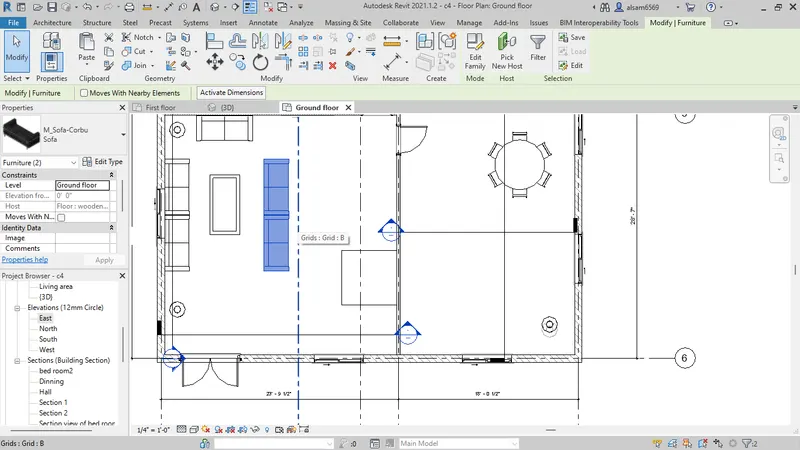
K) COPY (CO)
- In the floor plan
- Type CO command
- Select the element to be copy
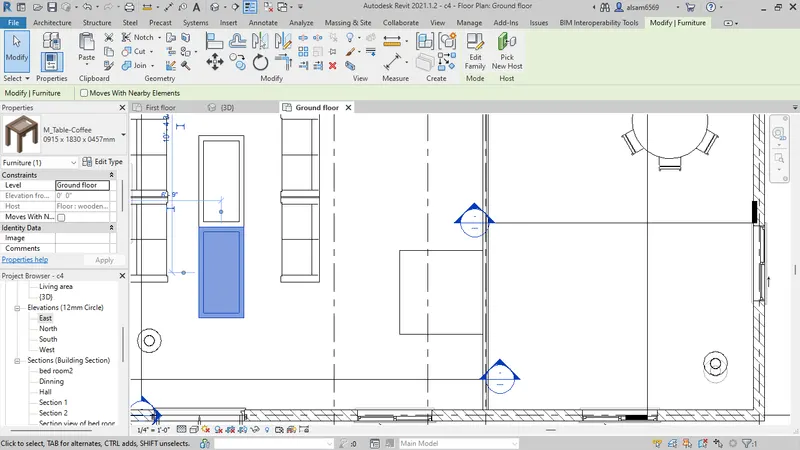
L) MIRROR(MM)
- In the floor plan
- Type MM command
- Select the element then press enter and choose axis to be mirror
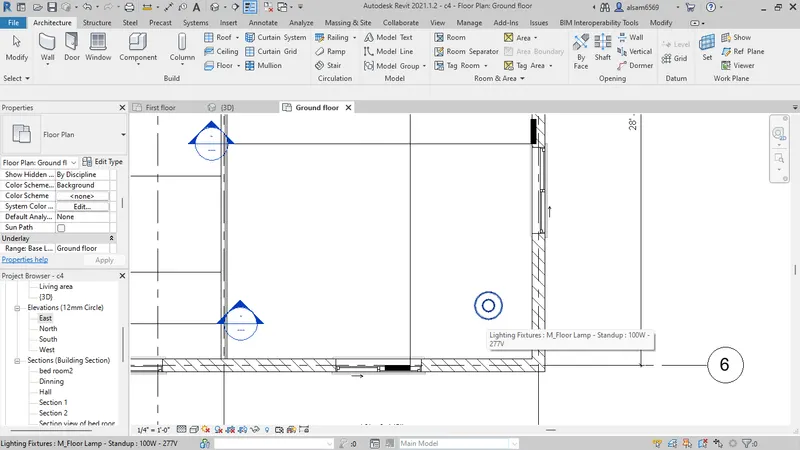
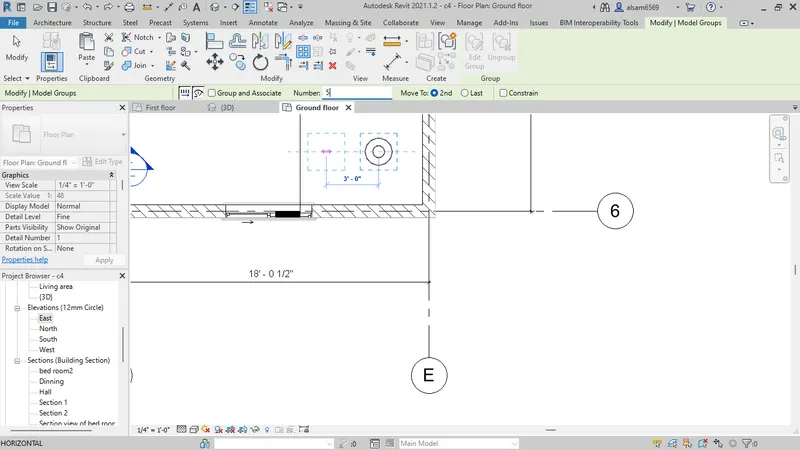
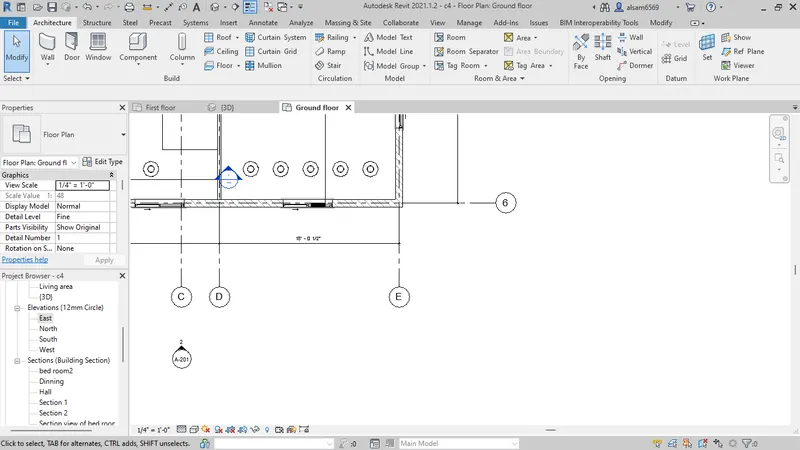
M) ARRAY(AR)
- In the floor plan
- Type AR command
- Select the element to be array> enter
- In ribbon modify tab will be appear provide the number of copies
- Pick the point of the element, move desired side to make array of element
RESULT:
In the question we have modified or created the elements by using shortcut keys
2. AIM:
In the question we have to create schedule for wall, door, window and material in previous week model 6 to 8
INTRODUCTION:
From week 6 to 8, I have worked on same project so that I prepare only one building door window schedule
PROCEDURE:
STEP 1) OPEN MODEL
- Launch the Revit software
- Click on open and select previously created drawing as Arch_Residential
STEP 2) CREATE SCHEDULE FOR WALL
- Go to view tab drop down schedule and click on schedule/quantities
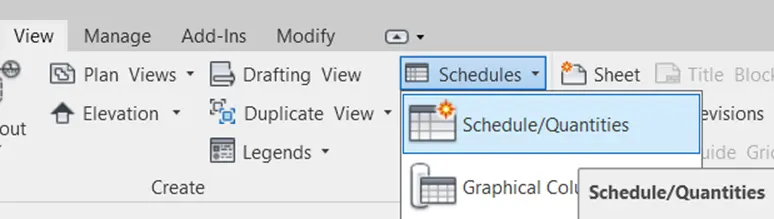
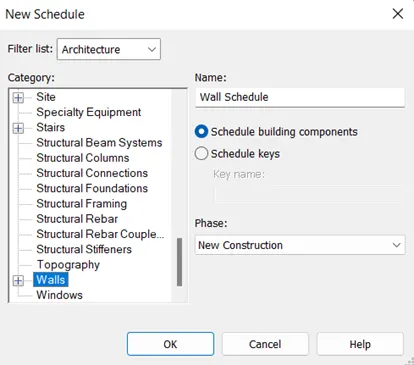
- Select wall from dialog box and click ok
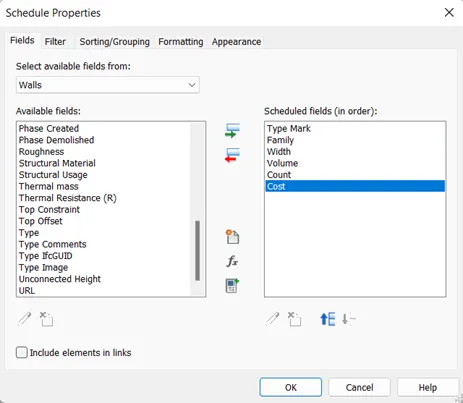
- Add required parameters in the list
- Arrange in order
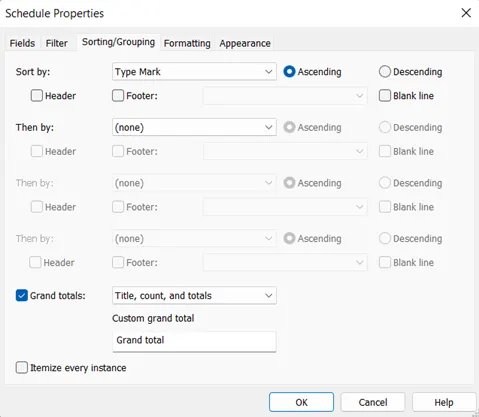
- In the dialog box go to shorting/grouping tab and change the settings
- After change the setting similar walls can not be shown multiple time in schedule
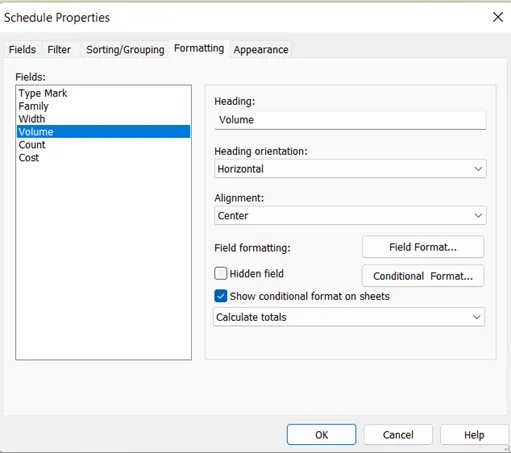
- In the dialog box go to formatting changed to calculate totals
- Similarly change for cost
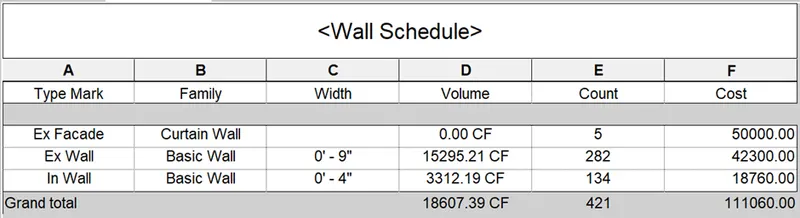
- After change the setting wall schedule prepare
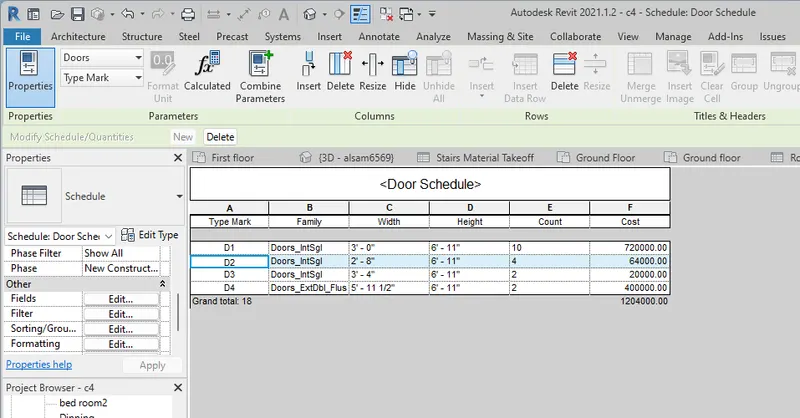
STEP 3) CREATE SCHEDULE FOR DOOR
- Similarly did all the setting for door
STEP 4) CREATE SCHEDULE FOR WINDOW
- Similarly did all the setting for window
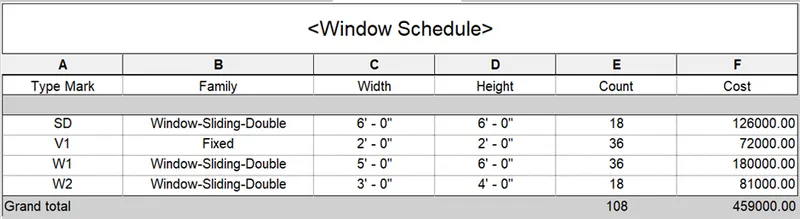
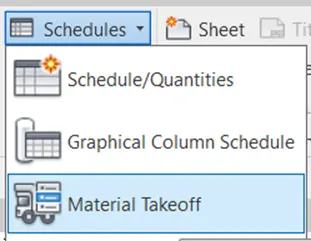
STEP 5) CREATE SCHEDULE MATERIAL
- Go to view tab drop down schedule and click on material takeoff
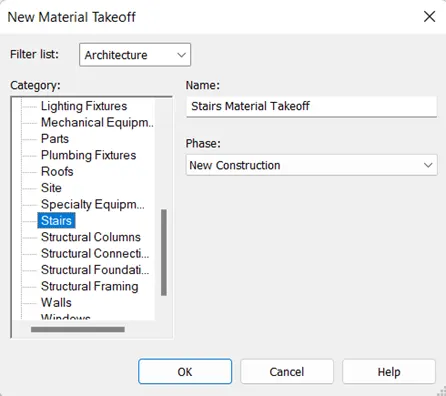
- Select stairs from dialog box and click ok
- Add required parameters in the list
- Arrange in order
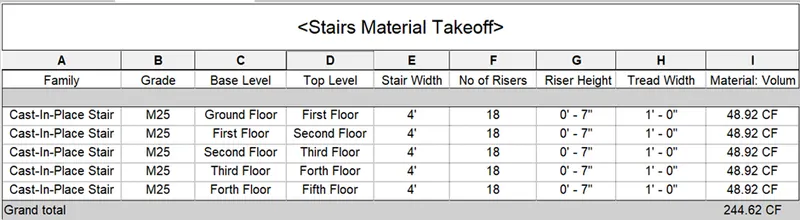
RESULT:
Following above procedure, we got the result of each task
3. AIM:
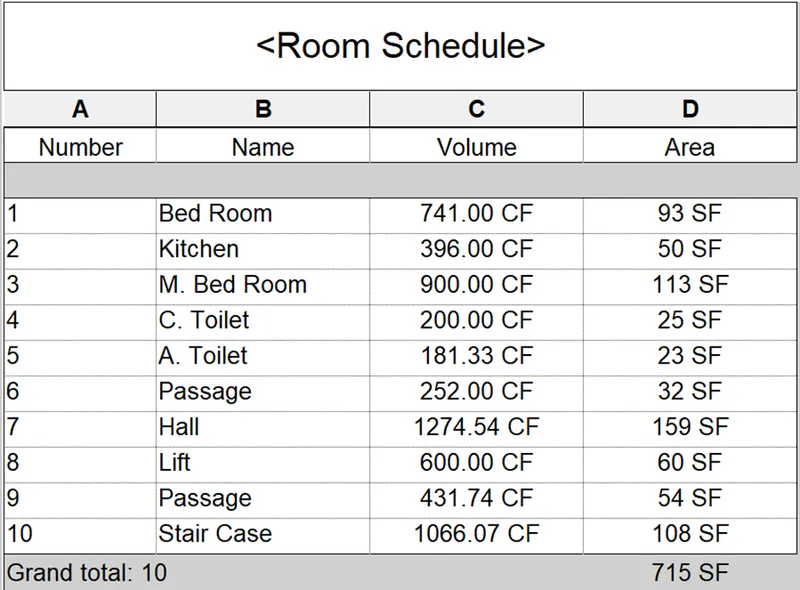
In the question we have to create schedule report for area and volume of each room
INTRODUCTION:
Calculate the area and volume of each room then provide room tags and prepare report schedule
PROCEDURE:
STEP 1) OPEN MODEL
- Launch the Revit software
- Click on open and select previously created drawing as Arch_Residential
STEP 2) CALCULATE AREA AND VOLUME
- In the first-floor plan
- Go to architecture tab
- Select room under the room and area panel

- Click one by one in all rooms
- Used room separator to divide the hall with passage
- Edit the names of rooms accordingly
STEP 3) PREPARE SCHEDULE
- Go to view tab drop down schedule and click on schedule/quantities
- Select rooms from dialog box and click ok
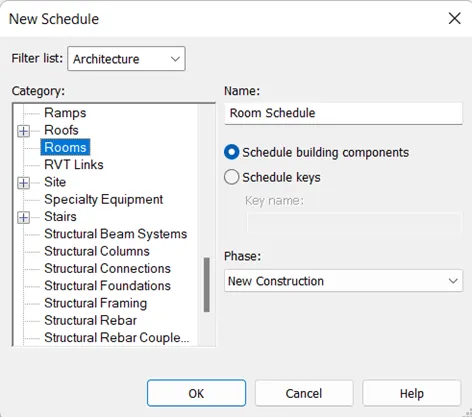
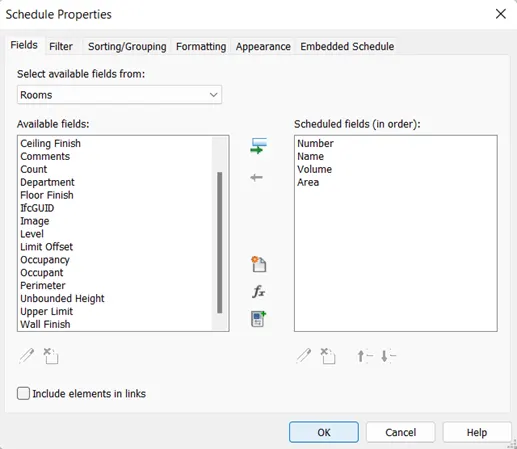
- Add required parameters in the list
- Arrange in order>OK
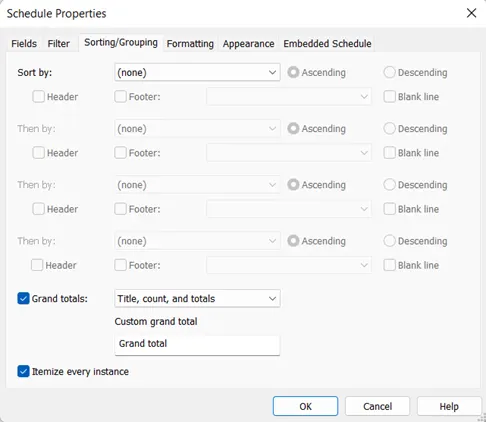
- From shorting/ grouping tab check on grand total for calculate the total area
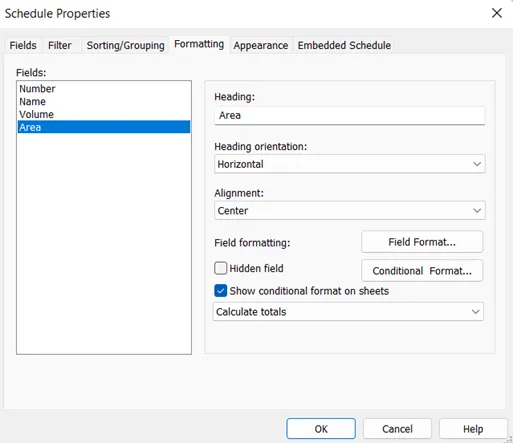
- For calculating total area of room select calculate totals from formatting tab for area only
RESULT:
Following above procedure, we got the result of area and volume of each room with appropriate tag and prepare room schedule
4. AIM:
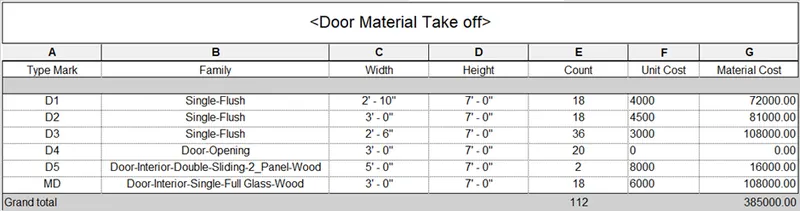
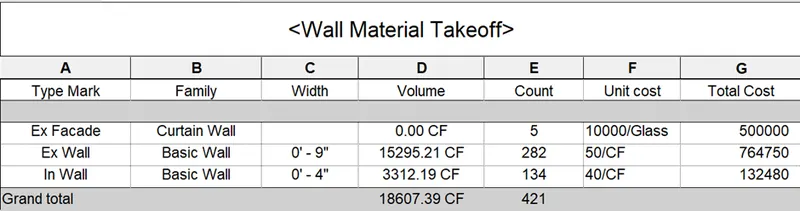
In the question we have to create same schedule for material and prepare total cost of material
INTRODUCTION:
By using unit rate of material through internet prepared total cost of material individually
PROCEDURE:
STEP 1) OPEN MODEL
- Launch the Revit software
- Click on open and select previously created drawing as Arch_Residential
STEP 2) TOTAL COST OF MATERIAL
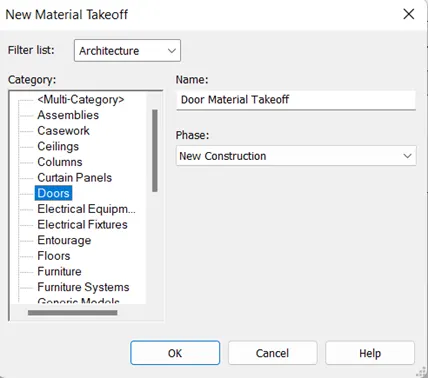
- Go to view tab drop down schedule and click on Material takeoff
- Select Door from dialog box and click ok
- Add required parameters in the list
- Created material take off schedule
- Similarly created other material take-off schedule
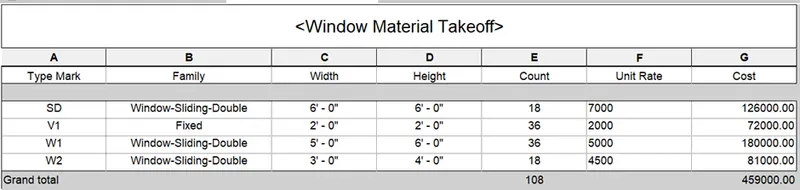
RESULT:
Following above procedure, we got the result of total cost of material and prepared schedule individually
ANSWER 5:
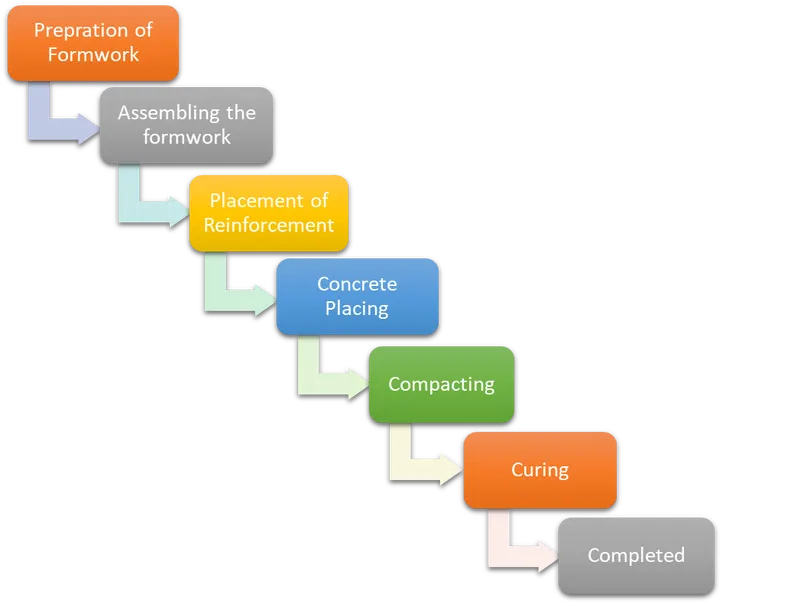
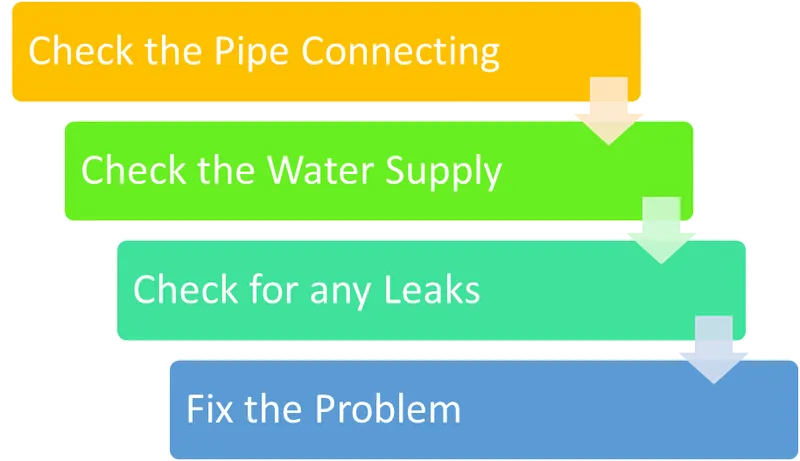
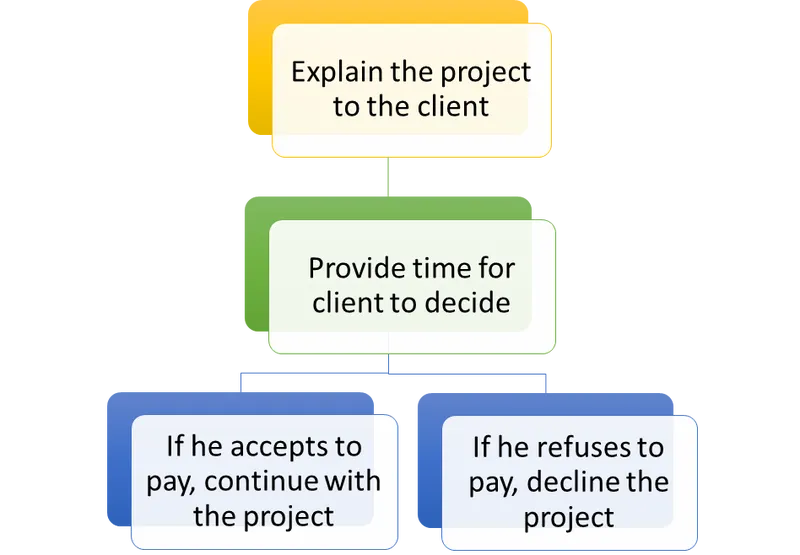
AS per discussed in class, I have listed the flow chart for below scenario:
a) How to decide framings for a structure using Dynamo
b) If there is no water coming from the pipes
c) If request for money from client has been declined for the project
ANSWER6:
a)The parameter associated with wall are listed
- Type
- Model
- Volume
- Material
- Thickness
- Function
- cost
b)The parameter associated with floor are listed
- Material
- Function
- Finish
- Mark
- Model
- Cost
- thickness
c) The parameter associated with door are listed
- Type
- Mark
- Material
- Function
- Width
- Height
- Cost
The parameter associated with window are listed
- Type
- Mark
- Material
- Function
- Length
- Width
- Height
- Cost
e) The parameter associated with table are listed
- Model
- Function
- Length
- Width
- Height
- Cost
- material
f) The parameter associated with building are listed
- Grids
- Levels
- Area
- Length
- Width
- Height
- Family
- Geographic
- Material
- Functional
- Aesthetics
- sustainability
- safety