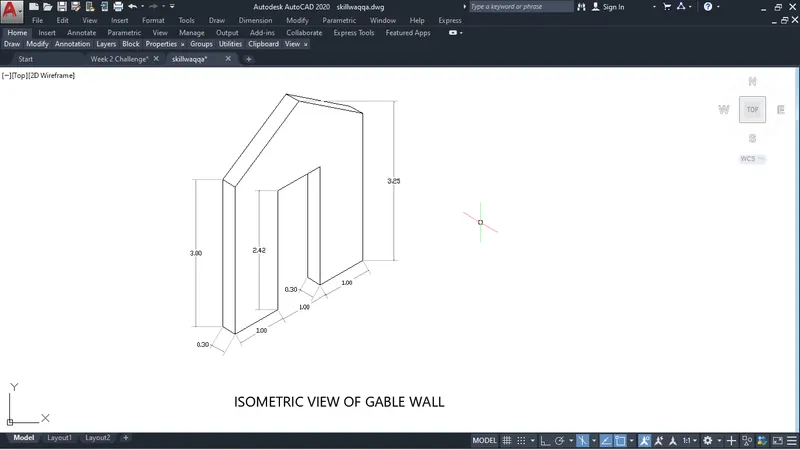
Creating a Floor plan, Footing detail and Isometric view using AutoCad
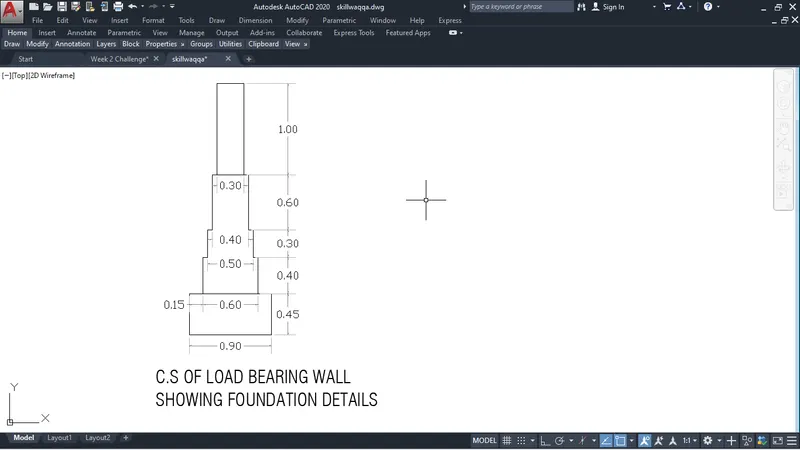
AIM: Draw C.S. of load bearing wall showing foundation details using AutoCad.
- Using template Imperial
- Set unit to decimal by commad- UN
- All the dimensions can be measured from tool dimension in Ribbon
Lets Draw
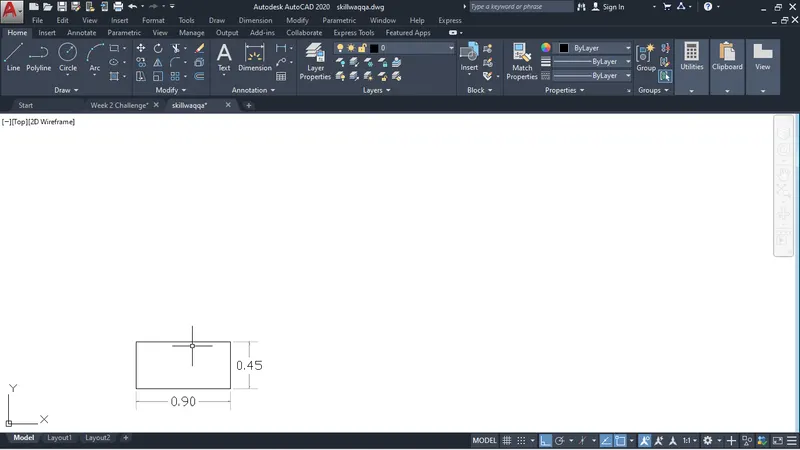
- First we draw rectangle (0.90 x 0.45) as you can see below fig.
- To draw the rectangle we use command- REC or Rectangle from draw tool
- Specify the first corner point: click any where to start
- Specify other corner point: 0.90, 0.45
- Esc
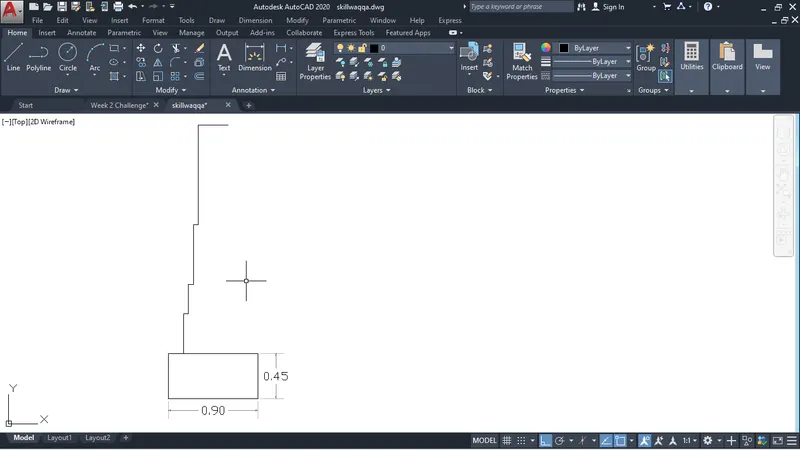
After that we use line tool to draw further
- Choose the line tool by Commad- L or LINE
- Line Specify the first point: click on left upper corner of rectangle
- Specify the next point: @0.15,0
- Specify the next point: @0,0.40
- Specify the next point: @0.05,0
- Specify the next point: @0,0.30
- Specify the next point: @0.05,0
- Specify the next point: @0,0.60
- Specify the next point: @0.05,0
- Specify the next point: @0,1
- After specifying the point drawing would be like as you can see left fig below.
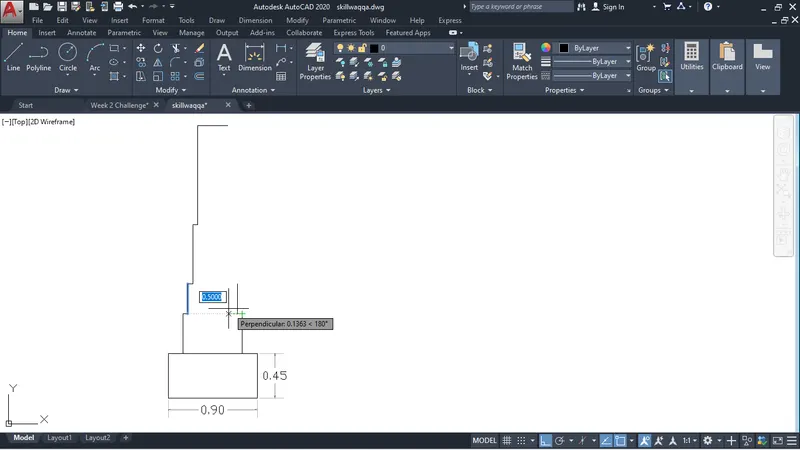
After that we can take offset to draw further
- choose offset from modify tool in ribbon or command- O
- After that select object which you want to offset
- Specify point on side to offset or distance: 0.60
- Similarly we can do further with offset as you can see in right fig. below.
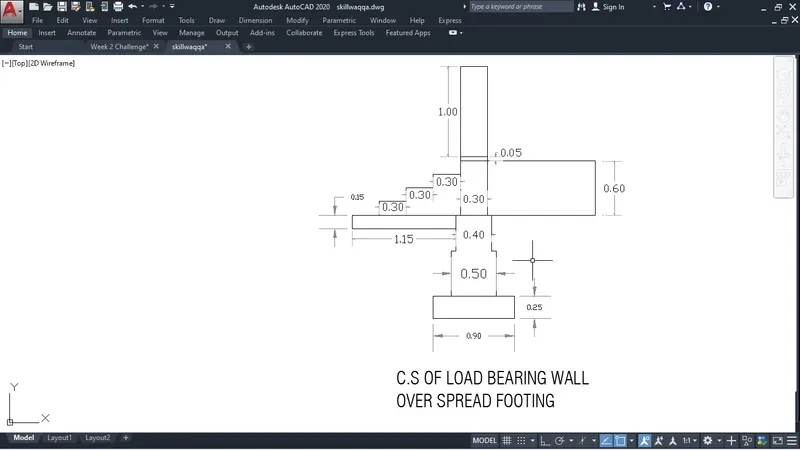
AIM: Draw C.S. of load bearing wall over spread footing using AutoCad.
As you can below drawing fig. It is same drawing as above but little difference in measure and some change
- Similary above we can draw rectangle (0.90, 0.25)
- And after drawing rectangle use line tool to draw further
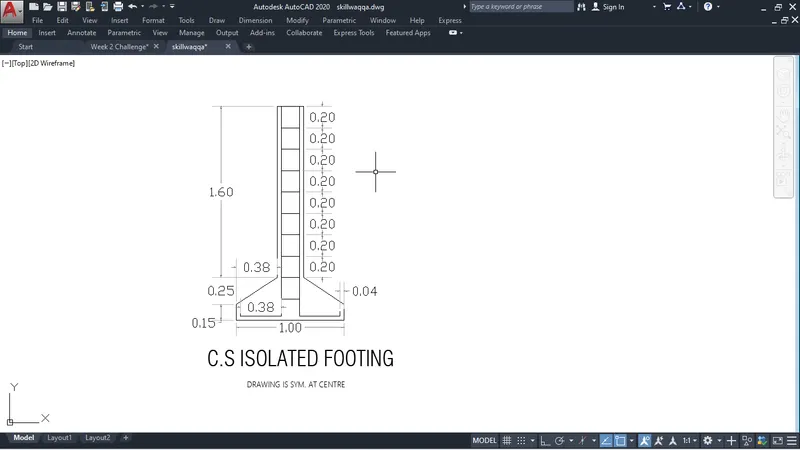
AIM: Draw C.S. Isolated footing using AutoCad.
First we draw as fig. below by using line tool
- choose the line tool
- Specify the first point: Click any where
- Specify the next point: @0, -0.04
- Specify the next point: @0.38,0
- Specify the next point: @0,1.96
- Specify the next point: @0.17,0
- Specify the next point: @0,-1.96
- Specify the next point: @0.38,0
- Specify the next point: @0,0.04
- Esc
- now we take offset
- Select object: top of corner
- Spececfy on side to offset or distnce: 0.20 as you can in the right side fig.
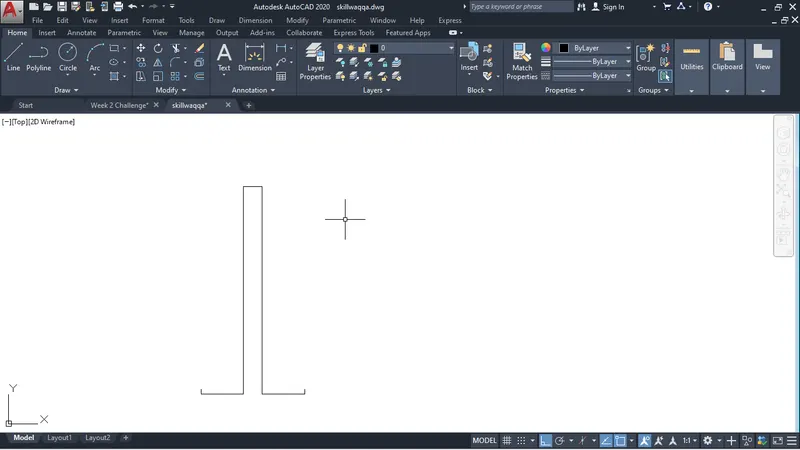
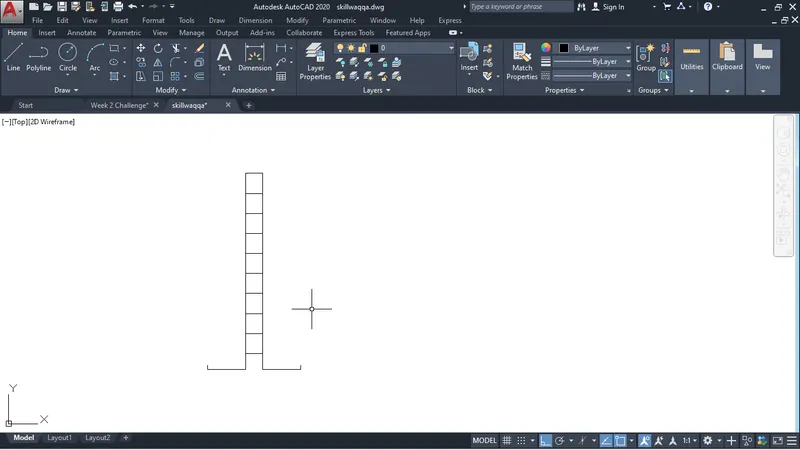
after drawing the above drawing
- take offset distance 0.04
- take offset of line which is 1.60 from both side as you can in fig.
- Similarly we draw further.
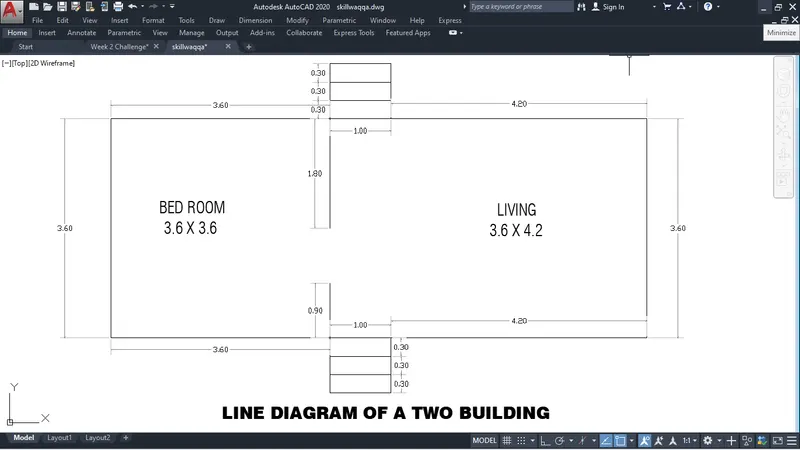
AIM: Draw Line Diagram of a Two Bedroom Building using AutoCad.
I am using Rectangle to draw this drawing
- Choose ractagnle from draw tool in ribbon or command- REC
- Specify the first corner point: click any where to start rectangle
- Specify the other coner point: 8.8, 3.60
after that explode the rectangle to unjoin line
- Now take offset 3.60 from left line of rectangle
- Make the gap in offset line from the bottom of rectangle line above 0.90 as you can se in the fig.
- And Make stair width at 1 .
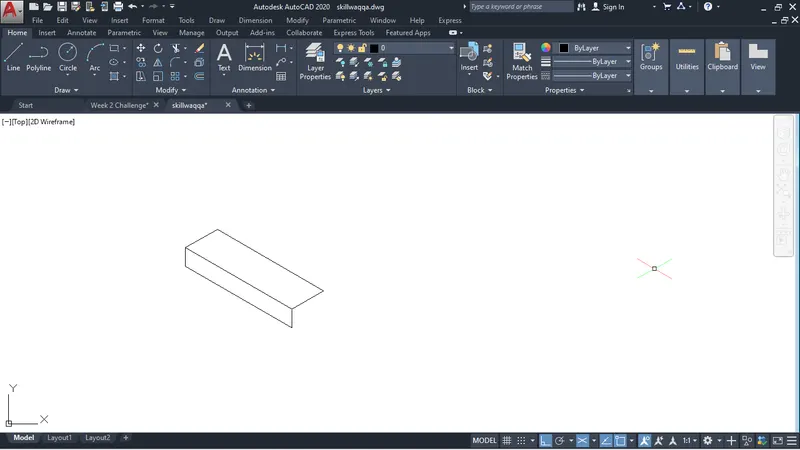
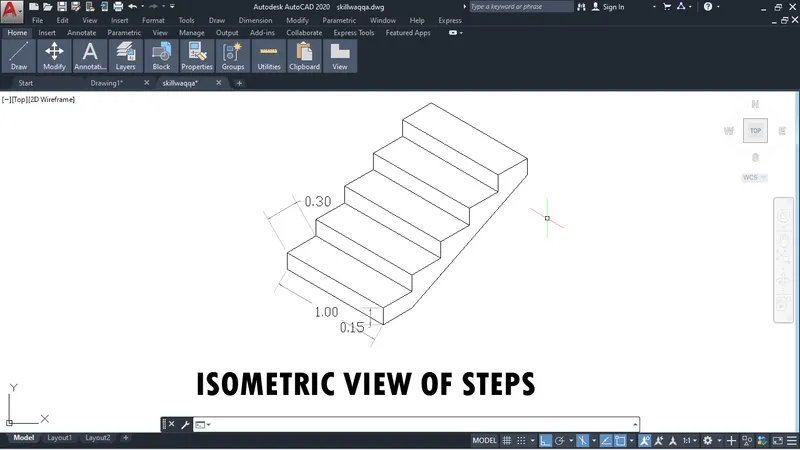
AIM: Draw Isometric View of Steps
To draw an isometric drawing we have change setting to isometric view
To set isometric view Go to draft setting by command- DS
then go to snap and grid > Snap Style > select the isometric view
Now your workspace is isometric
Lets draw
Before drawing I have tell you that there are 3- isometric plane which are
- Isometric Top
- Isometric Right
- Isometric Left
So we are going draw with help of these 3- plane
- Now Choose the line
- Specify the first point: click any where
- Specify the next point: take your curssor anywhere (like top, right, left plane) and give the line size which you want.
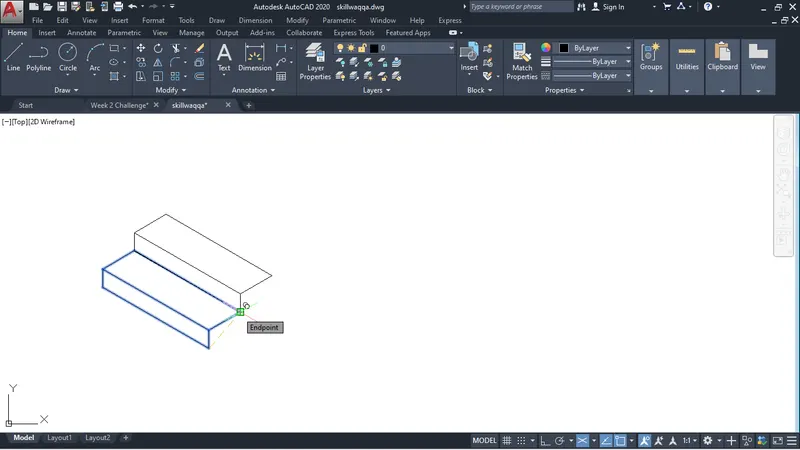
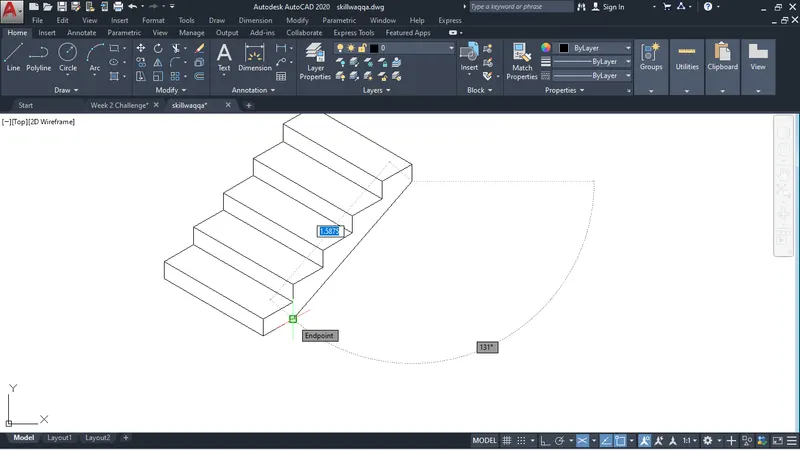
- Now after drawing the first step we can copy whole step from first corner as you can see in right fig.
- To copy use command-CO
- select the object
- Specify the baseline: first corner point
- That how we draw all five steps.
AIM: Draw isometric view of global wall using AutoCad.
use isometric view to draw this
choose the line tool to draw below drawing.
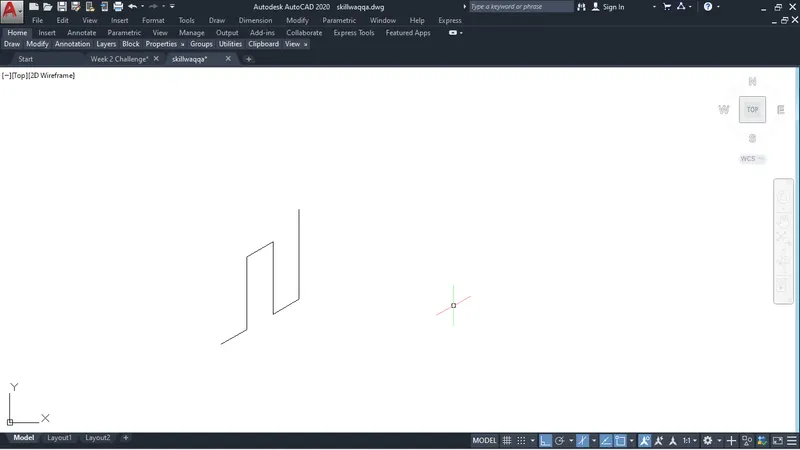
after above drawing we choose line tool to draw further as you can see in fig below.
we use line tool to draw wall.
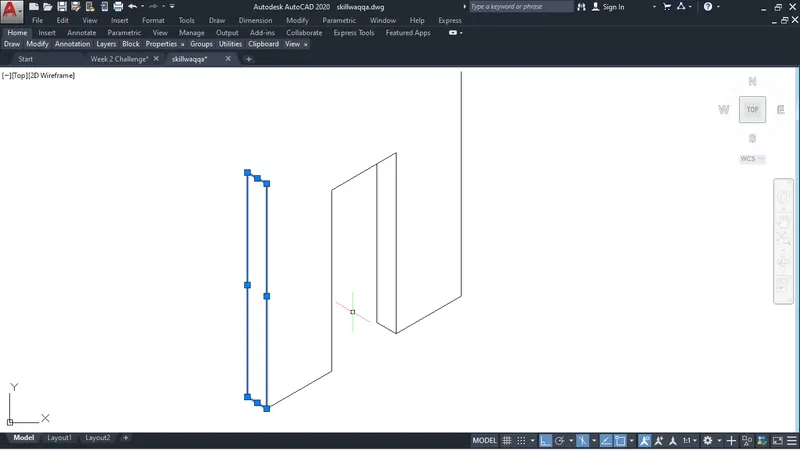
After above we upper part of wall with help of line tool.