Preparing Schedule & Cost Estimation for a building using REVIT
1. Aim:- To create the topics discussed in class to complete the given tasks and list them by using shortcut keys in revit.
Introduction: To create the topics discussed in class to complete the given tasks and list them by using shortcut keys in revit.
Procedure:
- Section Box:- BX (Shortcut Key)
- Open the revit software and open the previous existing drawing.
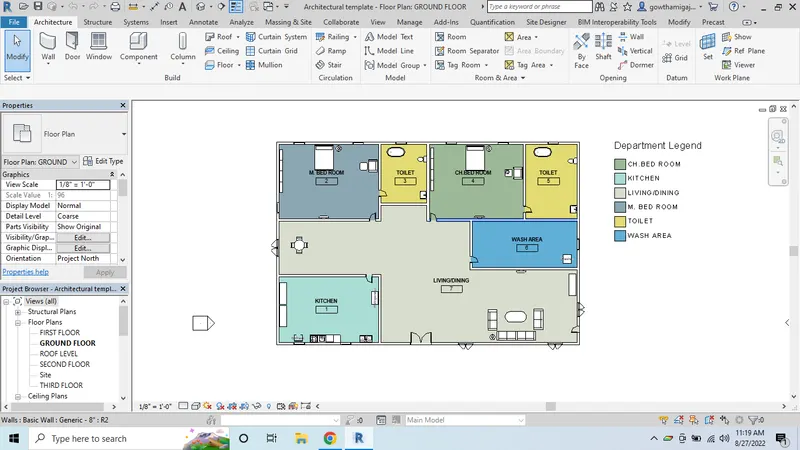
- Now click on the 3D view of the drawing.
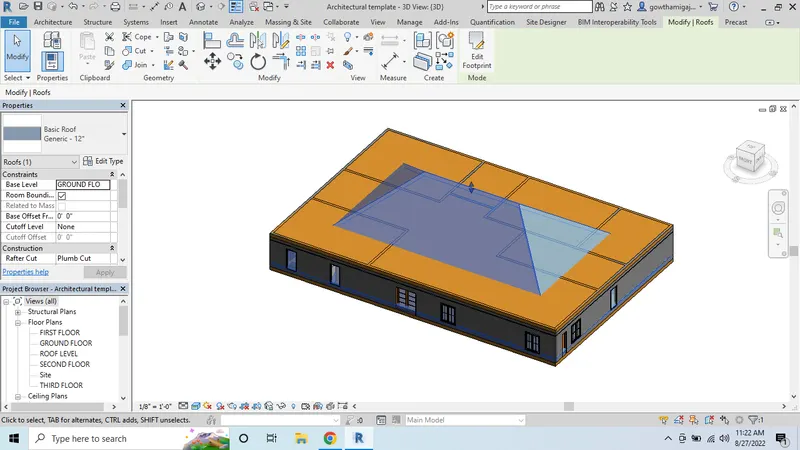
- Select the area where the section is to be placed.
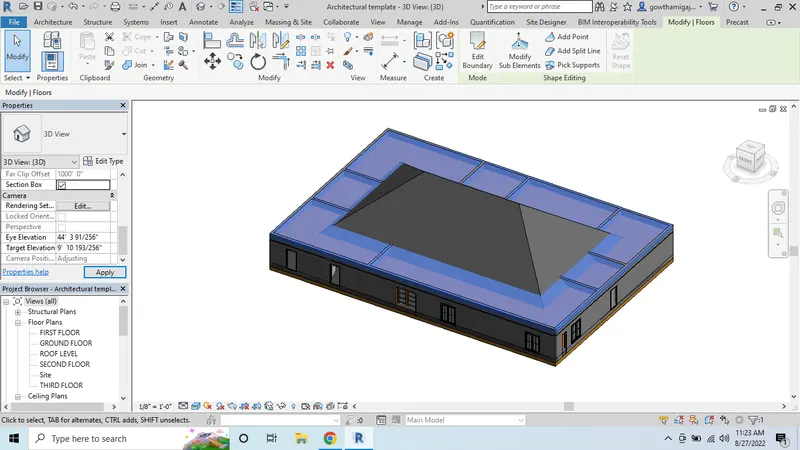
- Now go to the properties browser, and select the box.
- Then the section is assigned to the drawing.
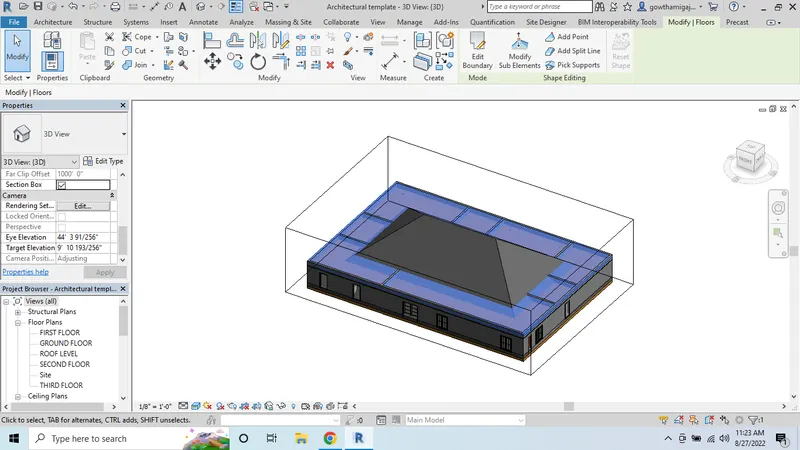
- In the same way select window of the building.
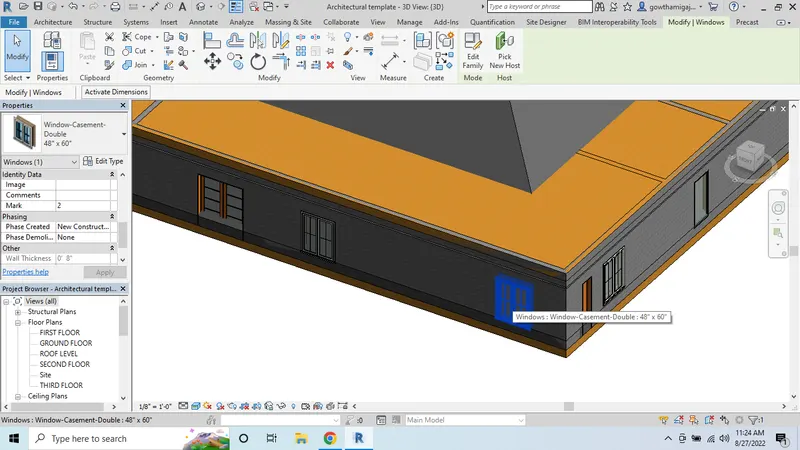
- Select the section view from the properties browser or type SC command.
- Then the section view is assigned to the window.
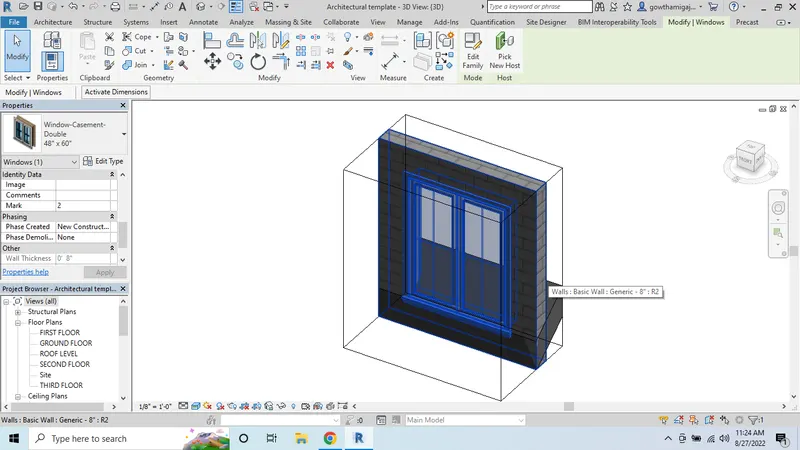
Create Similar: CS (Shortcut Key)
- Open the revit software and open the existing drawing model.
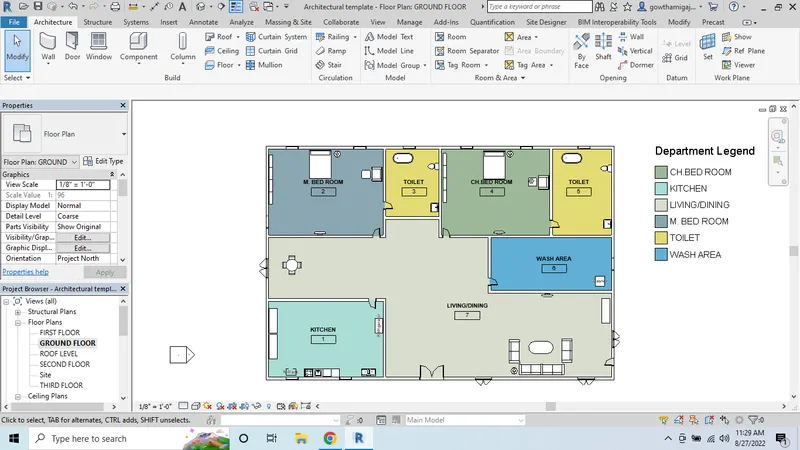
- Now select any object from the drawing.
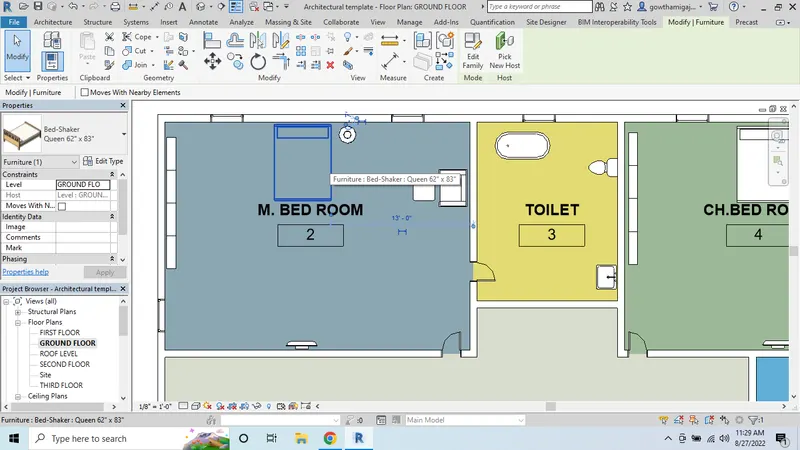
- Now type the command CS in the keyboard.
- Now we can see the similar object created.
- Then we can place it anywhere.
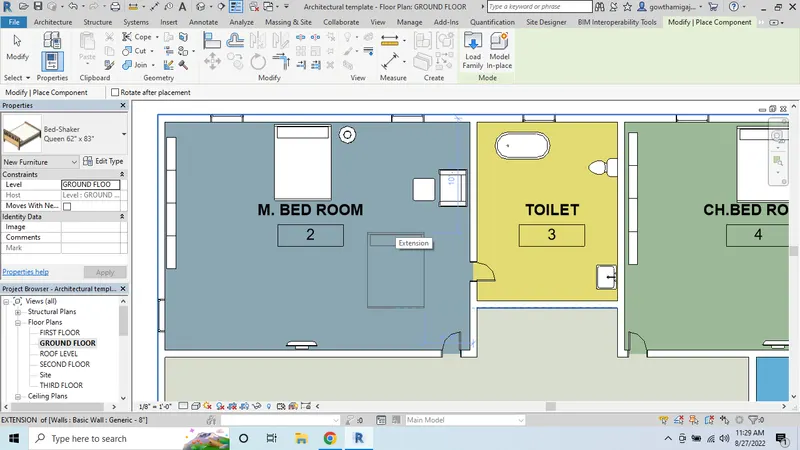
Thin Line: TL (Shortcut Key)
- Open the revit software and open the existing drawing model.
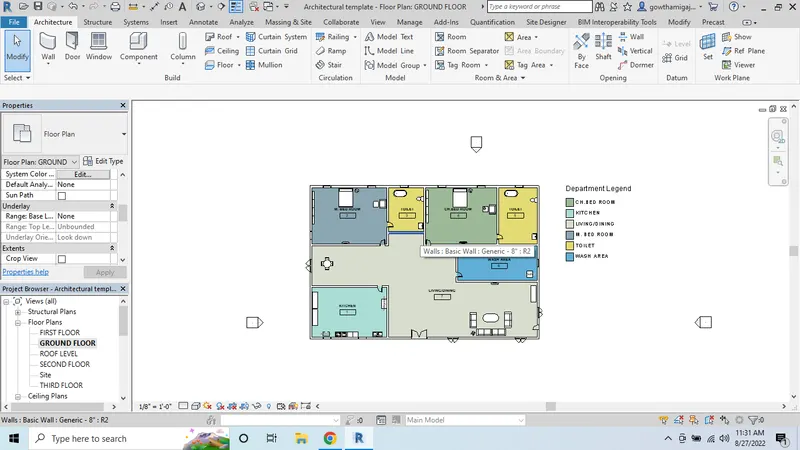
- Here we can see the wall line in the thin lines.
- Now type TL command and then the line type will be changed.
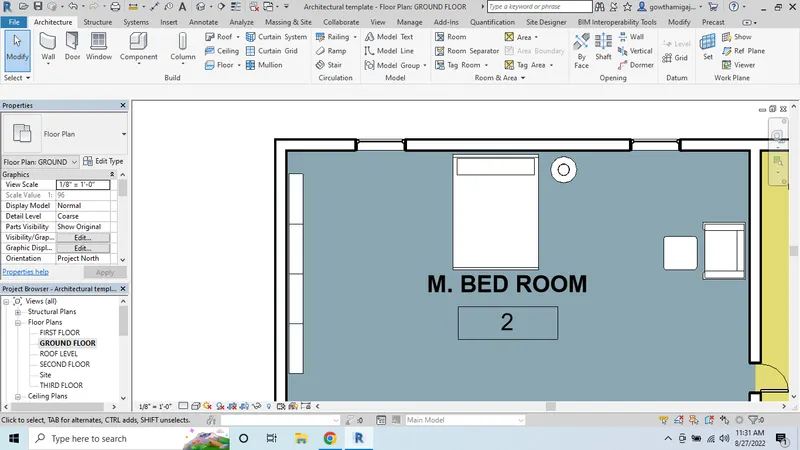
- Now we can see that the line has been changed.
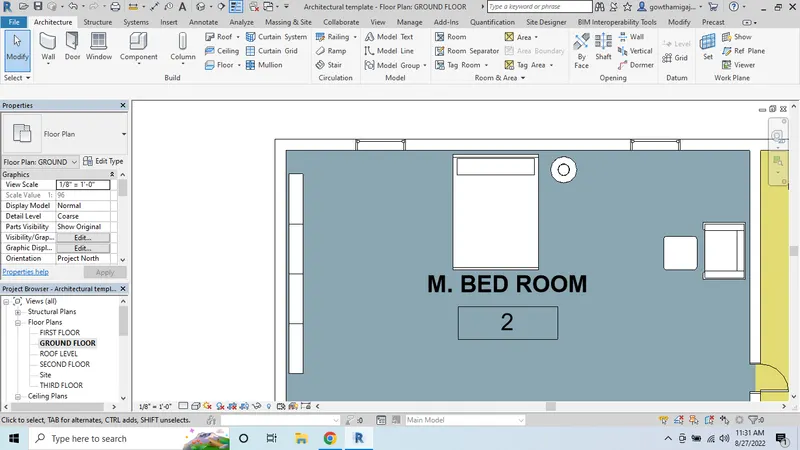
- Again select the lines and type TL, then lines will be changed to thick lines.
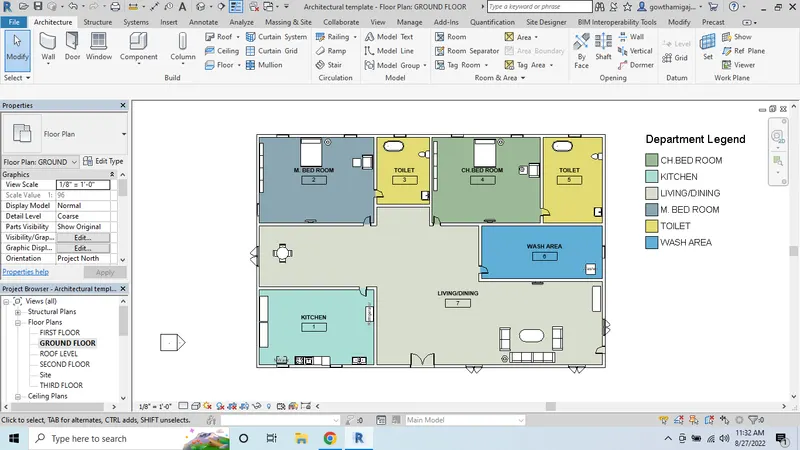
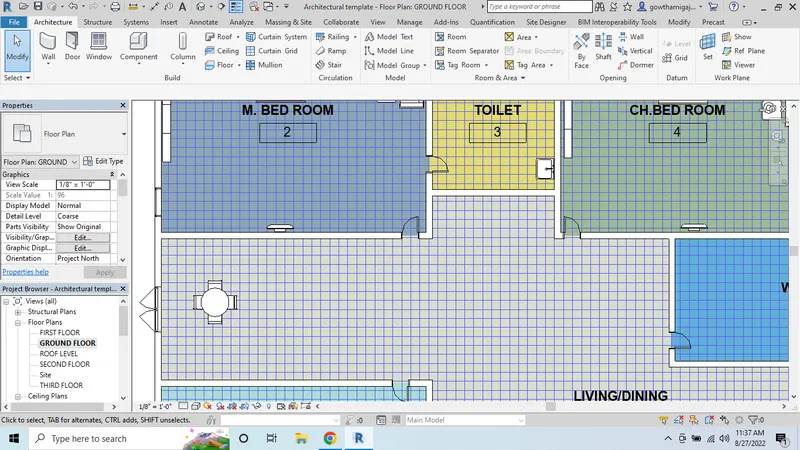
Override setting to floor- VG (shortcut Key)
- Open the revit software and open the existing drawing model.
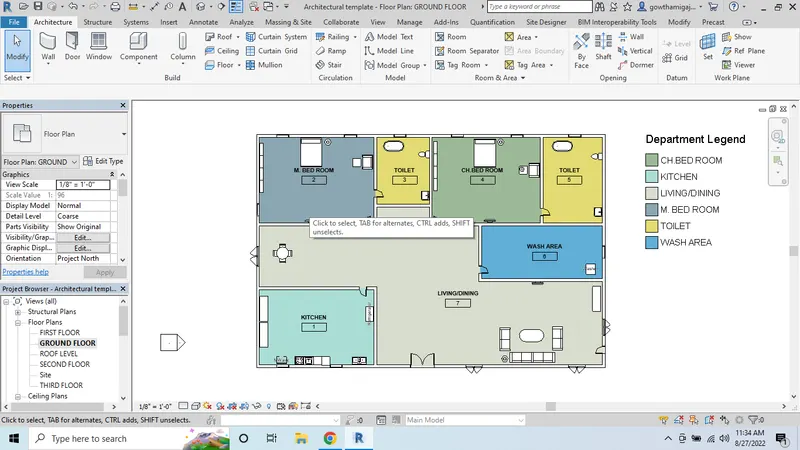
- Now type VG and a dialogue box will appear on the screen.
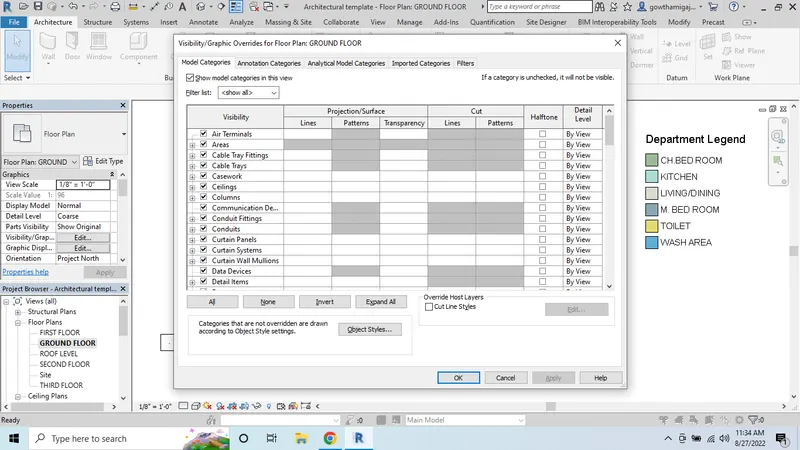
- drag down the options and select the floor option.
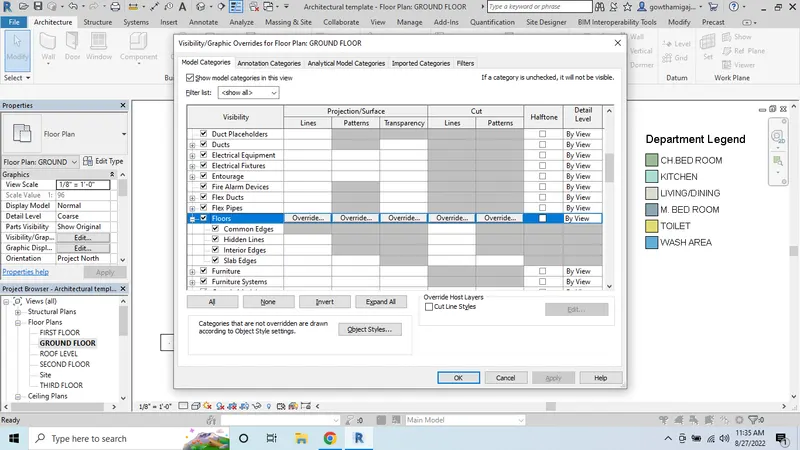
- Click on override option in the pattern.
- Then the dialogue box will appear on the screen.
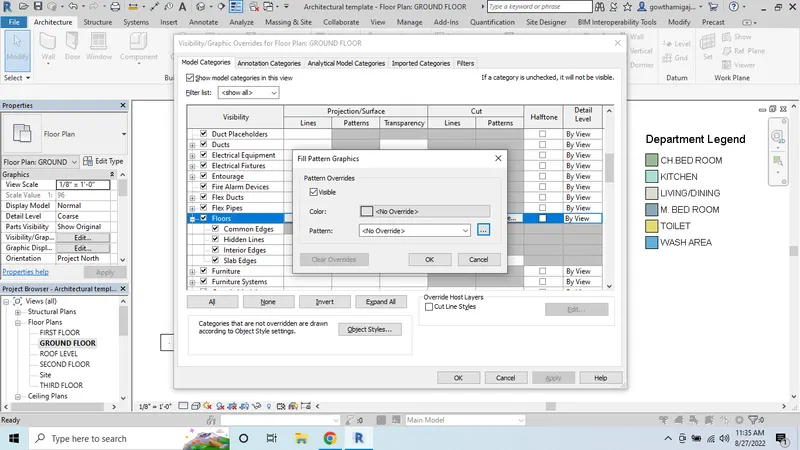
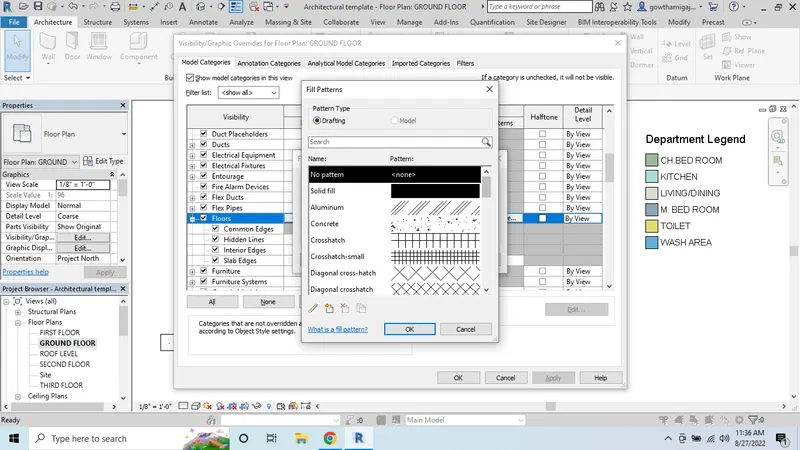
- Now from the dialogue box we can selec the pattern to the floor.
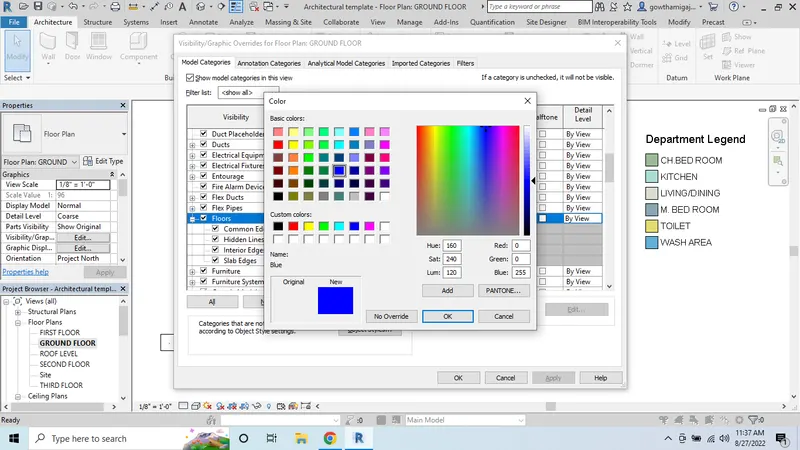
- In the same way select the colour to be appeared on the floor.
- Now click ok and then we can see the pattern which is applied to the floor.
- Click on Applu and click ok.
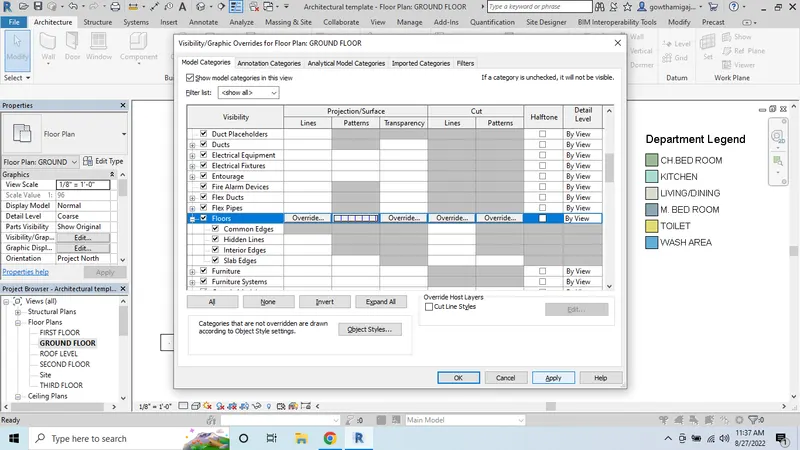
- Now we can see the floor pattern and colour has been changed.
View Range- VR ( Shortcut Key)
- Open the revit software and open the existing drawing model.
- Type VG from the keyboard.
- Then the dialogue will appear on the screen.
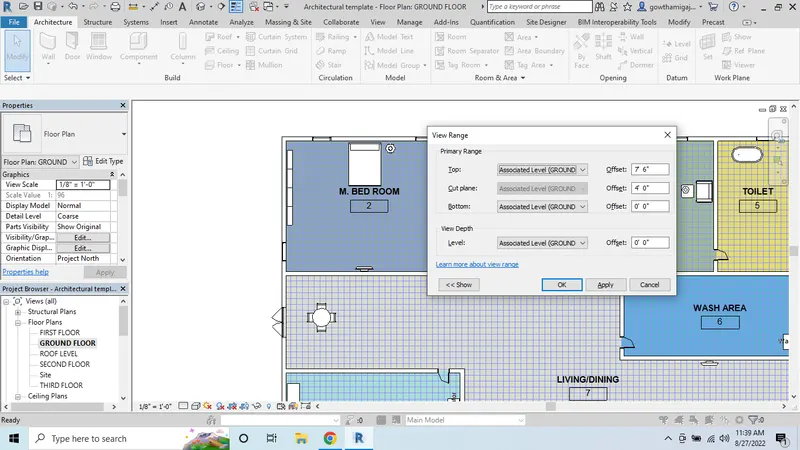
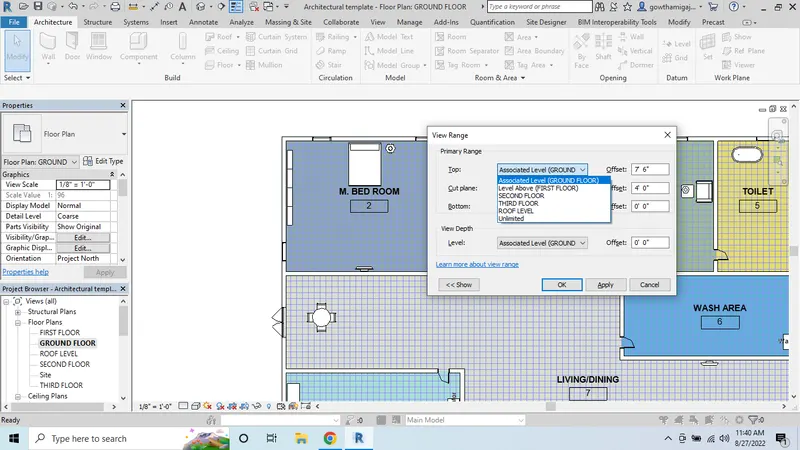
- From the dialogue box, we can select the options related to the drawing.
- And finally click ok.
Reselect- Ctrl <
- Open the drawing and select any object from the drawing.
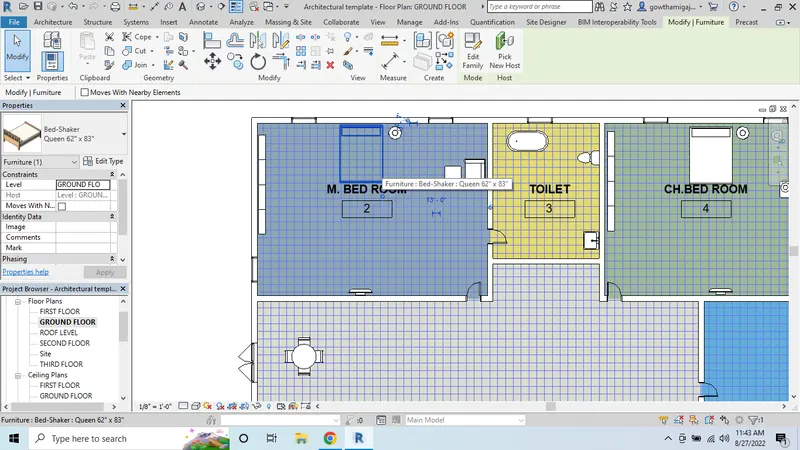
- Type RE command from the keyboard.
- Then the object which is selected will be unselected.
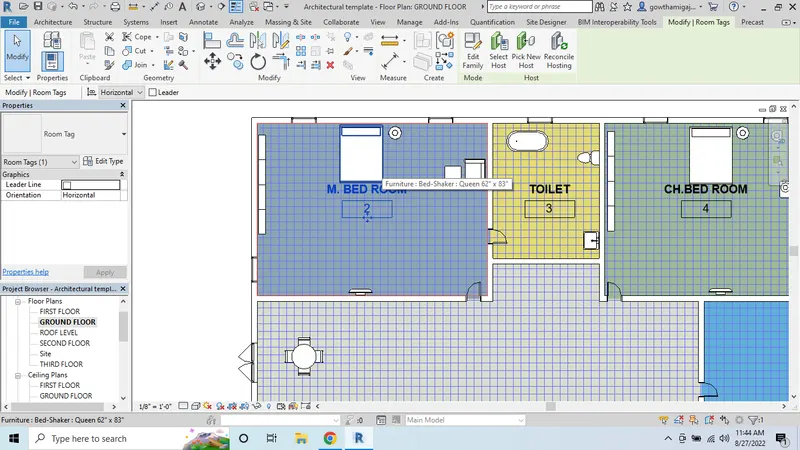
Annotation: DI (Shortcut Key)
- Open the revit software and open the existing drawing model.
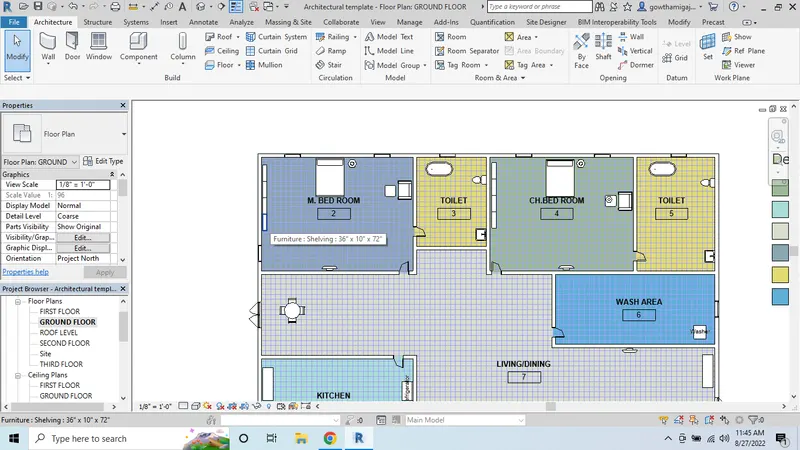
- Type Al from the keyboard.
- And we can see the annotate tab from the menu bar.
- Now select the dimensions command.
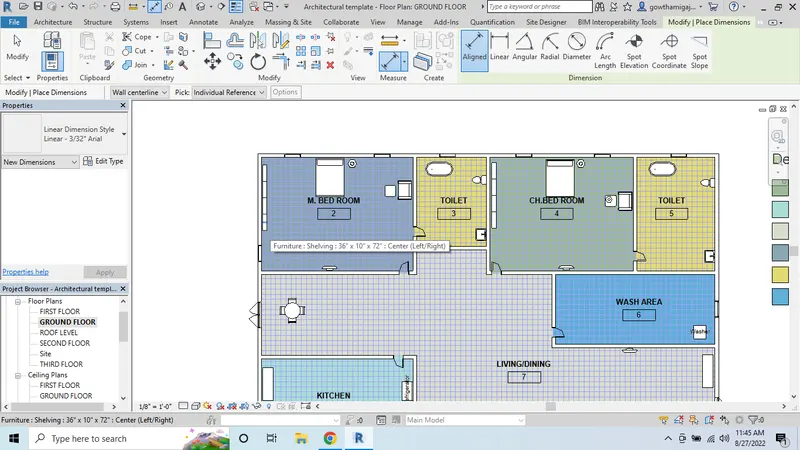
- Select the lines from the drawing and mention the dimensions.
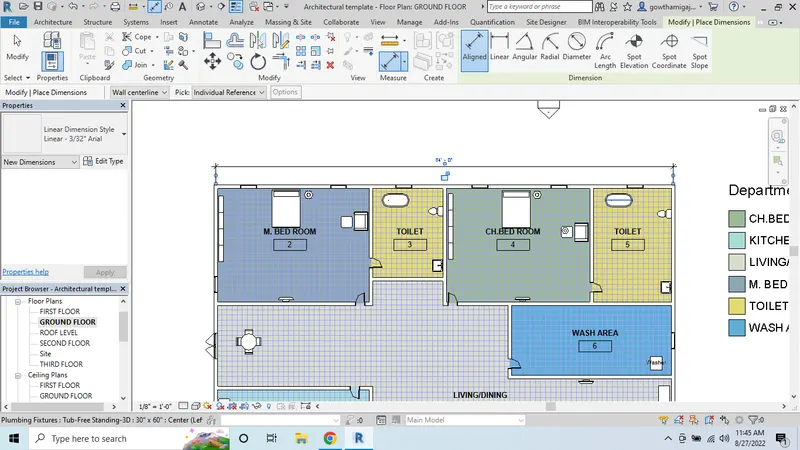
Align- AL (Shortcut Key)
- Open the revit software and open the existing drawing model.
- Then short cut key is AL
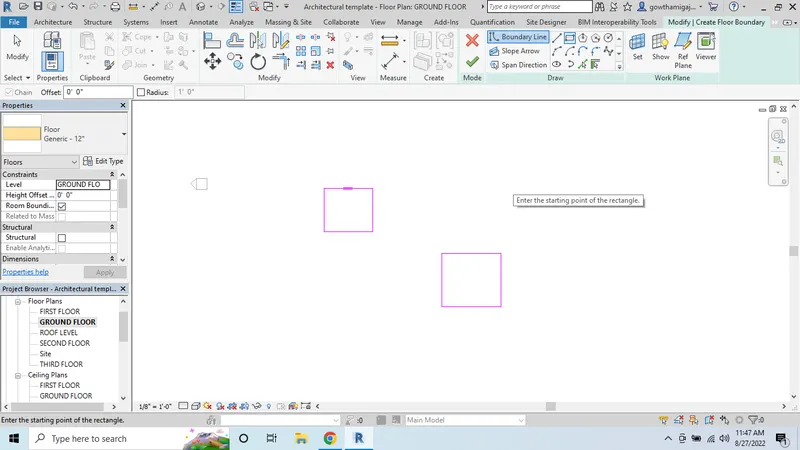
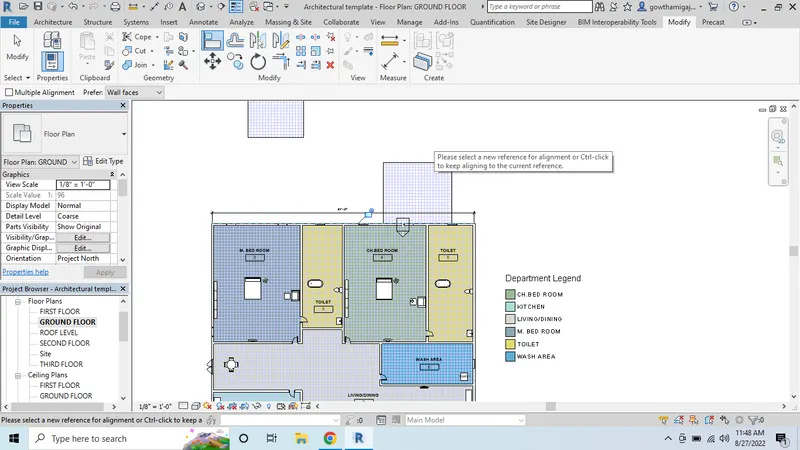
- Select the one end line and another end to the wall and type AL.
- Then both the points will intersect at one point.
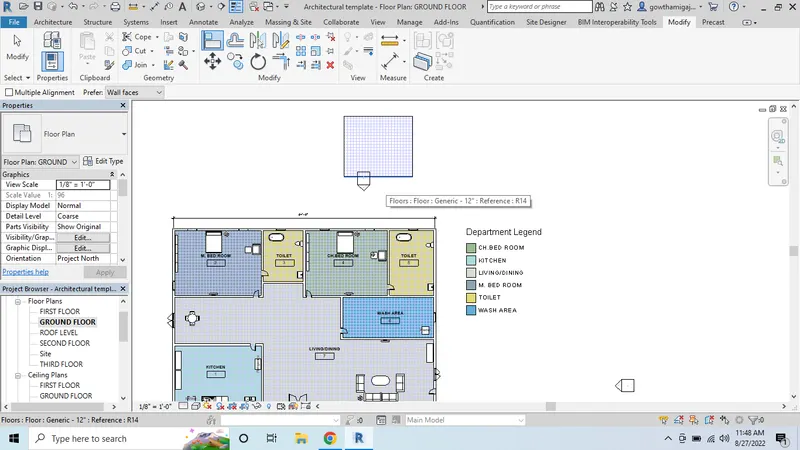
- Finally two points will intersect each other.
Rotate- RO (Shortcut Key)
- Open the revit software and open the existing drawing model.
- Now to rotate select any object.
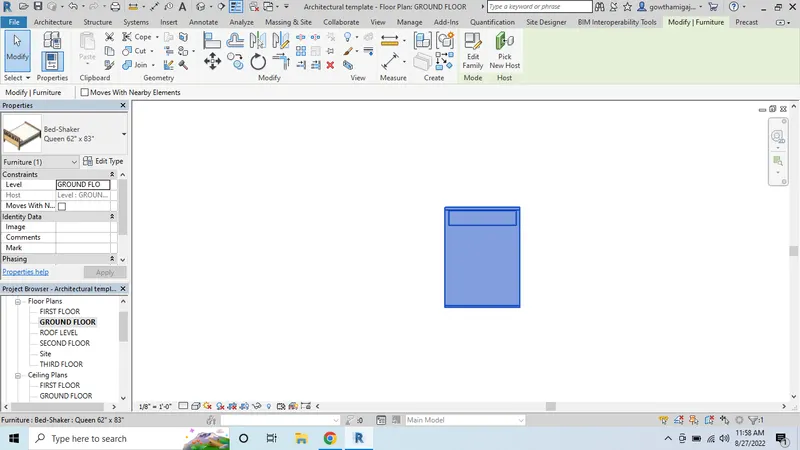
- Type RO form the keyboard and we can see the line coming and click on that line,
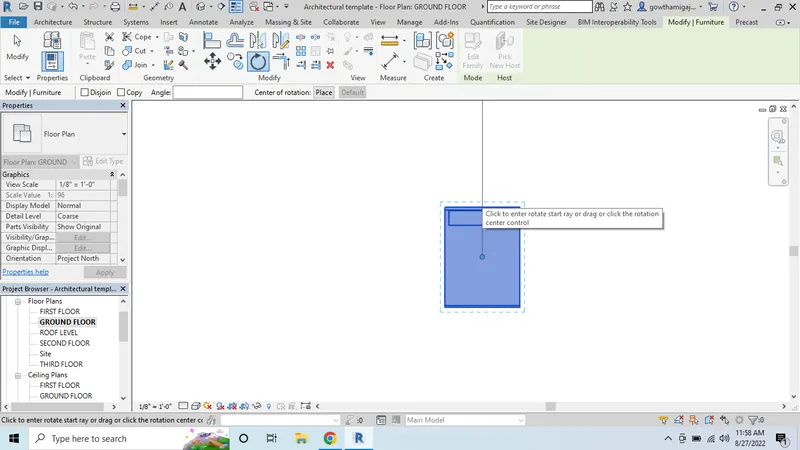
- Now select the direction to rotate and give the angle to rotate.
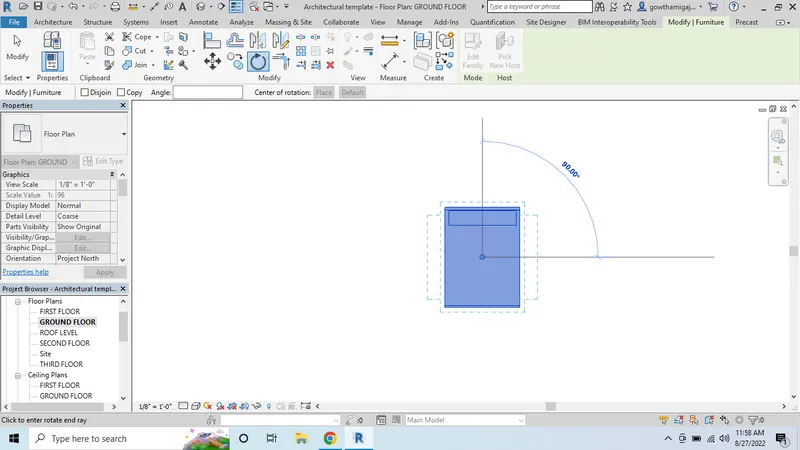
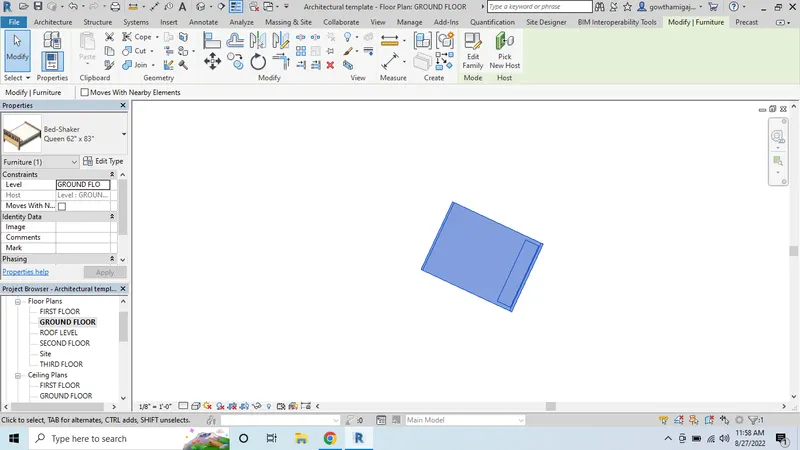
- Then finally the rotated angle can be applied to the object.
Move- MV (shortcut Key)
- Open the revit software and open the existing drawing model.
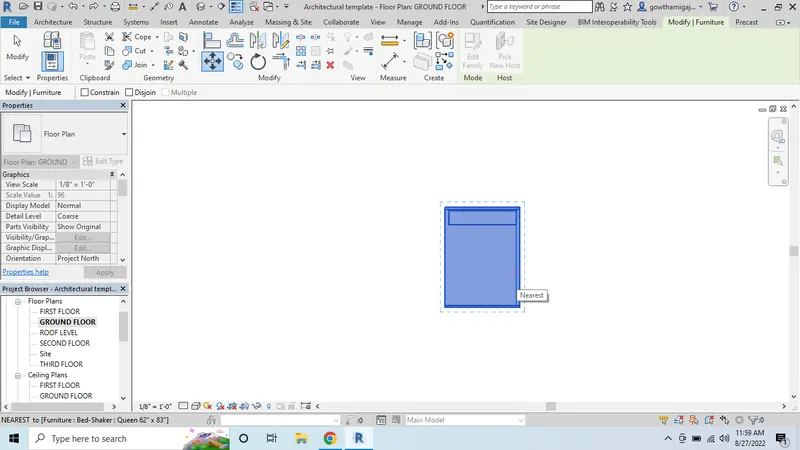
- Type the command MV from the keyboard and select the object.
- Then we can see the object to move and we will see the reference line of the object.
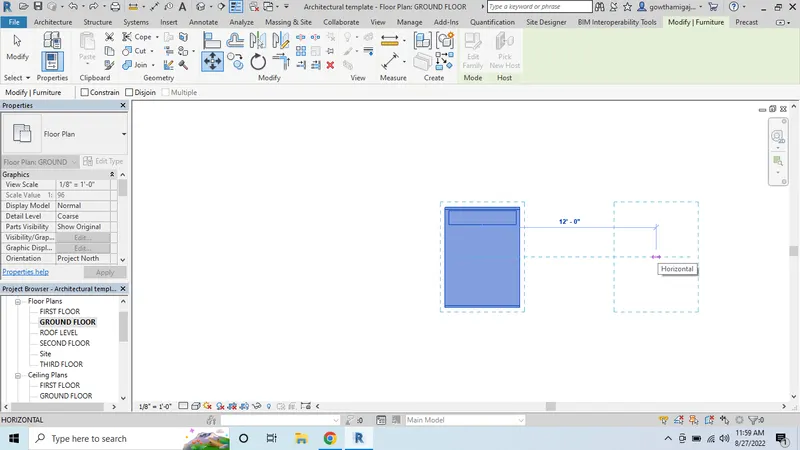
- Then the object is moved.
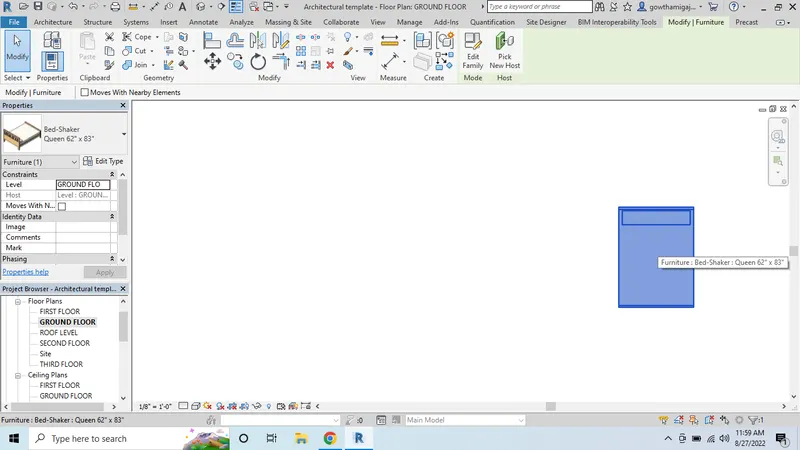
Mirror - MM (Shortcut Key)
- Open the revit software and open the existing drawing model.
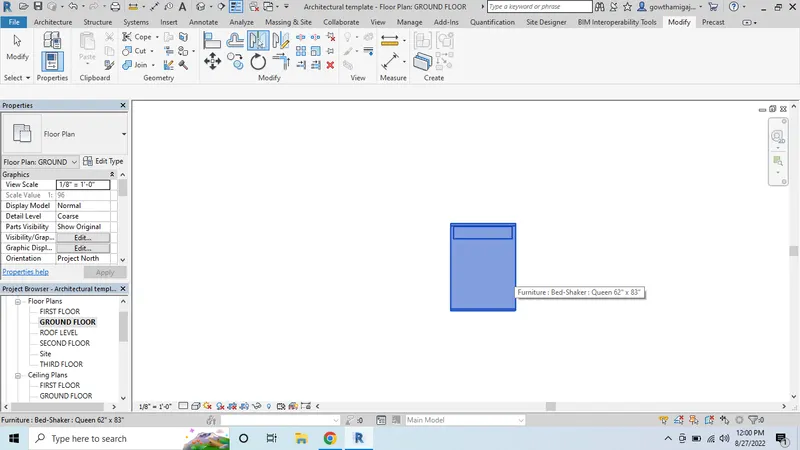
- Now type MM from the keyboard.
- And select the reference line to the object.
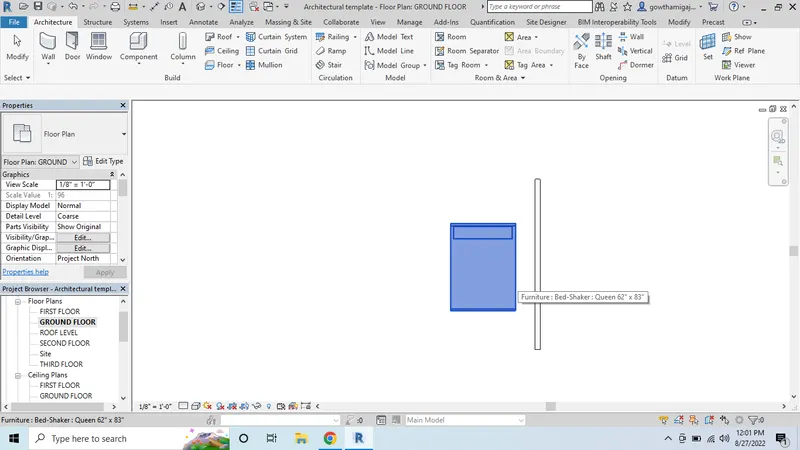
- Then click enter and we can see the mirror object.
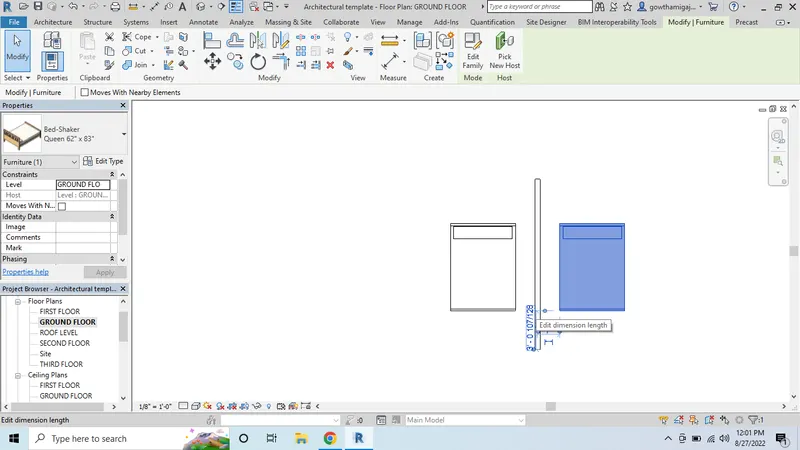
- Now two objects are placed.
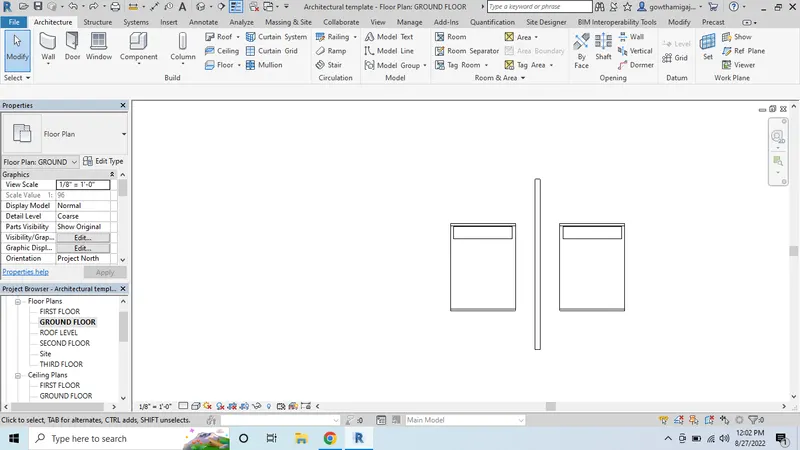
Array- AR (Shortcut Key)
- Open the revit software and open the existing drawing model.
- Select the object to array and type AR command from the keyboard.
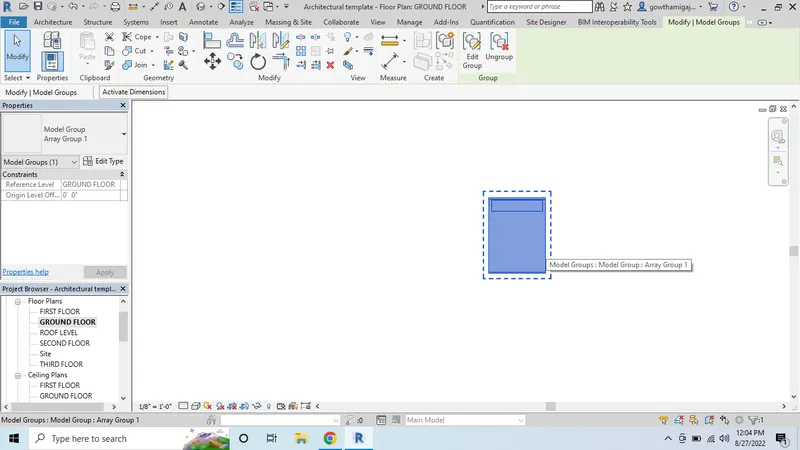
- And we can see the object is selected and reference line is attache to the line.
- Now type AR command
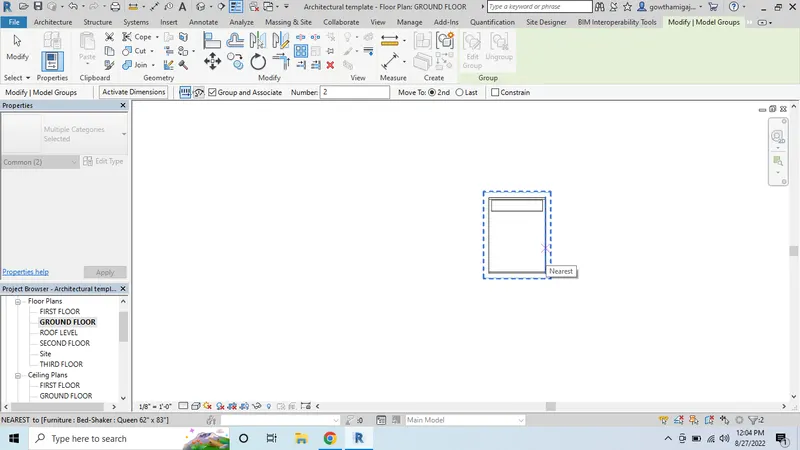
- Now give the number of items to get array of the object.
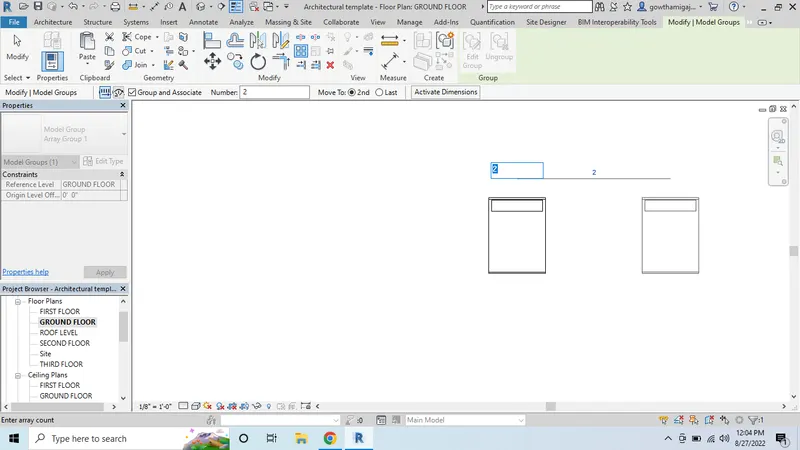
- Number is given to the object to get array.
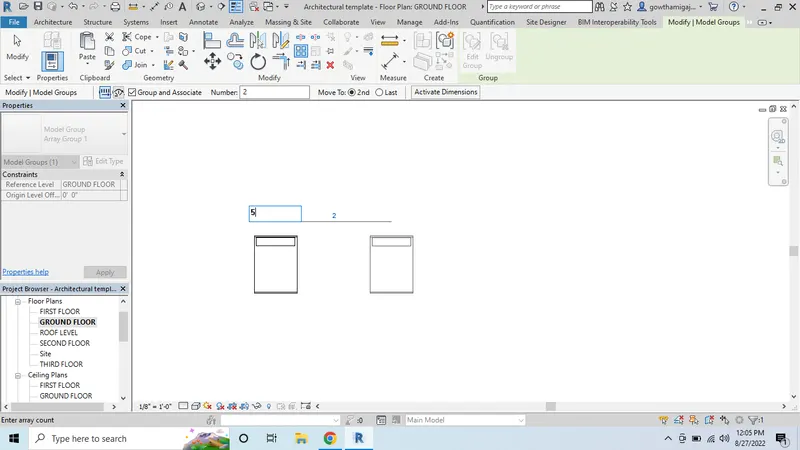
- Finally array command is applied to the object and we can see the object.
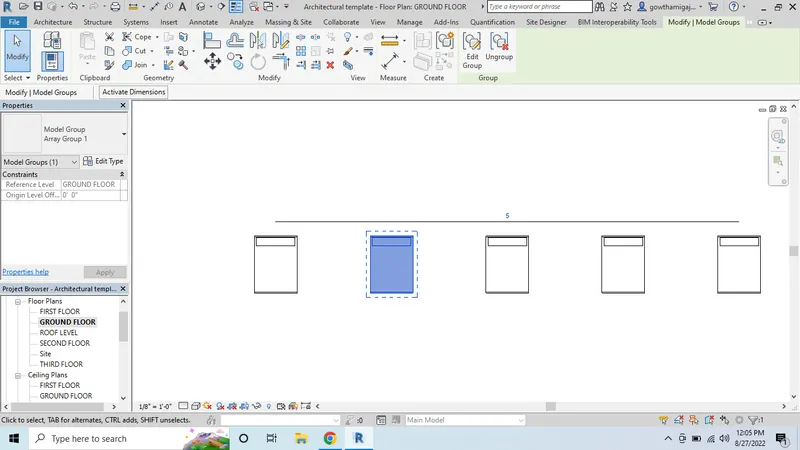
Result:
2. Aim:- To create a schedule for the project created in week 6 to 8 by using Revit.
Introduction: To create a schedule for the project created in week 6 to 8 by using Revit.
Procedure:
- Open the revit software and open the existing drawing model.
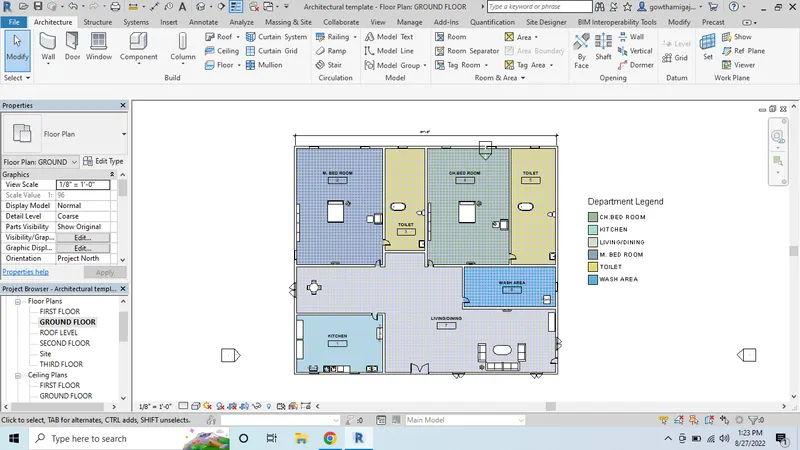
- Go to view tab and select the schedule tab.
- From the schedule tab select the schedule from the given options.
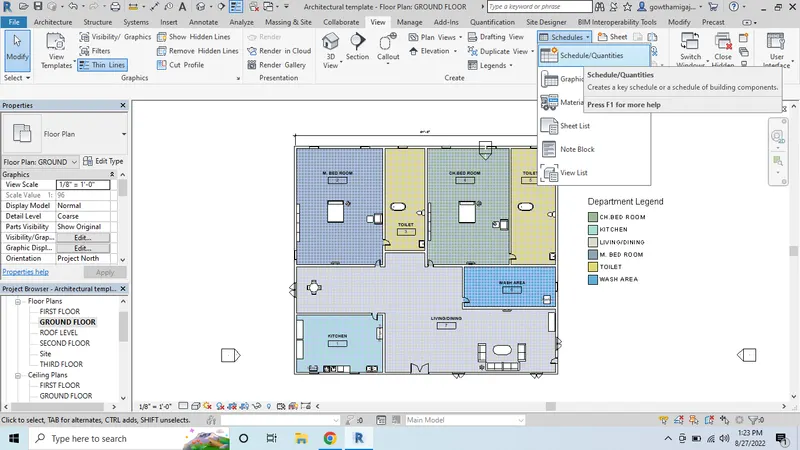
- Then a dialogue box will appear on the screen.
- Now select the wall option from the options and click ok.
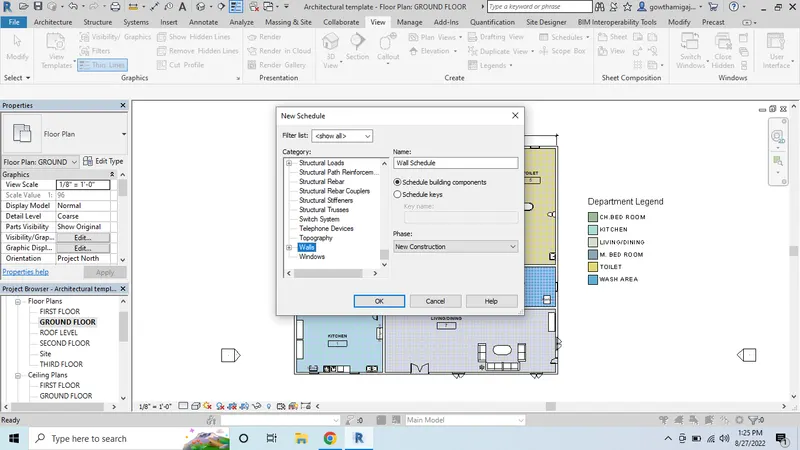
- Now we can see the another dialogue box appears on the screen.
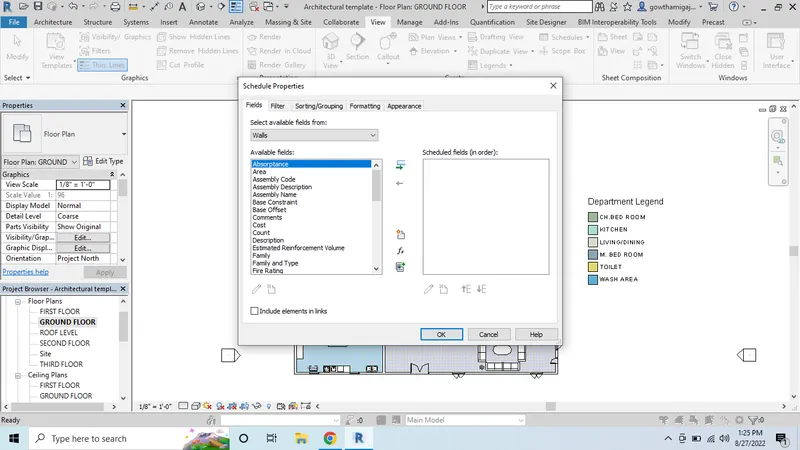
- Select the items to get in the schedule tab and click on ok.
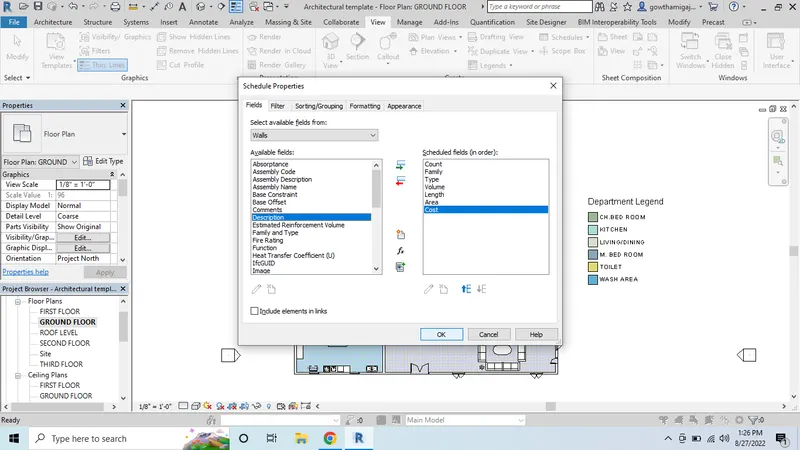
- Now we can see the schedule box for the wall with the details given.
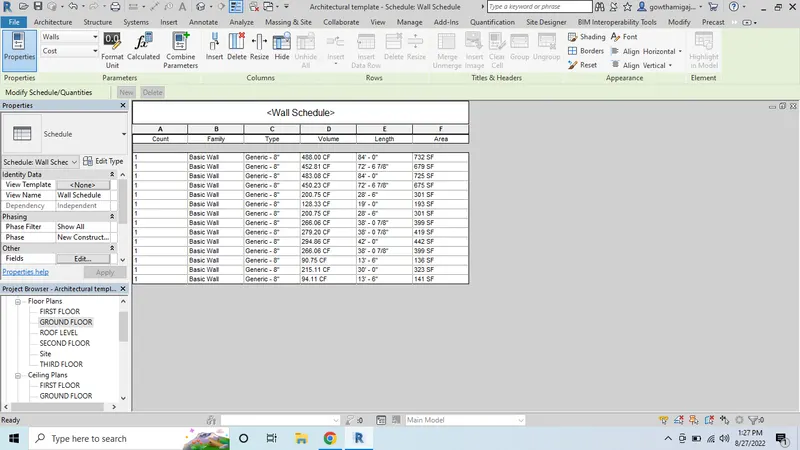
- In the project browser, select schedule and we can see the table form.
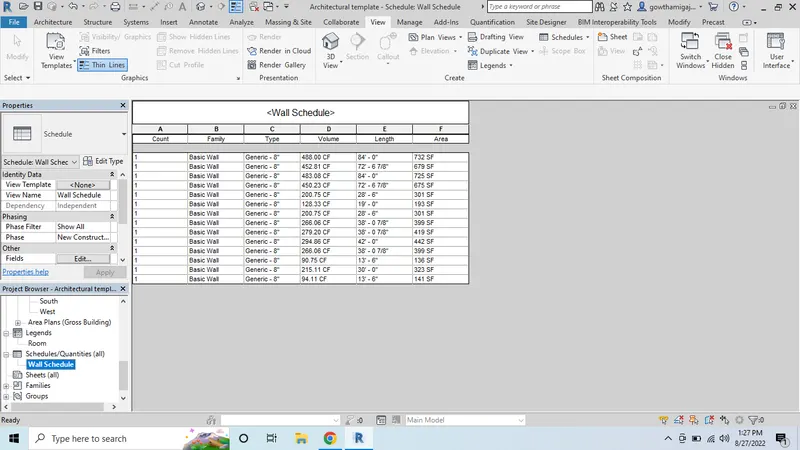
- Open the revit software and open the existing drawing model.
- Now we have to give the schedule quantity for doors.
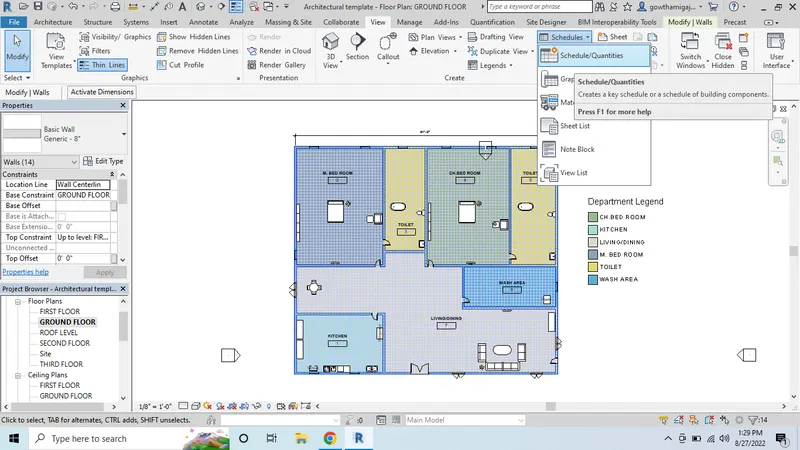
- Go to view tab and select the schedule tab.
- From the schedule tab select the schedule from the given options.
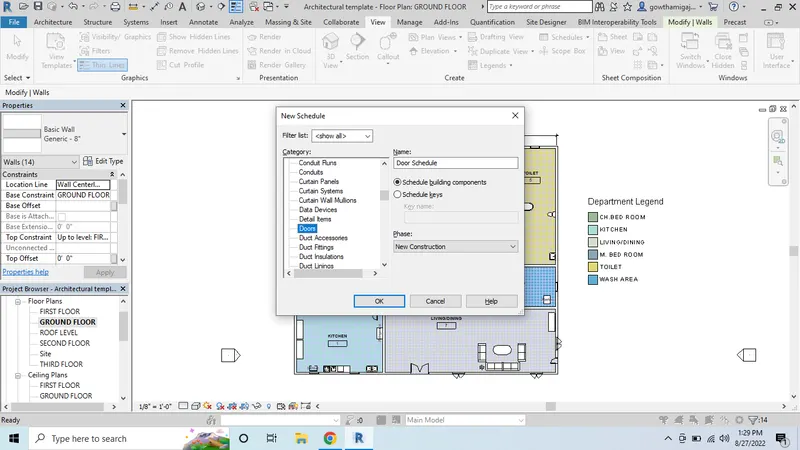
- Then a dialogue box will appear on the screen.
- Now select the wall option from the options and click ok
- Select the items to get in the schedule tab and click on ok.
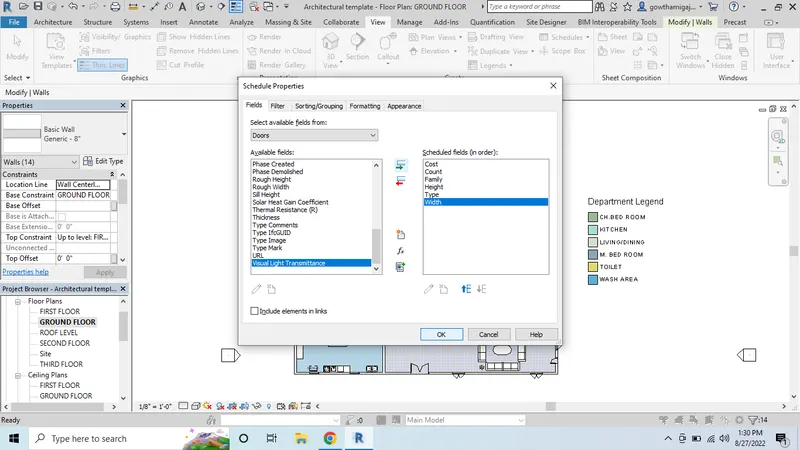
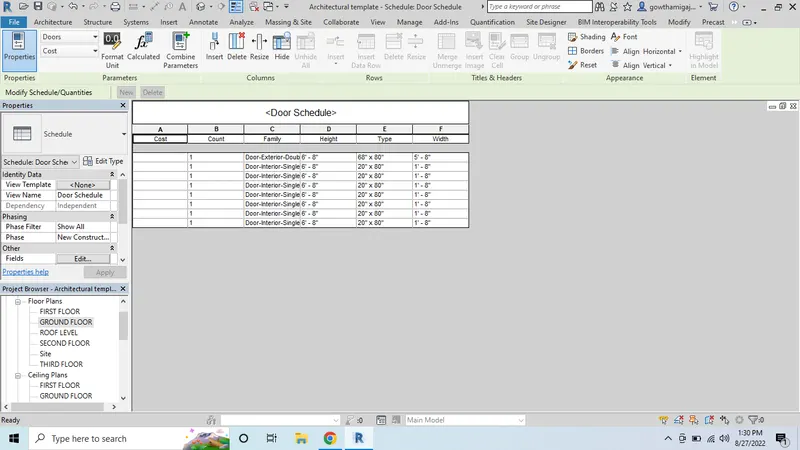
- Now we can see the schedule box for the door with the details given.
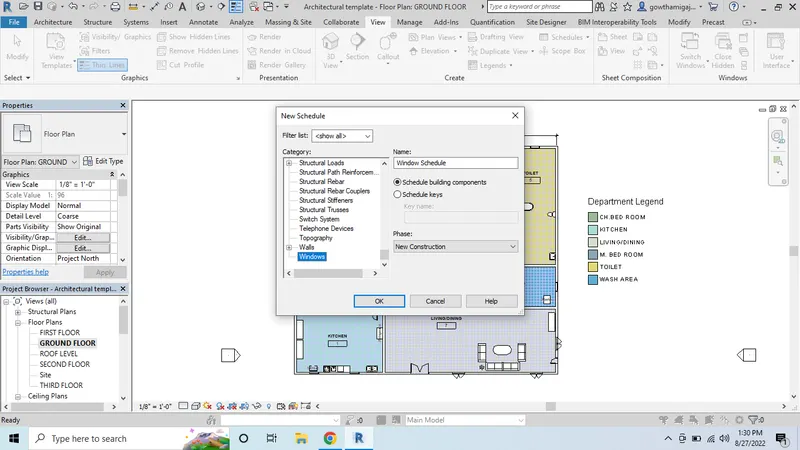
- In the same way, select schedule for windows and click on ok.
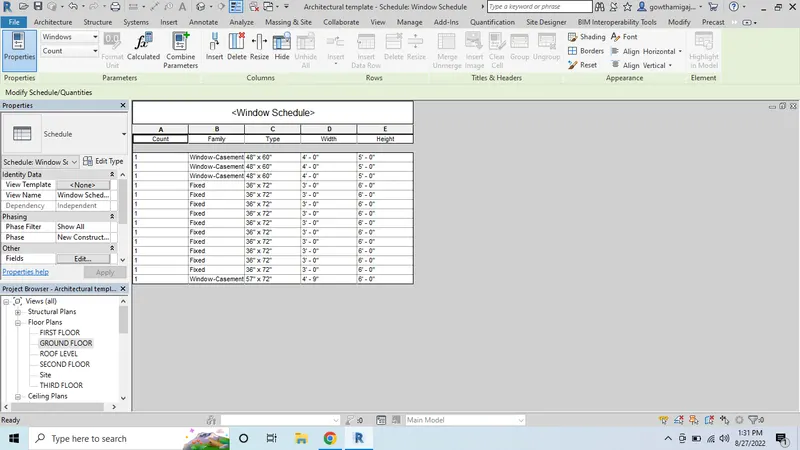
- Then we can see the schedule for windows.
- Now we have get the maerial schedule for the drawing.
- Select the schedule and select the option as material takeoff.
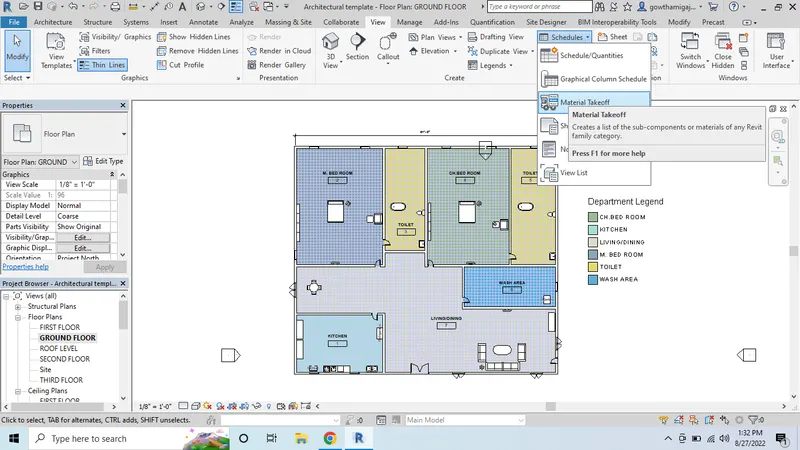
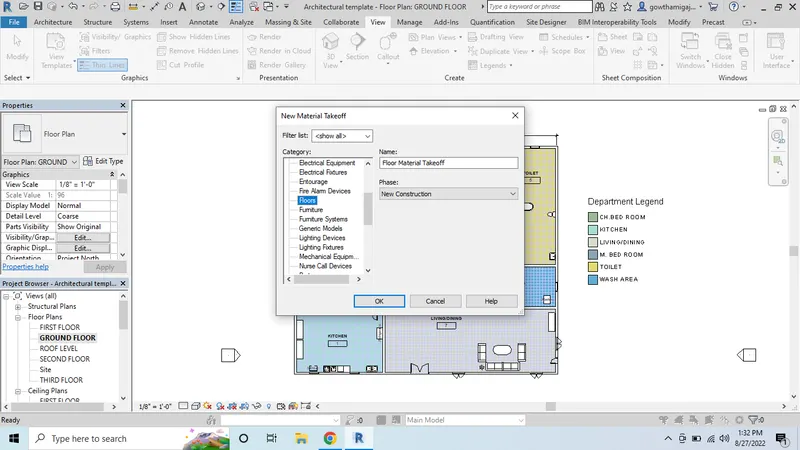
- Select the floor option and click ok.
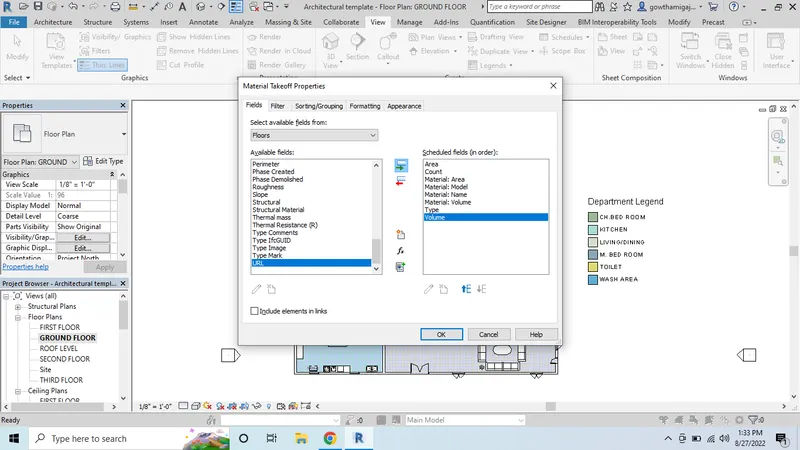
- Now we can see the table and select the options from the table.
- Now we can see the schedule table for the floor.
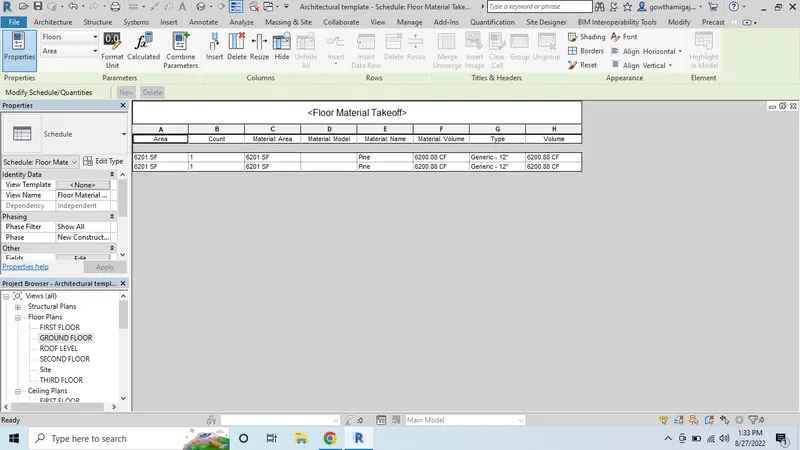
- In the project browser, select the schedule and double click.
- Then we can see the schedule table for floor.
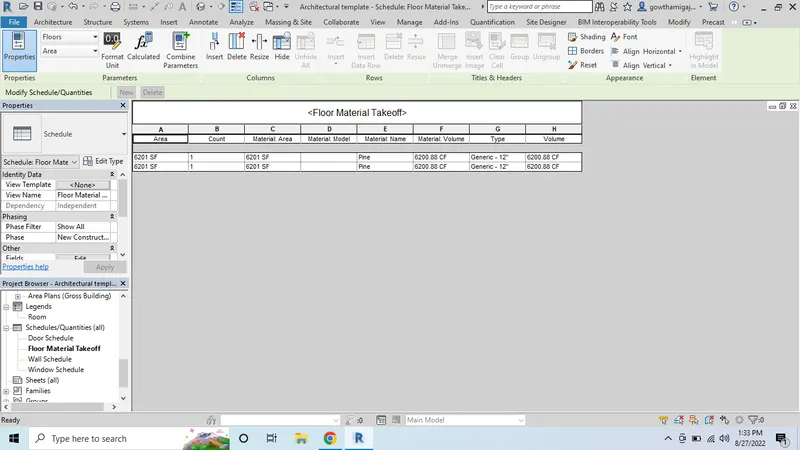
Result:
3. Aim:- To calculate the area and volume of each room in the model with appropriate room tags applied to each room in the model with appropriate room tags applied to each room.
Introduction: To calculate the area and volume of each room in the model with appropriate room tags applied to each room in the model with appropriate room tags applied to each room.
Procedure:
- Open the revit and open drawing.
-
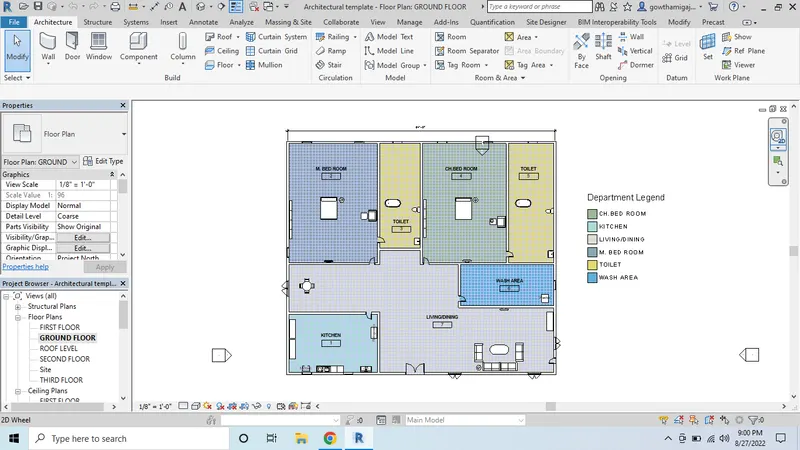
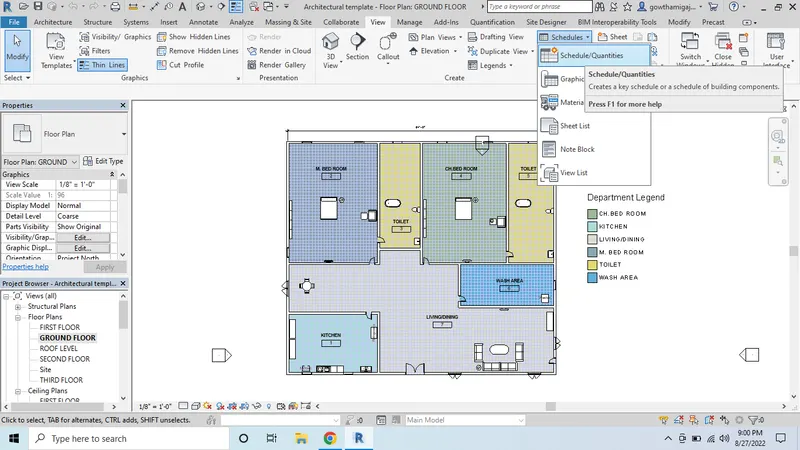
- Now go to the view tab and select the schedule quantities from the options.
- Now we can see the dialogue box and select the room option from the dialogue box.
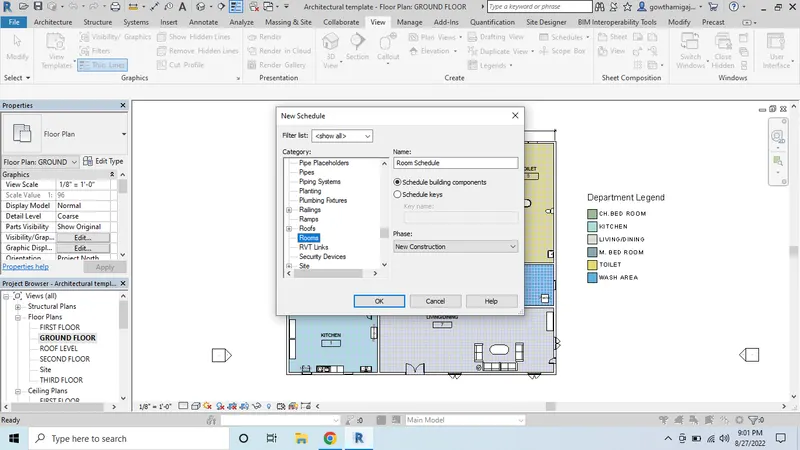
- Then select the available quantities from the box.
- and click ok.
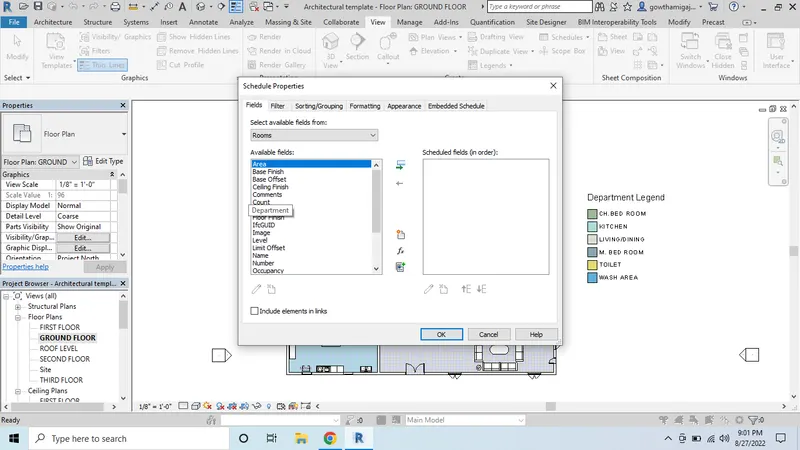
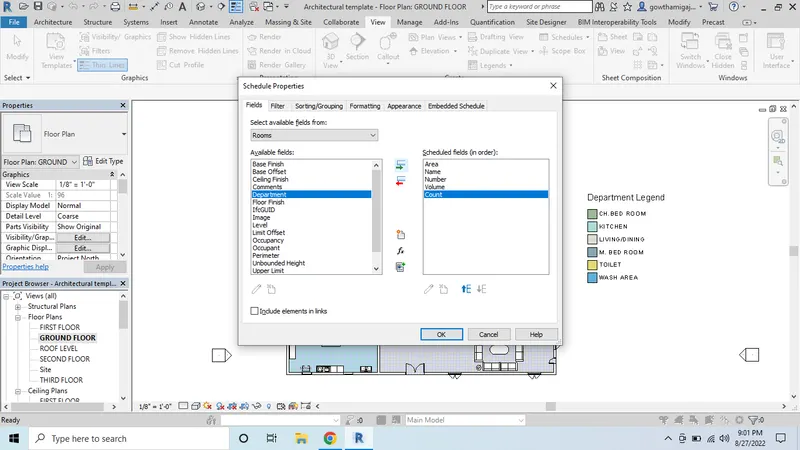
- Now we can see the schedule table for the room.
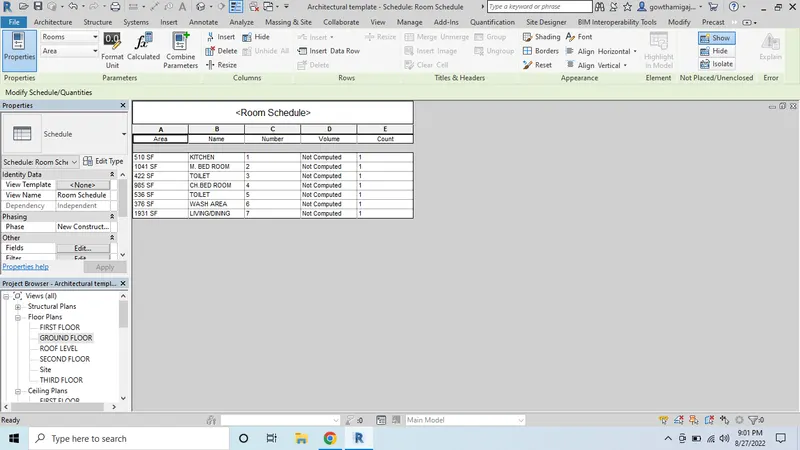
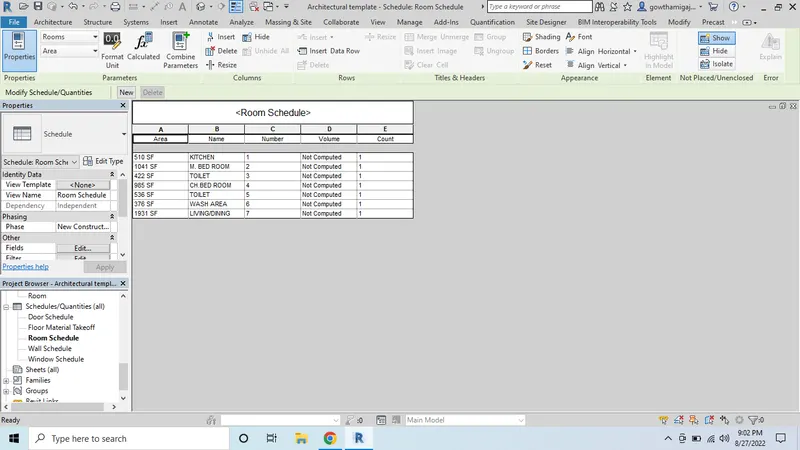
- From the project browser, click on the schedule option and double click on it.
- Now we can get the schedule table for the room.
4. Aim: To create by using schedule using the unit cost rate for materials available in the internet, prepare total cost of materials used in the project.
Introduction: To create by using schedule using the unit cost rate for materials available in the internet, prepare total cost of materials used in the project.
Procedure:
Individual Material Takeoff:
- Open the revit software and open the drawing.
- Select the wall from the drawing.
- Click on the edit option from the properties bar.
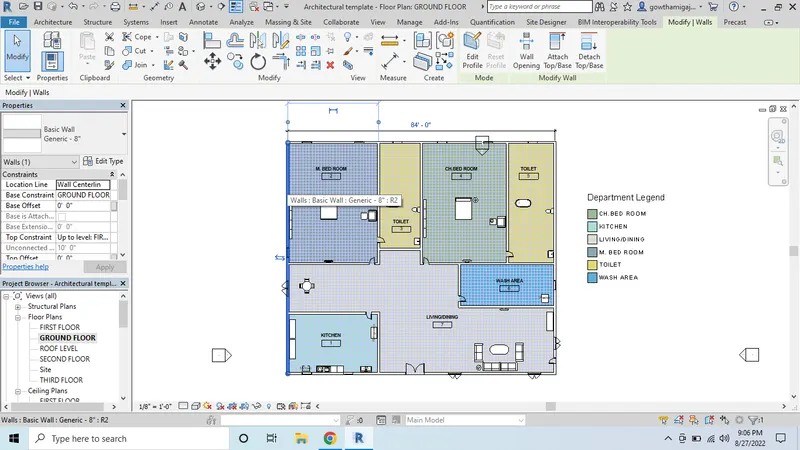
- Now we can see the properties for the wall in the table.
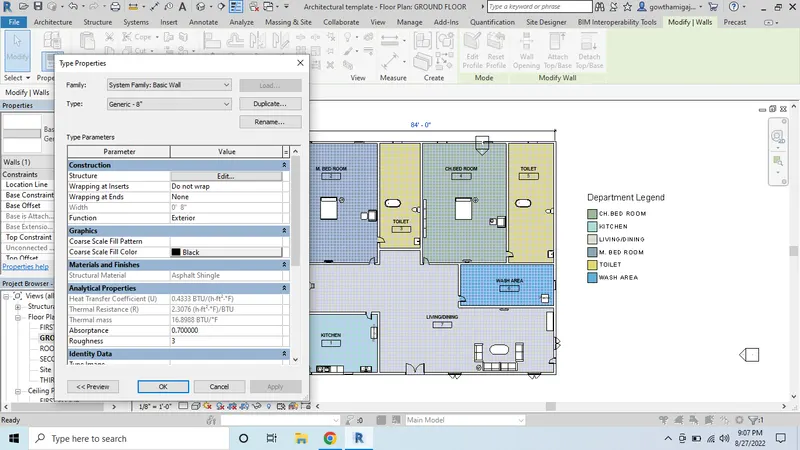
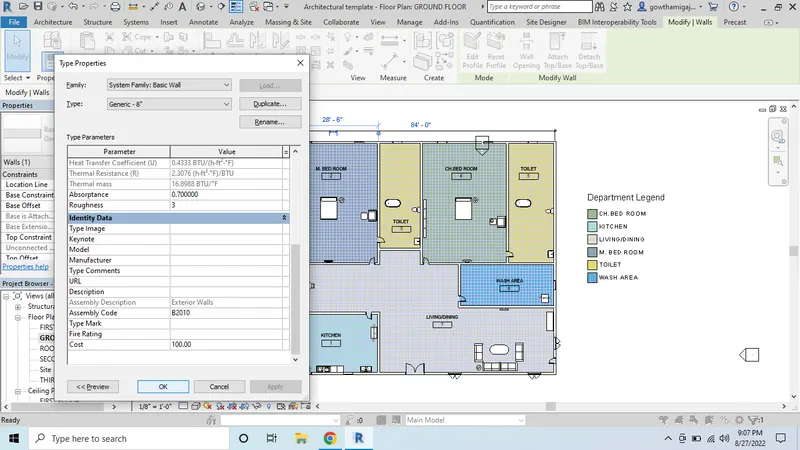
- Open the revit software and open the drawing.
- Go to the view menu and select the material takeoff option.
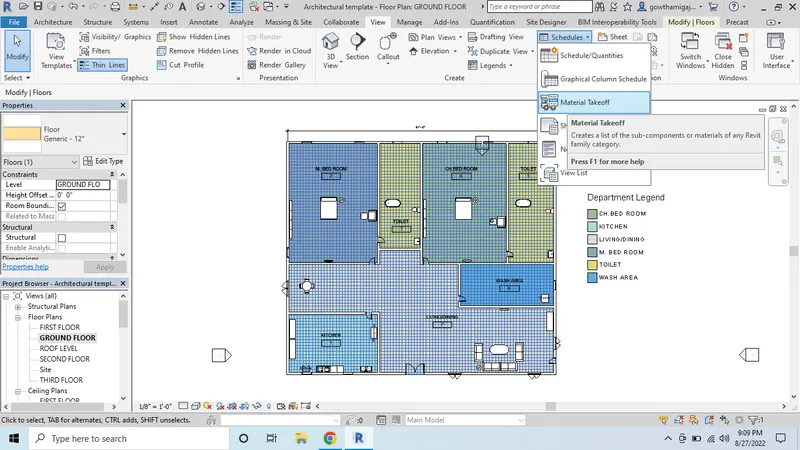
- Select the wall option from the menu bar and click ok.
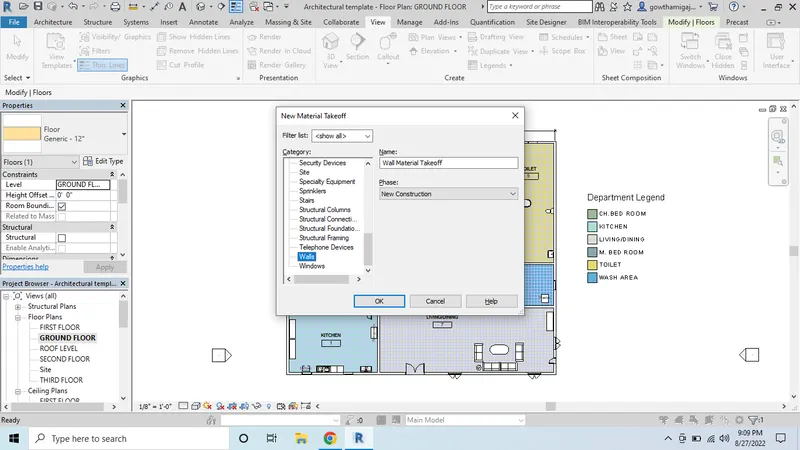
- Select the option from the table.
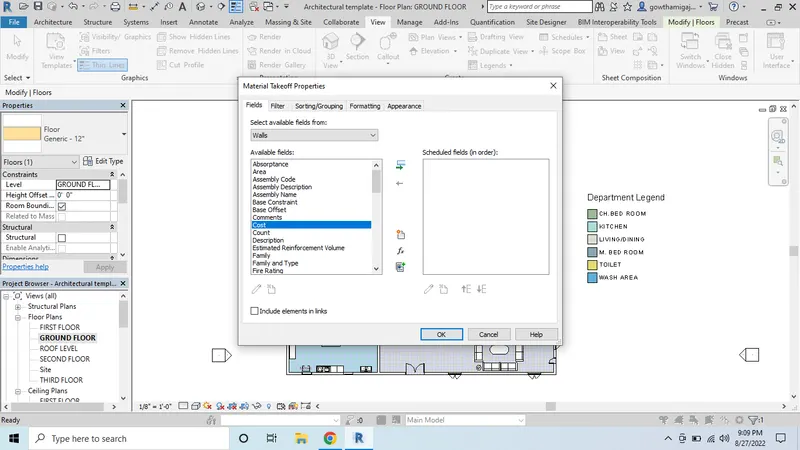
- Select the cost option from the table.
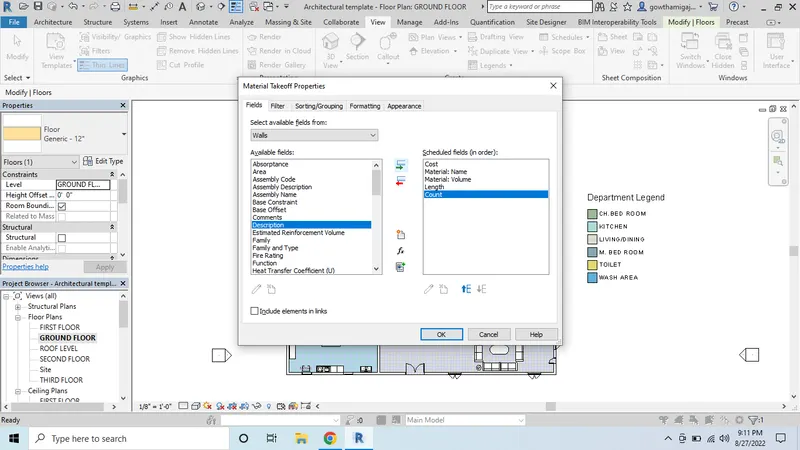
- Now we can see the schedule table given in the drawing.
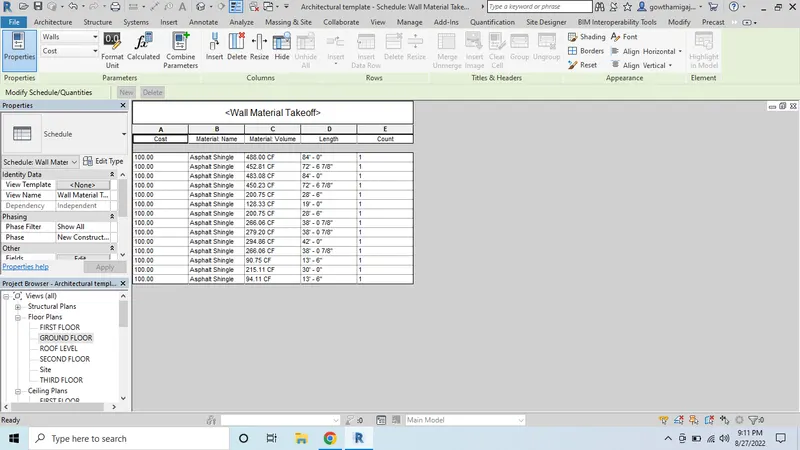
- Now select the table and insert the column.
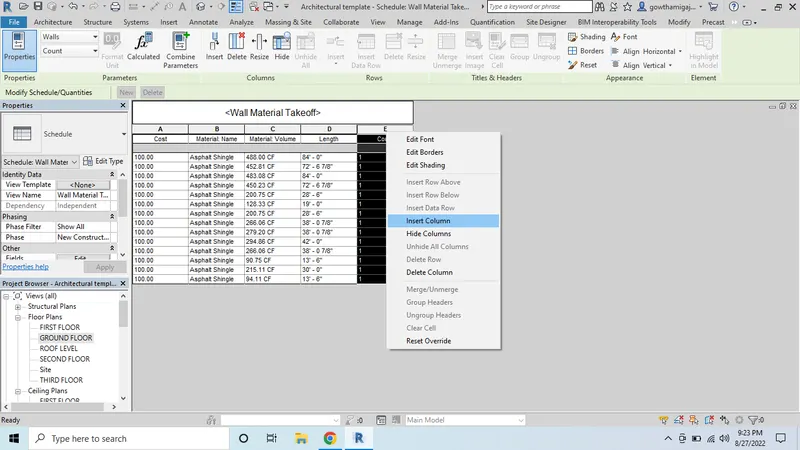
- Click on the options given for the table.
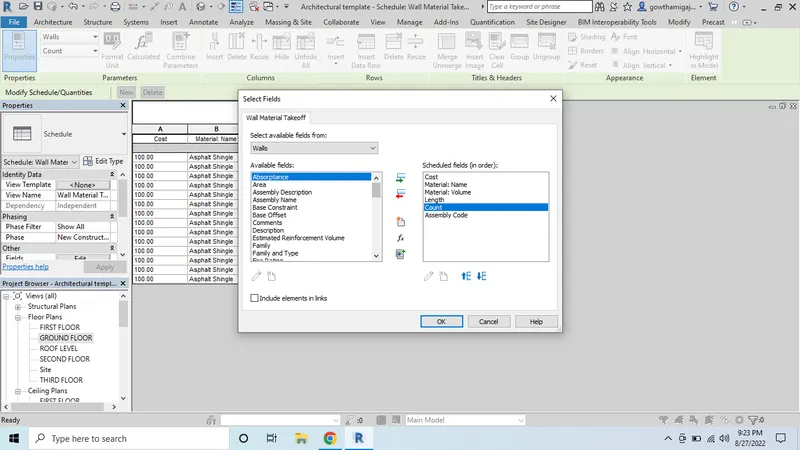
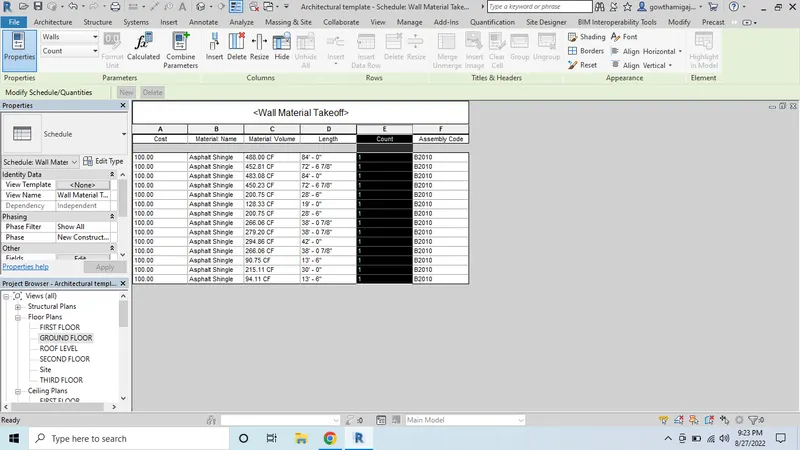
- Now another column is inserted in the table.
- Give the formula for the table to get the cost.
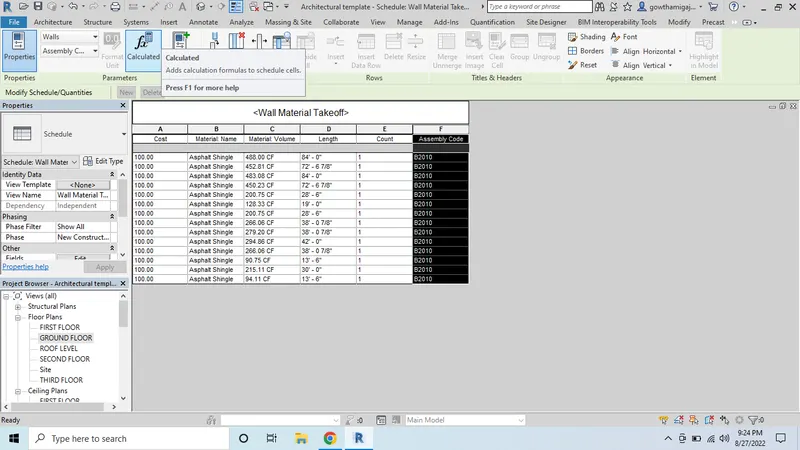
- Now the table is given and inserted the formula.
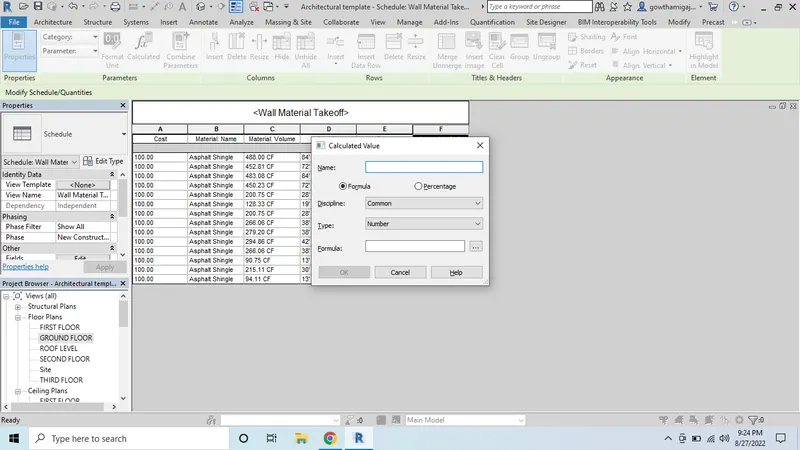
- Now give the formula has to give in the table and we can get the formula for the cost.
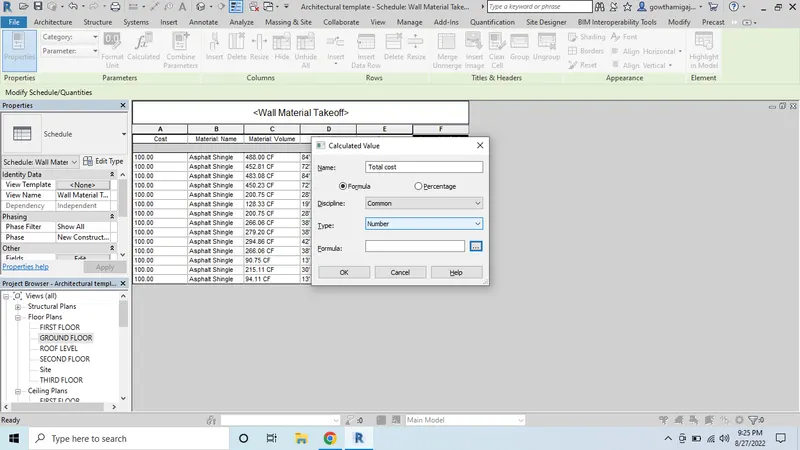
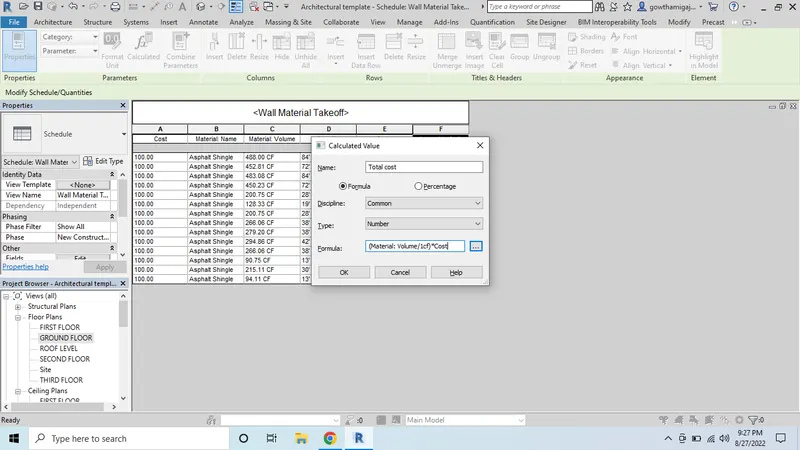
- Give the formula for calculating the cost of the material.
- Now we can see the cost for the table.
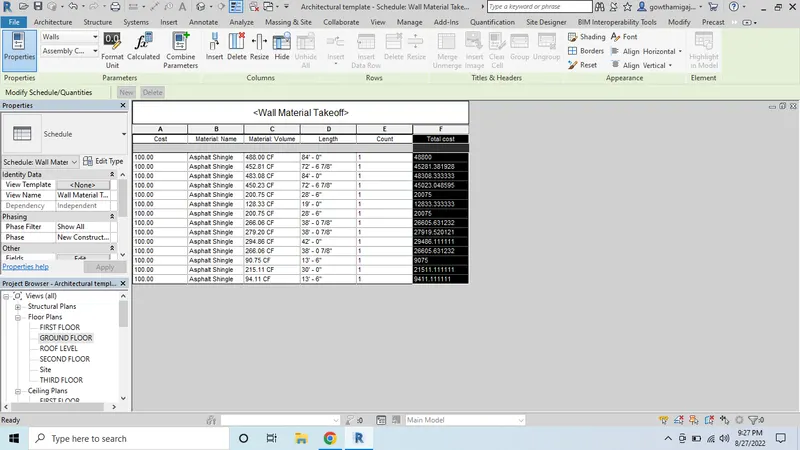
- Open the revit software and open the drawing.
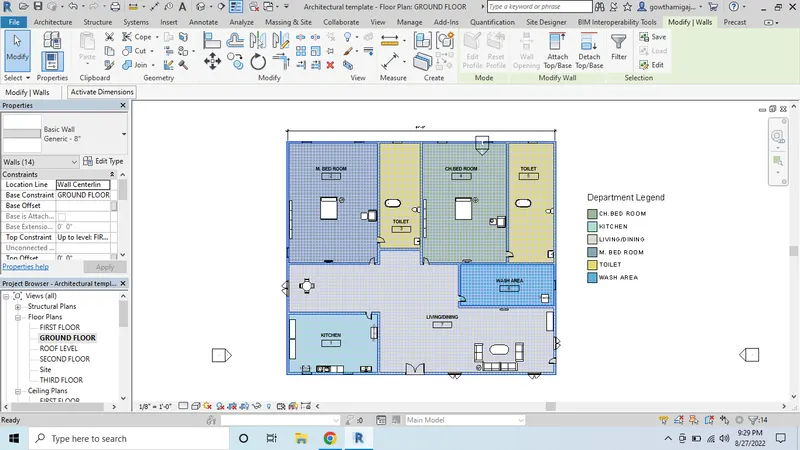
- Now go the project browser and click on the edit option.
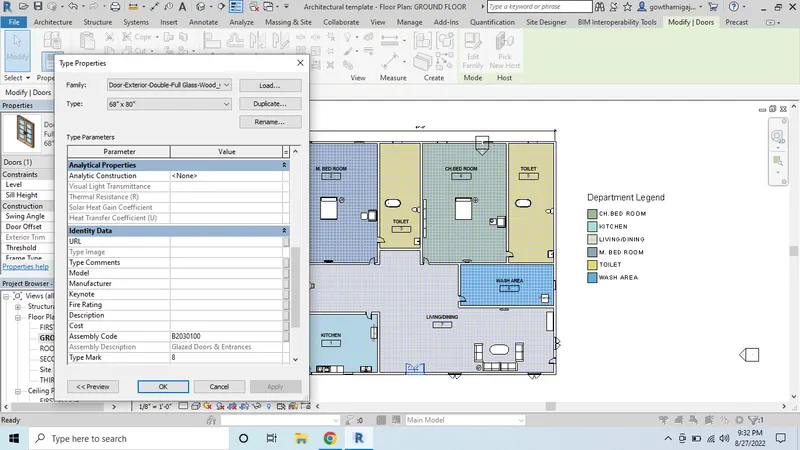
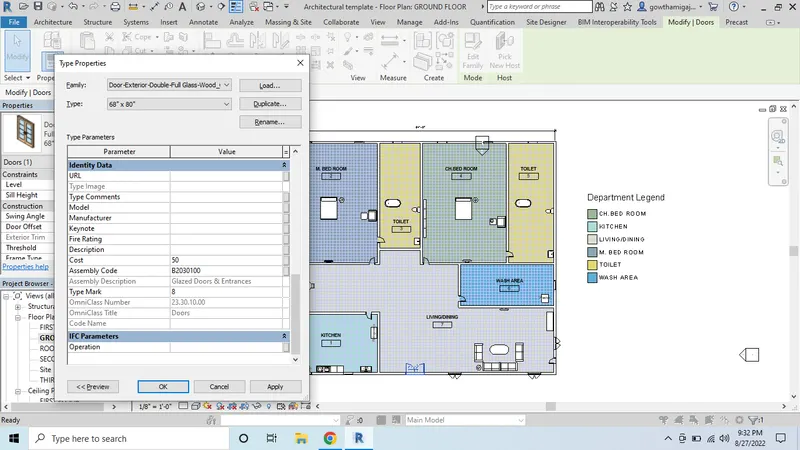
- Select the door and give the properties of the door.
- Go the view tab and select the material take off from the options.
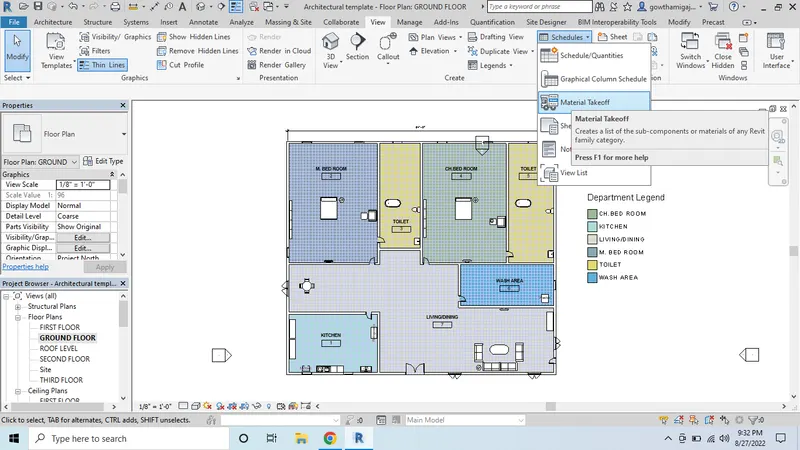
- Select the door option from the drop down options.
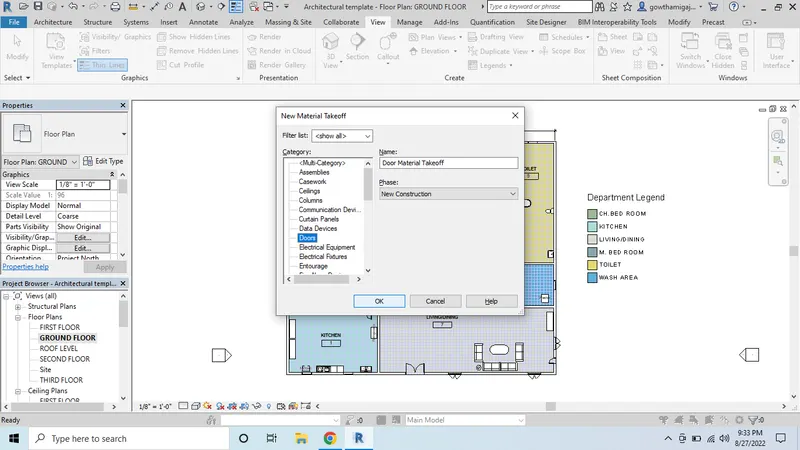
- Now select the items which is to get in the table.
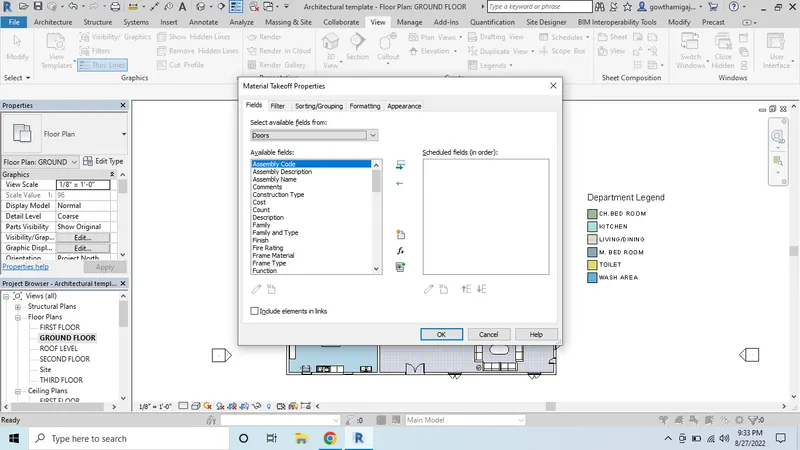
- Select the proper materails from the table.
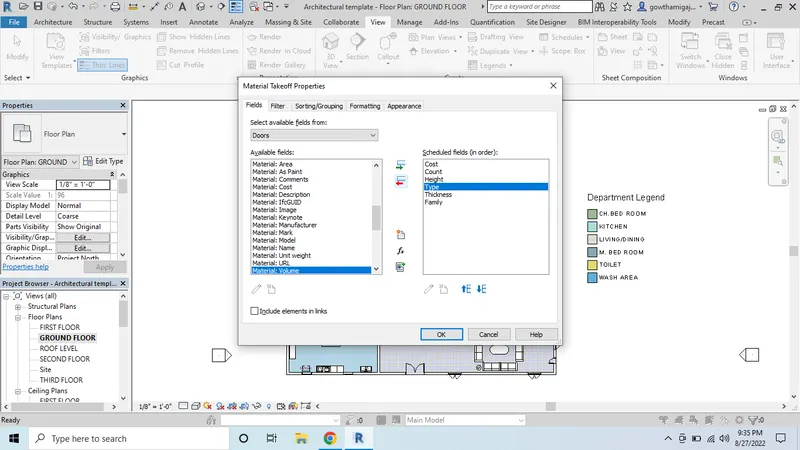
- Select the cost for the material.
- Insert any dummy column to the table.
- From the dialogue box select the items. and give the names.
- Now give the formula for the cost.
- Click on ok.
- Finally we can see the cost for the material applied from the table.
5. Aim: To concept of visual programming discussed in class list a flowchart for the given scenario.
Introduction: To concept of visual programming discussed in class list a flowchart for the given scenario.
Procedure:
A. Framing the structure using Dynamo:
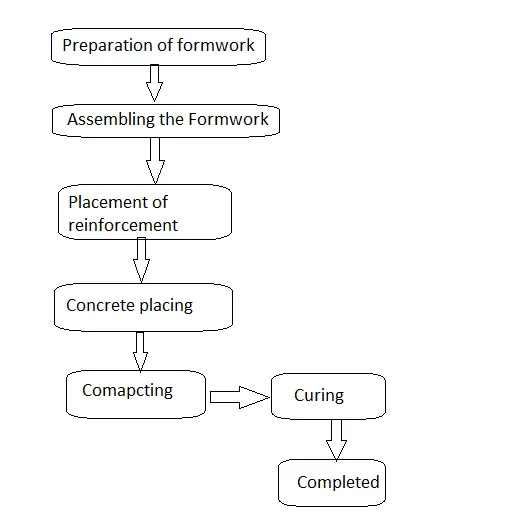
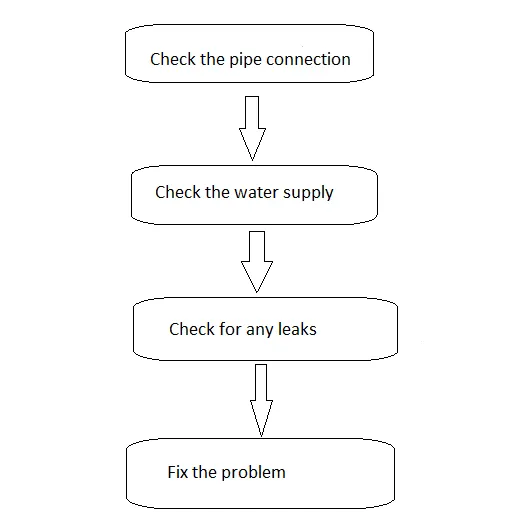
B. If there is no water coming from the pipes:
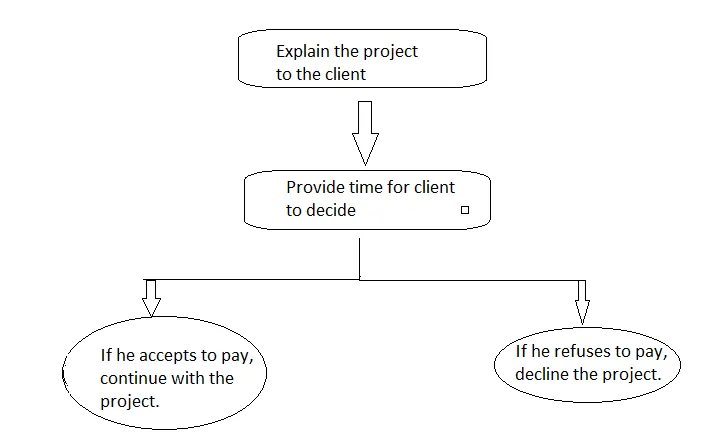
C. If request for money from client has been declined for the project:
6.Aim: To create the list parameters associated with each model elements.
Introduction: To create the list parameters associated with each model elements.
Procedure:
A. Wall:
- Open the revit software and open the drawing from the template.
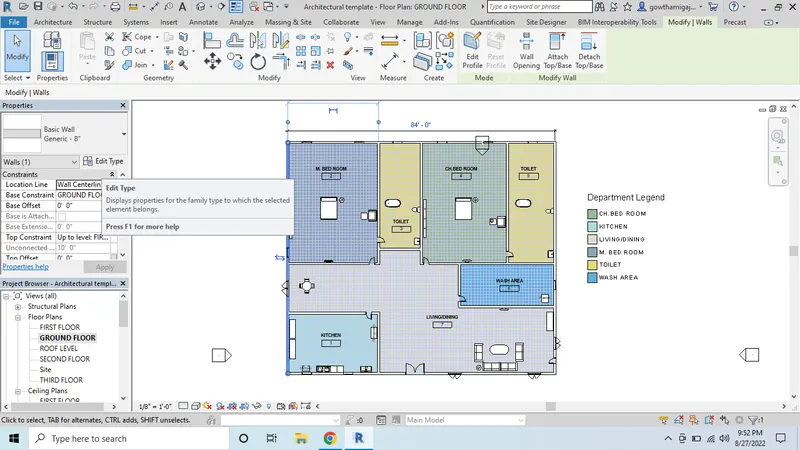
- Now select the wall and click on edit option.
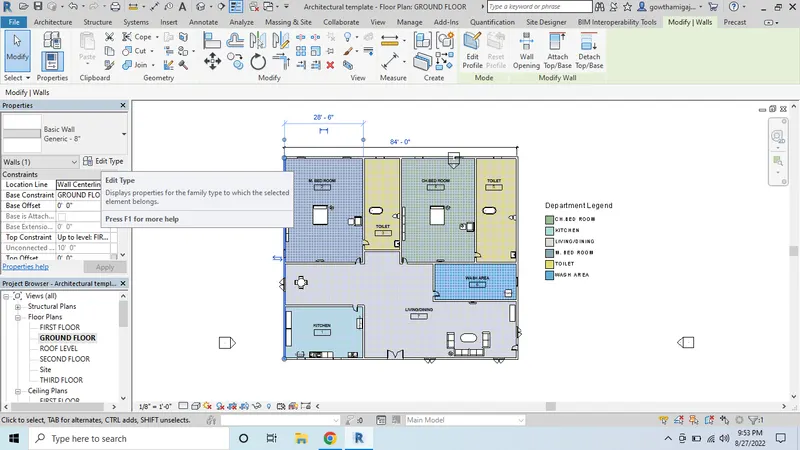
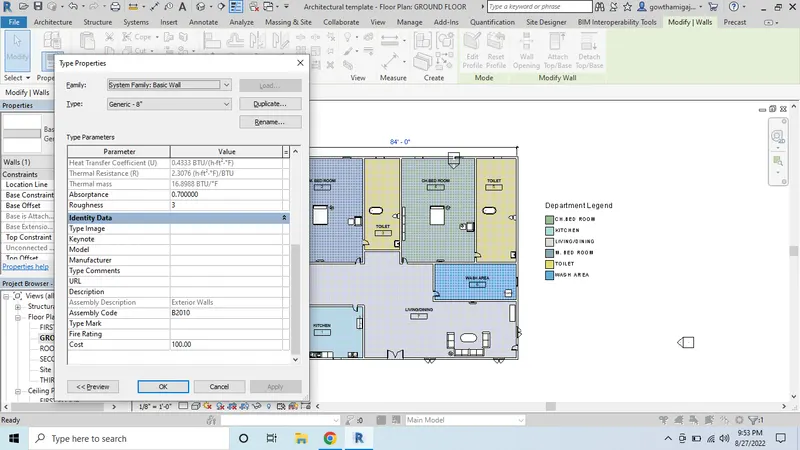
- Now we can see the properties for the wall.
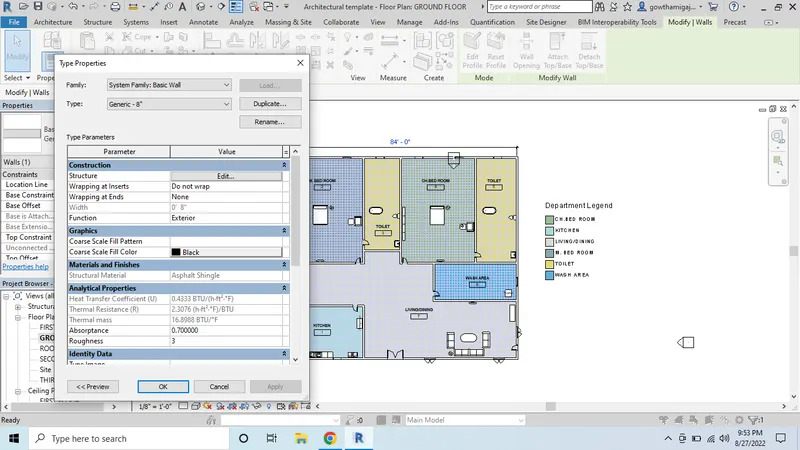
- In the properties give the cost value for the drawing.
- Click on Ok.
B. Door:
- Open the architectural drawing for the door properties.
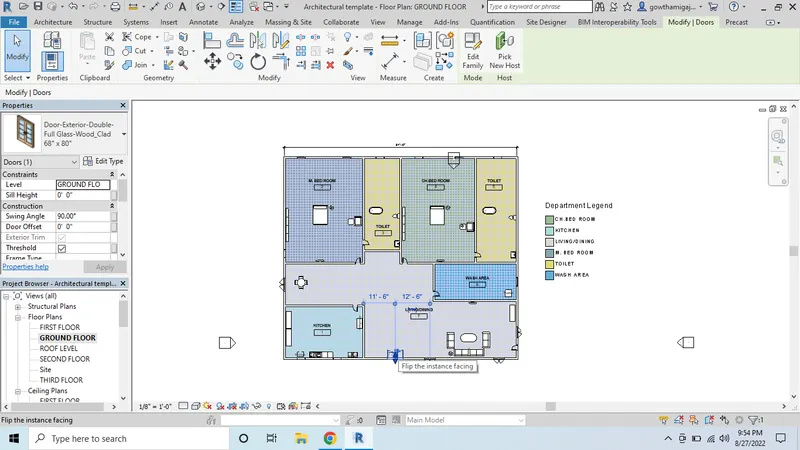
- Now select any drawing from the drawing and click on edit option from the properties browser.
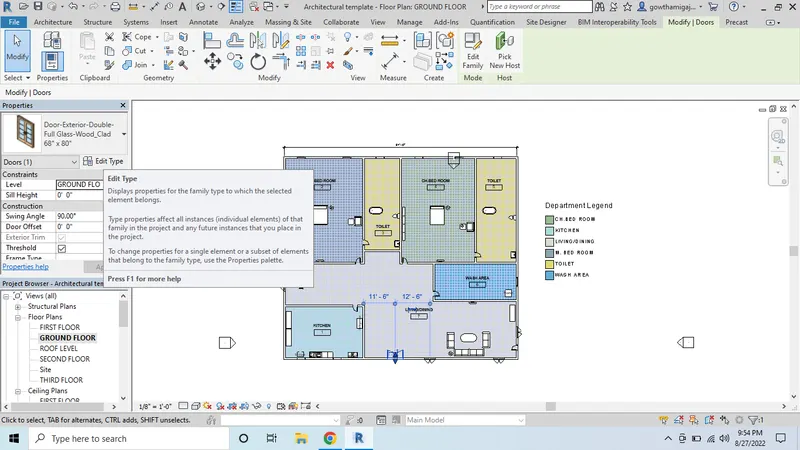
- Now a dialoge box will appear and we can seet he properties in the dialogue box.
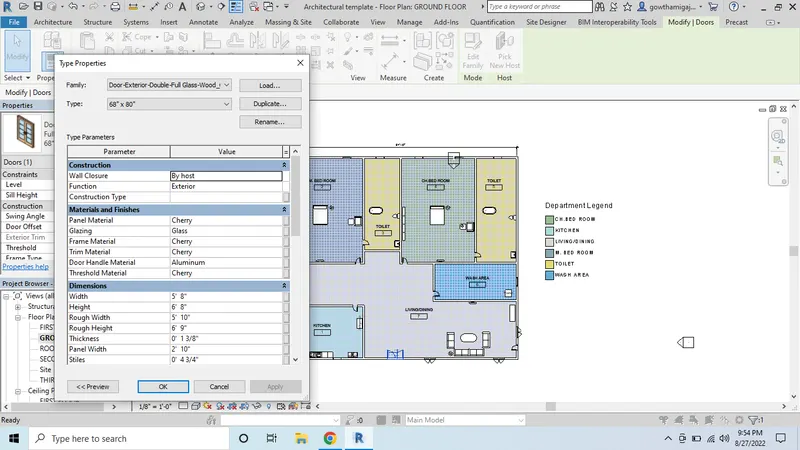
- We can mention the cost in the properties bar.
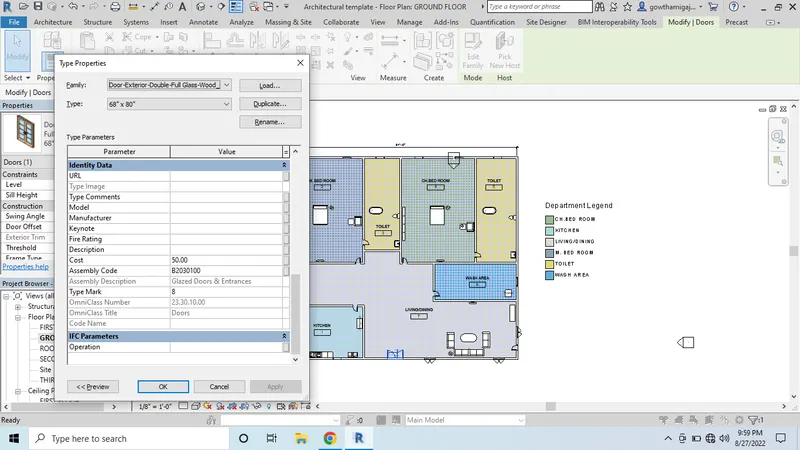
- Now select the floor area from the drawing.
- Then go to the properties browse option and click on the edit option.
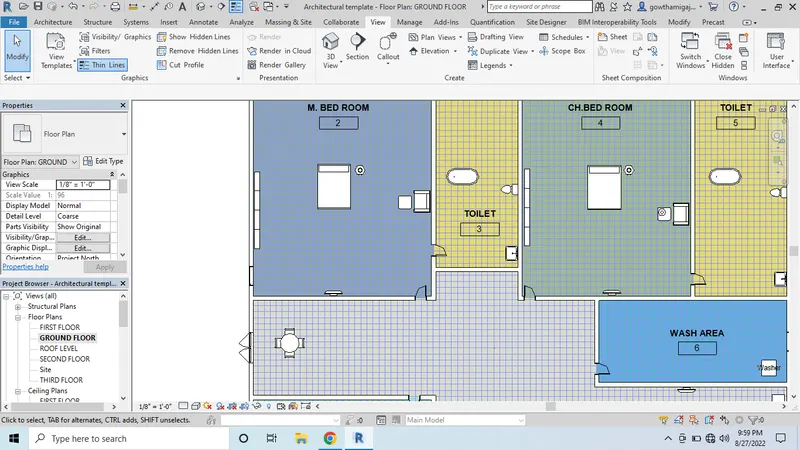
- Now we can see the properties of the floor in the dialogue box.
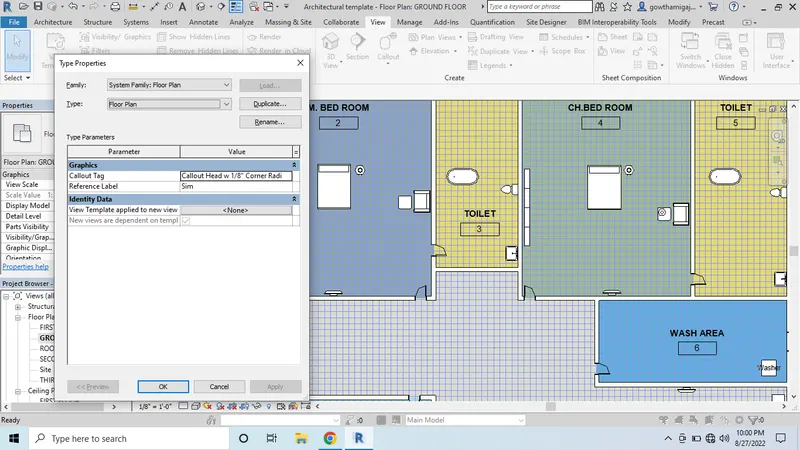
- Now select the dining furniture in the drawing.
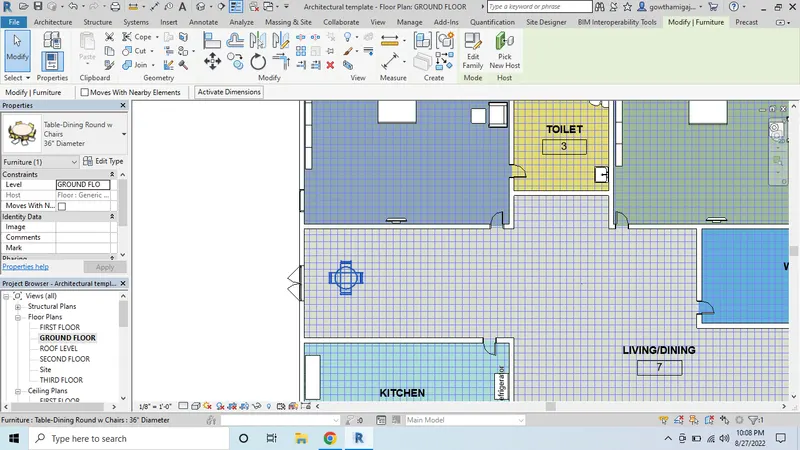
- Now go to the properties browser and click on the edit option.
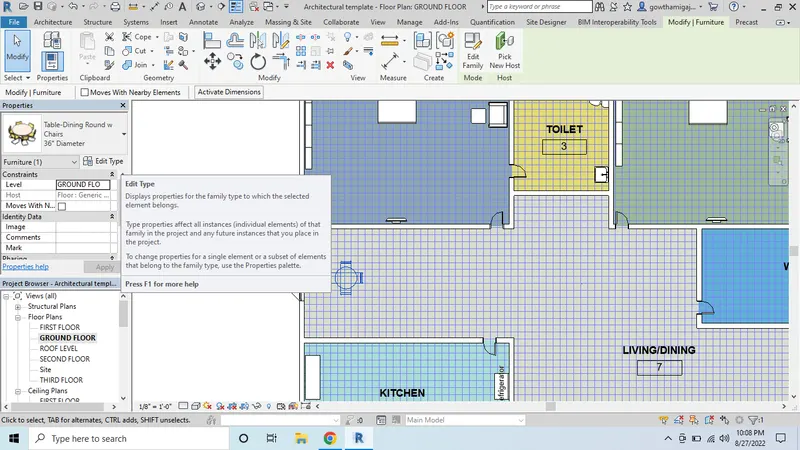
- Now we cam see the properties for the dining.
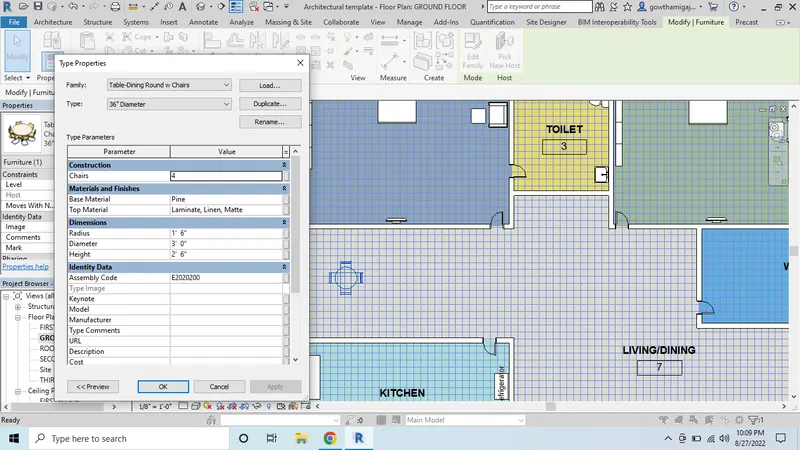
Result: