Preparing Schedule & Cost Estimation for a building using REVIT
1) The shortcut keys in Revit for following tasks are:-
- Using 3D model create a section box = BX
- To create similar doors and windows in a floor plan layout =CS
- To reduce the thickness of lines visible in plan views = TL
- To apply override settings to a floor in the model section view = EOD
- To increase the range of visibility in a plan view = VR
- To select the previously selected items = CTRL + <
- To add annotations to the model views = DI
- To bring the model elements in line = AL
- To rotate the model elements = RO
- To move an object to another location = MV
- To copy a model element = CO
- To mirror an element about an axis = MM
- To create an array of model elements = AR
2) AIM: To creating a schedule of walls, doors, windows and materials using Revit application
PROCEDURE:
- GO to revit and open the week 6 or week 8 drawing file.
- Go to ground floor level.
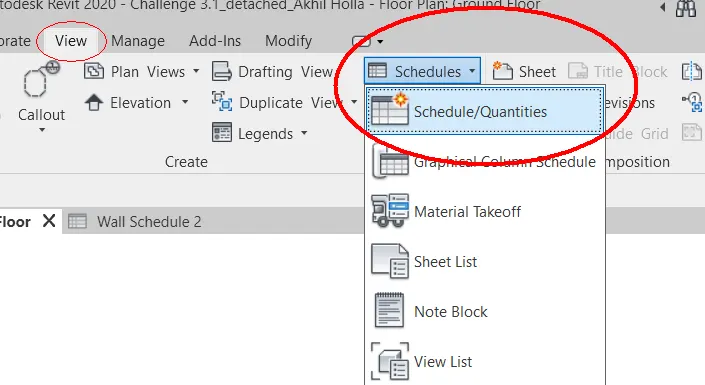
- Go to View tab
- Click Schedule/Quantities option
- New dialogue box will appear there Click Walls
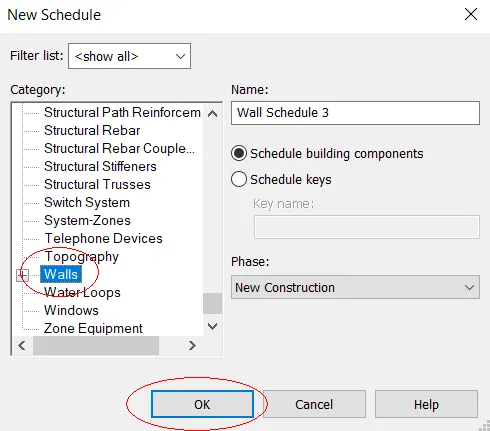
- If needed rename it and click ok.
- Add the scheduled fields you want to show in schedule.
- Here am choosing Assembly description, area, cost, type, count
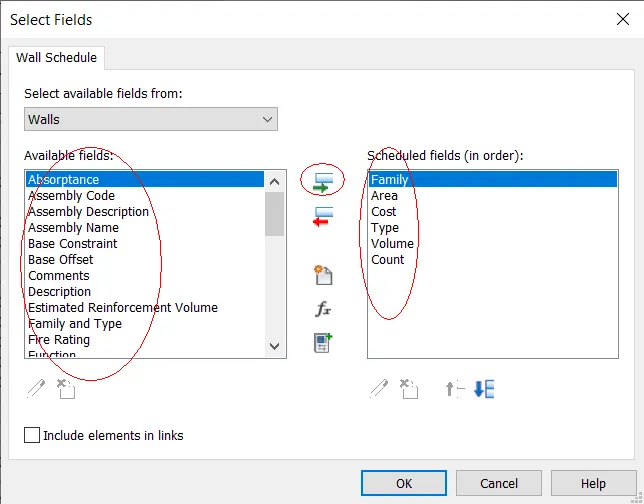
- After selecting all the needed feilds then press ok.
- After added all the scheduled fields the screen will show the schedule of the wall
- If we change anything in the field click edit field
- Add or remove any property as our wish
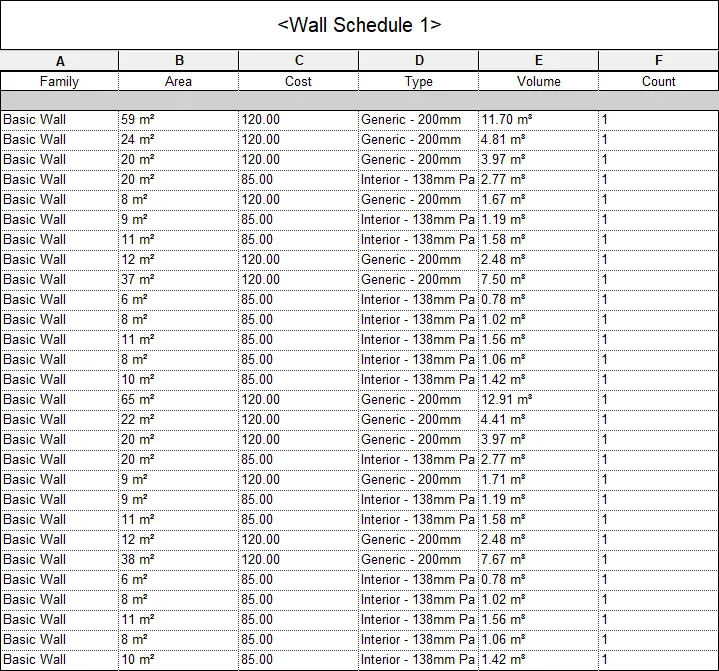
- if we need grand total of the material
- Go to Sorting/Grouping option
- Click tick mark in grand total option
- Click ok. After assigning the grand total option from grouping tool the screen will show the total material inorder to our project.
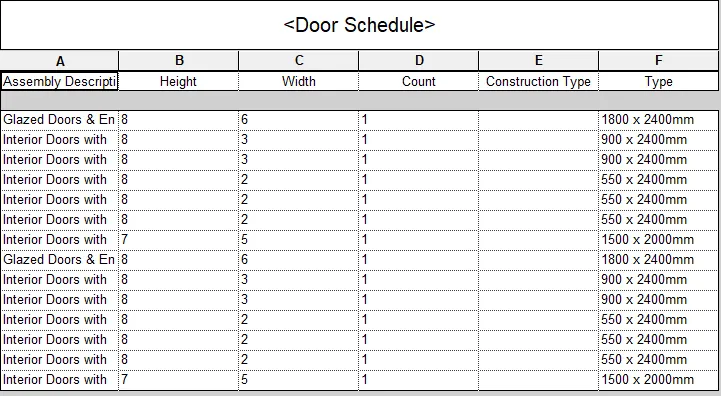
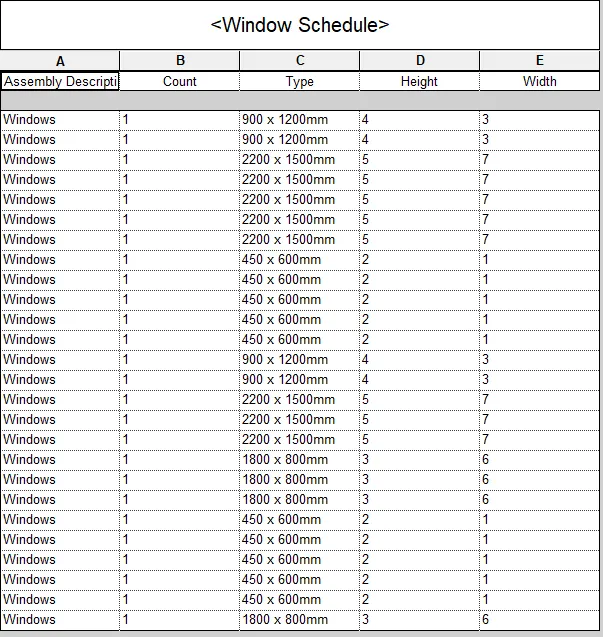
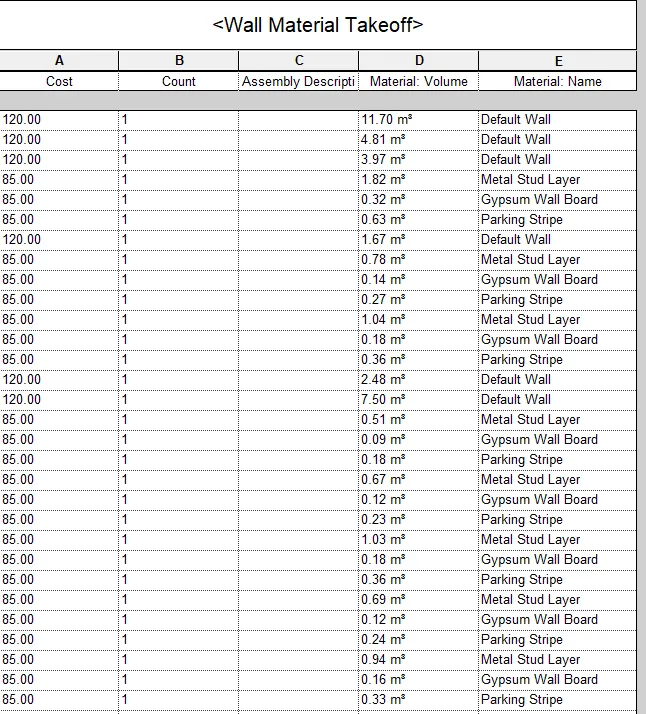
- By doing the same procedure above create window, door, material schedule also.
Door schedule:
Window schedule:
Material takeoff:
3) AIM: To Preparing a schedule report for area and volume of each room in the project using Revit application
PROCEDURE:
- Open the required drawing as per mentioned.
- Go to Schedule/Quantities in view tab
- Click Rooms
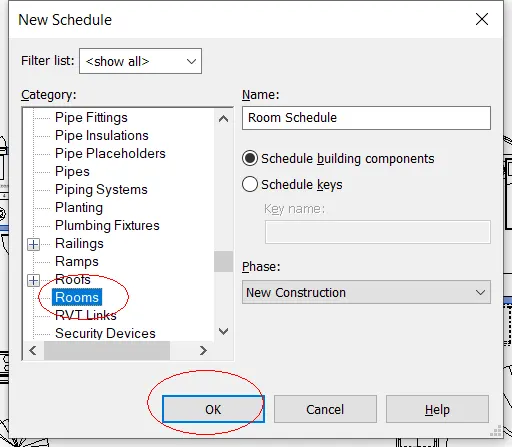
- Add the scheduled fields you want to show in schedule.
- Here am choosing Assembly description, area, number, volume count
- Click ok
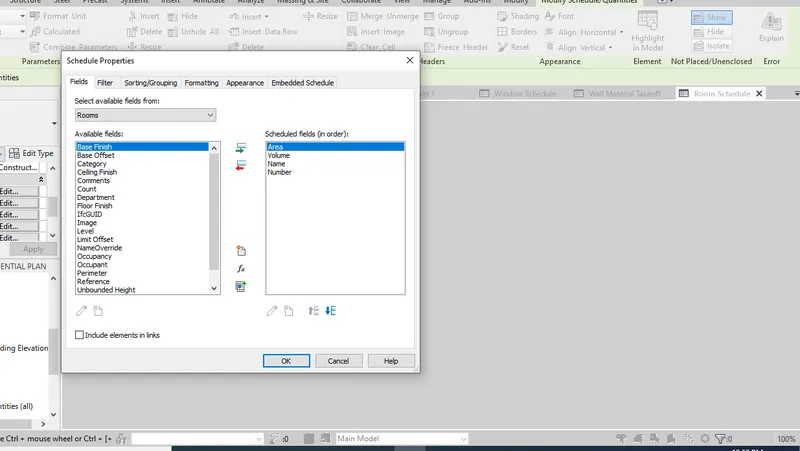
- After added all the scheduled fields the screen will show the room area and volume in the schedule
RESULT:
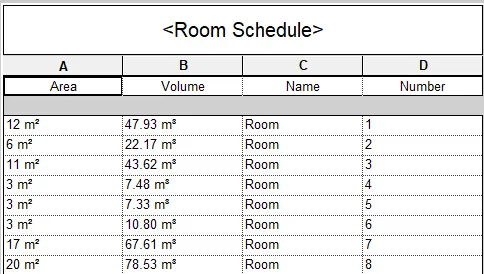
4) AIM: To creating a Total Cost of Materials and Individual Material Take off using Revit application.
PROCEDURE:
- Go to revit and open the drawing of which we want to make the estimation.
- Go to View tab
- Click Schedule/Quantities option
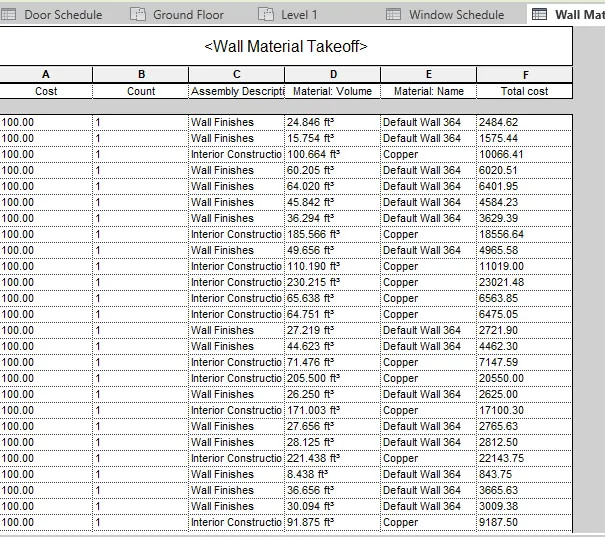
- Choose Wall and add relevent fields
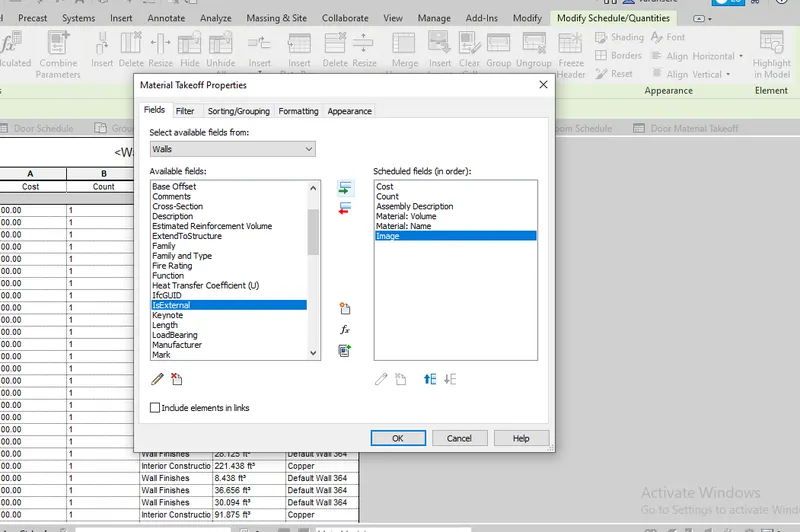
- Once the table is formed now we have to put the formulas.
- Click Calculated tool on the ribbon
- choose type as Currency
- Write the formula as (material volume/1ft^3) * (Cost)
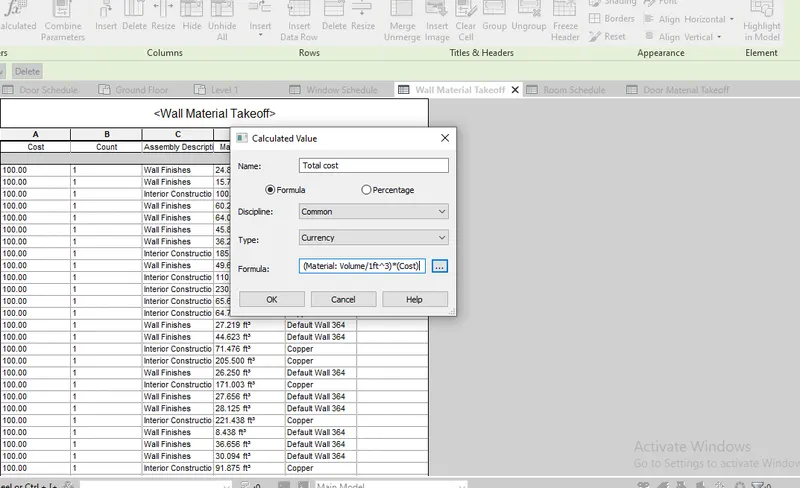
- After creating a formula the screen will shows a total cost of the wall
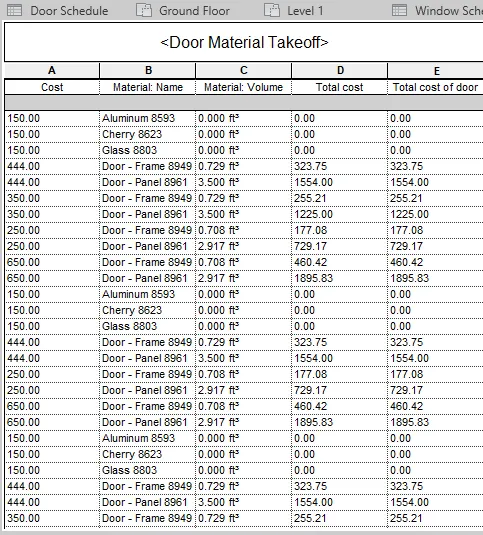
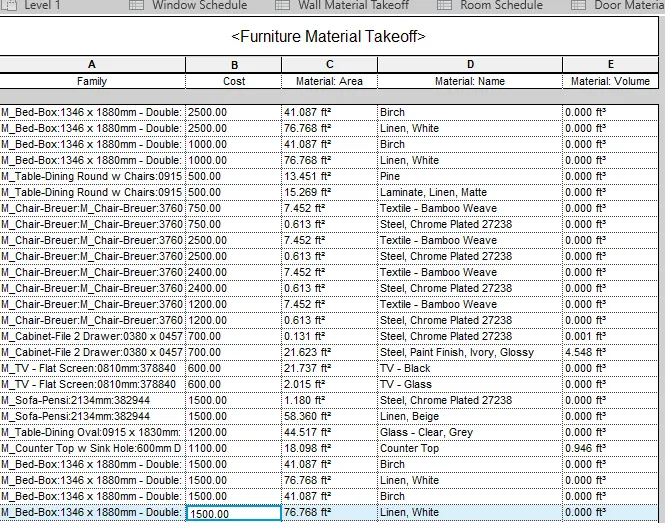
- Similarly do the same procedure for windows, furnitures, doors
- Door Costs:
- Furniture Cost:
5) Below are the list of flowchart for certain scenario
a)
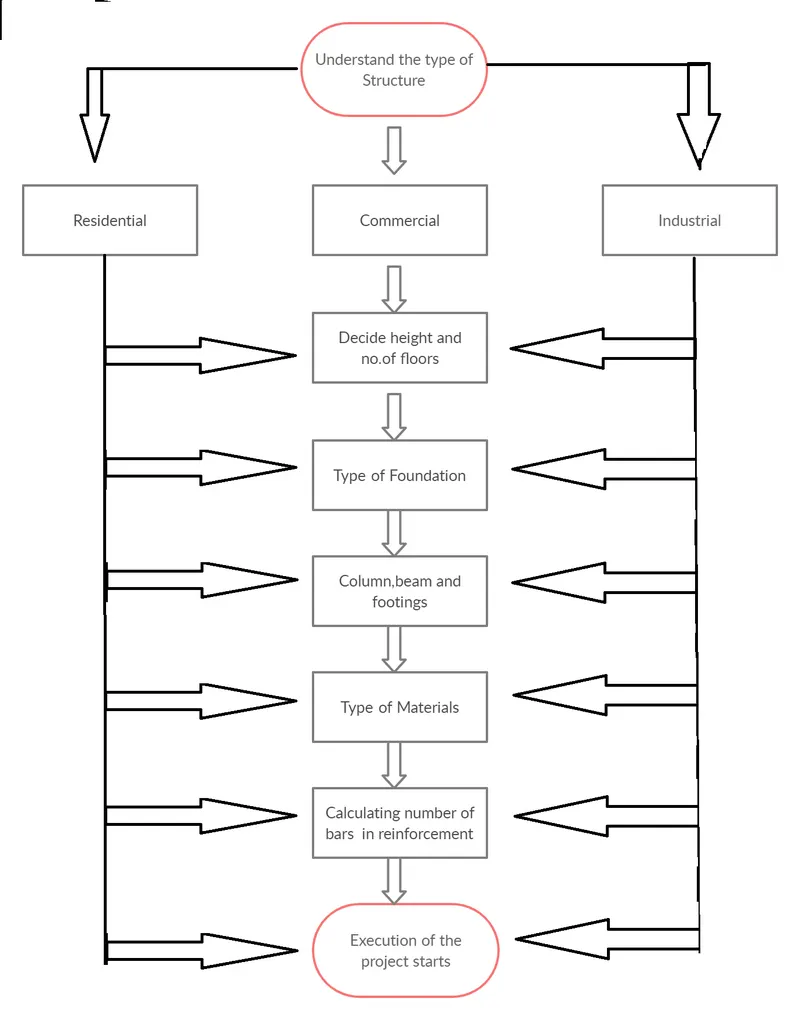
b)
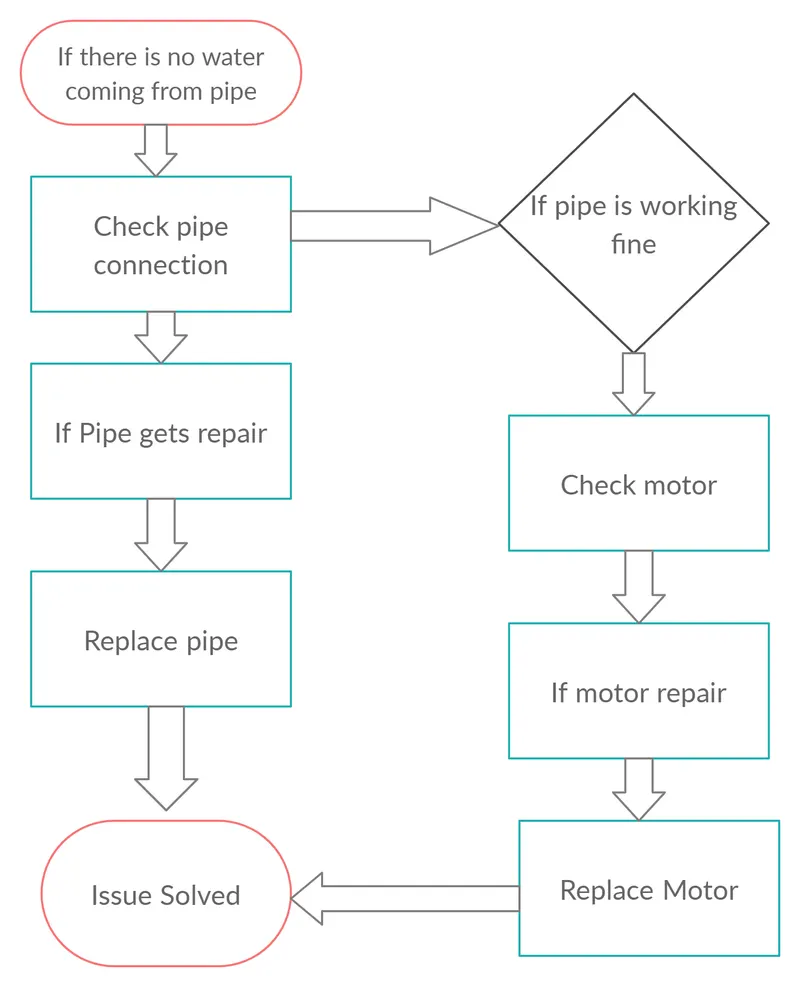
c)
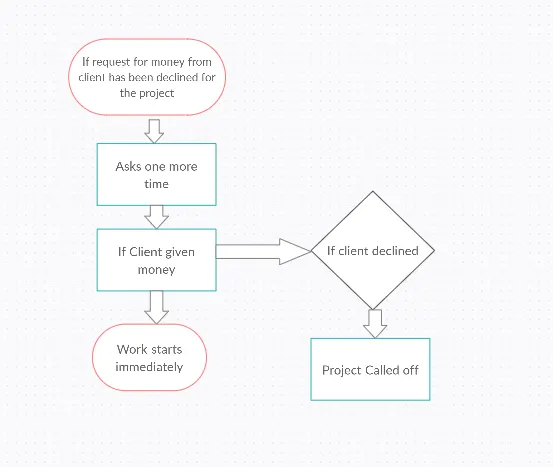
6)
a) Wall
- Area
- Volume
- Type of Material
- Placement of wall either Interior or Exterior
- Type of load applied
b) Floor
- Area
- Material type
- Floor finishing
- Cost
- Thickness
c) Door
- Height and width
- Material type
- Frames
- Door types
- Cost
d) Window
- Height and width
- Framings
- Material type
- Type of windows
- Cost
e) Table
- Material type
- Placement either dining or hall area
- Cost
- Size
f) Building
- Number of floors
- Type of structure
- Height
- Width of road
- Usage purpose
- Foundation type
- Geographical location