Preparing Schedule & Cost Estimation for a building using REVIT
1) Use the shortcut keys in Revit discussed in class to complete the following tasks and list them below
a. Using 3D model create a section box
b. To create similar doors and windows in a floor plan layout
c. To reduce the thickness of lines visible in plan views
d. To apply override settings to a floor in the model section view
e. To increase the range of visibility in a plan view
f. To select the previously selected items
g. To add annotations to the model views
h. To bring the model elements in line
i. To rotate the model elements
j. To move an object to another location
k. To copy a model element
l. To mirror an element about an axis
m. To create an array of model elements.
Aim:- To use the different shortcut keys as discussed in the tutorial video.
a. Using 3D model create a section box.
Procedure:-
- Open up with the revit architecture model created for week 7 challenge.
- To create a section box, Go to 3D view of the model.
- Select the element for which you want to create section box.
- like selecting the wall part as shown below,
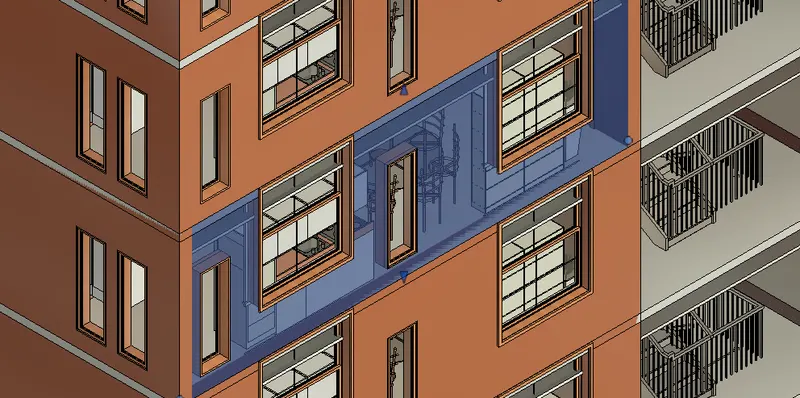
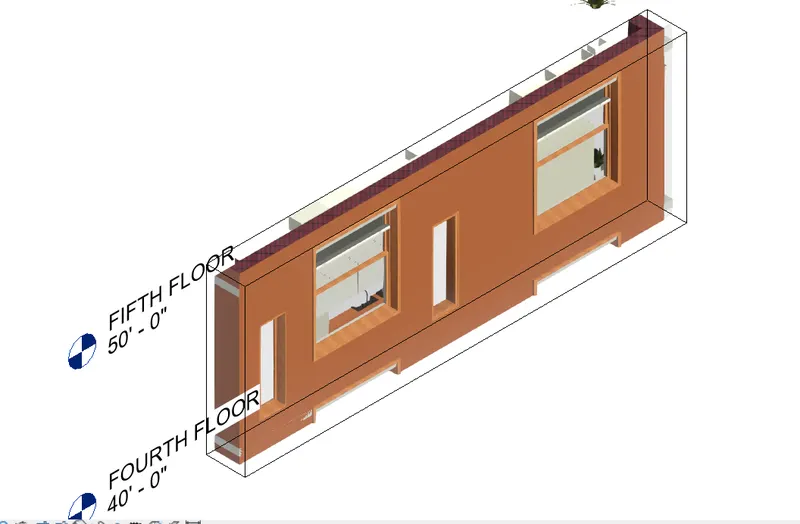
- after selecting the element type "BX" using the keyboard.
- Automatically section box will be created in 3D view as shown below.
b. To create similar doors and windows in a floor plan layout.
Procedure:-
- Open up with the revit architecture model created for week 7 challenge.
- To create similar doors and windows in a floor plan layout,Go to floor plan layout.
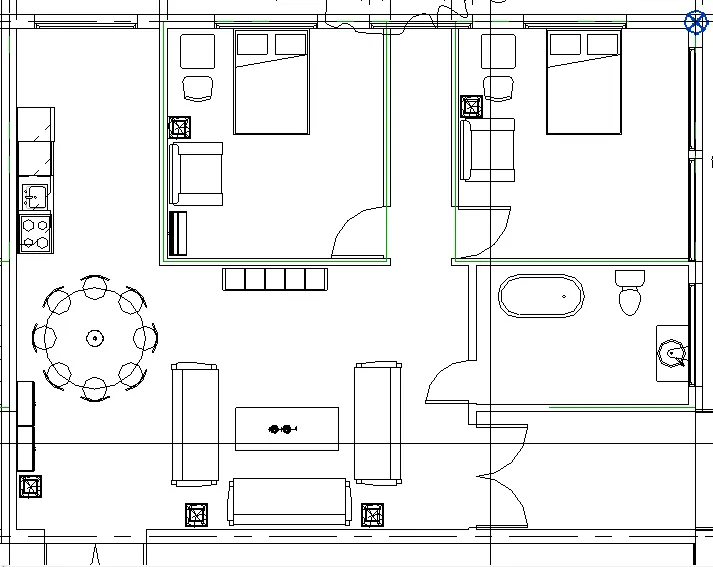
- From the floor plan select the door or window and type "CS" and automatically the similar properties door or window wiil be created to place as a component.
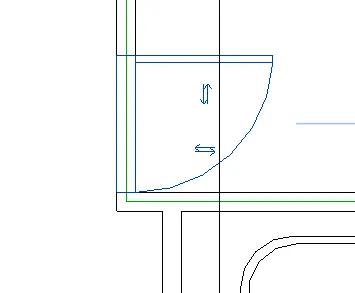
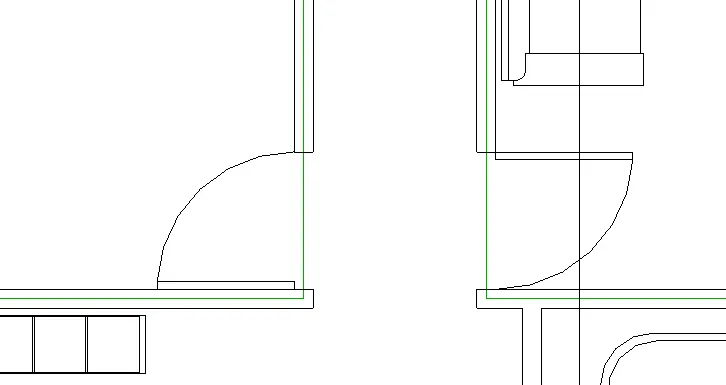
- Similar door is placed as a component in another wall.
c. To reduce the thickness of lines visible in plan views.
Procedure:-
- Open up with the revit architecture model created for week 7 challenge.
- Go to floor plan views.
- The ground floor plan looks like this before using thin lines shortcut command key.
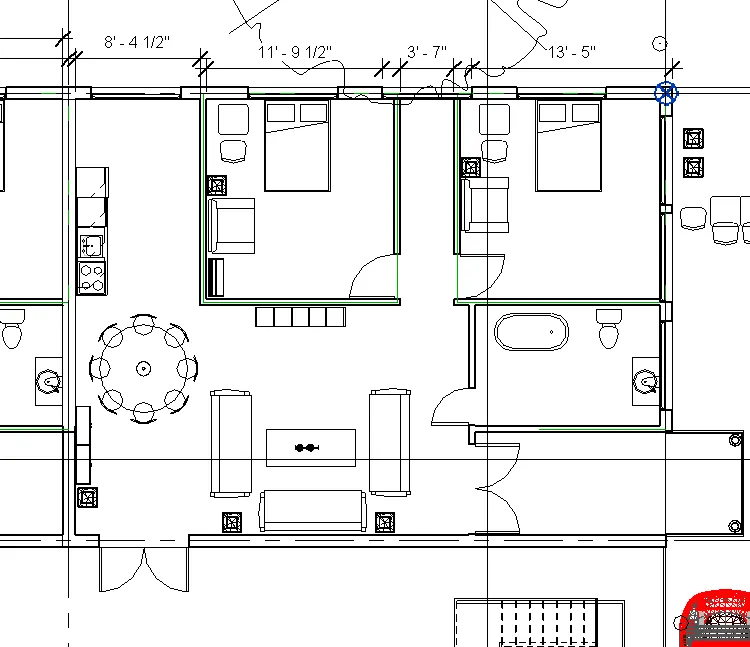
- After using the shortcut key for thin lines "TL" the view can be seen below,
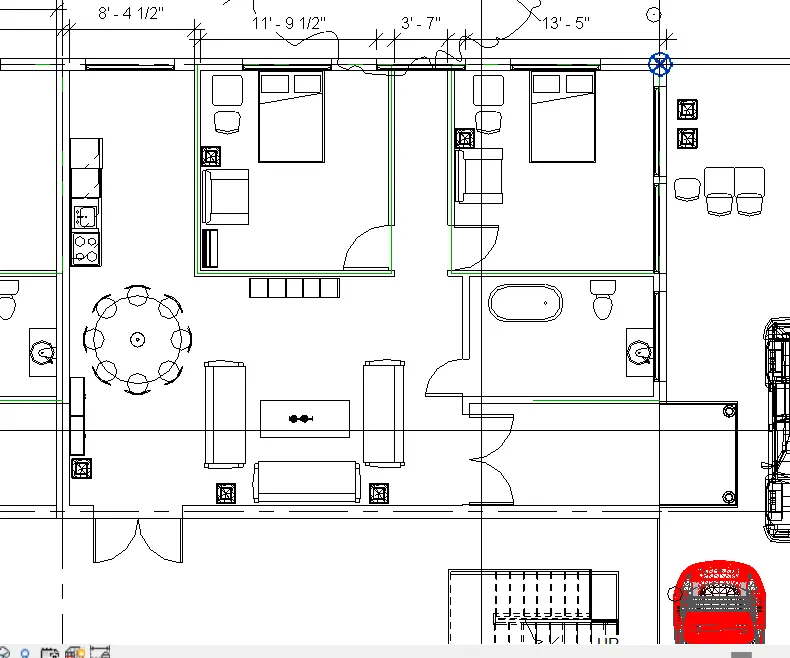
- By pressing TL again we can revert back to original thickness of the lines.
d. To apply override settings to a floor in the model section view
Procedure:-
- Open up with the revit architecture model created for week 7 challenge.
- Go to floor plan views and get open with ground floor plan.
- Type VG a dialouge box will get open,from several options in visibility column go to floors under pattern section change the pattern and clour for floor visibility as shown below,
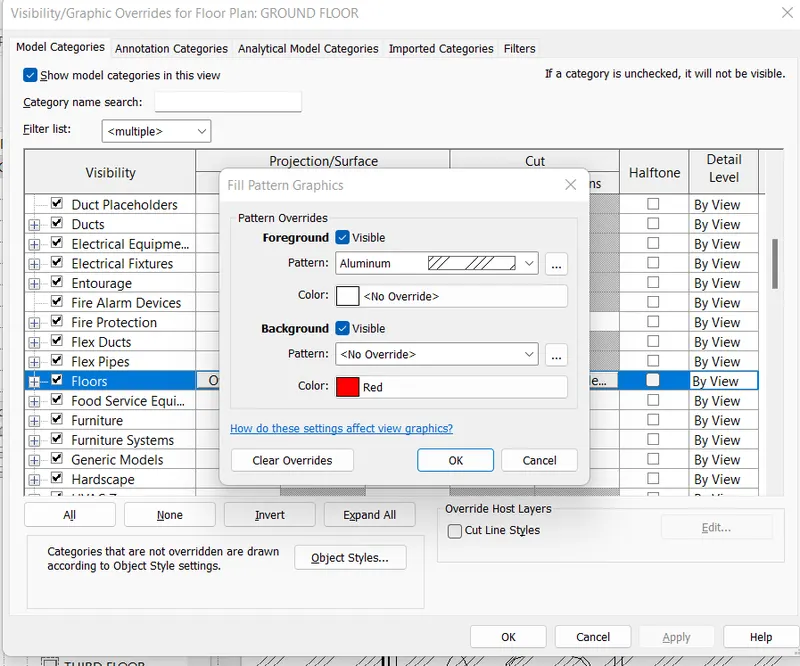
- previously the visibility of the floor is as shown below,
- The changes in floor visibility is depicted below,
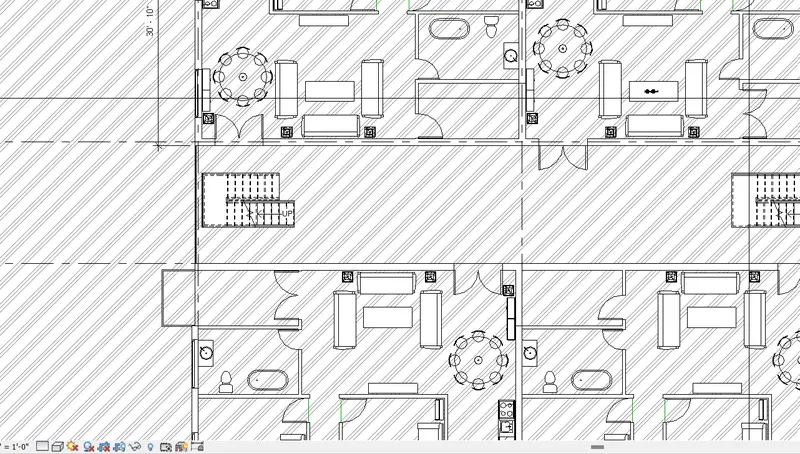
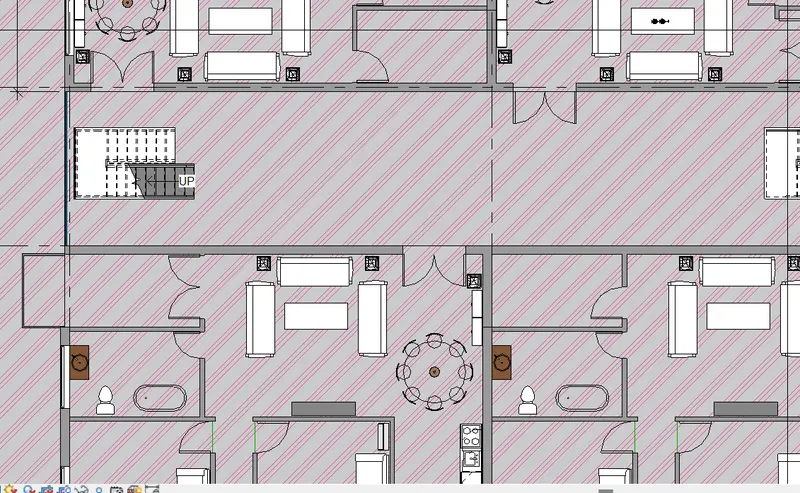
e. To increase the range of visibility in a plan view.
Procedure:-
- Open up with the revit architecture model created for week 7 challenge.
- Go to floor plan views and get open with ground floor plan.
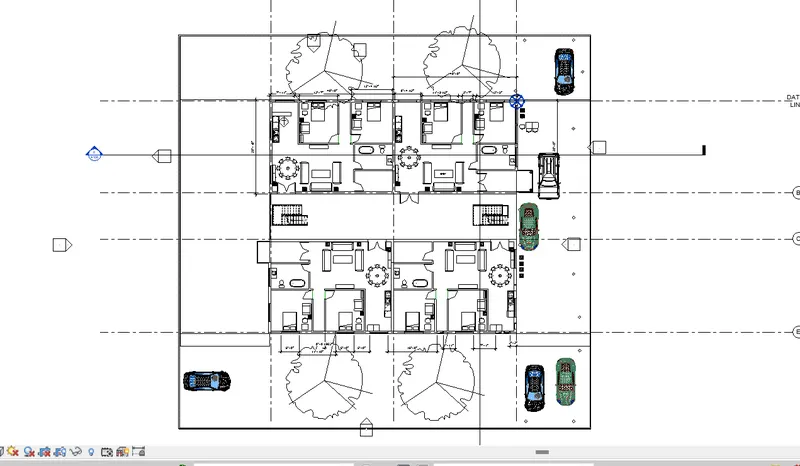
- To increase the range of of visibility in a plan view type "VR" a dialouge box will get open.
- Feed the view range dimension values as shown below,
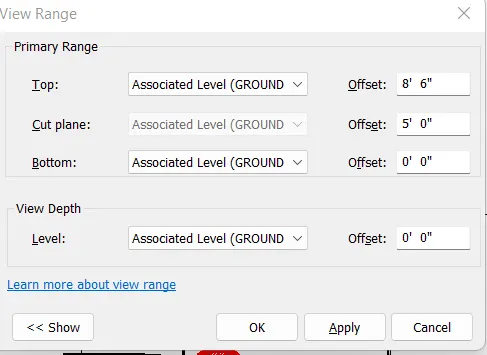
- The view of the given range is as shown below,
f. To select the previously selected items,
Procedure:-
- Open up with the revit architecture model created for week 7 challenge.
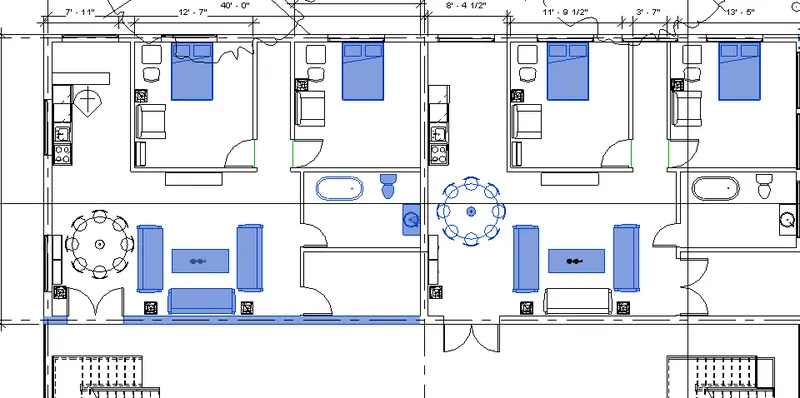
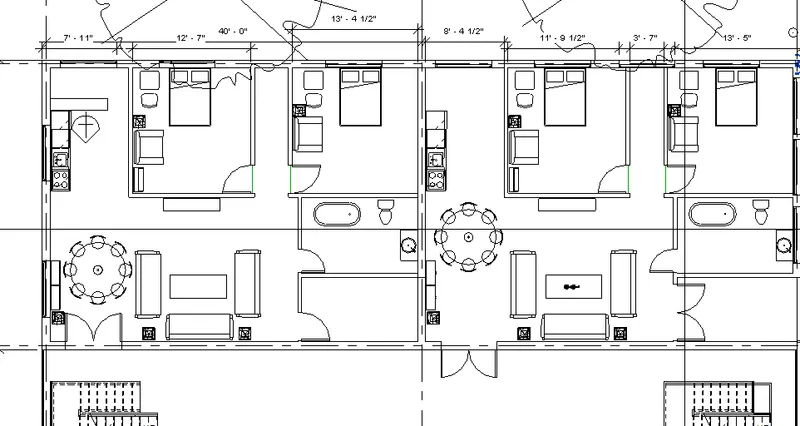
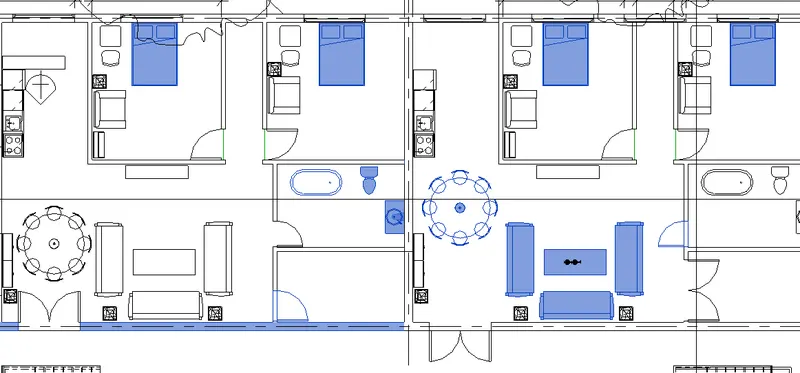
- This shortcut command is the solution of the problem occurred sometimes,like when we are required to select multiple items art the same time by pressing the ctrl key but, if we unhold the ctrl key the selected items will get unselected and we need do it again,this problem is sorted by the concept command Reselect.
- If we have unhold the ctrl key while selecting the multiple items we don't need to do it again from the scratch bu use Ctrl+left arrow key and previously selected items will get selected again.
- Selecting multiple items at a time by holding ctrl key as shown below,
- After escaping froom ctrl key the selected items get unselected as shown below,
- The lost selections is retrieved back by pressing ctrl and left arrow key as shown below,
g. To add annotations to the model views
Procedure:-
- Open up with the revit architecture model created for week 7 challenge.
- Get open with a floor plan.
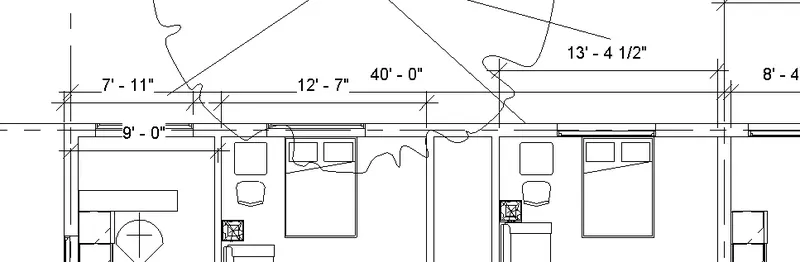
- Type DI and then select the dimensioning types like linear or aligned and mark the dimensions.
- This is the shortcut way for dimensioning.
h. To bring the model elements in line.
Procedure:-
- Open up with the revit architecture model created for week 7 challenge.
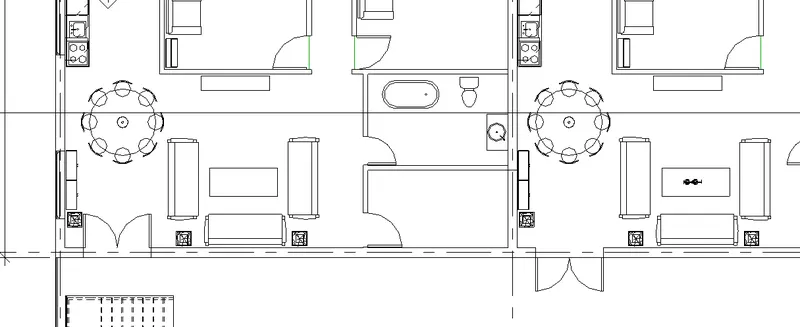
- This is a shortcut key for aligning the model elements in one line.
- Just type "AL" using the keyboard then it will ask for reference axis,select the reference axis from the component along which you want to align the model element after selecting the reference axis select the the element you want to align.
- The model components will automatically get aligned to each other.
- The aligned Sofa sets and dining table in two different spaces are shown below,
i. To rotate the model elements
Procedure:-
- Open up with the revit architecture model created for week 7 challenge.
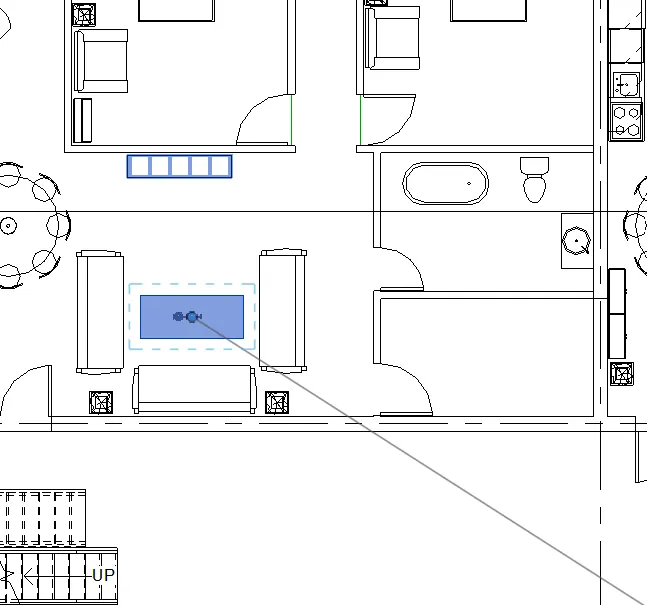
- This is a shortcut key for rotating any model elements in revit.
- Just select the element you want to rotate and then type "RO" the rotate command will automatically get activated.
- The selection of the object and activation of the rotation command can be seen below,
j. To move an object to another location.
Procedure:-
- Open up with the revit architecture model created for week 7 challenge.
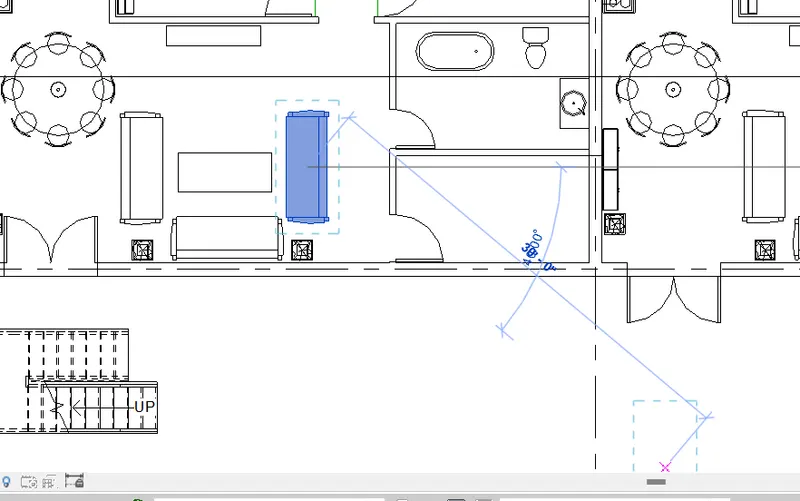
- This is a shortcut key for moving any model elements in revit model space.
- Just select the element you want to move and then type "MV" the move command will automatically get activated.
- After which it will ask for the reference point from where you want to pick the element and then the element can be moved anywhere in the model space.
- The selection of the object and activation of the move command can be seen below,
k. To copy a model element.
Procedure:-
- Open up with the revit architecture model created for week 7 challenge.
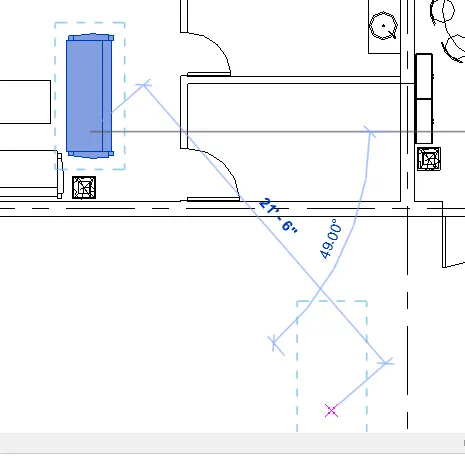
- This is a shortcut key for copying any model elements in revit model space.
- Just select the element you want to copy and then type "CO" the move command will automatically get activated.
- After which it will ask for the reference point from where you want to pick the element and then the element can be Copied anywhere in the model space.
- The selection of the object and activation of the copy command can be seen below,
l. To mirror an element about an axis
Procedure:-
- Open up with the revit architecture model created for week 7 challenge.
- This is a shortcut key for mirroring any model elements in revit model space.
- Just select the element you want to mirror and then type "MM" then mirror command will automatically get activated.
- After which it will ask for the reference line as mirror along the line which the element will gewt mirrored.
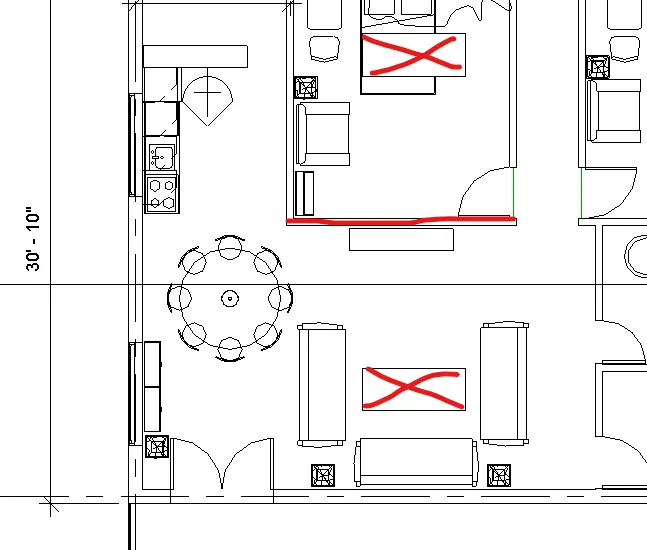
- The selection of the object and completion of the mirroring centre table in revit model can be seen below,
m. To create an array of model elements.
Procedure:-
- Open up with the revit architecture model created for week 7 challenge.
- This is a shortcut key for arraying the elements in revit model space.
- just select the element for which you want to create array and tpe "AR" then it will ask to select the base point and then the side and angle by which you want to array the element, again it will ask for the number of elements.
- Feed the total numbers you want then the object element get arrayed automatiocally.
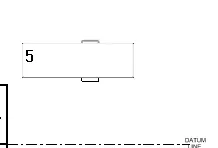
- Arraying of centre table for 5 numbers can be seen below,
2) Using Revit and the project used from week 6 to 8 prepare a schedule for the following
a. Walls
b. Doors
c. Windows
d. Material – Concrete/Wood
a. Walls
Aim:- To create the wall schedules using revit for the project used from week 6 to 8.
Procedure:-
- Open with the revit software and select the file to open the project used from week 6 to 8.
- Once the project get opened Go to view tab and search for schedule in create panel.
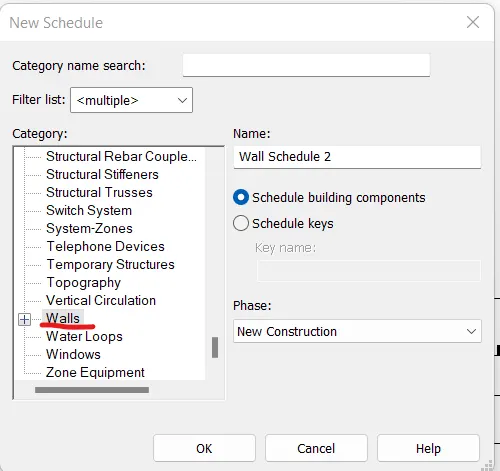
- click over that and select schedule quantitites a dialouge box will get open then select the Wall from category column and press ok.
- A new dialouge box will get open then add the parameters and again press ok.
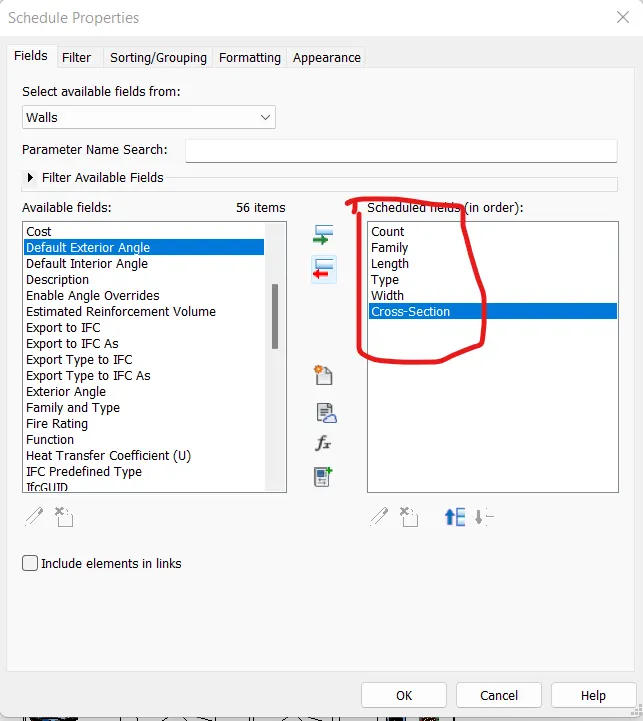
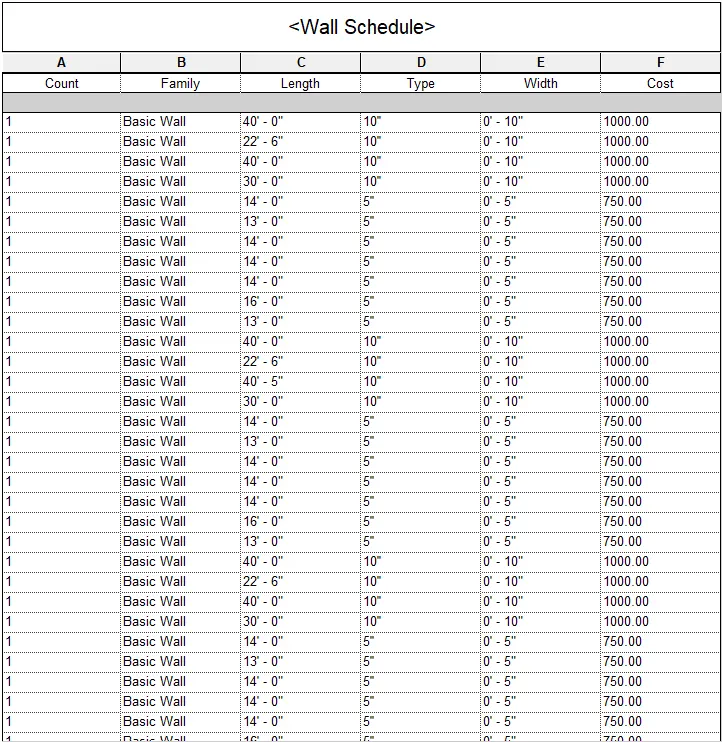
- Our wall Schedule is created and can be accessed from project browser under schedule/Quantities tab.
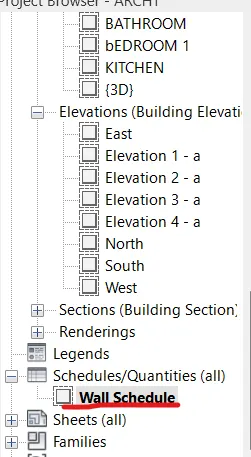
- The created wall ashedule is depicted below,
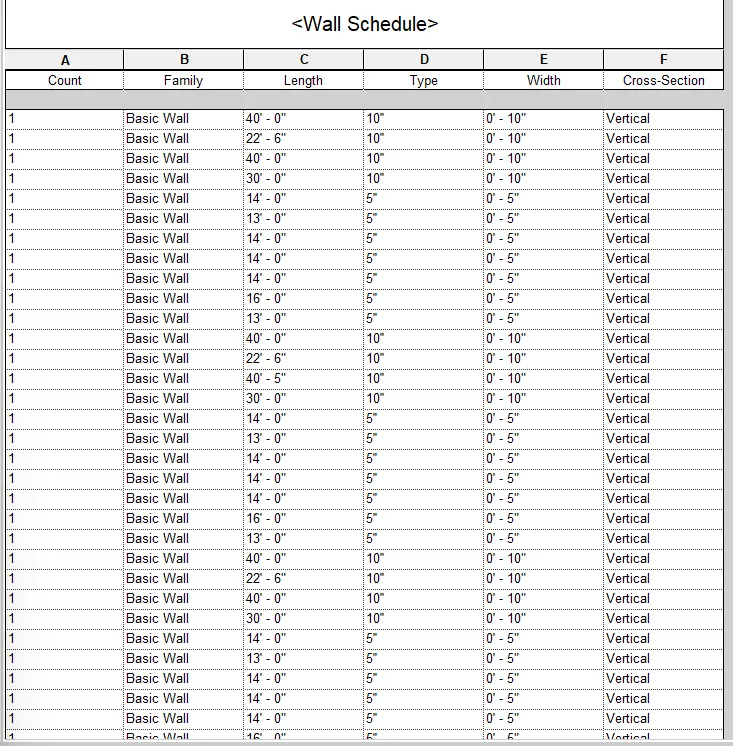
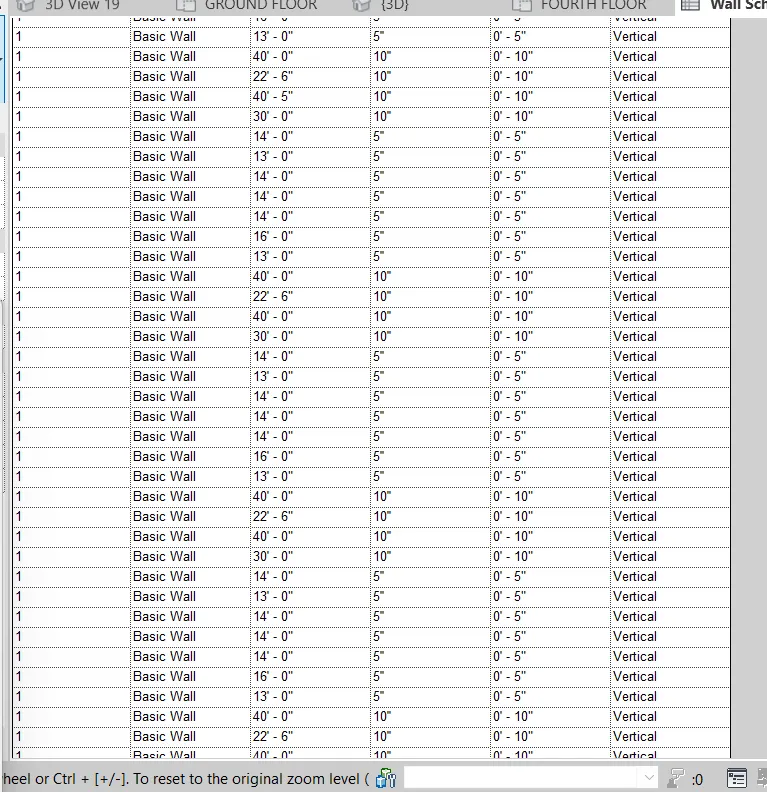
b. Doors.
Aim:- To create the Door schedule using revit for the project used from week 6 to 8.
Procedure:-
- Open with the revit software and select the file to open the project used from week 6 to 8.
- Once the project get opened Go to view tab and search for schedule in create panel.
- click over that and select schedule quantitites a dialouge box will get open then select the Door from category column and press ok.
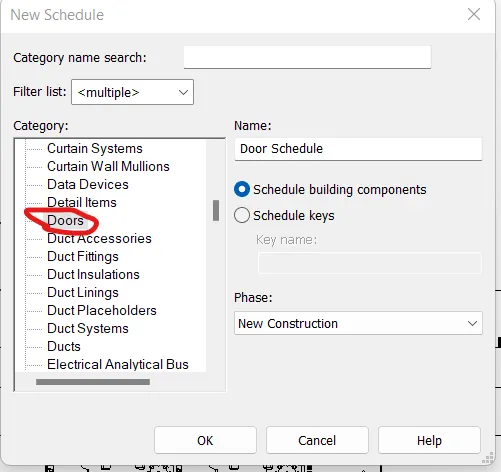
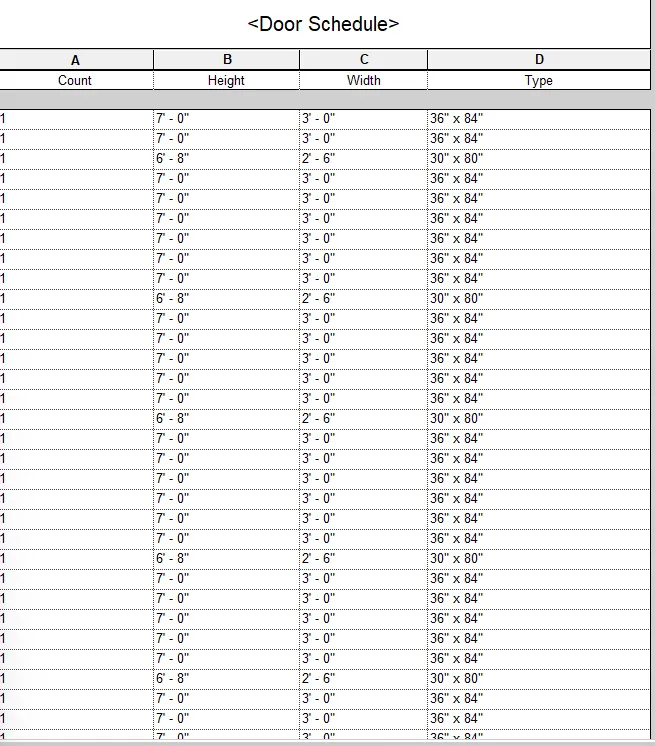
- A new dialouge box will get open then add the parameters and again press ok.
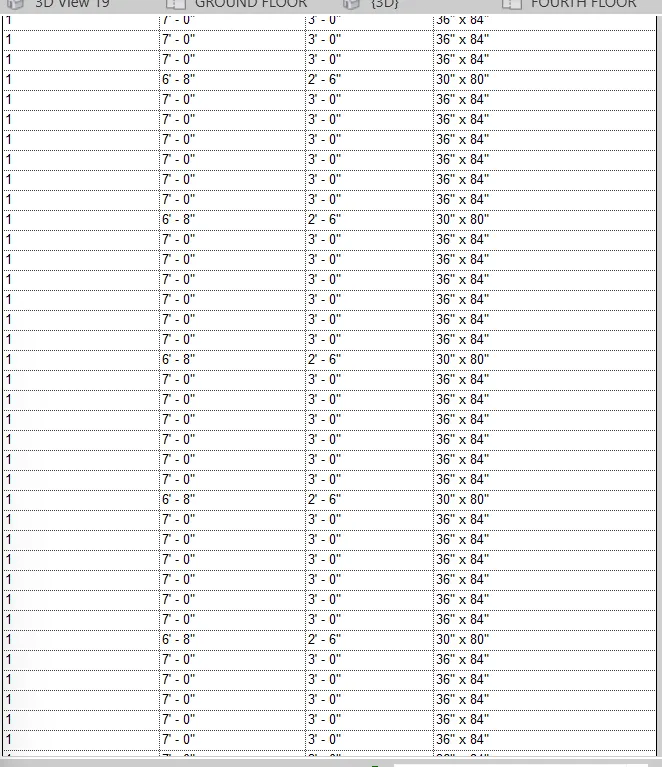
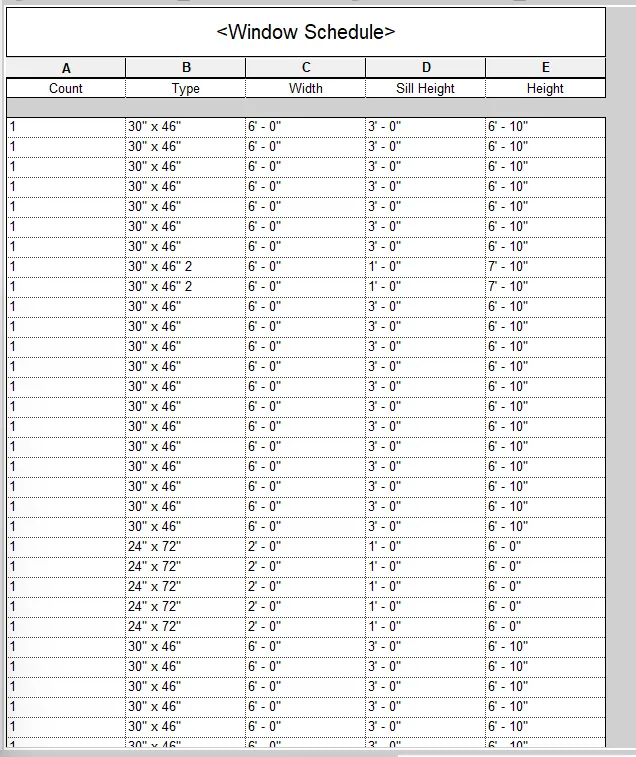
- The created door schedule can be seen below,
c. Windows.
Aim:- To create the windows schedule using revit for the project used from week 6 to 8.
Procedure:-
- Open with the revit software and select the file to open the project used from week 6 to 8.
- Once the project get opened Go to view tab and search for schedule in create panel.
- click over that and select schedule quantitites a dialouge box will get open then select the windows from category column and press ok.
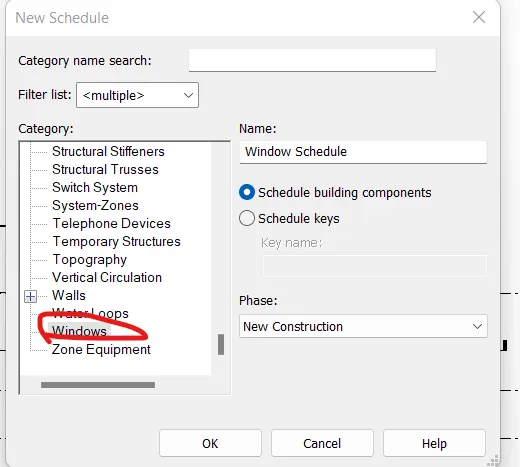
- A new dialouge box will get open then add the parameters and again press ok.
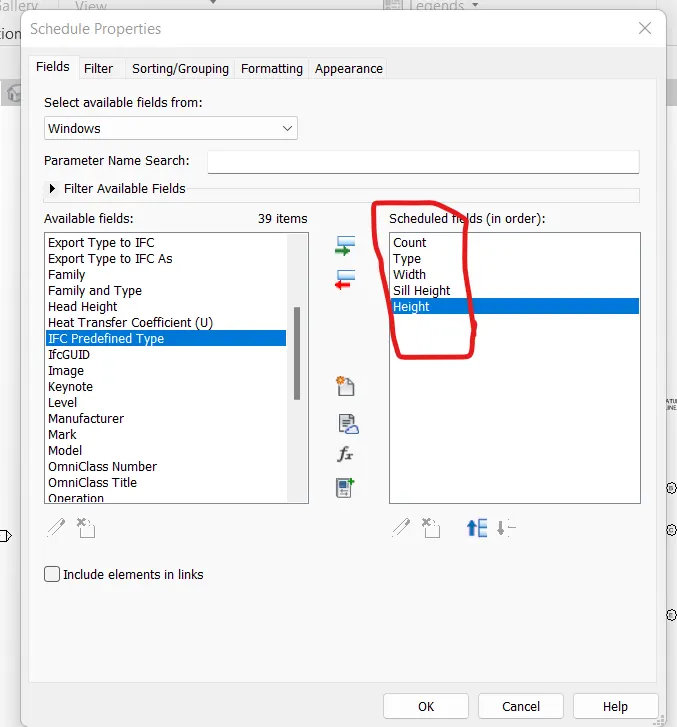
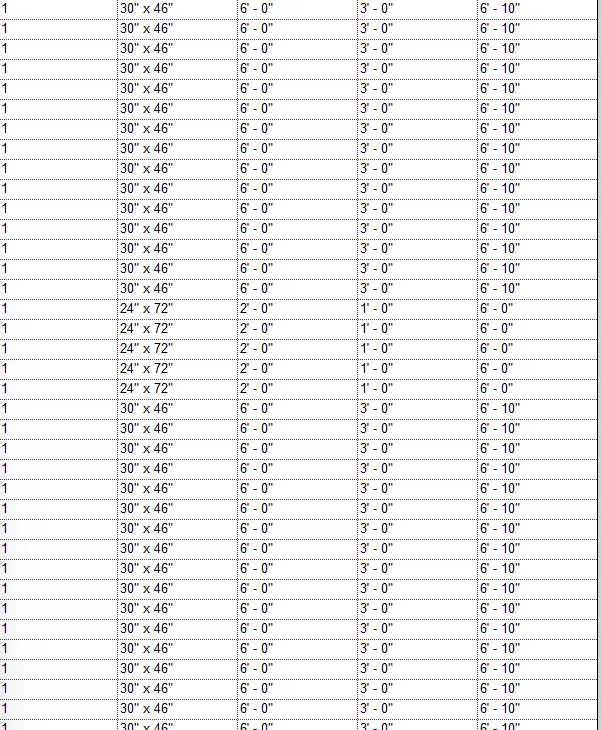
- The created window schedule can be seen below,
d. Material – Concrete/Wood
Aim:- To create the Material – Concrete/Wood using revit for the project used from week 6 to 8.
Procedure:-
- Open with the revit software and select the file to open the project used from week 6 to 8.
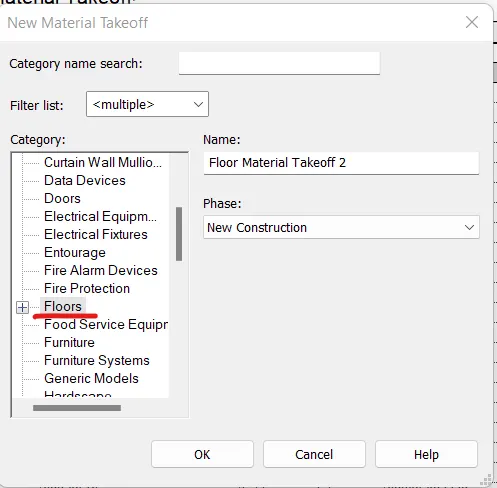
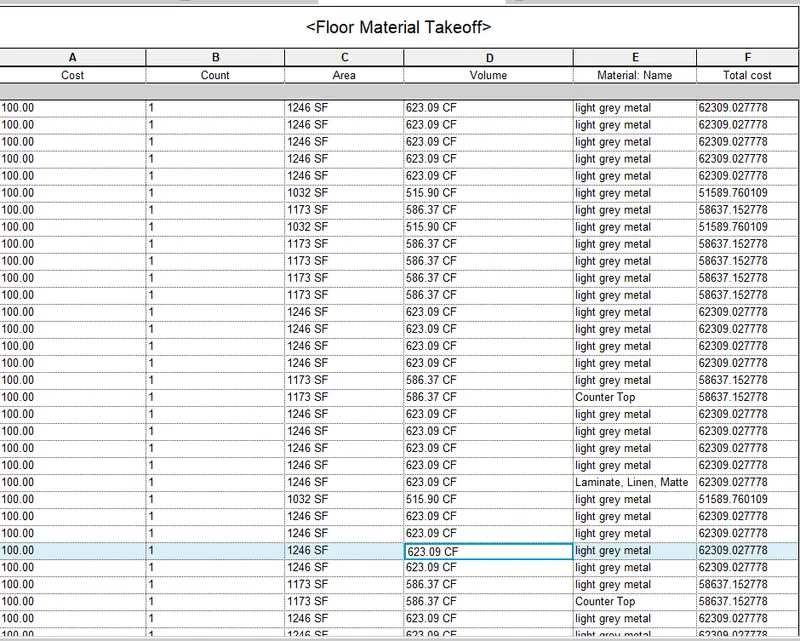
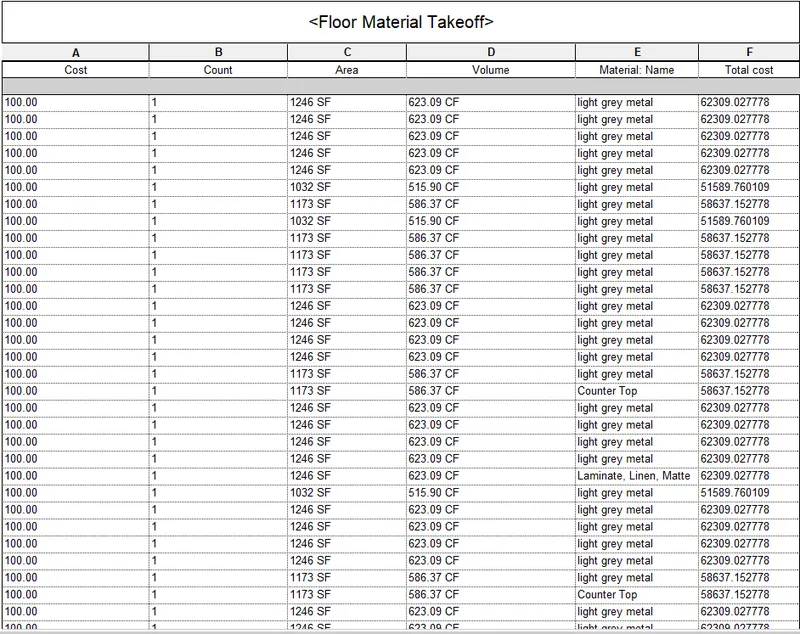
- Go to view then,from Schedules select Material takeoff and among the category select floors.
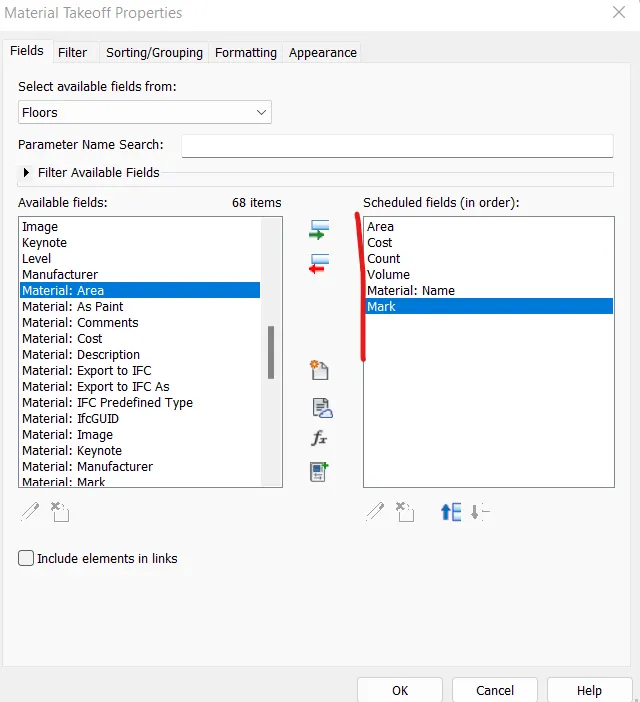
- then again a new dialouge box will get open select the parametrers you want,
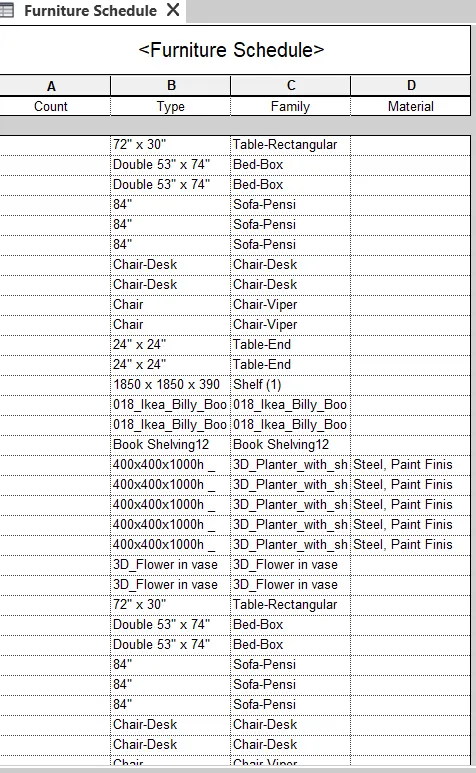
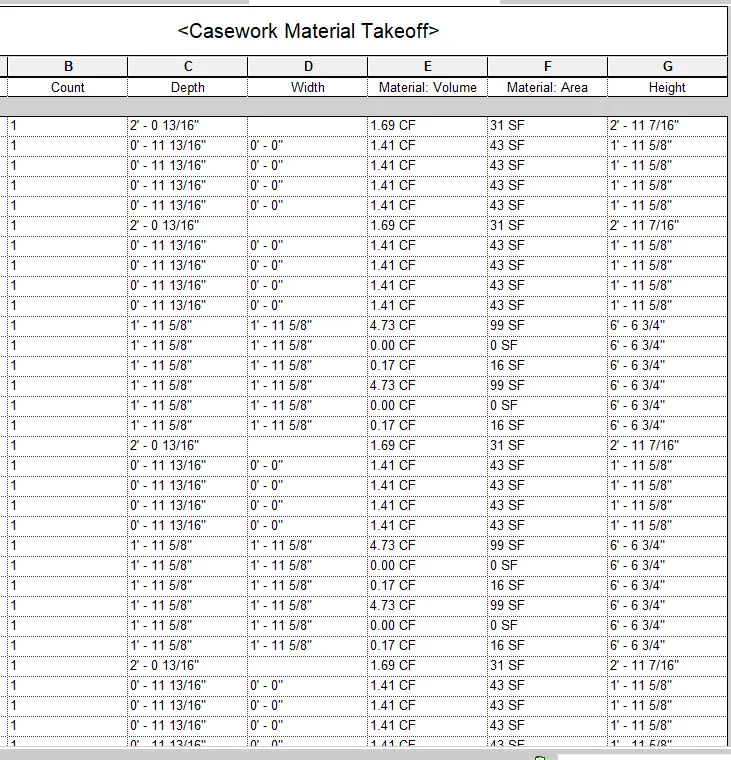
- The created material takeoff for floors is shown below,
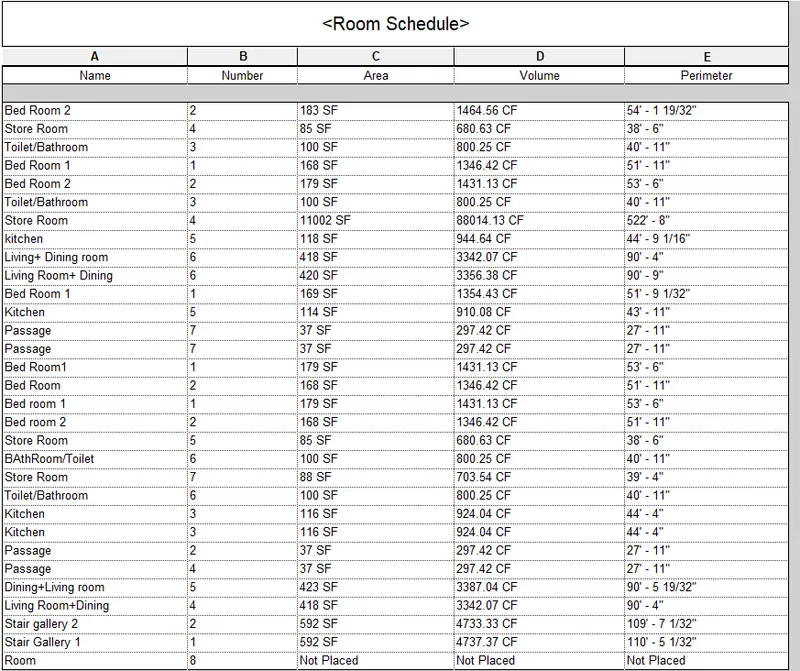
3) Using Revit Calculate area and volume of each room in the model with appropriate room tags applied to each room. Prepare a schedule report for area and volume of each room.
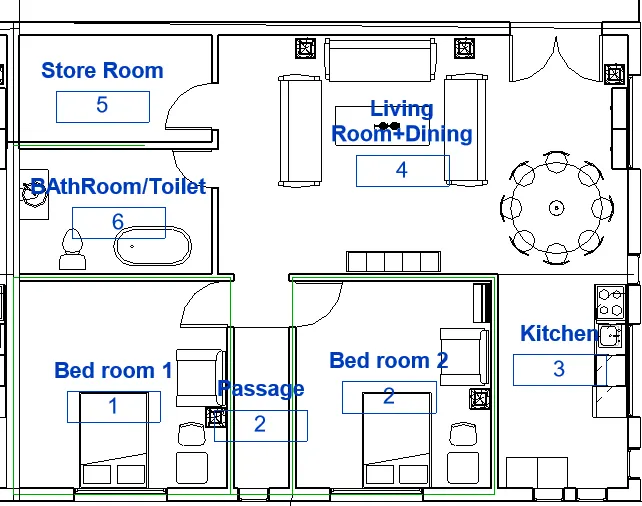
Aim:- To create the rooms schedule with the parameter as for area and volume for each room.
Procedure:-
- Open with the revit software and select the file to open the project used from week 7.
- Get open with the floor plan,
- In the architectural tab from room &area panel select room tag.
- Tag all the rooms and open spaces as well,Give them there name and number.
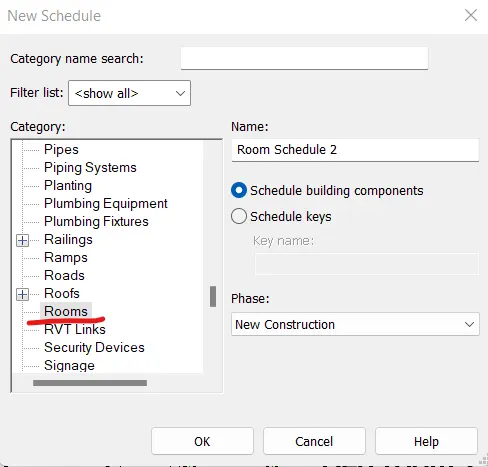
- Now, to create the room schedule, Go to view From the schedule panel select Schedule and quantities.
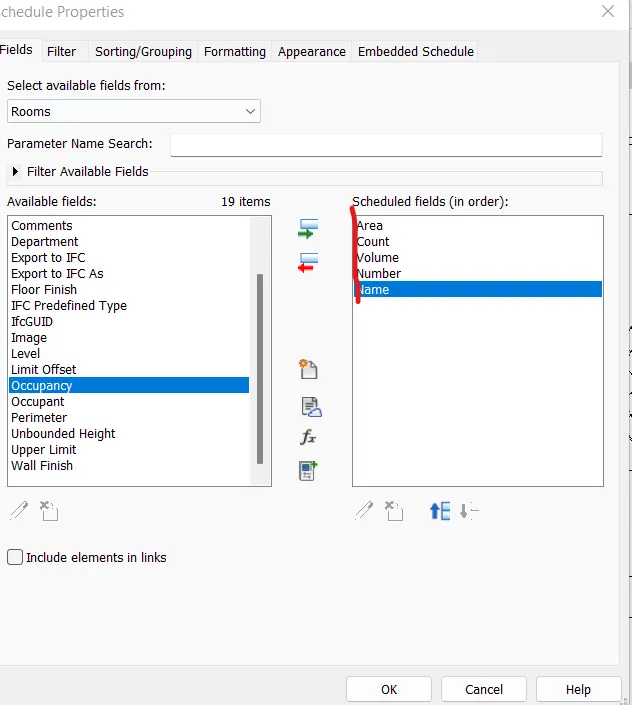
- Select the parametersz you want in your room schedule,and the room schedule will get created.
Results:-The snaps of the procedure and results are as follows,
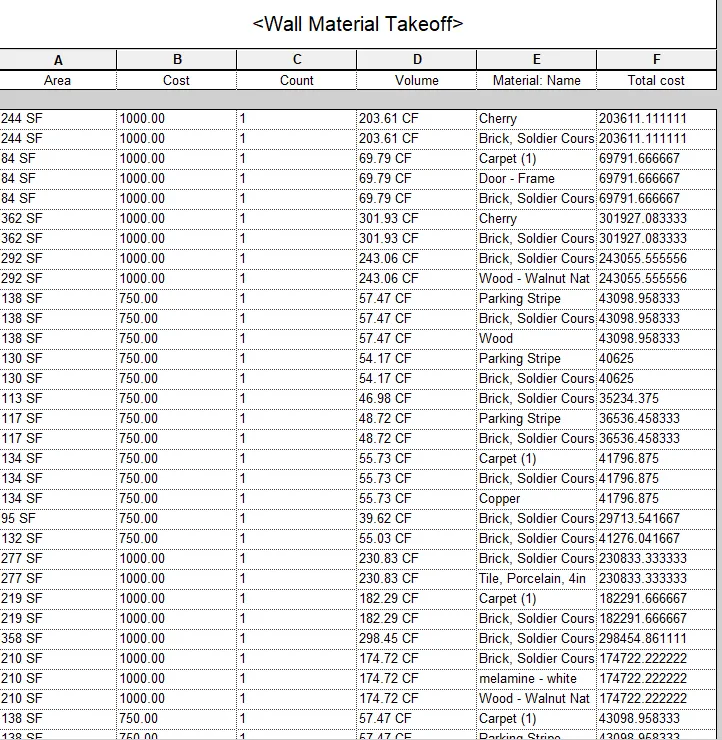
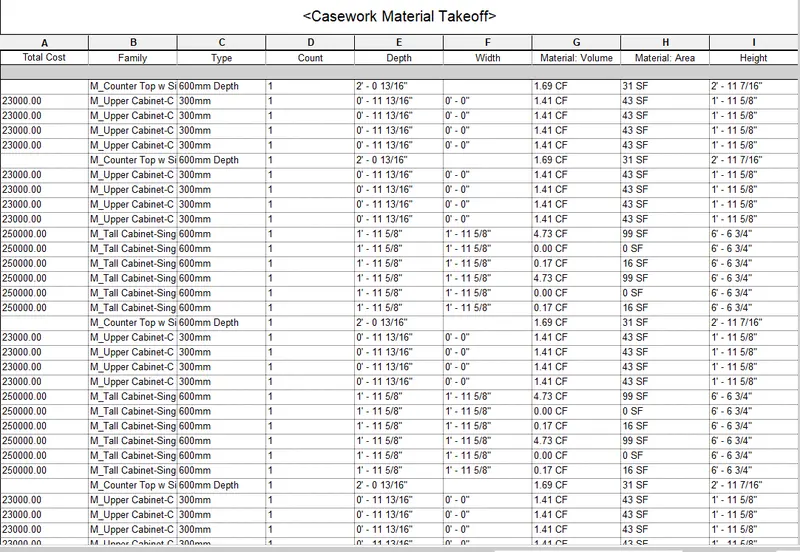
4) Using the same schedule using the unit cost rate for materials available in the internet, prepare total cost of materials used in the project
a. Total Cost of Materials
b. Individual Material Take off
Aim:- From the same schedule include the total cost with them as aparameter for different materials and elements.
Procedure:-
- Open with the revit software and select the file to open the project used from week 7.
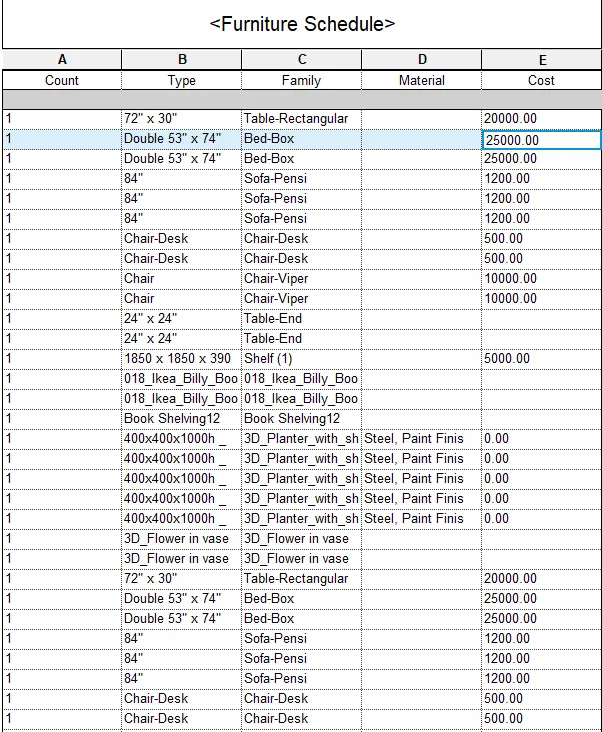
- Go to Schedule from the project browser and open the schedules created earlier .
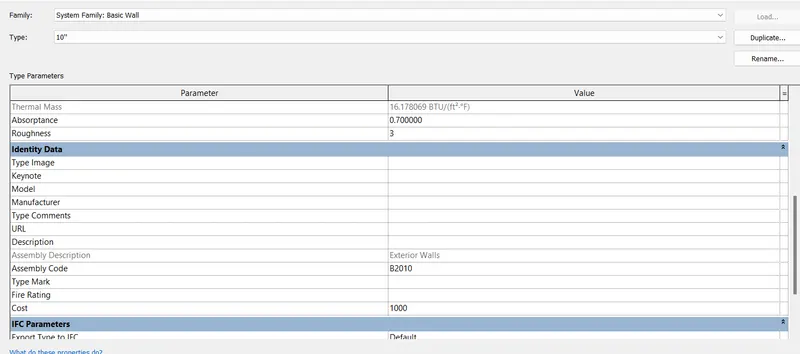
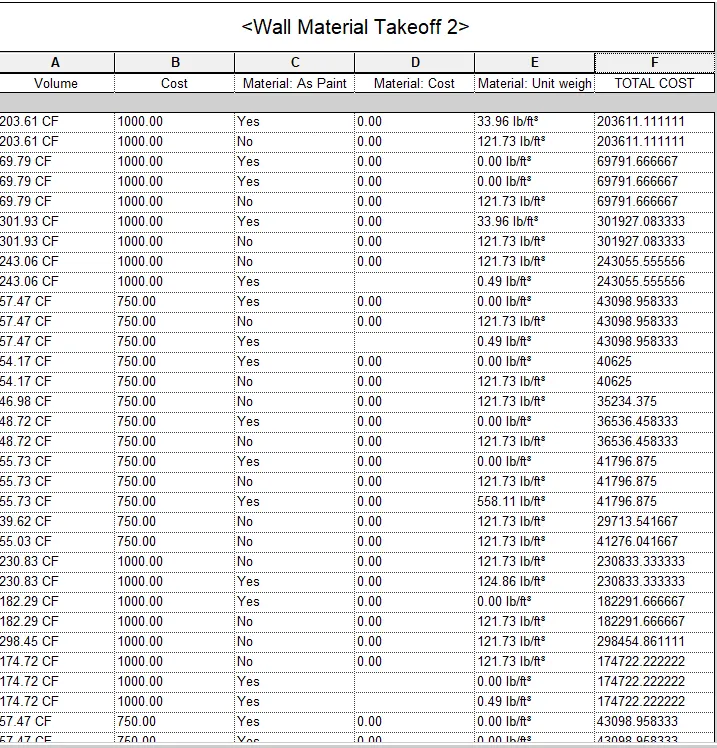
- In each schedule table include a column for total cost.
- For creating the total cost set all the values for different items included in the project.
- like,for 10'' wall setting the cost as 1000per cft and for 5'' wall it is 750 per cft which can seen below.
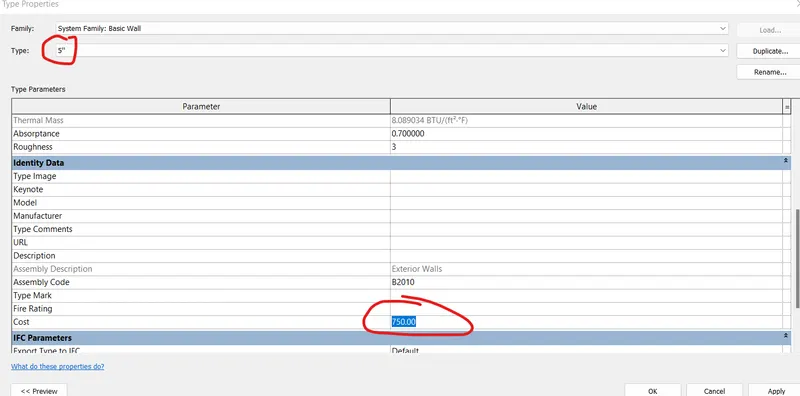
Results:-The snaps of the schedules included with total cost and with total material takeoff,
5) Using the concept of Visual Programming discussed in class, list a flowchart for the following scenario
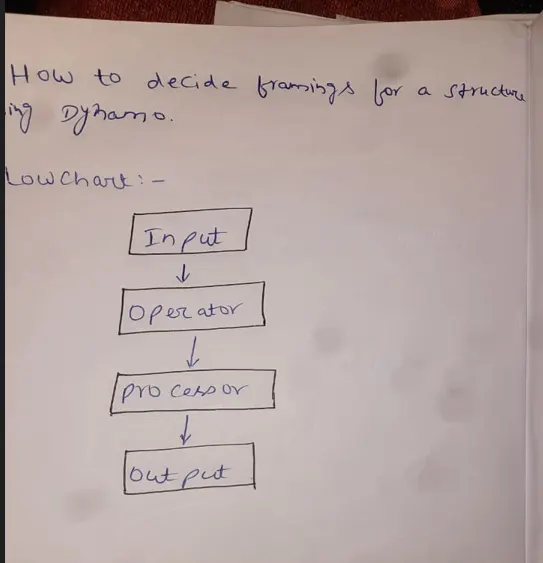
a. How to decide framings for a structure using Dynamo ?
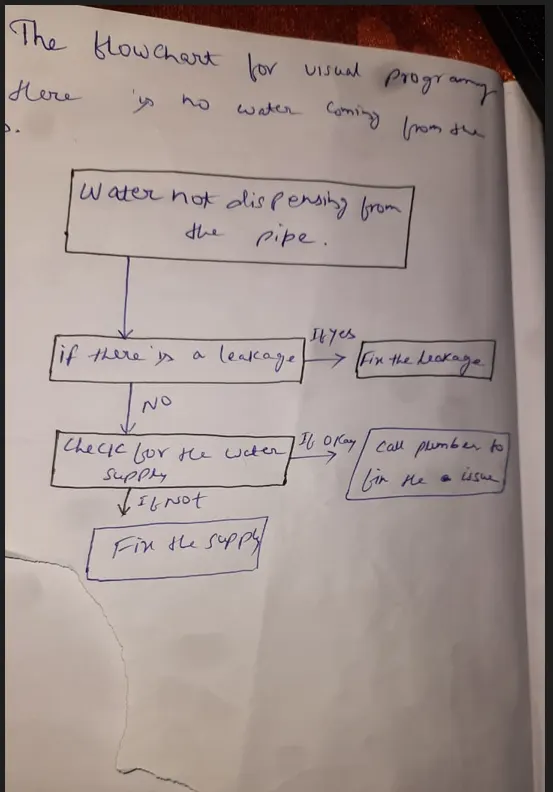
b. If there is no water coming from the pipes
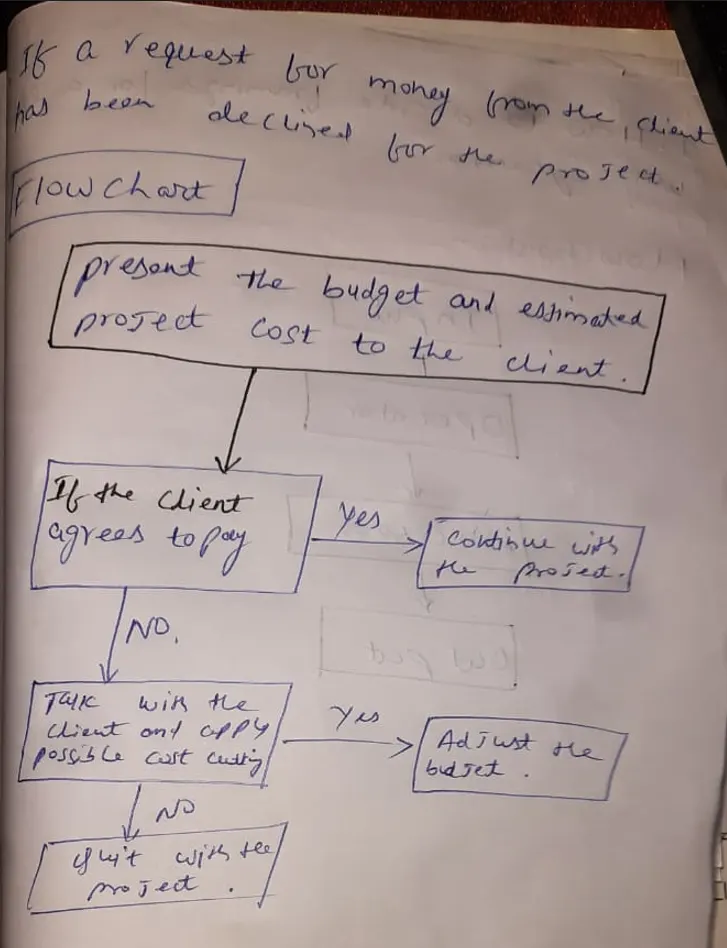
c. If request for money from client has been declined for the project
a. How to decide framings for a structure using Dynamo ?
The flowchart to decide framings for a structure using Dynamo is as follows,
b. If there is no water coming from the pipes,
The flowchart for visual programming If there is no water coming from the pipes,
c. If request for money from client has been declined for the project
6) List the parameters associated with each model element
a. Wall
b. Floor
c. Door
d. Window
e. Table
f. Building
The parameters associated with each model element are
wall,Floor