Preparing Schedule & Cost Estimation for a building using REVIT
AIM-1: Use the shortcut keys in Revit discussed in class to complete the following tasks and list them below
INTRADUCTION: Using key points in revit to easy the process of drafting and design elements stractres
PROCEDRE:
a. Using 3D model create a section box
- Open the revit application then open the already created element useing open icon left up corner or in file tab
- after open the previous drawing select any element in drawing enter BX command in the keypad section box created in the working revit display
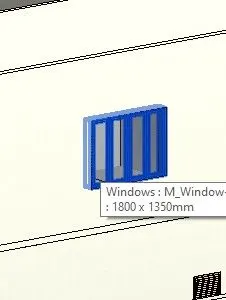
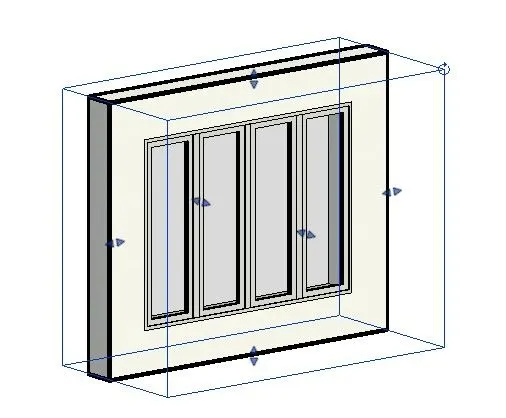
- like this we focus any elment in the drawing it is useful to the edit element seperatly.
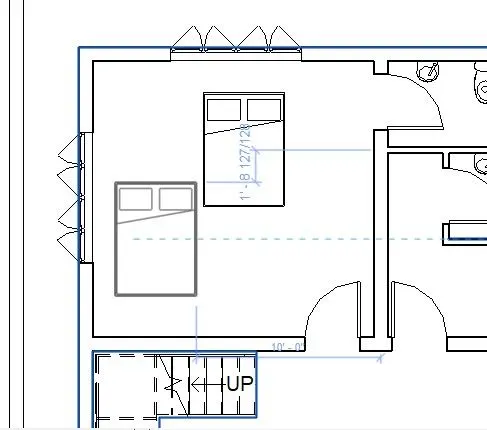
b. To create similar doors and windows in a floor plan layout
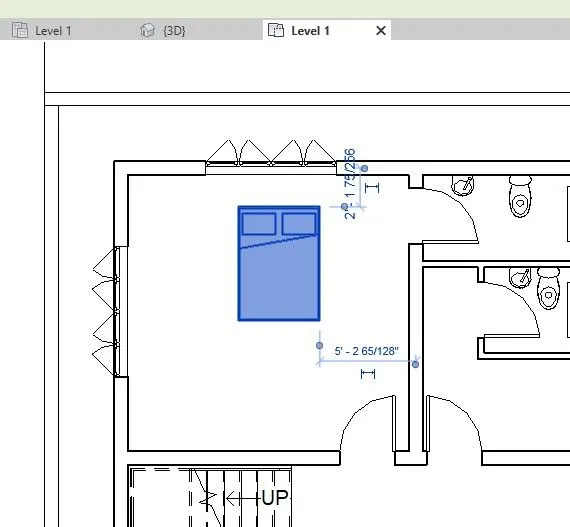
- go to the previous drawing select any element like door,window and furniture like after enter CS in keyboard similer element is created.
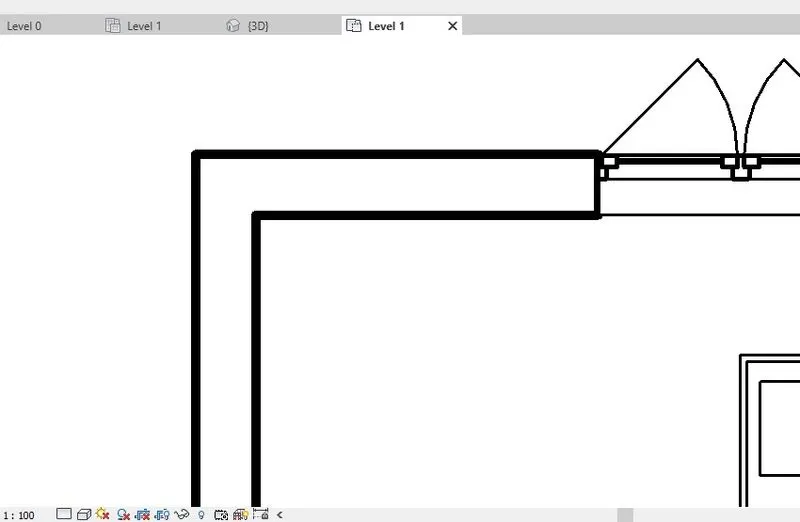
c. To reduce the thickness of lines visible in plan views
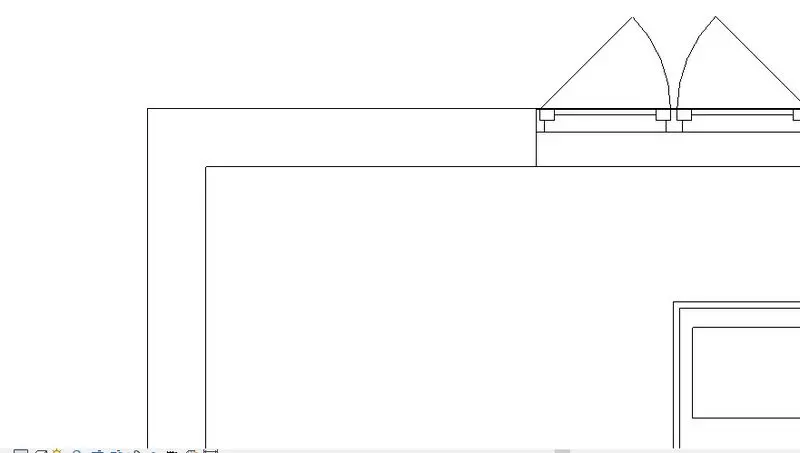
- if we want reduce the line thikness appeared in the drawing while any perpose click TL command type in the keyboard then reduce the line thickness
- if we regain the thikness to the lines again type TL its regain the weight of the line.
-
d. To apply override settings to a floor in the model section view
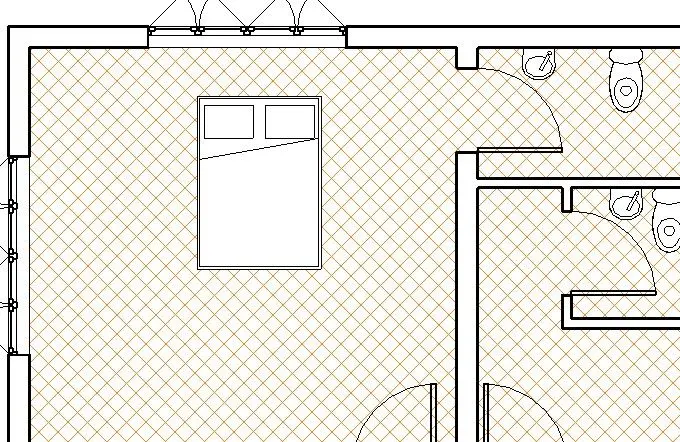
- enter VG shortcut key then we appear the grapical and visuvalization window appeared in the serch for floor and override the then change the pattern and colour of the appeared floor element
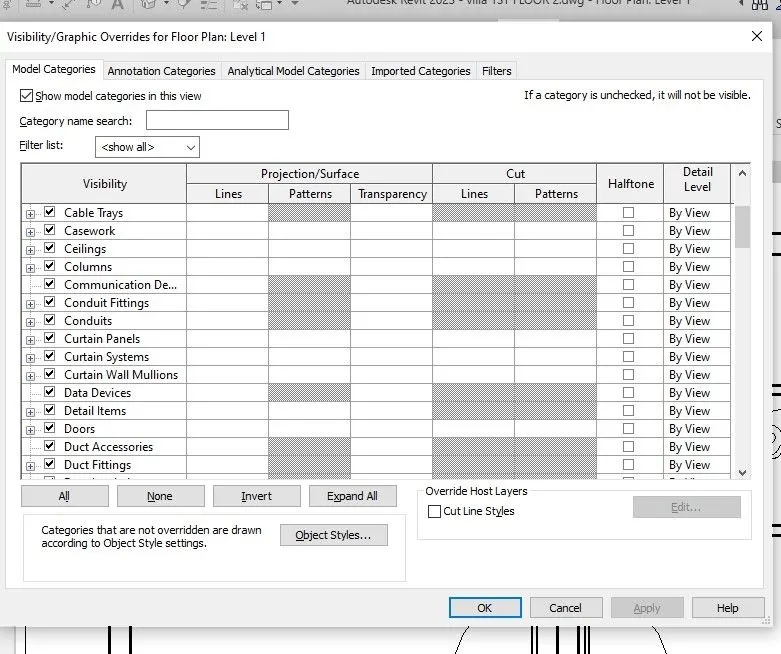

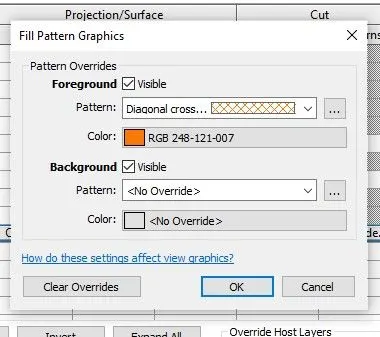
- then change the floor pattern and colour click ok then apply.
e. To increase the range of visibility in a plan view
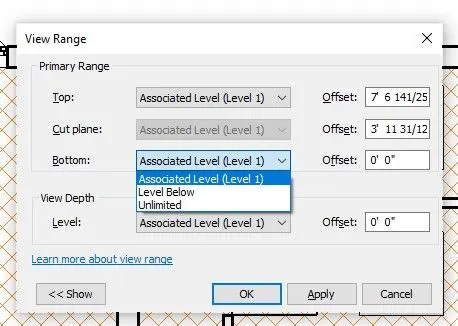
- now enter key point VR then we get the dailogbox related view settings
- then select the top view range we require like level-1 range or over all top of the drawing till top
- another about bottion range for floor level or site level like plinth level
- then we have option related level view to visible elements in the drawing
f. To select the previously selected items
- shortcut key - CTRL+<
g. To add annotations to the model views
- shortcut key - DI
h. To bring the model elements in line
- shortcut key - AL
i. To rotate the model elements
- shortcut key - RO
j. To move an object to another location
- shortcut key - MV
k. To copy a model element
- shortcut key - CO
l. To mirror an element about an axis
- shortcut key - MM
m. To create an array of model elements
- shortcut key - AR
AIM-2: Using Revit and the project used from week 6 to 8 prepare a schedule for the following
PROCEDURE:
a) WALLS:
- Open the previous drawing then go to the view tab and select the shedule and quantity icon in tools
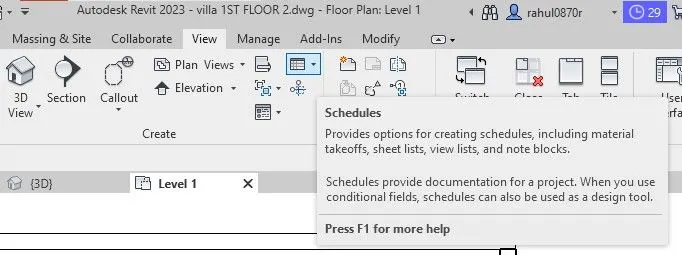
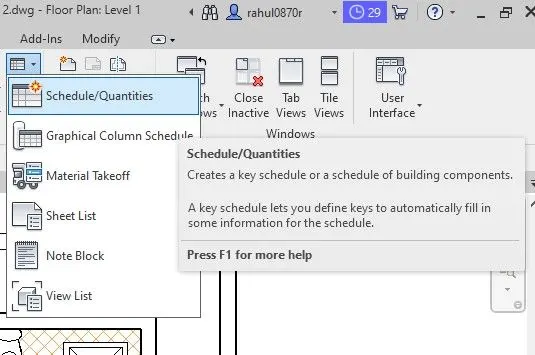
- then we get a another dailog box appeared related shedule
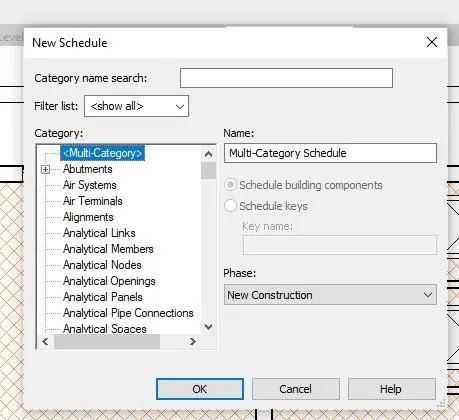
- find for a wall parameture then we get another daiog box appeared then add the required sheduled quantities.
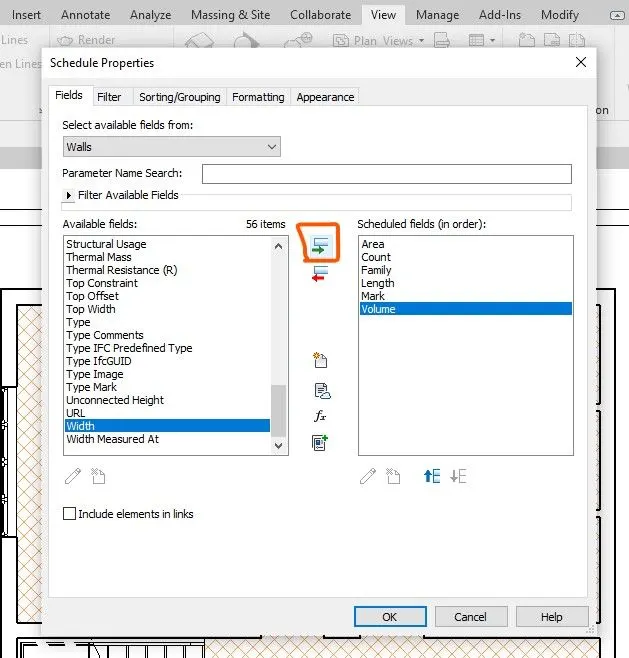
- click ok to shedule created as we prepared element included
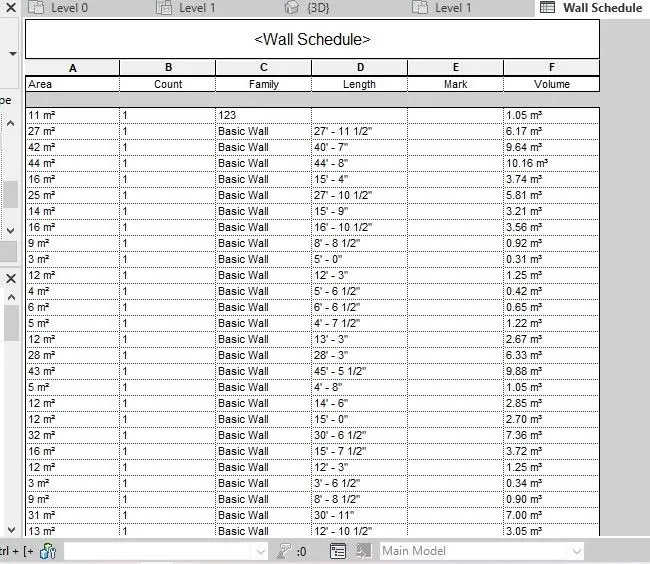
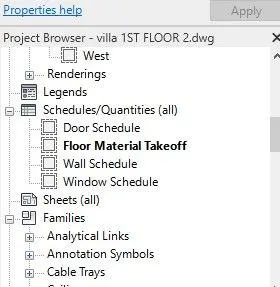
- these wall shedule is available in property brower
DOOR SHEDULE:
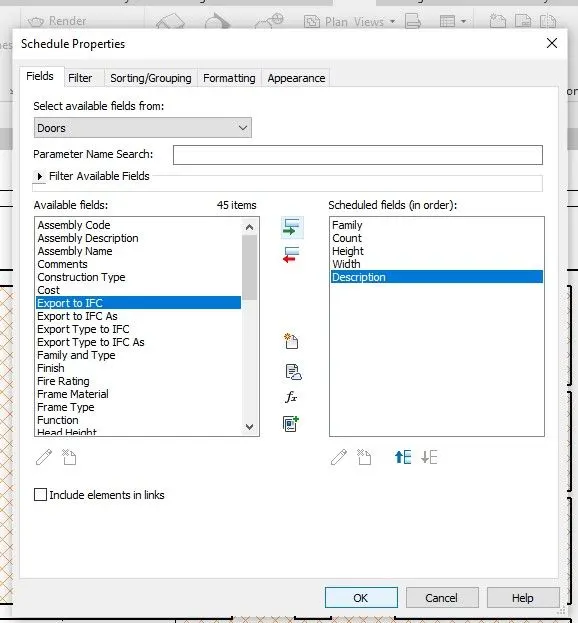
- Open the previous drawing then go to the view tab and select the shedule and quantity icon in tools
-
- then we get a another dailog box appeared related shedule
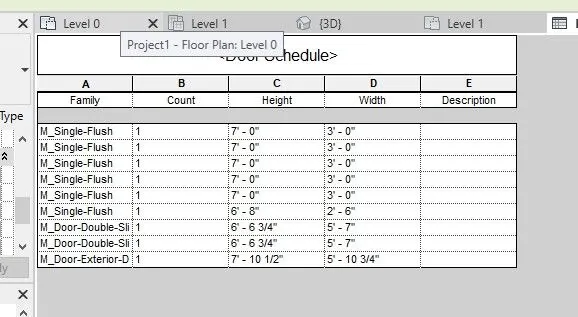
- find for a DOOR parameture then we get another daiog box appeared then add the required sheduled quantities.
WINDOW SHEDULE:
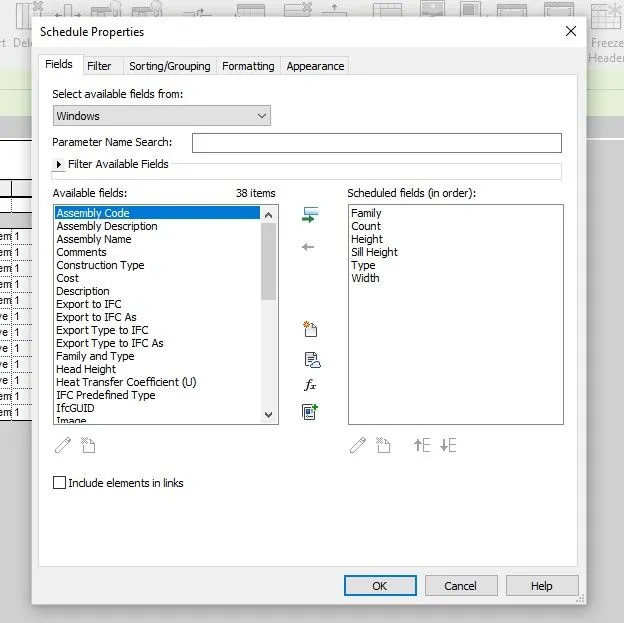
- Open the previous drawing then go to the view tab and select the shedule and quantity icon in tools
-
- then we get a another dailog box appeared related shedule
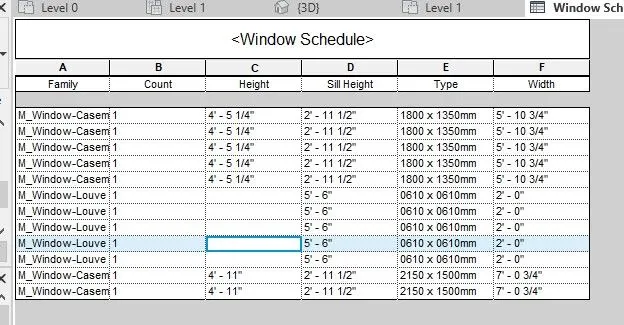
- find for a wall parameture then we get another daiog box appeared then add the required sheduled quantities.
MATERIAL AND CONCRETE SHEDULE:
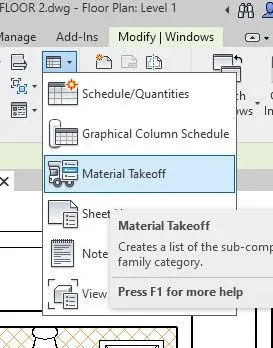
- Go to view tab then select shedule option then select material take-off.
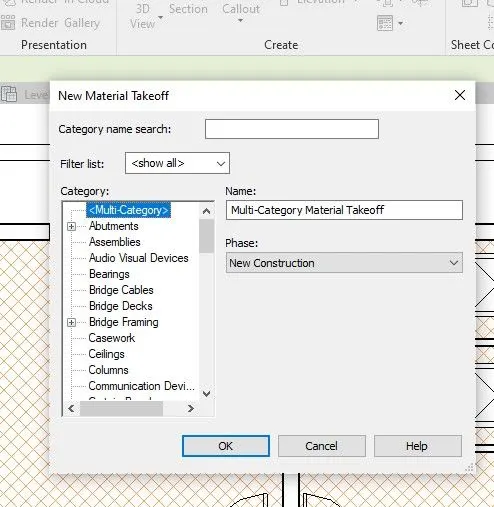
- serch for a category select floor
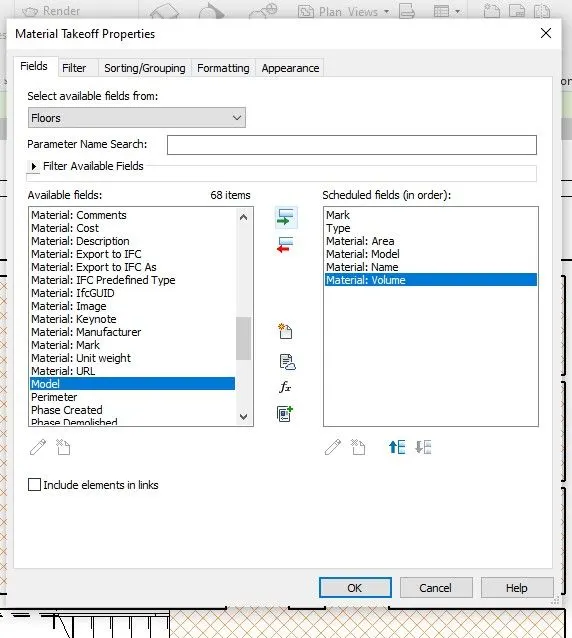
- click ok to shedule is created
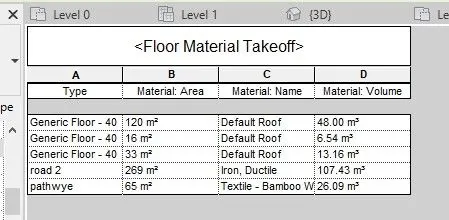
RESULTS:
These all the sheduled sheets are avlabile in the project browser
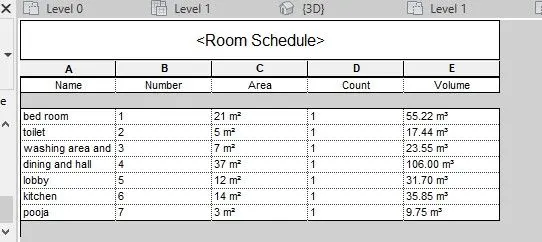
AIM-3: Using Revit Calculate area and volume of each room in the model with appropriate room tags applied to each room. Prepare a schedule report for area and volume of each room.
PROCEDURE:
- Open the previous drawing then go to the view tab and select the shedule and quantity icon in tools
-
- then we get a another dailog box appeared related shedule
- find for a ROOMS parameture then we get another daiog box appeared then add the required sheduled quantities.
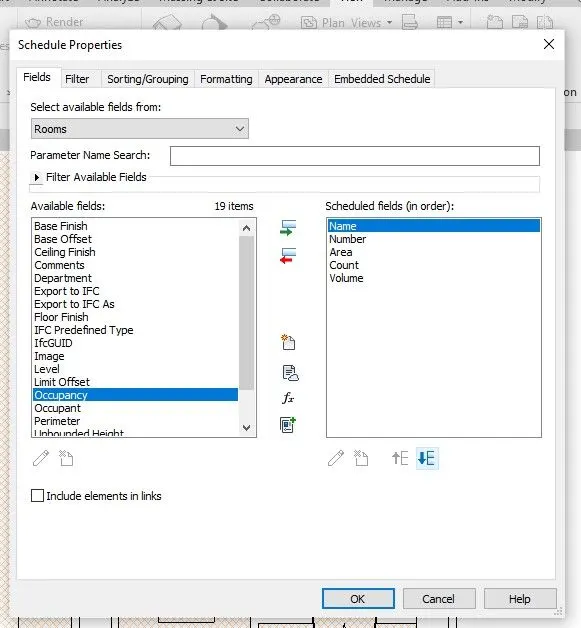
- click ok to shedule is created
RESULTS:
AIM-4: Using the same schedule using the unit cost rate for materials available in the internet, prepare total cost of materials used in the project
a. Total Cost of Materials
PROCEDURE:
Individual Material Take off:
- Go to view tab then select shedule option then select material take-off.
-
- then select the wall in the project then open properties of the wall in that rows mention a cost.
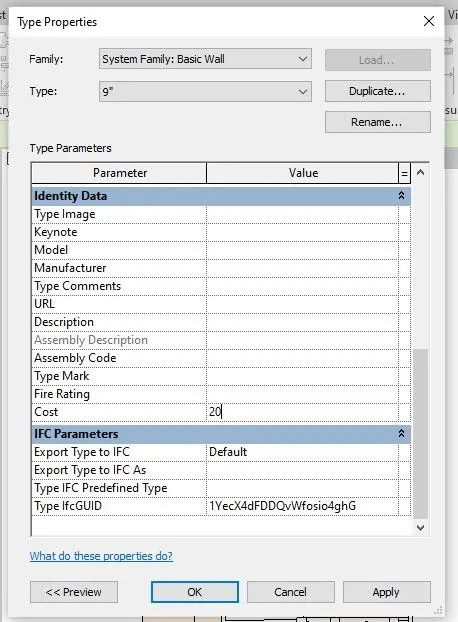
- similerly all the wall cost to be mention in that multiple types of the walls
- then after that go to takeoff material dailogbox then go to search for a walls
- after that include content things to add to what msterial quantities to be extract
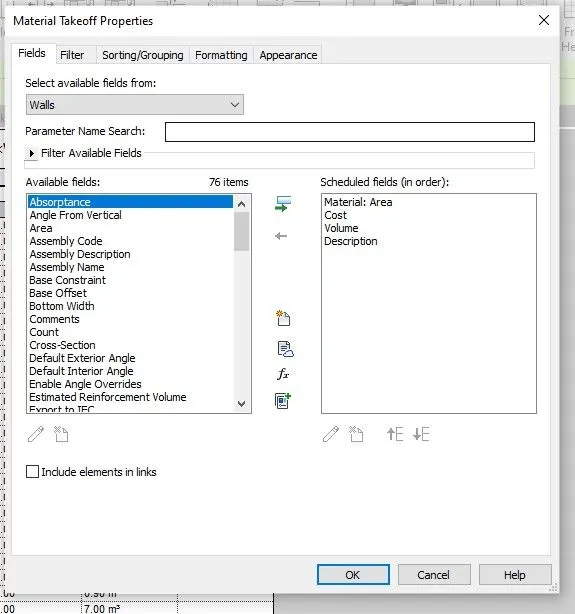
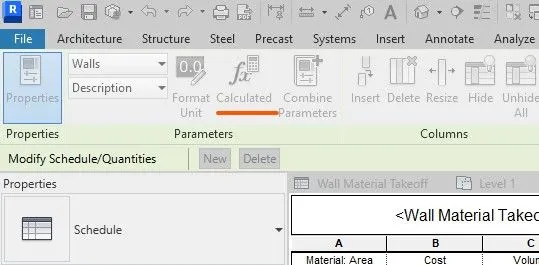
- then click ok the material shedule sheet is created then inclide a empty column select that colume then click calculated formula icon to be click appeared in tool bar.
- then we get the dailog box appeared to include formula
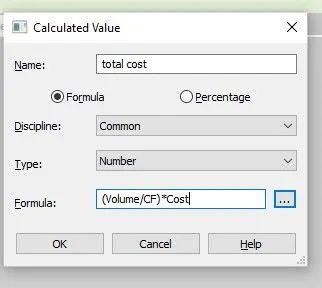
- then click ok to all the shedule created.
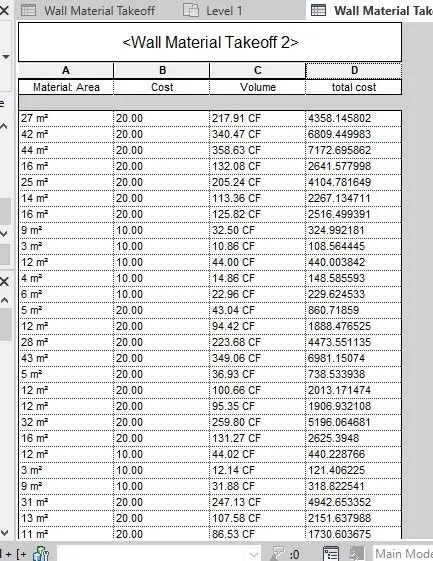
- same process continue the untill every element cost inhanced.
AIM-5: Using the concept of Visual Programming discussed in class, list a flowchart for the following scenario
a. How to decide framings for a structure using Dynamo ?
b. If there is no water coming from the pipes
c. If request for money from client has been declined for the project
PROCEDURE:
How to decide framings for a structure using Dynamo
- properties of the formwork --> assembling the formwork --> placement of the reinforcement --> cocreate placeing --> compacting--> curing --> completed.
If there is no water coming from the pipes
- Check the pipe connection --> check the water supply --> check for any leaks --> Fix the probleam.
If request for money from client has been declined for the project
-->if he accept to pay continue with the project
- EXplain the project to the client --> provide time for client to decide --
-->if he refuse to pay decline the project
AIM-6: List the parameters associated with each model element
a. Wall
b. Floor
c. Door
d. Window
e. Table
f. Building
ANS:
a)walls:
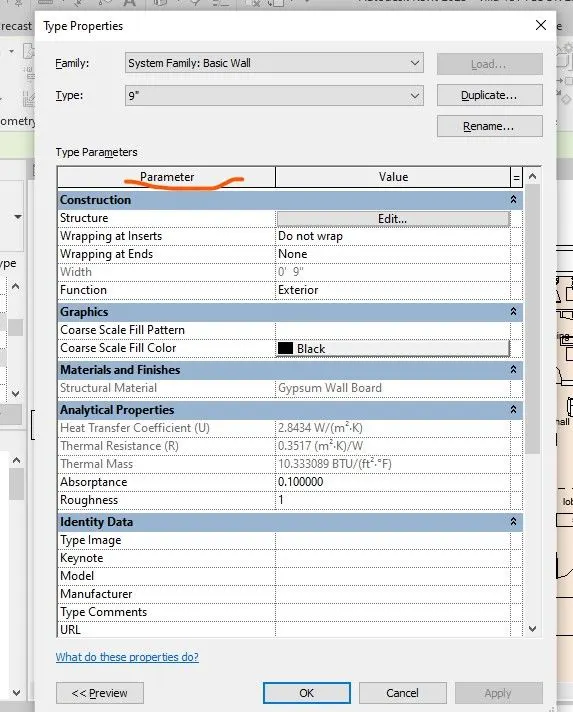
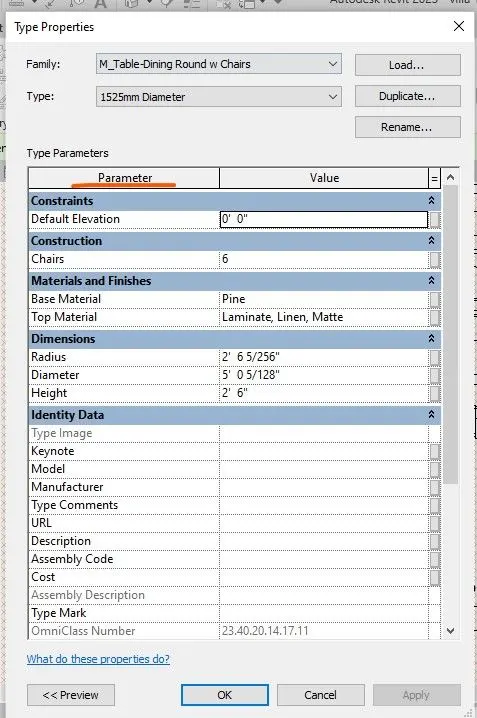
- in type propeties are known as parameterslike
- constraction width,length,height, depth
- function of material
- colour properties of material
- if it is stractural element then get analytical properties
b) floor:
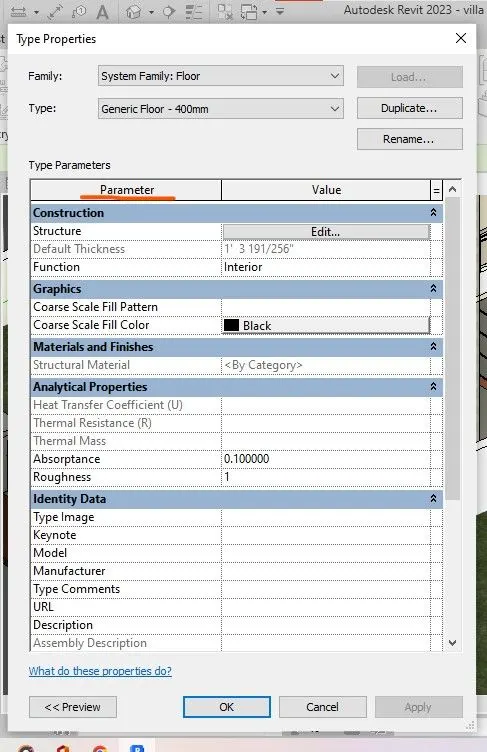
- type of stractural material
- length,area,model,colur
- analytical properties
- function of element.
DOOR:
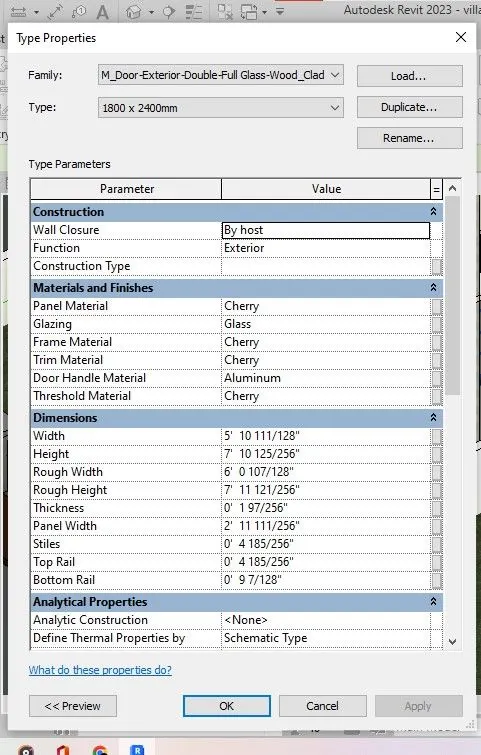
- if it is arctechtural element then it will be a finishing
- what type of material included in that then its thickness
- analytical properties
- constraction width,length,height, depth
window:
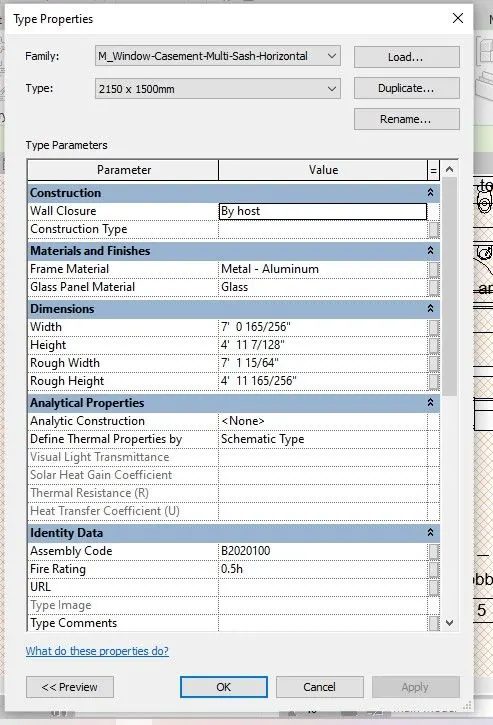
table: