Photo Realistic Rendering
MODELING AND RENDERING OF AMERICAN CHOPPER USING SOLIDWORKS
INTRODUCTION :
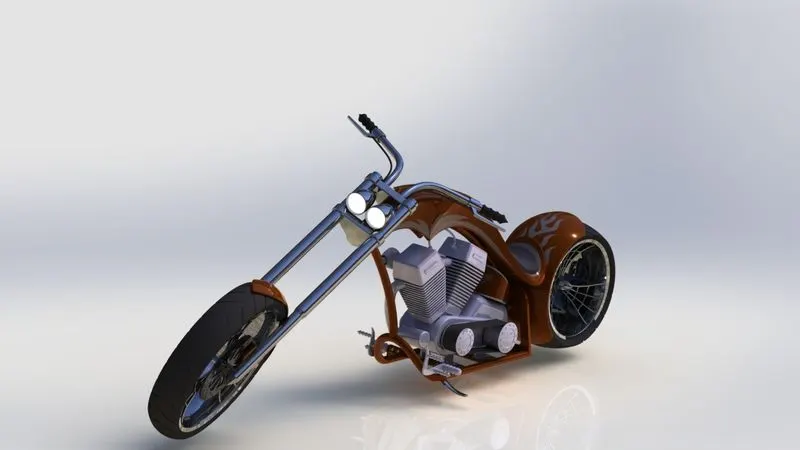
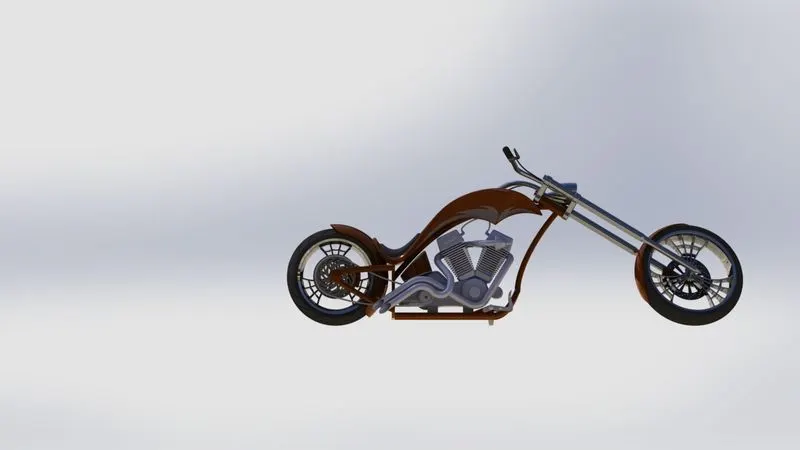
Solidworks is one of the most used CAD programs in professional settings across the globe. This software is mainly used to create 3D model parts using 2D sketch. It also has the feature to assemble the parts that we designed into a complete model. It also has another add-in feature like Photoview 360 which helps in rendering the final model to make it look in realistic. In this project learned about the detailed design of American Chopper Parts and Assembling them and Rendering the Assembly Chopper.
Version used in this Project is Solidworks 2020.
OBJECTIVE :
The main objectives in this projects are,
- To know about the blueprints of American Chopper parts.
- To create individual parts of American Chopper using Solidworks.
- To assemble all the individual parts into a Chopper.
- To the applications of Decals, Lights, Camera, etc.
- To create Photorealistic model and render it using Photoview 360 and Solidworks Visualize.
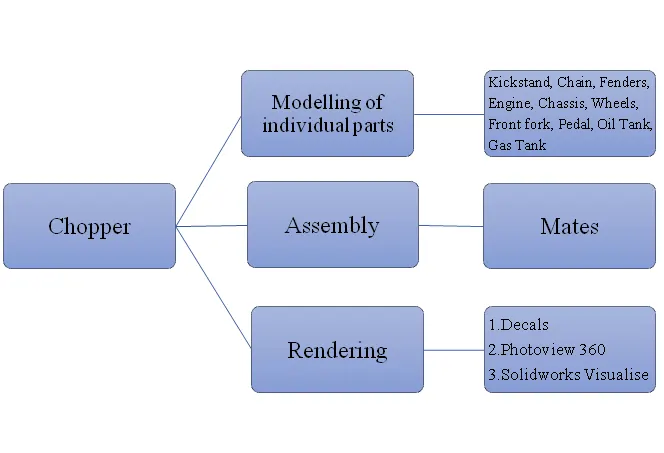
DESIGN FLOWCHART :
TOOLS AND FEATURES :
Kickstand: It is also known as side stand. It is used to support the chopper while it in rest.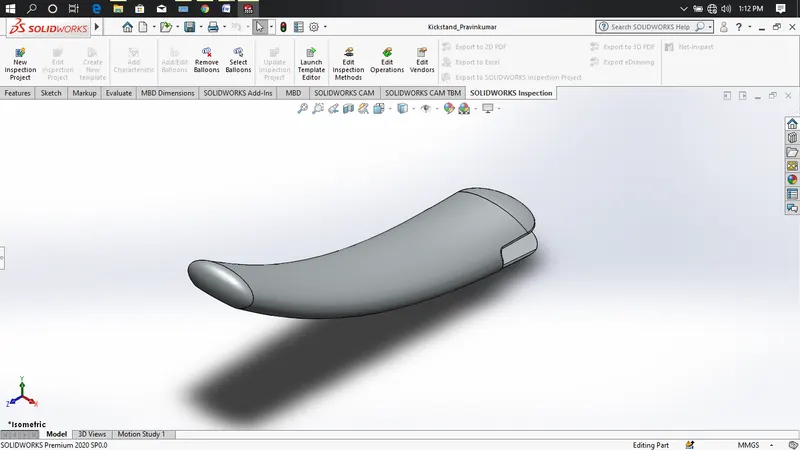
Features used to create kickstand:
- Sketch: The sketch is a 2D representation of the model. These are known as entities in Solidworks. e.g: line, rectangle, spline, circle, arcs etc.
- Loft: The Loft feature allows you to generate complex geometry. It does this by interpolating surfaces between various cross section of the model. These cross sections can be sketches, faces or edges. In the Loft interface the cross sections are considered as Loft profiles.
- Dome: This tool provides a smooth curve on the face of the profile.
- Extrude Boss/Base: This feature is used to convert a 2D sketch into 3D model
- Extrude cut: It is used to remove materials from a solid model in desired patterns and also it can be extruded in both directions.
- Fillet: This is to create a curved surface on the profile edges of the solid model by selecting the required lines or the face. This fillet also has a feature to select multiple lines which reduces time consumption.
- Split: This tool is very handy, when two or more solid bodies intersect in between or intersect each other than split tool allows to delete unwanted solid body formation and gives a clean look.
Procedure to create Kickstand model:
- Before creating the sketch change the default planes as follows:
1.Front Plane- Front plane
2.Top Plane- Top Plane
3.Right Plane-Mid Plane
Then, select mid Plane and start sketch
- Then 2D sketch is created in the front plane and dimensions are given and sketch is fully defined, while sketching we use spline and trim commands
- There are two new planes created and ellipse is drawn in the new plane as per the requirement.
- Then the loft command is used to create loft for the kickstand.
- The extrude cut is used to cut parts which are not required for the stand.
- Then the dome feature is applied to the smaller face of the kickstand to make the face round and smooth.
- Fillets are applied on the sharper edges for required radius.
- Then finally the part is saved by the name “Kickstand”.
Chain: Chain is a type of transmission system that is used to transmit a power from the Engine to the Rear wheel. The sprocket is used to transmit the power to the chain.
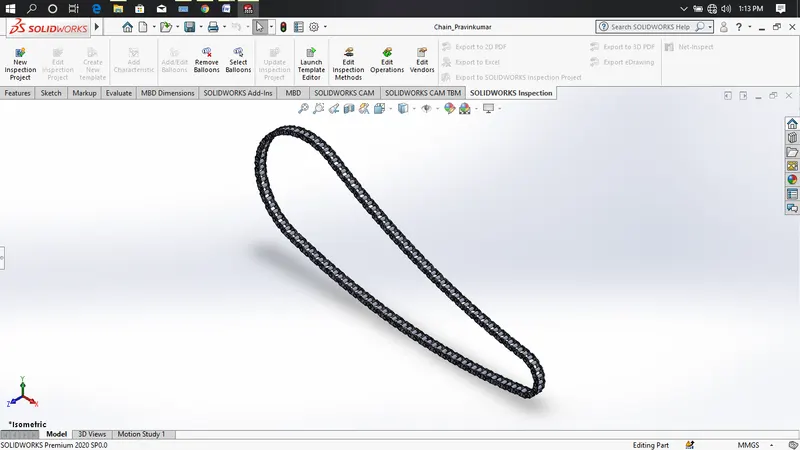
Features used to create Chain:
- Sketch
- Trim Entities
- Fillet
- Blocks
- Extrude
- Patterns
- Appearances
Trim Entities: You can remove unwanted sketch line from the drawn sketch using this tool.
To make Blocks:
-
-
- Create a sketch
- Click Make Block (tools>block>make block)
- Select the entity you want to make as a block for Block entities
- Click ok and save the first block
- Repeat steps 2-4 for another block
- With the sketch in edit mode, add necessary relations.
- Finally save the part
Patterns: The curve driven pattern tool allows you to create Patterns along a Planar or 3D curve. You can base your pattern on a open curve or on a closed curve such as circle. In the chain part curve driven pattern is used.
-
Front Fender: The front fender is the mounted on the front fork above the wheel to protect the rider and the chopper.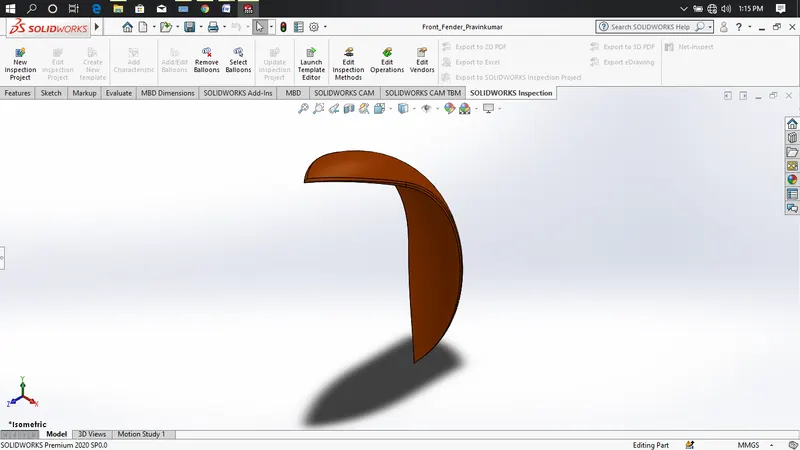
Features used to create Front Fender:
- Sketch
- Offset entities
- Trim entities
- Revolve
- Dynamic Mirror
- Split
- Appearances
Revolve: To create a cylindrical shape profile using a center line as reference this feature tool is used.
Dynamic Mirror: It is used as you sketch the entities, they are mirrored about the pre-sketched sketch entity.
Rear Fender: The use of rear fender is the same as front fender. The rear fender is mounted on the Chassis of the rear part above the Rear Wheel.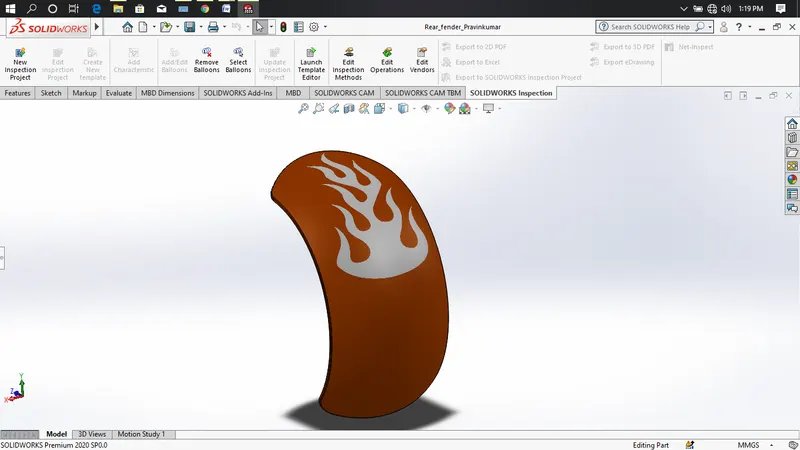
Features used to model Rear Fender:
- Sketch
- Offset Entities
- Trim Entities
- Revolve
- Appearances
Engine: Engine id a machine designed to convert one form of energy into mechanical energy. Heat engines convert heat into work via various thermodynamic processes.
-
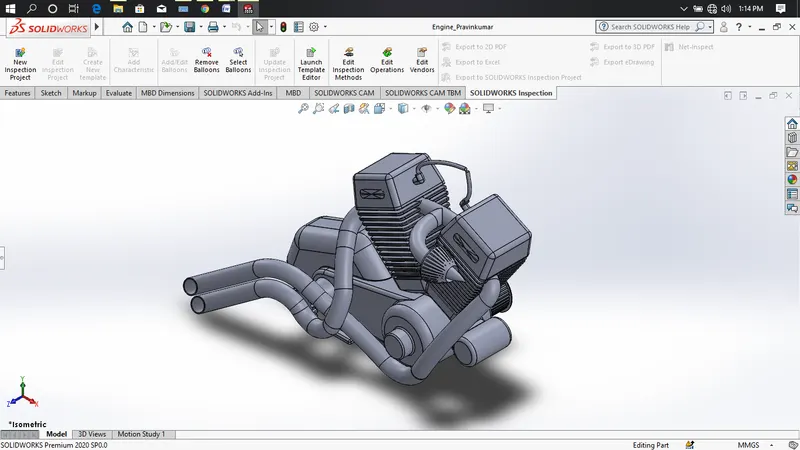
Features used to create engine:
- Sketch
- Trim
- Revolve
- Boss Extrude
- Extrude Cut
- Offset
- Dome
- Fillet
- Projected Curve
- Composite Curve
- Sweep
- Mirror
- Circular pattern
- Split
Composite curve: This feature is used to join two curves and make them a single curve. Eg: combining a projected curve to another curve etc.
Chassis: All the components of a motorcycle like suspension, wheels, fuel tank, seats, handle bars etc. are attached to this base structure which lends a motorcycle its strength and ability to handle well.
-
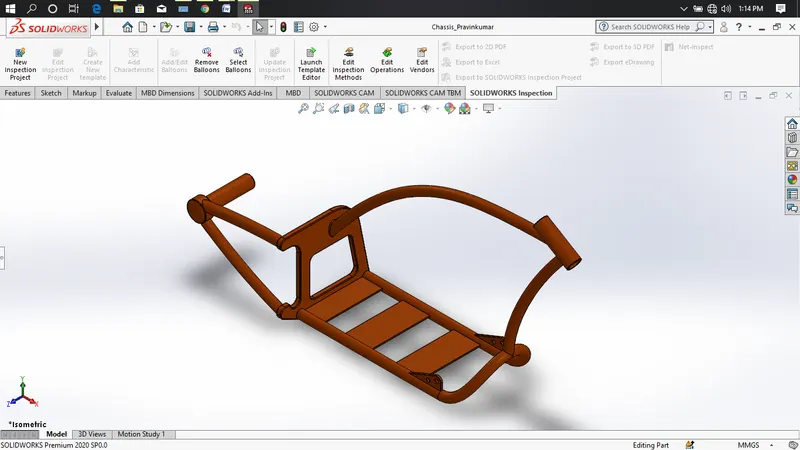
Features used to create Chassis:
- Sketch
- Offset
- Convert Entities
- Project Curve
- Trim
- Sweep
- Split
- Revolve
- Cut Extrude
- Fillet
- Combine
Front Wheel:
-
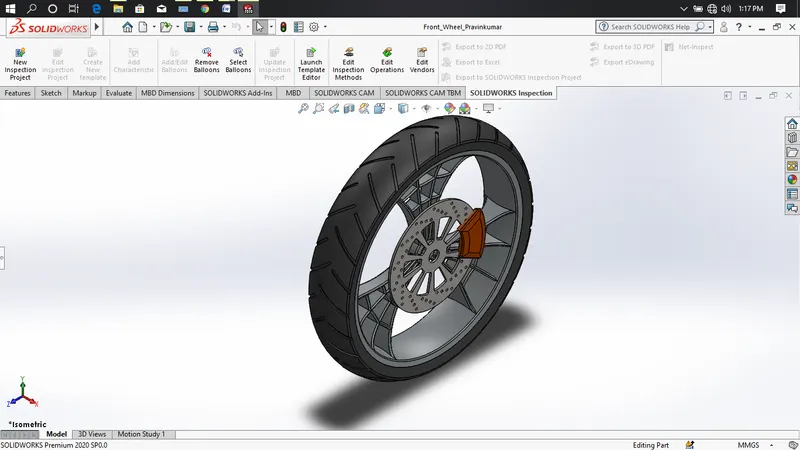
Features used to create Front Wheel:
- Revolved Boss/ Extruded: Create a sketch with a center line, a plane, or an axis for revolve.
- Extrude Boss/Base: This feature is to convert 2D into a solid modeling only when the 2D sketch is completely closed. It also allows to extrude the surface in both directions and also offset it to require distance.
- Extrude Cut: It is used to remove materials from a solid model in desired patterns and also it can be extruded in both directions.
- Circular Pattern: Feature is used to create a different number of patterns required to create the circular pattern.
- Combine: Combine feature is used to combine two or more bodies when intersecting to each other and make it a single body.
- Fillet: This is to create a curved surface on the profile edges on the solid model by selecting the required lines or the face. This fillet also has a feature to select multiple lines which reduces time consumption.
- Chamfer: It is similar to the fillet feature but in chamfer, it cuts the solid model intersection area into recurred length and angle.
Rear Wheel:
A circular object that revolves on an axis and is fixed below a vehicle or other object enabling it to move easily over the ground. The disc and sprocket are attached with rear wheel. The chain is connected between the Engine and rear wheel.
-
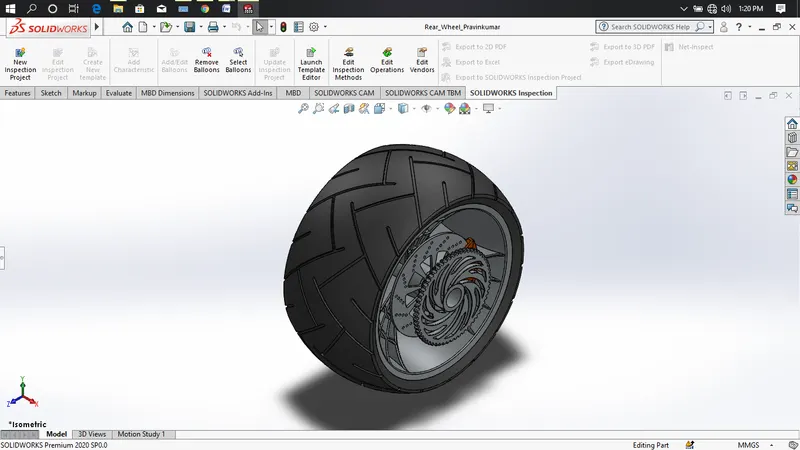
Features used to create Rear Wheel:
- Sketch
- Revolve
- Trim
- Sketch fillet
- Extrude Boss
- Planes
- Revolve cut
- Linear pattern
- Chamfer
- Fillet feature
- Extrude Cut
- Circular pattern
Front Fork:
-
-
Most motorcycles today use telescopic forks for the front suspension. The forks can be most easily understood as simply large hydraulic shock absorbers with internal coil springs. They allow the front wheel to react to imperfections in the road while isolating the rest of the motorcycle from that motion.
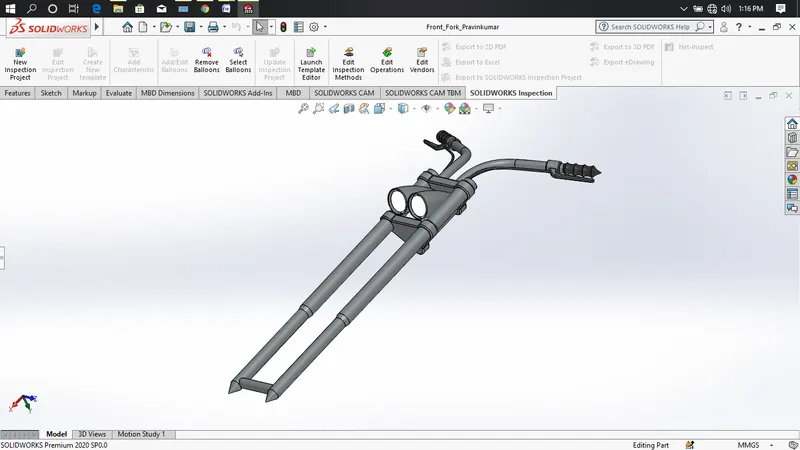
Features used to create Front Fork:
- Sketch
- Extrude
- Trim
- Revolve
- Split
- Move/copy bodies
- Dome
- Mirror
- Combine
- Projected curve
- Sweep
-
Pedal:
-
-
Pedal is the external part attached to the chassis. The pedal is used to place the leg on top of that to give comfort to the rider.
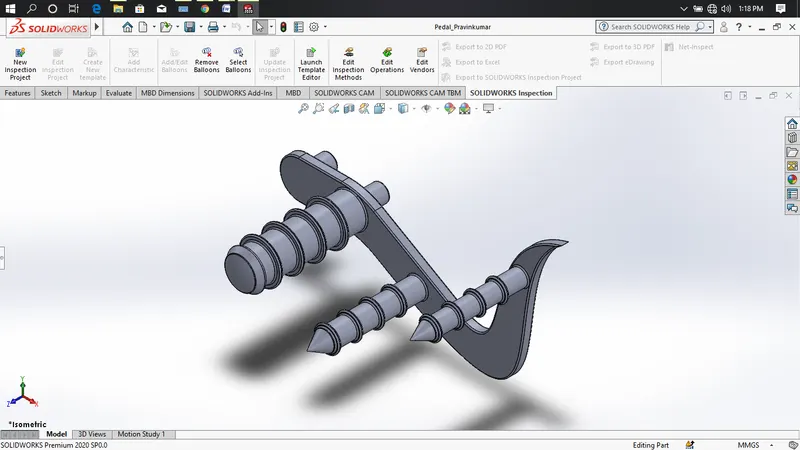
Features used to create Pedal:
- Sketch
- Extrude
- Fillet
- Linear pattern
- Dome
- Chamfer
-
Oil Tank:
-
Features used to Oil Tank:
- Extrude Boss/Base: This feature is to convert 2D into a solid modeling only when the 2D sketch is completely closed. It also allows to extrude the surface in both directions and also offset it to require distance.
- Combine: Combine feature is used to combine two or more bodies when intersecting to each other and make it a single body.
- Fillet: This is to create a curved surface on the profile edges on the solid model by selecting the required lines or the face. This fillet also has a feature to select multiple lines which reduces time consumption.
- Shell: It is used to create thickness of the profile.
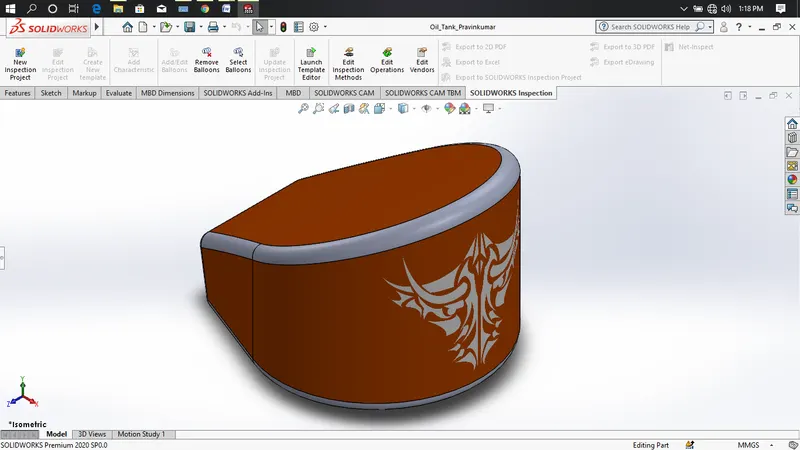
Gas Tank:
-
Gas tanks are used to store gas and its gives gas to the engine when required.
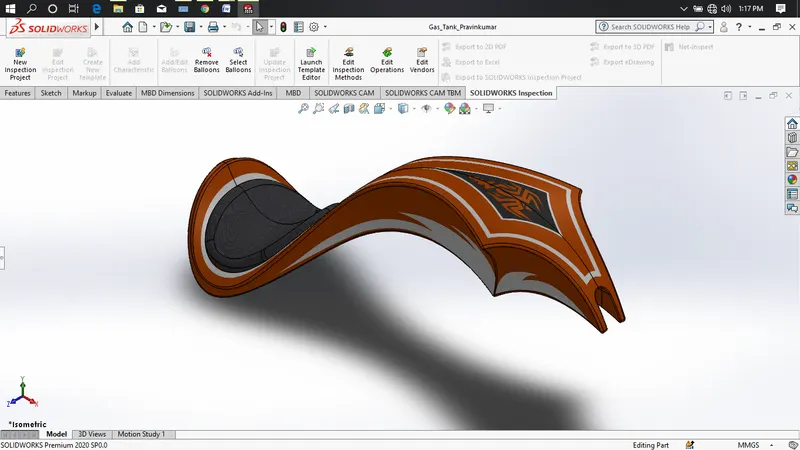
Features used to Gas Tank:
- Trim
- Projected curve
- Sweep surface
- Loft surface: Loft surfaces are surfaces generated by multiple 3D curves or existing edges creating a smooth tangency between the selected curves.
- Fill surface: The fill surface feature constructs a surface path with any number of sides with in a boundary defined by existing model edges, sketches or curves including composite curves.
- Surface Trim: Primarily used to cut away material from a surface and provides two modes: standard and mutual
- Surface Knit: Surface knit is used to knit two free edges / open edges of the surface together. Also it reduces the gap between two edges of the surfaces.
- Sweep Cut
- Fillet
- Sweep Surfaces: Sweep surfaces are surfaces that are generated from a section curve positioned along a path.
ASSEMBLY OF THE CHOPPER:
- Initially the Chassis part is inserted in the assembly by using insert parts in the option. After that the part is inserted in the assembly environment and click ok to fix the Chassis.
- After that other parts of the chopper are inserted into the assembly and given possible mate conditions.
RENDERING:
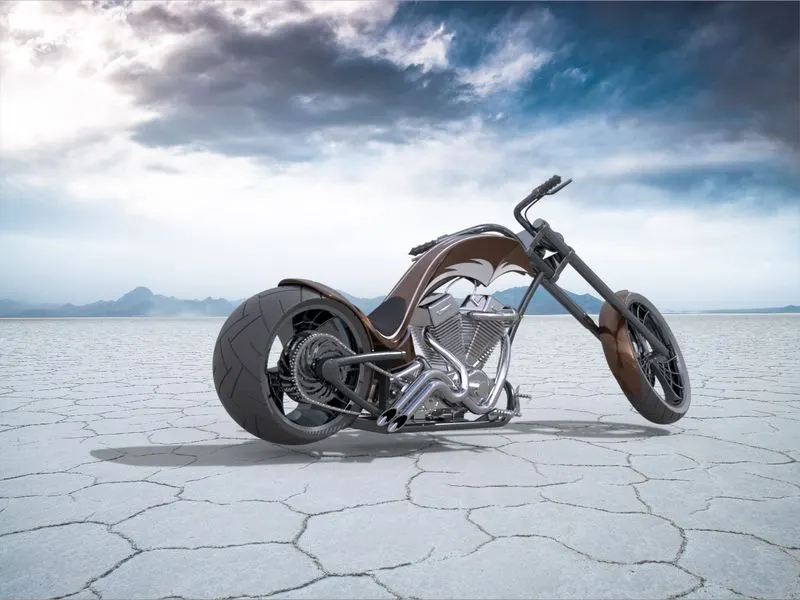
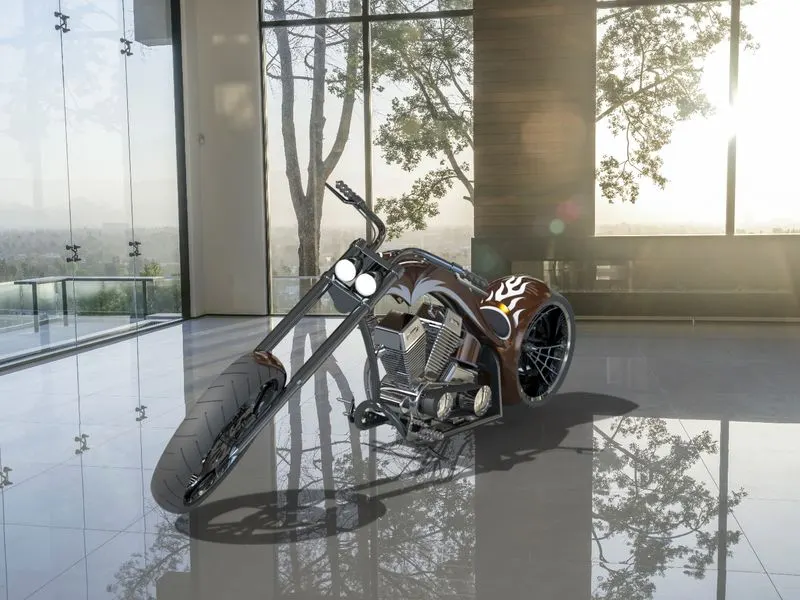
- Rendering is a process of creating realistic images of the photorealistic model with the environment.
- Rendering has been done in two ways in Solidworks:
- Photoview 360: Photoview 360 is a visualization and rendering solution includes with Solidworks. Providing a highly interactive environment for viewing designs as well as for creating photo-realistic rendering it can be used to showcase our designs as well.
- Solidworks Visualize: Solidworks Visualize provides a suite of stand-alone software tools that combine industry leading rendering capabilities with visual design-oriented features and workflows, allowing easy and fast creation of visual content that communicates a designs vision, passion and emotion.
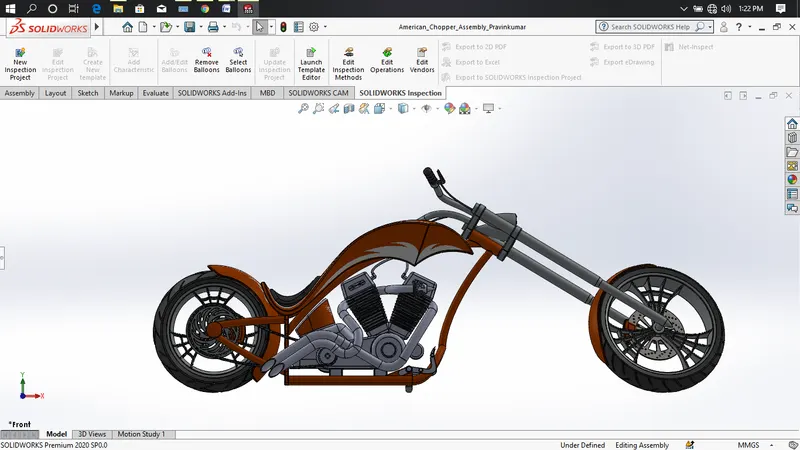
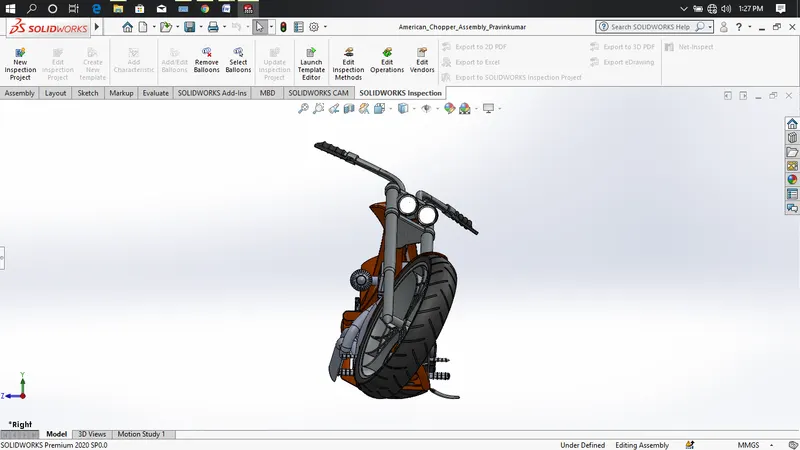
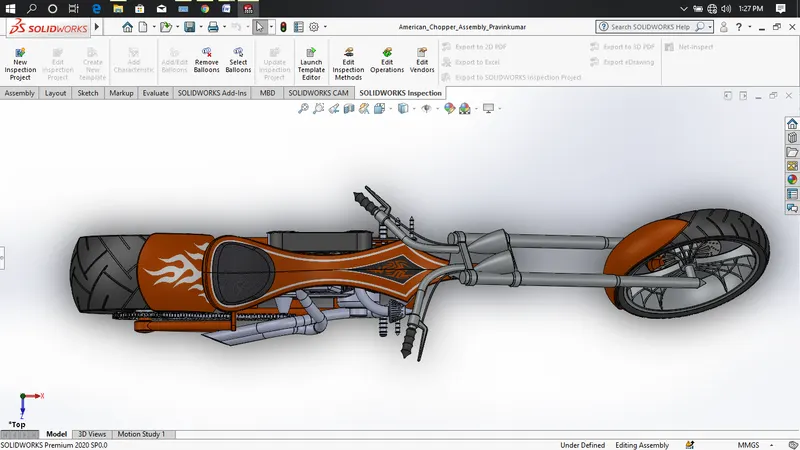
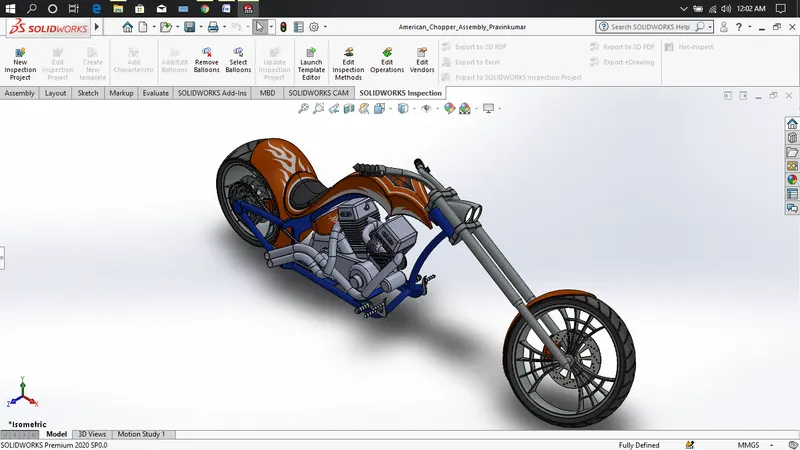
VIEWS OF ASSEMBLED AMERICAN CHOPPER:
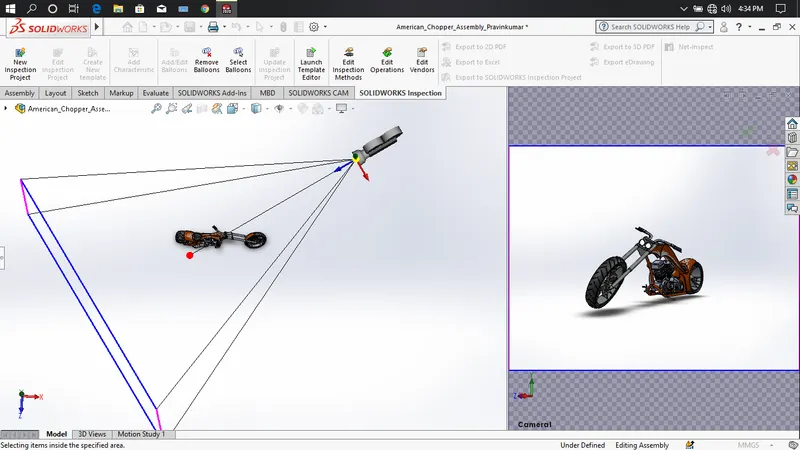
CAMERA SETUP VIEW:
RENDERING IMAGES:
CONCLUSION:
- Knowledge about converting a sketch into solid modeling.
- Good knowledge of assembling of parts.
- The parts are inserted into the assembly environment and the chopper is assembled.
- Learned how to render an image by adding different types of materials, camera views, and background images.
- The realistic image was rendered with the use of the Photoview 360 and Solidworks Visualize.