Modelling of 25 storey building with the specified properties using ETABS
AIM
Model a 25 storey building on ETABS with structural properties as specified below. Ground floor or plinth floor level can be taken at a height of 1.5 metres from the base. Each of the successive 25 storeys has a storey height of 3 metres.
INTRODUCTION
ETAB or ETABS they mean the same. Its full form is extended three-dimentional analysis of building system. It is an engineering software product that caters to multi-story building analysis and design. ETABS offers a single user interface to perfom modelling, analysis, design and reporting.There is no limit to the number of modelling windows,model manipulation views and data views .
PROCEDURE
STEP:1
- Open ETABS software
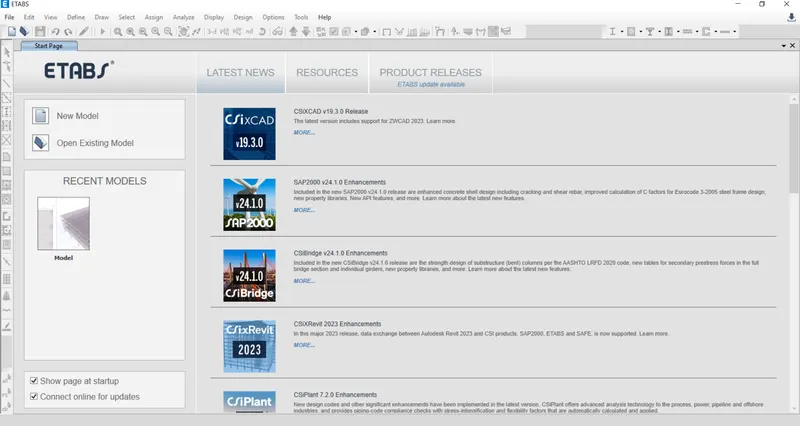
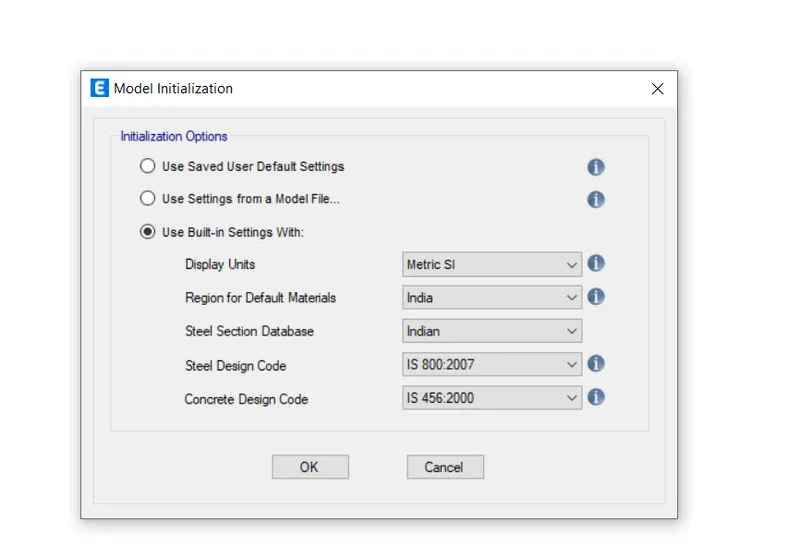
- Then click on the new model and choose use built-in setting with option
- Set the display unit as Metric SI or as per the requirement
- Then click ok
- New dialogue box will appear.
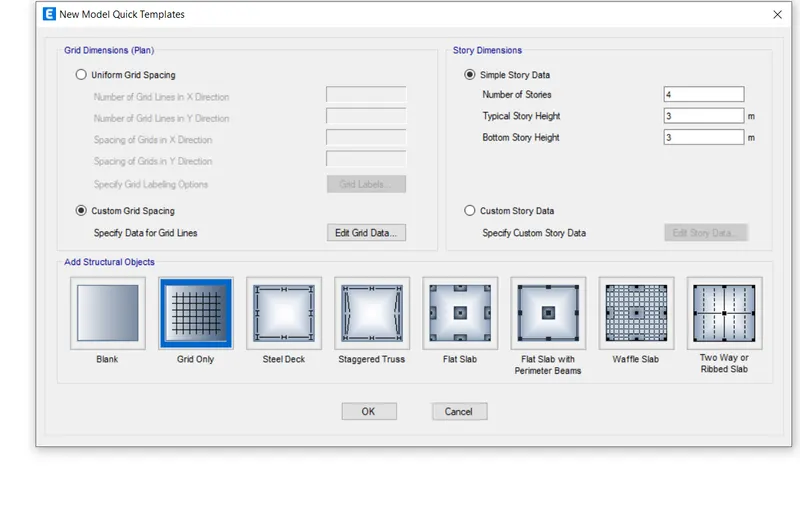
- Select the custom grid spacing and then select the edit grid data
- New dialoge box will appear and enter the X grid data at a distance of 4 meter and Y grid data at 4 meter distance
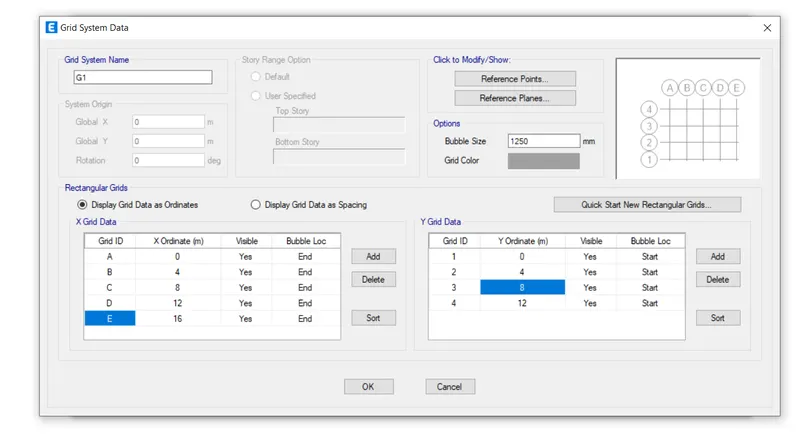
- click ok
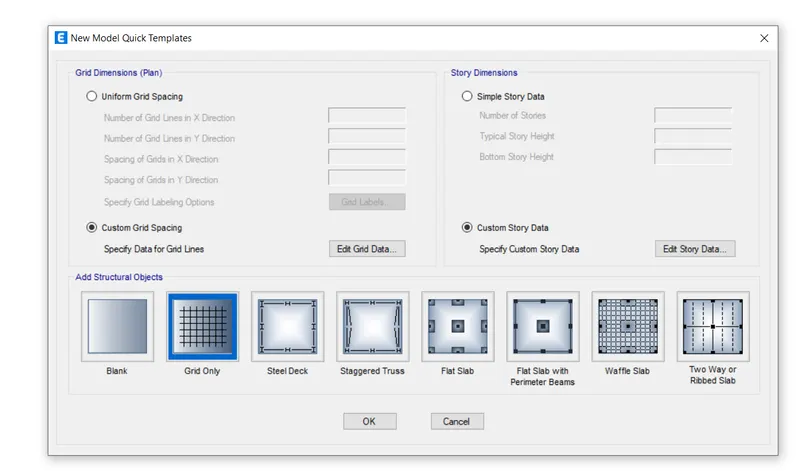
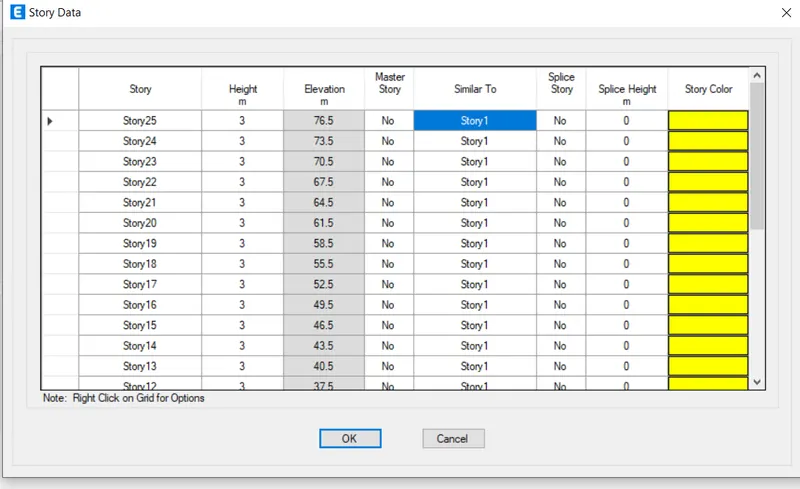
- Then select custom story data and select edit the story data
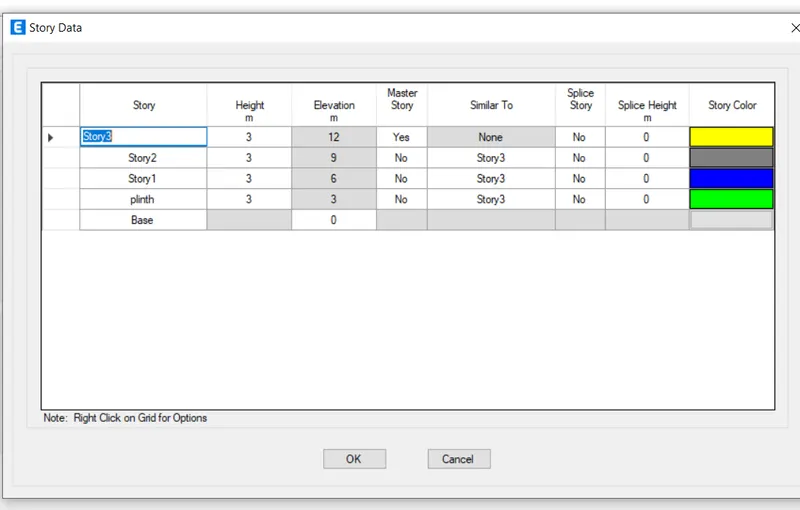
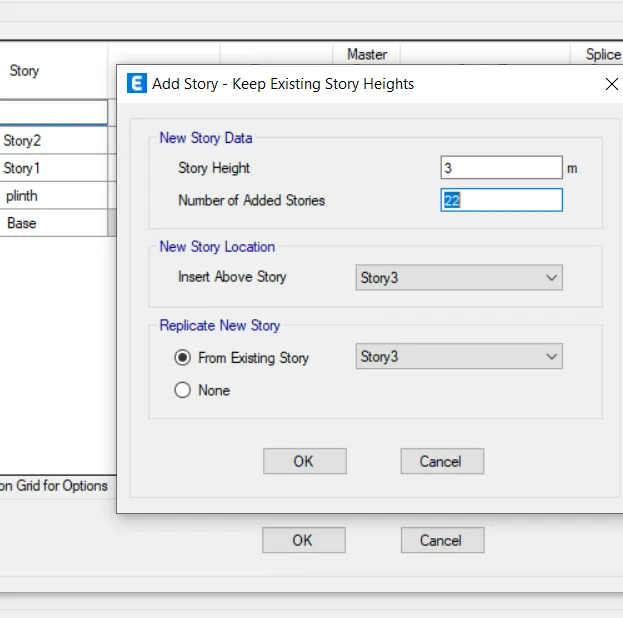
- Add storys upto 25 and give input plinth height as 1.5m and all other story height as 3m
- Then make story1 as master story and all other storys are similar to 1
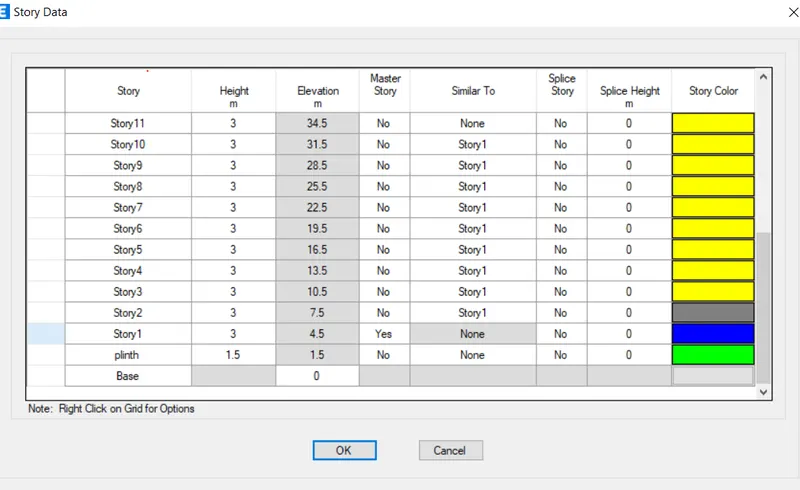
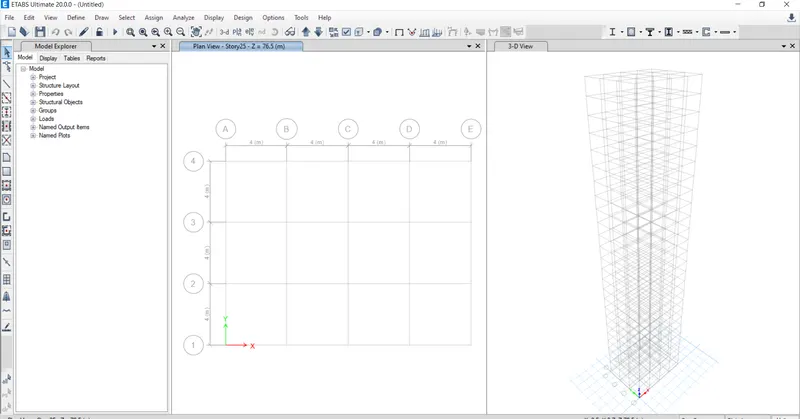
- Then our building model is generated in the window
STEP:2
- To provide material properties select define from that select material properties
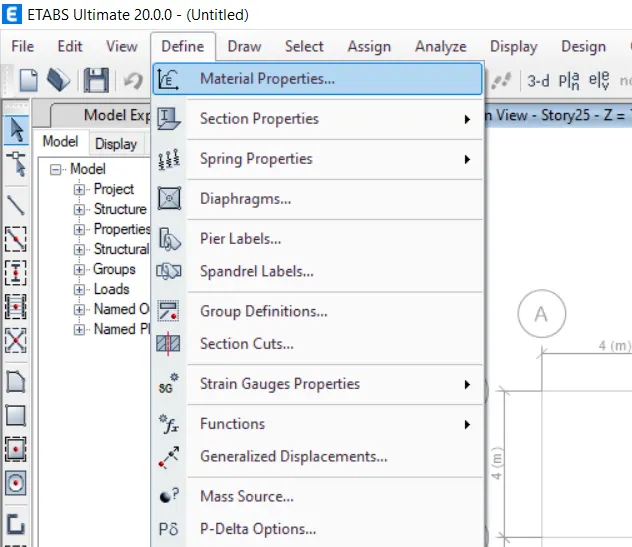
- New window will appear and from that select add new material
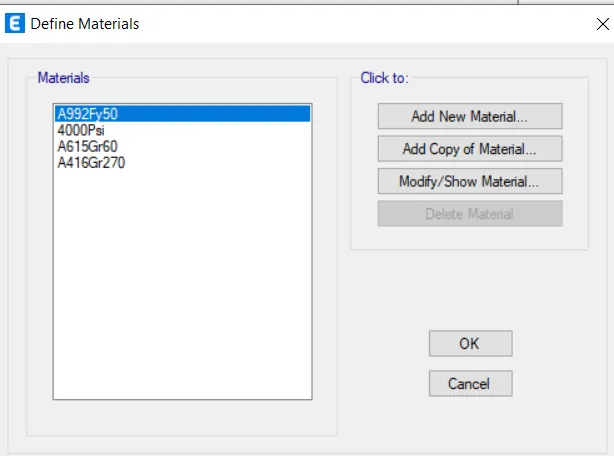
- New window will appear now define material type as concrete and grade as M30
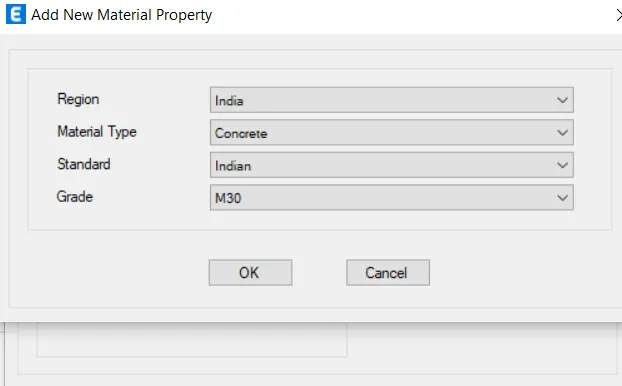
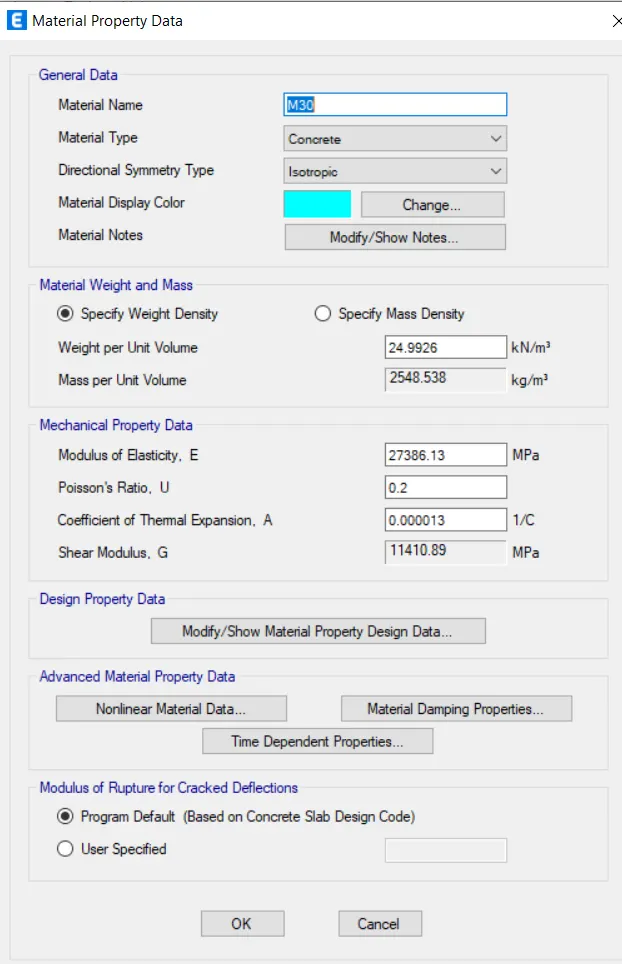
- Similarly define rebar property
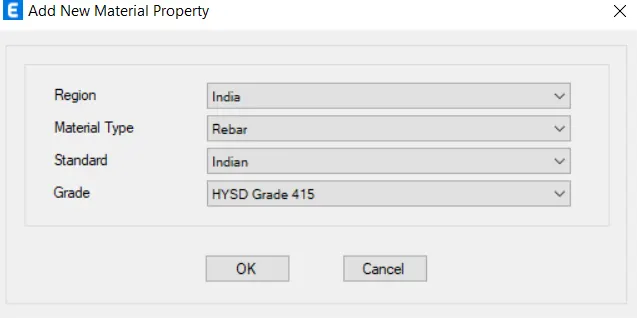
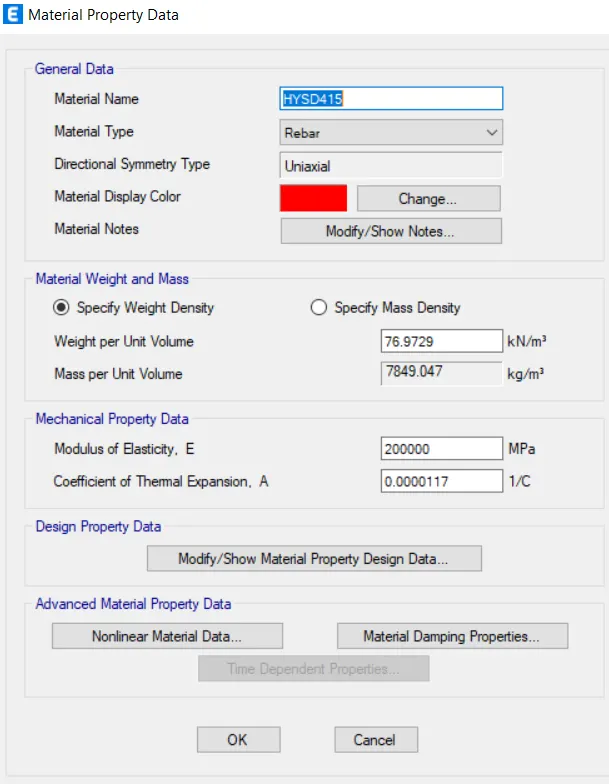
STEP:3
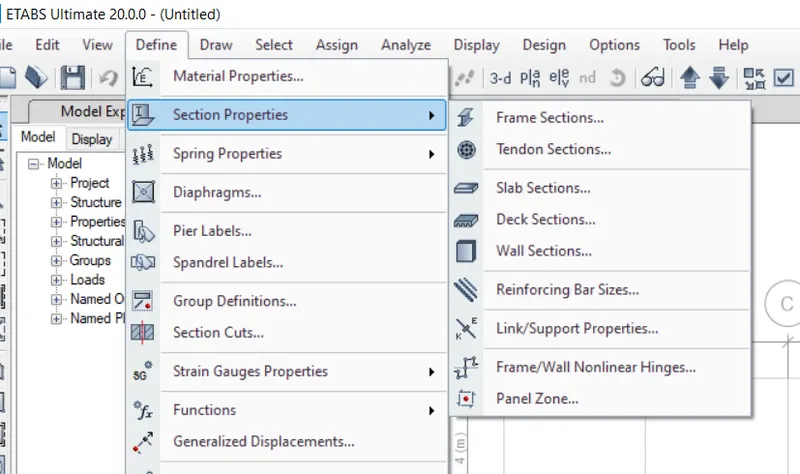
- Go to the define tab ,select section properties and from that select frame properties
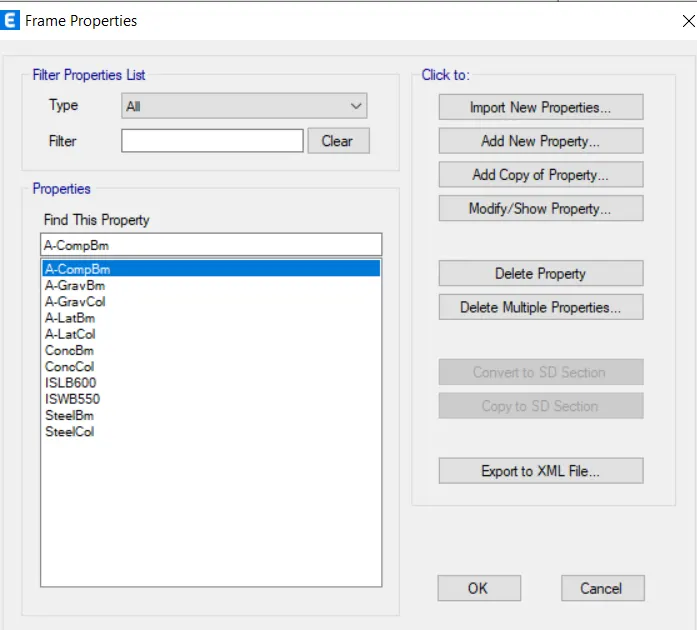
- A new window will appear ,in that select add new property
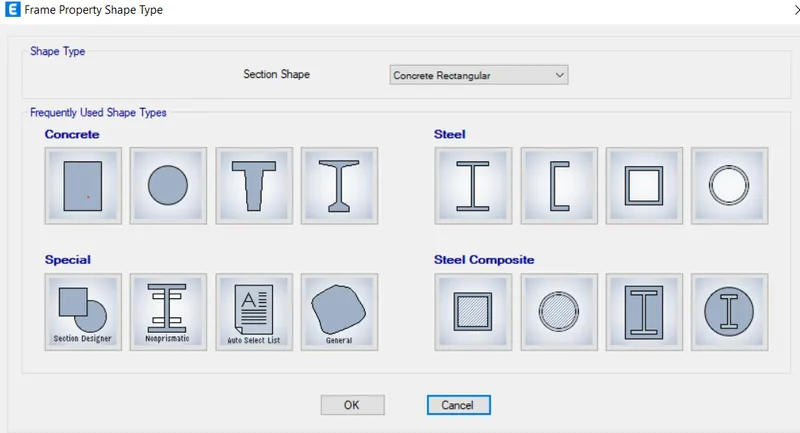
- Then select the rectangular concrete section,rename it as B300*400
- Change the property as M30 and change the size as B300*400
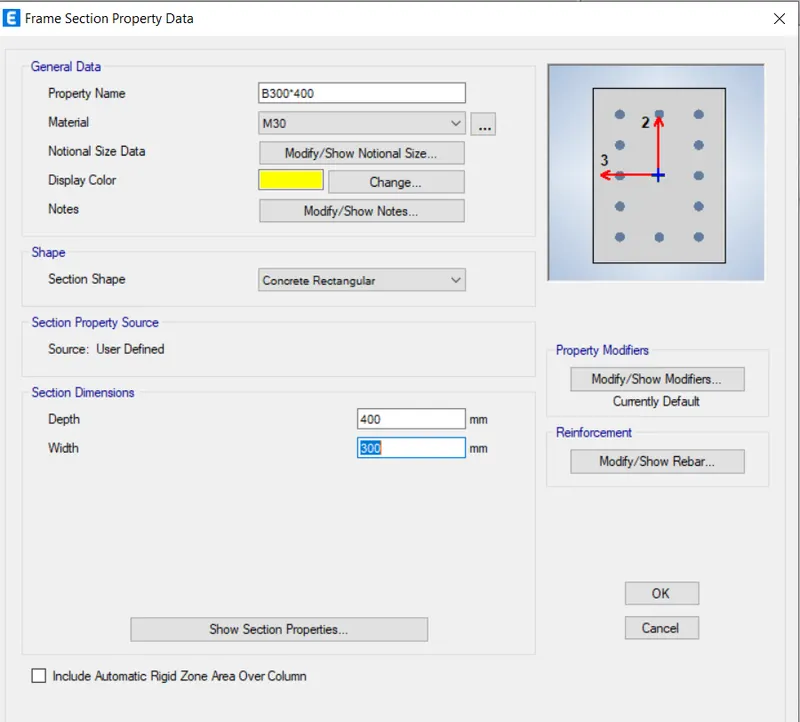
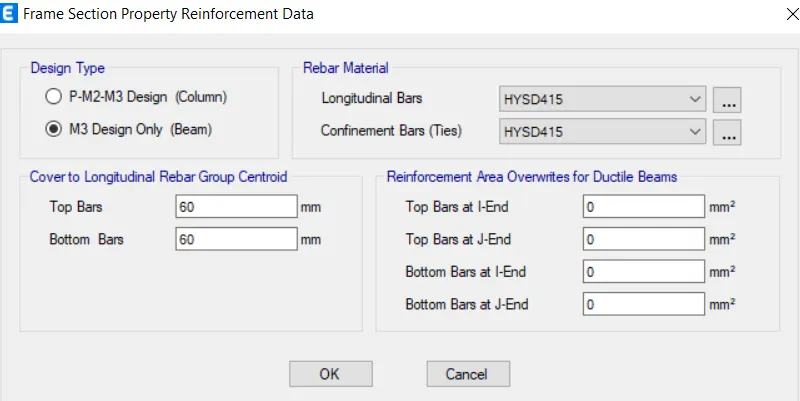
- Similarly add column section properties
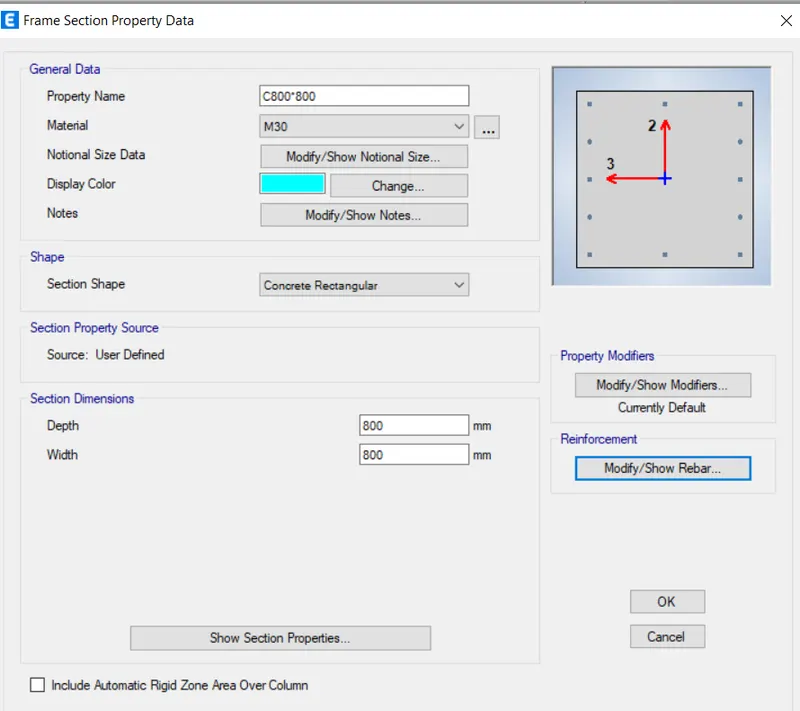
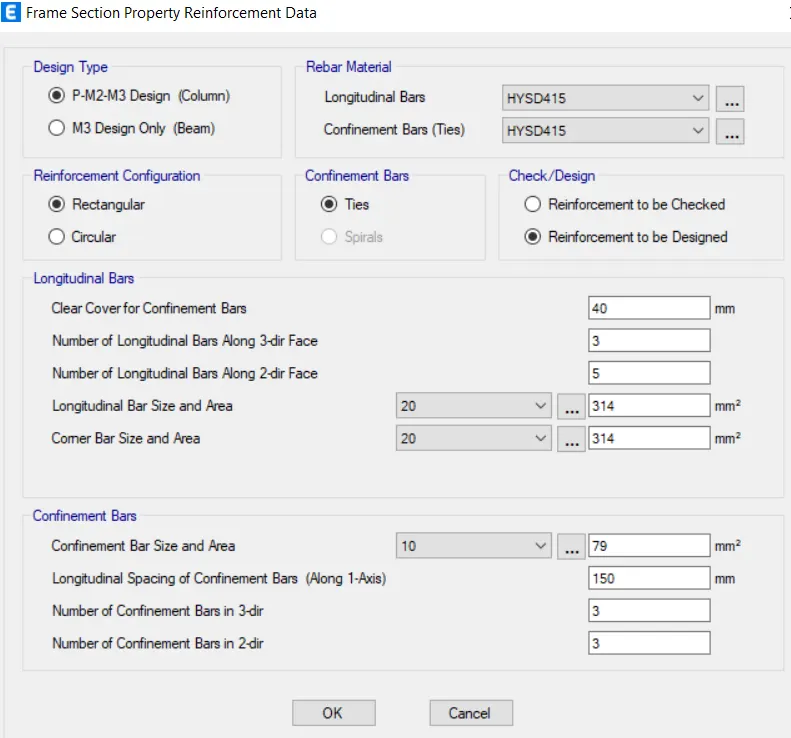
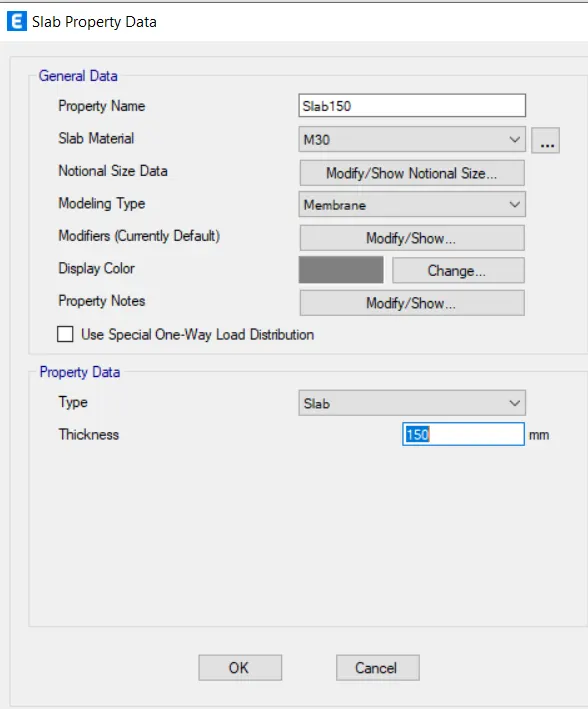
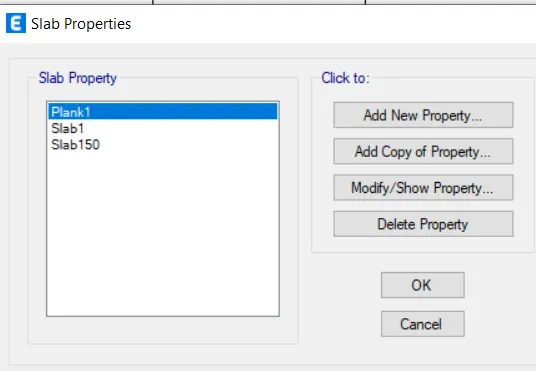
- Then go to define select section properties from that select slab section
- New window appears
- Rename it as slab150, modelling type as membrane and change thickness as 150mm
STEP:4
- Draw structural members
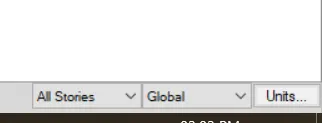
- For that first select the mode as all stories at the right bottom corner
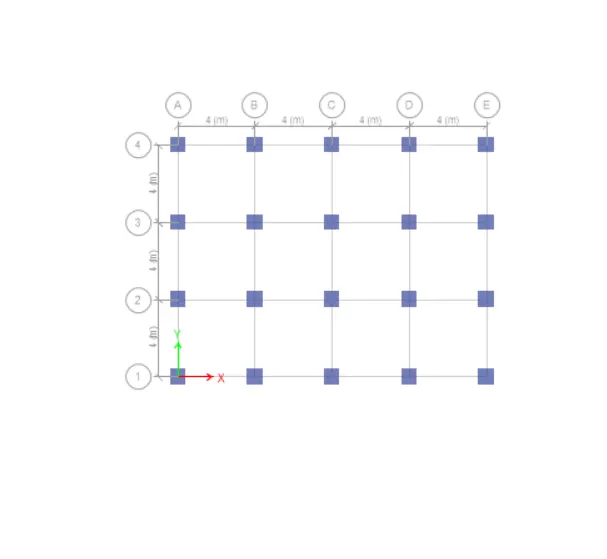
- Then select quick draw columns and change property as C800*800
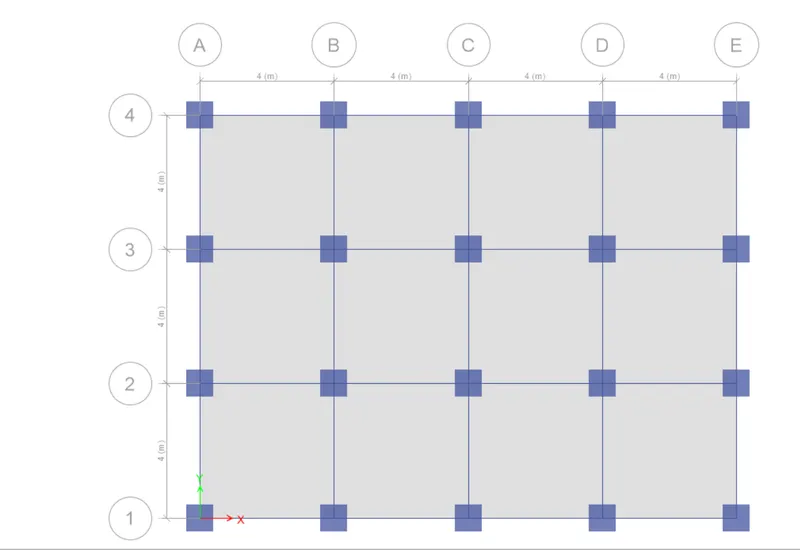
- Place the columns at every intersections of grids
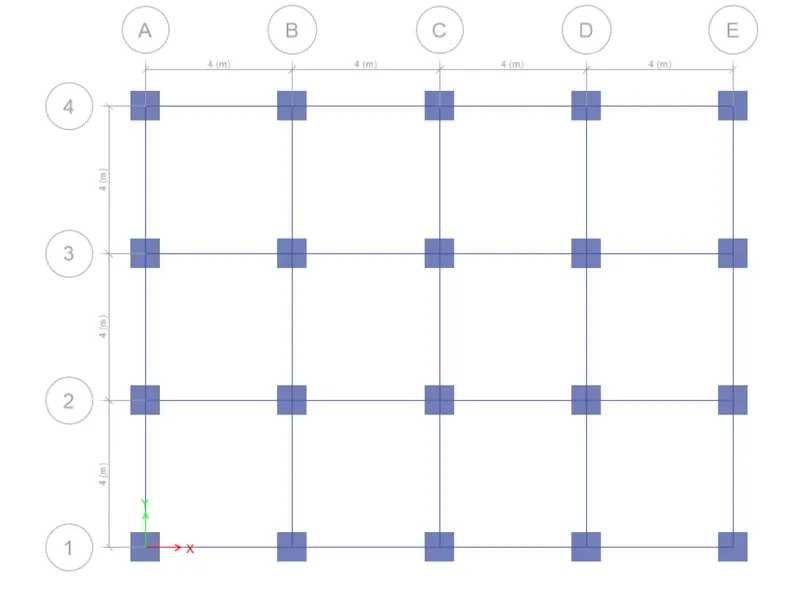
- Then select quick draw beams/columns
- Change the property as B300*400
- place beam at all grids
- Now we need to change mode as similar stories at the bottom of the window
- Inorder to avoid slab placement in the plinth level
- Select quick draw floor/slab and draw slab sections
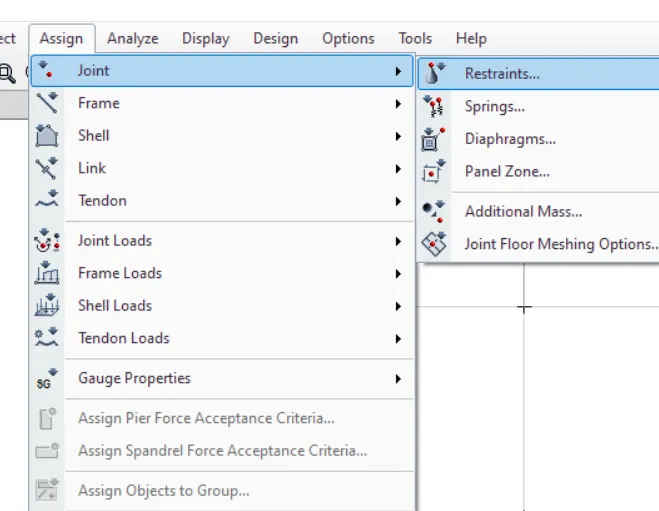
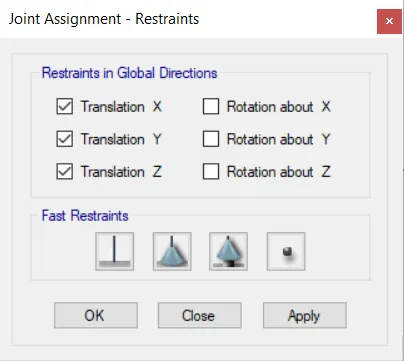
- Select assign and click on joint select pinned support
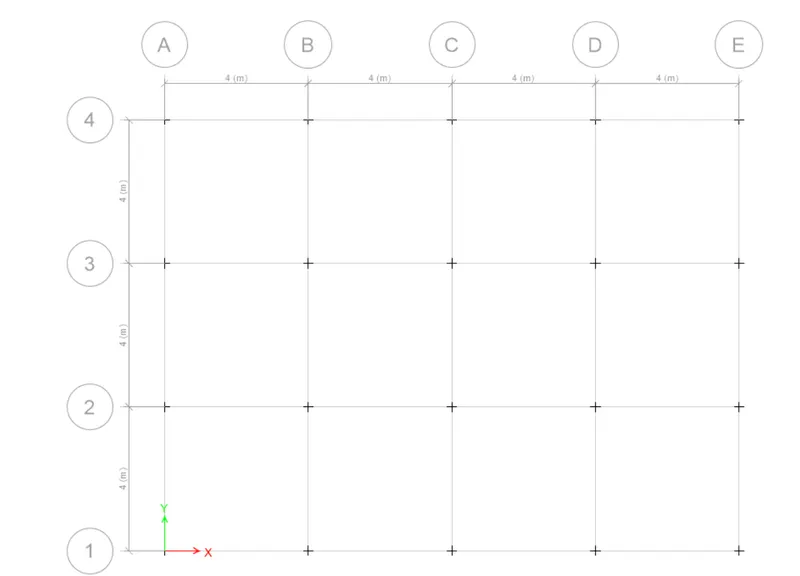
- Fix the pin supports at the base
STEP:5
- Click on the define and from that select the load patterns
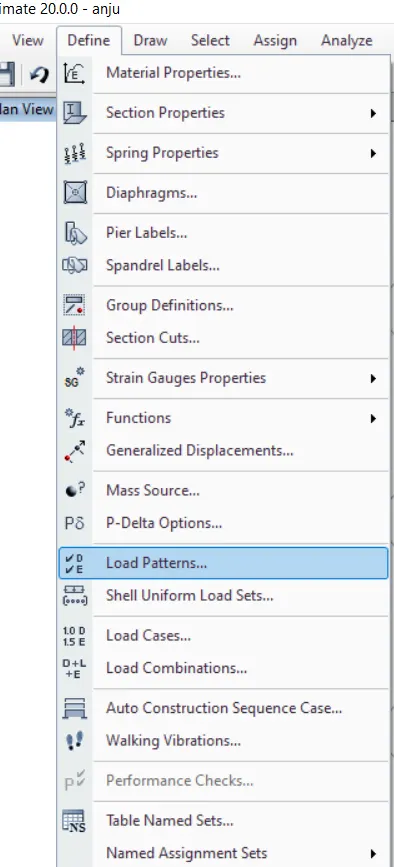
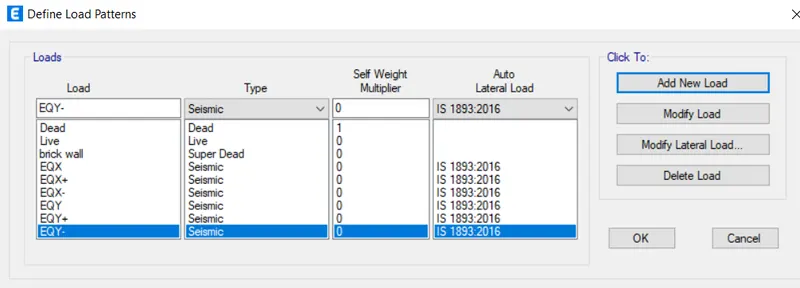
- Define the loads like dead load , live load , brick wall load and earthquake load in x direction and eccentric earthquake loads in positive x and negative x and same loads in y direction also mension IS codes of respective loads
- Click on modify lateral load, set range from base to 25th story,change direction and eccentricity ,seismic zone factor as 1.25 and time period as 0.5 seconds
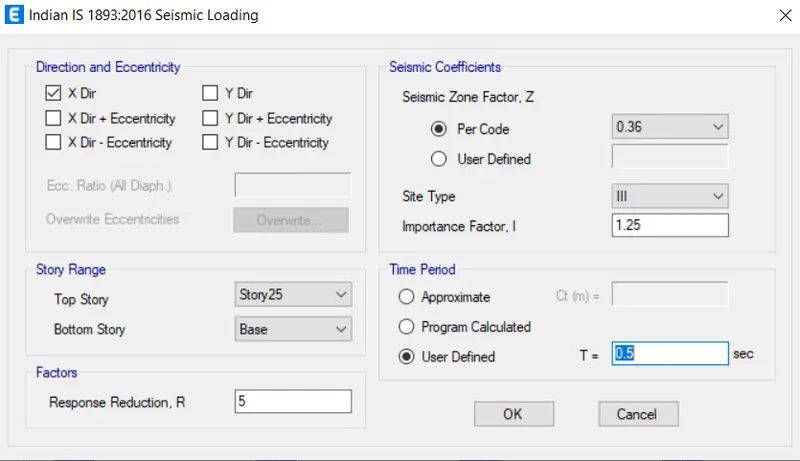
- Do the same for all the earthquake loads
STEP:7
- Assign loads
- To assign loads , selesct the similar stories at the bottom of window
- Then select the members
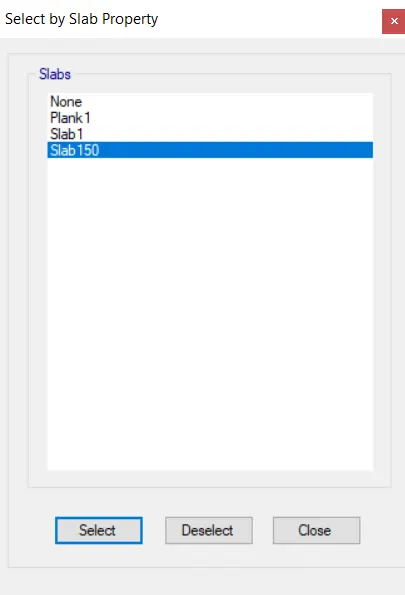
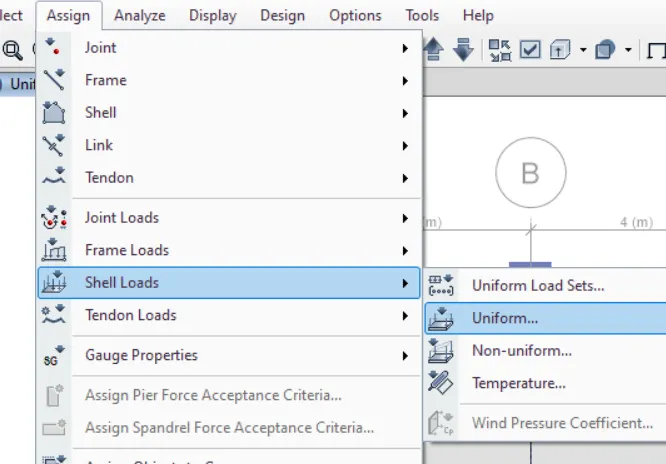
- After that go to the assign tab-->shell loads -->uniform
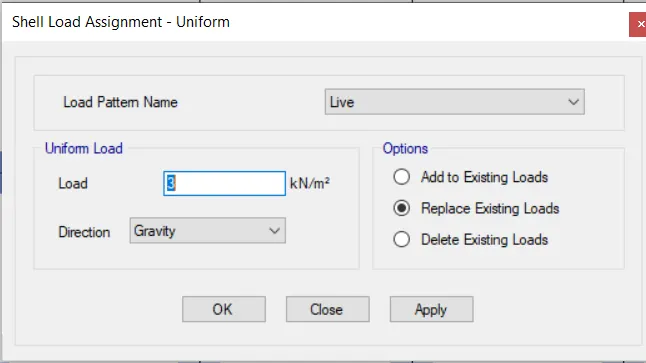
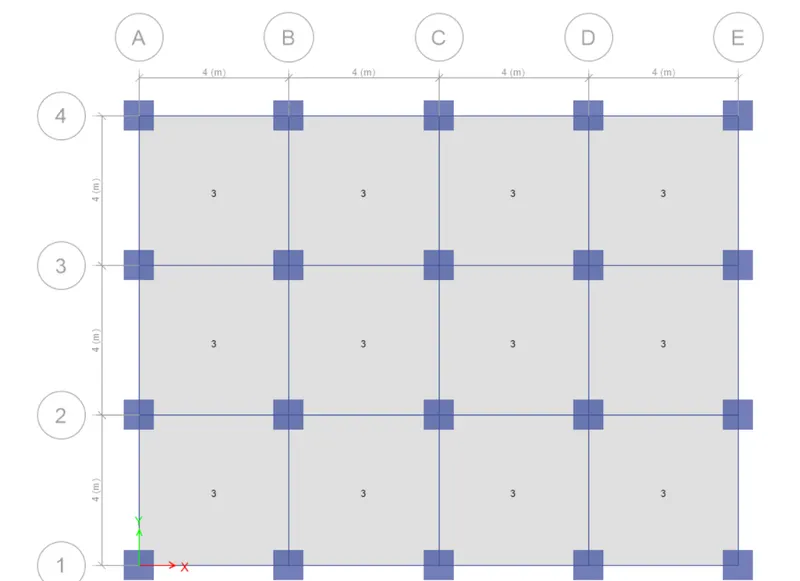
- A new window will appear in that select live load and give value as 3kN/m2
- Click on apply
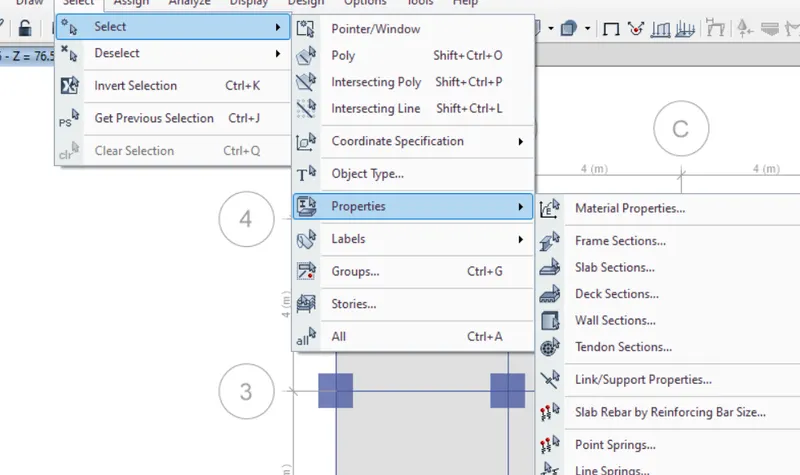
- Then select all story at the bottom of the window and select all beams by clicking object types-beams under select tab
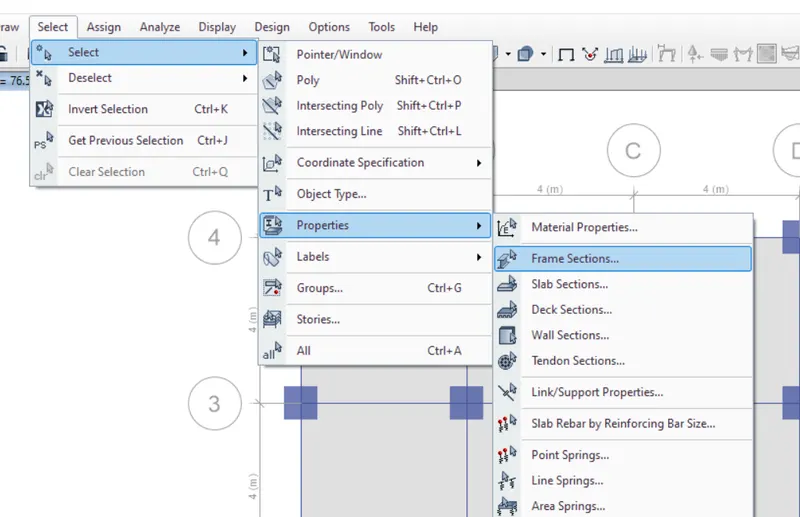
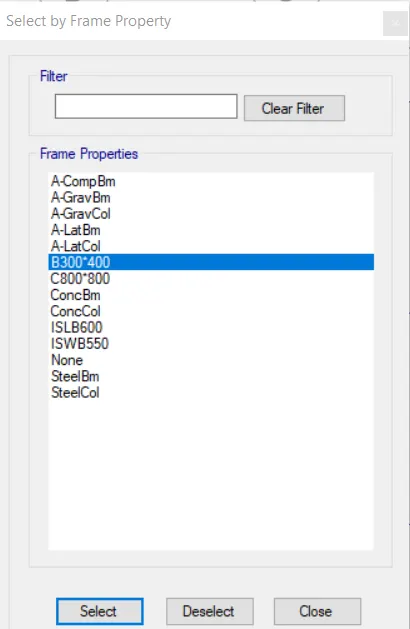
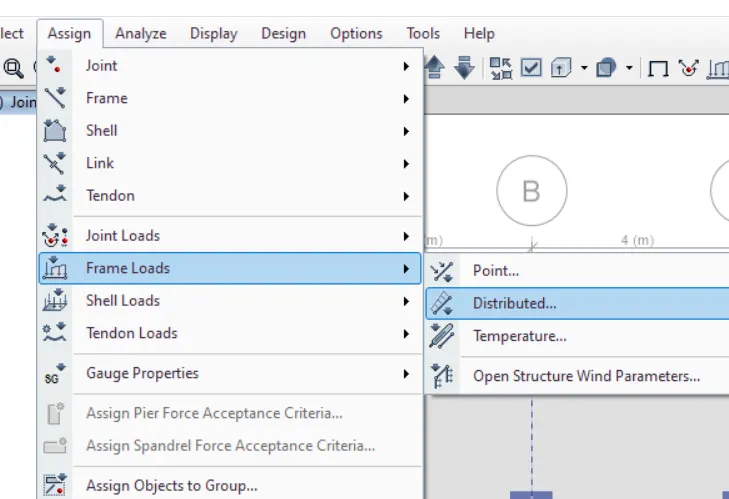
- After that do to the assign tab-->frame load-->distributed
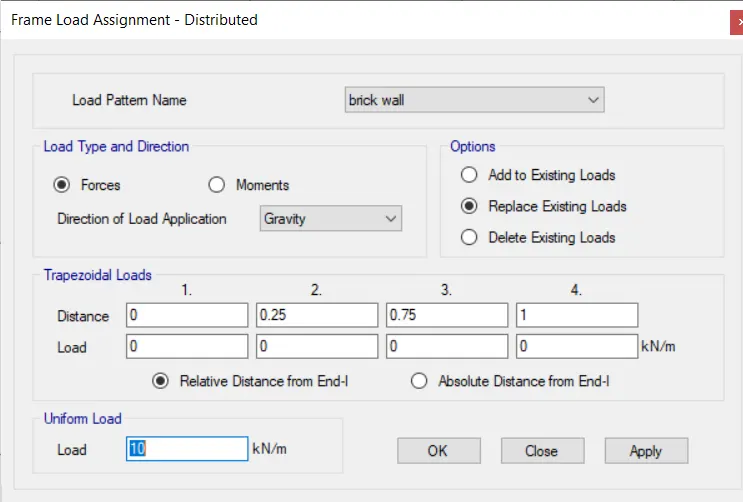
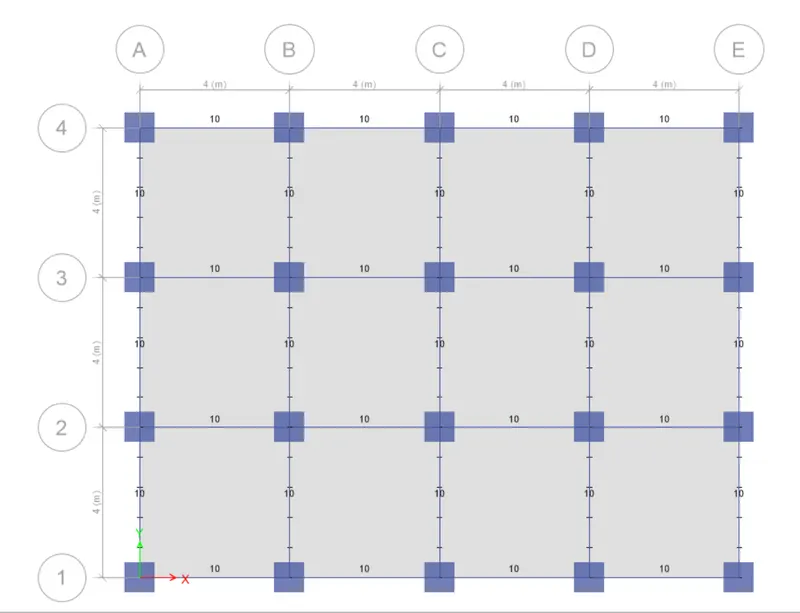
- Enter the value as 10kN/m2
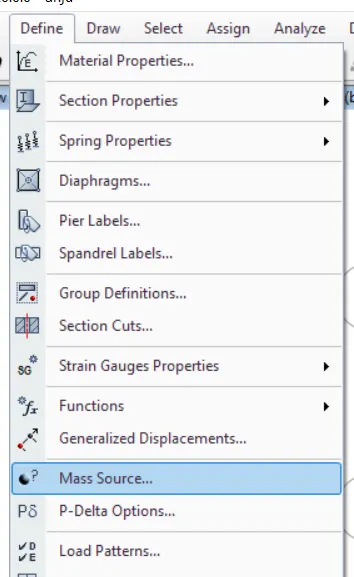
- Now go to the mass source from the define tab
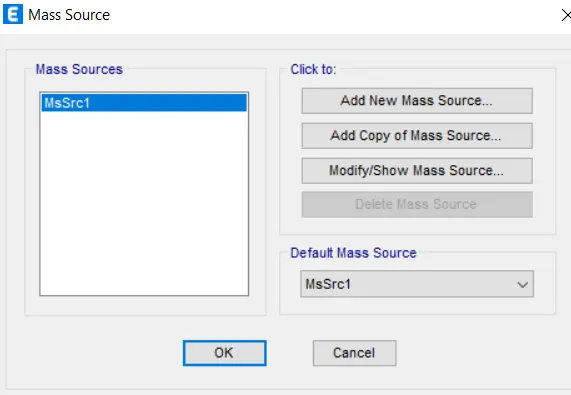
- modify the mass source and check the specify load pattern
- Add load pattern and assign the model
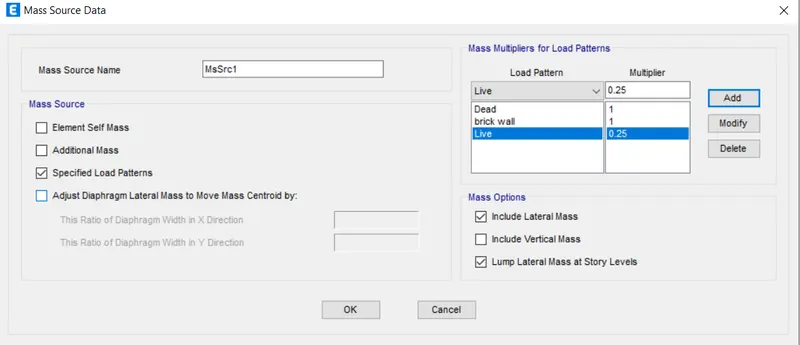
- Click ok
STEP:8
- Define load cases
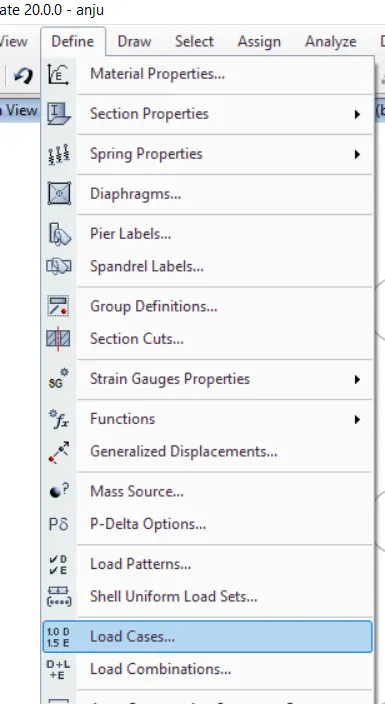
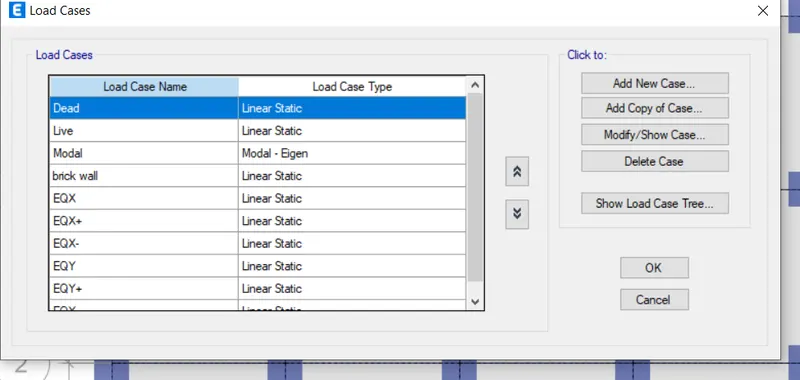
- click ok
- Then go to define-->load combination
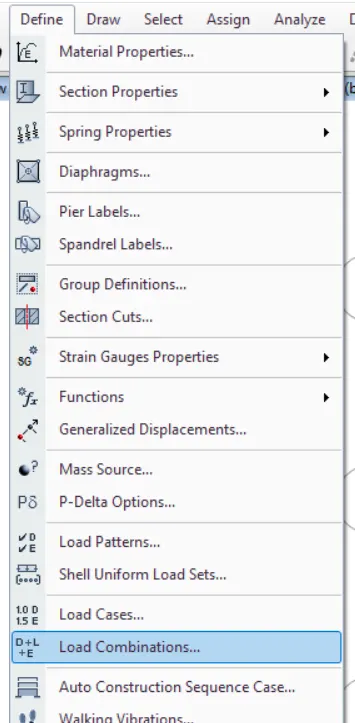
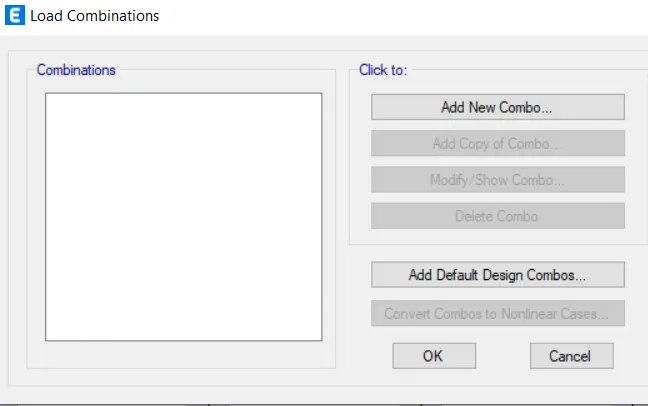
- Click on the add default design combos and select the concrete frame design
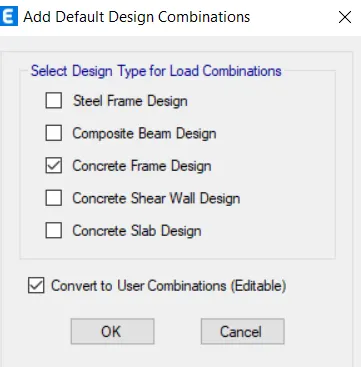
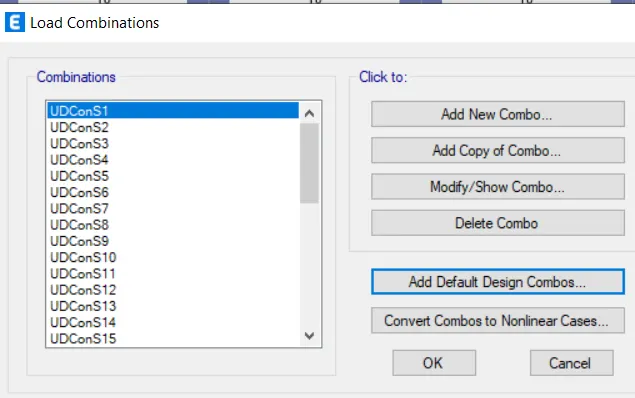
- click ok
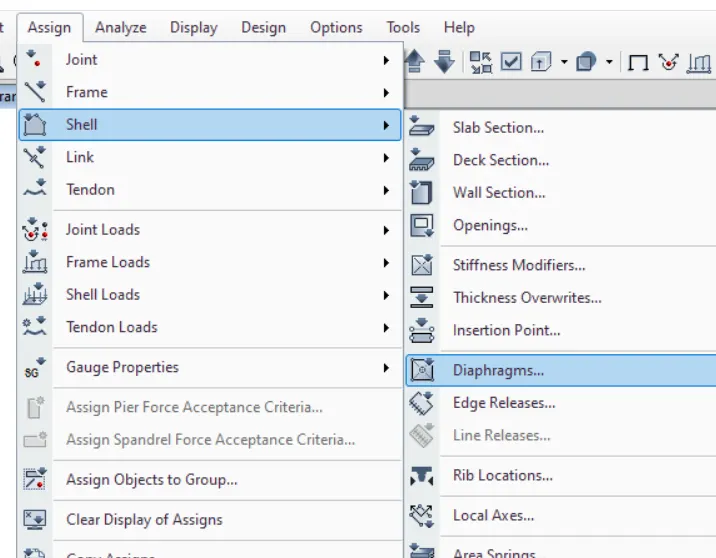
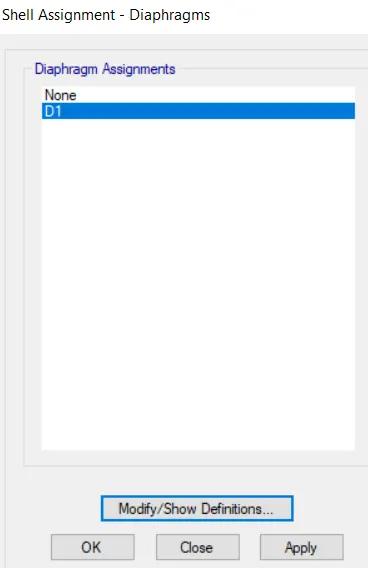
- first select the slab
- then go to the assign tab,select shell and click on diaphragm created successfully
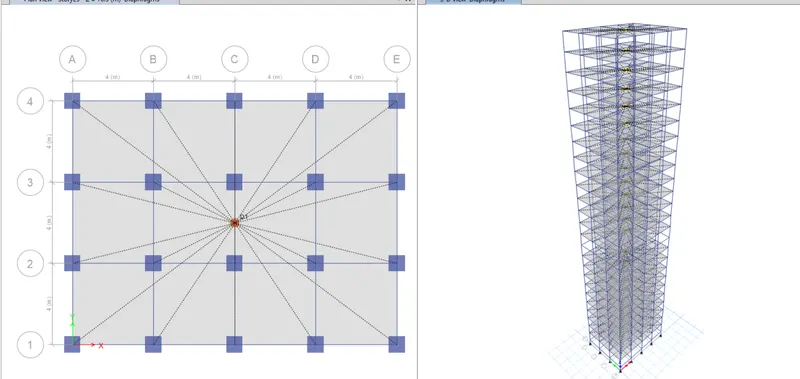
- check model the modelled structure is verified without warnings and errors
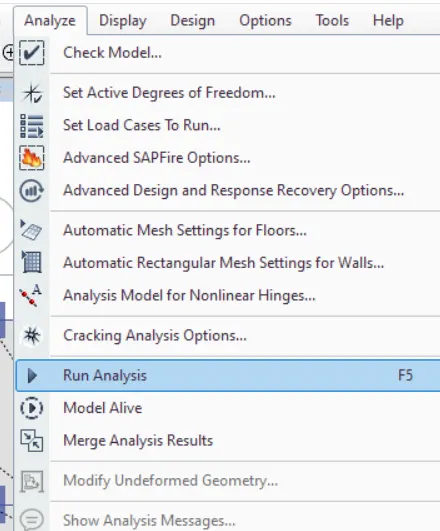
- Then go to the analyze tab abd run analysis
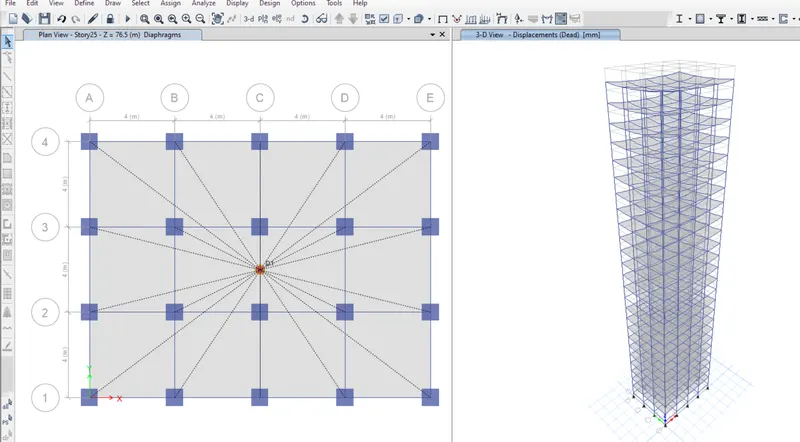
RESULT
- Now click on Display-show tables analysis results structure output modal information-modal period and frequencies
- The time periods for fundamental mode-ly direction and fundamental mode -1 direction are noted from the table as follows
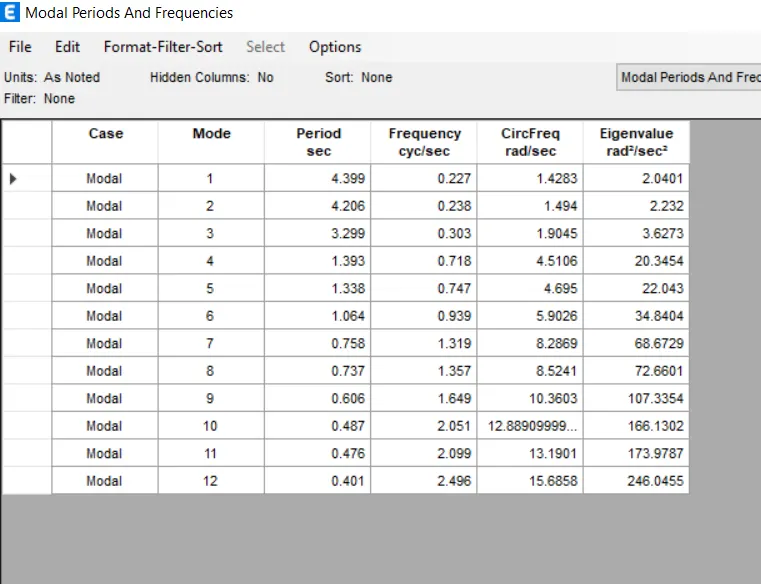
- MODEL-1 TIME PERIOD =4.399 seconds
- MODEL-2 TIME PERIOD =4.206 seconds
- Display--> show tables-->analysis result-->structure output-->modal information--> modal participation mass ratios
- From the table the natural time period for mode 1 and torsional DOF are noted as follows:
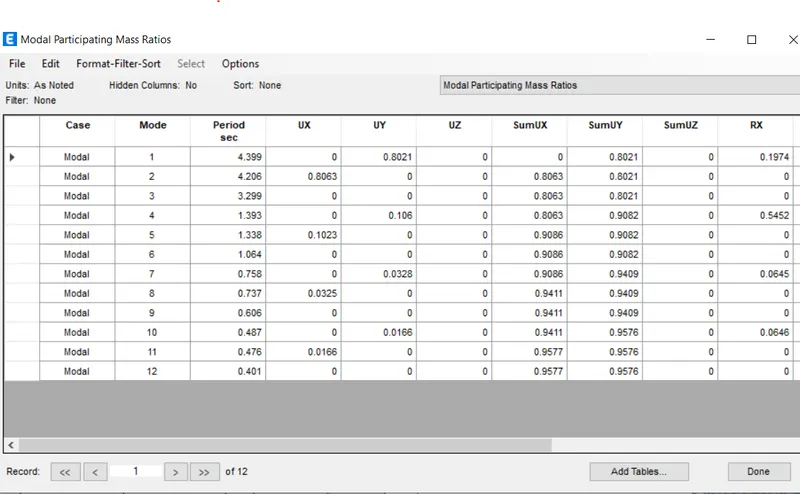
- Tx1= 4.399 seconds, Ty1=4.206 seconds= and Txy1=3.299 seconds
- So from the results it is clear that the torsional time period is less than two translational time period is less than two translational time period as required by IS 1893 provision Table 5
- When we add the three mode mass ratios we get 0.8042 which means the first three modes of seismic oscillation contribute more than 65% of building weight as per ETABS analysis
- The storey drift for seviceability base shear case (EQxor EQy) is tabulated from the following tool path
- Then go to display-->story response plot
- keeping load case to EQy and switching to max story drift the maximum drift value is noted as 0.001625
- Keeping load case for EQx and switching to max story drift the maximum drift value noted is 0.001492
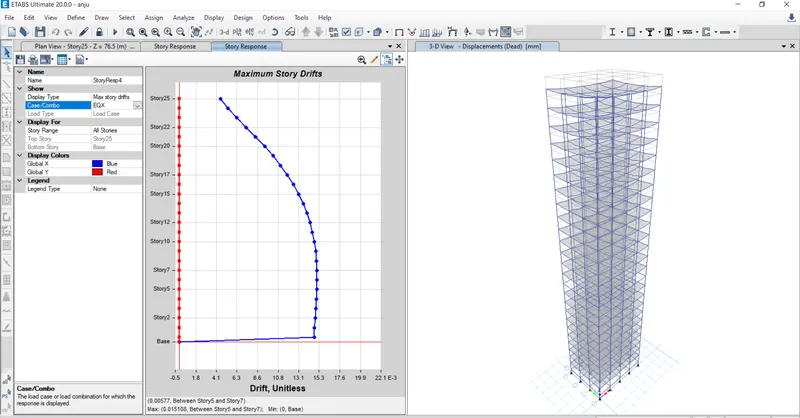
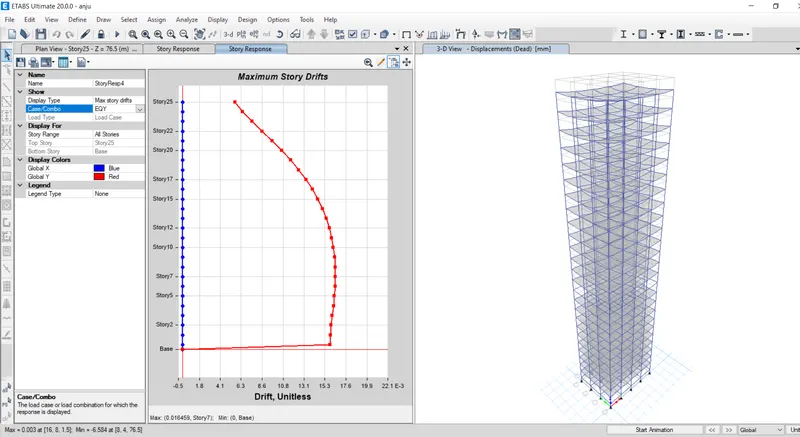
- so as per the clause 7.11.1, the maximum inter storey drift is limited to 0.004 for each story height. But our value is 0.001625 which is within the code limits
CONCLUSION
The modelling is completed and analyzed in ETABS ,the results are within the given range.
-------------------------------------------------------------------------------------------------------------------------------------------